Appendix: Performing OS Factory Reset from USB
This procedure will completely re-install the OS from scratch; existing configurations will be lost.
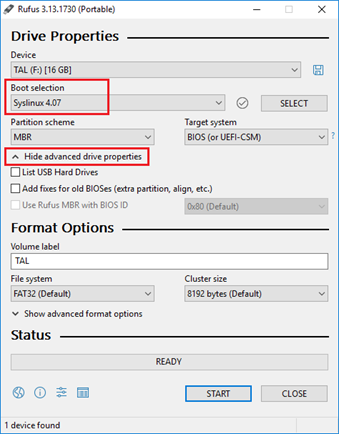
Prepare a bootable USB drive. Recommended to use “Rufus” (on Windows), https://rufus.ie/
- Make sure to “Show advanced drive properties”
Select “Syslinux 4.07” in the “Boot selection” drop-down and press “START”
- Extract the content of image zip file (e.g., mfgusb-X86_64-8.0.1610.zip) to the USB drive root.
- Connect the USB drive to a USB port located on the back panel of the GW appliance.
Enter the BIOS of the GW appliance using a serial connection and set the boot order to boot from the USB device first:
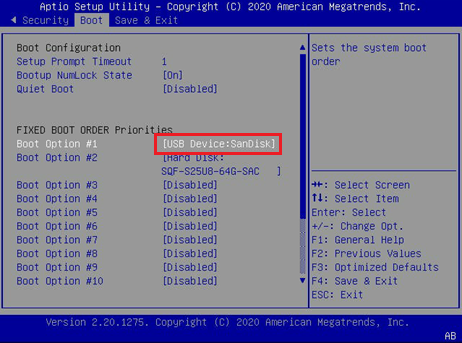
- Save and Exit the BIOS, the GW should now start booting from the USB drive.
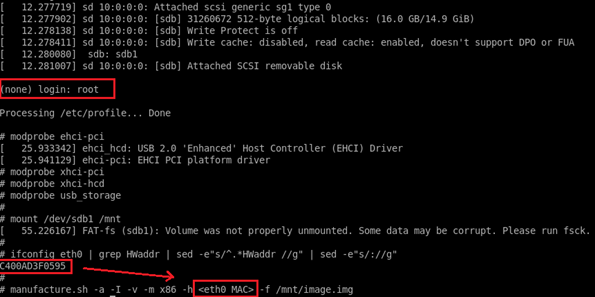
- If prompted to login, type “root”.
Load kernel modules to enable access to the USB drive, and mount it
- modprobe ehci-pci
- modprobe xhci-pci
- modprobe xhci-hcd
- modprobe usb_storage
- mount /dev/sdb1 /mnt
Find the MAC address of the GW mgmt. port by running:
- ifconfig eth0 | grep HWaddr | sed -e"s/^.*HWaddr //g" | sed -e"s/://g"
Start the manufacture process by the following command. Replace <eth0 MAC> with the output of step 7:
manufacture.sh -a -I -v -m x86 -h <eth0 MAC> -f /mnt/image.img
- After the manufacture process is done, type “reboot”.
Enter the BIOS again (like step 3) and return boot order to boot from the Hard Disk first.
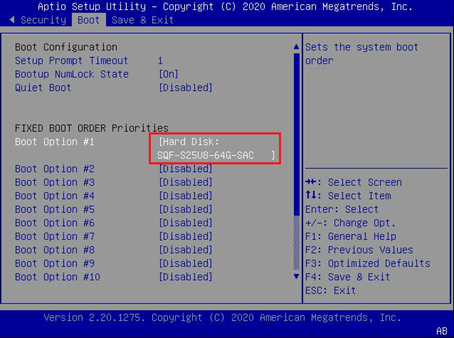
- Save and Exit the BIOS, the GW should now start booting the newly installed OS.
At this stage, a firmware burn process may take place during OS boot process and may take up to 30 minutes to complete.