Appendix - Deploying UFM Cyber-AI from an ISO File
This section provides a step-by-step guide for deploying Cyber-AI from an ISO file.
Extract the ufm-cyberai-appliance-<version>-omu.tar file to a temporary directory.
Extract TAR file
tar xzf /path/to/ufm-cyberai-appliance-<version>-omu.tar -C /tmp
There is both an ISO file and an upgrade script located in the directory.
Extract TAR file
            ls -ltrh /tmp/ufm-cyberai-appliance-<version>-omu/
-rw-r--r-- 1 root root 7.5G Dec 31 17:49 ufm-cyberai-appliance-<version>.iso
-rwxr-xr-x 1 root root  11K Dec 31 17:49 ufm-os-upgrade.sh
To burn the ISO onto a USB device, you can use either a Windows or Linux operating system. Follow the instructions below depending on your preferred installation method.
Windows
Download and open Rufus. Refer to Rufus - Create bootable USB drives the easy way.
Download and open the tar file ufm-cyberai-appliance-<version>-omu.tar.
Click on "SELECT" and from the drop-down menu, select the ufm-cyberai-appliance-<version>.iso, then click "START".

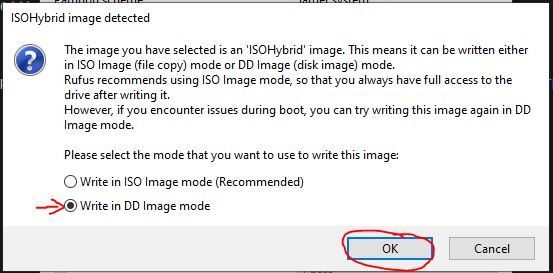
When the "ISOHybrid image detected" message appears, select "Write in DD mode" and then click "OK".
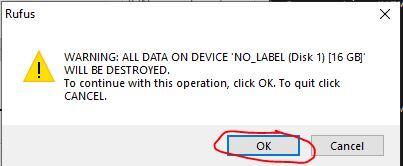
You will see a message indicating that all data on the USB device will be erased. Click "OK and continue" to proceed.
Wait for Rufus to finish.
Unplug the USB device.
Linux
Identify the USB drive by running the following command:
ImportantIMPORTANT!!! Ensure you are NOT running the following commands on a hard drive device but only on the USB (in the examples below it will be /dev/sdb).
WarningThe USB drive is mapped to sdb in the following command snippet.
root@ubuntu18:~
# ls -ltrh /dev/disk/by-id/usb*lrwxrwxrwx 1 root root 9 Jan 2 13:44 /dev/disk/by-id/usb-SanDisk_Cruzer_Glide_3.0_4C530000040724111091-0:0 -> ../../sdb lrwxrwxrwx 1 root root 10 Jan 2 13:44 /dev/disk/by-id/usb-SanDisk_Cruzer_Glide_3.0_4C530000040724111091-0:0-part1 -> ../../sdb1Copy the ufm-cyberai-appliance-<version>.iso to the USB using the following dd command:
ddif=/path/to/ufm-cyberai-appliance-<version>.iso of=/dev/sdb bs=4M status=progress oflag=syncVerify that the USB is bootable:
root@ubuntu18:~
# fdisk -l /dev/sdbDisk /dev/sdb: 14.9 GiB, 16005464064 bytes, 31260672 sectors Units: sectors of 1 * 512 = 512 bytes Sector size (logical/physical): 512 bytes / 512 bytes I/O size (minimum/optimal): 512 bytes / 512 bytes Disklabeltype: dos Disk identifier: 0x594ec03e Device Boot Start End Sectors Size Id Type /dev/sdb1 * 64 15679439 15679376 7.5G 17 Hidden HPFS/NTFSUnplug the USB.
Plug the USB (prepared in the previous step) to one of the Cyber-AI server USB ports on its rear panel.
Log in to BMC web UI: https://<BMC_IP_ADDRESS>.
Navigate to "Remote Control" → "Server Power Control" and check the "Force-enter BIOS Setup" checkbox under the "Restart Server". Then, click "Perform Action".

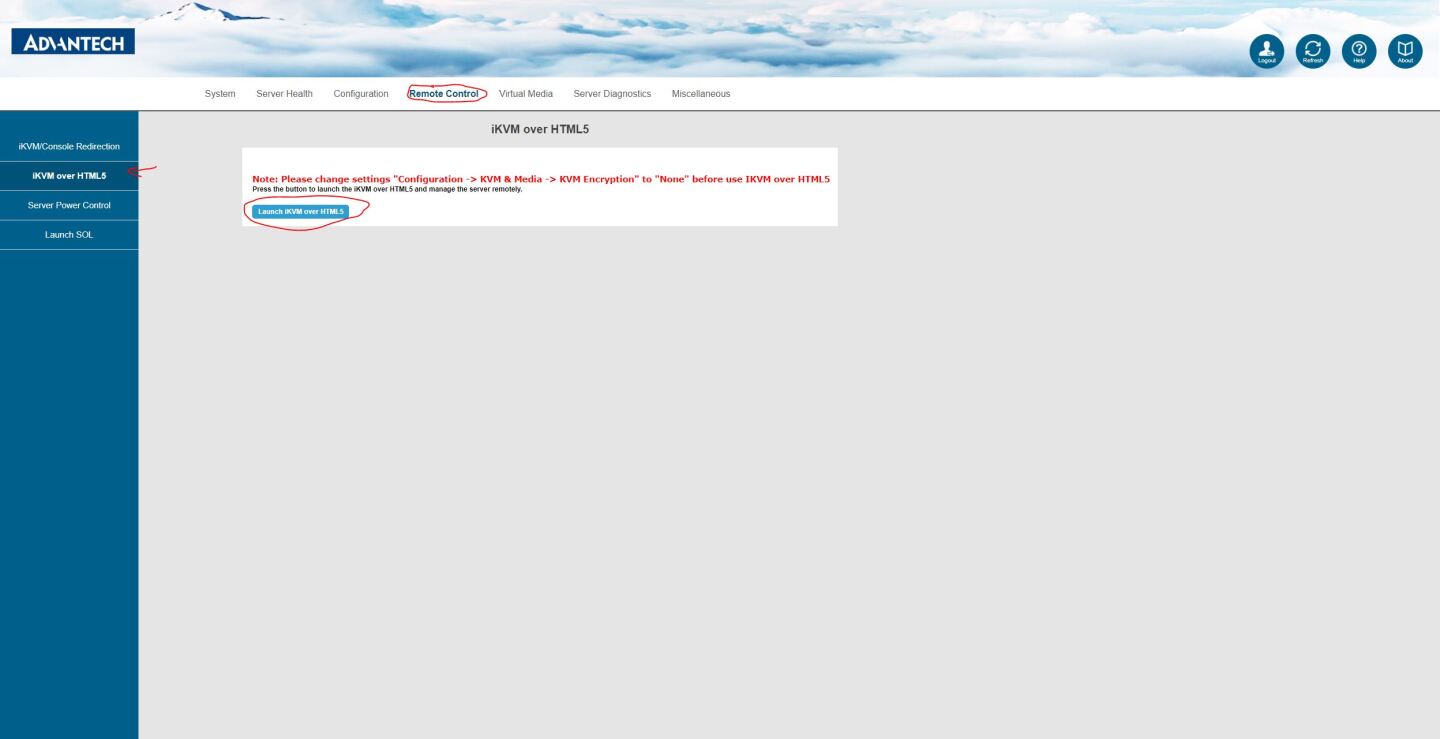
Navigate to "Remote Control" → "iKVM over HTML5" and click "Launch iKVM over HTML5" button.
A new window will open.
- In the BIOS menu, navigate to BOOT → "Boot Option #1" and check "USB Device:". images/networking/download/attachments/119762436/iso-deployment6.png images/networking/download/attachments/119762436/iso-deployment7.png
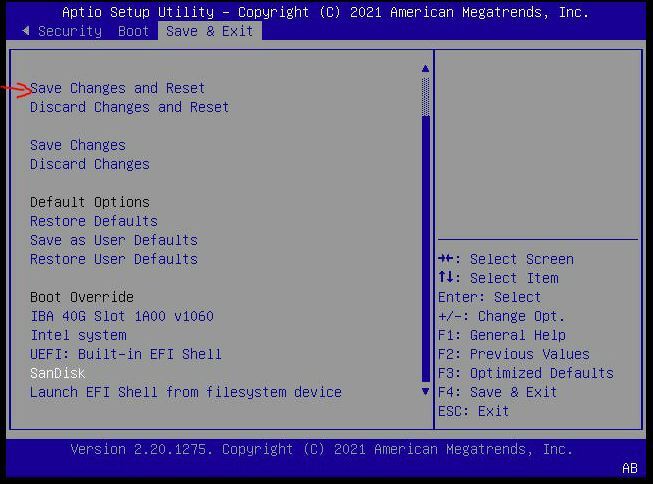
Navigate to "Save & Exit" → "Save Changes and Reset" and press enter.
At this point Cyber-AI installation should start automatically.
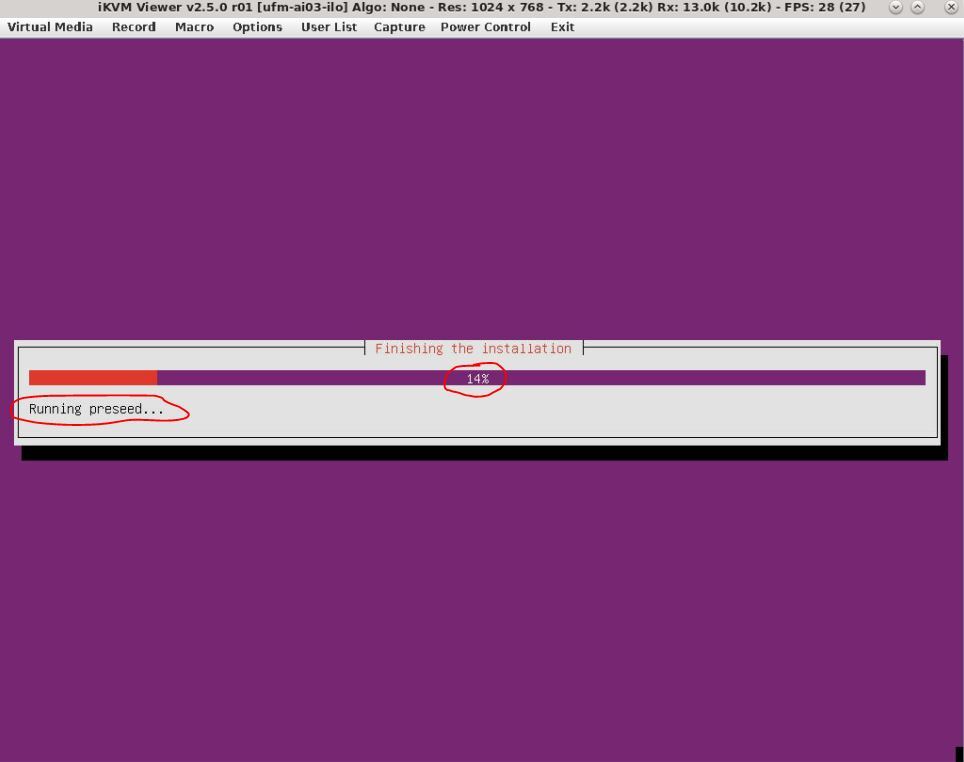
The process takes ~50 minutes, "Running preseed..." will show ~14-16 percent and will remain on this percentage for most of the time. This does not mean that the process is stuck.
The preseed file runs in the background and will take ~35-40 minutes to complete.
a log can be viewed by switching to tty4 by click on "Virtual Media" → "Virtual Keyboard"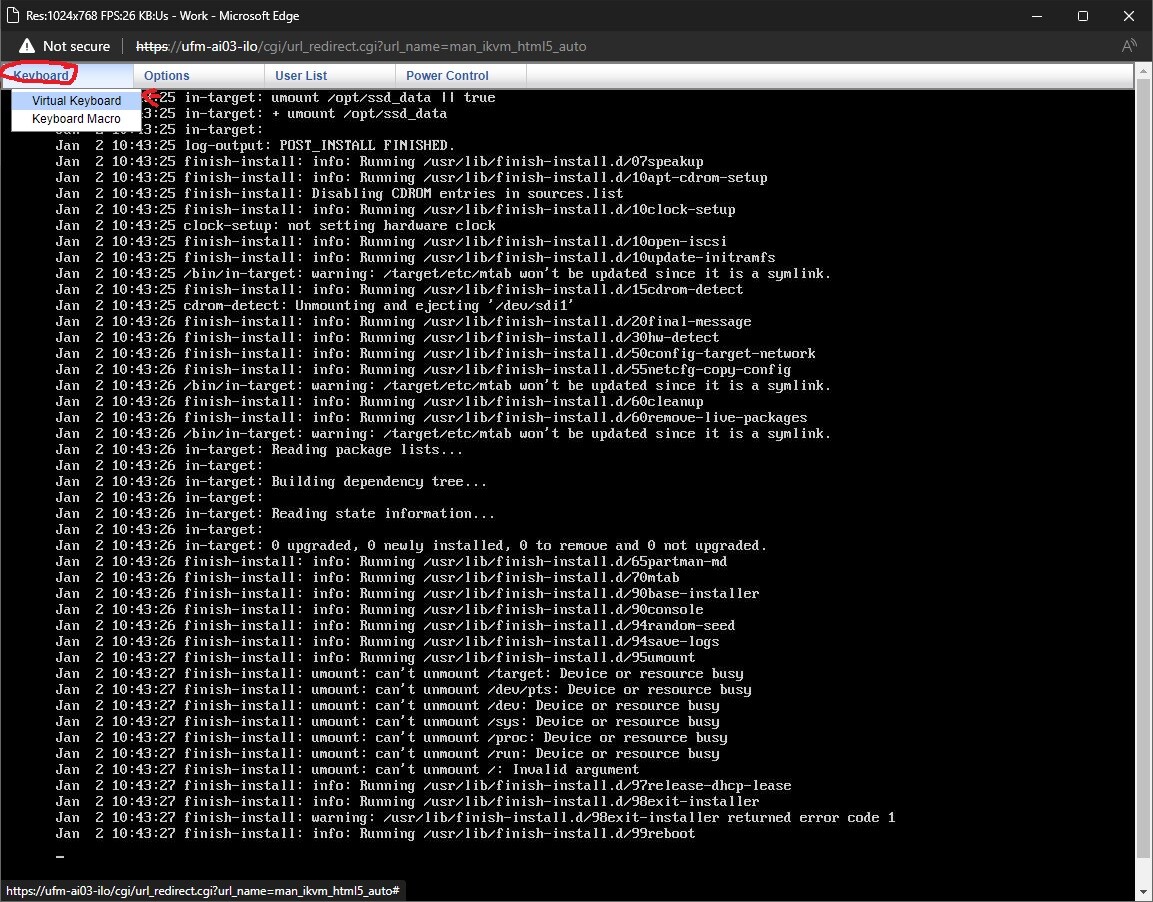
On the virtual keyboard that appears, press ALT+F4 (do this on the virtual keyboard to switch to tty4, otherwise the window will close).
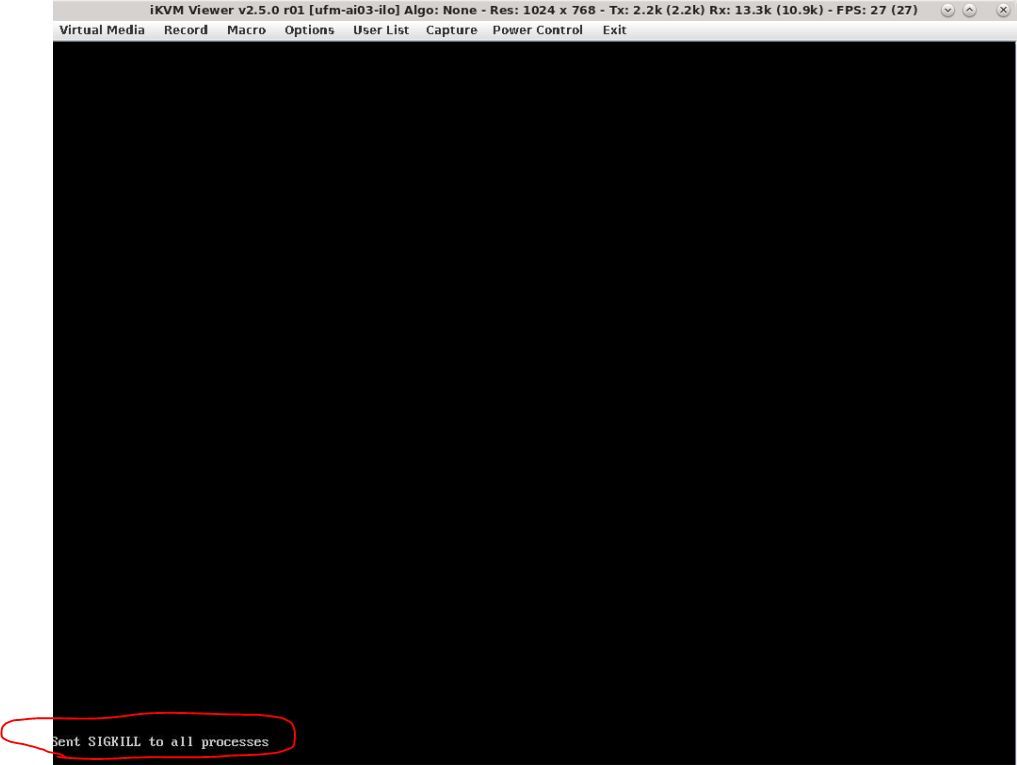
When the OS installation is complete (if still on tty1 (purple screen)) the screen will be black and a "Sent SIGKILL to all processes" message will appear.
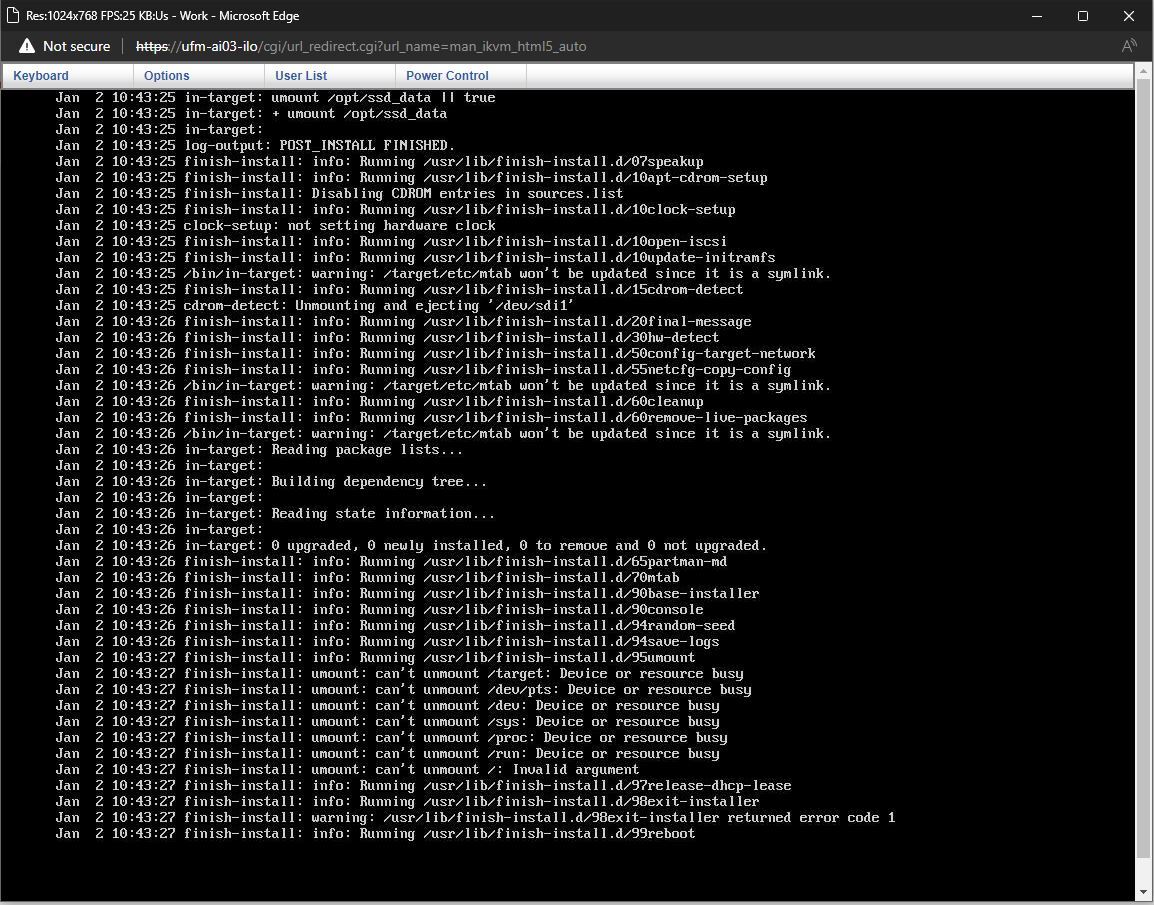
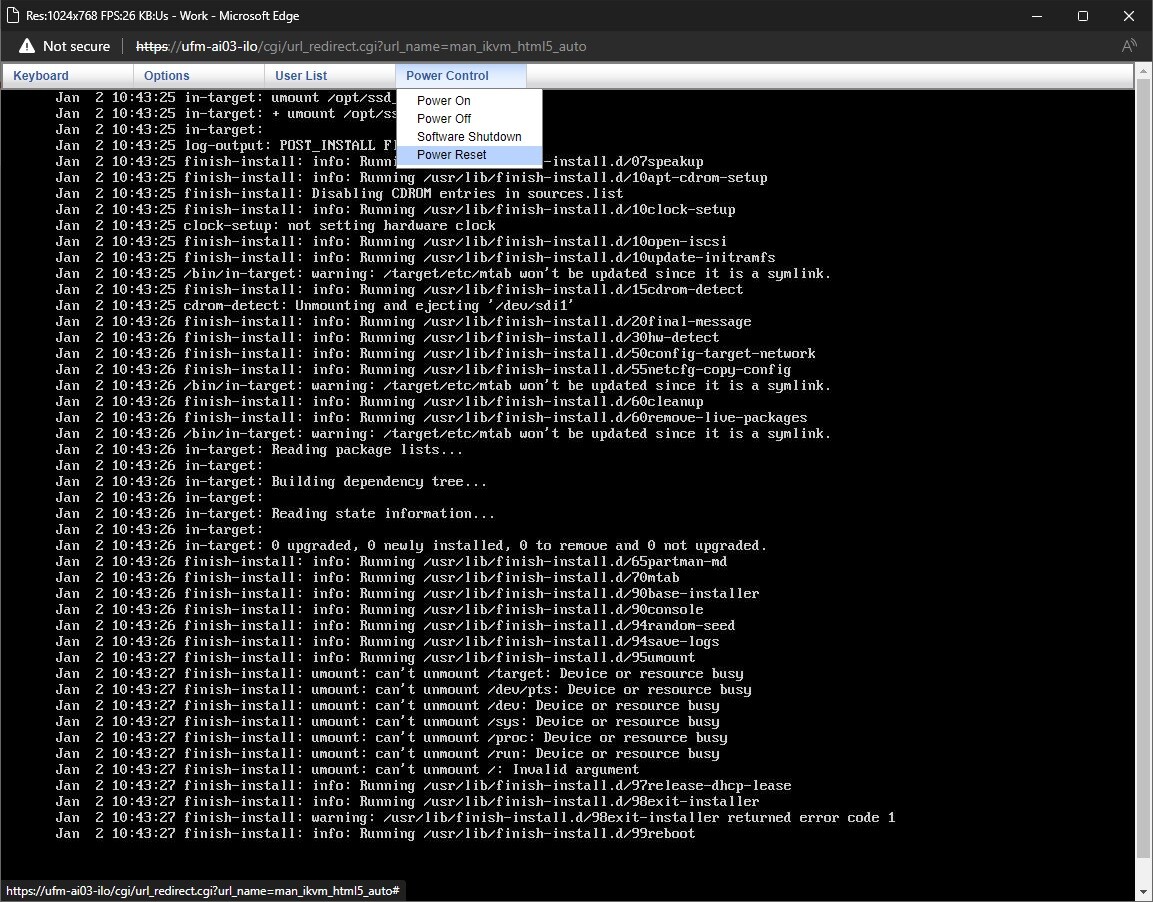
On the tty4 (log screen), a messages with "finish-install:" will appear.
At this point, remove the USB from the Cyber-AI server (or reboot to BIOS as seen in step #3 and change the "Boot option #1" which was set to USB earlier to "disabled".
Reboot the server. Click the "Power Control" menu and select "Power Reset".
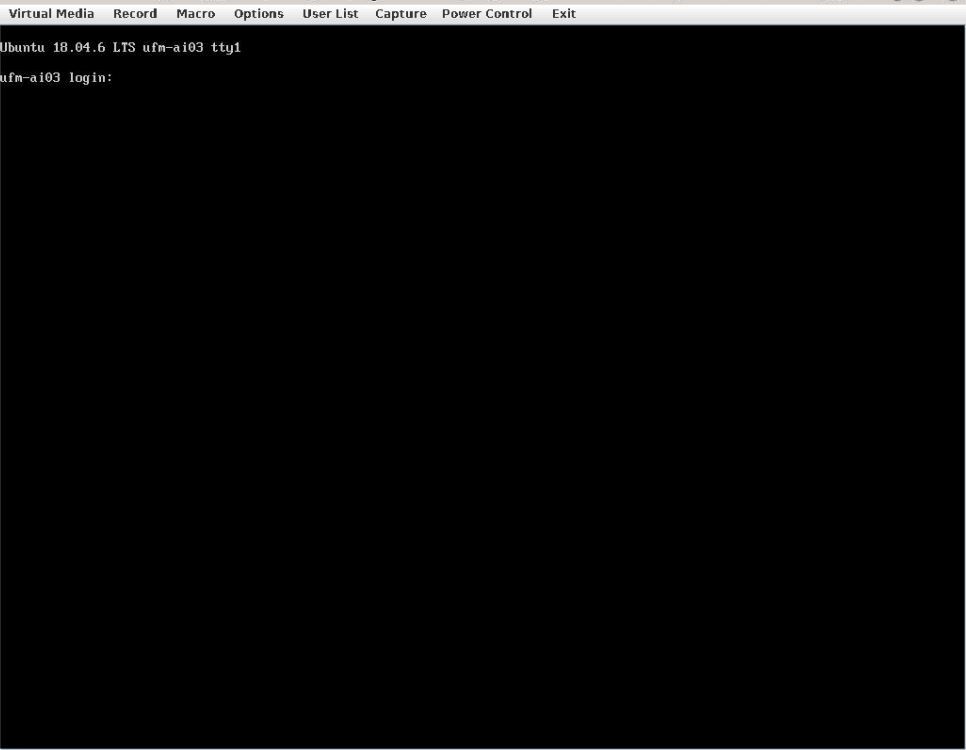
After the server boots up a login screen will appear.
0000018a-6670-dd68-a38e-f773e6ae0001
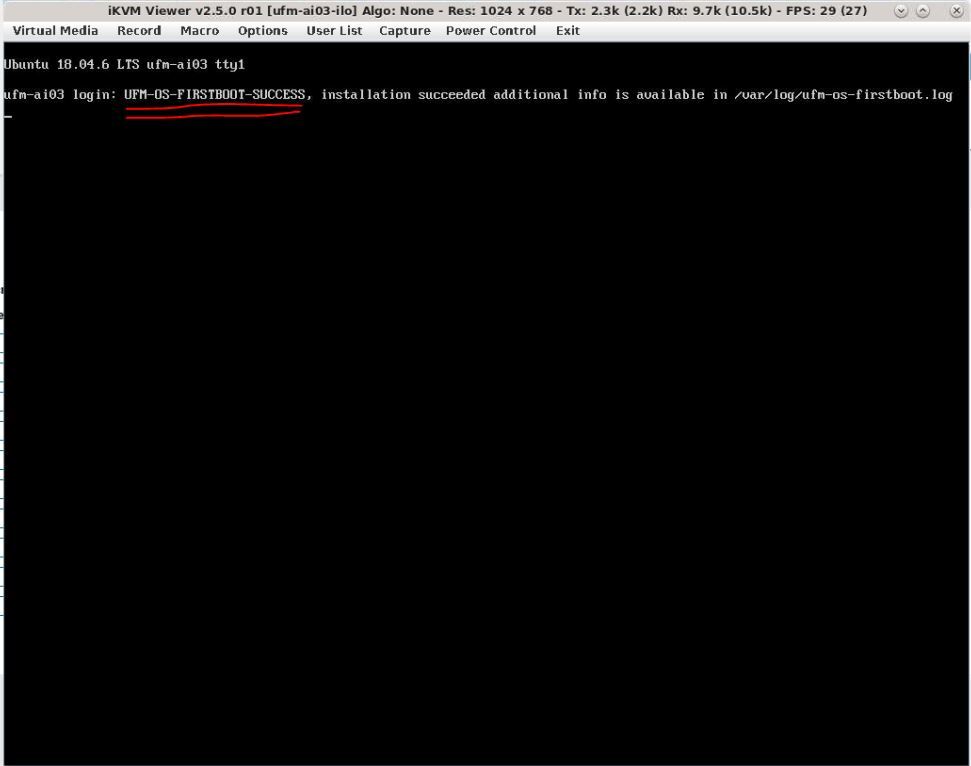
Additional software installation is triggered on the server's first boot. Once complete, a message will appear on all the connected terminals "UFM-OS-FIRSTBOOT-SUCCESS" in case of success, and FAILED in case the process failed.

To manually check the status, run:
systemctl status ufm-os-firstboot
if the installation is still running, the output provides a status.
if the installation finished, ufm-os-firstboot will not be found and the log at /var/log/ufm-os-firstboot.log can be viewed.
Cyber-AI is now successfully installed and can be started.