Abstract
This HPC Visualization Containers User Guide provides a detailed overview about how to use the the high performance computing (HPC) visualzation containers provided on the NGC registry.
This HPC Visualization Containers User Guide provides a detailed overview about how to use the the high performance computing (HPC) visualzation containers provided on the NGC registry.
1. HPC Visualization Containers
In addition to accessing the NVIDIA optimized frameworks and HPC containers, the NVIDIA GPU Cloud (NGC) container registry also hosts the following scientific visualization containers for HPC. These containers rely on the popular scientific visualization tool called ParaView.
- server container
- The server container needs access to the files on your server system. Details on how to grant this access are provided below. The server container can run both in serial mode or in parallel. For this alpha release, we are focusing on the serial node configuration. If you are interested in parallel configuration, contact hpcviscontainer@nvidia.com.
- client container
- To ensure matching versions of the client application and the server container, NVIDIA provides the client application in a container. Similarly, to the server container, the client container needs access to some of the ports to establish connection with the server container.
- ParaView with NVIDIA Holodeck
- Enables graphically rich scientific visualizations; bridging between ParaView and high-end rendering engines such as NVIDIA Holodeck.
- ParaView with NVIDIA IndeX
- Offers the NVIDIA IndeX scalable volume rendering technology within the popular scientific visualization tool called ParaView.
- ParaView with NVIDIA OptiX
- Provides GPU accelerated ray-tracing technology within ParaView; offering enhanced visual cues and high performance rendering for large scale scenes.
2. Prerequisites For HPC Visualization Containers
- Install docker-ce and nvidia-docker2. First install docker-ce, then install nvidia-docker2 for your operating system and Docker version. For a script to
install nvidia-docker2, see Installing NVIDIA Docker 2.0.
Note: If you already have nvidia-docker1 installed and intend to keep it, you can install nvidia-container-runtime.
- Install the NVIDIA Display driver version 384.57 or onwards depending on your GPU product type and series for your operating system. For more information, see Download Drivers.
- Ensure you have an NVIDIA GPU supporting Compute Unified Device Architecture® (CUDA) version with compute capability 6.0.0 or higher. For example, Pascal GPU architecture generation or later.
- Log into the NVIDIA® GPU Cloud (NGC) Container Registry located at nvcr.io using your NGC API key. For step-by-step instructions on how to gain access and get your API key, see NGC User Guide.
2.1. Installing NVIDIA Docker 2.0
The following script installs NVIDIA Docker 2.0 which is a prerequisite to pulling the ParaView with NVIDIA IndeX HPC visualization container.
Full support for concurrent graphics and compute capabilities in containers is supported in NVIDIA Docker 2.0. Current installations of NGC run on NVIDIA Docker 1.0. Prior to using a container on any of these instances, NVIDIA Docker 2.0 must be installed.
# Install NVIDIA Docker 2.0
docker volume ls -q -f driver=nvidia-docker | \
  xargs -r -I{} -n1 docker ps -q -a -f volume={} | xargs -r docker rm -f
sudo apt-get purge -y nvidia-docker
curl -L https://nvidia.github.io/nvidia-docker/gpgkey | sudo apt-key add -
sudo tee /etc/apt/sources.list.d/nvidia-docker.list <<< \
"deb https://nvidia.github.io/libnvidia-container/ubuntu16.04/amd64 /
deb https://nvidia.github.io/nvidia-container-runtime/ubuntu16.04/amd64 /
deb https://nvidia.github.io/nvidia-docker/ubuntu16.04/amd64 /"

sudo apt-get -y update
sudo apt-get install -y nvidia-docker2
sudo pkill -SIGHUP dockerd

# Tests
#docker run --runtime=nvidia --rm nvidia/cuda nvidia-smi
3. ParaView With NVIDIA Holodeck
Currently, the ParaView with NVIDIA Holodeck container requires a running X server both on the server host and the client host. Therefore, only a single container image is required.
docker pull nvcr.io/nvidia-hpcvis/paraview-holodeck:glx-17.11.13-beta
3.1. Running The ParaView With NVIDIA Holodeck Container
- Create X-forwarding variables for your container.
XSOCK=/tmp/.X11-unix; XAUTH=/tmp/.docker.xauth;
touch /tmp/.docker.xauth;
xauth nlist :0 | sed -e 's/^..../ffff/' | xauth -f /tmp/.docker.xauth nmerge -
- On the server host, start the ParaView Holodeck server:
docker run --rm -it --runtime=nvidia \
-v /tmp/.X11-unix:/tmp/.X11-unix -v /tmp/.docker.xauth:/tmp/.docker.xauth \
-e XAUTHORITY=/tmp/.docker.xauth -e DISPLAY=:0 \
-p 11111:11111 \
--shm-size=4g \
nvcr.io/nvidia-hpcvis/paraview-holodeck:glx-17.11.13-beta \
./service.sh externalvis pvserver
The Holodeck render window showing a space scene displays.
The server container is ready after you receive a message similar to the following:“Accepting connection(s): [...]:11111”
- Set up X access and start the client container on the client host. Ensure you
replace your_server_hostname.
XSOCK=/tmp/.X11-unix; XAUTH=/tmp/.docker.xauth
touch /tmp/.docker.xauth
xauth nlist :0 | sed -e 's/^..../ffff/' \
| xauth -f /tmp/.docker.xauth nmerge -docker run --rm -it --runtime=nvidia \
-v /tmp/.X11-unix:/tmp/.X11-unix -v /tmp/.docker.xauth:/tmp/.docker.xauth \
-e XAUTHORITY=/tmp/.docker.xauth -e DISPLAY=:0 \
nvcr.io/nvidia-hpcvis/paraview-holodeck:glx-17.11.13-beta \
sh -c paraview\ --server-url=cs://your_server_hostname:11111
The ParaView user interface displays.
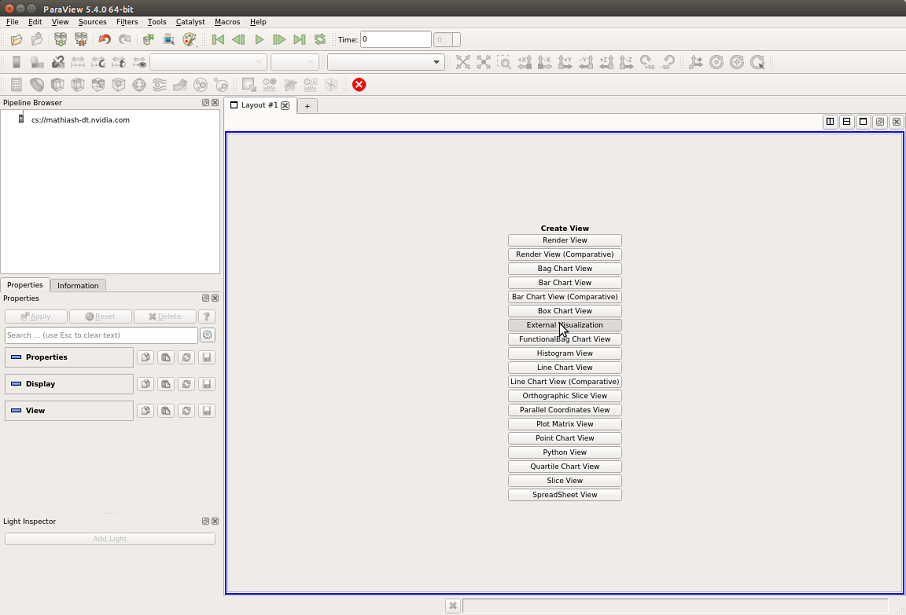
- To enable rendering in Holodeck, replace ParaView’s default view. Remove the default view by closing the layout:
- Insert a new External Visualization view:
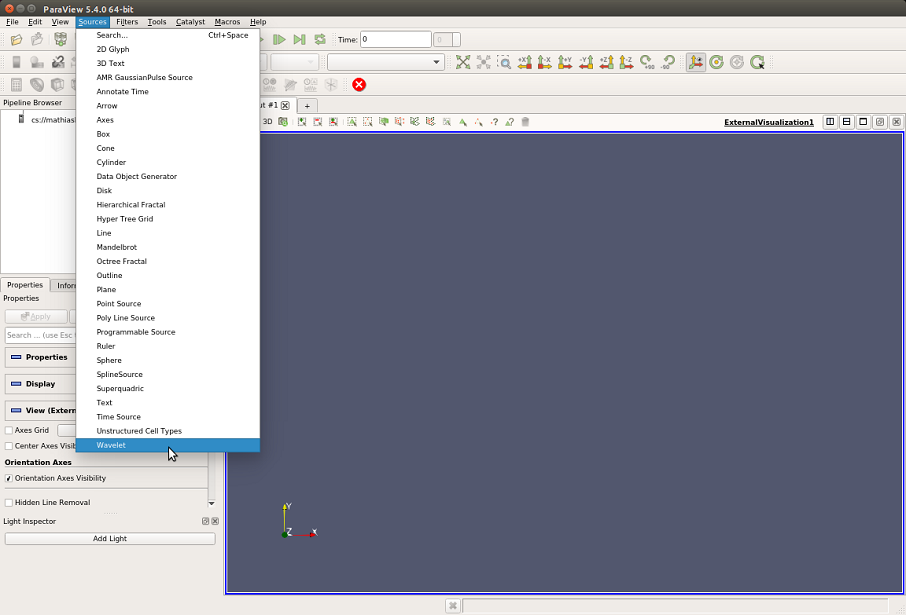
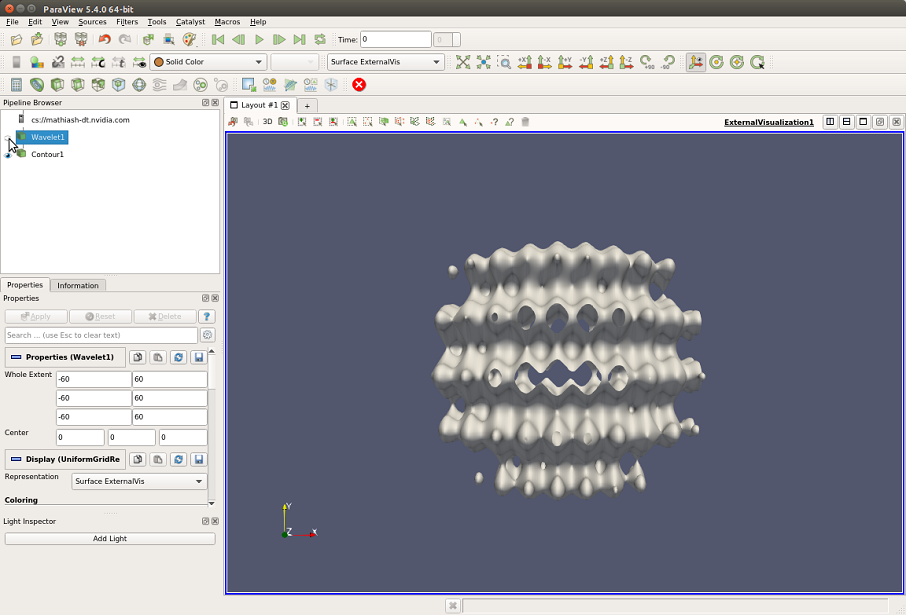
- The ParaView Holodeck container is now ready to display a visualization pipeline. For a simple test scene, add a Wavelet Source:
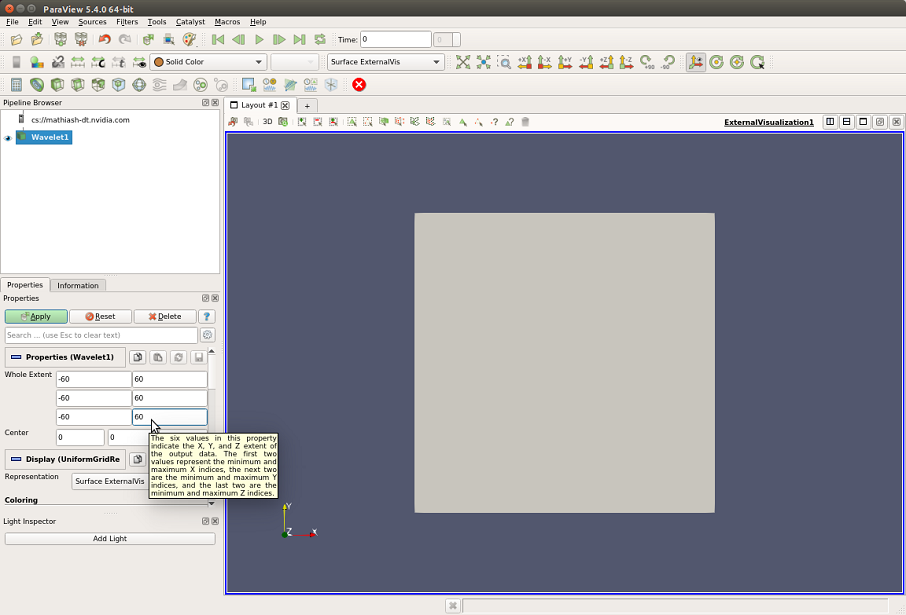
- Adjust the Wavelet Sources extents from -60 to 60 in all three dimensions, then click Apply:
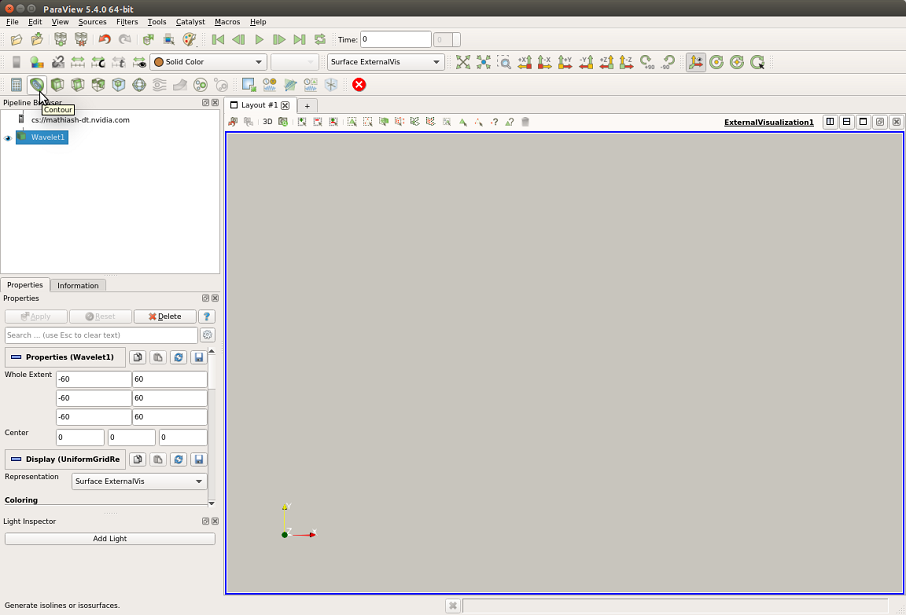
- Add a Contour filter, then click Apply:
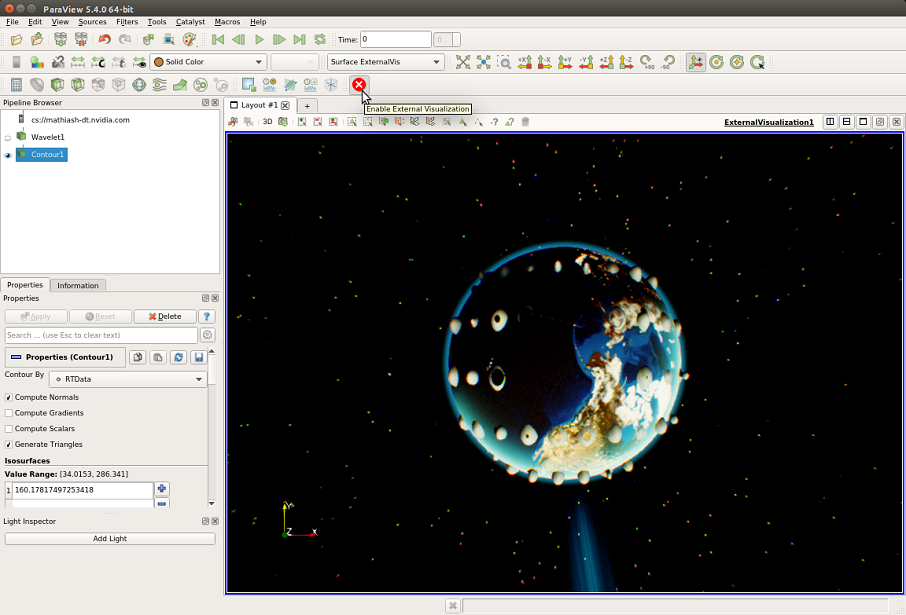
- Hide the Wavelet Source from the view to prevent the bounding box from blocking the iso surface:
- Enable rendering through Holodeck using the Enable External Visualization button:

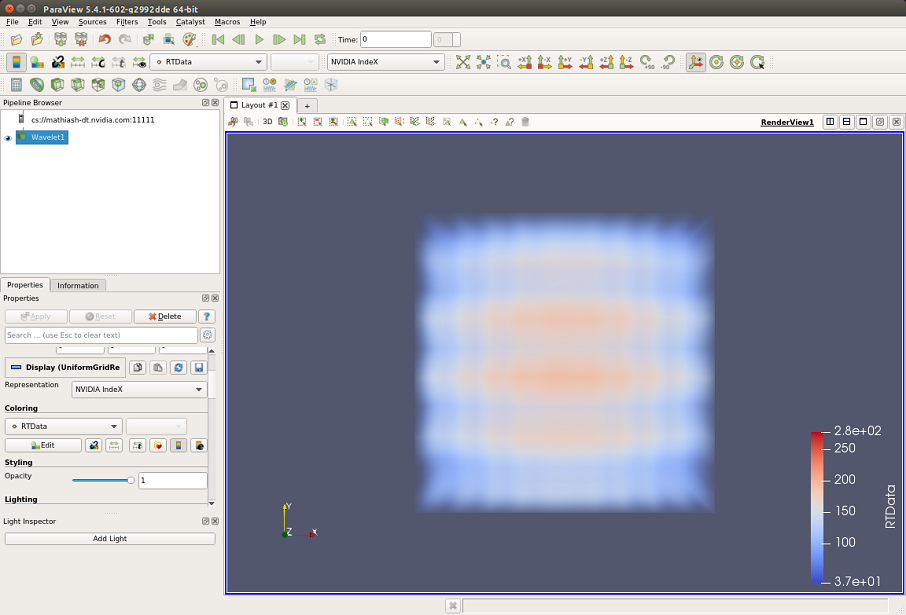
4. ParaView With NVIDIA IndeX
To support both X-enabled and headless hosts, the ParaView IndeX container image is available with GLX and EGL support. The following section shows how to launch the IndeX container with different use cases.
For more information about ParaView, see the ParaView User’s Guide and the NVIDIA IndeX SDK.
4.1. Single-Machine With GLX
- Login to the docker repository and pull the X display-enabled container on your
workstation:
docker pull nvcr.io/nvidia-hpcvis/paraview-index:glx-17.11.13-beta
- Specify X-forwarding variables:
XSOCK=/tmp/.X11-unix; XAUTH=/tmp/.docker.xauth
touch /tmp/.docker.xauth
xauth nlist :0 | sed -e 's/^..../ffff/' \
| xauth -f /tmp/.docker.xauth nmerge
- Run the image. In this example, host system data in the current directory
$(pwd) are mounted to both /work in the container. This should be modified as
desired by the user.
docker run --rm -it --runtime=nvidia \
-v /tmp/.X11-unix:/tmp/.X11-unix -v /tmp/.docker.xauth:/tmp/.docker.xauth \
-v $(pwd):/work -e XAUTHORITY=/tmp/.docker.xauth -e DISPLAY=:0 \
nvcr.io/nvidia-hpcvis/paraview-index:glx-17.11.13-beta \
sh -c paraview
4.2. Server Container With EGL
docker pull nvcr.io/nvidia-hpcvis/paraview-index:egl-17.11.13-beta
docker run --runtime=nvidia -p 11111:11111 --rm -it \
nvcr.io/nvidia-hpcvis/paraview-index:egl-17.11.13-beta sh -c pvserver
4.3. GLX Client Connecting To A Server
docker pull nvcr.io/nvidia-hpcvis/paraview-index:glx-17.11.13-beta
XSOCK=/tmp/.X11-unix; XAUTH=/tmp/.docker.xauth
touch /tmp/.docker.xauth
xauth nlist :0 | sed -e 's/^..../ffff/' \
| xauth -f /tmp/.docker.xauth nmerge -
docker run --rm -it --runtime=nvidia \
-v /tmp/.X11-unix:/tmp/.X11-unix -v /tmp/.docker.xauth:/tmp/.docker.xauth \
-e XAUTHORITY=/tmp/.docker.xauth -e DISPLAY=:0 \
nvcr.io/nvidia-hpcvis/paraview-index:glx-17.11.13-beta \
sh -c paraview\ --server-url=cs://your_server_hostname:11111

5. ParaView With NVIDIA OptiX
The ParaView with NVIDIA OptiX container is designed to run ParaView as a user normally would outside a container. The following sections show how to launch the OptiX container with different use cases.
For more information about ParaView see the ParaView User’s Guide and the NVIDIA OptiX SDK.
5.1. Single-Machine Container With GLX
- Pull the docker image:
docker pull nvcr.io/nvidia-hpcvis/paraview-optix:glx-17.11.13-beta
- Set up X11 forwarding variables:
XSOCK=/tmp/.X11-unix; XAUTH=/tmp/.docker.xauth;
touch /tmp/.docker.xauth;
xauth nlist :0 | sed -e 's/^..../ffff/' | xauth -f /tmp/.docker.xauth nmerge -
- Run the image. In this example, host system data in the current directory
$(pwd) are mounted to both /work in the
container. This should be modified as desired.
docker run --rm -it --runtime=nvidia -v /tmp/.X11-unix:/tmp/.X11-unix -v /tmp/.docker.xauth:/tmp/.docker.xauth -e XAUTHORITY=/tmp/.docker.xauth -e DISPLAY=:0 -v $(pwd):/work:rw nvcr.io/nvidia-hpcvis/paraview-optix-glx-beta:17.11.10 sh -c paraview
5.2. Server Container With EGL
- Pull the container:
docker pull nvcr.io/nvidia-hpcvis/paraview-optix:egl-17.11.13-beta
- Specify the connection port and launch the container as follows (in this
example, we listen on the default port 11111):
docker run --runtime=nvidia -p 11111:11111 --rm -it \
nvcr.io/nvidia-hpcvis/paraview-optix:egl-17.11.13-beta sh -c pvserver
- For users who wish to run the server on a GLX-capable workstation, it is equally possible to use the GLX image with the pvserver argument.
5.3. Running The GLX Client And Attaching To The Server
docker pull nvcr.io/nvidia-hpcvis/paraview-optix:glx-17.11.13-beta

XSOCK=/tmp/.X11-unix; XAUTH=/tmp/.docker.xauth
touch /tmp/.docker.xauth
xauth nlist :0 | sed -e 's/^..../ffff/' \
| xauth -f /tmp/.docker.xauth nmerge -

docker run --rm -it --runtime=nvidia \
-v /tmp/.X11-unix:/tmp/.X11-unix -v /tmp/.docker.xauth:/tmp/.docker.xauth \
-e XAUTHORITY=/tmp/.docker.xauth -e DISPLAY=:0 \
nvcr.io/nvidia-hpcvis/paraview-optix:glx-17.11.13-beta \
sh -c paraview\ --server-url=cs://your.server.address:11111
5.4. Optional: Using The ParaView .config File
It is helpful to reuse ParaView configuration files to maintain settings across ParaView sessions. To do this, first create a new directory for ParaView to store its settings.
mkdir pvsettings
When issuing the docker run command, add the following command as an argument:
-v $(pwd)/pvsettings:/home/paraview/.config/ParaView
Insert the command before the image URL. For example,
docker run --rm -it --runtime=nvidia \
 -v /tmp/.X11-unix:/tmp/.X11-unix -v /tmp/.docker.xauth:/tmp/.docker.xauth \
 -e XAUTHORITY=/tmp/.docker.xauth -e DISPLAY=:0 \
 nvcr.io/nvidia-hpcvis/paraview-optix:glx-17.11.13-beta \
 -v $(pwd)/pvsettings:/home/paraview/.config/ParaView \
 sh -c paraview\ --server-url=cs://your.server.address:11111
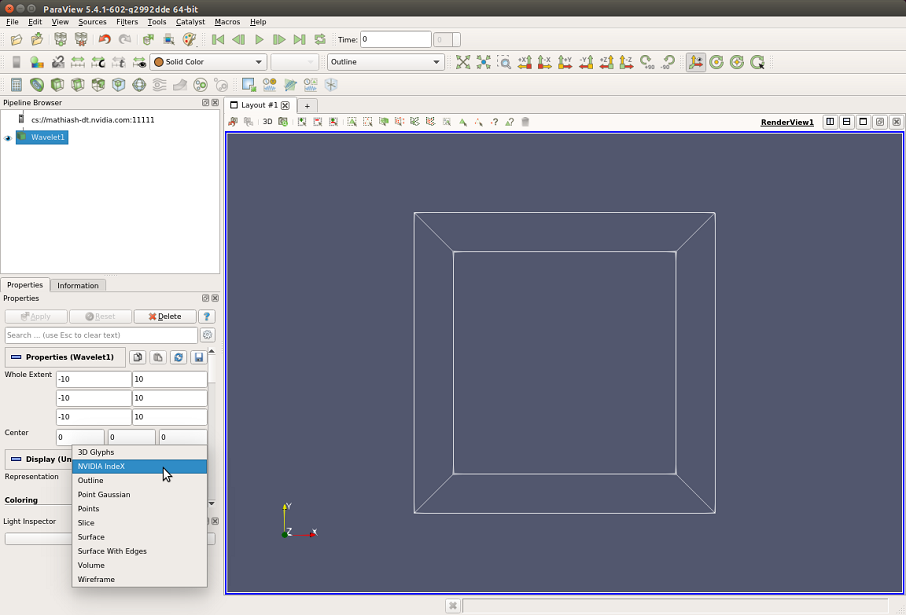
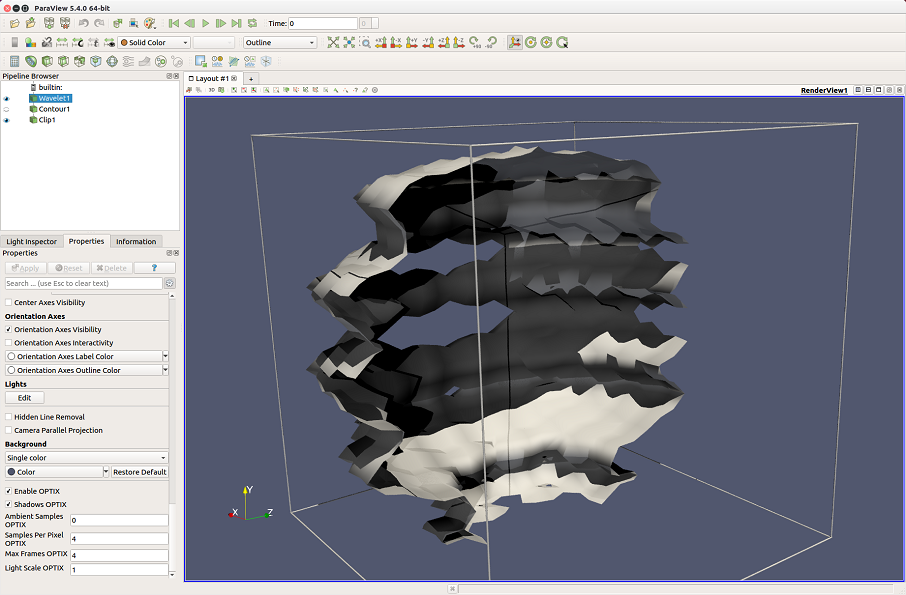
5.5. Example ParaView Pipeline With NVIDIA OptiX
- Exit the splash screen.
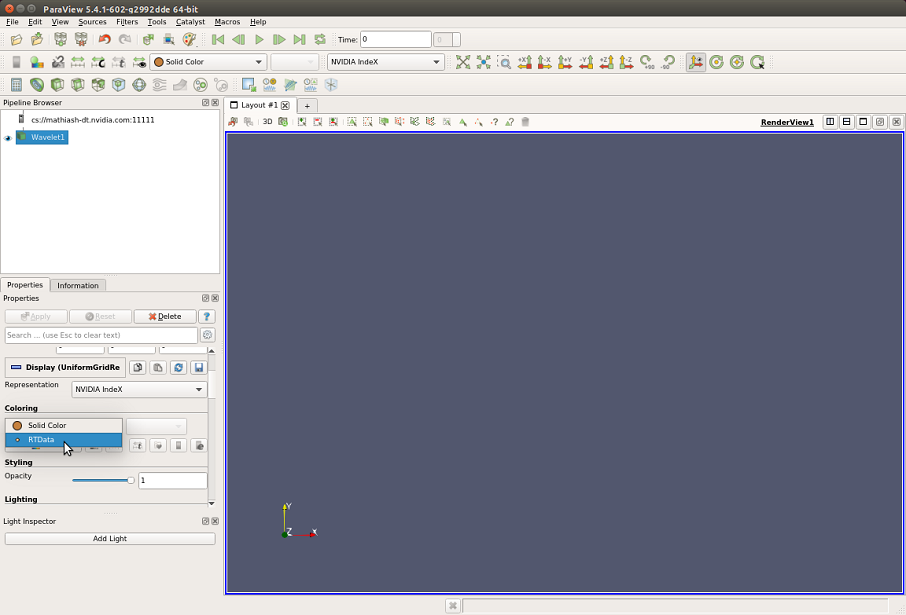
- Click Sources > Wavelet on the top pull-down menu. Click Apply on the left pane.
- Select Filter > Common > Contour from the top pull-down menu. Click Apply again.
- Select Filter > Common > Clip from the top pull down menu. Move the clip plane to the desired position and click Apply.
- Under the Plane Parameters sub-pane on the left pane, uncheck Show Plane to hide the clip plane.
- Scroll down on the left pane and select Enable OptiX.
- Optional: Enable Shadows OptiX.
- Optional: Enable 4 samples per pixel and 4 ambient samples in OptiX.
- Optional: Click Add Light on the left pane and modify as desired. The result should appear as follows:
6. Troubleshooting
For more information about nvidia-docker containers, visit the GitHub site: NVIDIA-Docker GitHub.
For deep learning frameworks release notes and additional product documentation, see the Deep Learning Documentation website: Release Notes for Deep Learning Frameworks.
Notices
Notice
THE INFORMATION IN THIS GUIDE AND ALL OTHER INFORMATION CONTAINED IN NVIDIA DOCUMENTATION REFERENCED IN THIS GUIDE IS PROVIDED "AS IS." NVIDIA MAKES NO WARRANTIES, EXPRESSED, IMPLIED, STATUTORY, OR OTHERWISE WITH RESPECT TO THE INFORMATION FOR THE PRODUCT, AND EXPRESSLY DISCLAIMS ALL IMPLIED WARRANTIES OF NONINFRINGEMENT, MERCHANTABILITY, AND FITNESS FOR A PARTICULAR PURPOSE. Notwithstanding any damages that customer might incur for any reason whatsoever, NVIDIA's aggregate and cumulative liability towards customer for the product described in this guide shall be limited in accordance with the NVIDIA terms and conditions of sale for the product.
THE NVIDIA PRODUCT DESCRIBED IN THIS GUIDE IS NOT FAULT TOLERANT AND IS NOT DESIGNED, MANUFACTURED OR INTENDED FOR USE IN CONNECTION WITH THE DESIGN, CONSTRUCTION, MAINTENANCE, AND/OR OPERATION OF ANY SYSTEM WHERE THE USE OR A FAILURE OF SUCH SYSTEM COULD RESULT IN A SITUATION THAT THREATENS THE SAFETY OF HUMAN LIFE OR SEVERE PHYSICAL HARM OR PROPERTY DAMAGE (INCLUDING, FOR EXAMPLE, USE IN CONNECTION WITH ANY NUCLEAR, AVIONICS, LIFE SUPPORT OR OTHER LIFE CRITICAL APPLICATION). NVIDIA EXPRESSLY DISCLAIMS ANY EXPRESS OR IMPLIED WARRANTY OF FITNESS FOR SUCH HIGH RISK USES. NVIDIA SHALL NOT BE LIABLE TO CUSTOMER OR ANY THIRD PARTY, IN WHOLE OR IN PART, FOR ANY CLAIMS OR DAMAGES ARISING FROM SUCH HIGH RISK USES.
NVIDIA makes no representation or warranty that the product described in this guide will be suitable for any specified use without further testing or modification. Testing of all parameters of each product is not necessarily performed by NVIDIA. It is customer's sole responsibility to ensure the product is suitable and fit for the application planned by customer and to do the necessary testing for the application in order to avoid a default of the application or the product. Weaknesses in customer's product designs may affect the quality and reliability of the NVIDIA product and may result in additional or different conditions and/or requirements beyond those contained in this guide. NVIDIA does not accept any liability related to any default, damage, costs or problem which may be based on or attributable to: (i) the use of the NVIDIA product in any manner that is contrary to this guide, or (ii) customer product designs.
Other than the right for customer to use the information in this guide with the product, no other license, either expressed or implied, is hereby granted by NVIDIA under this guide. Reproduction of information in this guide is permissible only if reproduction is approved by NVIDIA in writing, is reproduced without alteration, and is accompanied by all associated conditions, limitations, and notices.