NGC on Azure Virtual Machines#
This guide explains how to set up an NVIDIA GPU Cloud Machine Image on Microsoft Azure and includes release notes for each image version.
Using NGC on Azure Virtual Machines#
NVIDIA GPU-Optimized Virtual Machine Images are available on Microsoft Azure compute instances with NVIDIA A100, T4, and V100 GPUs.
On Azure, launching an instance is as simple as signing in, selecting the NVIDIA GPU‑optimized image, configuring settings, and launching the VM. After launch, you can SSH into the VM and start building AI applications in deep learning, machine learning and data science by leveraging GPU‑accelerated containers, pre‑trained models, and resources from NGC.
This document provides step-by-step instructions for accomplishing this, including how to use the Azure CLI.
Security Best Practices#
Cloud security starts with the security policies of your CSP account. Refer to the following link for how to configure your security policies for your CSP:
Azure security fundamentals documentation
Users must follow the security guidelines and best practices of their CSP to secure their VM and account.
Prerequisites#
These instructions assume the following:
You have an Azure account - https://portal.azure.com, with either permissions to create a Resource Group or with a Resource Group already available to you.
Browse the NGC website and identify an available NGC container and tag to run on the Virtual Machine Instance (VMI).
If you plan to use the Azure CLI or Terraform, then the Azure CLI 2.0 must be installed.
Windows Users: The CLI code snippets are for bash on Linux or Mac OS X. If you are using Windows and want to use the snippets as-is, you can use the Windows Subsystem for Linux and use the bash shell (you will be in Ubuntu Linux).
Before You Start#
Be sure you are familiar with the information in this chapter before starting to use the NVIDIA GPU Cloud Machine Image on Microsoft Azure.
Setting Up SSH Keys#
If you do not already have SSH keys set up specifically for Azure, you will need to set one up and have it on the machine you will use to SSH to the VM. In the examples, the key is named “azure-key”.
On Linux or OS X, generate a new key with the following command:
ssh-keygen -t rsa -b 2048 -f ~/.ssh/azure-key
On Windows, the location will depend on the SSH client you use, so modify the path above in the snippets or in your SSH client configuration.
Alternatively, you could also choose to authenticate using a username and password that can be set up while creating the VM. However, the SSH key method ensures optimal security.
For more information, see Create and manage SSH keys for authentication to a Linux VM in Azure.
Setting Up a Security Group#
When creating your NVIDIA GPU Cloud VM, Azure sets up a network security group for the VM and you should choose to allow external access to inbound ports 22 (for SSH) and 443 (for HTTPS). You can add inbound rules to the network security group later for other ports as needed, such as port 8888 for DIGITS.
You can also set up a separate network security group so that it will be available any time you create a new NVIDIA GPU Cloud VM. This can be done ahead of time. Refer to the Microsoft instructions to Create, Change, or Delete a Network Security Group.
Add the following inbound rules to your network security group:
SSH
Destination port ranges: 22
Protocol: TCP
Name: SSH
HTTPS
Destination port ranges: 443
Protocol: TCP
Name: HTTPS
Others as needed
Example: DIGITS
Destination port ranges: 8888
Protocol: TCP
Name: DIGITS
Security Warning
It is important to use proper precautions and security safeguards prior to granting access, or sharing your AMI over the internet. By default, internet connectivity to the AMI instance is blocked. You are solely responsible for enabling and securing access to your AMI. Please refer to Azure guides for managing security groups.
Creating an NGC Certified Virtual Machine using the Azure Console#
Log in and Launch the VM#
Log into the Azure portal (https://portal.azure.com).
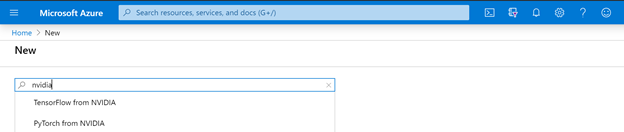
Select Create a resource from the Azure services menu.

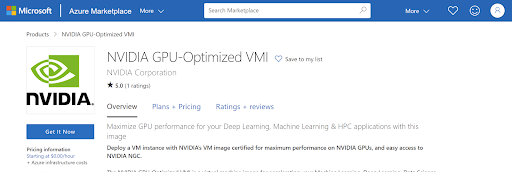
On the New pane, search for “nvidia”, and then select the NVIDIA Virtual Machine Image you would like to use. Note that you can choose between the NVIDIA AI Enterprise image or the various NVIDIA GPU-Optimized images.
Based on your selection, you will have two slightly different paths.
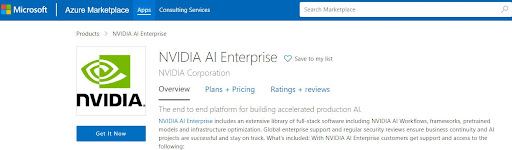
Selecting the pay-as-you-go NVIDIA AI Enterprise image:
At the list page, click Get It Now.
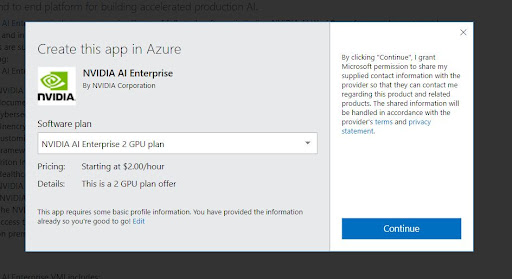
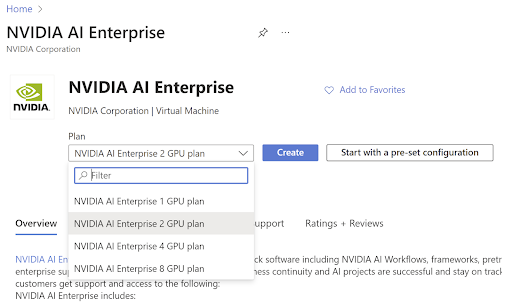
At the Azure app creation dialog, select your plan based on the number of GPUs you want to launch and click Continue.
At the VMI deployment page, verify your plan selection and pricing, then click Create.
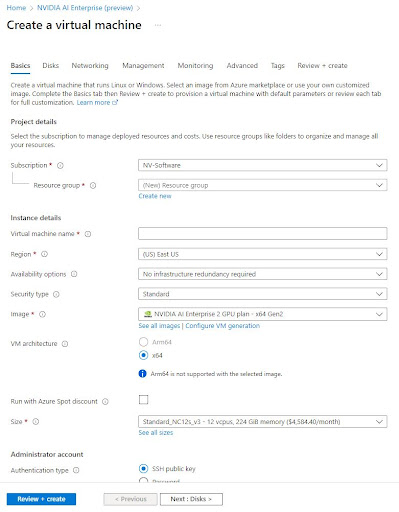
From the Create a virtual machine page, the rest of the process is similar for all options. You can find detailed instructions for this process in Step 5, provided below.
Selecting the free GPU-Optimized image:
At the listing page, click Get It Now.
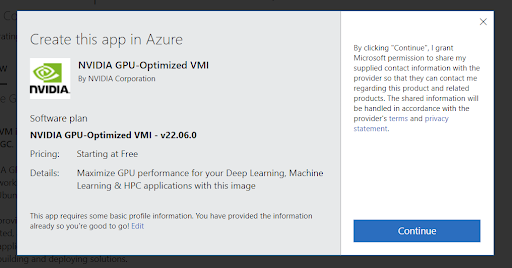
At the Azure app creation dialog, review the information and click Continue.
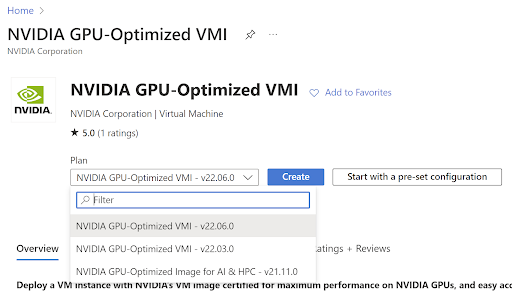
At the VMI deployment page, select your desired release version from the software plan menu and click Create.
From the Create a virtual machine page, the rest of the process is similar for all options. You can find detailed instructions for this process in Step 5, provided below.
Select the latest release version (or version of your choice if required) from the software plan menu and then click Create.

Complete the settings under the Basics tab as follows:
Subscription and Resource Group: Choose relevant options to your subscription
Virtual Machine Name: Name of your choice
Region: Select a region with instance types featuring the latest NVIDIA GPUs (NC-v3 Series). In this example we use the (US) East US region. Refer to the list of available instance types by region.
Authentication Choice: SSH, with username of choice
SSH public key: Paste in your SSH public key that you previously generated
Click Next to select a Premium SSD and add data disks.
In the Networking section, select the Network Security Group you created earlier under the Configure network security group option.
Make other Settings selections as needed, then click OK. After the validation passes, the portal presents the details of your new image which you can download as a template to automate deployment later.
Click Deploy to deploy the image. The deployment starts, as indicated by the traveling bar underneath the Alert icon. It may take a few minutes to complete.
Connect to Your VM Instance#
Open the VM instance that you created.
Navigate to the Azure portal home page and click on Virtual Machines under the Azure services menu.
Select the VM you created and want to connect to.
Click Connect from the action bar at the top and then select SSH.
If the instructions to log in via SSH login do not work, refer to Troubleshooting SSH connections to an Azure Linux VM that fails, errors out, or is refused documentation for further troubleshooting.

Start/Stop Your VM Instance#
Open the VM instance you created.
Navigate to the Azure portal home page and click on Virtual Machines under the Azure services menu.
Select the VM you created and want to manage.
Click Start or Stop from the action bar at the top.
Delete VM and Associated Resources#
When you created your VM, other resources for that instance were automatically created for you, such as a network interface, public IP address, and boot disk. If you deleted your VM, you will also need to delete these resources.
Open the VM instance you created.
Navigate to the Azure portal home page and click on Virtual Machines under the Azure services menu.
Select the VM you created and want to delete.
Click Delete from the action bar at the top and confirm your choice by typing ‘yes’ on the pane to the left that pops up.
Launching an NVIDIA GPU Cloud VM Using Azure CLI#
If you plan to use Azure CLI, then the CLI must be installed.
Some of the CLI snippets in these instructions make use of jq, which should be installed for jq on the machine from which you’ll run the CLI. You may paste these snippets into your own bash scripts or type them at the command line.
Set Up Environment Variables#
Use the following table as a guide for determining the values you will need for creating your GPU Cloud VM. The variable names are arbitrary and used in the instructions that follow.
VARIABLE |
DESCRIPTION |
EXAMPLE |
|---|---|---|
|
Name for your GPU Cloud VM |
|
|
Your resource group |
|
|
The NVIDIA GPU-Optimized Image. See the release notes NVIDIA Virtual Machine Images on Azure for the latest release. |
|
|
A zone that contains GPUs. Refer to https://azure.microsoft.com/en-us/global-infrastructure/services/ to see available locations for NCv2 and NCv3 series SKUs. |
|
|
The SKU specified by the number of vCPUs, RAM, and GPUs. Refer to https://learn.microsoft.com/azure/virtual-machines/linux/sizes-gpu for the list of P40, P100, and V100 SKUs to choose from. |
|
|
<path>/<public-azure-key.pub> |
|
|
Your username |
jsmith |
|
Your network security group |
|
Launch Your VM Instance#
Be sure you have installed Azure CLI and that you are ready with the VM setup information listed in the section Set Up Environment Variables. You can then either manually replace the variable names in the commands in this section with the actual values or define the variables ahead of time.
Log in to the Azure CLI.
az loginEnter the following:
az vm create \
 --name ${AZ_VM_NAME} \
 --resource-group ${AZ_RESOURCE_GROUP} \
 --image ${AZ_IMAGE} \
 --location ${AZ_LOCATION} \
 --size ${AZ_SIZE} \
 --ssh-key-value ${AZ_SSH_KEY} \
 --admin-username ${AZ_USER} \
 --nsg ${AZ_NSG}
If successful, you should see output consisting of a JSON description of your VM. The GPU Cloud VM gets deployed. Note the public IP address for use when establishing an SSH connection to the VM. You can also set up an AZ_PUBLIC_IP variable by defining an Azure JSON file for the VM as follows:
AZ_JSON=$(az vm create \
 --name ${AZ_VM_NAME} \
 --resource-group ${AZ_RESOURCE_GROUP} \
 --image ${AZ_IMAGE} \
 --location ${AZ_LOCATION} \
 --size ${AZ_SIZE} \
 --ssh-key-value ${AZ_SSH_KEY} \
 --admin-username ${AZ_USER} \
 --nsg ${AZ_NSG})
AZ_PUBLIC_IP=$(echo $AZ_JSON | jq .publicIpAddress | sed 's/\"//g') && \
 echo $AZ_JSON && echo AZ_PUBLIC_IP=$AZ_PUBLIC_IP
Azure sets up a non-persistent scratch disk for each VM. See the section Persistent Data Storage for Azure Virtual Machines for instructions on setting up alternate storage for your datasets.
Connect to Your VM Instance#
Use a CLI on Mac or Linux (Windows users: use OpenSSH on Windows PowerShell or the Windows Subsystem for Linux install). Then run ssh to connect to your GPU VM instance.
ssh -i $AZ_SSH_KEY $AZ_USER@$AZ_PUBLIC_IP
Start/Stop Your VM Instance#
VMs can be stopped and started again without losing any of their storage and other resources.
To stop and deallocate a running VM:
az vm deallocate --resource-group $AZ_RESOURCE_GROUP --name $AZ_VM_NAME
To start a stopped VM:
az vm start --resource-group $AZ_RESOURCE_GROUP --name $AZ_VM_NAME
When starting a stopped VM, you will need to update the public IP variable, as it will change with the newly started VM.
AZ_PUBLIC_IP=$(az network public-ip show \
  --resource-group $AZ_RESOURCE_GROUP \
  --name $AZ_VM_NAME\PublicIP | jq .ipAddress | sed 's/\"//g') && \
  echo AZ_PUBLIC_IP=$AZ_PUBLIC_IP
Delete VM and Associated Resources#
When you created your VM, other resources for that instance were automatically created for you, such as a network interface, public IP address, and boot disk. If you deleted your instance, you will also need to delete these resources.
Perform the deletions in the following order.
Delete your VM.
az vm delete -g $AZ_RESOURCE_GROUP -n $AZ_VM_NAME
Delete the VM OS disk.
List the disks in your Resource Group.
az disk list -g $AZ_RESOURCE_GROUP
The associated OS disk will have the name of your VM as the base name.
Delete the OS disk.
az disk delete -g $AZ_RESOURCE_GROUP -n MyDisk
See Microsoft Azure CLI documentation az disk delete for more information.
Delete the VM network interface.
List the network interface resources in your Resource Group.
az network nic list -g $AZ_RESOURCE_GROUP
The associated network interface will have the name of your VM as the base name.
Delete the network interface resource.
az network nic delete -g $AZ_RESOURCE_GROUP -n MyNic
See Microsoft Azure CLI documentation az network nic delete for more information.
Delete the VM public IP address.
List the public IPs in your Resource Group.
az network public-ip list -g $AZ_RESOURCE_GROUP
The associated public IP will have the name of your VM as the base name.
Delete the public IP.
az network public-ip delete -g $AZ_RESOURCE_GROUP -n MyIp
See Microsoft Azure CLI documentation az network public-ip delete for more information.
Using Premium Storage SSDs for Datasets#
You can create a Premium Storage SSD from the Azure dashboard. Premium Storage SSDs are ideal for persistent storage of a large number of datasets and offer better performance.
Create a Data Disk Using the Azure Console#
Open the VM instance that you created.
Navigate to the Azure portal home page and click on Virtual Machines under the Azure services menu.
Select the VM that you created and want to manage.
Select Disks under the Settings category in the control panel on the left.
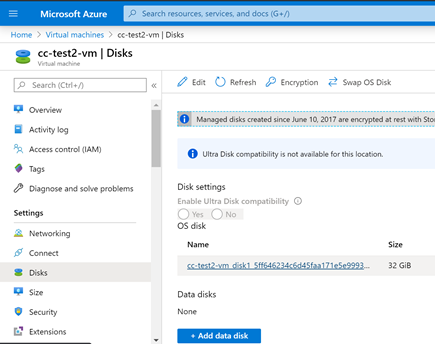
Click Add Disk and click Create Disk in the drop down menu upon clicking Name.
On the Create Managed Disk pane:
Enter a disk name
Select a resource group
Select Premium SSD for Account type
Enter a disk size
Click Create.
When the validation is completed, click Save.
Creating a Data Disk Using the Azure CLI#
To create a new data disk and attach it to your VM, include the following option in the az vm create command.
--data-disk-sizes-gb <data-disk-size>
To attach an existing data disk to your VM when creating it, include the following option in the az vm create command.
--attach-data-disks <data-disk-name>
Mounting a Data Disk#
Once the data disk is created, establish an SSH connection to your VM.
Create a filesystem on the data disk.
You can view the volume by running
lsblkcommand.:~# lsblk NAME MAJ:MIN RM SIZE RO TYPE MOUNTPOINT sdb 8:16 0 1.5T 0 disk └─sdb1 8:17 0 1.4T 0 part /mnt sr0 11:0 1 628K 0 rom sdc 8:32 0 2T 0 disk └─sdc1 8:33 0 2T 0 part sda 8:0 0 240G 0 disk └─sda1 8:1 0 240G 0 part /
:~# mkfs.ext4 /dev/sdc1
Mount the volume to a mount directory.
~# mount /dev/sdc1 /data
To mount the volume automatically every time the VM is stopped and restarted, add an entry to
/etc/fstab.When adding an entry to
/etc/fstab, use a UUID‑based device path (See device-names-problem for details).For example:
UUID=33333333-3b3b-3c3c-3d3d-3e3e3e3e3e3e /data ext4 defaults,nofail 1 2
Deleting a Data Disk#
You can delete a data disk only if it is not attached to a VM. Be aware that once you delete a data disk, you cannot undo the action.
Open the Azure Dashboard and click All resources from the left side menu.
Filter by Disks type, then locate and select the check box for your data disk.
Click Delete.
Enter ‘yes’ to confirm, then click Delete.
NVIDIA Virtual Machine Images on Azure#
NVIDIA makes available on the Microsoft Azure platform a customized machine image based on the NVIDIA® Tesla Volta™ and Pascal™ GPUs. Running NVIDIA GPU Cloud containers on this instance provides optimum performance for deep learning, machine learning, and HPC workloads.
See the Using NGC with Azure Setup Guide for instructions on setting up and using the VMI.
NVIDIA AI Enterprise VMI#
Information#
NVIDIA AI Enterprise is a secure, end-to-end, cloud-native suite of AI software enabling organizations to solve new challenges while increasing operational efficiency. It accelerates the data science pipeline and streamlines the development, deployment, and management of predictive AI models to automate essential processes and gain rapid insights from data. With an extensive library of full-stack software, including AI solution workflows, frameworks, pre-trained models, and infrastructure optimization. Global enterprise support and regular security reviews ensure business continuity and AI projects are successful and stay on track.
With NVIDIA AI Enterprise, customers get support and access to the following:
NVIDIA AI Workflows, prepackaged reference applications that include Helm Charts, Jupyter Notebooks, and documentation to enable fast time to production for contact center intelligent virtual assistants, audio transcription, and cybersecurity digital fingerprinting to detect anomalies. Only available with an NVIDIA AI Enterprise subscription.
Unencrypted pre-trained models for AI explainability, understanding model weights and biases, and faster debugging and customization. Only available with an NVIDIA AI Enterprise subscription.
Frameworks and tools to accelerate AI development (PyTorch, TensorFlow, NVIDIA RAPIDS, TAO Toolkit, TensorRT, and Triton Inference Server).
Healthcare-specific frameworks and applications including NVIDIA Clara MONAI and NVIDIA Clara Parabricks.
NVIDIA AI Enterprise includes support for all NVIDIA AI software published on the NGC public catalog labeled “NVIDIA AI Enterprise Supported.” Over 50 pre-trained models, frameworks, and development tools.
The NVIDIA AI Enterprise marketplace offer also includes a VMI, which provides a standard, optimized run time for easy access to the NVIDIA AI Enterprise software mentioned above and ensures development compatibility between clouds and on-premises infrastructure. Develop once, run anywhere.
Contact NVIDIA to learn more about NVIDIA AI Enterprise on Azure and for private pricing by filling out the form here.
To get started, refer to the NVIDIA AI Enterprise on Azure Marketplace Quick Start Guide.
Release Notes#
Version 25.09-NVAIE 7.0#
Ubuntu Server 24.04 LTS (x86)
NVIDIA GPU Datacenter Driver 580.65.06
Docker CE 28.4.0
NVIDIA Container Toolkit 1.17.8
Azure CLI (latest version)
Miniforge 25.7.0
JupyterLab (Conda) latest and other Jupyter core packages
NGC CLI 4.3.0
Git, Python3-PIP
Version 25.5.0-NVAIE 6.2#
Ubuntu Server 24.04 LTS (x86)
NVIDIA GPU Datacenter Driver 570.133.20
Docker CE 28.1.1
NVIDIA Container Toolkit 1.17.7
Azure CLI (latest version)
Miniforge 25.3.1
JupyterLab (Conda) latest and other Jupyter core packages
NGC CLI 3.146.4
Git, Python3-PIP
Version 25.5.0-NVAIE 4.6#
Ubuntu Server 24.04 LTS (x86)
NVIDIA GPU Datacenter Driver 535.247.01
Docker CE 28.1.1
NVIDIA Container Toolkit 1.17.7
Azure CLI (latest version)
Miniforge 25.3.1
JupyterLab (Conda) latest and other Jupyter core packages
NGC CLI 3.146.2
Git, Python3-PIP
Version 24.12.1-NVAIE 5.2#
Ubuntu Server 22.04 LTS (x86)
NVIDIA vGPU Driver 550.127.05
Docker CE 27.4.0
NVIDIA Container Toolkit 1.17.3-1
Azure CLI (latest version)
Miniconda
JupyterLab (latest version) and core Jupyter packages
NGC CLI 3.56.0
Git, Python3, and pip
Version 24.11.2-NVAIE 5.2#
Ubuntu Server 22.04 LTS (x86)
NVIDIA vGPU Driver 550.127.05
Docker CE 27.3.1
NVIDIA Container Toolkit 1.17.1-1
Azure CLI (latest version)
Miniconda
JupyterLab (latest version) and core Jupyter packages
NGC CLI 3.54.0
Git, Python3, and pip
Version 24.07.3-NVAIE 5.1#
Ubuntu Server 22.04 (x86)
NVIDIA vGPU Driver 550.90.07
Docker CE 26.1.4
NVIDIA Container Toolkit 1.15.0-1
Latest Azure CLI
Miniconda
JupyterLab latest and other Jupyter core packages
NGC CLI 3.43.0
Git, Python3-PIP
Version 24.03-NVAIE 5.0#
Ubuntu Server 22.04 (x86)
NVIDIA vGPU Driver 550.54.14
Docker CE 26.0.0
NVIDIA Container Toolkit 1.14.6-1
Latest Azure CLI
Miniconda
JupyterLab latest and other Jupyter core packages
NGC CLI 3.41.1
Git, Python3-PIP
Version 24.01-NVAIE 4.2#
Ubuntu Server 22.04 (x86)
NVIDIA vGPU Driver 535.154.05
Docker CE 25.0.3
NVIDIA Container Toolkit 1.14.5-1
Latest Azure CLI
Miniconda
JupyterLab latest and other Jupyter core packages
NGC CLI 3.38
Git, Python3-PIP
Version 23.11-NVAIE 4.1#
Ubuntu Server 22.04 (x86)
NVIDIA vGPU Driver 535.129.03
Docker CE 24.0.7
NVIDIA Container Toolkit 1.14.3-1
Latest Azure CLI
Miniconda
JupyterLab latest and other Jupyter core packages
NGC CLI 3.22.0
Git, Python3-PIP
Version 23.09.2-NVAIE 4.0#
Ubuntu Server 22.04
NVIDIA AI Enterprise Catalog access script
NVIDIA vGPU Driver 535.54.03 (v16.0)
Docker CE 24.0.5
NVIDIA Container Toolkit 1.13.5
NGC CLI 3.22.0
Miniconda
JupyterLab (within miniconda)
Version 23.04.0-NVAIE 3.1#
Ubuntu Server 20.04
NVIDIA AI Enterprise Catalog access script
NVIDIA vGPU Driver 525.105.17
Docker CE 23.0.3
NVIDIA Container Toolkit 1.13.0-1
Azure Cloud CLI 2.48.1
NGC CLI 3.20.0
Miniconda 23.3.1
JupyterLab (within conda base env) 3.5.3
Git 2.25.1
NVIDIA Riva VMI#
Information#
NVIDIA® Riva is a GPU-accelerated software development kit (SDK) for building and deploying fully customizable, real-time multilingual speech and translation AI pipelines—including automatic speech recognition (ASR), neural machine translation (NMT), and text-to-speech (TTS). Riva delivers world-class, out-of-the-box, accurate transcriptions and translations and engaging professional voices. It can be deployed on-premises, in any cloud environment, in embedded systems, and at the edge.
With NVIDIA Riva, customers can customize for different languages, accents, domains, vocabulary, and contexts to achieve the best possible accuracy for their use cases, as well as the desired brand voice and intonation. It provides consistent experiences for hundreds of thousands of input streams with higher inference performance compared to existing technologies. To accelerate building speech-AI-based AI solutions, Riva offers pre-packaged AI workflows for audio transcription and intelligent virtual assistants that include pretrained models and resources such as Helm Charts, Jupyter Notebooks, and documentation.
Riva, a premium edition of the NVIDIA AI Enterprise software platform, is available for $60 per GPU hour for high-performance GPUs such as NVIDIA A100. Contact NVIDIA for special pricing for alternative GPU options or private offers.
Release Notes#
Version 24.05#
Ubuntu Server 22.04 (x86)
NVIDIA GRID Driver 550.54.14 (vGPU 17.0)
Docker CE 26.1.1
NVIDIA Container Toolkit 1.15.0-1
Latest Azure CLI
Latest Miniconda and JupyterLab
NGC CLI 3.41.4
Version 2023.06.2-riva#
Ubuntu Server 22.04
NVIDIA vGPU Driver 525.60.13
Docker CE 24.0.2
NVIDIA Container Toolkit 1.11.0-1
Azure CLI
NGC CLI 3.22.0
Miniconda 23.5.0
JupyterLab (within conda base env) 34.0.2
Git 2.34.1
NVIDIA GPU-Optimized VMI#
Information#
The NVIDIA GPU-Optimized VMI is a virtual machine image for accelerating your Machine Learning, Deep Learning, Data Science and HPC workloads. Using this VMI, you can spin up a GPU-accelerated Azure Compute VM instance in minutes with a pre-installed Ubuntu OS, GPU driver, Docker and NVIDIA container toolkit.
Moreover, this VMI provides easy access to NVIDIA’s NGC Catalog, a hub for GPU-optimized software, for pulling & running performance-tuned, tested, and NVIDIA certified docker containers. NGC provides free access to containerized AI, Data Science, and HPC applications, pre-trained models, AI SDKs and other resources to enable data scientists, developers, and researchers to focus on building solutions, gathering insights, and delivering business value.
This GPU-optimized VMI is provided free of charge for developers with an enterprise support option. For more information on enterprise support, please visit NVIDIA AI Enterprise.
Release Notes#
Version 24.10.1#
Ubuntu Server 22.04 LTS (x86)
NVIDIA TRD Driver 550.127.05
Docker CE 27.3.1
NVIDIA Container Toolkit 1.16.2-1
Azure CLI (latest version)
Miniconda (latest version)
JupyterLab (latest version) and core Jupyter packages
NGC CLI 3.53.0
Git, Python3, and pip
Version 24.05#
Ubuntu Server 22.04 (x86)
NVIDIA TRD Driver 550.54.15
Docker CE 26.1.2
NVIDIA Container Toolkit 1.15.0
Latest Azure CLI
Miniconda
JupyterLab latest and other Jupyter core packages
NGC CLI 3.41.4
Git, Python3-PIP
Version 24.03.4#
Ubuntu Server 22.04 (x86)
NVIDIA TRD Driver 535.161.07
Docker CE 26.0.0
NVIDIA Container Toolkit 1.14.6
Latest Azure CLI
Miniconda
JupyterLab latest and other Jupyter core packages
NGC CLI 3.40.0
Git, Python3-PIP
Version 23.09.1#
Ubuntu Server 22.04 (x86)
NVIDIA TRD Driver 535.54.03
Docker CE 24.0.6
NVIDIA Container Toolkit 1.13.5
Latest Azure CLI
Miniconda
JupyterLab latest and other Jupyter core packages
NGC CLI 3.22.0
Git, Python3-PIP
Version 23.03.0#
Ubuntu Server 20.04
NVIDIA Driver 525.85.12
Docker CE 23.0.1
NVIDIA Container Toolkit 1.21.1-1
Azure Command Line Interface (CLI), NGC-CLI 3.16.0
Miniconda 23.1.0
JupyterLab and other Jupyter core packages
Git, Python3-PIP
Key Changes
Updated NVIDIA Driver to 525.85.12
Updated Docker CE to 23.0.1
Updated Nvidia Container Toolkit to Version 1.12.1-1
Updated Miniconda, JupyterLab, NGC-CLI, Git, Python3-PIP to latest
Version 22.06.0#
Ubuntu Server 20.04
NVIDIA Driver 515.48.07
Docker CE 20.10.17
NVIDIA Container Toolkit 1.10.0-1
NVIDIA Container Runtime 3.10.0-1
Azure Command Line Interface (CLI)
Miniconda 4.13.0
JupyterLab 3.4.3 and other Jupyter core packages
NGC-CLI 3.0.0
Git, Python3-PIP
Key Changes
Updated NVIDIA Driver to 515.48.07
Updated Docker CE to 20.10.17
Updated Nvidia Container Toolkit to Version 1.10.0-1
Updated Nvidia Container Runtime to Version 3.10.0-1
Packaged additional tools: Miniconda, JupyterLab, NGC-CLI, Git, Python3-PIP
NVIDIA GPU-Optimized VMI with vGPU Driver for A10 Instances#
Information#
The NVIDIA GPU-Optimized VMI with vGPU driver for A10 instances is a virtual machine image for accelerating your Machine Learning, Deep Learning, Data Science, and HPC workloads on Azure’s NVadsA10 v5-series instances. Using this VMI, you can spin up a GPU-accelerated Azure Compute VM instance with NVIDIA A10 GPU in minutes with a pre-installed Ubuntu OS, virtual GPU driver, Docker, and NVIDIA container toolkit with other CLI tools.
Release Notes#
Version 22.08.0#
Ubuntu Server 20.04
NVIDIA Driver 510.73.08
Docker CE 20.10.17
NVIDIA Container Toolkit 1.10.0-1
NVIDIA Container Runtime 3.10.0-1
Azure Command Line Interface (CLI)
Miniconda 4.13.0
JupyterLab 3.4.3 and other Jupyter Core packages
NGC CLI 3.4.1
Git, Python3-PIP
NVIDIA HPC SDK GPU-Optimized VM Image#
Information#
The NVIDIA HPC SDK C, C++, and Fortran compilers support GPU acceleration of HPC modeling and simulation applications with standard C++ and Fortran, OpenACC directives, and CUDA. GPU-accelerated math libraries maximize performance on common HPC algorithms, and optimized communications libraries enable standards-based multi-GPU and scalable systems programming. Performance profiling and debugging tools simplify porting and optimization of HPC applications, and containerization tools enable easy deployment on-premises or in the cloud.
Key features of the NVIDIA HPC SDK for Linux include:
Support for NVIDIA Ampere Architecture GPUs with FP16, TF32 and FP64 tensor cores
NVC++ ISO C++17 compiler with Parallel Algorithms acceleration on GPUs, OpenACC and OpenMP
NVFORTRAN ISO Fortran 2003 compiler with array intrinsics acceleration on GPUs, CUDA Fortran, OpenACC and OpenMP
NVC ISO C11 compiler with OpenACC and OpenMP
NVCC NVIDIA CUDA C++ compiler
NVIDIA Math Libraries including cuBLAS, cuSOLVER, cuSPARSE, cuFFT, cuTENSOR and cuRAND
Thrust, CUB, and libcu++ GPU-accelerated libraries of C++ parallel algorithms and data structures
NCCL, NVSHMEM and Open MPI libraries for fast multi-GPU/multi-node communications
NVIDIA Nsight Systems/Compute for interactive HPC applications performance profiler
Release Notes#
Version 23.11#
Ubuntu Server 22.04 (x86)
NVIDIA Driver 535.129.03
Docker CE 24.0.7
NVIDIA Container Toolkit Version: 1.14.3-1
Latest Azure CLI
Miniconda latest
JupyterLab latest and other Jupyter core packages
NGC-CLI 3.35.0
Git
Updated HPC SDK 23.11
Version 23.03.0#
Ubuntu Server 20.04
NVIDIA Driver 525.85.12
Docker CE 23.0.1
NVIDIA Container Toolkit Version: 1.12.1-1
Azure CLI, NGC-CLI 3.16.0
Miniconda latest
JupyterLab and other Jupyter core packages
Git, Python3-PIP
HPC SDK 23.1
NVIDIA Peer Memory: 1.3
MOFED: 5.8-1.0.1.1
Key Changes
Updated NVIDIA Driver to 525.85.12
Updated Docker CE to 23.0.1
Updated Nvidia Container Toolkit to Version 1.12.1-1
Updated Nvidia Container Runtime to Version 3.12.0-1
Updated NGC-CLI to 3.16.0
Updated HPC SDK to 23.1
Version 22.08.0#
Ubuntu Server 20.04
NVIDIA Driver 515.65.01
Docker CE 20.10.17
NVIDIA Container Toolkit Version: 1.10.1-1
NVIDIA Container Runtime Version: 3.10.0-1
Azure Command Line Interface (CLI)
Key Changes
Updated NVIDIA Driver to 515.48.07
Updated Docker CE to 20.10.17
Updated NVIDIA Container Toolkit to Version 1.10.0-1
Updated NVIDIA Container Runtime to Version 3.10.0-1
Known Issues
The version of Nsight Systems bundled with the HPC SDK 22.7 fails with the error ‘Agent launcher failed’ on some instance types. The issue is fixed in Nsight Systems version 2022.3.4 and later, which can be installed separately from the Nsight Systems downloads page. For more information, refer to the Nsight Systems documentation.
NVIDIA Cloud Native Stack VM Image#
Information#
NVIDIA Cloud Native Stack VMI is a GPU-accelerated VMI that is pre-installed with Cloud Native Stack, which is a reference architecture that includes upstream Kubernetes and the NVIDIA GPU and Network Operator. NVIDIA Cloud Native Stack VMI allows developers to build, test and run GPU-accelerated containerized applications that are orchestrated by Kubernetes.
Release Notes#
Version 6.2#
Ubuntu Server 20.04
Containerd 1.6.5
Kubernetes 1.23.8
Helm 3.8.2
GPU Operator 1.11.0
NVIDIA Driver 515.65.01
NVIDIA cuQuantum Appliance VMI#
Information#
The NVIDIA cuQuantum Appliance is a highly performant multi-GPU multi-node solution for quantum circuit simulation. It contains NVIDIA cuStateVec and cuTensorNet libraries which optimize state vector and tensor network simulation, respectively. The cuTensorNet library functionality is accessible through Python for Tensor Network operations. NVIDIA provides the following simulators with the cuStateVec libraries:
IBM Qiskit Aer frontend via cusvaer, NVIDIA distributed state vector backend solver.
Multi-GPU-optimized Google Cirq frontend via qsim, Google state vector simulator.
Release Notes#
Version 23.03#
Ubuntu Server 22.04
NVIDIA Driver 525.105.17
NVIDIA cuQuantum Appliance Docker Container 23.03
Docker CE 24.0.1
NVIDIA Container Toolkit 1.13.0-1
Azure CLI, NGC CLI
Miniconda, JupyterLab (within conda base env), Git: latest
Version 22.11#
Ubuntu Server 20.04
NVIDIA Driver 525.85.12
NVIDIA cuQuantum Appliance Docker Container 22.11
Docker CE 23.0.1
NVIDIA Container Toolkit 1.12.0-1
Azure CLI, NGC CLI
Miniconda, JupyterLab (within conda base env), Git: latest
Known Issues
Some instances on Azure, (specifically ND40rs v2) may emit an “unsupported instance type” warning at log-in. This is a known issue and will be addressed in the next release.
Known Security Vulnerabilities#
The NVIDIA GPU-Optimized VMI includes conda by default in order to use JupyterLab notebooks. The internal Python dependencies may be patched in newer Python versions, but conda must use the specific versions in the VMI. These vulnerabilities are not directly exploitable unless there is a vulnerability in conda itself. An attacker would need to obtain access to a VM running conda, so it is important that VM access must be protected. See the security best practices section.
The following releases are affected by the vulnerabilities:
NVIDIA GPU-Optimized VMI 22.06
NVIDIA GPU-Optimized VMI (ARM64) 22.06
The list of vulnerabilities are:
GHSA-3gh2-xw74-jmcw: High; Django 2.1; SQL injection
GHSA-6r97-cj55-9hrq: Critical; Django 2.1; SQL injection
GHSA-c4qh-4vgv-qc6g: High; Django 2.1; Uncontrolled resource consumption
GHSA-h5jv-4p7w-64jg: High; Django 2.1; Uncontrolled resource consumption
GHSA-hmr4-m2h5-33qx: Critical; Django 2.1; SQL injection
GHSA-v6rh-hp5x-86rv: High; Django 2.1; Access control bypass
GHSA-v9qg-3j8p-r63v: High; Django 2.1; Uncontrolled recursion
GHSA-vfq6-hq5r-27r6: Critical; Django 2.1; Account hijack via password reset form
GHSA-wh4h-v3f2-r2pp: High; Django 2.1; Uncontrolled memory consumption
GHSA-32gv-6cf3-wcmq: Critical; Twisted 18.7.0; HTTP/2 DoS attack
GHSA-65rm-h285-5cc5: High; Twisted 18.7.0; Improper certificate validation
GHSA-92x2-jw7w-xvvx: High; Twisted 18.7.0; Cookie and header exposure
GHSA-c2jg-hw38-jrqq: High; Twisted 18.7.0; HTTP request smuggling
GHSA-h96w-mmrf-2h6v: Critical; Twisted 18.7.0; Improper input validation
GHSA-p5xh-vx83-mxcj: Critical; Twisted 18.7.0; HTTP request smuggling
GHSA-5545-2q6w-2gh6: High; numpy 1.15.1; NULL pointer dereference
CVE-2019-6446: Critical; numpy 1.15.1; Deserialization of untrusted data
GHSA-h4m5-qpfp-3mpv: High; Babel 2.6.0; Arbitrary code execution
GHSA-ffqj-6fqr-9h24: High; PyJWT 1.6.4; Key confusion through non-blocklisted public key formats
GHSA-h7wm-ph43-c39p: High; Scrapy 1.5.1; Uncontrolled memory consumption
CVE-2022-39286: High; jupyter_core 4.11.2; Arbitrary code execution
GHSA-55x5-fj6c-h6m8: High; lxml 4.2.4; Crafted code allowed through lxml HTML cleaner
GHSA-wrxv-2j5q-m38w: High; lxml 4.2.4; NULL pointer dereference
GHSA-gpvv-69j7-gwj8: High; pip 8.1.2; Path traversal
GHSA-hj5v-574p-mj7c: High; py 1.6.0; Regular expression DoS
GHSA-x84v-xcm2-53pg: High; requests 2.19.1; Insufficiently protected credentials
GHSA-mh33-7rrq-662w: High; urllib3 1.23; Improper certificate validation
CVE-2021-33503: High; urllib3 1.23; Denial of service attack
GHSA-2m34-jcjv-45xf: Medium; Django 2.1; XSS in Django
GHSA-337x-4q8g-prc5: Medium; Django 2.1; Improper input validation
GHSA-68w8-qjq3-2gfm: Medium; Django 2.1; Path traversal
GHSA-6c7v-2f49-8h26: Medium; Django 2.1; Cleartext transmission of sensitive information
GHSA-6mx3-3vqg-hpp2: Medium; Django 2.1; Django allows unprivileged users can read the password hashes of arbitrary accounts
GHSA-7rp2-fm2h-wchj: Medium; Django 2.1; XSS in Django
GHSA-hvmf-r92r-27hr: Medium; Django 2.1; Django allows unintended model editing
GHSA-wpjr-j57x-wxfw: Medium; Django 2.1; Data leakage via cache key collision in Django
GHSA-9x8m-2xpf-crp3: Medium; Scrapy 1.5.1; Credentials leakage when using HTTP proxy
GHSA-cjvr-mfj7-j4j8: Medium; Scrapy 1.5.1; Incorrect authorization and information exposure
GHSA-jwqp-28gf-p498: Medium; Scrapy 1.5.1; Credential leakage
GHSA-mfjm-vh54-3f96: Medium; Scrapy 1.5.1; Cookie-setting not restricted
GHSA-6cc5-2vg4-cc7m: Medium; Twisted 18.7.0; Injection of invalid characters in URI/method
GHSA-8r99-h8j2-rw64: Medium; Twisted 18.7.0; HTTP Request Smuggling
GHSA-vg46-2rrj-3647: Medium; Twisted 18.7.0; NameVirtualHost Host header injection
GHSA-39hc-v87j-747x: Medium; cryptography 37.0.2; Vulnerable OpenSSL included in cryptography wheels
GHSA-hggm-jpg3-v476: Medium; cryptography 2.3.1; RSA decryption vulnerable to Bleichenbacher timing vulnerability
GHSA-jq4v-f5q6-mjqq: Medium; lxml 4.2.4; XSS
GHSA-pgww-xf46-h92r: Medium; lxml 4.2.4; XSS
GHSA-xp26-p53h-6h2p: Medium; lxml 4.2.4; Improper Neutralization of Input During Web Page Generation in LXML
GHSA-6p56-wp2h-9hxr: Medium; numpy 1.15.1; NumPy Buffer Overflow, very unlikely to be exploited by an unprivileged user
GHSA-f7c7-j99h-c22f: Medium; numpy 1.15.1; Buffer Copy without Checking Size of Input in NumPy
GHSA-fpfv-jqm9-f5jm: Medium; numpy 1.15.1; Incorrect Comparison in NumPy
GHSA-5xp3-jfq3-5q8x: Medium; pip 8.1.2; Improper Input Validation in pip
GHSA-w596-4wvx-j9j6: Medium; py 1.6.0; ReDoS in py library when used with subversion
GHSA-hwfp-hg2m-9vr2: Medium; pywin32 223; Integer overflow in pywin32
GHSA-r64q-w8jr-g9qp: Medium; urllib3 1.23; Improper Neutralization of CRLF Sequences
GHSA-wqvq-5m8c-6g24: Medium; urllib3 1.23; CRLF injection
Notices#
Notice#
THE INFORMATION IN THIS GUIDE AND ALL OTHER INFORMATION CONTAINED IN NVIDIA DOCUMENTATION REFERENCED IN THIS GUIDE IS PROVIDED “AS IS.” NVIDIA MAKES NO WARRANTIES, EXPRESSED, IMPLIED, STATUTORY, OR OTHERWISE WITH RESPECT TO THE INFORMATION FOR THE PRODUCT, AND EXPRESSLY DISCLAIMS ALL IMPLIED WARRANTIES OF NONINFRINGEMENT, MERCHANTABILITY, AND FITNESS FOR A PARTICULAR PURPOSE. Notwithstanding any damages that customer might incur for any reason whatsoever, NVIDIA’s aggregate and cumulative liability towards customer for the product described in this guide shall be limited in accordance with the NVIDIA terms and conditions of sale for the product.
THE NVIDIA PRODUCT DESCRIBED IN THIS GUIDE IS NOT FAULT TOLERANT AND IS NOT DESIGNED, MANUFACTURED OR INTENDED FOR USE IN CONNECTION WITH THE DESIGN, CONSTRUCTION, MAINTENANCE, AND/OR OPERATION OF ANY SYSTEM WHERE THE USE OR A FAILURE OF SUCH SYSTEM COULD RESULT IN A SITUATION THAT THREATENS THE SAFETY OF HUMAN LIFE OR SEVERE PHYSICAL HARM OR PROPERTY DAMAGE (INCLUDING, FOR EXAMPLE, USE IN CONNECTION WITH ANY NUCLEAR, AVIONICS, LIFE SUPPORT OR OTHER LIFE CRITICAL APPLICATION). NVIDIA EXPRESSLY DISCLAIMS ANY EXPRESS OR IMPLIED WARRANTY OF FITNESS FOR SUCH HIGH RISK USES. NVIDIA SHALL NOT BE LIABLE TO CUSTOMER OR ANY THIRD PARTY, IN WHOLE OR IN PART, FOR ANY CLAIMS OR DAMAGES ARISING FROM SUCH HIGH RISK USES.
NVIDIA makes no representation or warranty that the product described in this guide will be suitable for any specified use without further testing or modification. Testing of all parameters of each product is not necessarily performed by NVIDIA. It is customer’s sole responsibility to ensure the product is suitable and fit for the application planned by customer and to do the necessary testing for the application in order to avoid a default of the application or the product. Weaknesses in customer’s product designs may affect the quality and reliability of the NVIDIA product and may result in additional or different conditions and/or requirements beyond those contained in this guide. NVIDIA does not accept any liability related to any default, damage, costs or problem which may be based on or attributable to: (i) the use of the NVIDIA product in any manner that is contrary to this guide, or (ii) customer product designs.
Other than the right for customer to use the information in this guide with the product, no other license, either expressed or implied, is hereby granted by NVIDIA under this guide. Reproduction of information in this guide is permissible only if reproduction is approved by NVIDIA in writing, is reproduced without alteration, and is accompanied by all associated conditions, limitations, and notices.
Trademarks#
NVIDIA and the NVIDIA logo are trademarks and/or registered trademarks of NVIDIA Corporation in the United States and other countries. Other company and product names may be trademarks of the respective companies with which they are associated.
Copyright#
© 2024-2026, NVIDIA Corporation