

Quickstart Guide
This page describes how to launch Alpamayo1.5 NIM and verify that the service is ready.
Before following this guide, install and configure the components listed in Prerequisites.
Generate an API Key
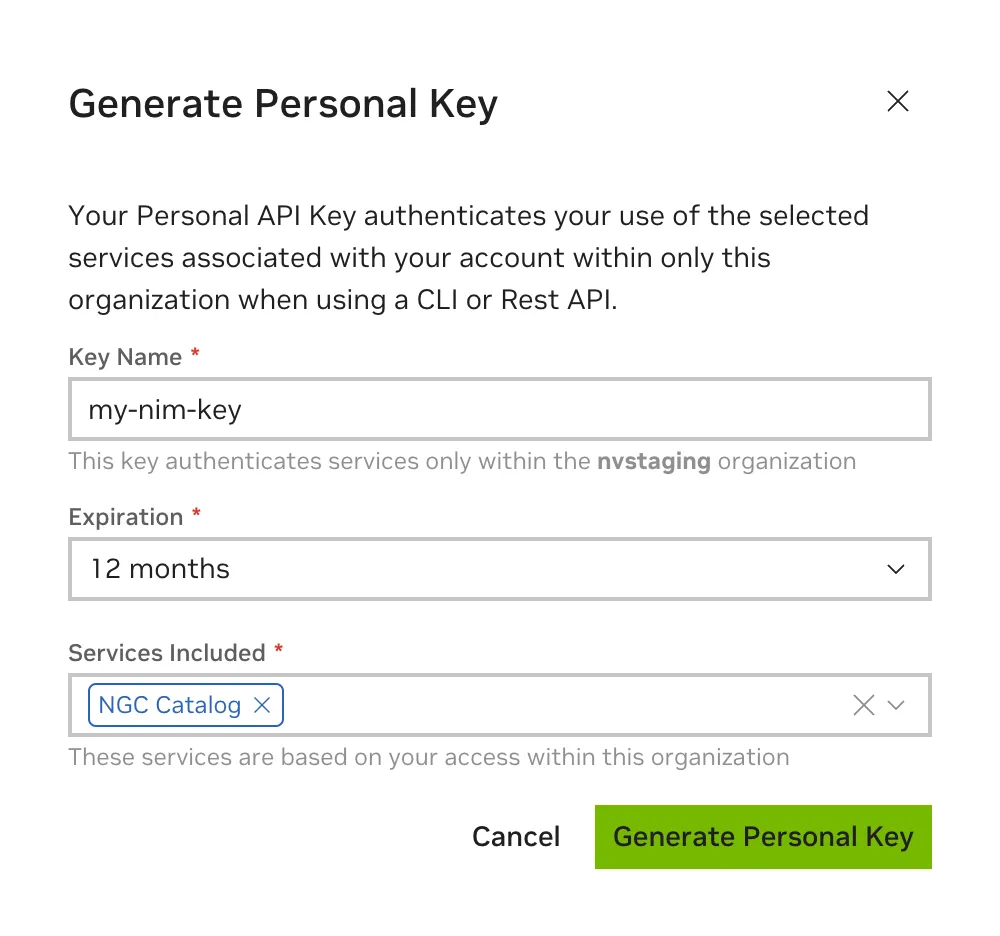
An NGC API key is required to access NGC resources. The key can be generated on the NGC setup page.
When creating an NGC API key, ensure that at least NGC Catalog is selected from the Services Included dropdown. If this key will be reused for other purposes, more services can be included.
Export the API Key
Pass the value of the API key to the docker run command in the next section as the NGC_API_KEY environment variable to download the appropriate models and resources when starting the NIM.
If you are not familiar with how to create the NGC_API_KEY environment variable, export it in your terminal:
Run one of the following commands to make the key available at startup:
Other, more secure options include saving the value in a file, which you can retrieve with cat $NGC_API_KEY_FILE, or using a password manager.
Docker Login to NGC
To pull the NIM container image from NGC, first authenticate with the NVIDIA Container Registry using the following command:
Use $oauthtoken as the username and NGC_API_KEY as the password. The $oauthtoken username is a special name indicating that you authenticate with an API key, not a username/password.
Launch the NIM
Use the following command to start Alpamayo1.5 NIM interactively. This form removes the container when you exit it and is convenient while evaluating the NIM:
For a detached service, use -d and omit --rm so that logs remain available after the process exits:
Follow startup with docker logs -f alpamayo1.5. Stop and remove the detached container with docker stop alpamayo1.5 followed by docker rm alpamayo1.5.
--shm-size=16g is important for direct Docker usage because PyTriton and TensorRT-LLM exchange multimodal request payloads through shared memory. Host IPC can also work when allowed by your deployment environment, but the quickstart uses an explicit shared-memory segment.
The container runs as user ID 1000, so the cache directory mounted at /opt/nim/.cache must be writable by UID 1000. The quickstart uses /tmp because home directories are commonly NFS-backed and reject writes from the container UID. For a persistent deployment, use a UID-1000-writable directory on local disk or a correctly initialized persistent volume. Refer to Configuring a NIM for cache permission options.
Docker Run Parameters
The NIM automatically selects a compatible profile for the visible GPU. To request a specific precision, add -e NIM_PRECISION=<precision> with one of bf16, fp8, or w4a16. Refer to Support Matrix for the supported GPU and precision combinations.
Check Startup
Check readiness and the available model metadata:
Readiness is reported after TensorRT-LLM initialization and the configured startup warmup requests complete. Startup warmup is enabled by default because the trajectory expert uses shape-specific CUDA graph replay. Warmup covers every K value in NIM_ALPAMAYO_TRAJ_SAMPLES. A first client request can still be slower than steady state because it may populate request-path caches that are not covered by startup warmup. Run one untimed request before benchmarking.
Set NIM_ALPAMAYO_STARTUP_WARMUP=0 to skip warmup inference during development. The backend still loads before readiness.
Run a Sample Request
The NIM image includes an Alpamayo sample scene at /workspace/sample_data. In another terminal, copy it from the named running container before using the examples:
You can also extract the scene without starting the NIM:
Payload Builder Options
The bundled helper produces complete JSON request bodies for each HTTP endpoint. Its command-line interface is:
Run python3 build_http_payload.py --help to inspect the options shipped in your container version. The helper writes JSON to standard output, so redirect it to a file and send that file with curl --data-binary.
For HTTP trajectory examples, the bundled payload builder uses the complete 16-image scene by default:
Use --layout reduced only for a quick single-image validation request. The reduced request still includes the required 16-row ego-motion history.
The directory contains images/, egomotion.json, and an optional gt_trajectory.json. Image files use <camera-short-name>_t<timestep>.png or .jpg names. The ego-motion file must contain ego_history_xyz with shape [16, 3] and ego_history_rot with shape [16, 4] or [16, 3, 3]. All 16 history entries remain required for reduced or single-image trajectory layouts.
The following Python examples use the extracted local sample_data directory. Use JPEG images when possible. JPEG payloads are smaller than PNG and use the fastest image decode path in the NIM. The following examples send JPEG payloads; if the sample files are PNG, the client converts them to JPEG in memory.
Run a gRPC Trajectory Request
For trajectory generation, use the gRPC API when your client can send compressed image bytes directly. HTTP is convenient for trying the NIM and debugging payloads, but latency-sensitive trajectory clients should use gRPC with JPEG image bytes.
Install all client dependencies before running the standalone gRPC example:
The preceding example sends the default 16-image layout: four cameras with four frames per camera. To send a reduced trajectory layout, set request.camera_order and request.num_frames_per_camera before adding frames. For example, to send one front-wide camera frame:
For controlled deployments, local_paths can reference images already available inside the NIM container. These are container-local paths, not paths on a remote client host. Normal clients should send JPEG bytes through compressed_images as shown in the preceding gRPC example.
Run an HTTP Trajectory Request
Use HTTP when you want a JSON-based interface for testing, debugging, or VQA. For production trajectory latency, prefer the gRPC path in the preceding section.
Install the client dependencies before running the standalone example:
For reduced HTTP trajectory layouts, keep the same egomotion payload and add camera_order plus num_frames_per_camera. The images array must follow that camera-major layout:
Next Steps
- Install and use the bundled workflows in Agent Skills.
- Refer to request parameters in Sampling Control.
- Refer to the full API schema and examples in API Reference.
- Refer to profile and GPU support in Support Matrix.