Creating Virtual Machines with NVIDIA AI Enterprise on KVM#
To create a VM in RHEL with KVM utilizing NVIDIA AI Enterprise, you can leverage either the RHEL web console (GUI) or command line interface. This guide will primarily use the GUI to create virtual machines, but a CLI section is provided optionally if needed here.
Note
Ensure that you have a sufficient amount of system resources to allocate to your VMs, such as disk space, RAM, or CPUs. The recommended values may vary significantly depending on the intended tasks and workload of the VMs.
An operating system (OS) installation source is available locally or on a network. This can be done via one of the following:
An ISO image of an installation medium
A disk image of an existing VM installation
Optional: A Kickstart file can be provided for faster and easier configuration of the installation.
Important
Installing from a host CD-ROM or DVD-ROM device is not possible in RHEL 9. If you select a CD-ROM or DVD-ROM as the installation source when using any VM installation method available in RHEL 9, the installation will fail. For more information, see the Red Hat Knowledgebase.
Creating virtual machines and installing guest operating systems using the web console#
To manage VMs in a GUI on a RHEL host, we will install and use the web console. The following sections provide information on how to use the RHEL web console to create VMs and install guest operating systems on them.
Installing the web console to manage virtual machines#
To access the RHEL web console, first enable the cockpit.socket service.
The RHEL web console is installed by default in many installation variants. If this is not the case on your system, install the cockpit package before enabling the cockpit.socket service.
If the web console is not installed by default on your installation variant, manually install the cockpit package:
# dnf install cockpitEnable and start the cockpit.socket service, which runs a web server:
# systemctl enable --now cockpit.socketIf the web console was not installed by default on your installation variant and you are using a custom firewall profile, add the cockpit service to firewalld to open port 9090 in the firewall:
1# firewall-cmd --add-service=cockpit --permanent
2
3# firewall-cmd --reload
Logging in to the web console#
Use the steps in this procedure for the first login to the RHEL web console using a system user name and password.
Prerequisites
Use one of the following browsers for opening the web console:
Mozilla Firefox 52 and later
Google Chrome 57 and later
Microsoft Edge 16 and later
System user account credentials. The RHEL web console uses a specific PAM stack located at /etc/pam.d/cockpit. Authentication with PAM allows you to log in with the user name and password of any local account on the system.
Procedure
Open the web console in your web browser, and enter the following address:
Note
This procedure will log you in on your local machine. If you want to log in to the web console of a remote system, see Section 1.4, “Connecting to the web console from a remote machine”
Warning
The browser may issue a warning if you are using a self-signed certificate. Check the certificate and accept the security exception to proceed with the login.
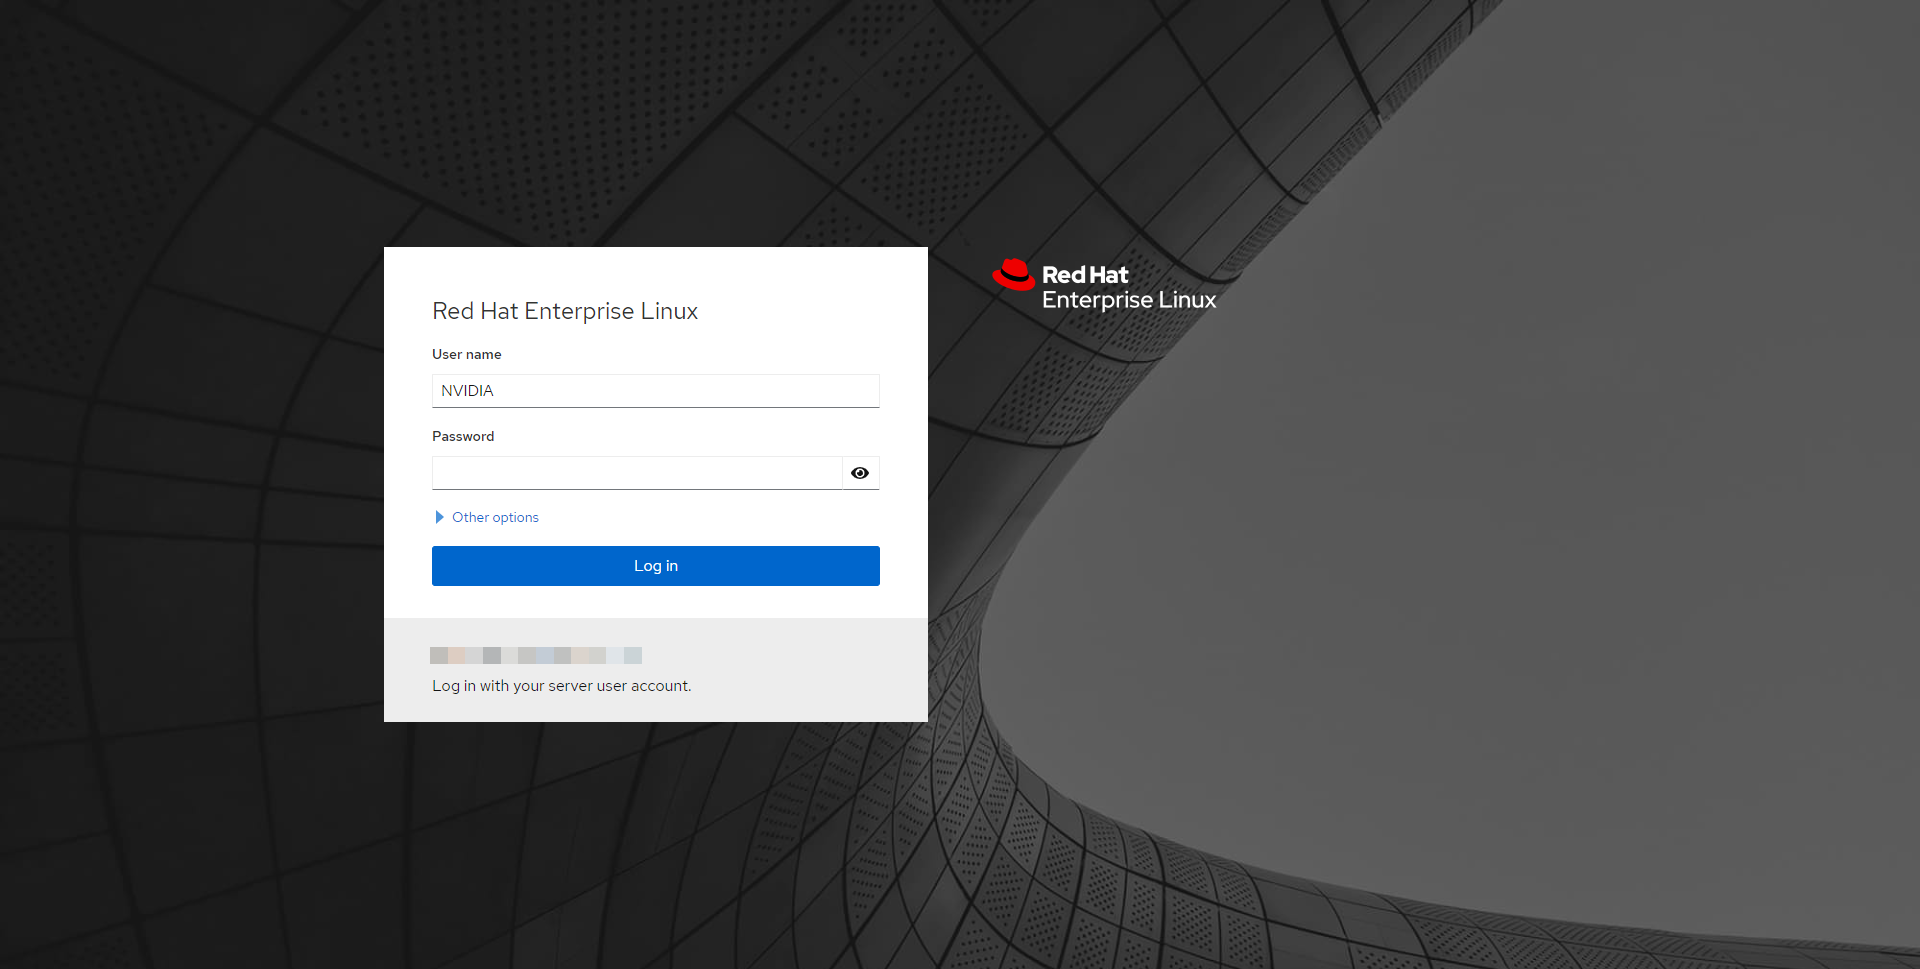
#. In the login screen, enter your system user name and password. Click Log In.
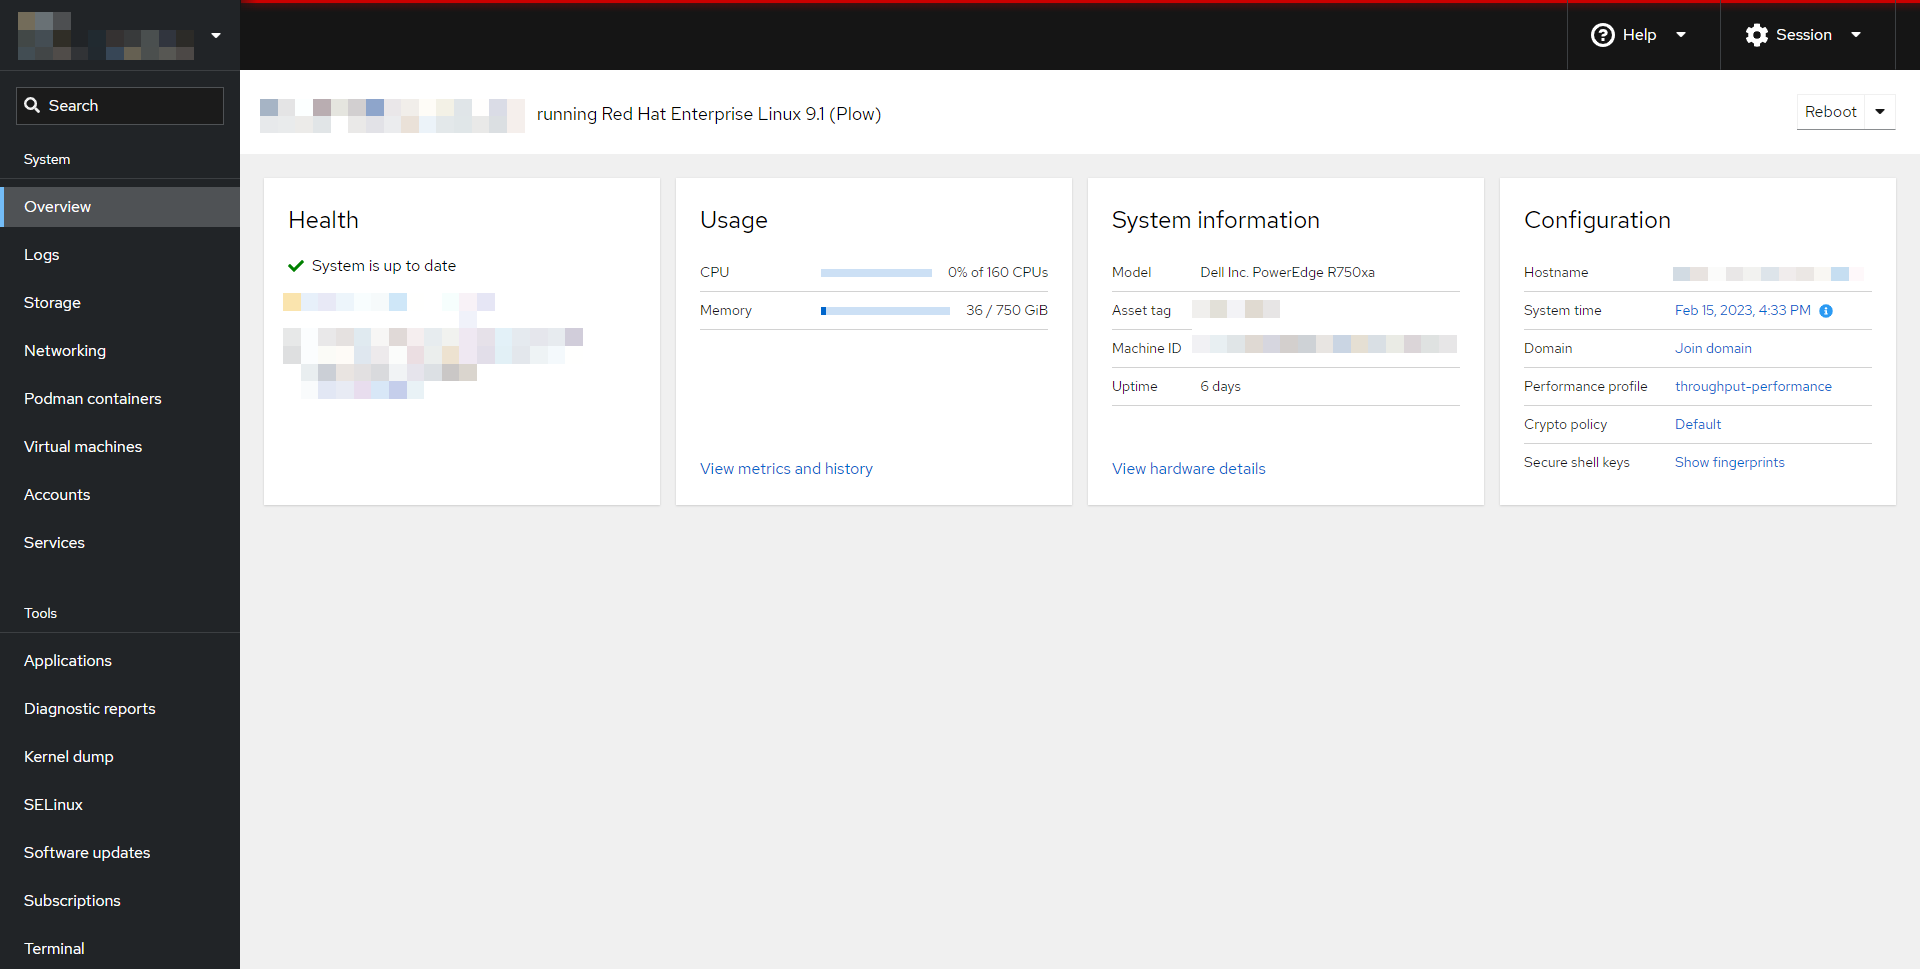
After successful authentication, the RHEL web console interface opens.
Tip
To switch between limited and administrative access, click Administrative access or Limited access in the top panel of the web console page. You must provide your user password to gain administrative access.
Tip
For more information on utilizing the features of the RHEL web console, please refer here.
Setting up the web console to manage virtual machines#
Before using the RHEL web console to manage VMs, you must install the web console virtual machine plug-in on the host.
Install the cockpit-machines plug-in.
# dnf install cockpit-machines
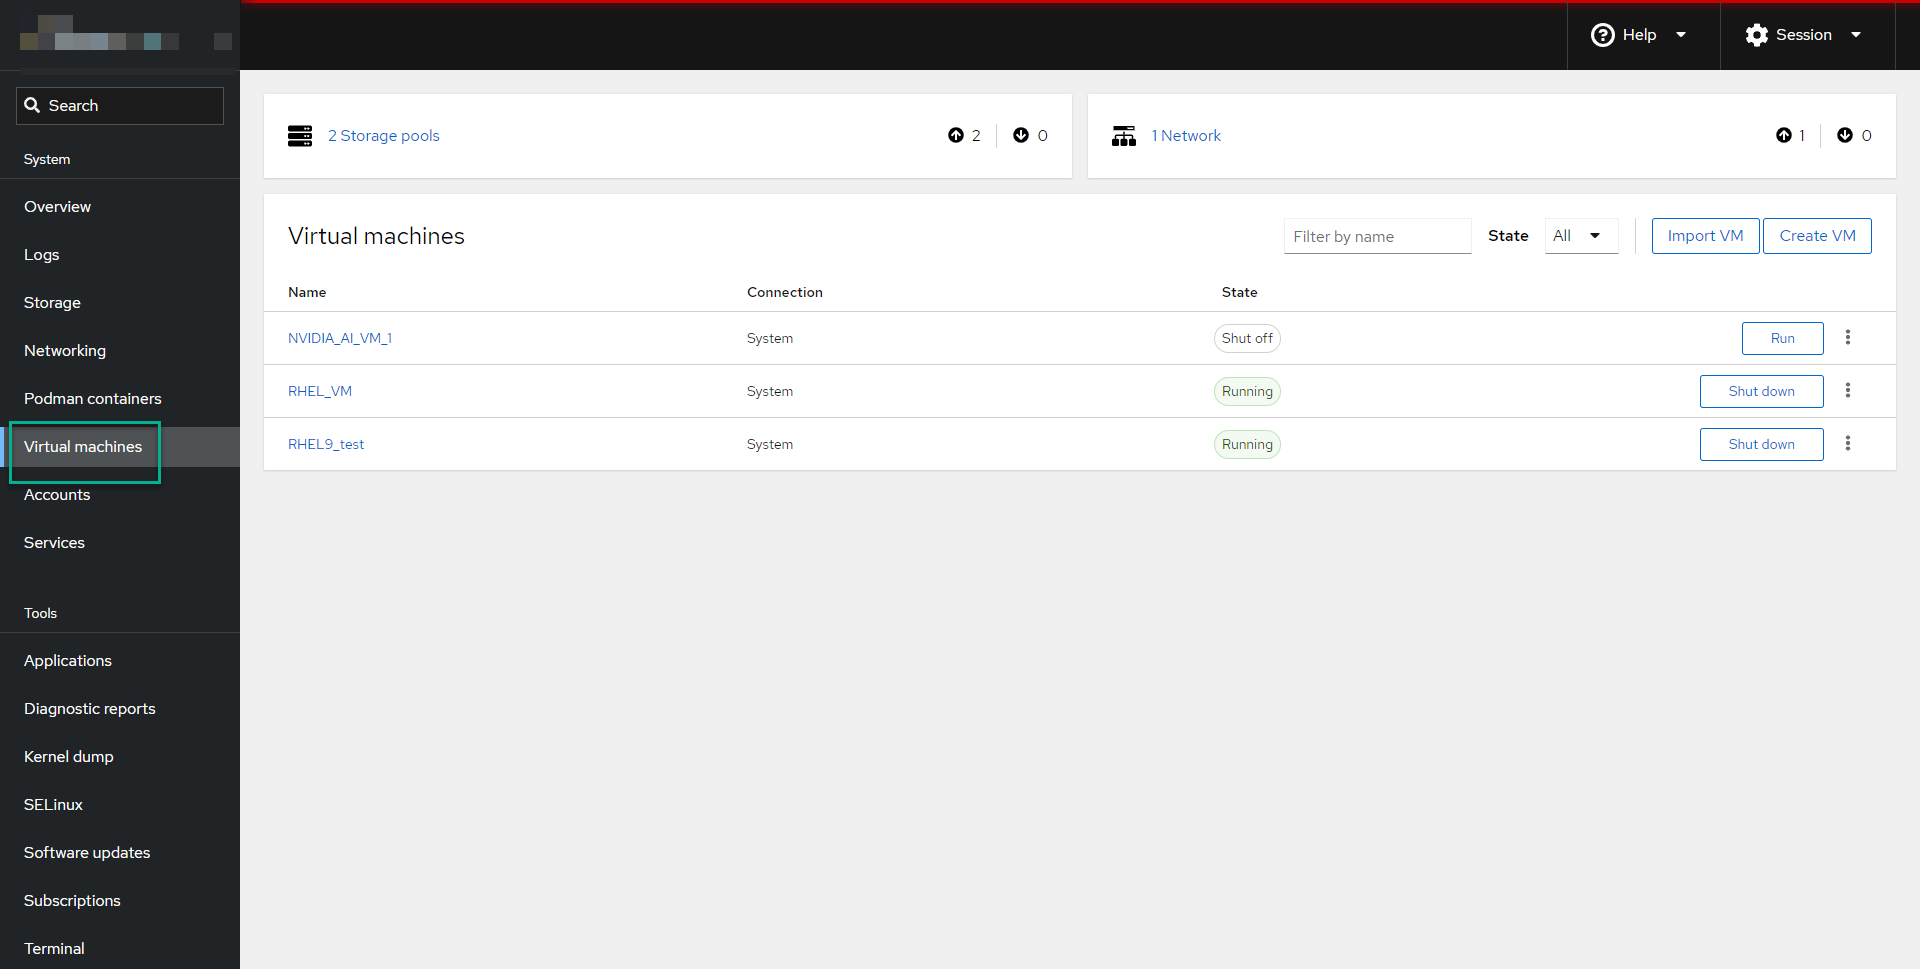
If the installation was successful, the Virtual Machines tab appears in the web console side menu.
Overview of virtual machine management using the web console#
The RHEL web console is a web-based user interface for system administration. As one of its features, the web console provides a graphical view of VMs on the host system, and makes it possible to create, access, and configure VM’s for NVIDIA AI Enterprise.
Note
For a comprehensive list of VM management actions that the web console provides not outlined in this document’s scope, please see Virtual machine management features available in the web console.
Creating VM’s with the web console#
To create a VM on the host machine to which the web console is connected, follow the instructions below. For the purposes of this guide, we downloaded an OS through RedHat’s customer portal via an offline token, then edited the VM’s configuration to NVIDIA AI Enterprise specifications. For instructions on how to Create VM’s through local disk installation, cloud image authentication, and various other creation methods please refer here.
- In the Virtual Machines interface of the web console, click Create VM.
The Create new virtual machine dialog appears.
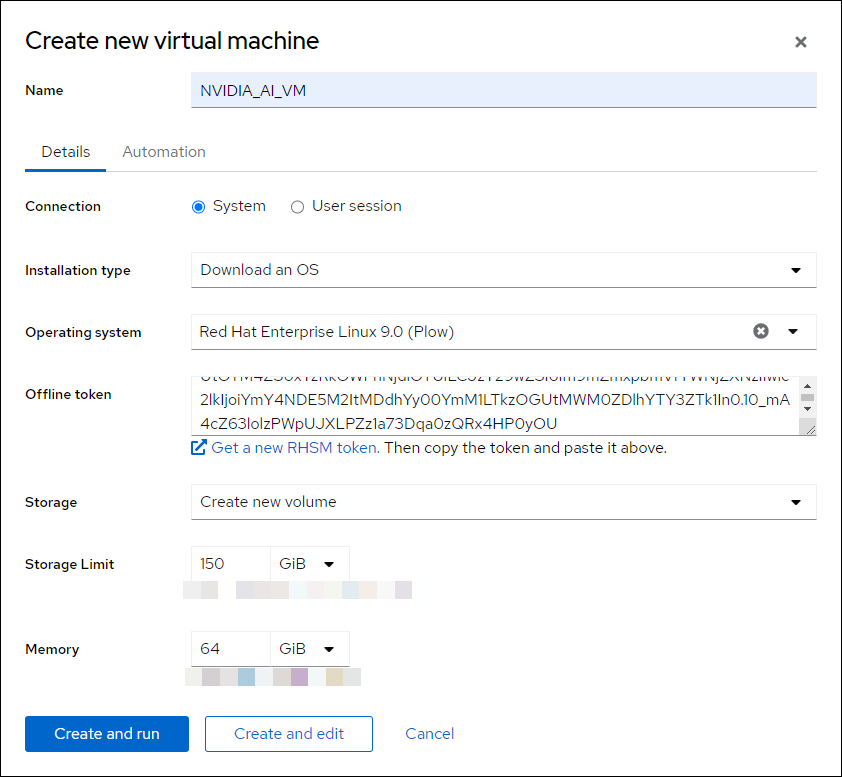
NVIDIA Recommends the following VM configuration:
Virtual Machine Configuration
CPU
16 vCPU on a single socket
RAM
64 GB
Storage
150 GB thin provisioned disk
Enter the basic configuration of the VM you want to create.
Name - The name of the VM
Installation type - The installation can use a local installation medium, a URL, a PXE network boot, a cloud base image, or download an OS from a limited set of operating systems.
Operating system - The VM’s operating system, in our case RHEL.
Storage - The type of storage with which to configure the VM.
Storage Limit - The amount of storage space with which to configure the VM.
NVIDIA recommends 150 GB thin provisioned disk
Memory - The amount of memory with which to configure the VM.
NVIDIA recommends 64 GB of RAM
Click Create and Edit, then edit the configuration to have 16 vCPUs on a single socket.
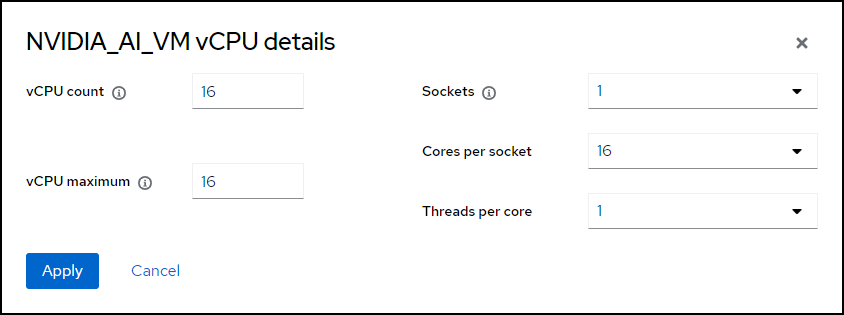
Apply the edited VM configuration settings and begin installation of the guest OS. Select the VM and the VNC console will display the start of the guest OS installation. If the installation routine fails, the VM must be deleted and recreated.
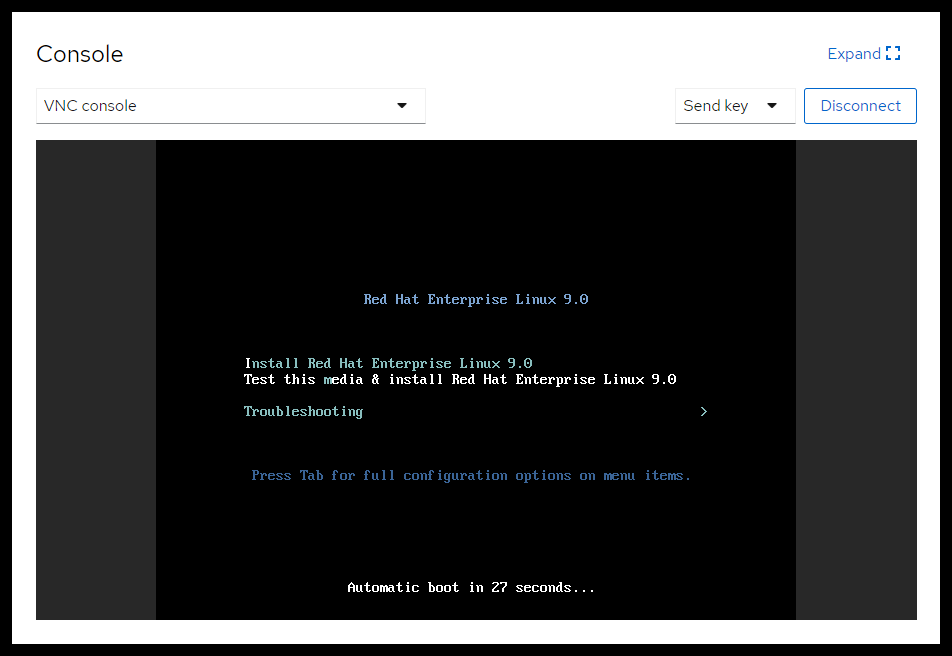
Note
If the VNC console screen is not displaying the full screen when expanded, zoom in or out via browser, then reset to original zoom settings to fix the issue.
Tip
For more information on how to manage virtual machines with RHEL KVM, in addition to troubleshooting solutions, please refer here.
Important
When Guest VM’s are created with RHEL KVM, they are accessible through SSH from the host but in the default configuration are not on an open network, as Linux defaults to security over accessibility. To configure Guest VM’s to be discoverable and connected to by locations outside the host, or conversely to be partially or completely isolated from inbound network traffic to increase its security and minimize potential risk, please refer to Configuring Virtual Machine Connections.
Creating virtual machines using the command-line interface (Optional)#
Note
Ensure that you have a sufficient amount of system resources to allocate to your VMs, such as disk space, RAM, or CPUs. The recommended values may vary significantly depending on the intended tasks and workload of the VMs.
An OS installation source is available locally or on a network. This can be done via one of the following:
An ISO image of an installation medium
A disk image of an existing VM installation
Tip
Optional
A Kickstart file can be provided for faster and easier configuration of the installation.
Important
Installing from a host CD-ROM or DVD-ROM device is not possible in RHEL. If you select a CD-ROM or DVD-ROM as the installation source when using any VM installation method available in RHEL, the installation will fail. For more information, see the Red Hat Knowledgebase.
To create a VM and start its OS installation, use the virt-install command, along with the following mandatory arguments:
The name of the new machine (–name)
The amount of allocated memory (–memory)
The number of allocated virtual CPUs (–vcpus)
The type and size of the allocated storage (–disk)
The type and location of the OS installation source (–cdrom or –location)
Based on the chosen installation method, the necessary options and values can vary. See the below example:
sudo virt-install --name NVIDIA_AI --memory 16384 --vcpus 16 --disk size=280 --os-variant rhel9.0 --location /tmp/rhel-baseos-9.0-x86_64-dvd.iso --graphics none --extra-args='console=ttyS0' --check disk_size=off
Note
Due to user permissions, it is recommended to put the ISO file in a directory that is readable by qemu user, such as /tmp.
For more sample configuration examples please refer to Section 3.1 for Creating Virtual Machines.
Verification#
If the VM is created successfully, a virt-viewer window opens with a graphical console of the VM and starts the guest OS installation.
For more information on how to manage virtual machines with RHEL KVM, in addition to troubleshooting solutions, please refer here.
Important
When Guest VM’s are created with RHEL KVM, they are accessible through SSH from the host but in the default configuration are not on an open network, as Linux defaults to security over accessibility. To configure Guest VM’s to be discoverable and connected to by locations outside the host, or conversely to be partially or completely isolated from inbound network traffic to increase its security and minimize potential risk, please refer to Configuring Virtual Machine Connections.
Installing the RHEL guest OS in VM with the web console#
Select the VM and the VNC console will display the start of the guest OS installation..
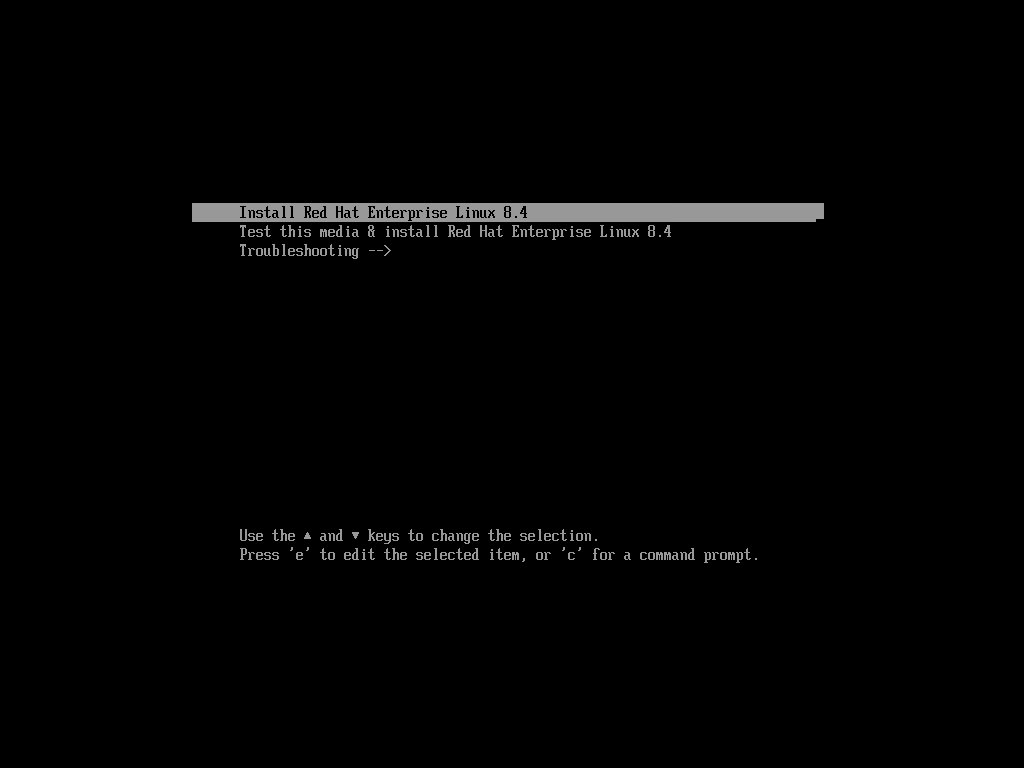
Select your preferred language and Continue.
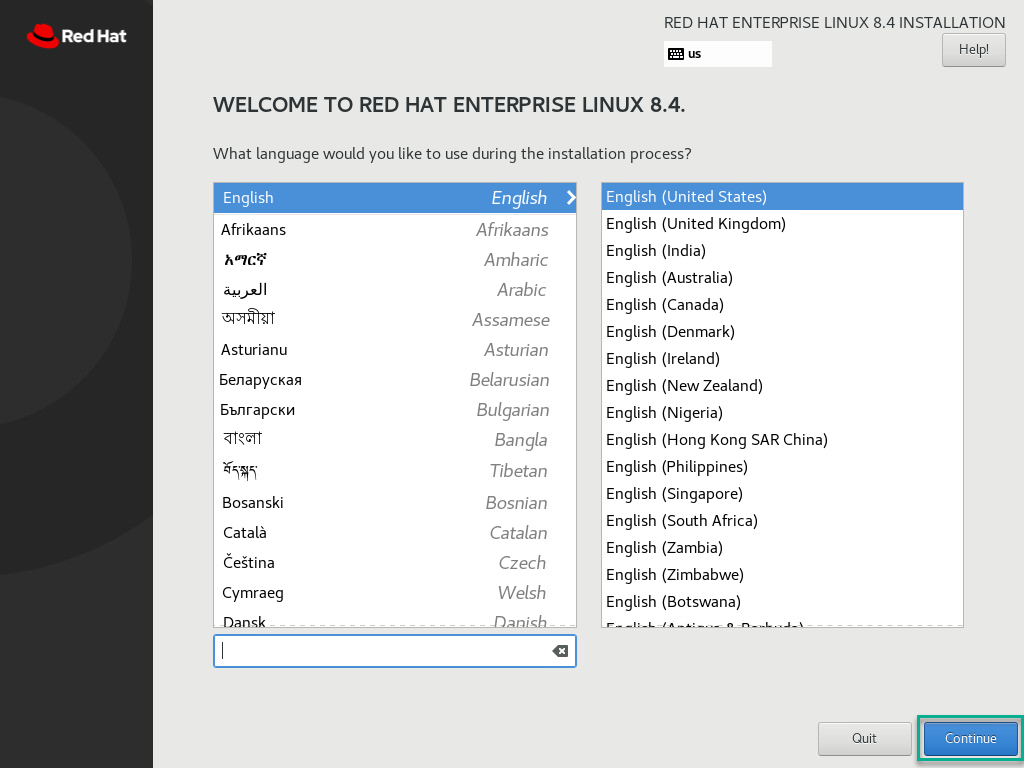
Next, select Time & Date under the Localization column. Set the time and date as required and click Done.
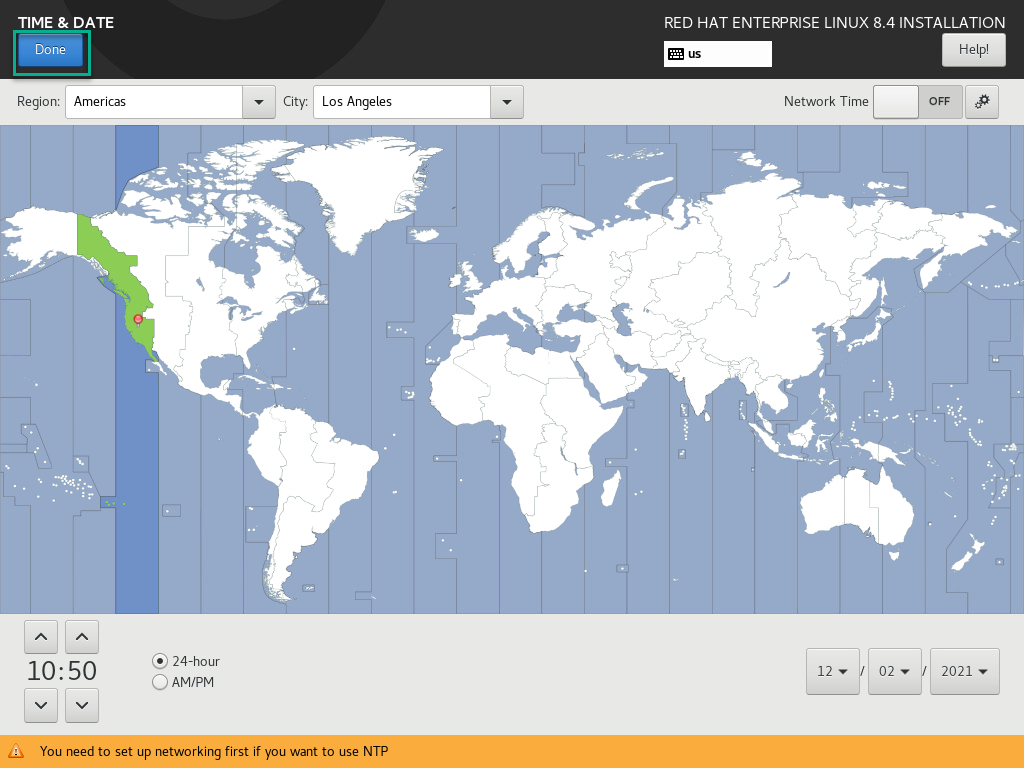
Next, select Software Packages under the Software column. Select Server and click Done.
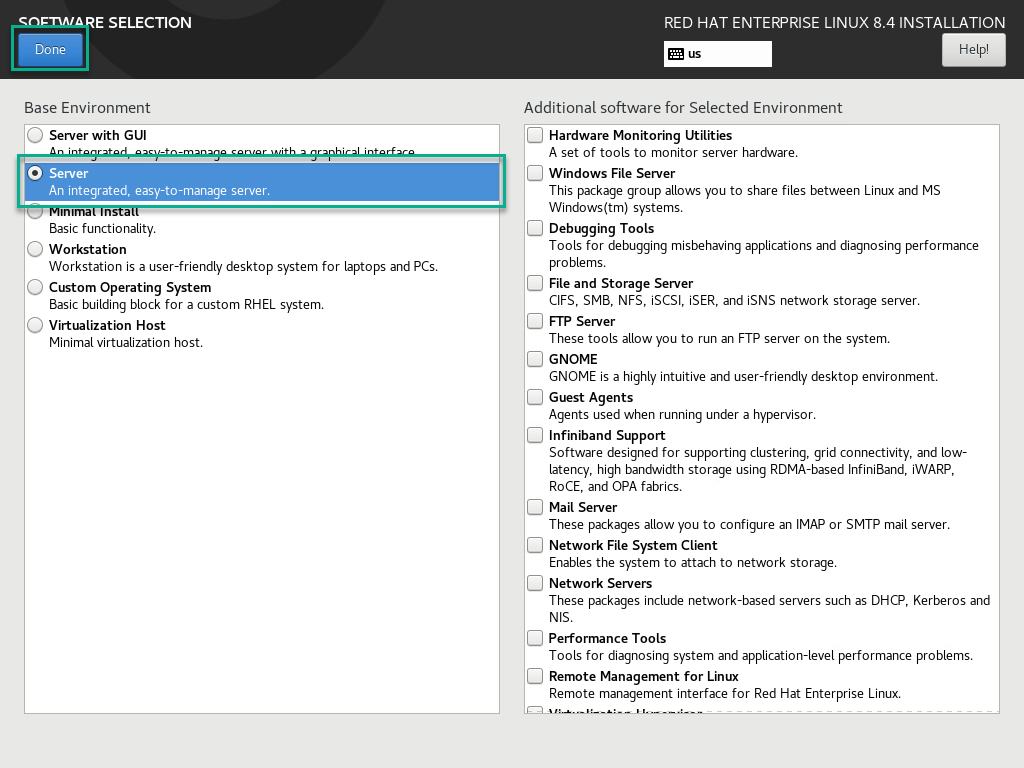
Next, select Installation Destination under the System Menu. Select the VMware Virtual disk and click Done.
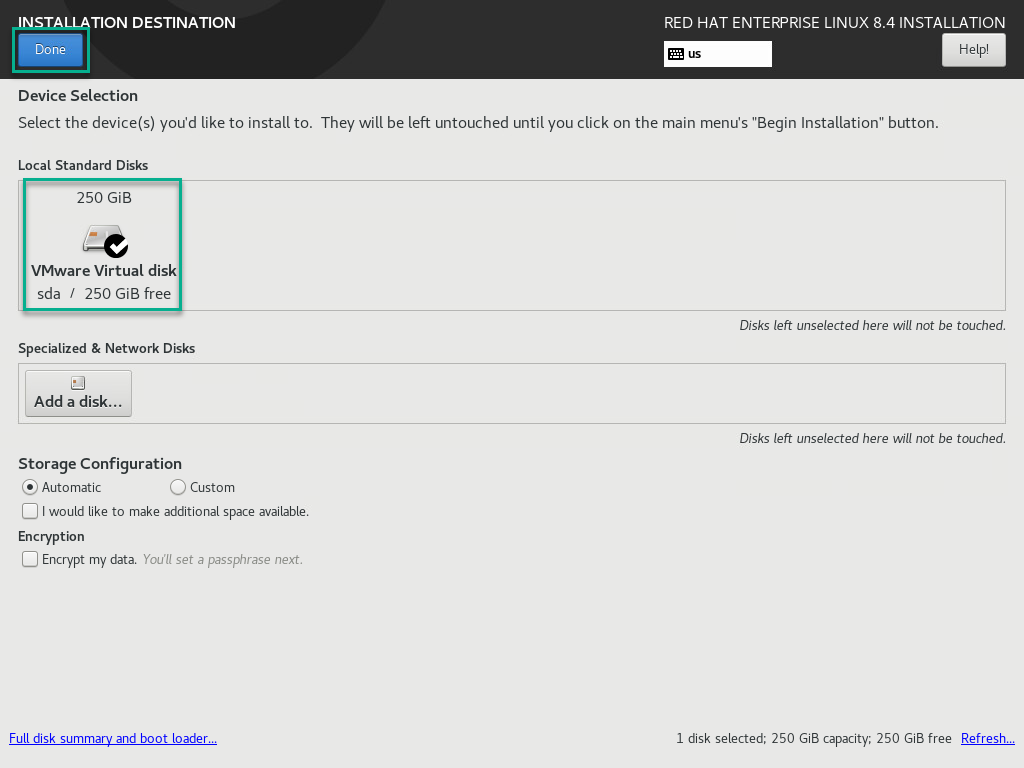
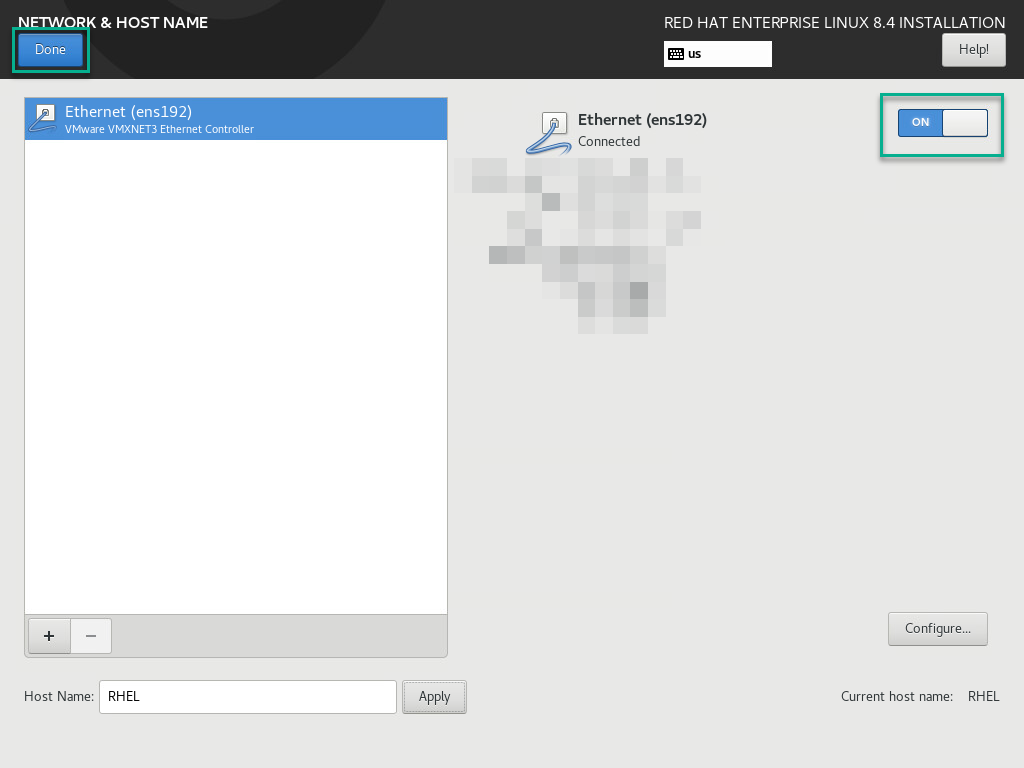
Next, select Network & Host Name under the System column. If your system is connected to a network, then it will try to get IP from DHCP server otherwise it can be configured manually. Click Done when finished.
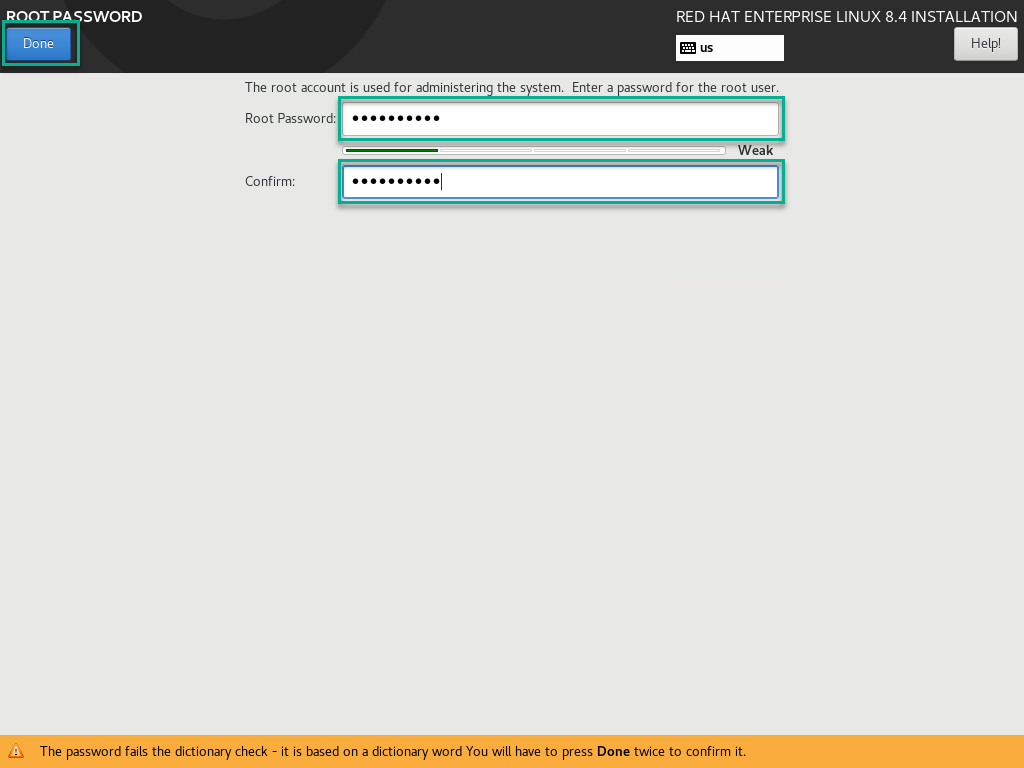
Select Root Password under the User Settings Column. Create a password and click Done.
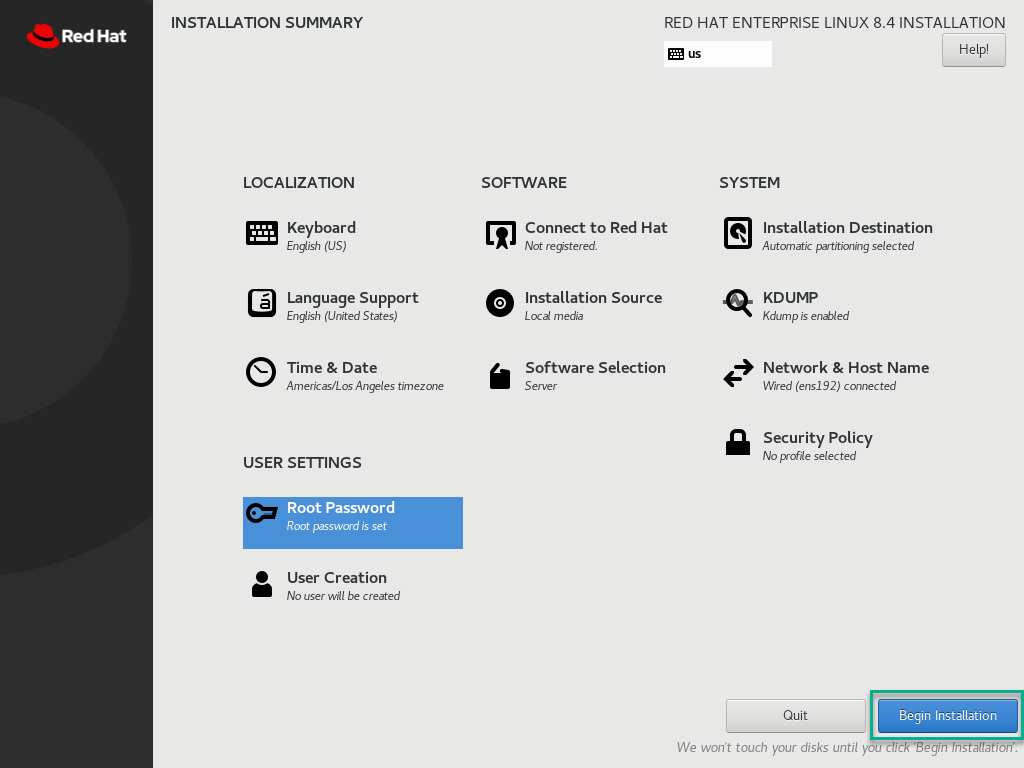
Click Begin Installation to start the install.
The installation will begin as shown below.
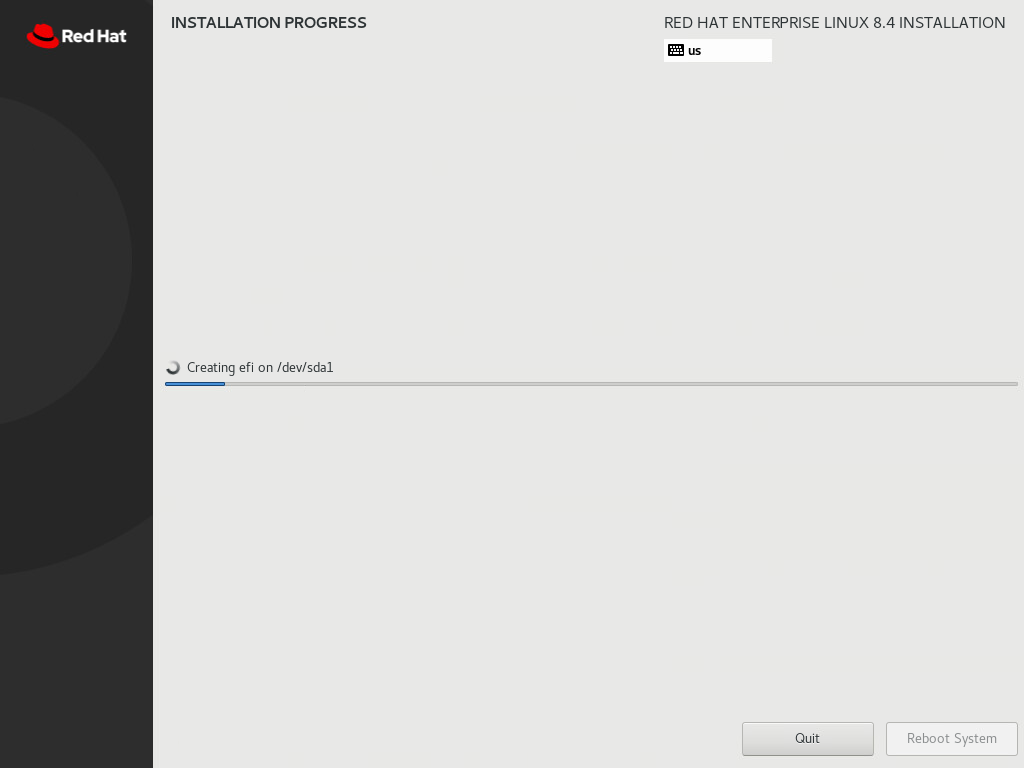
Once the installation is completed reboot the VM by clicking the Reboot System.
