Running NVIDIA Parabricks on DNAnexus
This guide shows how to run Parabricks on a compute instance on DNAnexus using both the GUI and the CLI.
Parabricks is an accelerated compute framework that supports applications across the genomics industry, primarily supporting analytical workflows for DNA, RNA, and somatic mutation detection applications. With industry leading compute times, Parabricks rapidly converts a FASTQ file to a VCF using multiple, industry validated variant callers and also includes the ability to QC and annotate those variants. As Parabricks is based upon publicly available tools, results are easy to verify and combine with other publicly available datasets.
More information is available on the Parabricks Product Page.
Detailed installation, usage, and tuning information is available in the Parabricks user guide.
In this section we will show how to find all the available Parabricks pipelines on DNAnexus.
Start on the DNAnexus homepage and click “Tools” from the toolbar at the top.

This will take you to the Tools Library, which shows all workflows you can run on DNAnexus. We can filter for just the Parabricks tools by clicking on “Name” and typing “Parabricks”. The list should look something like this:
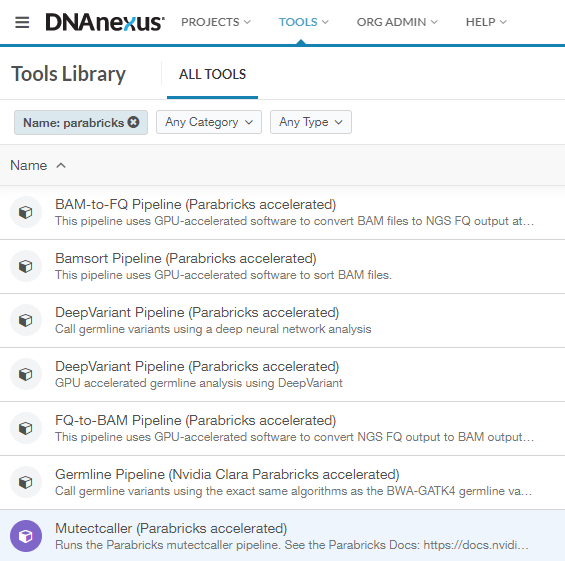
In this guide, we will run FQ-to-BAM as an example to show how to get started. All the workflows run in a similar way, so this information is transferable to any pipeline.
Let’s start by clicking on FQ-to-BAM which will take us to the landing page for that tool.
Each tool has a page like this which includes information such as a README, instructions for running on the command line, and input/outputs for this specific tool.
Let’s start by using the GUI to run FQ-to-BAM. Click “Run” in the top left corner.

This will open a new page and prompt us to select a project that has data for this run. You can use any fastq and reference files that you like, or you can download Parabricks sample files from using:
            $ wget -O parabricks_sample.tar.gz \
     "https://s3.amazonaws.com/parabricks.sample/parabricks_sample.tar.gz"
and upload them to DNAnexus as we have done for this tutorial. Note that the reference files must be zipped together in one folder.
Once we’ve selected our project we are shown a graphical representation of the file inputs and outputs for this pipeline on the left side of the page:
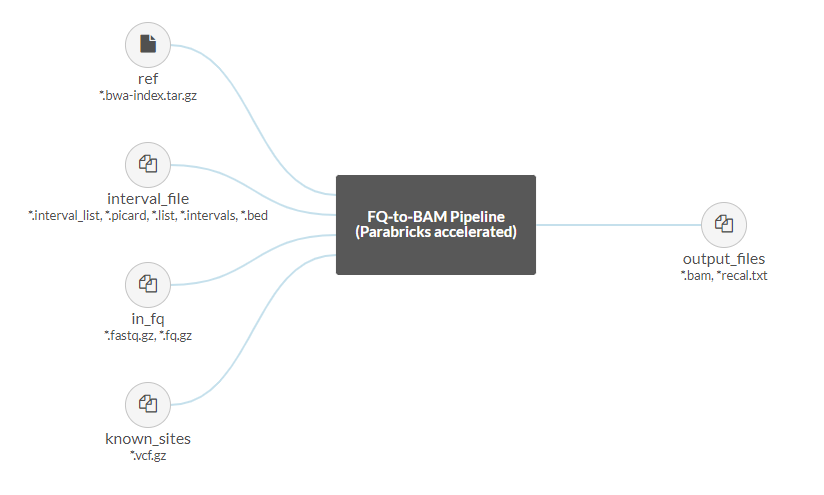
The Parabricks FQ-to-BAM pipeline accepts a reference and input fastq pairs as required files, with the option to add interval and known indel files as well. The output will be a bam with option recall file.
Other options can be found on the right side of the page under “Analysis Inputs 2”:
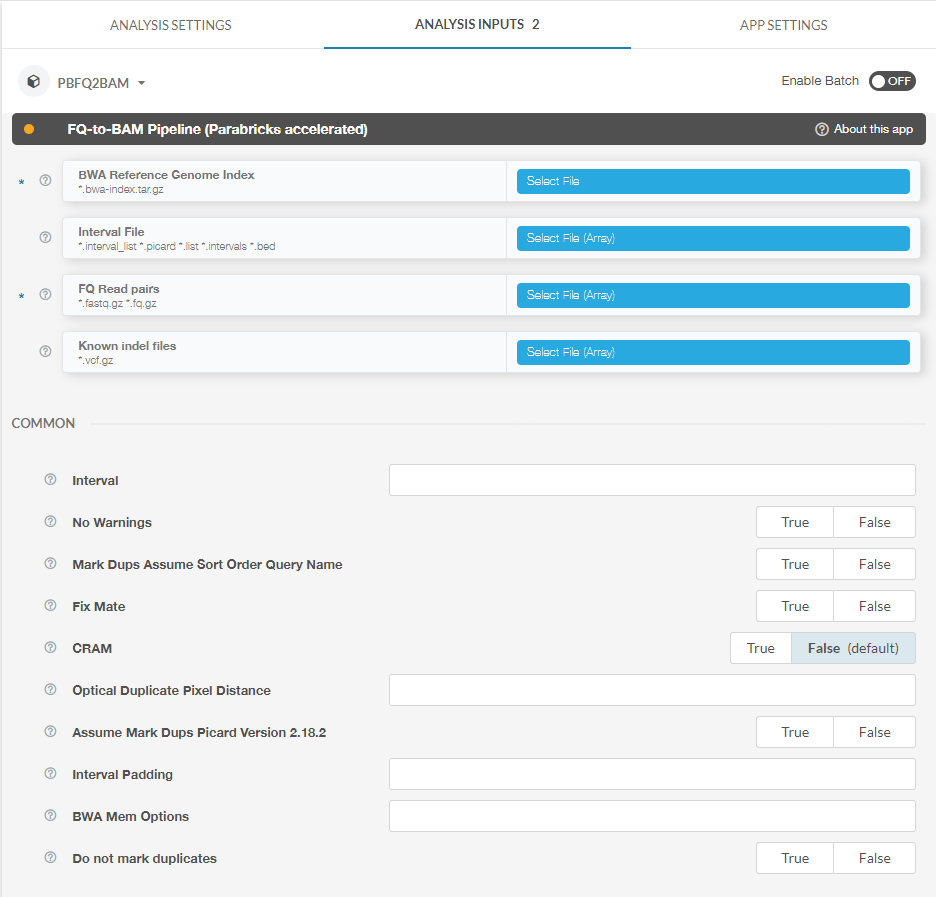
Here you can see inputs that are not files, for example boolean and integer inputs. Clicking the question mark next to each option will pull up a dialogue box explaining how to use each option. For example, clicking the question mark next to “Interval” results in the following:
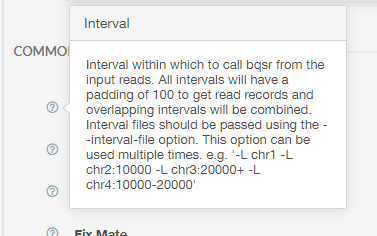
For this tutorial, we will click on “Select File” to select our reference zip file:

We will do the same for our fastq pairs. At this point you can set any other options we’d like, however we will leave the default values for everything else for the sake of simplicity in this tutorial.
Now that we have our files selected, we can click “Start Analysis” in the top right corner. This takes us to a page where we can monitor the status of our job. Let’s click on “View Log” and watch as the job runs.

It should take a few minutes for the job to start, and a few more minutes for the job to run to completion.
When the job is done we can check the logs by clicking on View Log. At the bottom of the log we can see the Parabricks terminal output and the confirmation text that the job successfully completed:
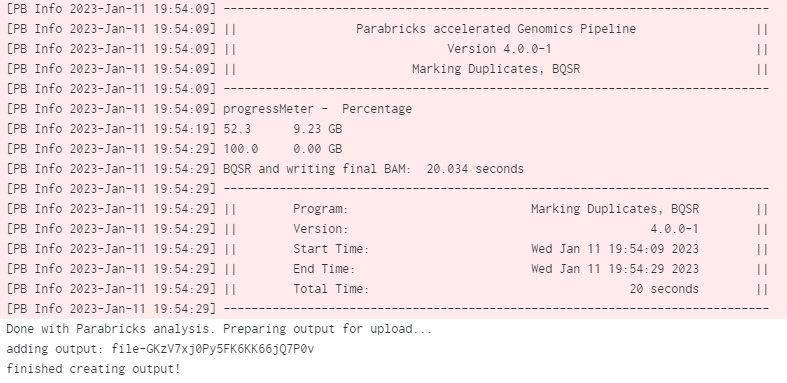
You can click on View all Inputs/Outputs to see the output files as well as the input arguments:

Congratulations! We have successfully run a Parabricks job on DNAnexus.
For users who prefer to use the terminal as opposed to a GUI, that option exists as well, provided you have the DNAnexus SDK installed. We can use the following command to run FQ-to-BAM with the same data we used in the previous section:
            $ dx run fq2bam \
   -iref=<project-id:reference-file-id> \
   -iin_fq=<project-id:fastq1-file-id> \
   -iin_fq=<project-id:fastq2-file-id>
For this we need the ID for the project and files that we plan to use. One way to get these is to go to the GUI, click on the file, and copy the ID from the right sidebar:
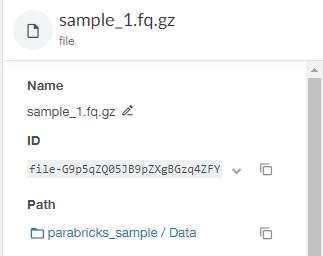
Once we have our project and file IDs ready, we can run the command and it should come up in the Monitor tab for the project just like using the GUI.