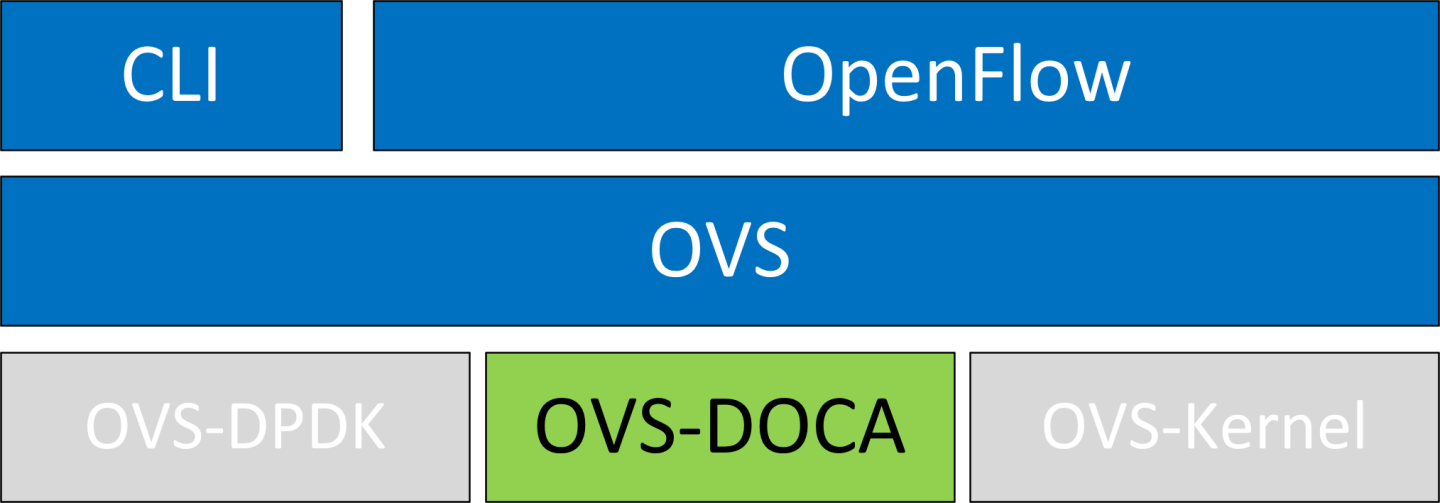
OVS-DOCA Hardware Offloads
OVS-DOCA is designed on top of NVIDIA's networking API to preserve the same OpenFlow, CLI, and data interfaces (e.g., vdpa, VF passthrough), as well as datapath offloading APIs, also known as OVS-DPDK and OVS-Kernel. While all OVS flavors make use of flow offloads for hardware acceleration, due to its architecture and use of DOCA libraries, the OVS-DOCA mode provides the most efficient performance and feature set among them, making the most out of NVIDA NICs and DPUs.
The following subsections provide the necessary steps to launch/deploy OVS DOCA.
To configure OVS DOCA HW offloads:
Unbind the VFs:
            echo 0000:04:00.2 > /sys/bus/pci/drivers/mlx5_core/unbind
echo 0000:04:00.3 > /sys/bus/pci/drivers/mlx5_core/unbind
NoteVMs with attached VFs must be powered off to be able to unbind the VFs.
Change the e-switch mode from legacy to switchdev on the PF device (make sure all VFs are unbound):
echo switchdev > /sys/class/net/enp4s0f0/compat/devlink/mode
NoteThis command also creates the VF representor netdevices in the host OS.
To revert to SR-IOV legacy mode:
echo legacy > /sys/class/net/enp4s0f0/compat/devlink/mode
Bind the VFs:
            echo 0000:04:00.2 > /sys/bus/pci/drivers/mlx5_core/bind
echo 0000:04:00.3 > /sys/bus/pci/drivers/mlx5_core/bind
Configure huge pages:
            mkdir -p /hugepages
mount -t hugetlbfs hugetlbfs /hugepages
echo 4096 > /sys/devices/system/node/node0/hugepages/hugepages-2048kB/nr_hugepages
Run the Open vSwitch service:
systemctl start openvswitch
Enable DOCA mode and hardware offload (disabled by default):
            ovs-vsctl --no-wait set Open_vSwitch . other_config:doca-init=true
ovs-vsctl set Open_vSwitch . other_config:hw-offload=true
Restart the Open vSwitch service.
systemctl restart openvswitch
InfoThis step is required for HW offload changes to take effect.
Create OVS-DOCA bridge:
ovs-vsctl --no-wait add-br br0-ovs -- set bridge br0-ovs datapath_type=netdev
Add PF to OVS:
ovs-vsctl add-port br0-ovs enp4s0f0 -- set Interface enp4s0f0 type=dpdk
Add representor to OVS:
ovs-vsctl add-port br0-ovs enp4s0f0_0 -- set Interface enp4s0f0_0 type=dpdk
InfoThe legacy option to add DPDK ports without using a related netdev by providing dpdk-devargs still exists:
Add a PF port:
ovs-vsctl add-port br0-ovs pf -- set Interface pf type=dpdk options:dpdk-devargs=
0000:88:00.0Add a VF representor port:
ovs-vsctl add-port br0-ovs representor -- set Interface representor type=dpdk options:dpdk-devargs=
0000:88:00.0,representor=[0]Add a SF representor port:
ovs-vsctl add-port br0-ovs representor -- set Interface representor type=dpdk options:dpdk-devargs=
0000:88:00.0,representor=sf[0]Add a BlueField host PF representor port:
ovs-vsctl add-port br0-ovs hpf -- set Interface hpf type=dpdk options:dpdk-devargs=
0000:88:00.0,representor=[65535]
Optional configuration:
To set port MTU, run:
ovs-vsctl set interface enp4s0f0 mtu_request=9000
NoteOVS restart is required for changes to take effect .
To set VF/SF MAC, run:
ovs-vsctl add-port br0-ovs enp4s0f0 -- set Interface enp4s0f0 type=dpdk options:dpdk-vf-mac=00:11:22:33:44:55
NoteUnbinding and rebinding the VFs/SFs is required for the change to take effect .
OVS-DOCA shares most of its structure with OVS-DPDK. To benefit from the DOCA offload design, some of the behavior of userland datapath and ports are however modified.
Eswitch Dependency
Configured in switchdev mode, the physical port and all supported functions share a single general domain to execute the offloaded flows, the eswitch.
All ports on the same eswitch are dependent on its physical function. If this main physical function is deactivated (e.g., removed from OVS or its link set down), dependent ports are disabled as well.
Pre-allocated Offload Tables
To offer the highest insertion speed, DOCA offloads pre-allocate offload structures (entries and containers).
When starting the vSwitch daemon, offloads are thus configured with sensible defaults. If different numbers of offloads are required, configuration entries specific to OVS-DOCA are available and are described in the next section.
Unsupported CT-CT-NAT
The special ct-ct-nat mode that can be configured in OVS-kernel and OVS-DPDK is not supported by OVS-DOCA.
The following configuration is particularly useful or specific to OVS-DOCA mode.
The full list of OVS vSwitch configuration is documented in man ovs-vswitchd.conf.db.
other_config
The following table provides other_config configurations which are global to the vSwitch (non-exhaustive list, check manpage for more):
|
Configuration |
Description |
|
other_config:doca-init |
|
|
other_config:hw-offload-ct-size |
|
|
other_config:hw-offload-ct-ipv6-enabled |
|
|
other_config:doca-congestion-threshold |
|
|
other_config:ctl-pipe-size |
|
|
other_config:ctl-pipe-infra-size |
|
|
other_config:pmd-quiet-idle |
|
|
other_config:pmd-maxsleep |
|
|
other_config:dpdk-max-memzones |
|
netdev-dpdk
The following table provides netdev-dpdk configurations which only userland (DOCA or DPDK) netdevs support (non-exhaustive list, check manpage for more):
|
Configuration |
Description |
|
options:iface-name |
|
vSwitch in userspace rather than kernel-based Open vSwitch requires an additional bridge. The purpose of this bridge is to allow use of the kernel network stack for routing and ARP resolution.
The datapath must look up the routing table and ARP table to prepare the tunnel header and transmit data to the output port.
VXLAN encapsulation/decapsulation offload configuration is done with:
PF on 0000:03:00.0 PCIe and MAC 98:03:9b:cc:21:e8
Local IP 56.56.67.1 – the br-phy interface is configured to this IP
Remote IP 56.56.68.1
To configure OVS DOCA VXLAN:
Create a br-phy bridge:
ovs-vsctl add-br br-phy -- set Bridge br-phy datapath_type=netdev -- br-set-external-id br-phy bridge-id br-phy -- set bridge br-phy fail-mode=standalone other_config:hwaddr=98:03:9b:cc:21:e8
Attach PF interface to br-phy bridge:
ovs-vsctl add-port br-phy enp4s0f0 -- set Interface enp4s0f0 type=dpdk
Configure IP to the bridge:
ip addr add 56.56.67.1/24 dev br-phy
Create a br-ovs bridge:
ovs-vsctl add-br br-ovs -- set Bridge br-ovs datapath_type=netdev -- br-set-external-id br-ovs bridge-id br-ovs -- set bridge br-ovs fail-mode=standalone
Attach representor to br-ovs:
ovs-vsctl add-port br-ovs enp4s0f0_0 -- set Interface enp4s0f0_0 type=dpdk
Add a port for the VXLAN tunnel:
ovs-vsctl add-port ovs-sriov vxlan0 -- set interface vxlan0 type=vxlan options:local_ip=56.56.67.1 options:remote_ip=56.56.68.1 options:key=45 options:dst_port=4789
Connection tracking enables stateful packet processing by keeping a record of currently open connections.
OVS flows utilizing connection tracking can be accelerated using advanced NICs by offloading established connections.
To view offload statistics, run:
ovs-appctl dpctl/offload-stats-show
To configure OVS-DOCA SR-IOV VF LAG:
Enable SR-IOV on the NICs:
            // It is recommended to query the parameters first to determine if a change is needed, to save potentially unnecessary reboot.
mst start
mlxconfig -d <mst device> -y set PF_NUM_OF_VF_VALID=0   SRIOV_EN=1 NUM_OF_VFS=8
NoteIf configuration did change, perform a BlueField system reboot for the mlxconfig settings to take effect.
Allocate the desired number of VFs per port:
echo $n > /sys/class/net/<net name>/device/sriov_numvfs
Unbind all VFs:
echo <VF PCI> >/sys/bus/pci/drivers/mlx5_core/unbind
Change both NICs' mode to SwitchDev:
devlink dev eswitch set pci/<PCI> mode switchdev
Create Linux bonding using kernel modules:
modprobe bonding mode=<desired mode>
NoteOther bonding parameters can be added here. The supported bond modes are Active-Backup, XOR, and LACP.
Bring all PFs and VFs down:
ip link set <PF/VF> down
Attach both PFs to the bond:
ip link set <PF> master bond0
Bring PFs and bond link up:
            ip link set <PF0> up
ip link set <PF1> up
ip link set bond0 up
Add the bond interface to the bridge as type=dpdk:
ovs-vsctl add-port br-phy bond0 -- set Interface bond0 type=dpdk options:dpdk-lsc-interrupt=true
InfoThe legacy option to work with VF-LAG in OVS-DPDK is to add the bond master (PF) interface to the bridge:
ovs-vsctl add-port br-phy p0 -- set Interface p0 type=dpdk options:dpdk-devargs=<PF0-PCI>,dv_flow_en=
2,dv_xmeta_en=4options:dpdk-lsc-interrupt=trueAdd representor of PF0 or PF1 to a bridge :
ovs-vsctl add-port br-phy enp4s0f0_0 -- set Interface enp4s0f0_0 type=dpdk
Or:
ovs-vsctl add-port br-phy enp4s0f1_0 -- set Interface enp4s0f1_0 type=dpdk
InfoThe legacy option to add DPDK ports:
ovs-vsctl add-port br-phy rep$N -- set Interface rep$N type=dpdk options:dpdk-devargs=<PF0-PCI>,representor=pf0vf$N,dv_flow_en=
2,dv_xmeta_en=4Or:
ovs-vsctl add-port br-phy rep$N -- set Interface rep$N type=dpdk options:dpdk-devargs=<PF0-PCI>,representor=pf1vf$N,dv_flow_en=
2,dv_xmeta_en=4
Multiport eswitch mode allows adding rules on a VF representor with an action, forwarding the packet to the physical port of the physical function. This can be used to implement failover or to forward packets based on external information such as the cost of the route.
To configure multiport eswitch mode , the nvconig parameter LAG_RESOURCE_ALLOCATION=1 must be set in the BlueField Arm OS, according to the following instructions:
mst start mlxconfig -d /dev/mst/mt*conf0 -y s LAG_RESOURCE_ALLOCATION=
1Perform a BlueField system reboot for the mlxconfig settings to take effect.
After the driver loads, and before moving to switchdev mode, configure multiport eswitch for each PF where p0 and p1 represent the netdevices for the PFs:
devlink dev param set pci/
0000:03:00.0name esw_multiport value1cmode runtime devlink dev param set pci/0000:03:00.1name esw_multiport value1cmode runtimeInfoThe mode becomes operational after entering switchdev mode on both PFs.
This mode can be activated by default in BlueField by adding the following line into /etc/mellanox/mlnx-bf.conf:
ENABLE_ESWITCH_MULTIPORT=
"yes"
While in this mode, the second port is not an eswitch manager, and should be add to OVS using this command:
ovs-vsctl add-port br-phy enp4s0f1 -- set interface enp4s0f1 type=dpdk
VFs for the second port can be added using this command:
ovs-vsctl add-port br-phy enp4s0f1_0 -- set interface enp4s0f1_0 type=dpdk
The legacy option to add DPDK ports:
ovs-vsctl add-port br-phy p1 -- set interface p1 type=dpdk options:dpdk-devargs="0000:08:00.0,dv_xmeta_en=4,dv_flow_en=2,representor=pf1
VFs for the second port can be added using this command:
ovs-vsctl add-port br-phy p1vf0 -- set interface p1 type=dpdk options:dpdk-devargs="0000:08:00.0,dv_xmeta_en=4,dv_flow_en=2,representor=pf1vf0
Geneve tunneling offload support includes matching on extension header.
OVS-DOCA Geneve option limitations:
Only 1 Geneve option is supported
Max option len is 7
To change the Geneve option currently being matched and encapsulated, users must remove all ports or restart OVS and configure the new option
Matching on Geneve options can work with FLEX_PARSER profile 0 (the default profile). Working with FLEX_PARSER profile 8 is also supported as well. To configure it, run:
            mst start
mlxconfig -d <mst device> s FLEX_PARSER_PROFILE_ENABLE=8
NotePerform a BlueField system reboot for the mlxconfig settings to take effect.
To configure OVS-DOCA Geneve encapsulation/decapsulation:
Create a br-phy bridge:
ovs-vsctl --may-exist add-br br-phy -- set Bridge br-phy datapath_type=netdev -- br-set-external-id br-phy bridge-id br-phy -- set bridge br-phy fail-mode=standalone
Attach a PF interface to br-phy bridge:
ovs-vsctl add-port br-phy enp4s0f0 -- set Interface enp4s0f0 type=dpdk
Configure an IP to the bridge:
ifconfig br-phy <$local_ip_1> up
Create a br-int bridge:
ovs-vsctl add-port br-int enp4s0f0_0 -- set Interface enp4s0f0_0 type=dpdk
Attach a representor to br-int:
ovs-vsctl add-port br-int rep$x -- set Interface rep$x type=dpdk options:dpdk-devargs=<PF PCI>,representor=[$x],dv_flow_en=2,dv_xmeta_en=4
Add a port for the Geneve tunnel:
ovs-vsctl add-port br-int geneve0 -- set interface geneve0 type=geneve options:key=<VNI> options:remote_ip=<$remote_ip_1> options:local_ip=<$local_ip_1>
To configure OVS-DOCA GRE encapsulation/decapsulation:
Create a br-phy bridge:
ovs-vsctl --may-exist add-br br-phy -- set Bridge br-phy datapath_type=netdev -- br-set-external-id br-phy bridge-id br-phy -- set bridge br-phy fail-mode=standalone
Attach a PF interface to br-phy bridge:
ovs-vsctl add-port br-phy enp4s0f0 -- set Interface enp4s0f0 type=dpdk
Configure an IP to the bridge:
ifconfig br-phy <$local_ip_1> up
Create a br-int bridge:
ovs-vsctl --may-exist add-br br-int -- set Bridge br-int datapath_type=netdev -- br-set-external-id br-int bridge-id br-int -- set bridge br-int fail-mode=standalone
Attach a representor to br-int:
ovs-vsctl add-port br-int enp4s0f0_0 -- set Interface enp4s0f0_0 type=dpdk
Add a port for the Geneve tunnel:
ovs-vsctl add-port br-int gre0 -- set interface gre0 type=gre options:key=<VNI> options:remote_ip=<$remote_ip_1> options:local_ip=<$local_ip_1>
Slow path rate limiting allows controlling the rate of traffic that bypasses hardware offload rules and is subsequently processed by software.
To configure slow path rate limiting:
Create a br-phy bridge:
ovs-vsctl --may-exist add-br br-phy -- set Bridge br-phy datapath_type=netdev -- br-set-external-id br-phy bridge-id br-phy -- set bridge br-phy fail-mode=standalone
Attach a PF interface to br-phy bridge:
ovs-vsctl add-port br-phy pf0 -- set Interface pf0 type=dpdk
Rate limit pf0vf0 to 10Kpps with 6K burst size:
ovs-vsctl set interface pf0 options:sw-meter=pps:10k:6k
Restart OVS:
systemctl restart openvswitch-switch.service
A dry-run option is also supported to allow testing different software meter configurations in a production environment. This allows gathering statistics without impacting the actual traffic flow. These statistics can then be analyzed to determine appropriate rate limiting thresholds. When the dry-run option is enabled, traffic is not dropped or rate-limited, allowing normal operations to continue without disruption. However, the system simulates the rate limiting process and increment counters as though packets are being dropped.
To enable slow path rate limiting dry-run:
Create a br-phy bridge:
ovs-vsctl --may-exist add-br br-phy -- set Bridge br-phy datapath_type=netdev -- br-set-external-id br-phy bridge-id br-phy -- set bridge br-phy fail-mode=standalone
Attach a PF interface to br-phy bridge:
ovs-vsctl add-port br-phy pf0 -- set Interface pf0 type=dpdk
Rate limit pf0vf0 to 10Kpps with 6K burst size:
ovs-vsctl set interface pf0 options:sw-meter=pps:10k:6k
Set the sw-meter-dry-run option:
ovs-vsctl set interface pf0vf0 options:sw-meter-dry-run=true
Restart OVS:
systemctl restart openvswitch-switch.service
Hairpin allows forwarding packets from wire to wire.
To configure hairpin :
Create a br-phy bridge:
ovs-vsctl --may-exist add-br br-phy -- set Bridge br-phy datapath_type=netdev -- br-set-external-id br-phy bridge-id br-phy -- set bridge br-phy fail-mode=standalone
Attach a PF interface to br-phy bridge:
ovs-vsctl add-port br-phy pf0 -- set Interface pf0 type=dpdk
Add hairpin OpenFlow rule:
ovs-ofctl add-flow br-phy"in_port=pf0,ip,actions=in_port"
OVS-DOCA supports OpenFlow meter action as covered in this document in section "OpenFlow Meters". In addition, OVS-DOCA supports chaining multiple meter actions together in a single datapth rule.
The following is an example configuration of such OpenFlow rules:
            ovs-ofctl add-flow br-phy -O OpenFlow13 "table=0,priority=1,in_port=pf0vf0_r,ip actions=meter=1,resubmit(,1)"
ovs-ofctl add-flow br-phy -O OpenFlow13 "table=1,priority=1,in_port=pf0vf0_r,ip actions=meter=2,normal"
Meter actions are applied sequentially, first using meter ID 1 and then using meter ID 2.
Use case examples for such a configuration:
Rate limiting the same logical flow with different meter types—bytes per second and packets per second
Metering a group of flows. As meter IDs can be used by multiple flows, it is possible to re-use meter ID 2 from this example with other logical flows; thus, making sure that their cumulative bandwidth is limited by the meter.
OVS supports group configuration. The "select" type executes one bucket in the group, balancing across the buckets according to their weights. To select a bucket, for each live bucket, OVS hashes flow data with the bucket ID and multiplies that by the bucket weight to obtain a "score". The bucket with the highest score is selected.
For more details, refer to the ovs-ofctl man.
For example:
ovs-ofctl add-group br-int 'group_id=1,type=select,bucket=<port1>'
ovs-ofctl add-flow br-int in_port=<port0>,actions=group=1
Limitations:
Offloads are supported on IP traffic only (IPv4 or IPv6)
The hash calculation may be different for packets going into software vs. ones that are offloaded
Does not work concurrently with CT (i.e., configure hw-offload-ct-size="0" beforehand)
Only one insertion thread is supported (n-offload-threads=1)
Only 250K connection are offloadable by default (can be configured)
NoteThe maximum number of supported connections is 2M.
Only 8 CT zones are supported by CT offload
Offload of IPv6 tunnels is not supported
When using two PFs with 127 VFs each and adding their representors to OVS bridge, the user must configure dpdk-memzones:
ovs-vsctl set o . other_config:dpdk-max-memzones=
6500restart ovs
Additional debugging information can be enabled in the vSwitch log file using the dbg log level:
                (
        topics='netdev|ofproto|ofp|odp|doca'
        IFS=$'\n'; for topic in $(ovs-appctl vlog/list | grep -E "$topics" | cut -d' ' -f1)
        do
            printf "$topic:file:dbg "
        done
    ) | xargs ovs-appctl vlog/set
The listed topics are relevant to DOCA offload operations.
Coverage counters specific to the DOCA offload provider have been added. The following command should be used to check them:
ovs-appctl coverage/show # Print the current non-zero coverage counters
The following table provides the meaning behind these DOCA-specific counters:
|
Counter |
Description |
|
doca_async_queue_full |
The asynchronous offload insertion queue was full while the daemon attempted to insert a new offload. The queue will have been flushed and insertion attempted again. This is not a fatal error but is the sign of a slowed down hardware. |
|
doca_async_queue_blocked |
The asynchronous offload insertion queue has remained full even after several attempts to flush its currently enqueued requests. While not a fatal error, it should never happen during normal offload operations and should be considered a bug. |
|
doca_async_add_failed |
An asynchronous insertion failed specifically due to its asynchronous nature. This is not expected to happen and should be considered a bug. |
|
doca_pipe_resize |
The number of time a DOCA pipe has been resized. This is normal and expected as DOCA pipes receives more entries. |
|
doca_pipe_resize_over_10_ms |
A DOCA pipe resize took longer than 10ms to complete. It can happen infrequently. If a sudden drop in insertion rate is measured, this counter could help identify the root cause. |
To build OVS-DOCA from provided sources and pre-installed DOCA and DPDK packages, run:
            $ ./boot.sh
$ ./configure --prefix=/usr --localstatedir=/var --sysconfdir=/etc --with-dpdk=static --with-doca=static
$ make -j 10
$ make install