

Appendix A#
Installing Pre-reqs for RunAI#
Get the Run.ai SaaS Login#
The run.ai portal where the control pane is required a login to be created by NVIDIA. Please work with Account/SA teams to get an org craved out for this.
Installing Nginx#
helm repo add nginx-stable https://helm.nginx.com/stable
helm repo update
helm install nginx-ingress nginx-stable/nginx-ingress --set rbac.create=true
Installing Prometheus#
Note
The default Prometheus enabled during creating the k8s cluster via BCM does not enable the prometheus operator in the monitoring namespace and that’s what Run:ai expects it to be at.
helm repo add prometheus-community https://prometheus-community.github.io/helm-charts
helm repo update
helm install prometheus prometheus-community/kube-prometheus-stack -n monitoring --create-namespace --set grafana.enabled=false
Create Certs and Private Keys#
Make sure to create it with the url that is going to be the cluster URL, replace era.nvidia.com with the URL you will be using.
# Generate a Private Key (2048-bit RSA)
openssl genpkey -algorithm RSA -out era.nvidia.com.key -pkeyopt rsa_keygen_bits:2048

# Generate a Self-Signed Certificate (Valid for 1 year)
openssl req -x509 -new -key era.nvidia.com.key -out era.nvidia.com.crt -days 365 -subj "/CN=era.nvidia.com"
Update BCM Ingress with CA Certificates#
Run the cm-kubernetes-setup CLI command on the BCMe head node, select Configure Ingress.
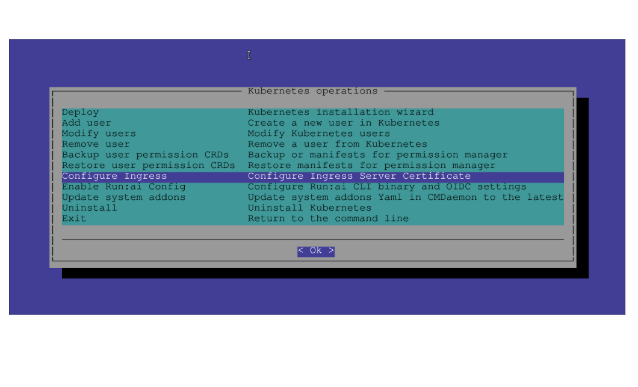
Figure 22 BCM Kubernetes Setup - Configure Ingress#
Select the cluster you will use for Run:ai and select “yes”, since we do want to configure an existing, properly signed certificate pair.
Press ENTER to proceed.
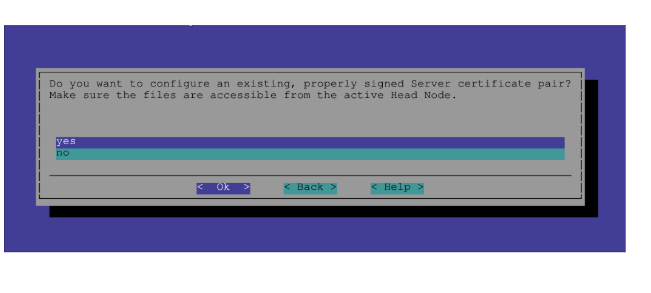
Figure 23 Configure existing signed certificate pair#
Set the path to the key and Certs in the next screen, click ok.
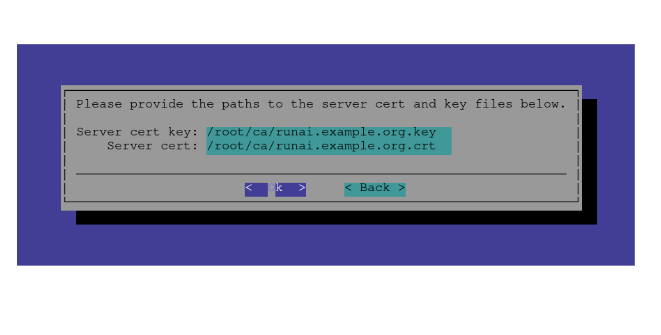
Figure 24 Set path to server cert and key#
Expose Ingress Controller to use Public IP from the Metal LB pool#
The ingress so far is on private Cluster network, we will expose it to public network so that we can use the Run:ai UI through Ingress’s public IP.
kubectl patch svc ingress-nginx-controller -n ingress-nginx -p '{"spec": {"type": "LoadBalancer"}}'
Update DNS Server#
Configure your DNS to map the IP of the Ingress Controller to the Service IP the Ingress Controller gets, the FQDN should point to the IP, so if you plan to use for e.g, runai.nvidia.local than the DNS and the Certificates should map the DNS runai.nvidia.local to the IP of the Nginx External IP, you you can check the External IP the Ingress gets by running:
kubectl get svc -A
Configure Run:ai#
Configure the addition of a cluster to Run.ai SaaS#
Login to the run.ai SaaS instance provided to you by NVIDIA, click on Resource, and click New Cluster button.
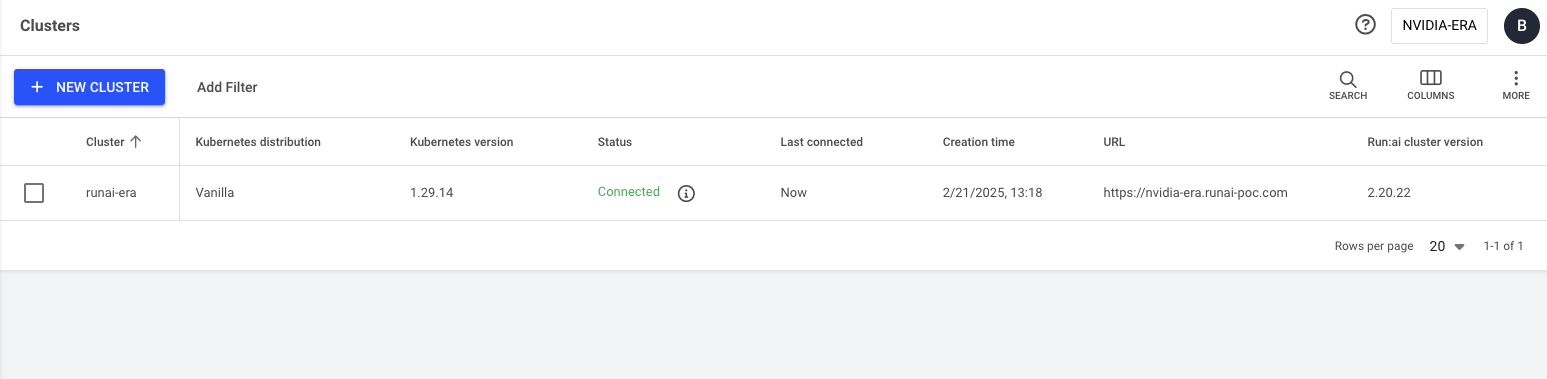
Figure 25 Add Cluster in Run:ai SaaS#
Give the cluster a name, let the default version, and enter the URL of the Kubernetes Cluster (Note: This should be the same URL that the certs were created in the steps above, and the certificates).
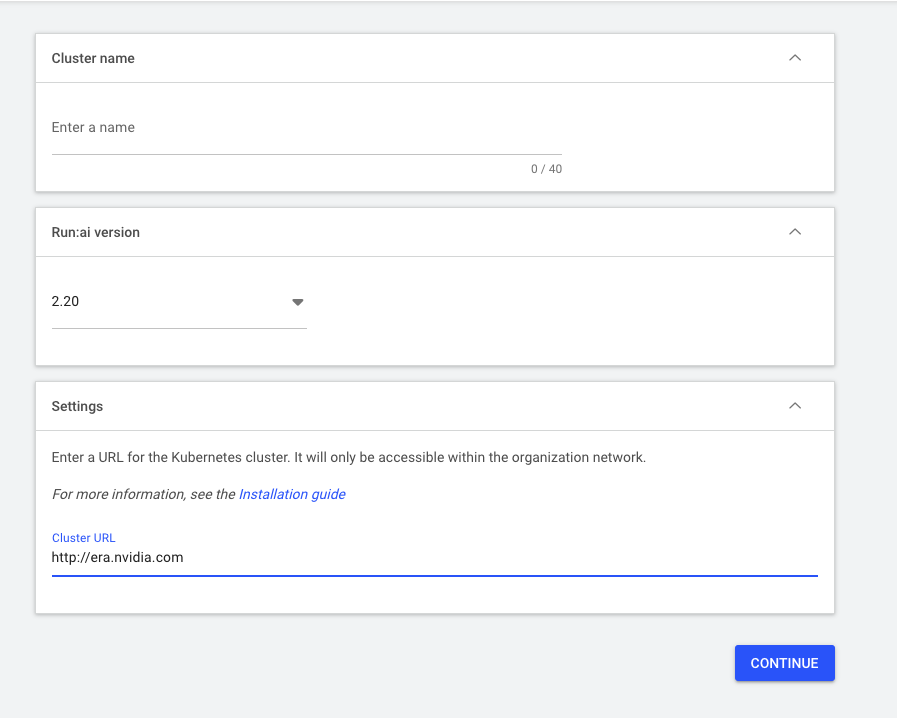
Figure 26 Cluster name and URL configuration#
Capture the instructions and run the next command.
Install Run:ai Cluster#
kubectl create ns runai
kubectl create secret tls runai-cluster-domain-tls-secret -n runai --cert /root/ca/era.nvidia.com.crt --key /root/ca/era.nvidia.com.key
helm repo add runai https://runai.jfrog.io/artifactory/api/helm/run-ai-charts --force-update
helm repo update
helm upgrade -i runai-cluster runai/runai-cluster -n runai --set controlPlane.url=nvidia-era.run.ai --set controlPlane.clientSecret=JpgdoQajWYHdCoN2YgQuolXFD5wnaL1D --set cluster.uid=1100804e-0bd4-4c11-9f15-0d0b8231ccca --set cluster.url=http://era.nvidia.com --version="2.20.20" --create-namespace
Wait for a few minutes till the cluster syncs with Control-Plane.
Install Knative for Inference Workloads#
kubectl apply -f https://github.com/knative/serving/releases/download/knative-v1.17.0/serving-crds.yaml
kubectl apply -f https://github.com/knative/serving/releases/download/knative-v1.17.0/serving-core.yaml
Configure Knative to use with Run:ai#
kubectl patch configmap/config-autoscaler \
  --namespace knative-serving \
  --type merge \
  --patch '{"data":{"enable-scale-to-zero":"true"}}'

kubectl patch configmap/config-features \
  --namespace knative-serving \
  --type merge \
  --patch '{"data":{"kubernetes.podspec-schedulername":"enabled","kubernetes.podspec-affinity":"enabled","kubernetes.podspec-tolerations":"enabled","kubernetes.podspec-volumes-emptydir":"enabled","kubernetes.podspec-securitycontext":"enabled","kubernetes.containerspec-addcapabilities":"enabled","kubernetes.podspec-persistent-volume-claim":"enabled","kubernetes.podspec-persistent-volume-write":"enabled","multi-container":"enabled","kubernetes.podspec-init-containers":"enabled"}}'
Configure HPA for Autoscaling by Knative#
kubectl apply -f https://github.com/knative/serving/releases/download/knative-v1.17.0/serving-hpa.yaml
Update Knative timeout#
For larger Inference Workloads, we need to increase the timeout value knative uses, else when a large model is deployed, the model will take a long time to download and run, knative will think the workload isn’t processing and timeout. In order to avoid this increase the time knative uses to wait for workloads to come up. The below will change it to 30 minutes.
kubectl patch ConfigMap config-deployment -n knative-serving --type='merge' -p '{"data": {"progress-deadline": "1800s"}}'
Create a Project in Run:ai#
Once the Cluster is connected to the Run:ai control plane, we need to create a Project in Run:ai, a project is a logical separation of resources, once a project gets created Run:ai adds its custom schedular in the namespace ont he Run:ai cluster defined during the creation of the project, this project is where all the workloads that are submitted will be scheduled by Run:ai.
Go to Run:ai UI → Click on Organization from the Left Hand Menu → Select “+New Project”.
Select the scope for the project, this could be org wide, enter the Name for the Project and the namespace the Kubernetes Cluster to be where Run:ai deploys its schedular, you can select an existing namespace in the cluster or create a new one, provide the GPU quota, this would be the max no. of GPUs to allocate from the pool to that project.
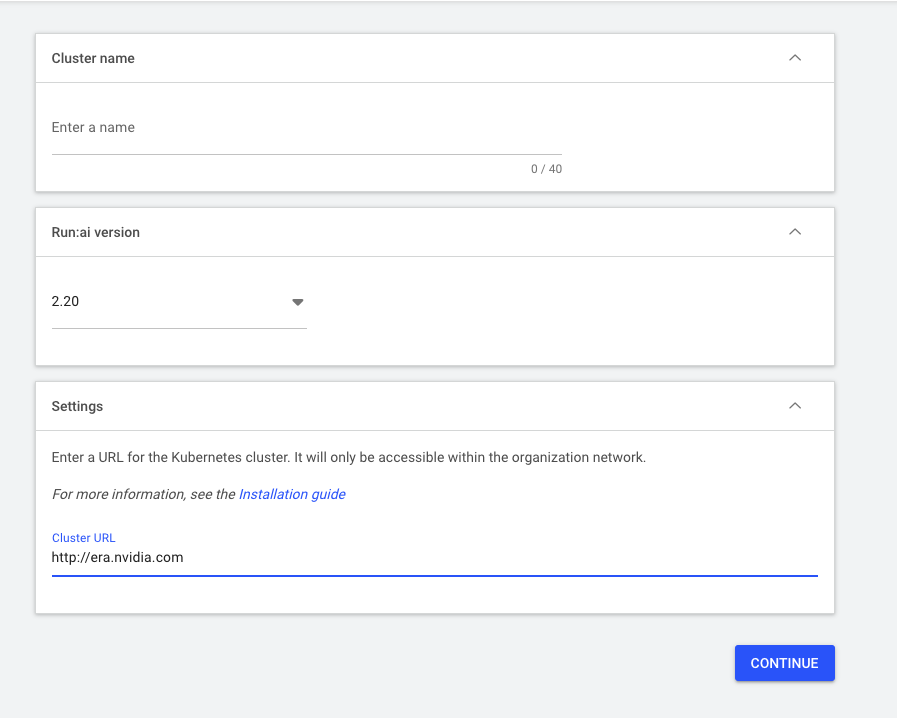
Figure 27 Create a Project in Run:ai#
Change the Placement Strategy#
Run:ai will try to pack as many workload on GPUs in a single worker node before it moves to another node, it will try to pack as much as possible. In order to test NIM scaling we need to change this default behavior to Spread, where new workload will be spread across all the nodes and GPUs in the cluster.
In the Run:ai UI → Go to Resources on the LHS menu → Select Node Pools → Click on the Node pool used, select Edit and change the Radio Button on Placement Strategy to Spread for both GPU and CPU and Click Save.
Add Users in Run:ai#
Login to Run:ai User Interface → On the LHS Menu → Select Access → Select Users → Click "New User".
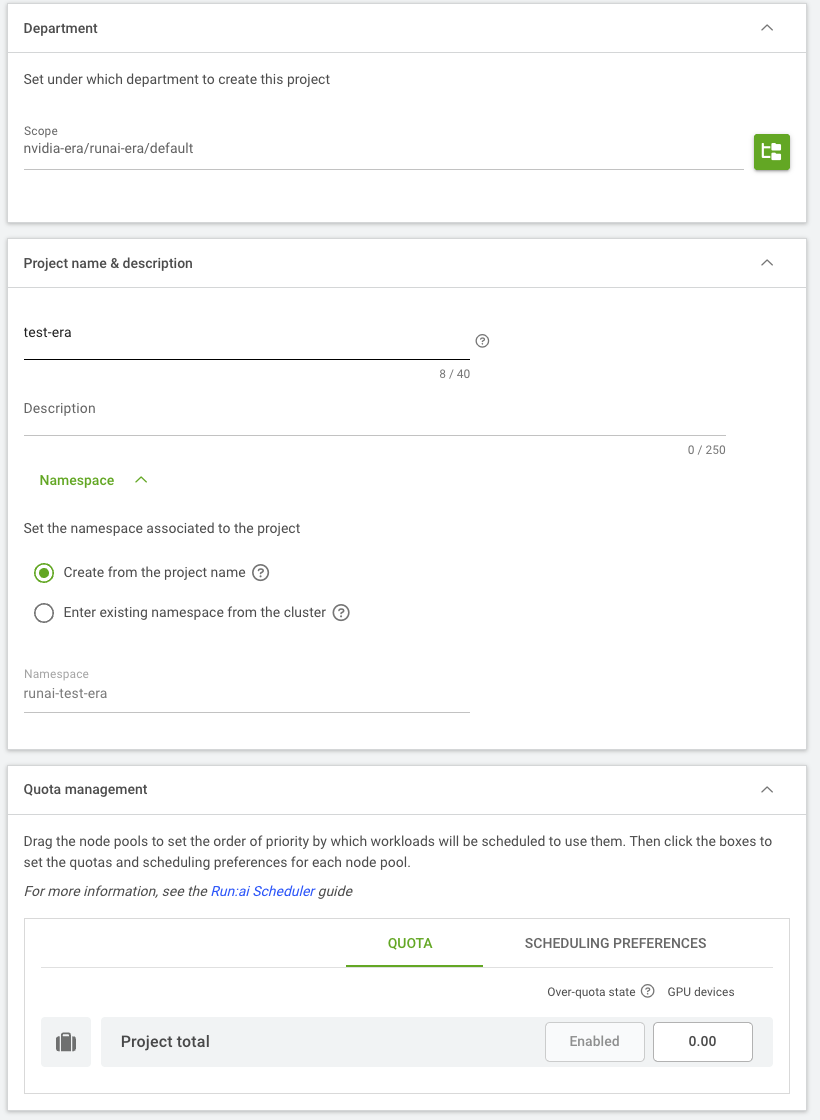
Figure 28 Add Users in Run:ai#