Quick Start Guide#
Important
JetPack 7.2 is the latest JetPack release for Jetson AGX Orin Developer Kit. It includes L4T r39.2 and introduces Jetson ISO as the recommended BSP update path.
Direct Download Link: Jetson ISO (r39.2)

This section details how to quickly set up your NVIDIA Jetson AGX Orin Developer Kit for your development needs.
Your NVIDIA Jetson AGX Orin Developer Kit comes with its eMMC flash memory pre-flashed with L4T BSP image, so you can boot directly into Ubuntu desktop right out of the box.
Note
For alternative setup methods (SDK Manager or flash script), see BSP Installation.
What You’ll Need#
NVIDIA Jetson AGX Orin module (included in box)
Reference Carrier board (included in box)
Wi-Fi module (included in box)
USB Type-C power supply (included in box)
USB Type-C to USB Type-A cable (included in box)
Internet connection
And you need either of the following set (for headless, see below):
PC monitor with DisplayPort cable
USB keyboard and mouse
Extra computer (Windows, Mac, Linux)
Step 1 - Run through Ubuntu Setup (oem-config)#
There are two ways to interact with the developer kit: with a display, keyboard and mouse attached (“display attached” or “headed” configuration); or in a “headless” configuration through a connection from another (host) computer.
You can conduct the initial setup either way.
🖥️ Initial setup with display attached |
📡 Initial setup in a headless configuration |
|
|---|---|---|
Monitor, keyboard and mouse |
❗ Required |
Not required |
Extra computer (Windows, Mac, Linux) |
Not required |
❗ Required |
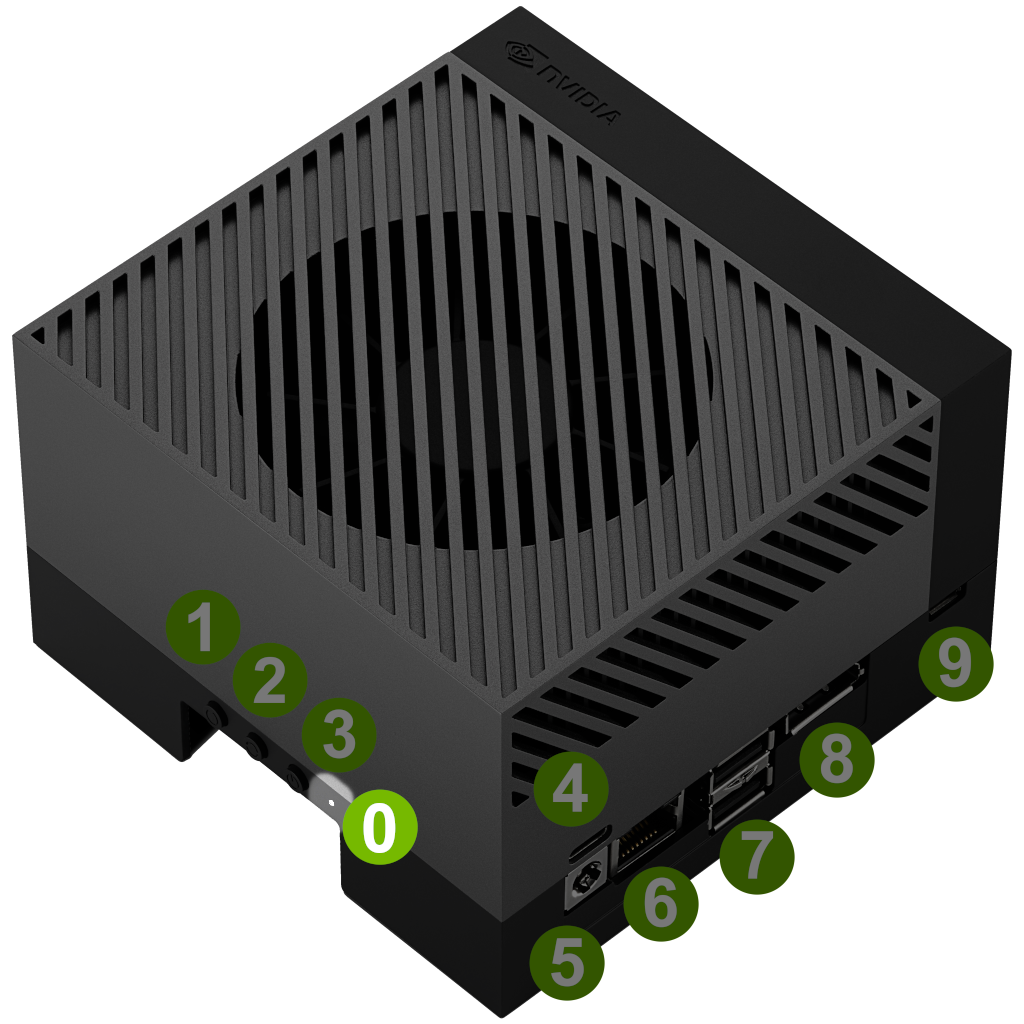
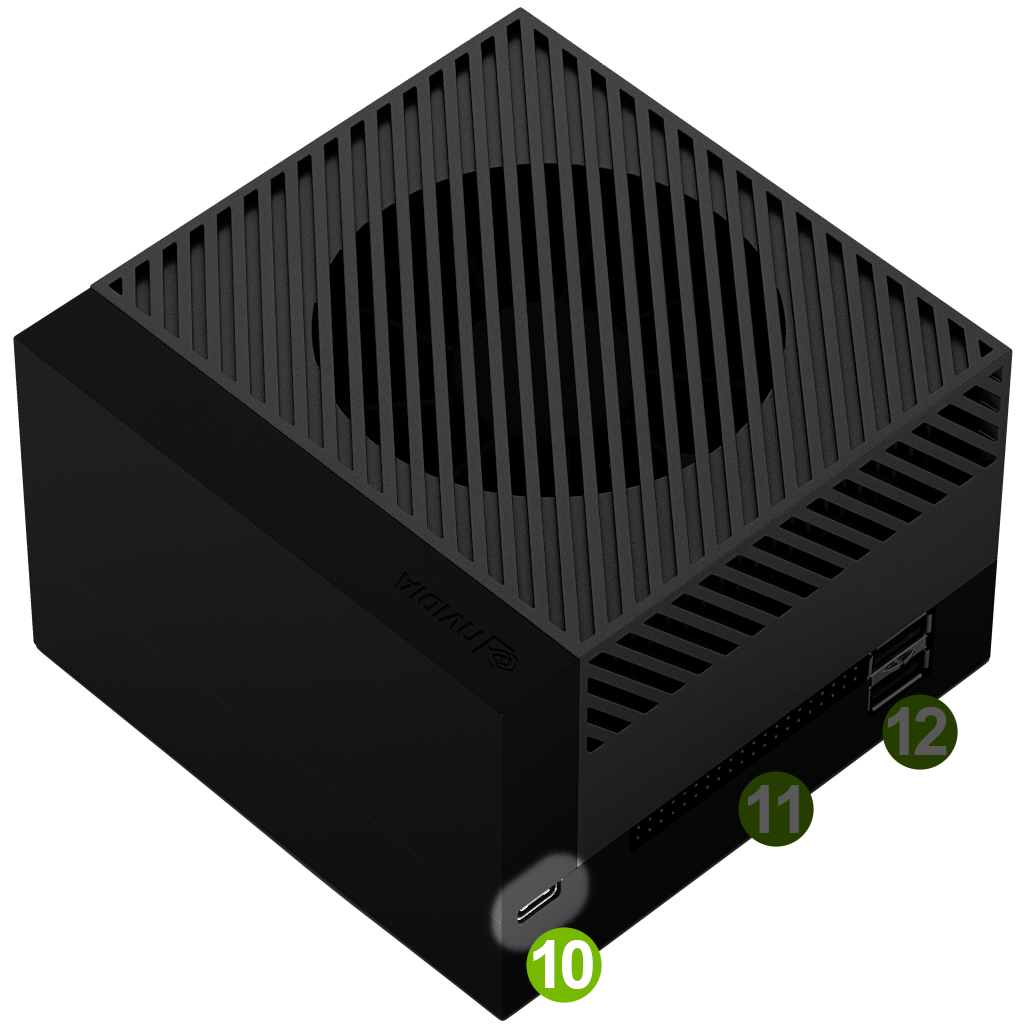
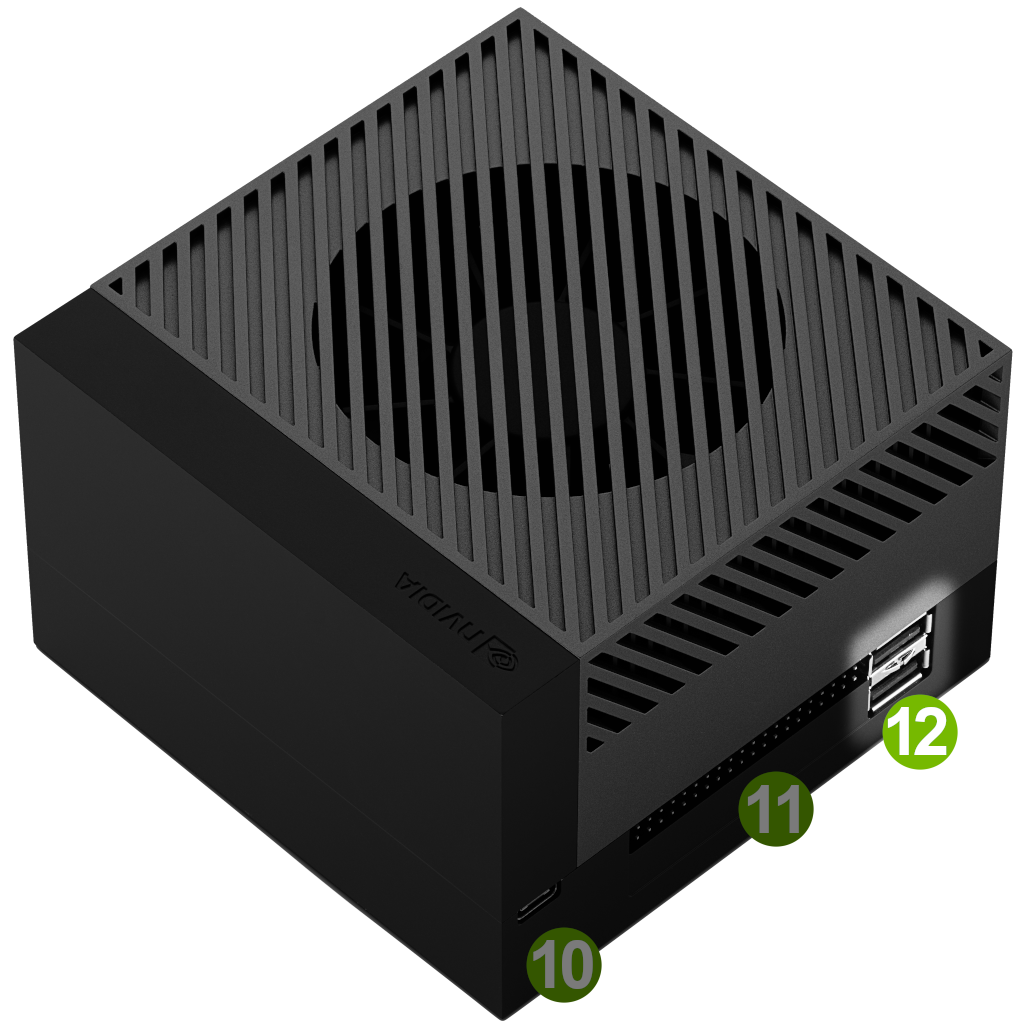
First, connect the following to the developer kit:
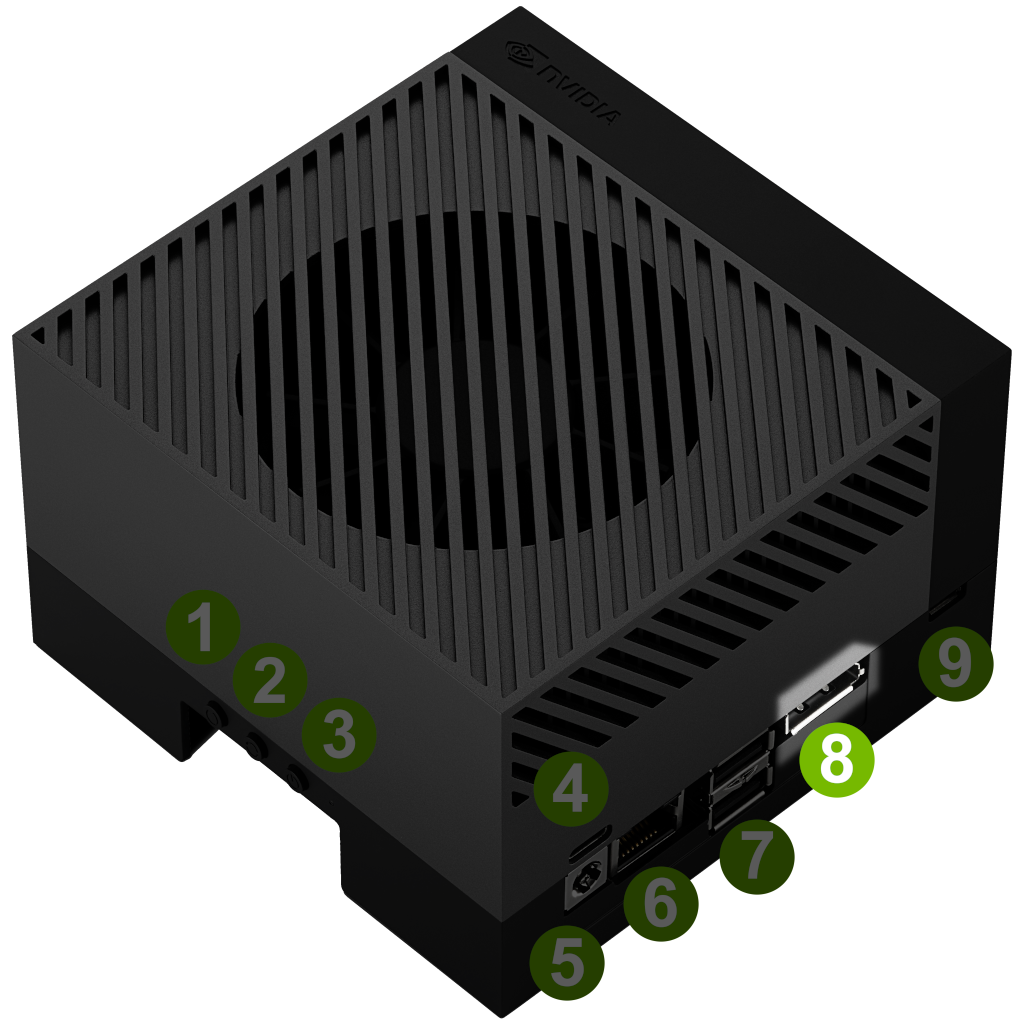
DisplayPort cable attached to a computer monitor ( 8
)For a monitor with HDMI input, use an active DisplayPort to HDMI adapter/cable.
USB keyboard and mouse ( 12
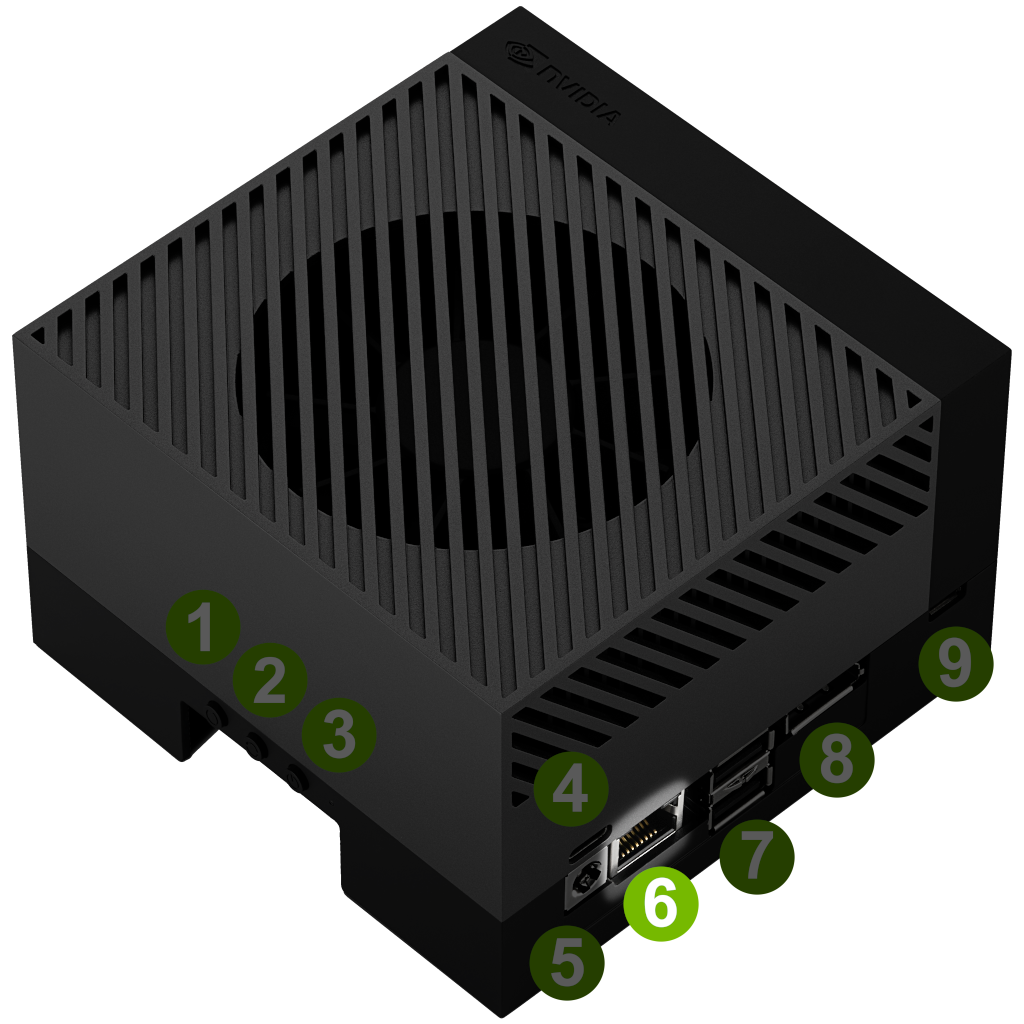
)Ethernet cable ( 6
) (optional if you plan to connect to the Internet via WLAN)
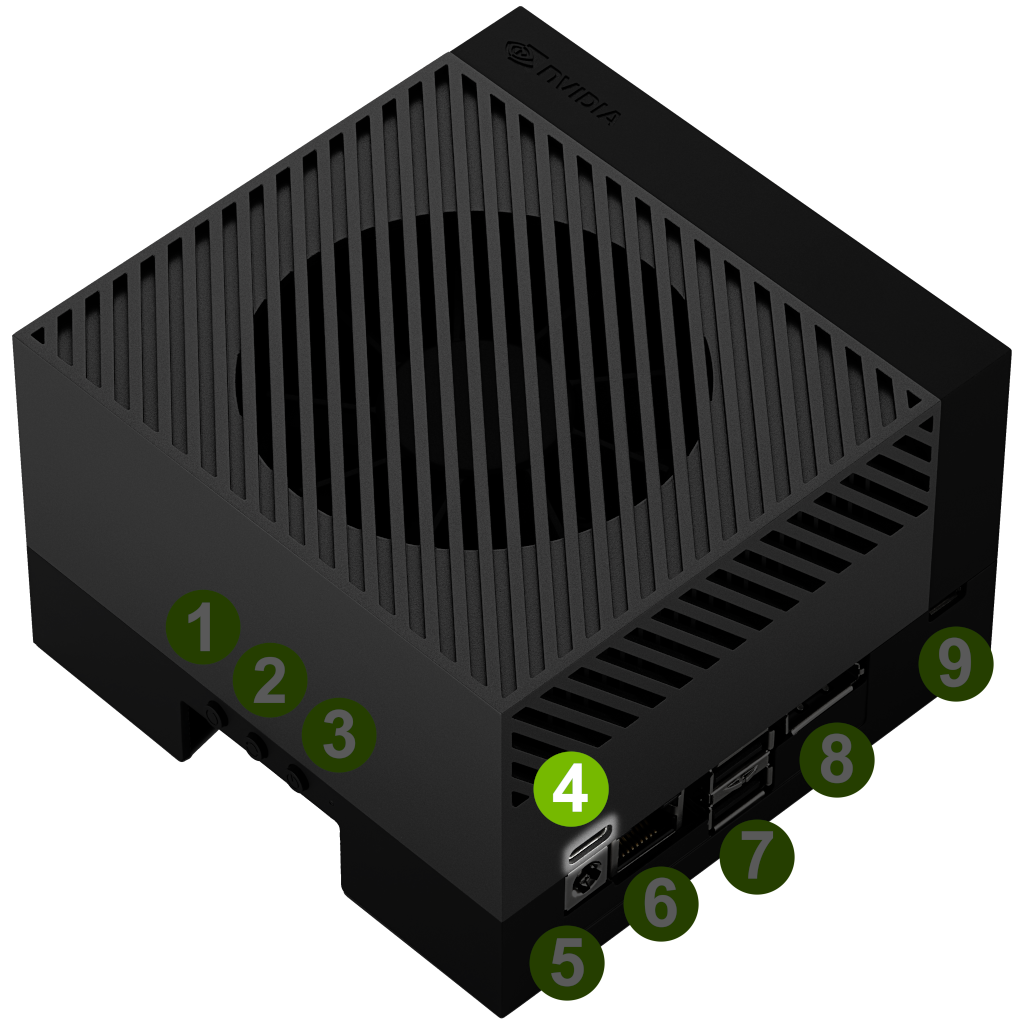
Then connect the included power supply into the USB Type-C port above the DC jack ( 4
)Your developer kit should automatically power on, and the white LED ( 0
) near the power button will light. If not, press the Power button ( 1 ).Wait up to 1 minute to have Ubuntu screen on the computer monitor.
When you boot for the first time, the developer kit will take you through some initial setup, including:
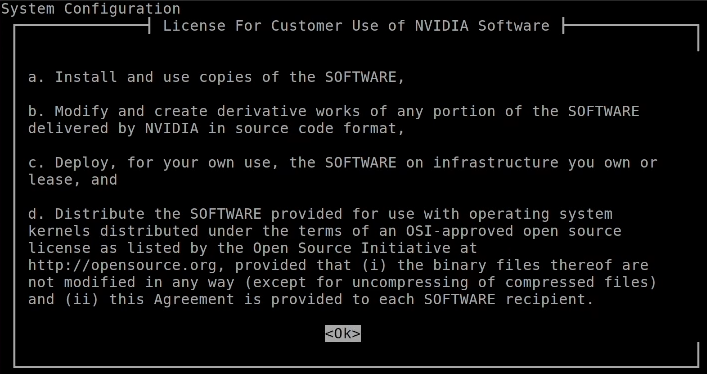
Review and accept NVIDIA Jetson software EULA
Select system language, keyboard layout, and time zone
Create username, password, and computer name
Configure wireless networking
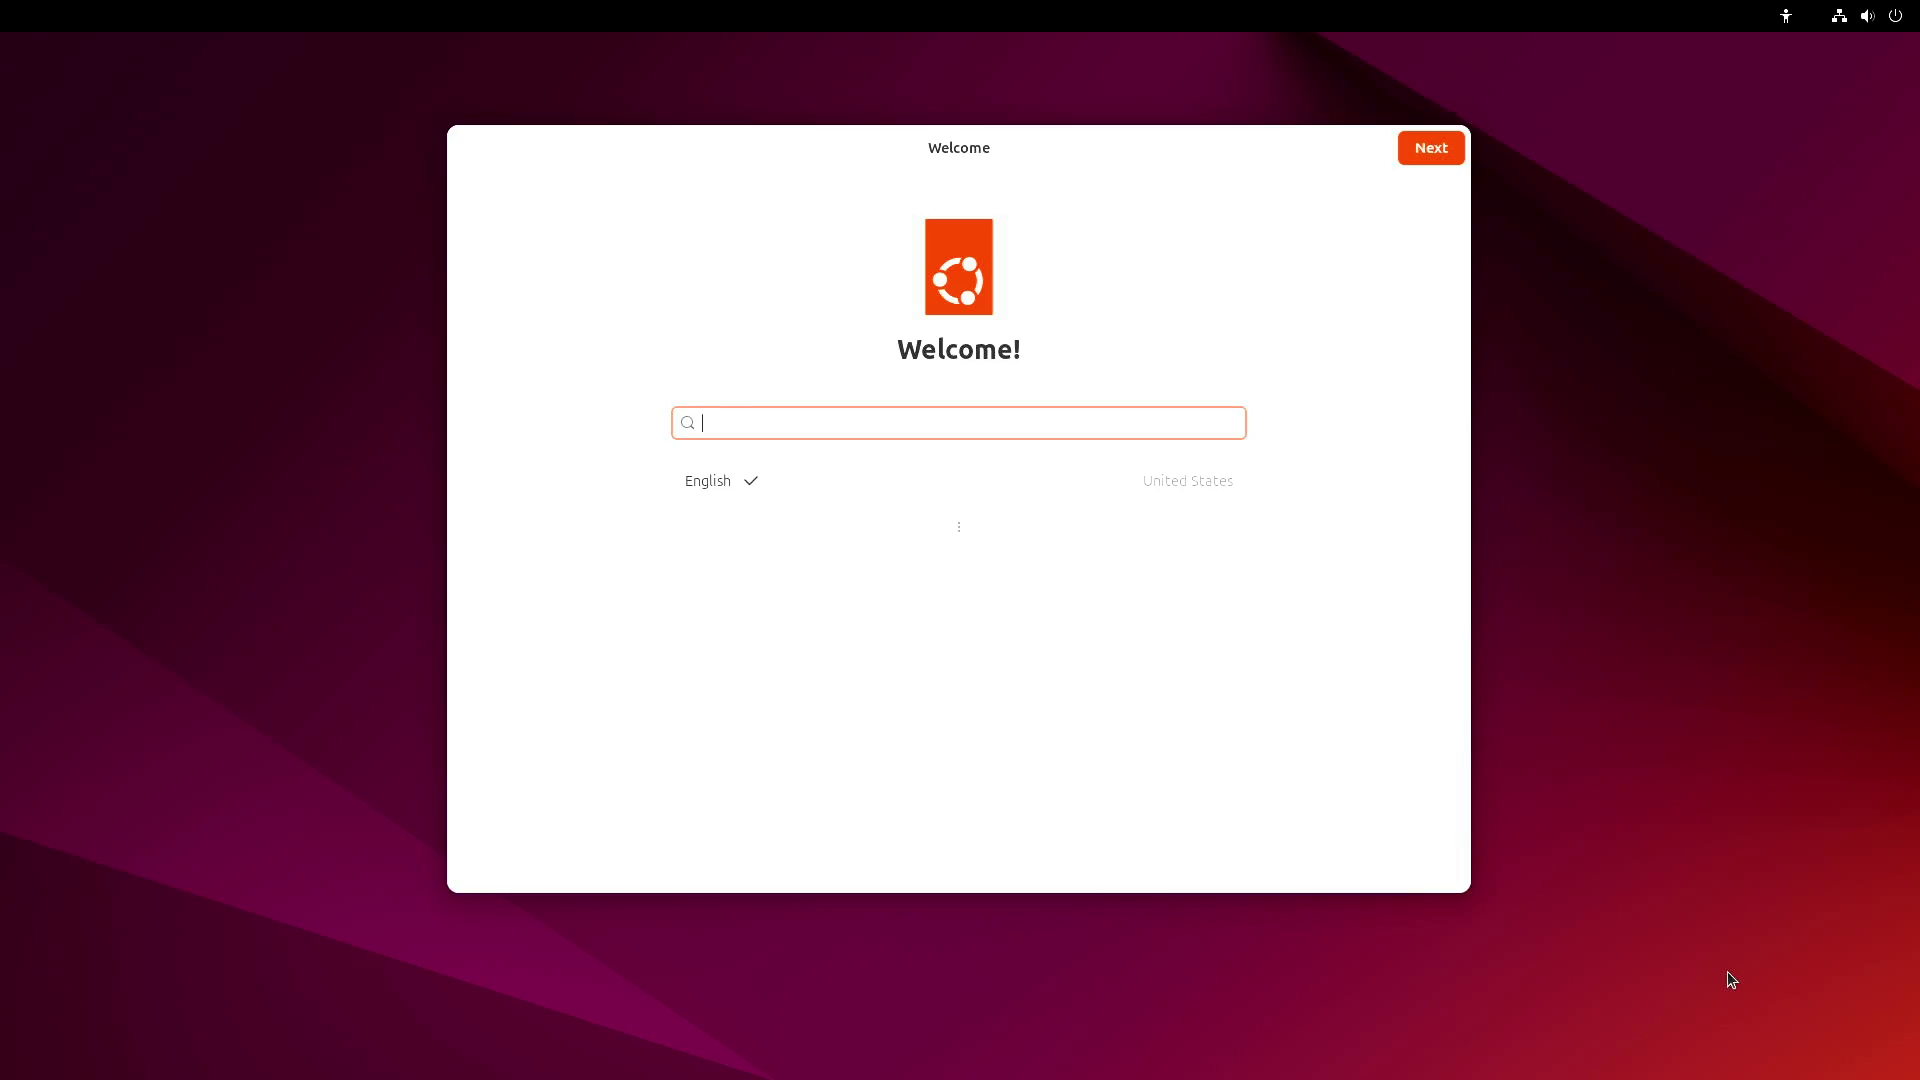
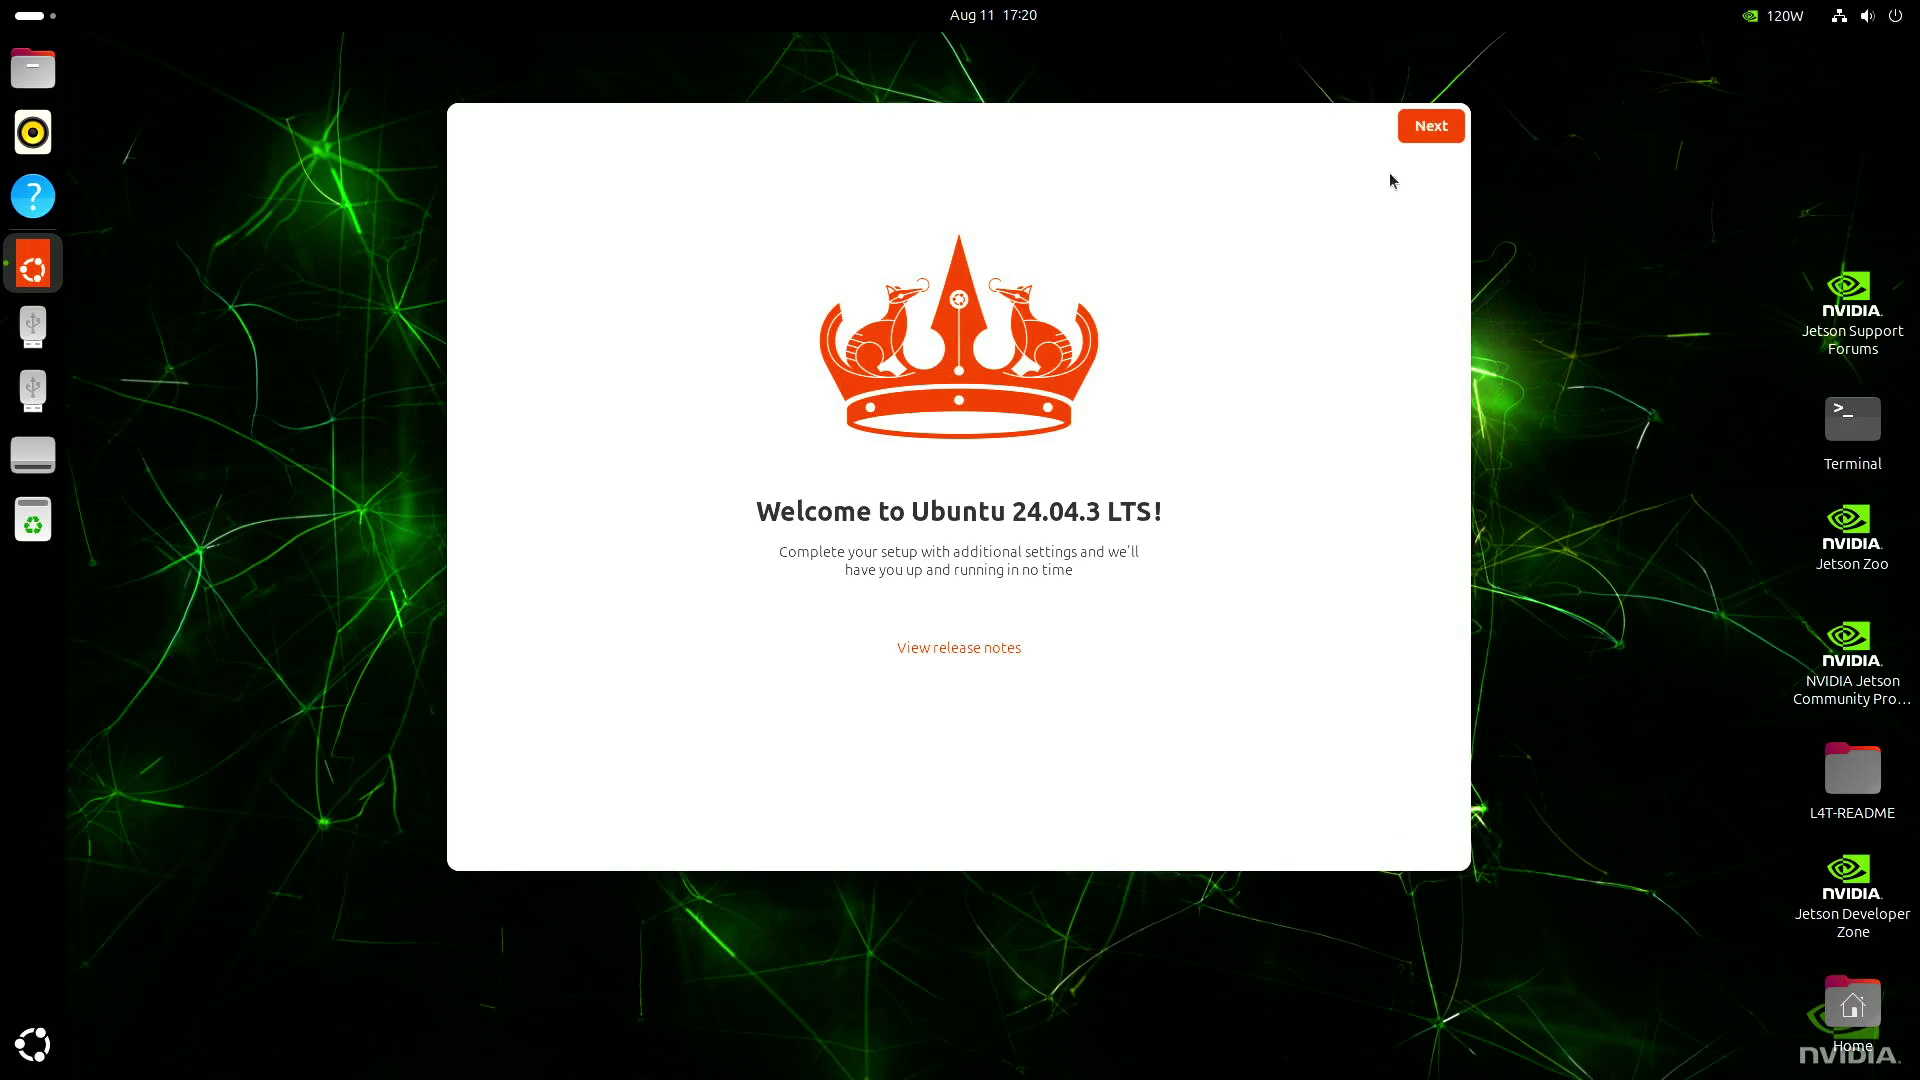
Upon completing the oem-config, the developer kit reboots, and you should see the Ubuntu desktop like this on the display.
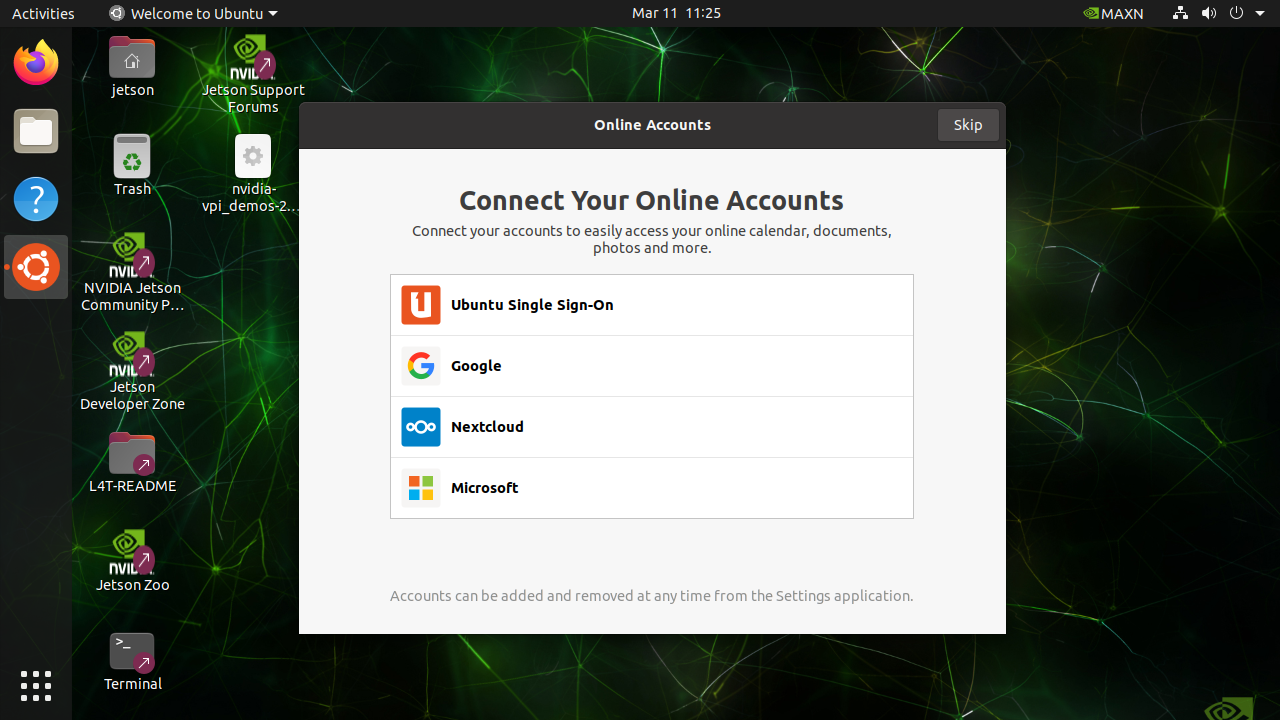
Congratulations!
You can now start the development on your Jetson AGX Orin Developer Kit.
Set up the developer kit in headless configuration
First, connect the following to the developer kit:
The USB Type-C end of the included USB Type-A to USB Type-C cable. Use the USB Type-C port ( 10
) next to the 40-pin connector. The other end should be connected to your computer.Ethernet cable ( 6
) (optional if you plan to connect to the Internet via WLAN)
Attention
Make sure you do NOT connect anything into DisplayPort output. It may direct the oem-config session to desktop and not allow you to perform the initial setup via USB.
Then connect the included power supply into the USB Type-C port above the DC jack ( 4
)Your developer kit should automatically power on, and the white LED ( 0
) near the power button will light. If not, press the Power button ( 1 ).Wait up to 1 minute.
On your computer, use a serial terminal application to connect via host serial port to the developer kit.
Complete oem-config via USB from your computer
Pick the type of your computer:
Right click on the Windows Start icon and select “Device Manager”.
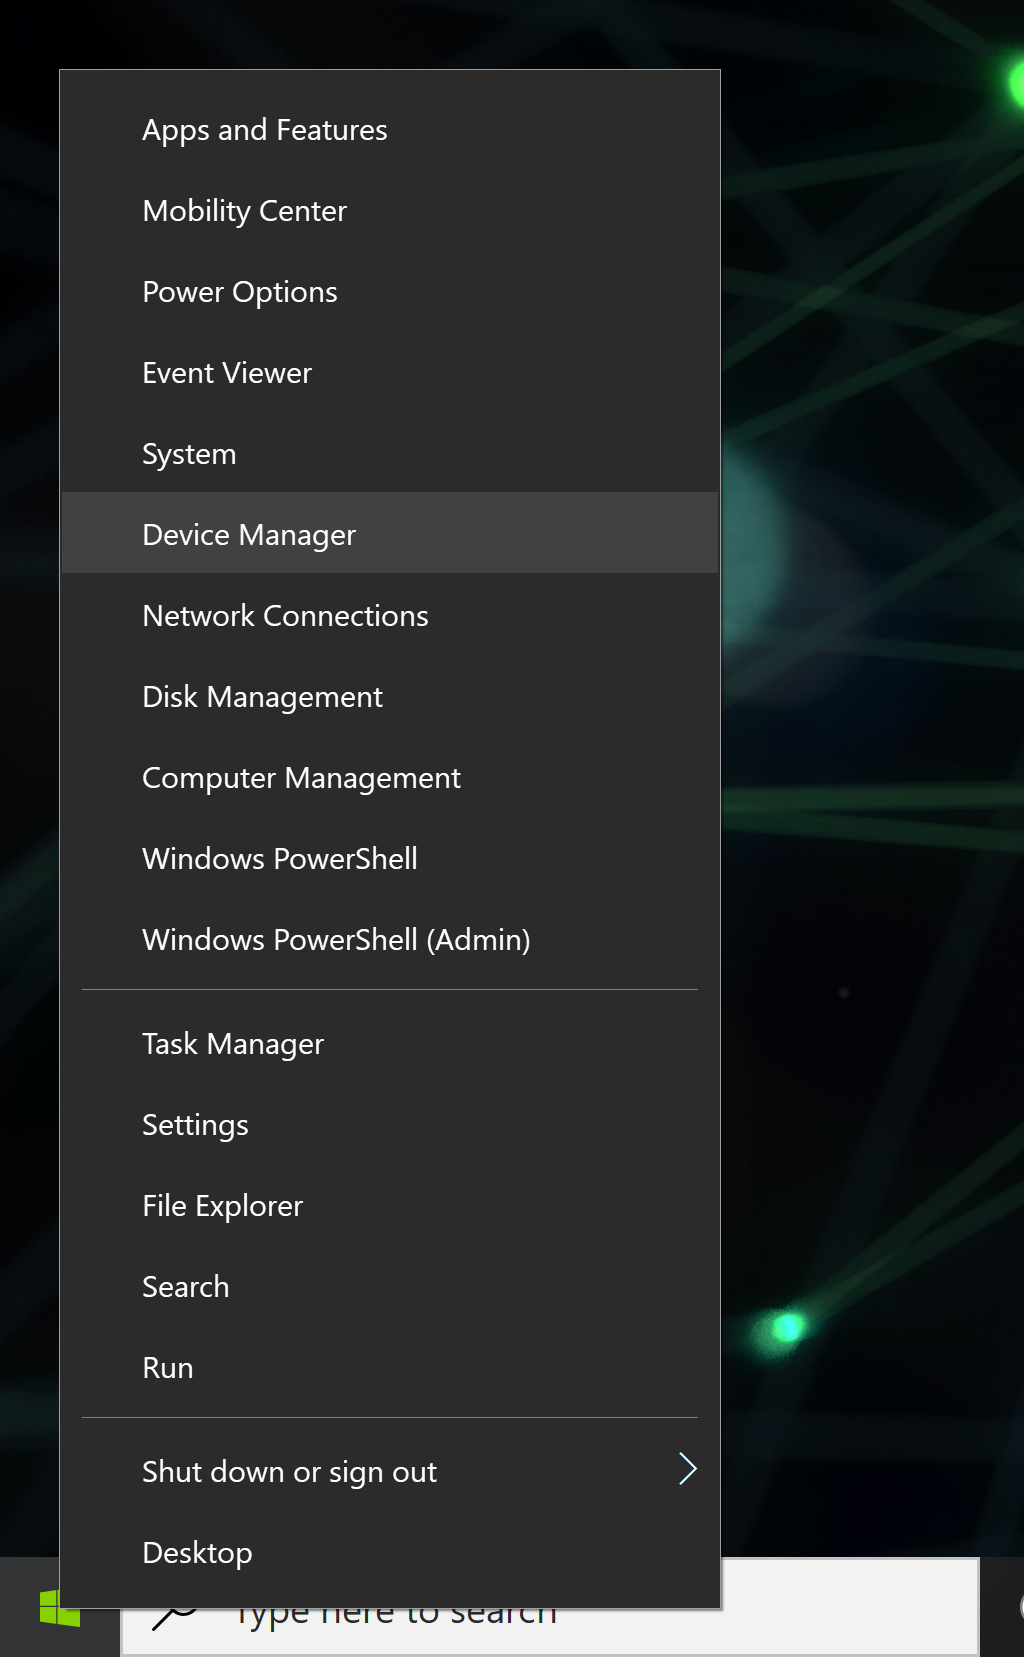
Open the
Ports (COM & LPT)to find aUSB Serial Device(in this caseCOM10).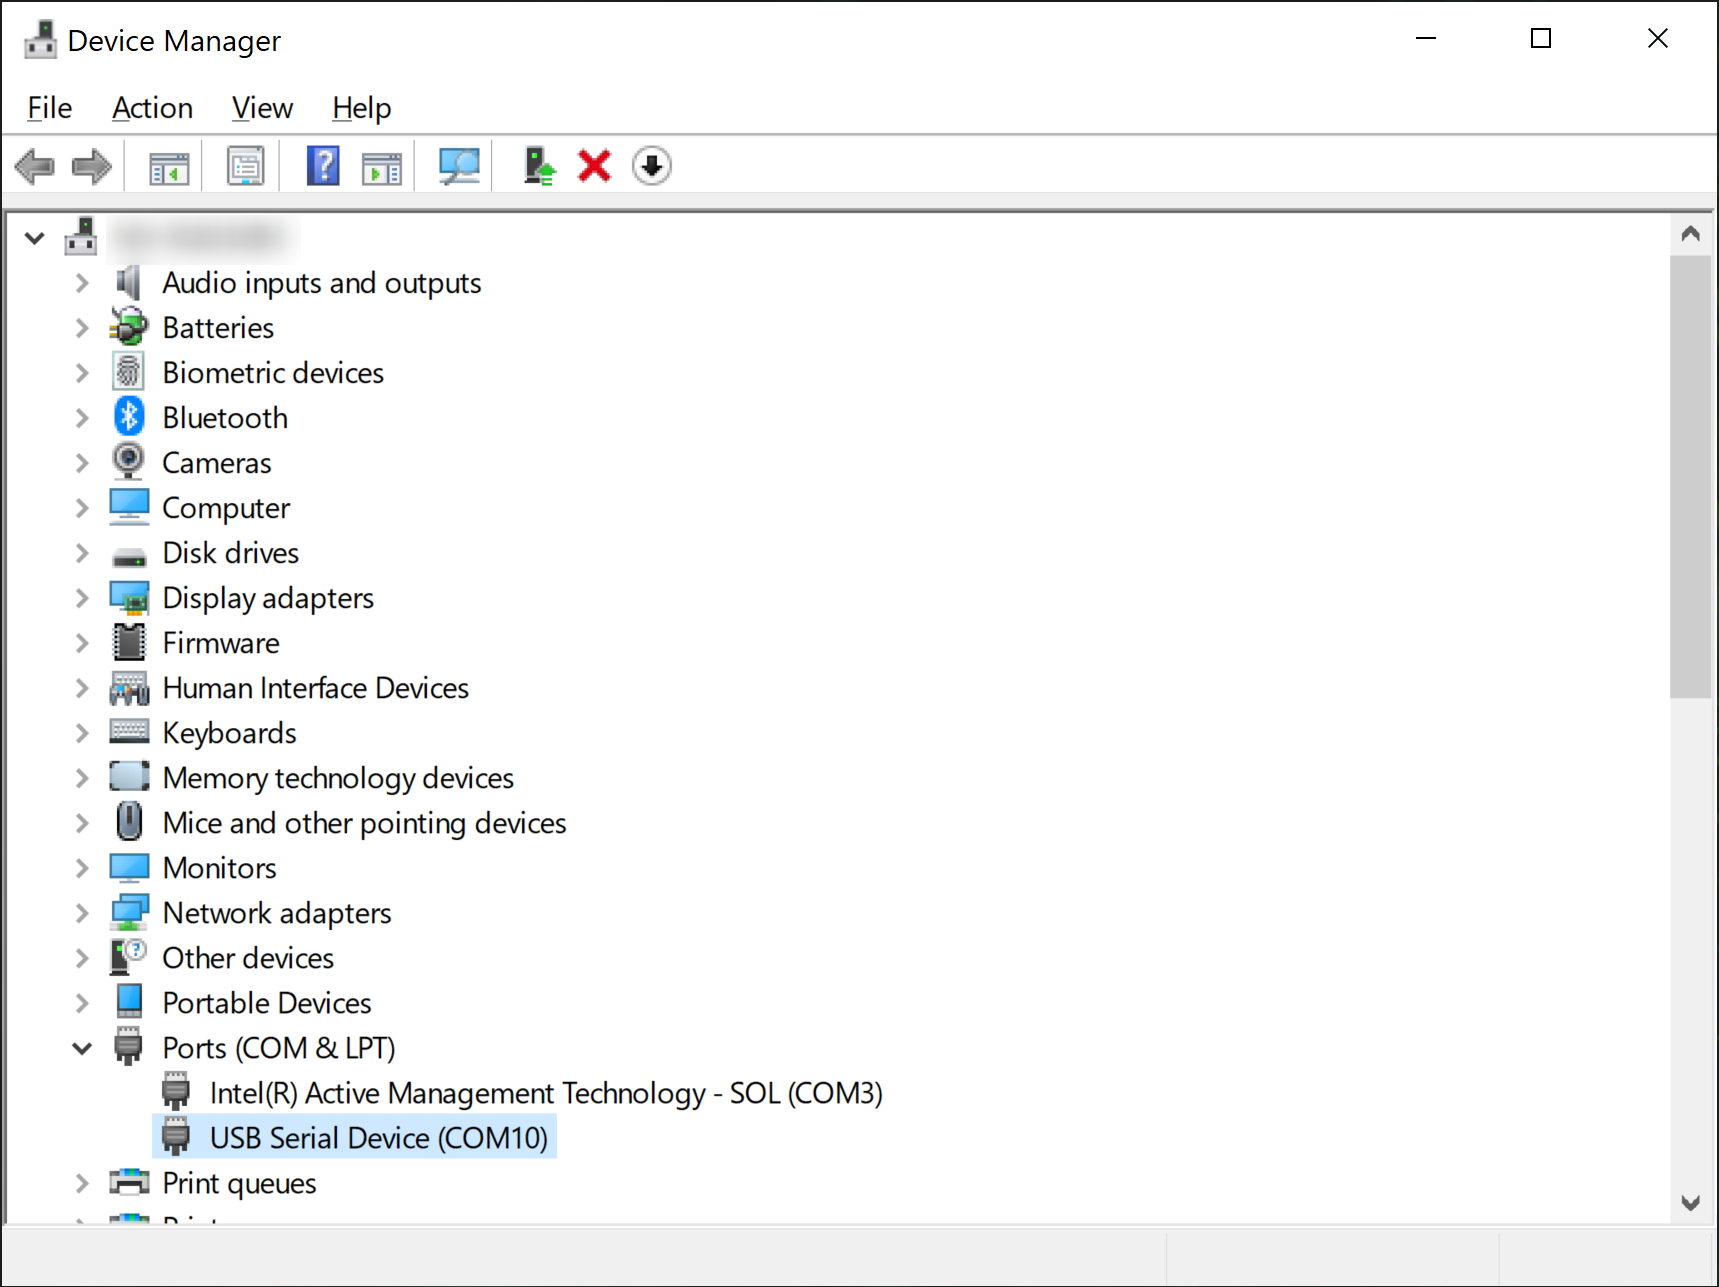
Check the device property by double-clicking the device entry, make sure the VID and PID are
0955and7020respectively underDetailstab.
Follow the instruction below based on your choice of terminal application:
PuTTY is one of the most widely used terminal applications for accessing serial consoles.
Open the PuTTY application
When
Sessionis selected in the leftCategory:pane, input the COM port name forSerial lineand115200forSpeed.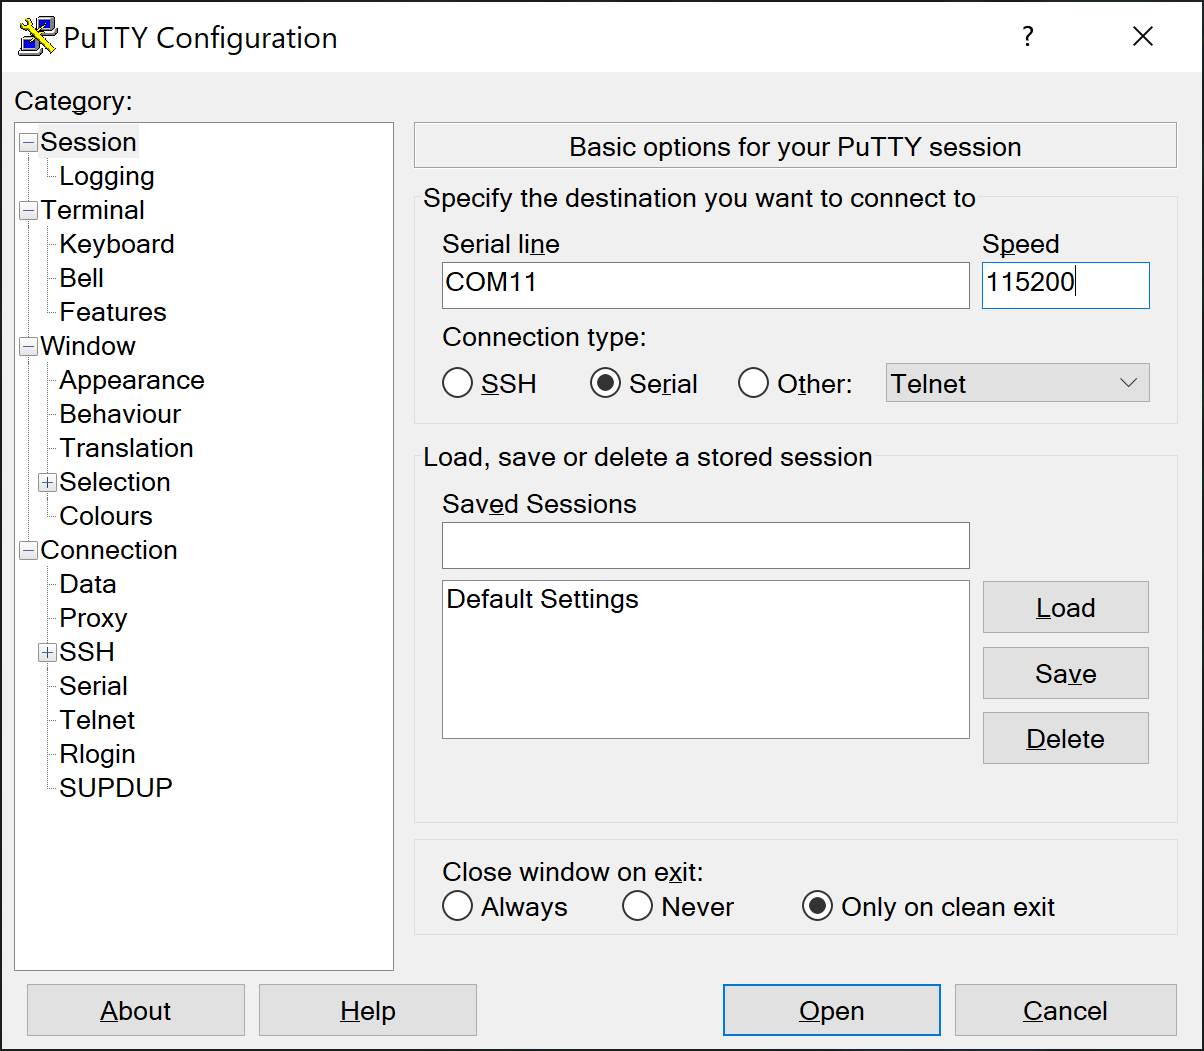
Click
Opento connect to the console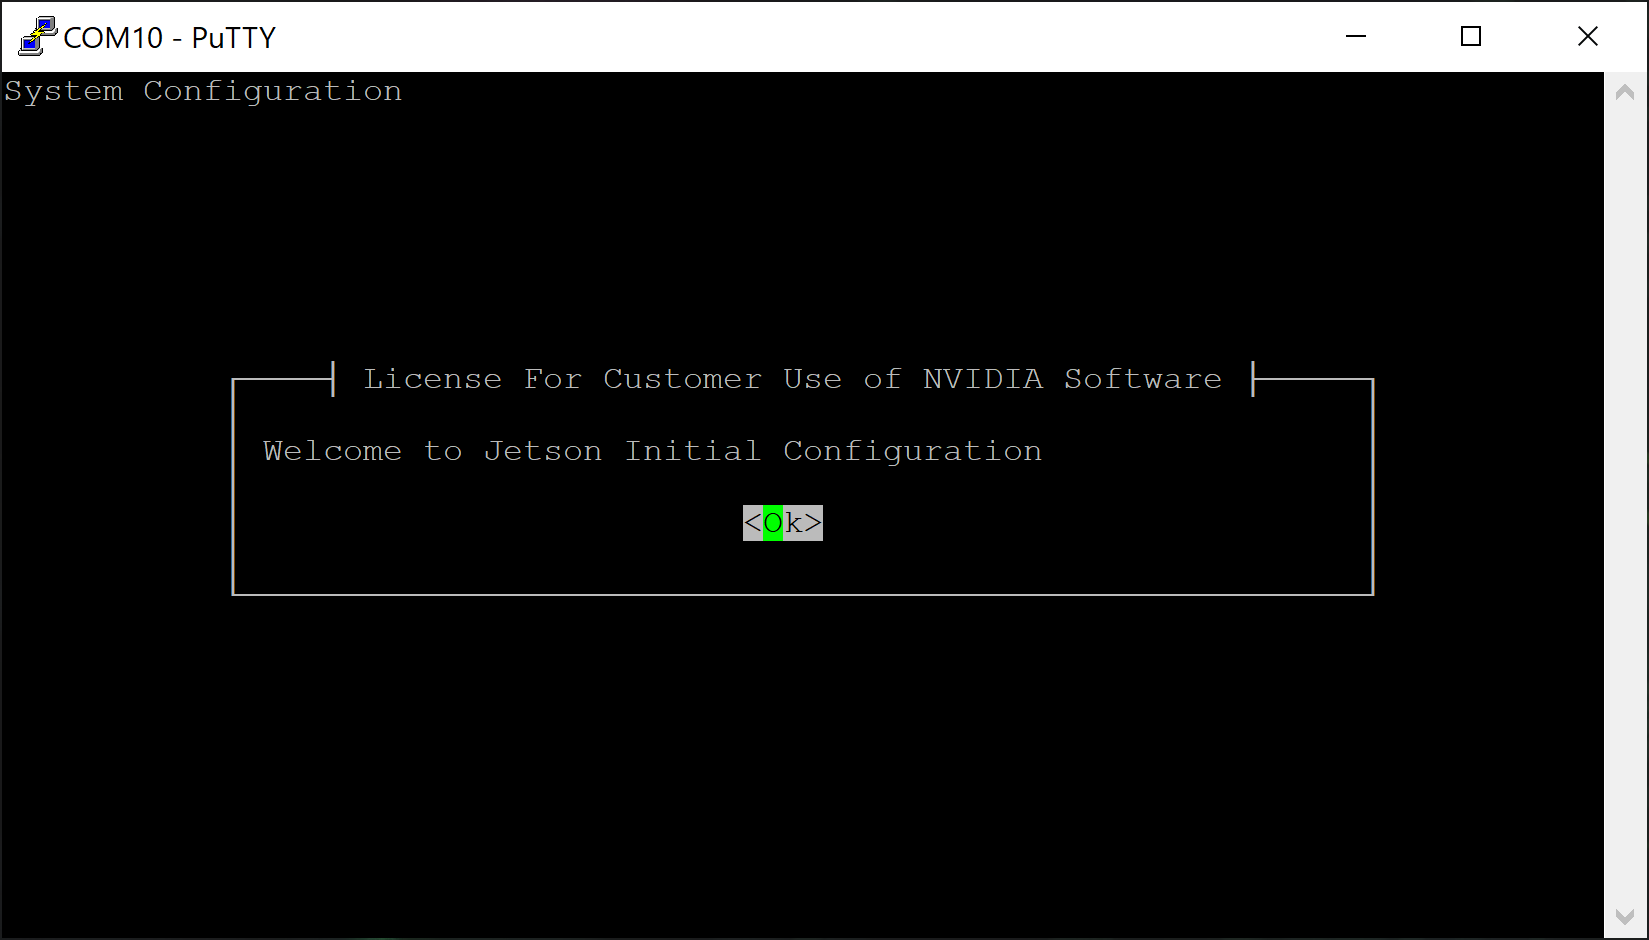
Complete this CUI-based “Jetson Initial configuration” (
oem-config) using your PC’s keyboard.
Open
MobaXtermapplication.Click
Sessionicon in the top menu bar (or from menu, selectSessions→New session).Select
Serialfrom the top bar, select the serial port you verified with Device Manager in the previous step, and setSpeed (bps)to be115200.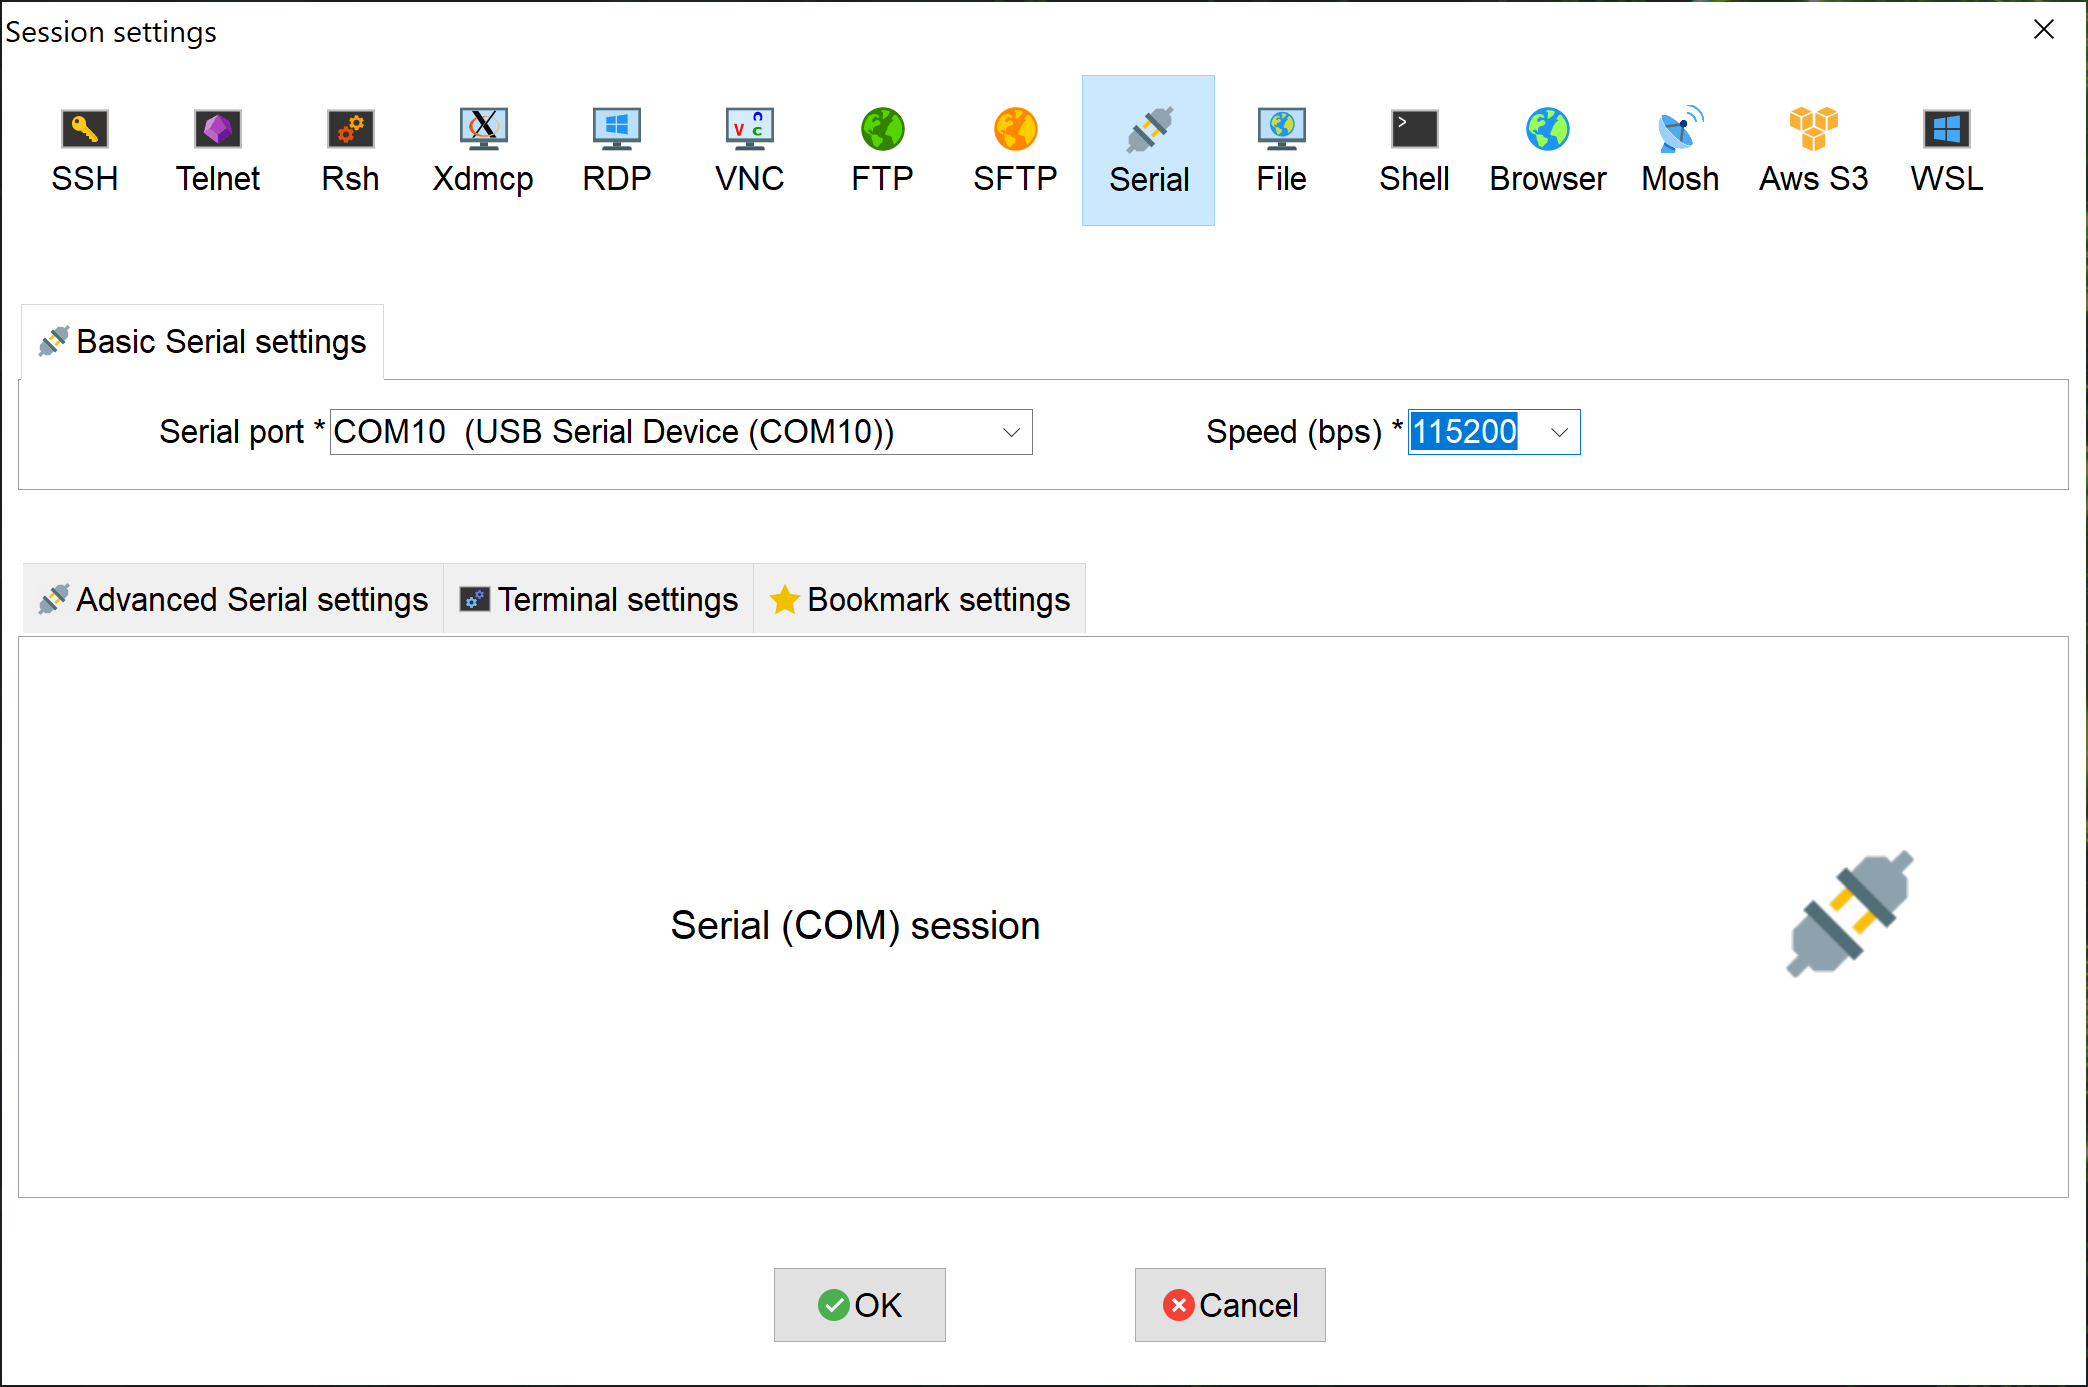
Click
OKto connect to the console
Complete this CUI-based “Jetson Initial configuration” (
oem-config) using your PC’s keyboard.
Locate the tty device
Before connecting to your Jetson developer kit for initial setup, check to see what Serial devices are already shown on your macOS computer.
ls /dev/cu.usbmodem*
Connect your macOS computer to the Jetson AGX Orin Developer Kit’s USB Type-C port next to the 40-pin connector and run the same command to find what’s newly added.
~$ ls /dev/cu.usbmodem*
/dev/cu.usbmodem14133200001053
The new serial device is for your Jetson developer kit.
~$ ls -l /dev/cu.usbmodem*
crw-rw-rw-  1 root  wheel   18,  19 Oct  2 03:54 /dev/cu.usbmodem14133200001053
Screen command
screen is already installed by default as part of macOS.
Use the device name discovered previously as a command line option for the screen command.
sudo screen /dev/cu.usbmodem14133200001053 115200
Complete the CUI-based “Jetson Initial configuration” (oem-config) using your Mac’s keyboard.
Terminate screen
To terminate your screen session, press Ctrl + A then K, then press y on confirmation.
Locate the tty device
Before connecting to your Jetson developer kit for initial setup, check to see what Serial devices are already shown on your Linux computer.
dmesg | grep --color 'tty'
Connect your Linux computer to the Jetson AGX Orin Developer Kit’s USB Type-C port next to the 40-pin connector and run the same command to find what’s newly added.
~$ dmesg | grep --color 'tty'
…
…
[xxxxxx.xxxxxx] cdc_acm 1-5:1.2: ttyACM0: USB ACM device
The new serial device is for your Jetson developer kit.
$ ls -l /dev/ttyACM0
crw-rw---- 1 root dialout 166, 0 Oct  2 02:45 /dev/ttyACM0
Screen command
Install the Screen program on your Linux computer if it is not already available.
For example, use this command to install Screen if you are running Ubuntu.
sudo apt-get install -y screen
Use the device name discovered previously as a command line option for the screen command.
sudo screen /dev/ttyACM0 115200
Complete the CUI-based “Jetson Initial configuration” (oem-config) using your PC’s keyboard.
Terminate screen
To terminate your screen session, press Ctrl + A then K, then press y on confirmation.
Congratulations!
You can now start the development on your Jetson AGX Orin Developer Kit.
Note
Your AGX Orin Developer Kit may come with older firmware and an older L4T BSP version pre-flashed (e.g., L4T r35.x / JetPack 5.x). You can complete the initial setup from eMMC first, then update to the latest BSP — currently L4T r39.2 (JetPack 7.2) — using the Jetson ISO method.
Step 2 - Update BSP with Jetson ISO#
Jetson ISO is the recommended path to update an AGX Orin Developer Kit from the default eMMC setup flow to the latest BSP. It uses a bootable installation USB stick and does not require an Ubuntu host PC.
Important
Jetson ISO can update AGX Orin Developer Kit to L4T r39.2 when the installed BSP is L4T r35.5 or greater. If your developer kit is running a release lower than L4T r35.5, update it to L4T r35.5 or greater first before using the Jetson ISO path.
Check the currently installed BSP version:
cat /etc/nv_tegra_release
A JetPack 7.2 system reports # R39 (release), REVISION: 2, ....
1️⃣ Download ISO Image#
Download the Jetson BSP installation media (”Jetson ISO”) for JetPack 7.2 / L4T r39.2.
Direct Download Link: Jetson ISO (r39.2)
2️⃣ Create Installation USB#
Create a bootable installation USB stick by writing the ISO image to a USB flash drive.
If you do not already have an ISO writing tool installed, download Balena Etcher for your laptop or PC.
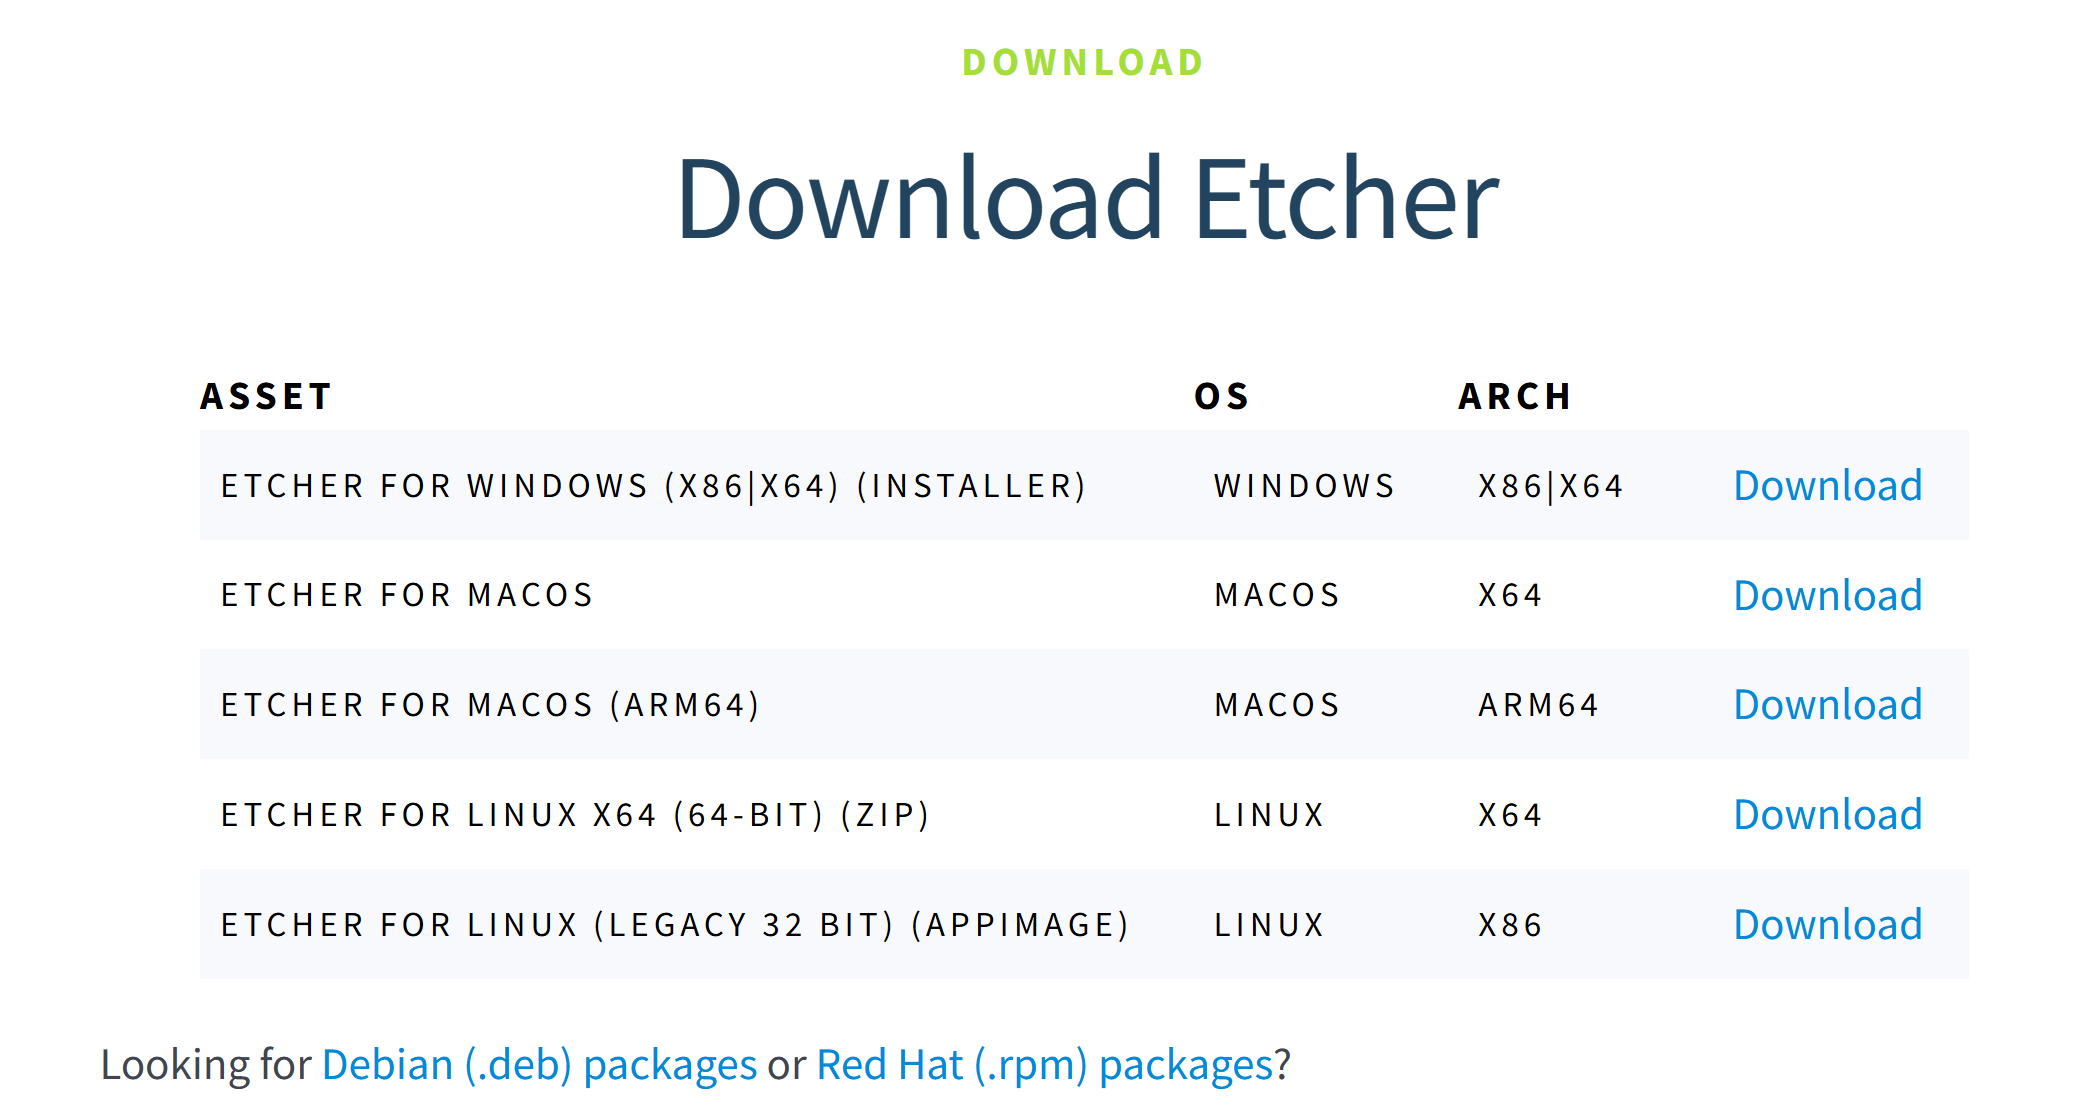
Caution
Do not copy the ISO file to the USB flash drive with Windows Explorer, macOS Finder, or a regular file copy command. Use a tool such as Balena Etcher to write the ISO image to the USB flash drive.
In Etcher, choose Flash from file, select the downloaded Jetson ISO, select the USB flash drive as the target, and flash it.
3️⃣ Insert the Installation USB#
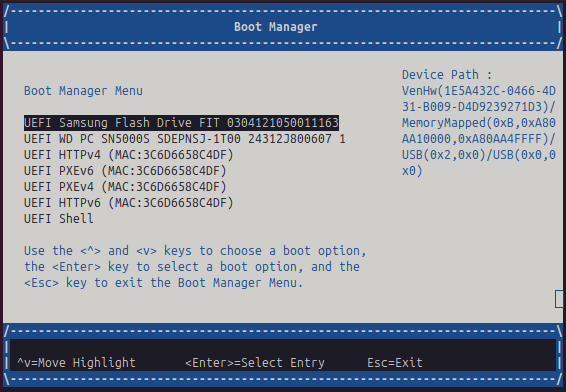
Insert the bootable USB flash drive into the developer kit and power on the system.
If the developer kit does not boot from the USB flash drive automatically, open the UEFI boot manager during boot and select the USB flash drive.
4️⃣ Boot from the USB Stick and Install the BSP#
If prompted to confirm a QSPI capsule update, press Y. The QSPI capsule update runs before the Jetson ISO installation starts. After the capsule update completes, the Jetson ISO installation flow continues.
Important
This prompt can appear when the device firmware is older than the firmware required by the Jetson ISO. The capsule update is required for compatibility with the Jetson ISO release.
Do not skip this prompt. If you miss the prompt or are unsure whether the capsule update completed, restart the installation and confirm the capsule update when prompted.
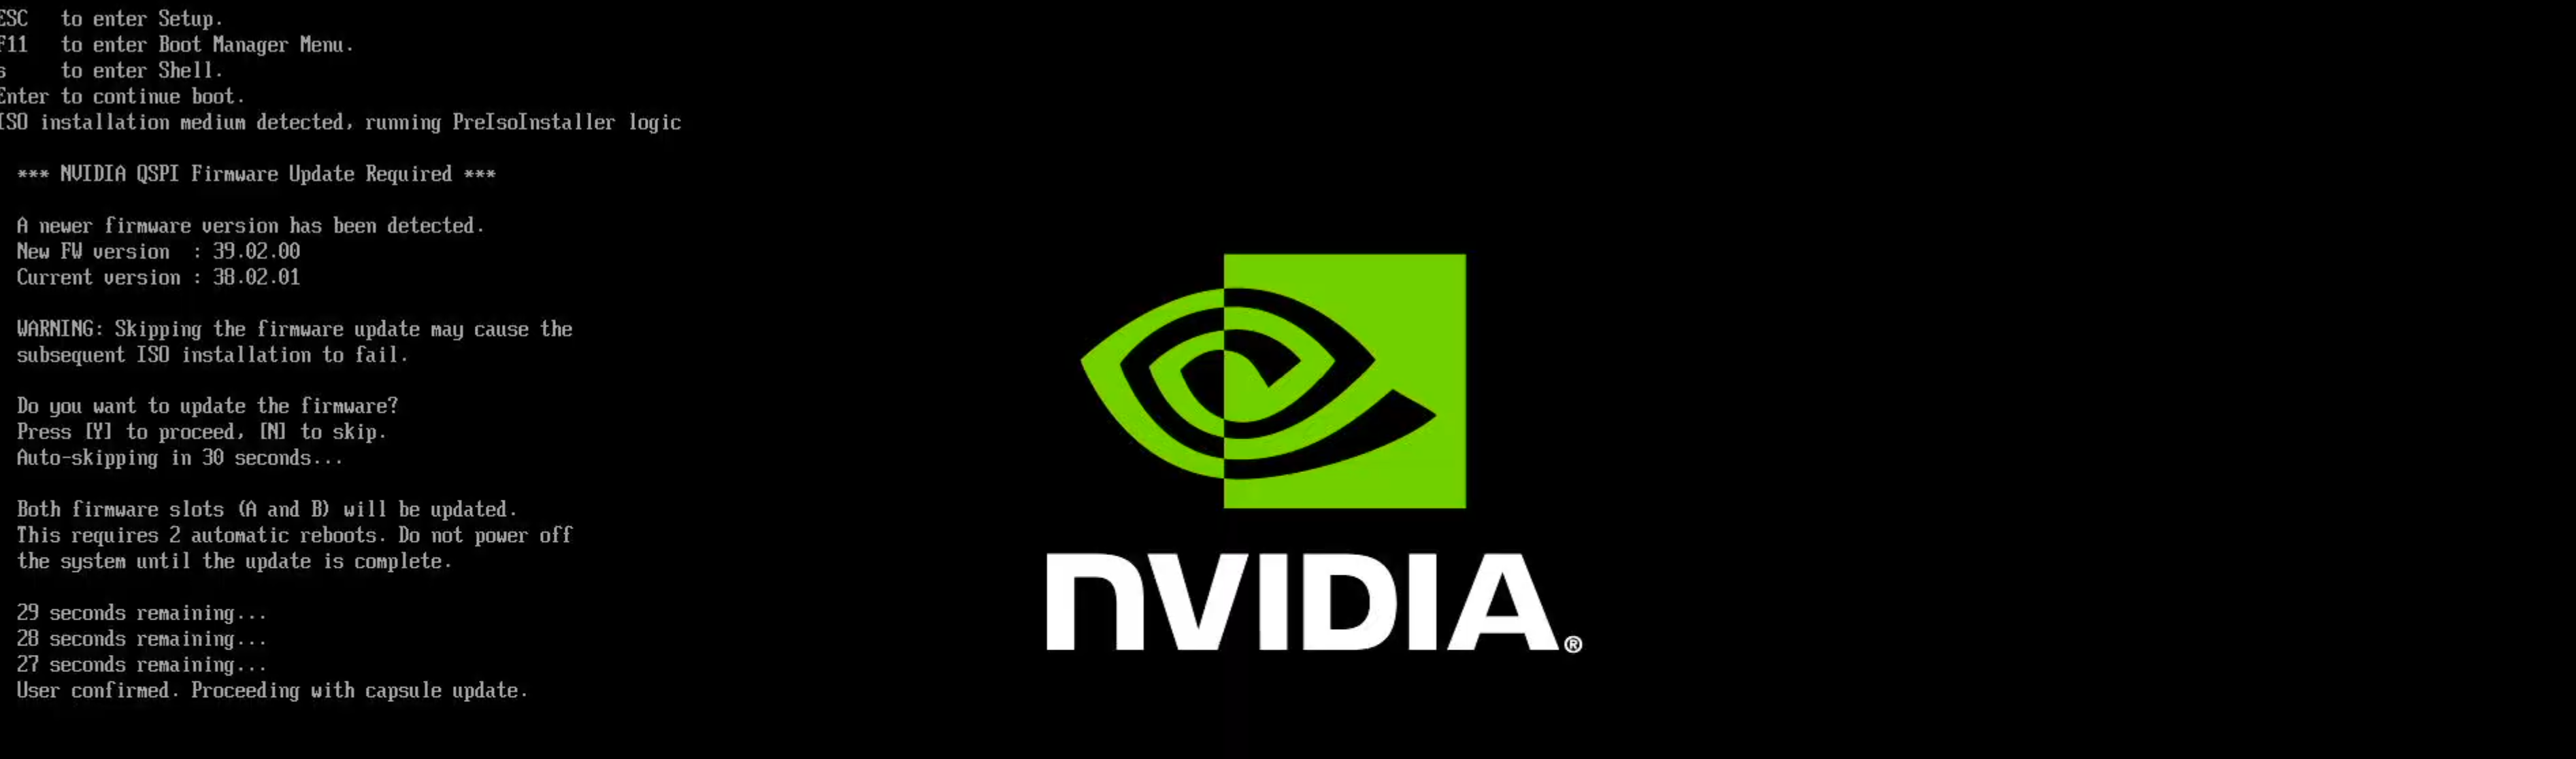
A progress bar is displayed while the capsule update runs. The update runs twice.

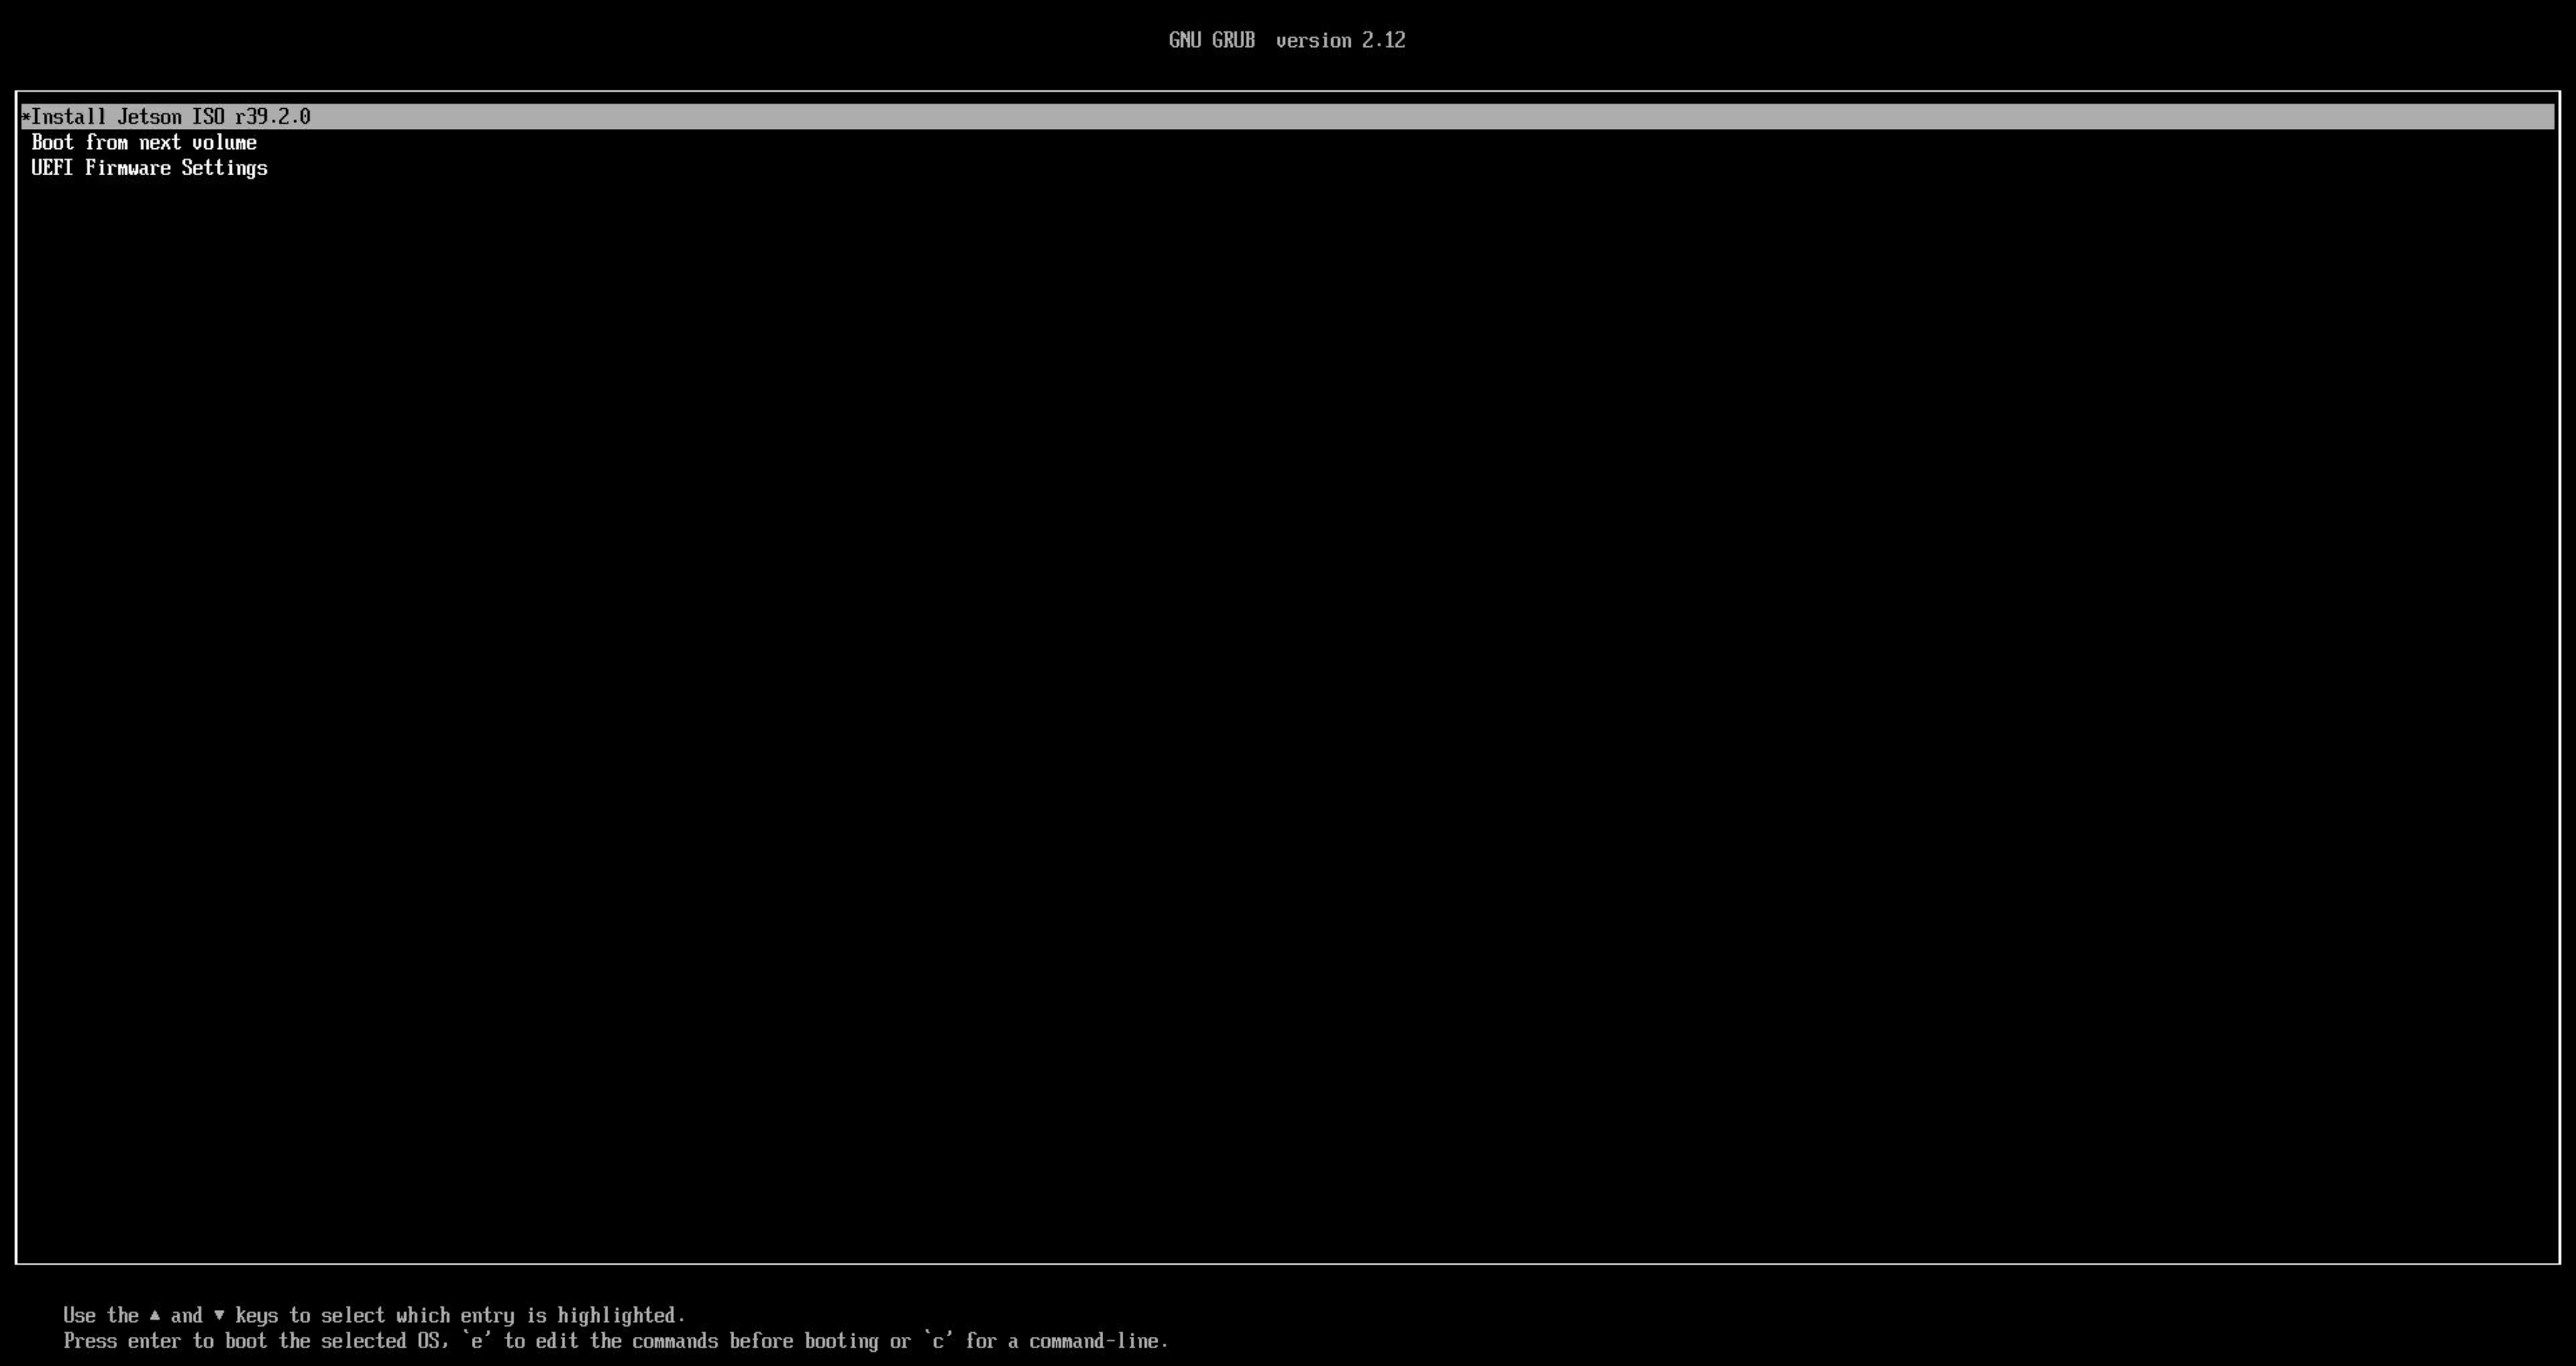
When the Jetson ISO GRUB menu appears, select Install Jetson ISO r39.2.0 and press Enter.
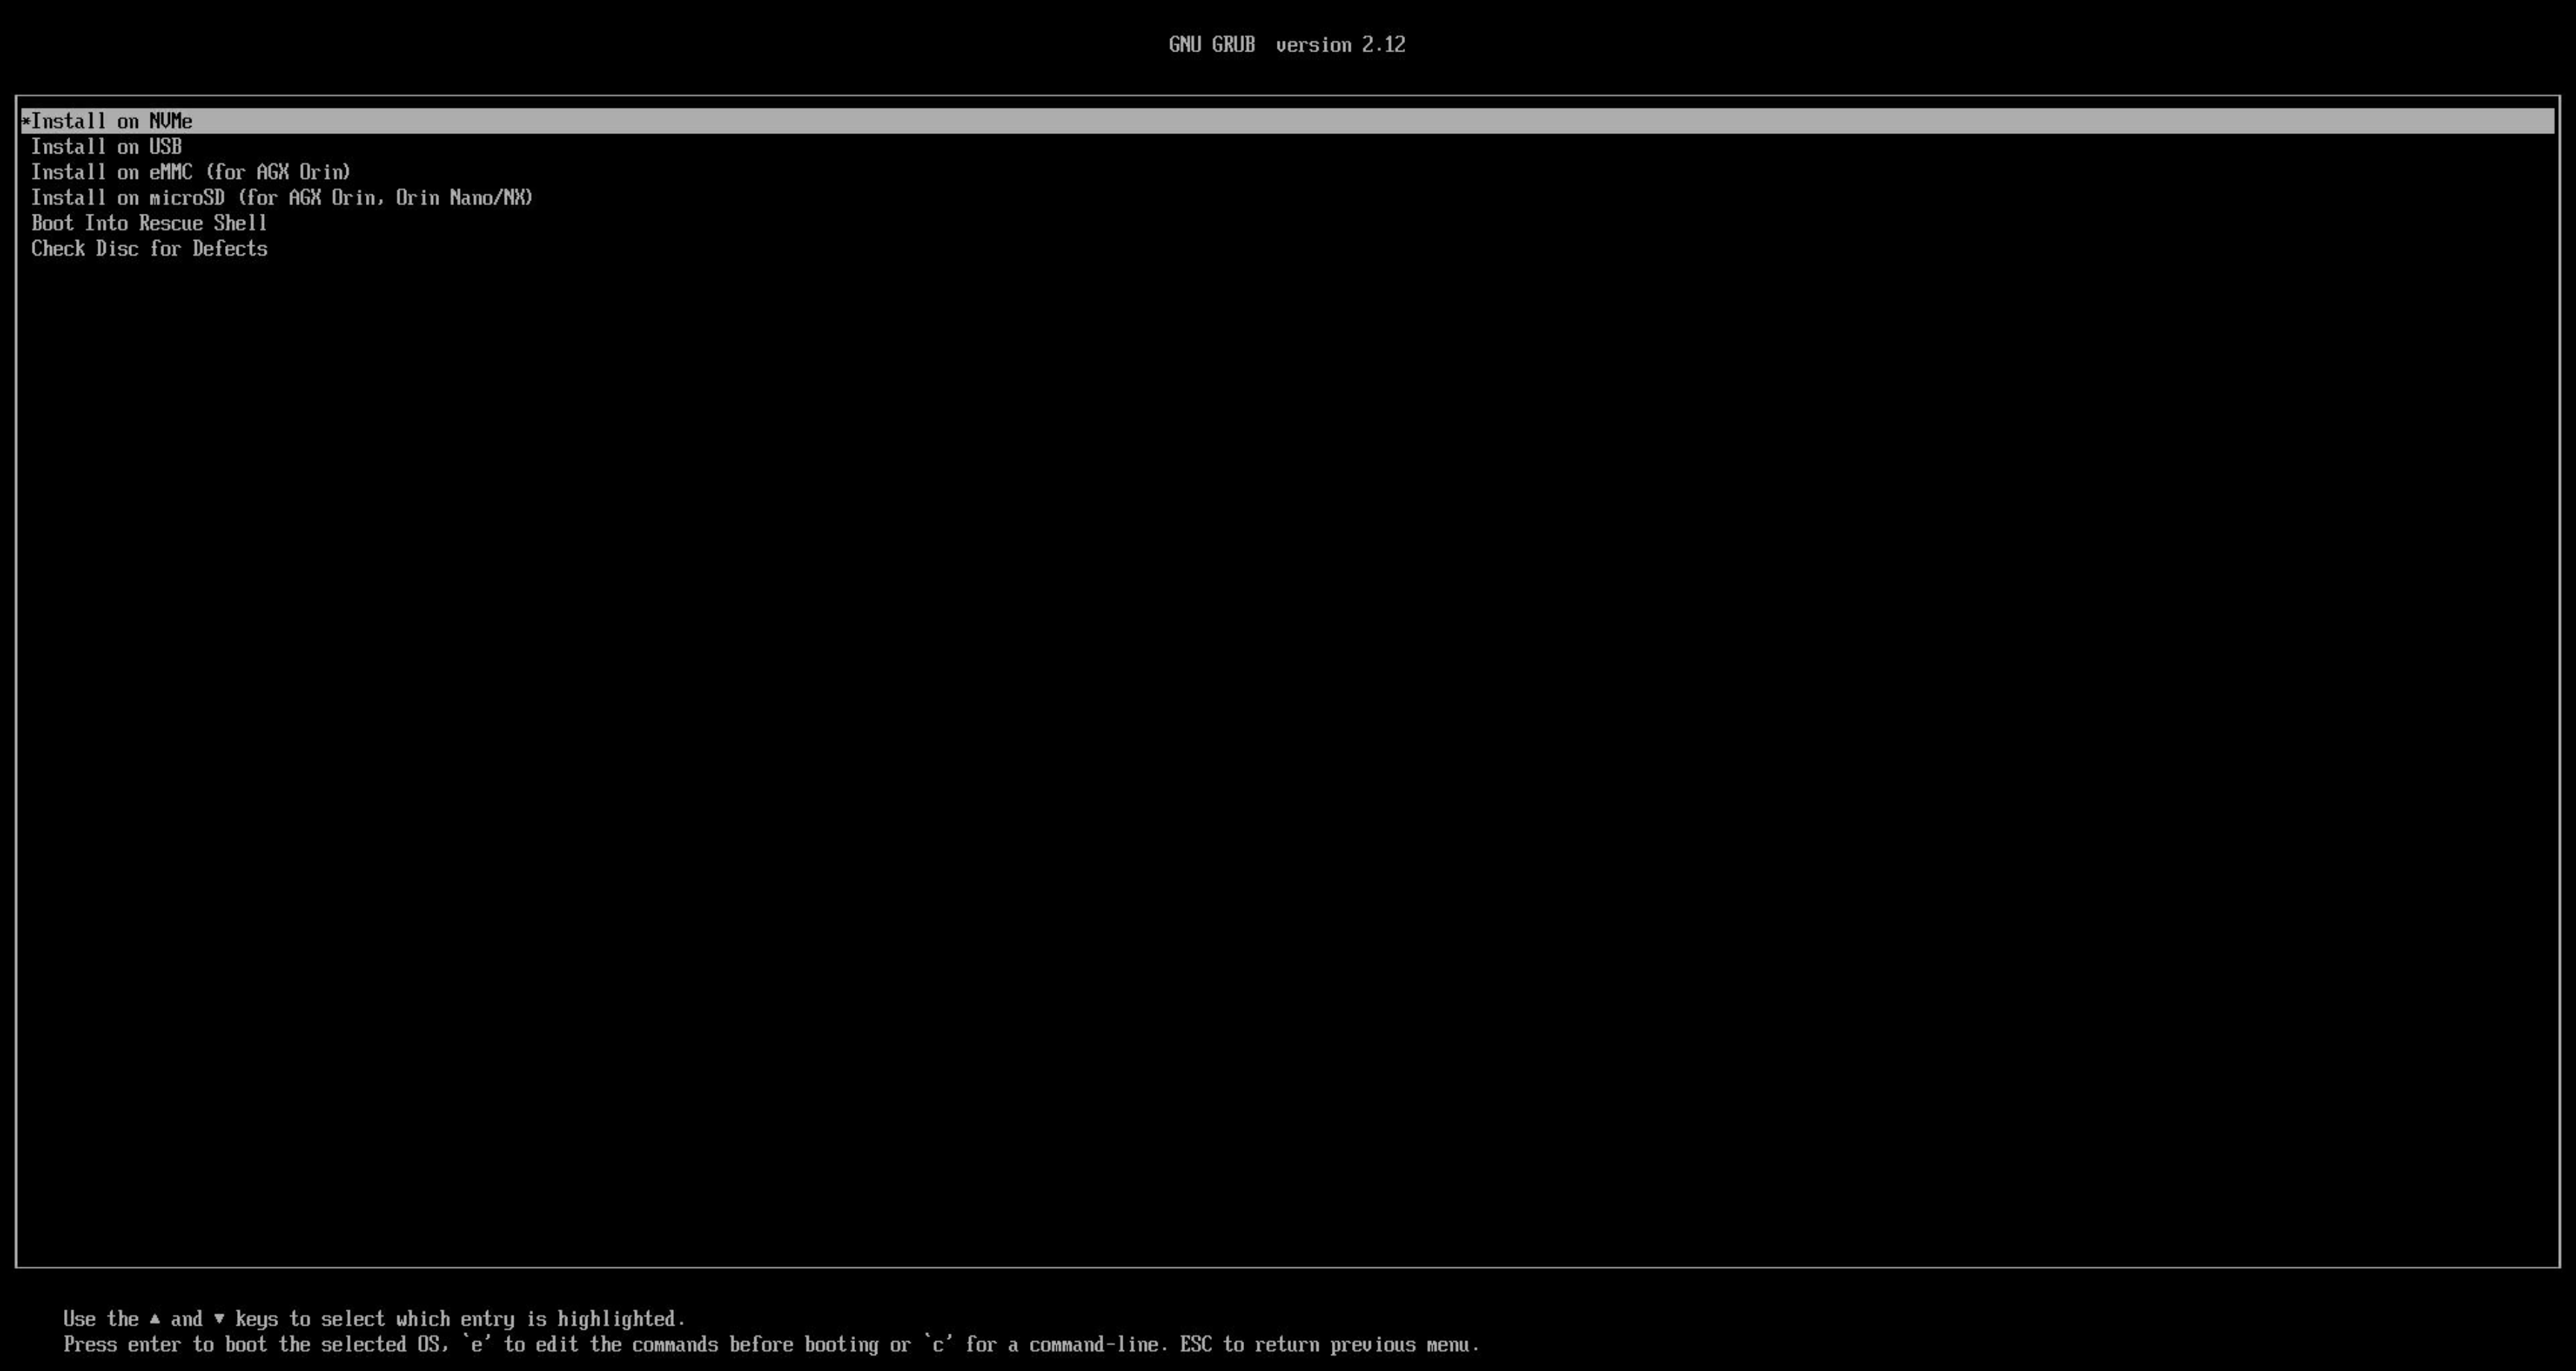
Select a suitable storage option by hitting ↑ (up) and ↓ (down) keys, and press Enter key.
Install on eMMC (for AGX Orin): Use this option for the initial setup path when you want to update the default internal eMMC image.
Install on NVMe: Recommended if you installed an NVMe SSD and want the BSP installed there.
The installation process starts after you select the storage target. During installation, you may see white text scrolling on the screen for several minutes.

After the installation finishes, the developer kit reboots.
5️⃣ Boot BSP from eMMC or NVMe for the First Time#
Important
Remove the bootable installation USB stick after installation. Otherwise, the developer kit may boot from the USB stick again instead of the updated BSP on eMMC or NVMe.
6️⃣ Complete Ubuntu Setup After the BSP Update#
After removing the USB stick, start the initial Ubuntu setup process (oem-config) to create the default user account and finish system setup.
You will see the GUI oem-config screen on the attached monitor.
Open the serial console from your laptop or PC and complete the CUI-based oem-config screens.
Once oem-config is complete, the updated BSP is ready.
Troubleshooting Jetson ISO Installation#
QSPI capsule update prompt appears#
If the installer asks you to confirm a QSPI capsule update, press Y.
This prompt appears when the device firmware is older than the firmware bundled with the Jetson ISO. The update is required for compatibility with the Jetson ISO release and runs before the Jetson ISO installation starts.
If you miss the prompt or are unsure whether the update completed, restart the ISO installation and confirm the capsule update when prompted.
Screen goes black during installation#
Some KVM switches and KVM devices may not handle the video output from the Jetson AGX Orin Developer Kit well during Jetson ISO installation. If the screen goes black or does not display the installer correctly, connect the monitor directly to the developer kit and try again.
Step 3 - Install JetPack Components#
After the BSP is updated and Ubuntu setup is complete, install the JetPack components that match your L4T release.
For the detailed version check and installation commands, see JetPack SDK Setup.
Next Steps#
Congratulations on setting up your Jetson AGX Orin Developer Kit!
The following guides will help you to learn more about the developer kit and setting up your ideal developer environment:
BSP Installation - BSP Installation Options
JetPack SDK Setup - JetPack SDK Setup
Hardware Layout - Hardware layout and connector details
How-to Guides - How-to guides for common tasks