BSP Installation#
BSP Installation Options#
For using NVIDIA Jetson AGX Orin Developer Kit as it is, you can complete the initial software setup in a stand-alone manner from the pre-flashed eMMC.
After first boot, Jetson ISO is the recommended way to update the developer kit to the latest BSP without using a Linux host PC. Besides this default flow, there are optional setup flows in which you use a Linux host PC to run NVIDIA SDK Manager or the L4T flash script.
Comparison#
💾 Start with eMMC |
🛠️ SDK Manager |
📜 Flash script |
|
|---|---|---|---|
📋 Short Summary |
Boot from pre-flashed eMMC, then update with Jetson ISO |
GUI software to flash BSP and install JetPack packages |
Ubuntu script to flash BSP |
🖥️ Ubuntu Host PC |
❌ Not required |
✅ Required |
✅ Required |
⏱️ Flash time |
⚡ Immediate first boot; ISO update time varies |
⌛ About 30 min |
⌛ About 30 min |
🔧 Install BSP? |
✅ Pre-installed; Jetson ISO updates to latest |
✅ Yes |
✅ Yes |
📦 Install JetPack components |
💡 Via apt after boot |
✅ Yes, when chosen in 2nd stage |
💡 Via apt after boot |
👥 Who is this for? |
🌟 Everybody including beginner |
🧑💻 Who has an Ubuntu PC |
🛠️ Product Developers |
Important
JetPack 7.2 is the latest JetPack release for Jetson AGX Orin Developer Kit. It includes L4T r39.2 and supports updating with Jetson ISO.
Direct Download Link: Jetson ISO (r39.2)
Option 1. 💾 Start with eMMC (Default)#
Recommended for everybody.
Your NVIDIA Jetson AGX Orin Developer Kit comes with its eMMC flash memory pre-flashed with L4T BSP image, so you can boot directly into Ubuntu desktop right out of the box.
Note
Your AGX Orin Developer Kit may come with older firmware and an older L4T BSP version pre-flashed (e.g., L4T r35.x / JetPack 5.x). We recommend completing the first-boot Ubuntu setup from eMMC first, then updating to the latest version — currently L4T r39.2 (JetPack 7.2) — using Jetson ISO.
This method is what’s illustrated in the Quick Start Guide.
Update BSP with Jetson ISO#
Jetson ISO is the recommended path to update an AGX Orin Developer Kit from the default eMMC setup flow to the latest BSP. It uses a bootable installation USB stick and does not require an Ubuntu host PC.
Important
Jetson ISO can update AGX Orin Developer Kit to L4T r39.2 when the installed BSP is L4T r35.5 or greater. If your developer kit is running a release lower than L4T r35.5, update it to L4T r35.5 or greater first before using the Jetson ISO path.
If the installer asks you to confirm a QSPI capsule update, press Y. This prompt can appear when the device firmware is older than the firmware bundled with the Jetson ISO. The QSPI capsule update runs before the Jetson ISO installation starts. If you miss the prompt or are unsure whether the update completed, restart the ISO installation and confirm the capsule update when prompted.
Check the currently installed BSP version:
cat /etc/nv_tegra_release
A JetPack 7.2 system reports # R39 (release), REVISION: 2, ....
For the step-by-step Jetson ISO procedure, see Jetson ISO method in the Quick Start Guide.
Option 2. 🛠️ NVIDIA SDK Manager#
For more details, please check the NVIDIA SDK Manager - Install with SDKM.
You would need a separate Linux PC to run the NVIDIA SDK Manager.
You may choose to use SDK Manager when, for example:
You want to flash the base L4T BSP on a different storage medium than the default internal eMMC (such as NVMe SSD, USB thumb-drive, or microSD card)
You cannot give a direct Internet connection to your Jetson developer kits
How to install SDK Manager#
Note
To install SDK Manager you need:
- Ubuntu Desktop 20.04 or 22.04 on x86_64 system (host machine)
System Memory 8GB
Free disk space: minimum of 25GB
Check NVIDIA SDK Manager - System Requirements for detail.
On your x86-64 PC, click here to download the Debian package file for the latest SDK Manager.
Attention
To download (and later run) SDK Manager, you need NVIDIA Developer Program Membership.
Log in or sign up for an NVIDIA account.
The Debian package file is named as sdkmanager_[version]-[build#]_amd64.deb, like sdkmanager_2.2.0-12028_amd64.deb.
In the directory where you downloaded the file, issue the following command to install the Debian package.
sudo apt install ./sdkmanager_*-*_amd64.deb
Login and Run SDK Manager#
You can launch the SDK Manager either by clicking the icon from Ubuntu launcher, or type the following command in the terminal.
sdkmanager
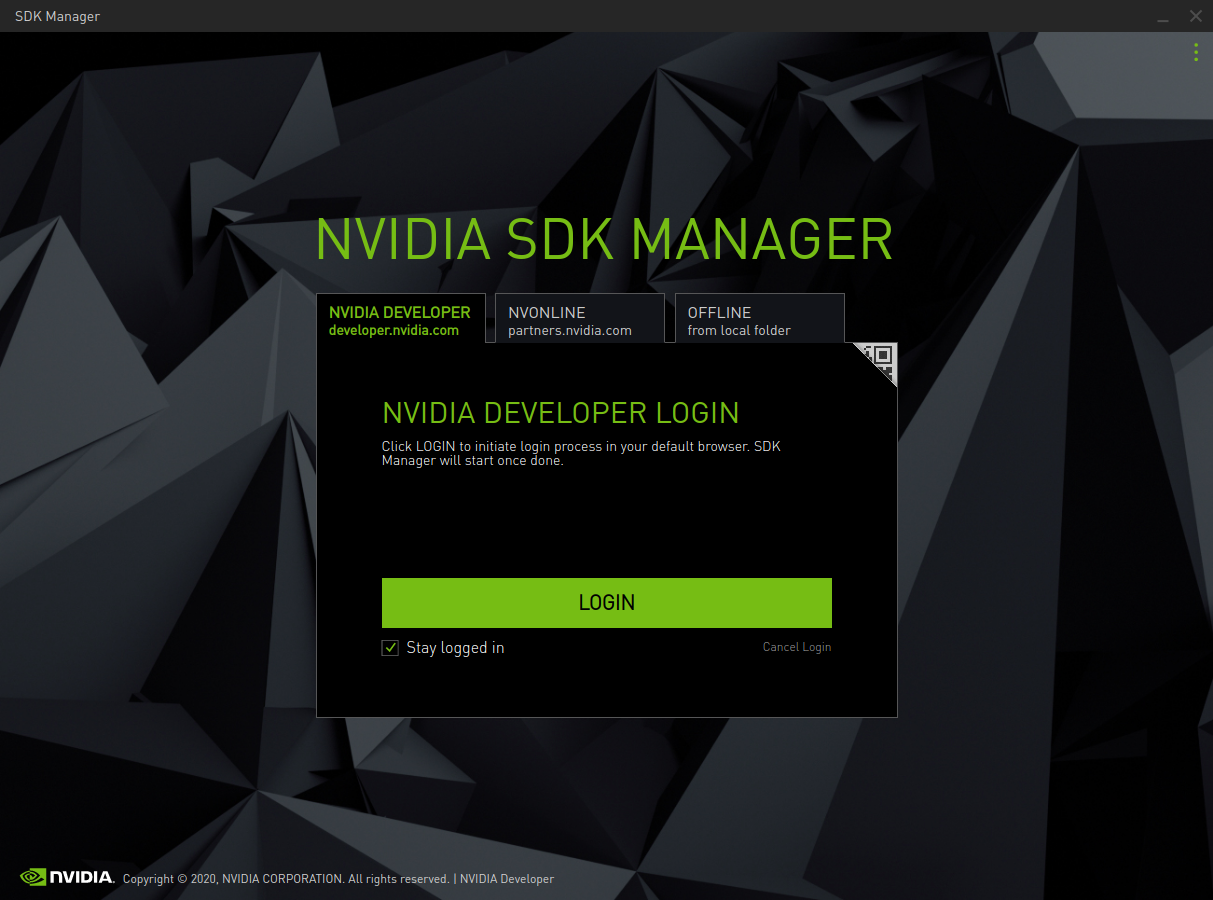
On the initial login screen, click NVIDIA DEVELOPER tab and press LOGIN button. Complete the login process on a web page, then come back to SDK Manager.
Note
For the detail instruction, see NVIDIA SDK Manager - Login and Run
How to use SDK Manager to Flash L4T BSP#
Hardware Setup#
Connect NVIDIA Jetson AGX Orin Developer Kit to the PC with the bundled USB Type-A to Type-C cable.
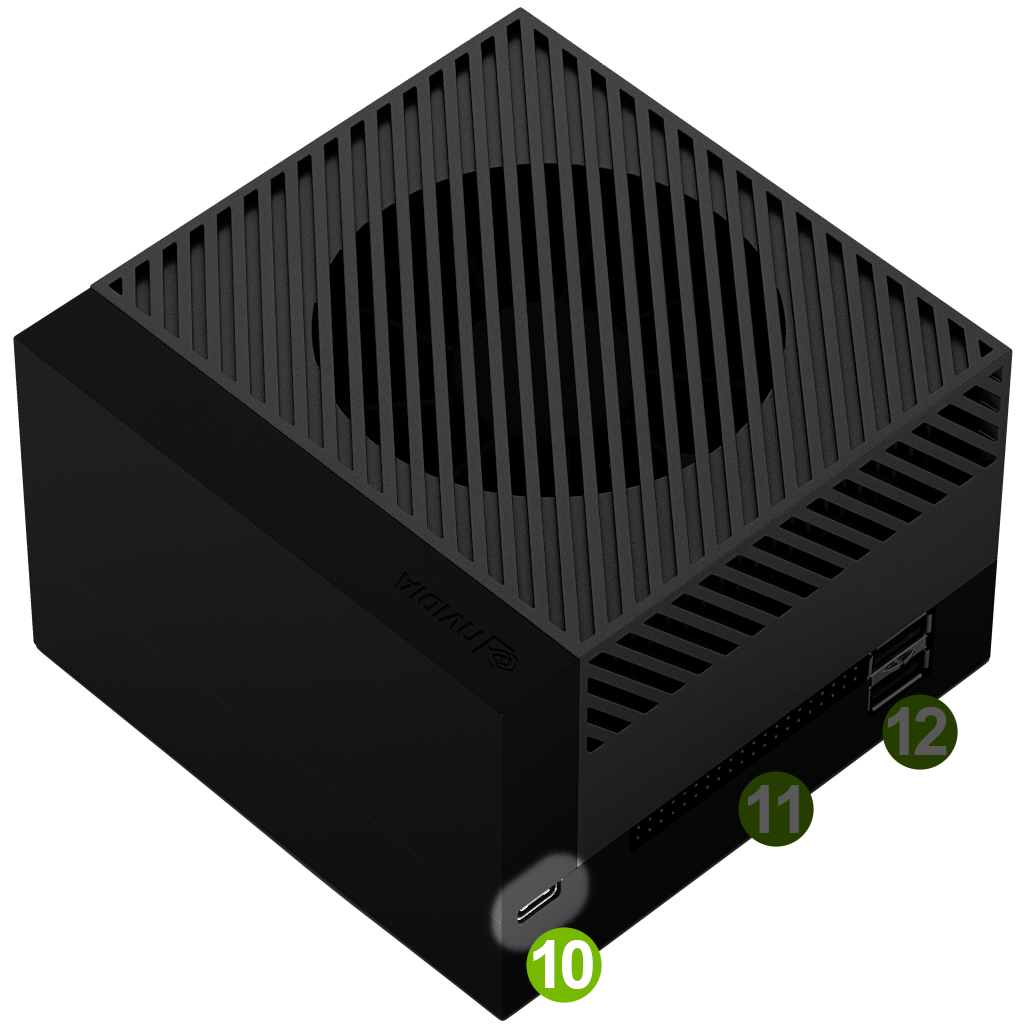
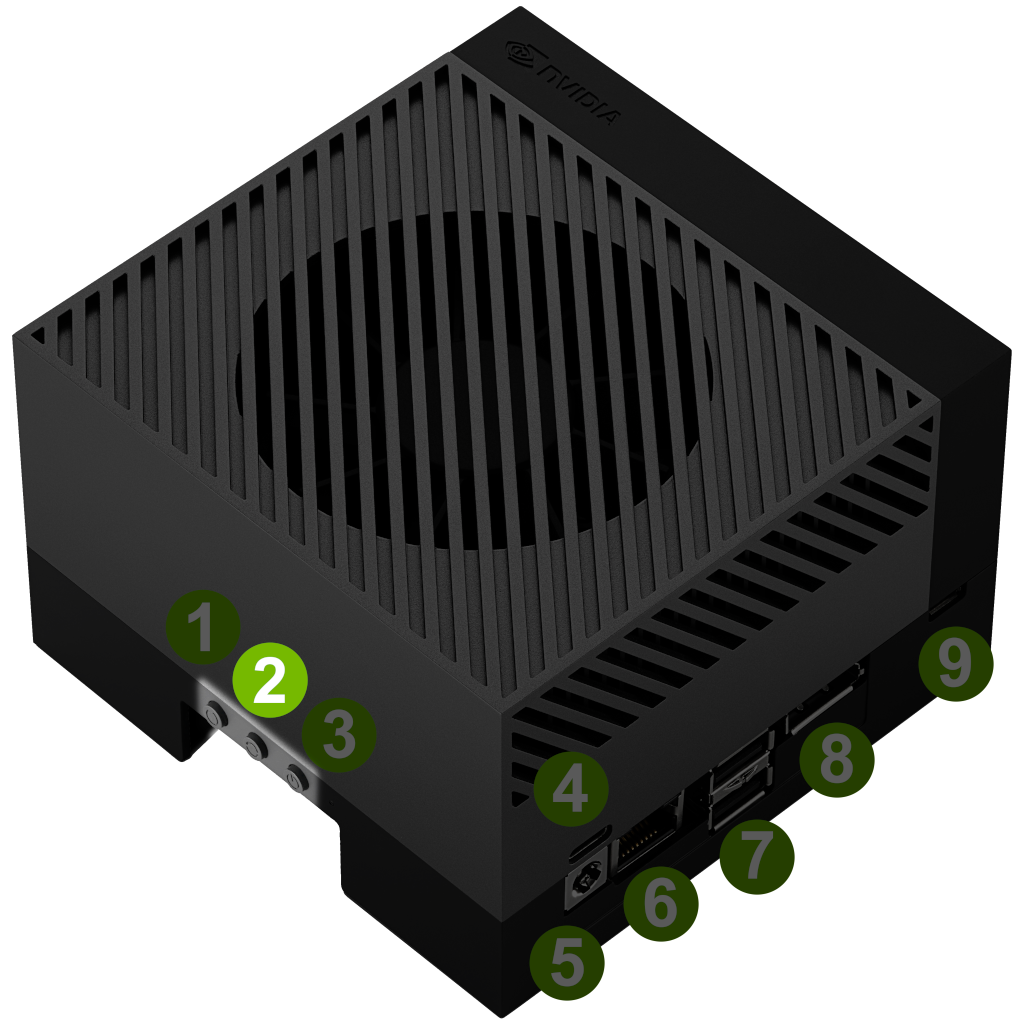
Make sure you put the Type-C plug of the cable into the USB Type-C port ( 10 ) next to 40-pin connector for flashing.
While holding the middle Force Recovery button ( 2 ), insert the USB Type-C power supply plug into the USB Type-C port above the DC jack.
This will turn on the Jetson dev kit in Force Recovery Mode.
Steps#
Launch SDK Manager
- On the Step 01 Development Environment window;
From the Product Category panel, select Jetson.
From the Hardware Configuration panel, de-select “Host Machine” and select Jetson AGX Orin module for Target Hardware.
Click “CONTINUE” button.
- On the Step 02 Details and License window;
From the Target Components panel, just select “Jetson OS” to install the base L4T BSP, and deselect “Jetson SDK Components”.
Review the license.
Enable the checkbox to accept the license agreements.
Click CONTINUE button.
Before the installation begins, SDK Manager prompts you to enter your sudo password.
Step 03 Setup Process window shows the download progress.
SDK Manager opens a dialog when it is ready to flash your target device. A prompt provides instructions for preparing your device to get it ready for flashing.
- On the flashing prompt;
Select “Manual Setup - Jetson AGX Orin” for 1.
Ignore 7, OEM configuration.
Select your desired storage device to flash the L4T BSP to for 8, Storage Device.
Click Flash button.
When flashing is done, the Jetson developer kit will reboot and boot into the L4T BSP.
You can complete the OEM Config.
Now you can install the JetPack components using JetPack SDK Setup.
Option 3. 📜 “Linux_for_Tegra” flash script#
For advanced users and product developers, you can use the flash.sh script from the Jetson Linux (L4T) package to flash a Jetson device.
See the Flashing Support section in the Jetson Linux Developer Guide for your target L4T release.