JetPack SDK Setup#
Note
Make sure your NVIDIA Jetson AGX Orin Developer Kit has the base L4T BSP flashed, the Ubuntu system is up and running, and you can login to the system.
See BSP Installation for instructions on flashing the L4T BSP.
Install via apt#
You can also install JetPack components directly on the Jetson without using SDK Manager:
Open a terminal window if you are on Ubuntu desktop ( Ctrl + Alt + T ).
Attention
Check your L4T version first to make sure your developer kit is running the latest BSP.
cat /etc/nv_tegra_release
A JetPack 7.2 system reports # R39 (release), REVISION: 2, ....
If your system reports an older L4T release, update the BSP first using the Jetson ISO method in the Quick Start Guide. After the BSP is updated to L4T r39.2, return here to install JetPack components.
sudo apt update
sudo apt dist-upgrade
sudo reboot
sudo apt install nvidia-jetpack
This will install all JetPack components including CUDA, cuDNN, TensorRT, and other libraries. It can take about an hour to complete the installation depending on the speed of your Internet connection.
Note
For more detail, see the “Package Management Tool” section of JetPack documentation.
Install via SDK Manager#
You can also use NVIDIA SDK Manager to install JetPack components. See BSP Installation for instructions on flashing the L4T BSP using SDK Manager.
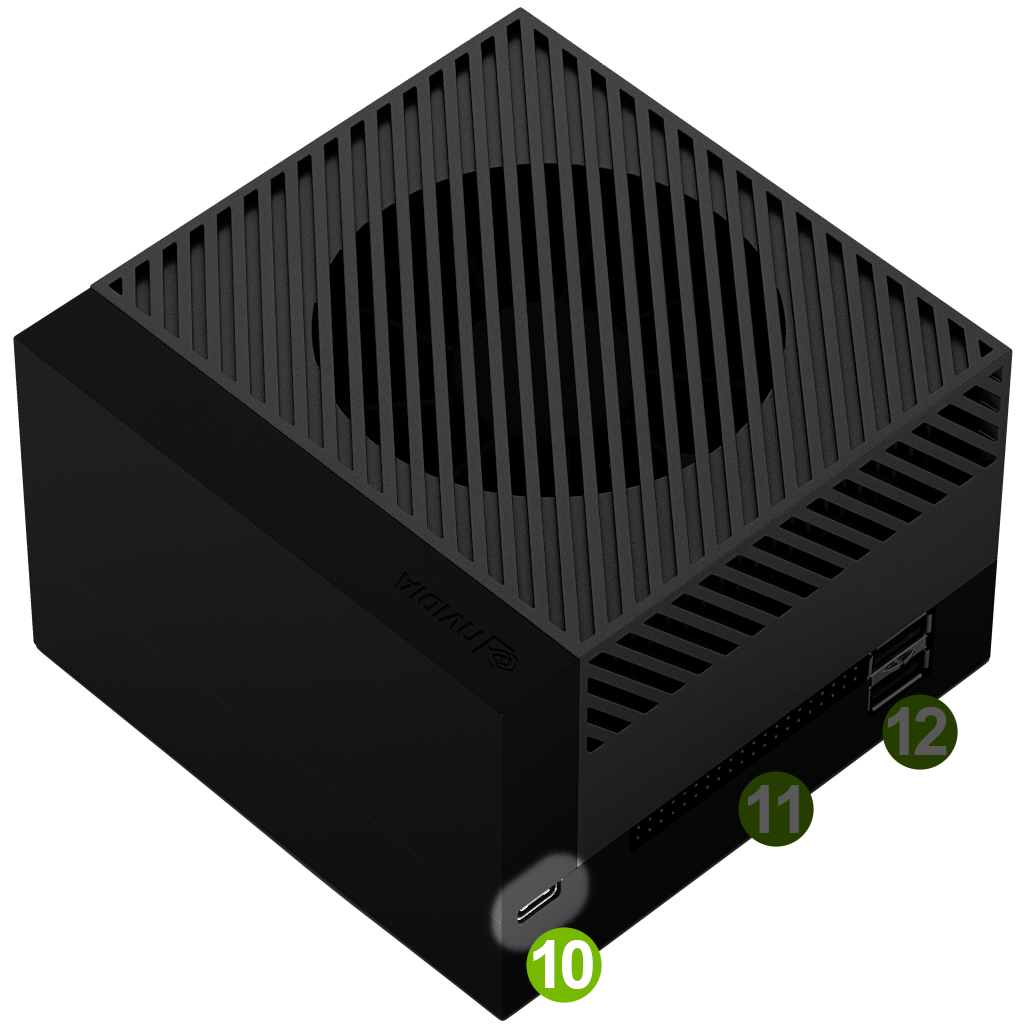
While the NVIDIA Jetson AGX Orin Developer Kit is turned on, connect it to the PC with the bundled USB Type-A to Type-C cable.
Make sure you put the Type-C plug of the cable into the USB Type-C port ( 10 ) next to 40-pin connector.
Steps to install JetPack components via SDK Manager
Launch SDK Manager
- On the Step 01 Development Environment window;
From the Product Category panel, select Jetson.
From the Hardware Configuration panel, de-select “Host Machine” and select Jetson AGX Orin module for Target Hardware.
Click “CONTINUE” button.
- On the Step 02 Details and License window;
From the Target Components panel, de-select “Jetson OS” and select “Jetson SDK Components” to install all the rest of the JetPack components.
Review the license.
Enable the checkbox to accept the license agreements.
Click CONTINUE button.
- Step 03 Setup Process window immediately brings up a dialog for inputting login information to install JetPack components
Leave the Connection as “USB”.
Leave the IPv4 address as
192.168.55.1.Click “Install” button.
Once the dialog is closed, the download progress is shown on the Step 03 Setup Process window.