Step #1: Interacting with Riva Speech AI APIs
Within this lab, you will work with Riva’s offline (non-streaming) speech APIs using a Jupyter Notebook. Then you will also try example applications that use Riva’s streaming speech APIs.
For this lab, the Riva Speech Skills server has automatically been set up for your convenience. The setup instructions provided in the Setup a Speech AI Server with Speech Recognition and Text-to-speech Models section of this lab.
A video tutorial overview is available on YouTube. For detailed step-by-step instructions please refer to Setup a Speech AI Server with Speech Recognition and Text-to-speech Models section of this lab.
Riva ASR and TTS supports both offline (non-streaming) and online (streaming) modes and in this lab we will explore both the modes. These modes are distinct such that one mode focuses on maximizing the throughput by capturing the complete input data (audio in the case of ASR and text in the case of TTS) at once before sending it to the Riva Speech Server and the other mode focuses on minimizing the latency by sending chunks (with a specified length) of input data and returns the intermediate output (text in the case of ASR and audio in the case of TTS) back to the client.
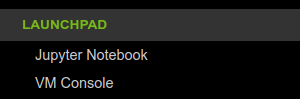
The Riva lab will use two important links from the left-hand navigation pane throughout the course of the lab.
For ASR in offline mode, the full audio signal is first read from a file or captured from a microphone. Following the capture of the entire signal, the client makes a request to the Riva Speech Server to transcribe it. The client then waits for the response from the server. For TTS in offline mode, the audio is not returned until the full audio sequence for the requested text is generated.
Please follow the below steps to learn how to use Riva’s python API for making non-streaming requests to Riva Speech Server.
Click on the Jupyter Notebook link on the left-hand navigation pane to access to the Riva samples notebooks.
Refer to
asr-python-basics.ipynbandtts-python-basics.ipynbto explore the usage of Riva’s offline ASR and TTS APIs. Please complete the notebooks as an exercise before moving forward!
When ASR is configured in online mode, a request is made to the server as soon as an audio segment of a specified length (a.k.a., chunk size) is captured. On the server side, a response is returned as soon as an intermediate transcript is available. For TTS in online mode, audio chunks are returned as soon as they are generated which significantly reduces the latency (as measured by time to first audio) for large requests.
Please follow the steps below to try the samples that demonstrate the Riva’s streaming speech APIs.
Open the VM Console by selecting VM Console on the left-hand navigation pange. The console prompt starts at your home directory
To try the streaming examples, you can leverage the same container as the Jupyter notebook. This container has all the dependencies required to run the examples. Enter the already running daemon container.
docker exec --workdir /work/examples -it riva_daemon_client /bin/bash
Streaming Automatic Speech Recognition (ASR)
Now, have a look at the python script example that uses Riva’s streaming ASR API.
The riva_streaming_asr_client.py script can be used to transcribe audio speech into text using Riva’s streaming StreamingRecognize API. This example reads chunks of audio from a sample .wav file, and sends a stream of this data to the StreamingRecognize API. For the sake of brevity, we keep this lab limited to trying out the provided examples. Feel free to take a peek inside to see how it actually getting used.
            usage: riva_streaming_asr_client.py [-h] [--num-clients NUM_CLIENTS] "Number of client threads"
                                    [--num-iterations NUM_ITERATIONS] "Number of iterations over the file"
                                    [--input-file INPUT_FILE] "Name of the WAV file with LINEAR_PCM encoding to transcribe"
                                    [--simulate-realtime] "Option to simulate realtime transcription"
                                    [--word-time-offsets] "Option to output word timestamps"
                                    [--max-alternatives MAX_ALTERNATIVES] "Maximum number of alternative transcripts to return (up to limit configured on server)"
                                    [--automatic-punctuation] "Flag that controls if transcript should be automatically punctuated"
                                    [--riva-uri RIVA_URI] "URI to access Riva server"
                                    [--no-verbatim-transcripts] "If specified, text inverse normalization will be applied"
                                    [--language-code LANGUAGE_CODE] "Language code of the model to be used"
                                    [--boosted_lm_words BOOSTED_LM_WORDS] "Words to boost when decoding"
                                    [--boosted_lm_score BOOSTED_LM_SCORE] "Value by which to boost words when decoding"
For example, to obtain transcripts of the sample audio file provided, use the command.
python3 riva_streaming_asr_client.py --input-file "/work/wav/en-US_sample.wav"
The output will be saved in a text file in the current directory e.g. output_0.txt. In this file, you would observe the intermediate transcription at each timestep that the Riva ASR Speech AI server has returned. When the server detects a pause, it prints the final transcript of that input with a tag like Transcript “x”:
cat output_0.txt
Streaming Text-to-Speech (TTS)
The client container also contains binary command-line client applications for try Riva services.
The riva_tts_client command-line application synthesizes human-like voice using Riva’s streaming TTS SynthesizeOnline API.
            usage: riva_tts_client [--text=] "Input text to Synthesize to audio"
                       [--audio_file=] "Output file path to write the utterance"
                       [-o] [--riva_uri=] "URI (server_name:port) to GRPC server endpoint"
                       [--rate=] "Sample rate"
                       [--language=] "Language code"
                       [--voice_name=] "Name of the TTS voice. ljspeech by default"
                       [--online=] "true/false. --online=true indicates streaming TTS, and false indicates offline (non-streaming) TTS. "
To convert text to audio, use the command below. Note that we use the online mode for streaming TTS.
riva_tts_client --riva-uri localhost:50051 --online=true --text="Hello, welcome to Riva on Launchpad." --voice_name="English-US-Female-1" --audio-file="/work/notebooks/tts-output.wav"
The generated audio file will be stored in the /work/notebooks/ directory. To hear the utterance, you can click on the Jupyter Notebook link on the left-hand navigation pane, which will (by default) open at /work/notebooks/ directory. Then, you can either double click on the wav file and play it, or download the wav file from the Jupyter browser and then play it with your local audio player software.