

Installation Guide for NVIDIA Mission Control autonomous job recovery#
Introduction#
This guide explains how to install NVIDIA Mission Control autonomous job recovery, which is included in the NVIDIA Mission Control on-premises software bundle for DGX SuperPOD B200 and DGX SuperPOD GB200. Mission Control autonomous job recovery is a suite of microservices deployed in a Kubernetes cluster. It integrates components of the AI training lifecycle into a unified, automated workflow that minimizes downtime. The software automates manual and automated recovery processes and handles most AI workflow failures without input from model engineers. This capability increases productivity and helps you scale successful AI training practices across current and future generations of AI supercomputers.
Note: This project will download and install additional third-party open source software projects. Review the license terms of these open source projects before use.
Prerequisites#
Mission Control autonomous job recovery requires the following prerequisites, which NVIDIA Mission Control installs through the installation wizard:
BCM license that allows Mission Control autonomous job recovery installation
Kubernetes is deployed and configured with the
cm-kubernetes-setupwizard. In addition to Kubernetes, apply the following configuration changes and install the following packages:Kyverno is disabled during Kubernetes installation
Prometheus Operator Stack is installed
Prometheus Adapter is installed
Grafana Loki is installed
Grafana Alloy is installed
Disable collection of logs in
/var/log.With the default Grafana Alloy configuration, store Mission Control autonomous job recovery logs under
/homeso that Alloy can collect and send them to Loki. This location is not a strict requirement. If you store job logs elsewhere, update the Alloy configuration to monitor the target directories.
Kubernetes Metrics Server is installed
Kubernetes State Metrics is installed
Local Path storage class is enabled with the default NFS-based storage path
Ingress NGINX Controller is installed
Slurm is deployed with the
cm-wlm-setupwizardMySQL is installed on the BCM head node
Have credentials ready for the MySQL
rootaccount or another administrative account. The alternative account requires the globalCREATE USERprivilege, theCREATEprivilege for the Mission Control autonomous job recovery database, and the required database privileges withGRANT OPTION. TheCREATE USERprivilege permits the account to create and alter users.
NGC (NVIDIA GPU Cloud) token to pull the images from the registry. Refer to the next section to obtain one if you do not have it already.
The following image shows an example configuration produced with the BCM Setup Assistant (the cm-kubernetes-setup tool). Options and packages might differ. For operator installation instructions, refer to Kubernetes Installation.
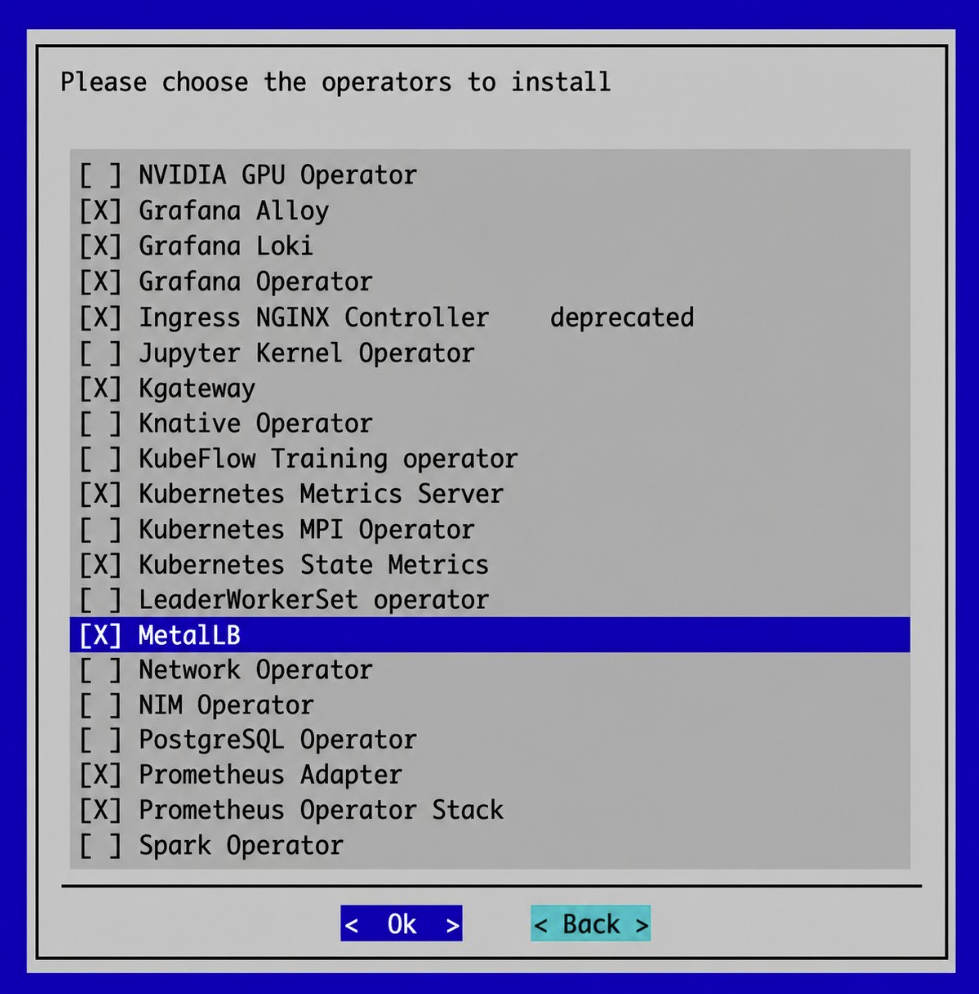
Install all prerequisites before beginning the Mission Control autonomous job recovery installation.
Before installing Mission Control autonomous job recovery#
The following additional steps are required before the Mission Control autonomous job recovery installation can begin:
Important
The steps in this section and the installation procedure differ for air-gapped environments. If you are installing Mission Control autonomous job recovery in an air-gapped environment, follow NVIDIA Mission Control autonomous job recovery (air-gapped) instead of this guide.
Obtain the NGC token (Skip if already done)
The software artifacts required for the deployment and operation of Mission Control autonomous job recovery are stored on NGC (NVIDIA GPU Cloud). For this reason an NGC token is necessary for the installation process to pull the required resources such as the Helm charts and the container images.
To obtain a valid NGC API token from the NGC console, you will need to have a subscription with the appropriate entitlement for artifacts in the NVIDIA Mission Control NGC collection of the NGC Catalog.
If your organization’s subscription hasn’t been activated yet, follow the instructions here to do so (must be organization owner).
Once the organization’s subscription has been activated, sign in as the organization owner: https://docs.nvidia.com/ngc/latest/ngc-user-guide.html#sign-in-account-owner
Once you’ve successfully gained access to the NGC console, generate an NGC API token (choose one):
Service Key: https://org.ngc.nvidia.com/service-keys
Personal API Key: https://docs.nvidia.com/ngc/latest/ngc-user-guide.html#generating-a-personal-api-key
Make sure to select ‘NGC Catalog’ under ‘Services Included’ when creating your personal key.
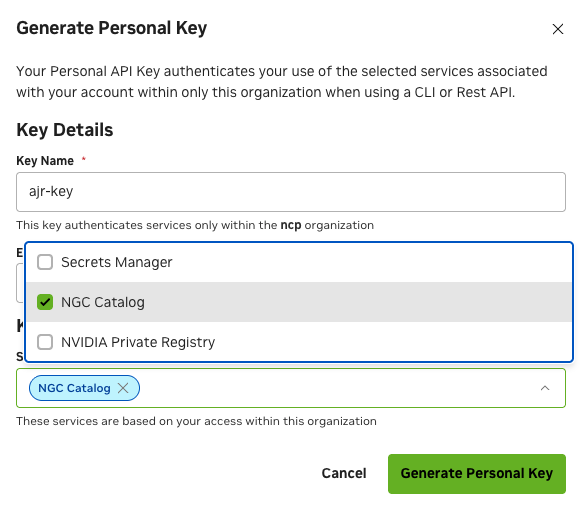
Create the Kubernetes namespace for Mission Control autonomous job recovery.
Create a file named
create-are-namespace.yamlon the active BCM head node with the following content:
apiVersion: v1
kind: Namespace
metadata:
  name: heimdall
Apply this file on the active BCM head node:
kubectl apply -f create-are-namespace.yaml
namespace/heimdall created
Run
cm-mission-control-setupto fetch thecm-setup-ajr-bcm11plugin package if this is the first Mission Control autonomous job recovery installation in the cluster. Exit the wizard after it installs the plugin package. This step installs only the plugin; it does not install Mission Control autonomous job recovery.Run
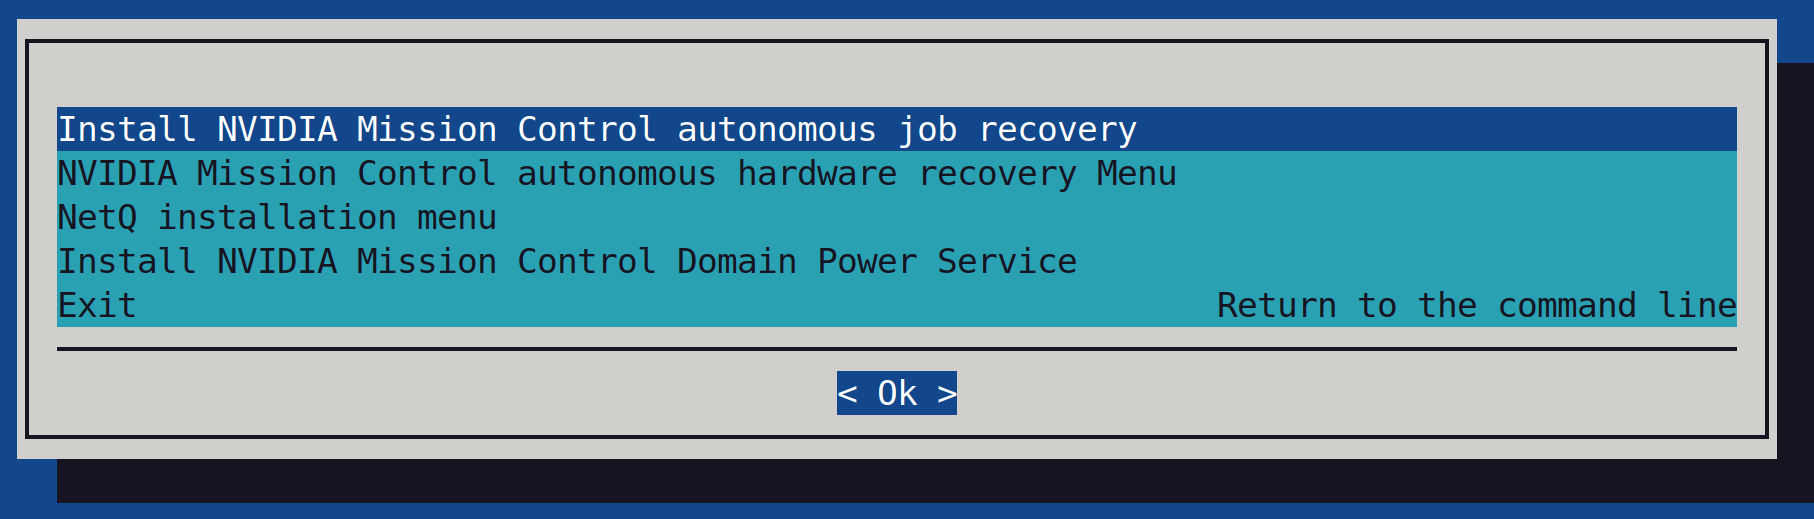
cm-mission-control-setupand select Install NVIDIA Mission Control autonomous job recovery.
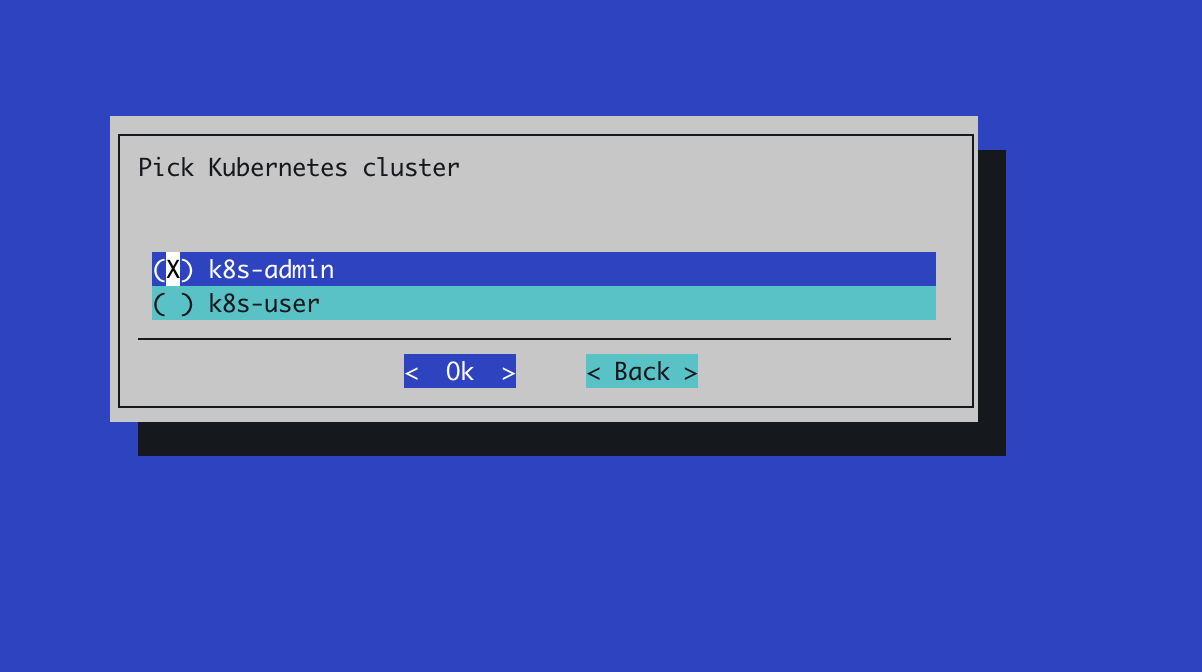
Select k8s-admin on the next screen.
After the plugin package is installed, exit the wizard.
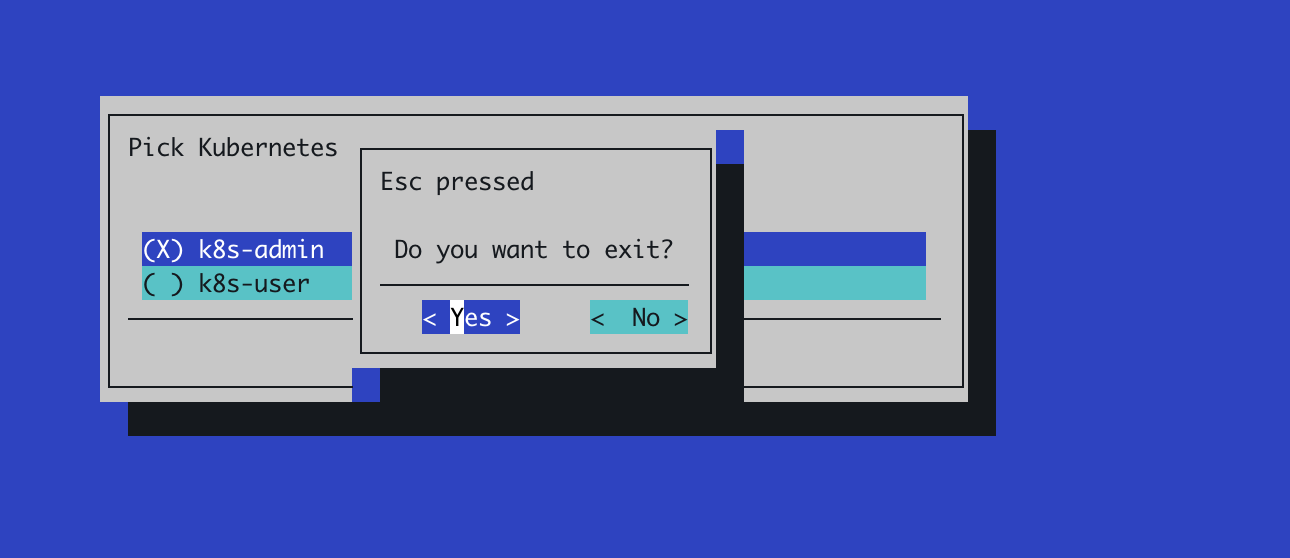
Export desired version of product and Helm/container registry repositories. This step must be performed before starting the Mission Control autonomous job recovery installation.
Before running the following commands, update the values to match your environment. Replace each placeholder with the appropriate value for your deployment:
REGISTRY— Your container registry URL.AJR_FQDN— The fully qualified domain name that matches your TLS certificate.HELM_REPO_URL— Your Helm repository URL.
export REGISTRY="nvcr.io/nvidia/nv-mission-control" # official public registry
export AJR_FQDN="ajr.customer-domain.com" # replace with the certificate domain name
export HELM_REPO_URL="https://helm.ngc.nvidia.com/nvidia/nv-mission-control"
Apply the patch before starting the Mission Control autonomous job recovery installation.
echo "H4sIANpasmkAA81Y/3fTNhD/3X+F5lK6rXG8FNggg70GCKN7pe0SYNvj8fxkWU5EZMlIckvetv99J8lOnMZldBuw/BDZ0unudPe5L/LOF3HKRJxiPQ8INugHFJuijFNSRKTSRhb9EhsyR/fvo/HpkyCKIhSTIuaSYB7jstTwFmlqqjLmLI3LpZlLcas/OIg1MzQqMVngGbVUnqjk1YwJHePKSCELWenkjUwTRYk8p2oZG1qUHBvYASokGc1xxY3uL3HBg/39/c8mvC/oRXB4iKJbg97gO7Tvh8PDAGFjFEsrw6QAXdQ5I3QYIISowCmn2RAZVVE7wQpQZhhE8IgULSXoKNVyiMQ5UX0mY3HOMoZhiAqmtWVHpDBK8jjHxDS8g/3L+3cn4x+Pps8nv+1uEjYizyrOp5QoarRTDKEICVzQIXCZwXQWBOhCqkXO5UUjklPlaItKzGjS1hzgMP8Qnd1Or6zf0lLTr8HKRZ4wwcw/EtCh8hXiuigv+ePTCRXaYA4gA66JWZbgBcCaw8s5FSZJq8ZJFfjRuylUOE2ZKd6GDoF3b/cAgO7f4q8DaTUCav6POAQyVUdngQcOZwTrIbpjT+5t8AEHhziJCiyA2h243tc6b5sA5BBZwBvo9GqvtbL3uq0e8M7ZrD4ul7OEgw34EGyUS3fSwa3v7FH94GINohbzZZRRQ4mLOKYlGFOq7pC7yhDXOfnVMrsN8R56axeIN/Azw1yvDr5g9SNCkNQSXLLEyAUViXZRm3gUzCkrMoBOZDdEjsAb6d63vcFtsJIfPSRqi0K2mx17ox6dPDltVrRReDYDRI4bgz2fvBg3q2mVwuRPMtWby5FfJpIsSmae/Pz4BKAJ4A19BFxa2dsd/TRJ7PPuXsOZviPgAjDJiczo1DCyYIJq3akFpzNMlqN1cp1QDdl4RftkdDyticFoFtOW6MSZCqvCrzjv1Ga0ceTzXRjU6jYQfV3zUTPt3qLV3usARNGCAolzeStU3oeRri0IbYTpwE+UUsEJ7n5z9xv/vqo0FgIHg3u9e2jfDwCAAGVQz1OJVdYRF9cB/4pPN9bXy1vGbmqLlSZmCtyc5G8z4dPd/uXJy2ipV+u4MKtgsQe3/Gs/v1ERocp4I9y+ZZOFH9ZRcPx4dJa8mByB+3mGSz2M4wLbNBBuUDw7fXHyPDkbPX8KhLa3iC1jvUn08OjkceJgT8QDRXEmBV8qKU0vIw9I4f59jgmbaFnvOxtNp7+cTh7D7hDtoPE7CEJiUK5ksd3VZDE1xI59mySbAOtkduNLMFXp1iag0imodIa1/juef5DKoCg/QFG2F+59dW2V2naZjkeTR0+Th6PpGBTatkUT0mD/R6Npy4HOJRHBK5IFXbZW+vDqa97BnTu9wQC868e1ewl+iXlFa6OGl7SWJRWWkVfdOjQmuF9SyFlISMPyOm3ofxkmG7y6Q2WTxGetGtSaQ6O6Smw5lAbaWng0x0LYDP5r/YNzNrUAYUjiBhFP4jG3nZ9hwxlwonPJM6qQXekhZtAFAw4pRbb5VSyDuoTSJcJIE8VKg2wnrJAUfXQkkJlTlFemUrQHz0yvNtN3NlMxw2GnXtAM5VJB+Lr2BZWApNL0PX6vLA+fXz/QLktbfdcQfV0s9Vue2Bc/PZfarKbti8flt/dc0nGDy7wX9rpEu/qR6wCq5tINpWYRJOzsoJeSVwXV/s3+n7uJZ7IStuH3d5a7LnrqsYkeCvKVFAX0I0NrCnsRAA/p9TXmOiq3d3brvUGxZZ6trL9lvcYJdQVpXrc7DV2lvh/fEllXpy4BH/9u6/vdT3SXbQlb3V0PBg6sg40CuXHTuCGB39w1l+GaoIR6AveZzGbZZrbegFkmzaraVQryVDg3xtXZOeVFX8xI34MG6kZxNX5WXaTnsft0fPwsmYzPTqF4H++G7X6uhAtt3Wes+4LmTnupybM/eyQgtN8vghTsWJVJxtSDy8Xiv7W/FxQGAcvRKyiyYNu17BC9/t6mLAFKUjKXKHzo1iA5uRRI3zFtdA9SZrmEoEBSMRCGOcoZp9qlMPdZxq71+317VlJCNUctGdvfMD7Vx5NObVp4/Lh6BNTXzy67OsyJWQ8VeGFt5/VDMl9ZWDf2LBagNYrKTb+tjva5vkNt2PTTaNP23Ib0nAUByVCMbt70cARzDdD97i+IQaCh+EYMhXpnXRN2bvzePP+5E36+T4st3VbFBHRrnv8vum0mRVBwY+Kja9kuYMFfMNFpQDoWAAA=" | base64 -d | gunzip | bash
Create certificates for Mission Control autonomous job recovery endpoints#
Mission Control autonomous job recovery provides a web UI and other management endpoints. We strongly recommend enabling TLS encryption and authentication. You can acquire a publicly signed certificate or create a self-signed certificate.
Choose a domain that will be used for the application’s endpoints in the customer’s environment, e.g.
ajr.customer-domain.com.Have the customer’s IT team generate a wildcard certificate by a trusted certificate authority for the domain that was chosen, e.g. the certificates for the
ajr.customer-domain.comdomain would be for*.ajr.customer-domain.com.One way of generating publicly-signed wildcard certs manually yourself is by leveraging a service like letsencrypt using the certbot binary. One limitation of generating certificates this way is that they will need to be rotated every 90 days, so leveraging certificates managed by the customer’s IT team is the preferred method.
A self-signed certificate also can be used for the environment. If it needs to be created, follow steps in the Backend Setup with a Self-Signed Certificate Guide to generate it.
The following example demonstrates how to generate a certificate when your domain is managed with Route53 as your public DNS provider:
Generate wildcard certificates using certbot. Note: You will need the person who has the ability to add DNS records to the customer’s DNS zone present when running this command. Make sure to replace the value with the correct domain when setting the
AJR_DOMAINvariable:export AJR_DOMAIN=ajr.customer-domain.com
apt-get update && apt-get install -y certbot

certbot certonly --manual \
  --preferred-challenges dns \
  --debug-challenges --agree-tos \
  -d "*.${AJR_DOMAIN}","${AJR_DOMAIN}"
Two TXT records will be produced that will need to be added to the DNS zone under the same entry (DNS standards allow for multiple distinct TXT records with the same name). Sample output of a DNS record to be added:
Please deploy a DNS TXT record under the name:

_acme-challenge.ajr.customer-domain.com.

with the following value:

zeLqHJbd7WG3JQCXZJbADYhWbk0kI8ADiw6KMVoS_Fk
Once you add all the DNS TXT records to your public DNS, you should see a message like this
Successfully received certificate.
Certificate is saved at: /etc/letsencrypt/live/ajr.customer-domain.com/fullchain.pem
Key is saved at:         /etc/letsencrypt/live/ajr.customer-domain.com/privkey.pem
This certificate expires on 2025-07-24.
These files will be updated when the certificate renews.
Copy the generated certs to a directory named by domain to the local directory for easy access:
sh -c "cd /etc/letsencrypt/live/; tar -chf - ${AJR_DOMAIN}" | tar -xvf -
Save the copied
.keyand.crtfiles from the new directory somewhere safe as they will be needed at a later step in the installation:cp ${AJR_DOMAIN}/privkey.pem ajr.key cp ${AJR_DOMAIN}/fullchain.pem ajr.crt
Create a kubernetes secret using the following command:
kubectl create secret tls -n heimdall ajr-cert --cert=ajr.crt --key=ajr.key
Set up DNS resolution for Mission Control autonomous job recovery endpoints#
Add A records to the DNS zone that contains $AJR_DOMAIN for the two endpoints required to access the Mission Control autonomous job recovery UI. Ask your DNS administrator to configure the following records to resolve to the external or floating IP address of the BCM head node, which is the address that you use to connect to the head node with SSH:
$AJR_DOMAIN
api.$AJR_DOMAIN
Mission Control autonomous job recovery installation#
After all prerequisites are met, start the Mission Control autonomous job recovery installation with the cm-mission-control-setup wizard.
Select Install NVIDIA Mission Control autonomous job recovery when the wizard starts. Some steps may vary depending on the installation wizard version.
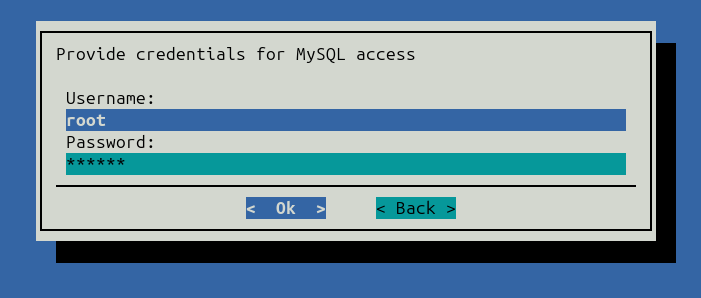
Mission Control autonomous job recovery requires a MySQL database. By default, the database is installed on the BCM head node. The installation wizard prompts for admin credentials to create the Mission Control autonomous job recovery MySQL database and user.
Enter root as the database user and the corresponding password for the MySQL root account.
Alternatively, enter the credentials for the MySQL administrative account described in the prerequisites.
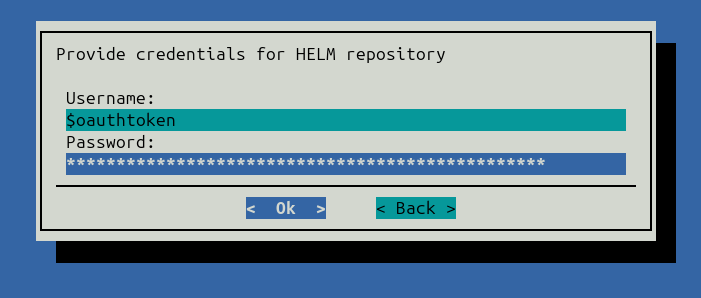
When prompted, provide credentials for the Helm chart repository. You must supply an NVIDIA Container Registry (NVCR) personal access token for the operator and container images.
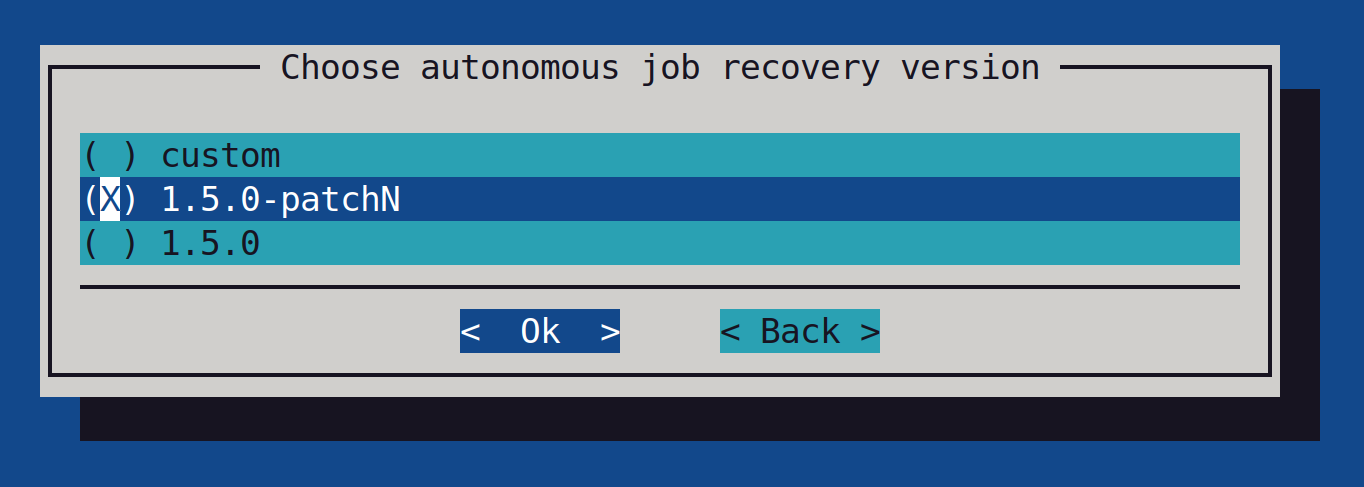
When prompted, select Mission Control autonomous job recovery version 1.5.0-patchN.
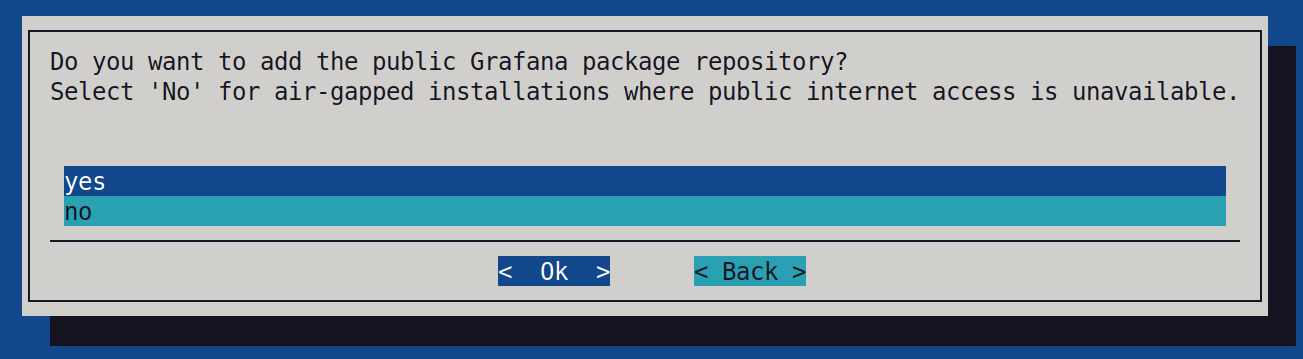
Next, choose whether the Grafana public package repository must be configured. Select yes to configure the Grafana public package repository.
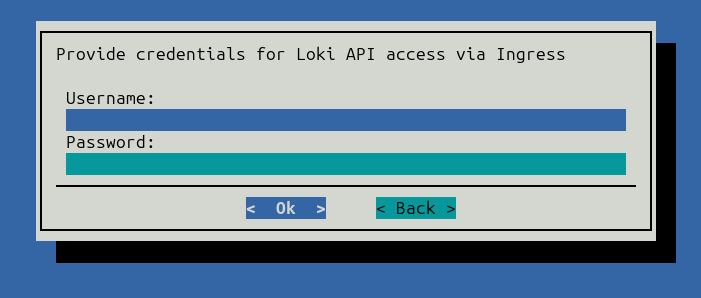
Optionally, provide credentials for the Loki API.
If NVIDIA Mission Control autonomous hardware recovery is installed, the Mission Control autonomous job recovery installation wizard prompts you to enable the integration. This optional integration enhances the capabilities of Mission Control autonomous job recovery.
Note
Skip this step for B300 clusters because break and fix is not available for B300 yet.
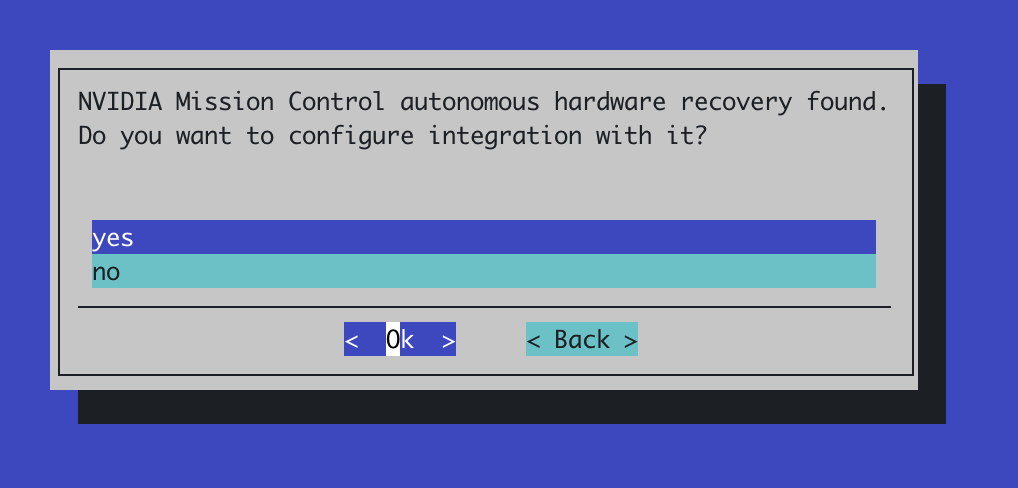
To enable the integration, select Yes and proceed to the configuration step:
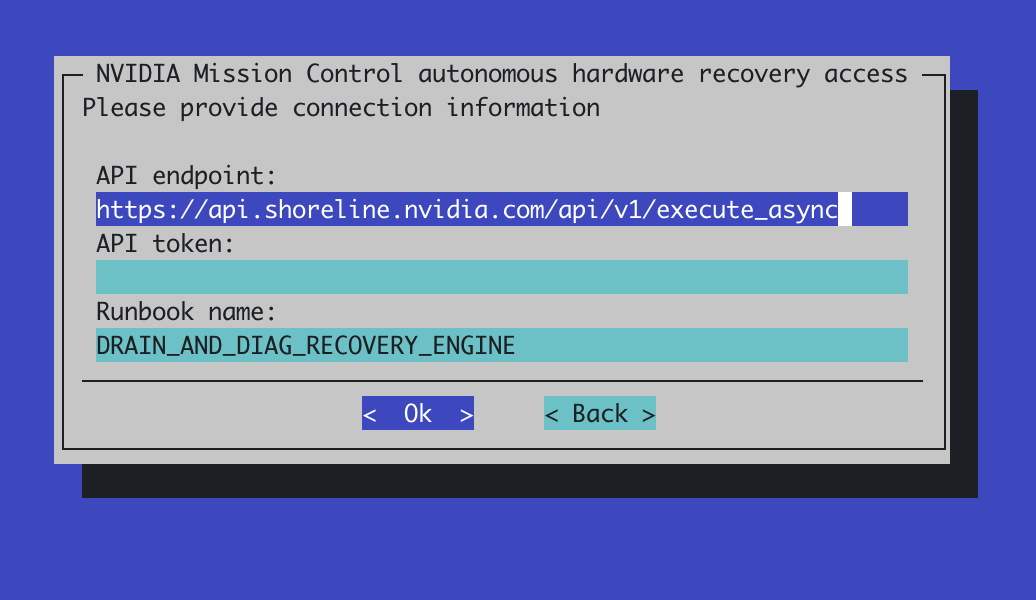
On this screen, enter the AHR API JWT token and verify the AHR API endpoint, which Mission Control autonomous job recovery uses to communicate with the AHR backend. The token field has no default value and must be provided. The API endpoint is pre-populated, but the pre-populated value is not guaranteed to be correct for your environment, so verify it and update it if needed. The procedure for determining the correct AHR API endpoint and for generating the AHR API JWT token from the AHR UI is documented in Runbooks Deployment in the NVIDIA Mission Control autonomous hardware recovery installation guide. Proceed to the next step after the endpoint is verified and the token is entered.
In the next step, select Save config & exit if you want to customize the installation or Save config & deploy if you want to deploy Mission Control autonomous job recovery immediately.
The installation wizard saves the collected information to the specified file for customization and performs the installation.
After installation, access the Grafana dashboards and the Mission Control autonomous job recovery UI, and then complete Mission Control autonomous job recovery verification steps.
Mission Control autonomous job recovery post-installation steps#
To ensure that the Mission Control autonomous job recovery efficiency Grafana dashboard operates correctly, complete the following additional steps.
Update the password for the MySQL user heimdall-kpis-reader
Log in to the MySQL database as a root user and execute the following statements. Replace the password with a random generated one.
mysql> ALTER USER 'heimdall-kpis-reader' IDENTIFIED BY 'password';
Query OK, 0 rows affected (0.02 sec)
After Mission Control autonomous job recovery is installed, create a new mysql data source in Grafana using the heimdall-kpis-reader username and the password specified in the preceding step. Without it, the Mission Control autonomous job recovery efficiency Grafana dashboard will not function properly.
To add a new MySQL data source, access Grafana at
https://<headnode_ip_address>/grafana. Replace<headnode_ip_address>with the actual IP address. Refer to the Observability Stack Configuration guide for Grafana setup and authorization information.
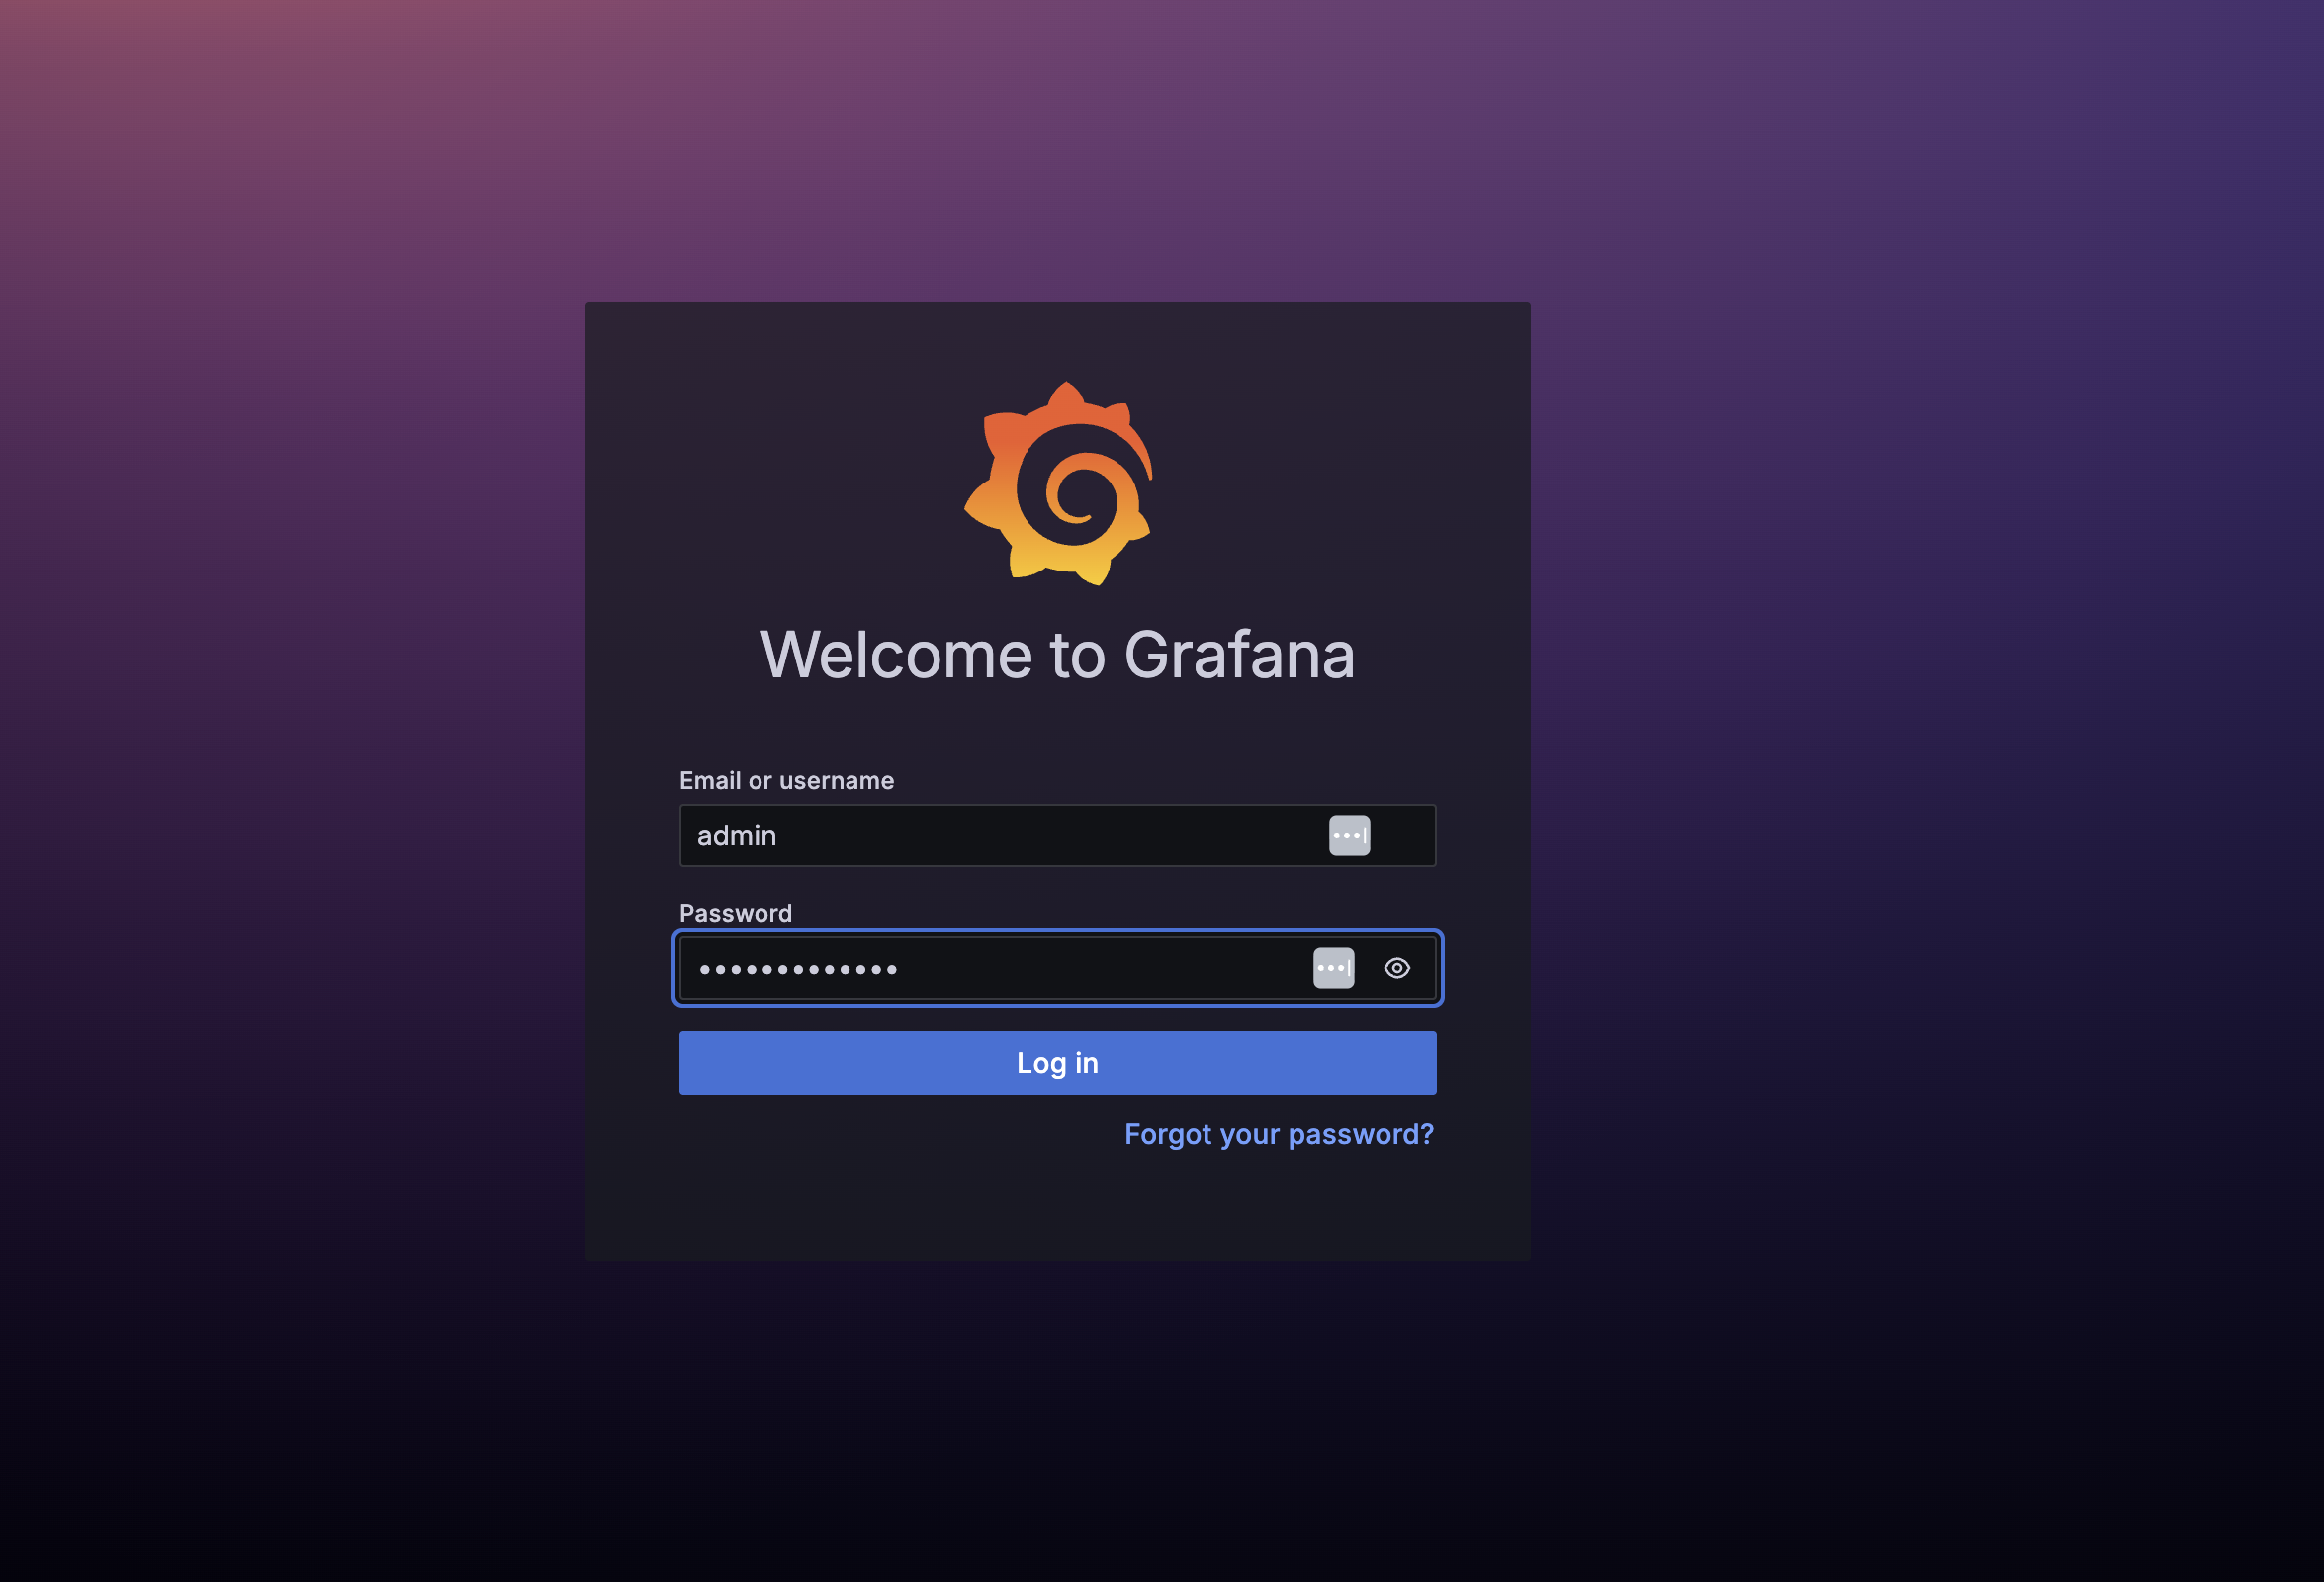
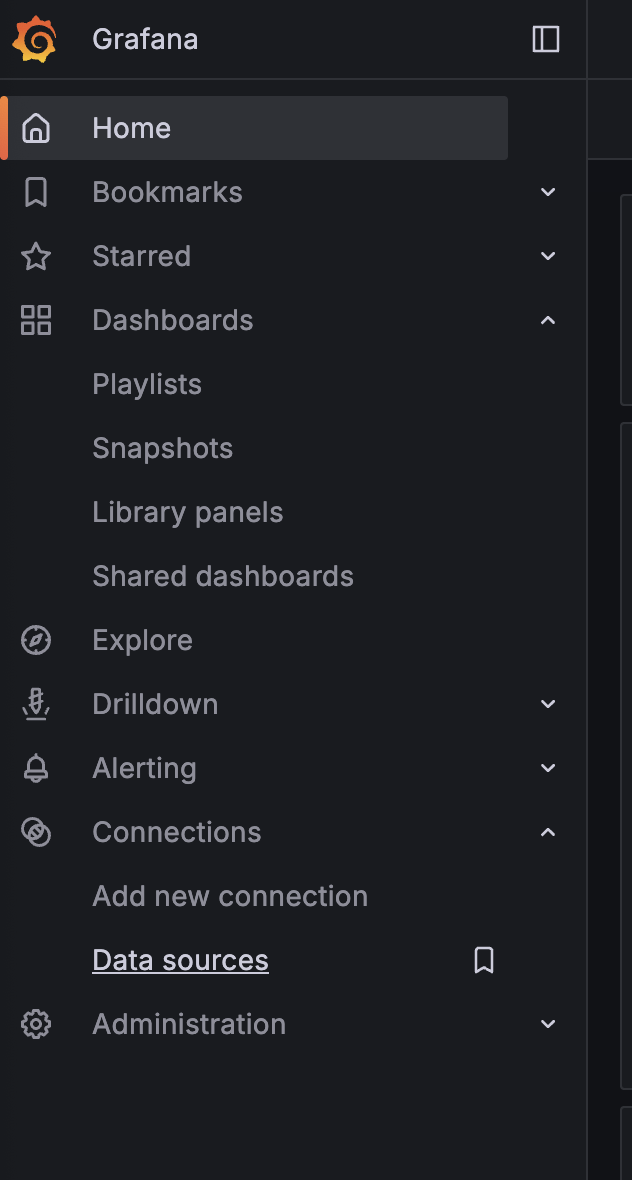
Log in to Grafana and click Data Sources in the Connections section. Select Add new data source and click on MySQL datasource in the SQL section.
On the following screen, configure the following fields:
For the name, use ‘mysql’
For the Host URL, use ‘master:3306’
For the database, enter ‘heimdall’
For the username, use ‘heimdall-kpis-reader’
For the password, use the password specified during the creation of the heimdall-kpis-reader user.
Leave the rest of the fields with the default settings
Click the Save and Test button. A green popup with the “Database connection ok” message should appear.
Mission Control autonomous job recovery verification steps#
After the preceding installation and configuration steps are completed, you can continue to validate the Mission Control autonomous job recovery deployment end to end. Run the following Slurm batch script to verify basic Mission Control autonomous job recovery functionality.
Sbatch script:
#!/bin/bash

#SBATCH -t 00:05:00
#SBATCH --comment='{"APS": {"auto_resume_mode": "requeue", "max_requeue_times": 1}}'

DATETIME=`date +'date_%y-%m-%d_time_%H-%M-%S'`
echo 'AJR light-weight fault simulation test (auto resume mode: requeue)'

# This srun command sets the output file for the job step. The job step sleeps for 30 seconds, prints a
# log line that Mission Control autonomous job recovery recognizes as a segmentation fault, sleeps for another 60 seconds, and exits with 1.

srun --output="$(pwd)/%x_%j_$DATETIME.log" bash -c \
      "echo 'Start time: $DATETIME' && echo 'Sleeping 30 seconds' && \
      sleep 30 && echo 'Rank0: (1) segmentation fault: artificial segfault' && \
      echo 'Sleep another 60 seconds' && \
      sleep 60 && exit 1"
Copy the contents of the preceding bash script and save it into a file in Slurm, e.g.:
bcm_sbatch_test_requeue.sh.The
--commentargument setsauto_resume_modetorequeueandmax_requeue_timesto1. These settings instruct Mission Control autonomous job recovery to requeue the job once, which reduces the test duration.Submit one job to Slurm with the
sbatchscript, note that you have to specify at least the job name (with -J option) and the partition name (with -p option) since they are not encoded in the script:sbatch -J ajr-verification-requeue-test -p <your_partition_name> bcm_sbatch_test_requeue.sh
The job will be submitted and the job ID will be displayed. Keep note of the job ID.
Monitor the job status using the
squeuecommand.squeue -u <your_user_id>
The log file of the Slurm job step will be created in the same directory where the sbatch script is located after the job starts execution. Since we encode the batch script execution time in the srun output file name, each job attempt will have its own log file. In this case, there will be 2 files created after the whole test is finished.
With the default Grafana Alloy configuration, place these log files under
/homeso that Alloy can collect and send them to Loki. Run thesbatchscript from a directory under/home, or updatesrun --outputin the script to use a path under/home. To store the logs in another directory, update the Alloy configuration to monitor that directory.In the Mission Control autonomous job recovery UI, verify that the job attempts are in the correct state and that the anomaly was persisted. Access the UI at
https://<FQDN>/mission-control/recovery-engine/dashboard/workflow, where<FQDN>is the fully qualified domain name of the head node. Log in with an existing BCM user, or create a user by running the following command on the head node:cmsh -c "user; add ajruser; set password testpassword; commit"
Replace ‘ajruser’ and ‘testpassword’ with appropriate username and a password.
The sequence should be:
The 1st job attempt is killed due to CRASH anomaly
The same job id is requeued and held to create a new job attempt.
The 2nd job attempt is released for execution.
The 2nd job attempt is killed due to CRASH anomaly
No more requeue because the maximum requeue limit has been reached.
To verify the CRASH anomaly, hover your cursor over the red triangle icon to view status information for the job ID you created in step 2. Refer to the following figure for an example.

Figure 3 Red triangle indicators (circled) showing hover locations for verification#
Confirm that the expected verification data appears in the tooltip.
Mission Control autonomous job recovery uninstallation#
Start the
cm-mission-control-setupwizard on the active BCM head node to uninstall Mission Control autonomous job recovery.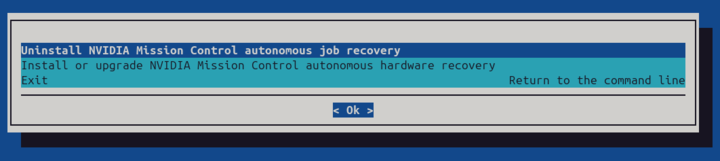
Select Uninstall NVIDIA Mission Control autonomous job recovery.
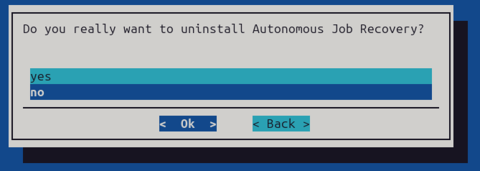
Confirm the uninstallation on the next page. The wizard uninstalls Mission Control autonomous job recovery and removes the
heimdallnamespace.Note
If the installation failed unexpectedly, the previous run may have left the deployment only partially created. In this situation the uninstall wizard can report errors while trying to remove objects that were never fully created. These errors are expected. Proceed past them and allow the uninstall to complete.
Existing data in MySQL database and ‘heimdall-kpis-reader’ MySQL user would not be affected. In case there is a need to perform complete uninstall, log in to MySQL database as root user and perform the following steps:
DROP USER IF EXISTS 'heimdall-kpis-reader'@'%';

DROP USER IF EXISTS 'heimdall_user'@'%';

DROP DATABASE heimdall;
This will remove ‘heimdall-kpis-reader’ and ‘heimdall_user’ MySQL users and related ‘heimdall’ database.
After Mission Control autonomous job recovery is uninstalled by the wizard, remove the unnecessary “aidot” Helm repository
# helm repo remove aidot
"aidot" has been removed from your repositories
If the installation failed unexpectedly, a
kube-log-forwardconfiguration overlay from the incomplete run can remain. Normally the uninstall wizard removes this overlay, but if the wizard aborted before completing, the overlay may still be present. While it exists, a subsequent installation fails at the Create Configuration Overlay stage with aduplicate overlay name 'kube-log-forward'error. Check for the overlay and remove it manually if present:cmsh -c "configurationoverlay; list" | grep kube-log-forward cmsh -c "configurationoverlay; remove kube-log-forward; commit"
List the configuration overlays again to confirm that there is no
kube-log-forwardentry.If the installation failed unexpectedly, the metrics collection setup may have left
slurm-nodesEndpoints andslurm-node-exportersServiceMonitor objects in theprometheusnamespace. Normally, the uninstall wizard removes these objects, but if the wizard aborted before completing, they may remain. While they exist, a subsequent installation fails at the metrics collection stage with a Kubernetes conflict error. These objects are created directly by the installer, not by the Prometheus Helm chart, so uninstalling Prometheus with Helm does not remove them. Check for these objects and manually remove them if present:kubectl -n prometheus get endpoints slurm-nodes kubectl -n prometheus get servicemonitor slurm-node-exporters kubectl -n prometheus delete endpoints slurm-nodes kubectl -n prometheus delete servicemonitor slurm-node-exporters
Third-Party Open Source Software Licenses#
Mission Control autonomous job recovery incorporates third-party open source software components. A complete list of the components and their license texts is available in the following file:
Please review the license terms of these open source projects before use.