Connecting to BMC Interfaces
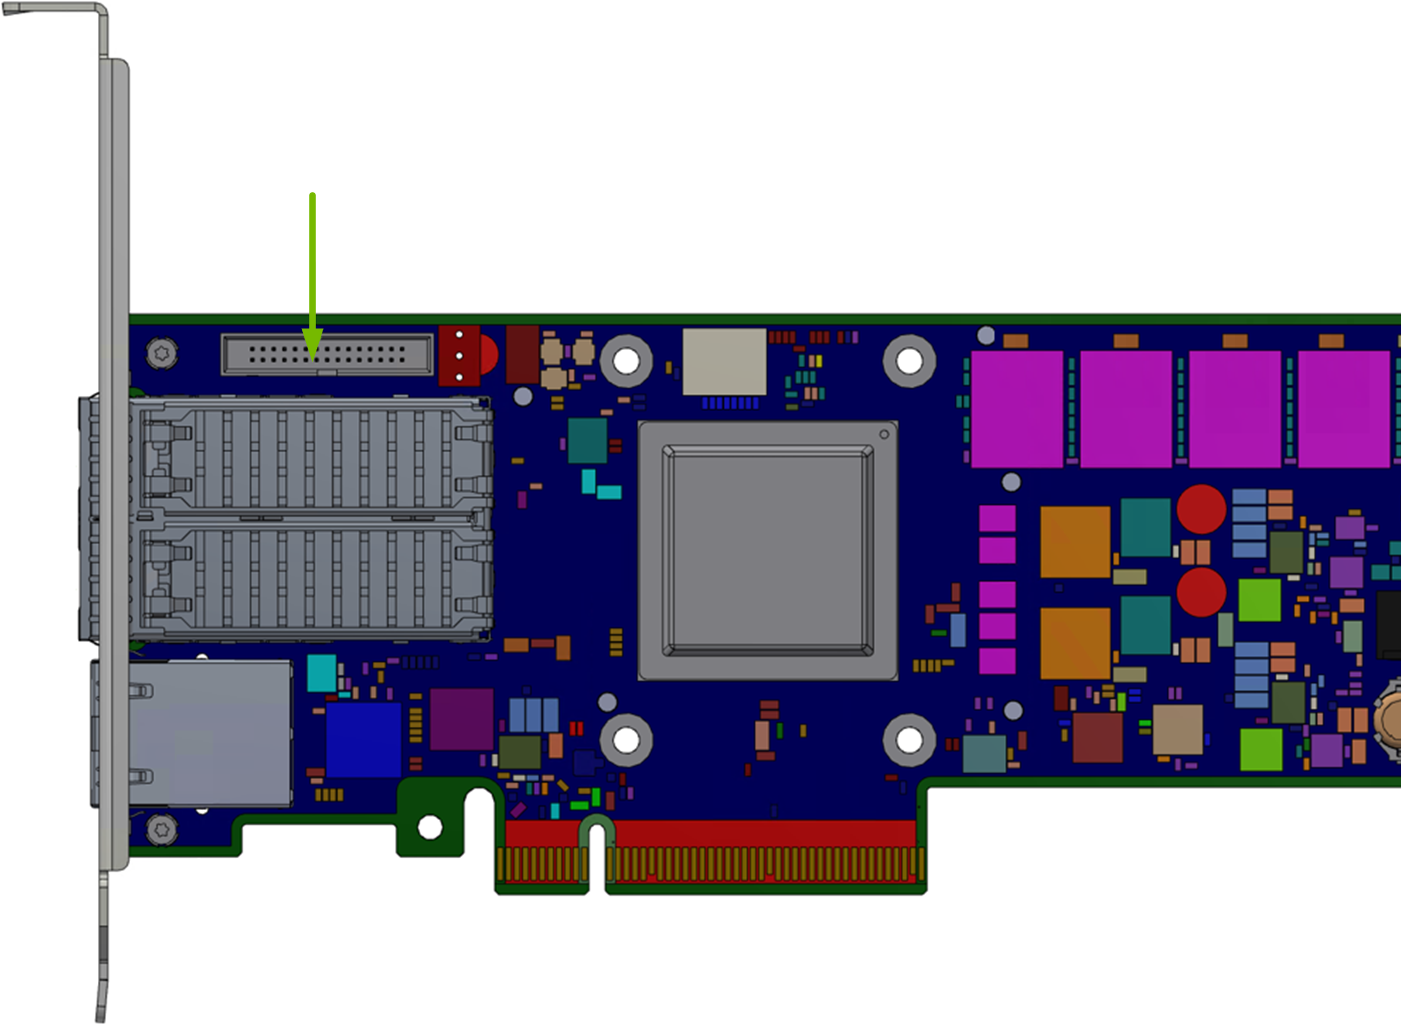
The BMC UART1 console is available on the IO panel. The BMC is connected to a 30-pin flat cable connector which allows the Linux console to be monitored.
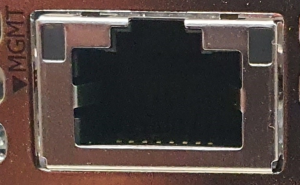
The BMC has a separate Ethernet interface which provides network connection for management traffic to the BMC. The DPU card bracket has an RJ45 port labeled "MGMT" which is the management interface port. The management port is configured with auto-negotiation capabilities by default (100MbE to 1GbE).
The BMC interface eth0 is the management interface, so any information displayed by "ifconfig eth0" pertains to the management interface. The MAC address to be used for eth0 is pre-programmed in the BMC FRU EEPROM. By default, the IP address used for eth0 is acquired via DHCP but can be configured differently.
Before connecting to the internet, it is important to change the default global password to prevent potential malicious attackers from hacking your system.
The default global password (0penBmc) is set to expire upon first login. A new password must be configured according to the following policy:
Minimum length: 13
Minimum upper case characters: 1
Minimum lower case characters: 1
Minimum digits: 1
Note that the root account locks after four consecutive failed attempts and automatically unlocks after 10 minutes.
Do not manually modify the network configuration file /etc/systemd/network/00-bmc-eth0.network.
There are two ways of configuring the network interfaces:
Dynamic (DHCP)
Static
Dynamic Address Configuration
Run the following:
busctl set-property xyz.openbmc_project.Network /xyz/openbmc_project/network/eth0 xyz.openbmc_project.Network.EthernetInterface DHCPEnabled b 1
Static
Set static address on the interface. Run:
busctl call xyz.openbmc_project.Network /xyz/openbmc_project/network/<interface> xyz.openbmc_project.Network.IP.Create IP ssys "xyz.openbmc_project.Network.IP.Protocol.IPv4" "<IP Address>" <Netmask Prefix> "<Network Gateway>"
Configure default gateway. Run:
busctl set-property xyz.openbmc_project.Network /xyz/openbmc_project/network/config xyz.openbmc_project.Network.SystemConfiguration DefaultGateway s "<DefaultGateway>"
This section describes the use cases for the BMC USB port. Note that only BMC Linux has access to the USB port and its feature set. There is no access to BMC USB port while running u-boot.
Due to a hardware bug in AST2500, the USB interface is only able to work at USB 1.0 speeds.
Storage device support on this port has only been validated with USB flash drives.
Providing Removable Storage via USB Stick
Once a USB stick is plugged in to the BMC’s USB port, issue the command lsusb and/or check the dmesg log to see if the USB stick has been detected. The successful insertion of a USB stick will create a device under /dev called sda (or sdb), and a mountable partition /dev/sda1. To mount the USB stick as a filesystem, just issue the command "mount /dev/sda1 /mnt" to mount it at /mnt. The command "umount /mnt" unmounts the device.