Installation and Configuration
# | Illustration |
1 | Attach parts D and E (x2 of each) to the switch. Push the switch chassis’ pins through the slider key holes, until locking occurs. Pay attention to the rack’s type. Short racks (430-800mm): 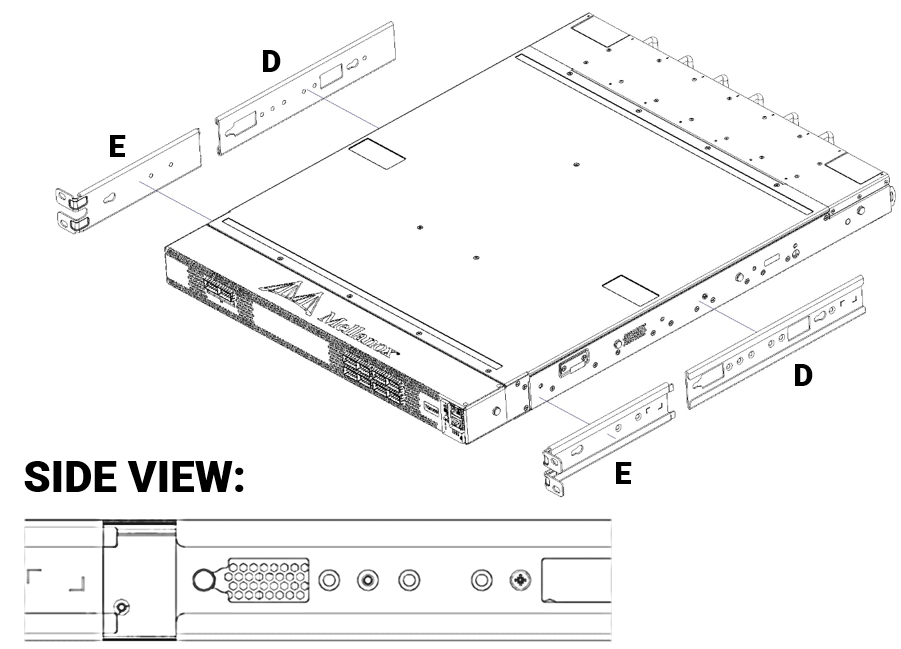
|
Standard racks (580-800mm): 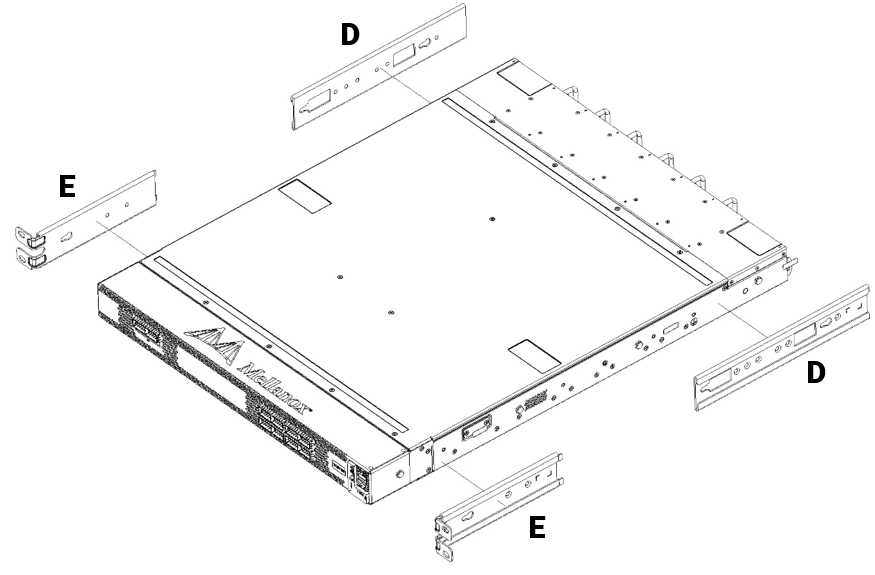
| |
2 | Short racks: 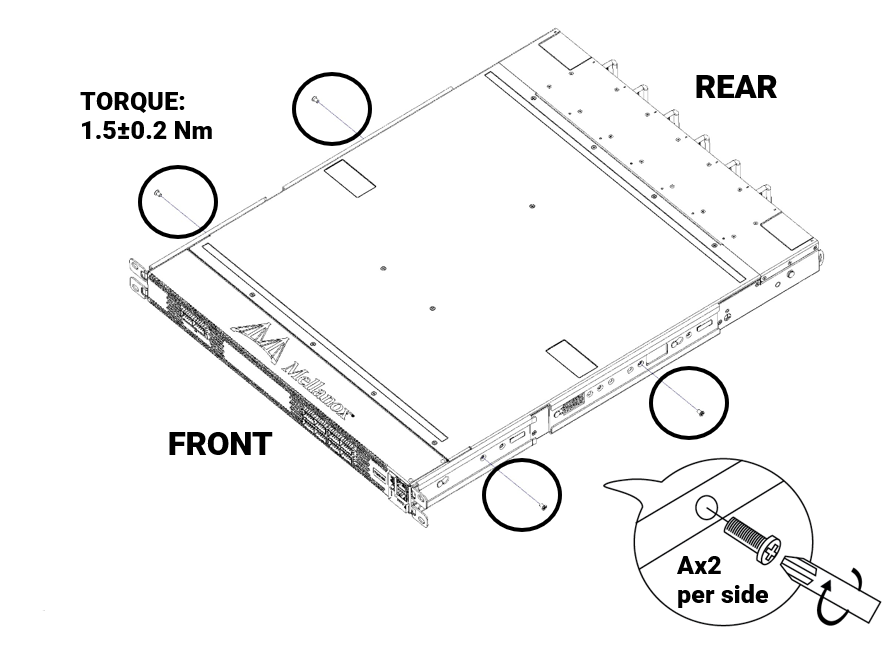
|
Standard racks: 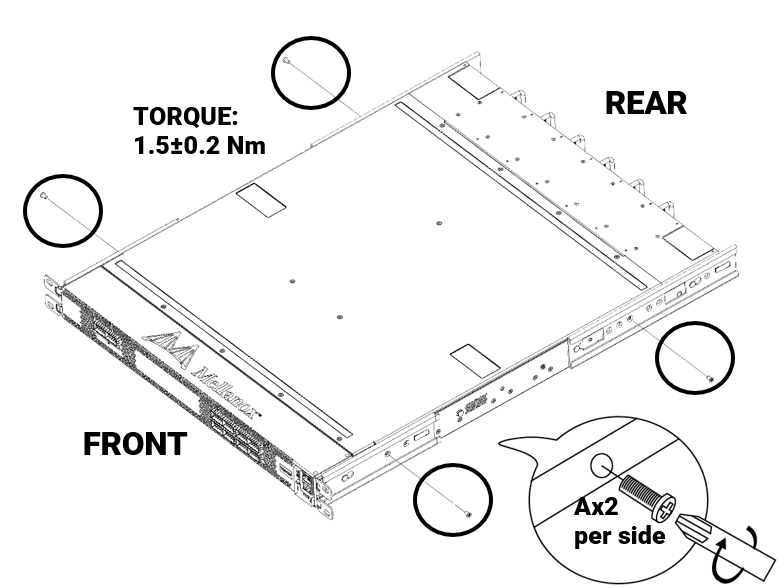
| |
3 | Install 8 cage nuts (b) in the desired 1u slots of the rack. 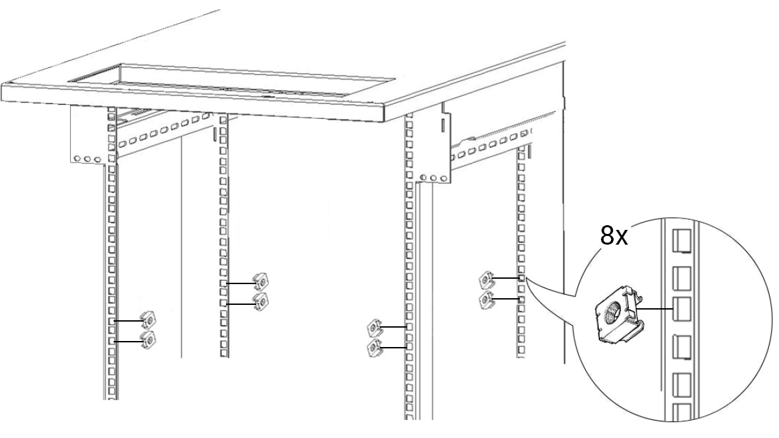
|
4 | Do not tighten the screws yet. 
|
5 | 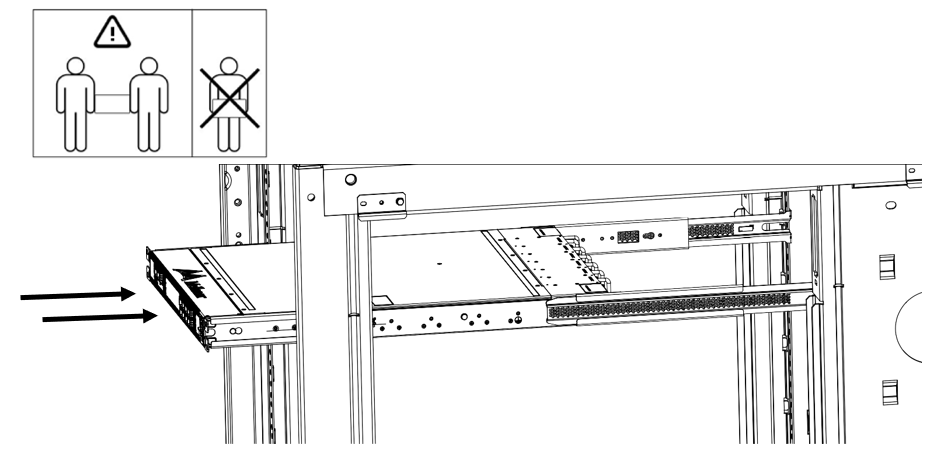
|
6 | Tighten all M6 (C) screws with a torque of 4.5±0.5. 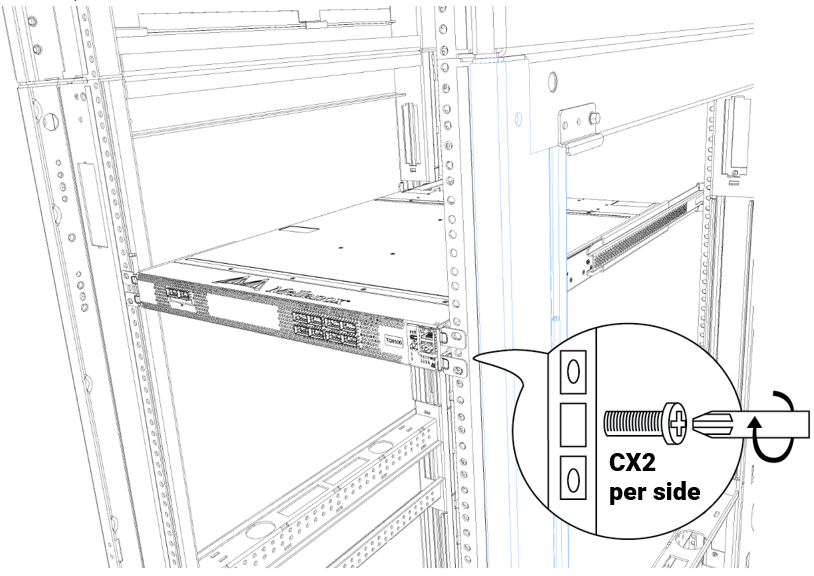
|

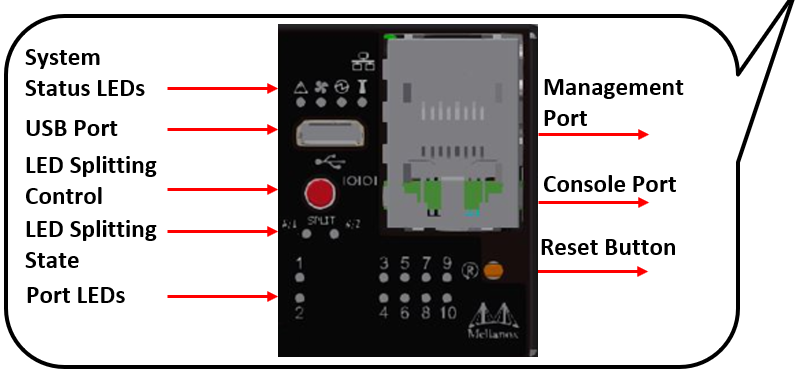

* It may take up to five minutes to turn on the system. If the System Status LED shows red/amber after five minutes, unplug the system and contact your NVIDIA representative.
LED Assignments
Symbol | Description | Normal Status |

| System health | Green/Flashing |

| Fan health | Green |

| Power supply health | Green |

| Bad port detected | Off |

| Identifier LED | Off/Blue |

| Reset button | |
Connect the host PC to the Console (RJ-45) port.
Configure a serial terminal program.
Parameter
Settings
Baud rate
115200
Data bits
8
Stop bits
1
Parity
None
Flow control
None
Login:
OS
Username
Password
Onyx (MLNX-OS)
admin
admin
Initial configuration in Onyx (MLNX-OS): Go through the configuration wizard. For further information, please refer to: https://docs.nvidia.com/networking/category/mlnxos.
For full installation instructions, go to https://docs.nvidia.com/networking/category/switchen.