
Cluster Assistant for Configuring a Multi-Node DGX Spark Cluster#
Overview#
The NVIDIA Sync Cluster Assistant automatically configures the ConnectX-7 network for you.
Understanding and configuring the ConnectX-7 network across DGX Spark devices is technically complex and requires scripts and terminal commands. For background, refer to ConnectX-7 Networking in the DGX Spark User Guide. The NVIDIA Sync Cluster Assistant simplifies that process. You do not need technical knowledge of networking or PCIe topology to set up a cluster.
If the devices are properly connected through QSFP cables, the application calculates and configures everything needed.
Note
The Cluster Assistant does not set up workloads, such as inference or fine-tuning on the cluster. It only sets up the network so that you can then set up those workloads yourself. Use NVIDIA playbooks to set up workloads, for example NCCL, vLLM, and fine-tuning with PyTorch.
You set up the devices and physical network properly, and the Cluster Assistant handles the rest.
Device access and configuration. Make sure the DGX Spark systems are updated, have valid user accounts, are on the correct network, and are added to NVIDIA Sync.
Cables and physical topology. Plug in the QSFP cables correctly, and set up a switch if your topology requires one.
Supported Device Configurations, Number of Devices, and Topologies#
Your DGX Spark devices must be updated to the current software version.
Refer to the DGX Spark Release Notes.
Check for updates and apply them through the DGX Dashboard.
The Cluster Assistant supports two to a maximum of four DGX Spark devices.
Direct connection through cables. Each device connects to the other devices through QSFP cables, not through a switch. This topology supports two-device and three-device clusters. It does not support four devices.
Connection through a switch. Each device connects to a switch through a QSFP cable, and devices are not connected directly. This topology supports two-device, three-device, and four-device clusters.
The Cluster Assistant supports a limited set of topologies.
Do not mix connection types. Connect all devices directly, or connect all devices through a switch. Do not connect some devices directly and others through a switch.
Use only one cable per link. This is true for both direct connections and switch connections. Connecting two devices with two cables will not improve performance. The same rule applies when you use a switch. Use only one cable between a device and the switch.
Follow specific patterns. Two and three DGX Spark systems allow direct cabling or a switch, but four devices require a switch.
Two Sparks. Use one cable for a direct connection, or use one cable per device through a switch (two cables total).
Three Sparks. Use three cables for a direct connection in which each device connects to the other two (a ring), or use one cable per device through a switch (three cables total).
Four Sparks. Use one cable per device through a switch (four cables total).
Limitations#
Supports only DGX Spark and GB10 devices. The Cluster Assistant works only with DGX Spark devices. It blocks clustering for other devices.
Supports up to four devices. Configure more than four devices, or any topology outside the supported set, manually. For example, the Cluster Assistant does not configure an eight-device switch topology.
Sets up only inter-device SSH for process communication. If you want to use something such as Slurm or Kubernetes on the cluster, set that up yourself.
Explanation and Instructions for Using the Cluster Assistant#
Prerequisites#
Work with supported devices and topologies. The Cluster Assistant does not work with other device types, an unsupported DGX OS version, or unsupported topologies.
Have proper user access. You have SSH access and
sudoprivileges with a username and password.Add the devices to NVIDIA Sync. Add the devices to NVIDIA Sync before you start. Refer to Adding a Device for a Direct Connection.
Step-by-Step Explanation and Instructions#
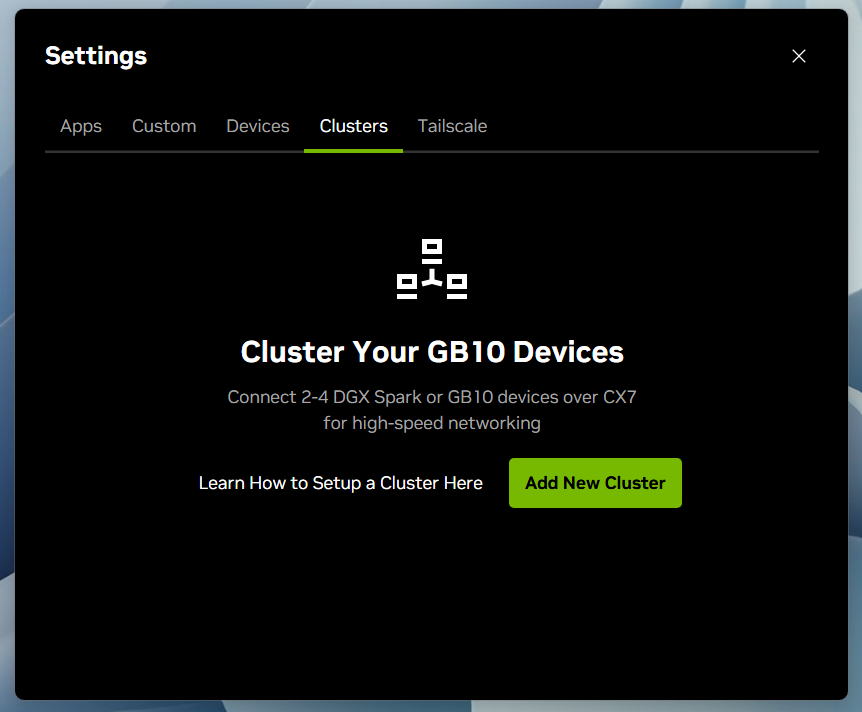
Open Settings. Open NVIDIA Sync Settings > Cluster Assistant and select Add New Cluster.
Create Name. In the Cluster Assistant window, name the cluster and proceed.
Device Selection. Select the devices that you want to cluster and proceed.
Device Checks. NVIDIA Sync checks the device requirements, that is, SSH access, GB10 devices, minimum OS version, and
sudoaccess. If any device requires a password forsudo, NVIDIA Sync prompts you to enter it. The password is used only for configuration and is not persisted or logged. After all passwords are validated, proceed.User Information Check. NVIDIA Sync then checks usernames, user IDs, and group IDs across the devices. If they are not the same across devices, it prompts you to standardize them. This step is not strictly necessary, but it is good hygiene for setting up workloads later. If you continue without standardizing the user information, NVIDIA Sync warns you again but still lets you proceed.
Optional: Rename Devices. You can rename the devices to make them more identifiable, or you can skip this step. If any of the devices are connected, you must disconnect them to rename them. You can do this in the Cluster Assistant window.
Network Check. NVIDIA Sync detects network interfaces and cabling. If a cable is not detected, you are warned and cannot proceed without fixing it. After the cables are connected, NVIDIA Sync checks the runtime network and negotiated link speeds. If network changes will be made or speeds are not 200 Gbit/s, NVIDIA Sync alerts you. Select Confirm Network Configuration to proceed.
Link Speed Check. NVIDIA Sync then runs a speed test across the links to check the lower bound of 184 Gbit/s. Each link is tested in turn and turns green if it passes the speed test or brown if it does not. If a link does not pass, you can resolve the issue and retry, or you can proceed. Select Run Test Again to retry or Next to proceed.
Inter-device SSH. The Cluster Assistant sets up key-based SSH for inter-device process communication. NVIDIA Sync creates a key pair and populates your default SSH configuration with aliases for each node so that you can
ssh <name>between devices. This process can take a while, and NVIDIA Sync has a five-minute limit for any individual machine, after which it times out. If it times out, retry. When it completes, select Next to proceed.Success. The Cluster Assistant window alerts you to completion and shows information about the cluster. Copy the network information for future use. Read the instructions in the Cluster Assistant window, and select Copy in Step One to copy the network information to your clipboard. Store it in a file on your desktop for later use. Then select See Example Workloads for NVIDIA playbooks that show how to use your new cluster.
Things to Do After the Cluster Is Set Up#
Use NVIDIA Playbooks to Set Up Software and Workloads#
After the network is set up, NVIDIA playbooks walk you through what comes next:
NCCL Playbook: Install and set up the NVIDIA Collective Communications Library to optimize data transfer on the network.
Fine-Tune with PyTorch Playbook: Fine-tune a model on two Sparks.
vLLM for Inference Playbook: Set up vLLM to run models over two or more Sparks.
Familiarize Yourself With the ConnectX-7 Network#
Understand the ConnectX-7 Network: Learn about the hardware and network interfaces.
Inspect and Verify a ConnectX-7 Cluster Network Plan: Review what is configured and test connectivity yourself by running terminal commands.
How to Delete the Cluster From NVIDIA Sync#
Deleting a cluster removes the node-to-node SSH configuration and deletes the cluster relationship in NVIDIA Sync.
If you want to change a cluster topology (for example, to add another node), you must delete the cluster and then recreate it.
Delete a cluster from the NVIDIA Sync interface:
Open Settings.
Select the Clusters tab.
Select the cluster that you want to delete.
Open the overflow menu (⋯) for that cluster.
Select Delete.
Troubleshooting#
Use this section to resolve common Cluster Assistant checks and configuration issues.
Validate System Readiness#
The Cluster Assistant checks whether each device is reachable and ready before it configures the cluster.
SSH Check Fails#
If the SSH check fails:
Verify that all devices are powered on.
Verify that all devices are connected to your network.
Verify that the system running NVIDIA Sync is on the same network as the devices.
Verify that the system running NVIDIA Sync can SSH directly to each device.
GB10 Check Fails#
If the GB10 check fails, the selected device is not recognized as a DGX Spark or GB10 system. DGX Spark or GB10 hardware is required for the Cluster Assistant feature.
Remove any unsupported device before continuing with cluster setup.
Software Version Check Fails#
If the software version check fails, update the system software on each device before continuing.
All DGX Spark or GB10 devices in the cluster must run the April 2026 system software release or later.
The easiest way to update is through the DGX Dashboard. To update manually, follow the DGX Spark User Guide:
Password Check Fails#
If the password check fails, verify that each device is configured with the permissions required by NVIDIA Sync.
NVIDIA Sync needs your password to configure network settings during setup. Select Fix Now and enter your password when prompted. NVIDIA Sync stores the password in memory only for temporary use during the setup process, then discards it.
Verify User Details#
Consistent usernames, user IDs (UIDs), and group IDs (GIDs) are not required for a cluster, but they can make the cluster easier to use.
If usernames differ across nodes, home directory paths also differ. This difference can make scripts, file paths, and manual SSH commands harder to manage. When you SSH between nodes, use the SSH aliases generated by NVIDIA Sync because the aliases already include the correct username for each node.
If UID or GID values differ across nodes, shared files can appear to have unexpected ownership depending on your workflow and storage configuration.
If you want usernames, UIDs, and GIDs to match, make this change before creating the cluster when possible. The simplest approach is to create matching user accounts on all nodes, then add the devices to NVIDIA Sync using those accounts.
Make User Details Consistent on Ubuntu 24.04#
Before creating new accounts, choose a username, UID, and primary GID that are not already in use on any node.
On each node, check whether the UID or GID is already assigned:
getent passwd <uid>
getent group <gid>
Create the group:
sudo groupadd --gid <gid> <group-name>
Create the user with the selected UID and primary GID:
sudo adduser --uid <uid> --gid <gid> <username>
If the account needs administrator privileges for your setup, add it to the sudo group:
sudo usermod -aG sudo <username>
Then sign in with the new account, configure SSH access as needed, re-add the devices to NVIDIA Sync using the matching accounts, and run the Cluster Assistant again.
Set Network Configuration#
If the detected ConnectX-7 network topology is incorrect or not what you expected:
Verify that all ConnectX-7 cables are fully seated.
For a two-device direct connection, verify that only one QSFP cable connects the devices.
For two-device, three-device, or four-device switch topologies, verify that each device has one QSFP cable connected to the switch.
For a three-device ring topology, verify that each device connects to the other two devices, using three QSFP cables total.
If the topology is still not detected correctly, reboot the devices with the ConnectX-7 cables connected, then try again.
For Netplan-level inspection, verification, and removal of the cluster network plan, refer to Inspect and Verify a ConnectX-7 Cluster Network Plan.
If port speed is not reported as the expected 200 Gbit/s:
Verify that you are using a supported QSFP112 DAC, 400 GbE, Ethernet-mode-only cable.
If you are using a switch, verify that the switch is negotiating the correct port speed.
If the switch is negotiating the wrong speed, update the port configuration in the switch administrator console.
Supported cables include:
Amphenol NJAAKK-N911
Luxshare LMTQF022-SD-R
Check Network Performance#
If bandwidth or latency is outside the expected range, measured performance can be below the optimal range for your topology. A bandwidth or latency warning does not necessarily mean the cluster is nonfunctional.
Network performance can be temporary or affected by other equipment. Try the following to determine whether performance improves:
Reboot the devices with the ConnectX-7 cables connected, then run the speed test again.
Verify that you are using a supported QSFP112 DAC, 400 GbE, Ethernet-mode-only cable and check the connections:
Amphenol NJAAKK-N911
Luxshare LMTQF022-SD-R
If you are using a switch, check the switch vendor documentation and configuration for possible issues.