Quickstart Guide#
Welcome to Tokkio! This guide will walk you through setting up a basic digital human avatar on a Bare-metal machine. At the end of this quickstart guide, you will have a fully interactive digital avatar you may speak with.
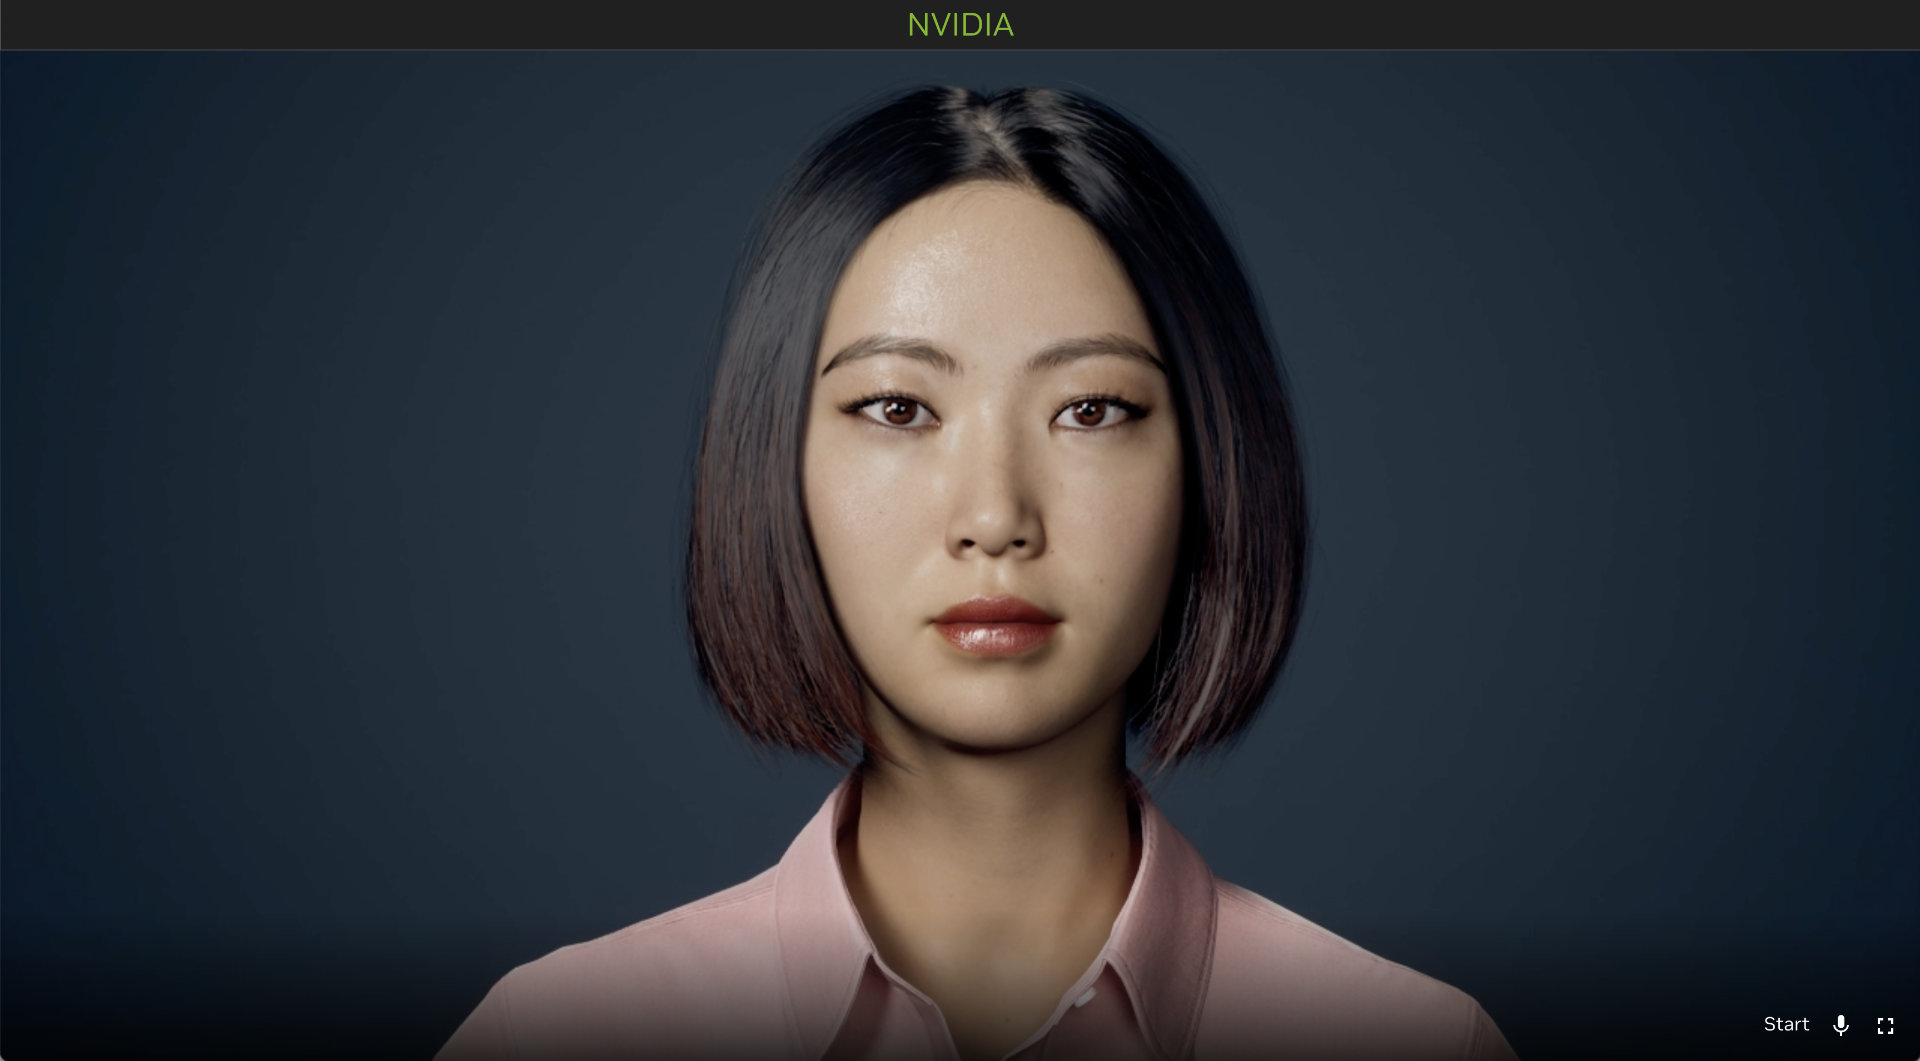
The Tokkio web UI and the avatar video stream that you will be able to see in your browser.#
If you do not have access to a Bare-metal machine with NVIDIA GPUs to deploy Tokkio, refer to the Deployment section for cloud service provider deployments.
Note that this quickstart guide does not detail all the customizations available for Tokkio.
The rest of this guide will walk you through installing Tokkio with deployment scripts that abstract the complexity of configuring the machine, pulling, and deploying Tokkio.
Prerequisites#
This quickstart guide requires having two machines:
Controller Instance: The controller instance is where you will run the deployment script.
Application Instance: The application instance is where Tokkio will be installed.
1. Configure Controller Instance#
As previously mentioned, the controller instance is where you will run deployment scripts. This machine must meet the following requirements:
Operating System: Ensure that the instance is running Ubuntu 22.04.
SSH Key Pair: Make sure you have an SSH key pair to be used later with the deployment scripts. To generate a new SSH key pair, follow these steps:
Open a terminal on your controller instance
Run the following command to generate a 4096-bit key replacing
your_email@example.comwith your email address:ssh-keygen -t rsa -b 4096 -C "your_email@example.com"
You will be prompted to specify a file location to save the key:
Press
Enterto accept the default location (~/.ssh/id_rsa).Alternatively, specify a custom path.
Passwordless Sudo Access: Ensure the user account on the controller instance has passwordless
sudoaccess enabled.You can test this by running
sudo ls /root. If this command does not prompt you for a password, then passwordless sudo access is enabled.If you don’t have passwordless sudo access enabled, follow the steps below or reach out to your company’s system administrator for support.
Edit the sudoers file safely using the
visudocommand. This ensures syntax checking and prevents errors.sudo visudoAdd your user for passwordless access: Scroll to the section where user privileges are defined. Add a line to grant passwordless sudo access to your user. Replace
usernamewith your actual username:username ALL=(ALL) NOPASSWD:ALL
ALL=(ALL): Grants administrative rights for all users and groups.NOPASSWD:ALL: Disables the password prompt for all sudo commands.
2. Configure Application Instance#
The application instance is where the Tokkio Pipeline will run. This machine must meet the following requirements:
Operating System: Ensure that the instance is running Ubuntu 22.04.
GPU: You will need at least 2xL4 or 2XA10 GPUs to deploy this single stream Tokkio example.
Partition Size: You will need at least 700 GB of storage allocated for the application instance.
Kubernetes Considerations: This instance should not have any prior Kubernetes installations running before you run the one-click scripts for the first time.
Passwordless Sudo Access: Ensure the user account on the application instance has passwordless
sudoaccess enabled.You can test this by running
sudo ls /root. If this command does not prompt you for a password, then passwordless sudo access is enabled.If you don’t have passwordless sudo access enabled, follow the steps below or reach out to your company’s system administrator for support.
Edit the
sudoersfile safely using thevisudocommand. This ensures syntax checking and prevents errors.sudo visudoAdd your user for passwordless access: Scroll to the section where user privileges are defined. Add a line to grant passwordless sudo access to your user. Replace
usernamewith your actual username:username ALL=(ALL) NOPASSWD:ALL
ALL=(ALL): Grants administrative rights for all users and groups.NOPASSWD:ALL: Disables the password prompt for all sudo commands.
IPv4 Address: Take note of the IP address of the application instance for later use.
Configure SSH access: On the controller instance, run the following command to copy the SSH key to the application instance’s authorized keys to allow passwordless communication:
ssh-copy-id <app-instance-username>@<app-instance-ip-address>
3. Obtain NVIDIA Personal API Key#
Before moving any further, you will need an NVIDIA personal API KEY to access and pull the Tokkio resources needed for this quickstart installation. Follow the steps below to obtain your NVIDIA personal API KEY.
Important
You can use your NVIDIA personal API Key in place of NGC_CLI_API_KEY or NVIDIA_API_KEY.
To obtain the API key, navigate to the NVIDIA API Catalog.
A pop-up should appear with the title “Develop with this Blueprint”. If the pop-up does not appear, select the download blueprint in the top right of the screen to see the pop-up.
Select Generate API key to create a key. For now, save this in a secure location.
As a reminder, you should now have the SSH key from the controller instance, IPv4 address from the application instance, and your NVIDIA API KEY readily available.
4. Obtain the Deployment Script from GitHub#
On the controller instance, clone the ACE GitHub repository from NVIDIA/ACE.git to get the deployment scripts and navigate to the Bare-metal one-click script directory.
git clone --single-branch --branch 5.0.0-beta https://github.com/NVIDIA/ACE.git
cd ACE/workflows/tokkio/5.0.0-beta/scripts/one-click/baremetal
5. Setup ElevenLabs TTS Service#
For this quick start guide, you will be using the ElevenLabs TTS service to generate audio for your avatar. For this you will need an ElevenLabs API key. If you do not have an ElevenLabs API key, follow the steps below to create one.
Navigate to https://elevenlabs.io/app/sign-up and sign up for an ElevenLabs account.
Once you have an account, navigate to https://elevenlabs.io/app/settings/api-keys and generate an API key. Alternatively, you can navigate to this page by selecting your account name in the bottom left of the ElevenLabs website and selecting API Keys.
Create an API key and make note of the API key as you follow the steps in the linked ElevenLabs setup page.
6. Configure the One-Click Script Deployment#
Next, you need to configure the controller instance environment.
Navigate to the
config-template-examples/tokkio-1streamdirectory and open themy-config.envfile.cd config-template-examples/tokkio-1stream nano my-config.env
Fill in the information below in the
my-config.envfile. For help on the environment variable definitions, refer to Environment Variable Definitions.my-config.env#export OPENAI_API_KEY="<replace-with-openai-api-key>" export NGC_CLI_API_KEY="<replace-with-your-NVIDIA-personal-API-Key>" export NVIDIA_API_KEY="<replace-with-you-NVIDIA-Personal-API-Key>" export APP_HOST_IPV4_ADDR="<replace-with-the-ip-address-of-application-instance>" export APP_HOST_SSH_USER="<replace-with-the-username-of-application-instance>" export COTURN_HOST_IPV4_ADDR="<replace-with-the-ip-address-of-application-instance>" export COTURN_HOST_SSH_USER="<replace-with-the-username-of-application-instance>" export ELEVENLABS_API_KEY="<replace-with-your-elevenlabs-api-key>"
Note
The default LLM is accessed via a NIM. For this tutorial, we will be using a NIM model, no additional steps are needed, and you may leave the OpenAI API Key unchanged for this quick start guide.
The
NGC_CLI_API_KEYandNVIDIA_API_KEYshould both be filled with the keys you obtained in step 3.Currently, we support the installation of turn servers (coturn/twilio) on the same machine as the application instance, so we only need one machine. The values of
APP_HOST_IPV4_ADDRandCOTURN_HOST_IPV4_ADDRshould be the same. Similarly, the values ofAPP_HOST_SSH_USERandCOTURN_HOST_SSH_USERare the same.
Source the environment variables to the current shell session.
source my-config.env
The command above will source the environment variables to the current shell session and will need to be redone every time you would like to manipulate your deployment (install, uninstall).
Next, in the same directory, there is the
config-template.ymlfile. Copy this file with a specific name and move it up two levels in the directory.cp config-template.yml <my-renamed-config-template.yml> mv <my-renamed-config-template.yml> ../.. cd ../..
You will then have to fill out the
<my-renamed-config-template.yml>file. Refer to Advanced Configuration for assistance.
Deployment#
Follow the steps below to get deployment scripts ready for installation.
1. Run the Deployment Script#
To install Tokkio, run the command below with your config-template.yml. Capture the URLs from the output.
./envbuild.sh install --tf-binary terraform --component all --config-file ./<my-renamed-config-template.yml>
Expected console output should be similar to the one below.
***(Several output lines omitted for brevity)***
.
.
access_urls:
   app:
      ace_configurator_endpoint: http://<application-instance-ip>:30180/
      api_endpoint: https://<application-instance-ip>:30888/
      ui_endpoint: https://<application-instance-ip>:30111/
      grafana_endpoint: http://<application-instance-ip>:32300/
    turn: {}
ssh_command:
  app:
     master: ssh -i /home/metroadmin/.ssh/id_rsa.pem -o StrictHostKeyChecking=no -o UserKnownHostsFile=/dev/null -o ProxyCommand="ssh -i /home/metroadmin/.ssh/id_rsa.pem -o StrictHostKeyChecking=no -o UserKnownHostsFile=/dev/null -W %h:%p ubuntu@<bastion-host-ip>" ubuntu@<application-instance-ip>
  turn:
     master: ssh -i /home/metroadmin/.ssh/id_rsa.pem -o StrictHostKeyChecking=no -o UserKnownHostsFile=/dev/null ubuntu@<turn-server-ip>
2. Verify the Installation#
At this point, you can log into the application instance with the SSH command below to check that all the Kubernetes pods are up and running.
ssh <application-instance-username>@<application-instance-IP-address>
kubectl get pods -n app
Expected console output should be similar to the one below.
NAME                                                       READY   STATUS    RESTARTS        AGE
a2f-a2f-deployment-7f4b46bdb4-j45gv                        1/1     Running   0               56m
ace-configurator-deployment-5f4967874-d6t4k                1/1     Running   0               56m
ace-controller-ace-controller-deployment-0                 1/1     Running   0               56m
ace-controller-ace-controller-deployment-1                 1/1     Running   0               56m
ace-controller-ace-controller-deployment-2                 1/1     Running   0               56m
ace-controller-sdr-envoy-sdr-deployment-7476d95999-l6klm   4/4     Running   0               56m
anim-graph-sdr-envoy-sdr-deployment-8647b8ff8b-c44qg       4/4     Running   0               56m
ia-animation-graph-microservice-deployment-0               1/1     Running   0               56m
ia-unreal-renderer-microservice-deployment-0               3/3     Running   0               56m
ia-unreal-renderer-microservice-deployment-1               3/3     Running   0               56m
ia-unreal-renderer-microservice-deployment-2               3/3     Running   0               56m
redis-redis-65b674b964-dk44f                               1/1     Running   0               56m
redis-timeseries-redis-timeseries-58d4d87d5c-995z6         1/1     Running   0               56m
riva-speech-6d9d5b7d4f-k5cvq                               1/1     Running   0               56m
tokkio-ingress-mgr-deployment-c98bbfc77-bqkdt              2/2     Running   0               56m
tokkio-ui-deployment-5c8774ffdb-68np8                      1/1     Running   0               56m
triton0-67974456bc-xjwdn                                   1/1     Running   0               56m
ue-renderer-sdr-envoy-sdr-deployment-59987d5b48-zcr2j      4/4     Running   0               56m
vms-vms-7467f69f66-2kl7j                                   1/1     Running   0               56m
3. Access Tokkio Workflow#
Once all the pods are running, you should be able to access the Tokkio application using the ui_endpoint URL that was part of the terminal output after running the deployment script (see the next section if you forgot the URL).
Enter the
ui_endpointURL in a Chrome browser to interact with Tokkio. e.g.,http://<application-instance-ip>:30111As we are not using a CA signed certificate, you may encounter a
Site is not securewarning. Confirm that the IP address and port are correct then read and follow the instructions in the browser to bypass this warning.When accessing the UI for the first time, the browser should prompt you for permissions such as Mic, Speaker, or Camera necessary for the UI to operate. Upon accepting the permissions, the UI should load.
4. Review Installation Details#
To review the installation output from the deployment script at a later time, run the command below. You will receive the same output from when Tokkio was initially installed.
./envbuild.sh info --tf-binary terraform --config-file ./<my-renamed-config-template.yml>
Expected console output should be similar to the one below.
access_urls:
   app:
      ace_configurator_endpoint: http://<application-instance-ip>:30180/
      api_endpoint: https://<application-instance-ip>:30888/
      ui_endpoint: https://<application-instance-ip>:30111/
      grafana_endpoint: http://<application-instance-ip>:32300/
    turn: {}
ssh_command:
app:
    master: ssh -i /home/metroadmin/.ssh/id_rsa.pem -o StrictHostKeyChecking=no -o UserKnownHostsFile=/dev/null -o ProxyCommand="ssh -i /home/metroadmin/.ssh/id_rsa.pem -o StrictHostKeyChecking=no -o UserKnownHostsFile=/dev/null -W %h:%p ubuntu@<bastion-host-ip>" ubuntu@<application-instance-ip>
turn:
    master: ssh -i /home/metroadmin/.ssh/id_rsa.pem -o StrictHostKeyChecking=no -o UserKnownHostsFile=/dev/null ubuntu@<turn-server-ip>
5. Un-install the Tokkio Workflow#
If you decide to uninstall the entire setup, run the command below. Ensure you have the variables from the my-config.env file sourced to your shell.
source my-config.env
./envbuild.sh uninstall --tf-binary terraform --component all --config-file ./<my-renamed-config-template.yml>
What is Next?#
Now that you have a working Tokkio avatar, there are different ways to deploy or customize the workflow.
Deployment Modes and Platforms#
In addition to deploying this basic Tokkio example on Bare-metal machines, you may alternatively deploy Tokkio on various platforms. Below are the deployment modes supported.
Bare Metal Deployment#
Manual Setup : Refer to Setup Guide for detailed instructions on Bare Metal Manual setup.
Automated Setup : Refer to Setup Guide for Bare Metal deployment using Deployment Scripts.
Cloud Deployment#
Tokkio Workflow can be deployed on multiple cloud platforms. Below are the CSPs supported at the moment.
AWS : Refer to Setup Guide for AWS using Deployment Scripts.
GCP : Refer to Setup Guide for GCP using Deployment Scripts.
Azure : Refer to Setup Guide for Azure using Deployment Scripts.
Reference Workflow#
You can find more information about the deployed workflow in the Reference Workflow section.
Customization#
The version of the Tokkio workflow deployed in this quickstart guide is the simplest version of the LLM-RAG reference workflow. If you would like to customize your Tokkio deployment, refer to the Customization Options section.
Troubleshooting#
If you are unable to follow the steps outlined in this quickstart guide, refer to Troubleshooting for troubleshooting.