Unreal Renderer Microservice Introduction#
The Tokkio LLM-RAG reference workflow uses the Unreal Renderer Microservice to support real-time animation rendering from Unreal Engine Pixel Streaming through WebRTC. It enables users to easily plug in their MetaHuman avatar created with Unreal Engine into the Tokkio app and stream on the Tokkio UI with high-definition quality and in real-time.
Custom Avatar Prerequisites#
An avatar created with Unreal Engine. Please refer to Avatar Customization for more information on creating and customizing avatars.
A GitHub account which its access token will be used for setting the required K8 secret for UE MS.
An Epic Games account which will be linked to the GitHub account.
Pre-steps#
Pre-step 1. Linking GitHub and Epic Games Accounts#
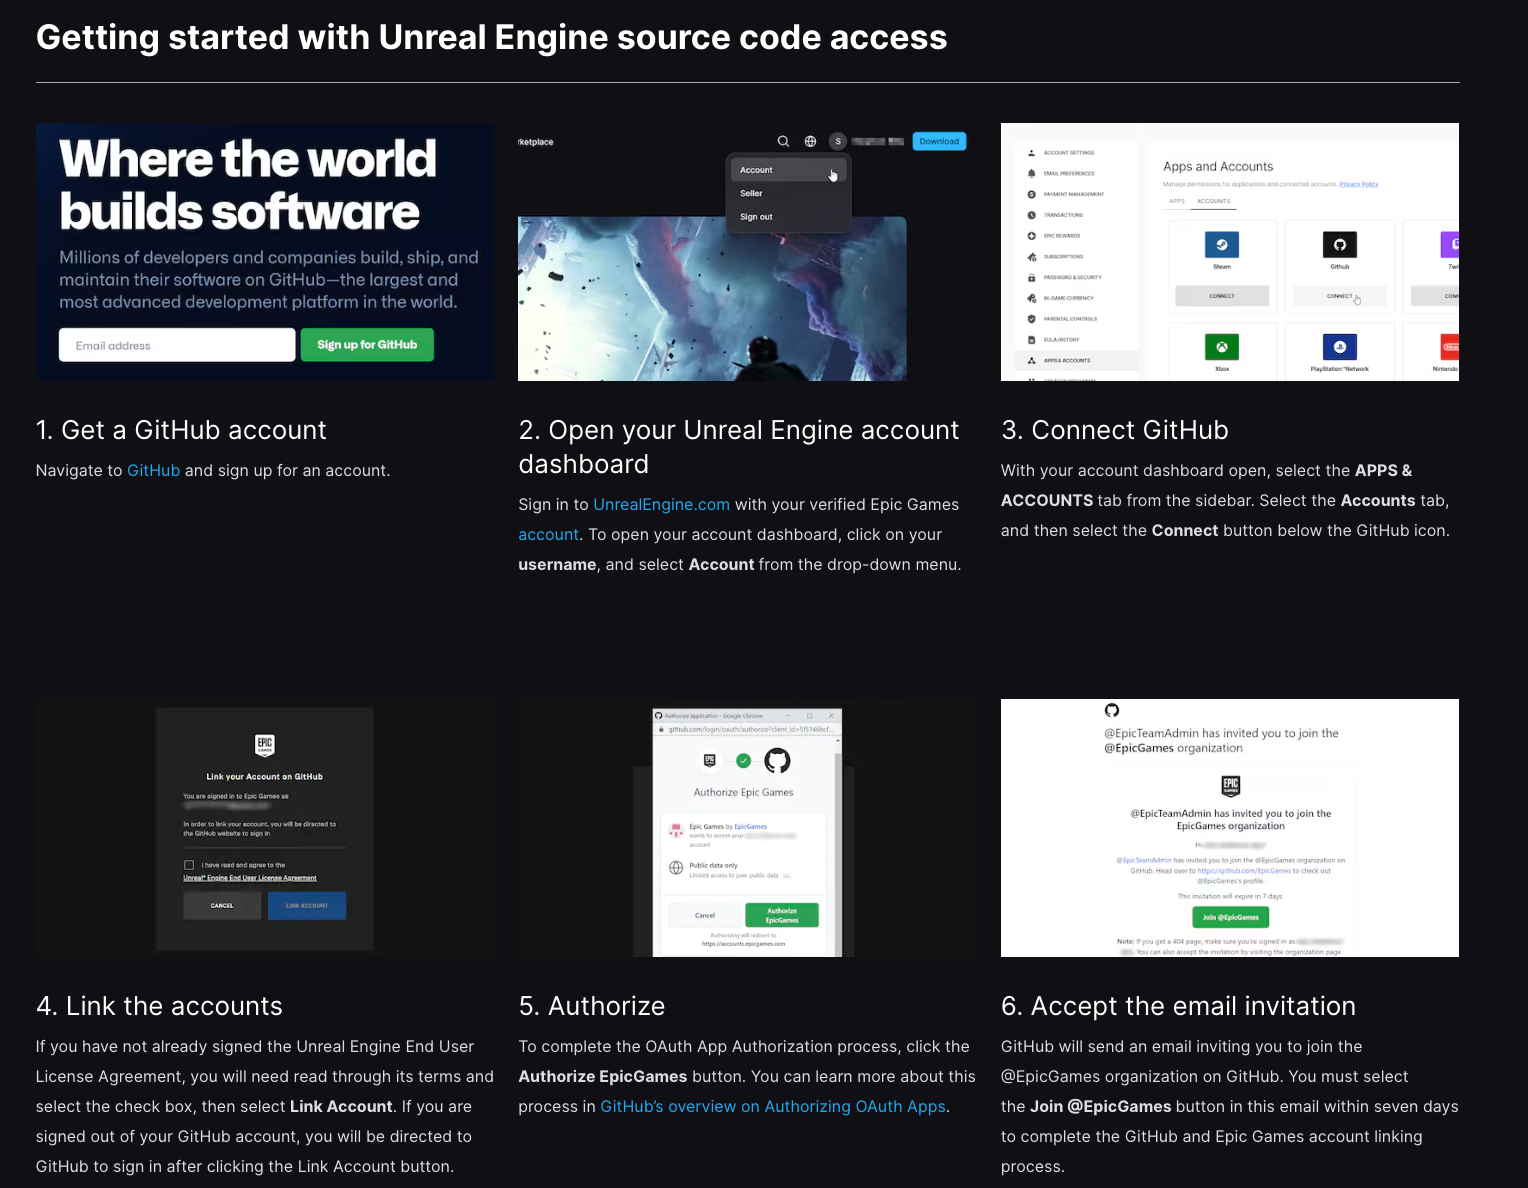
To link the Epic Game account to your GitHub account, follow the steps under Getting started with Unreal Engine source code access.
Pre-step 2. Obtain GitHub Access Token#
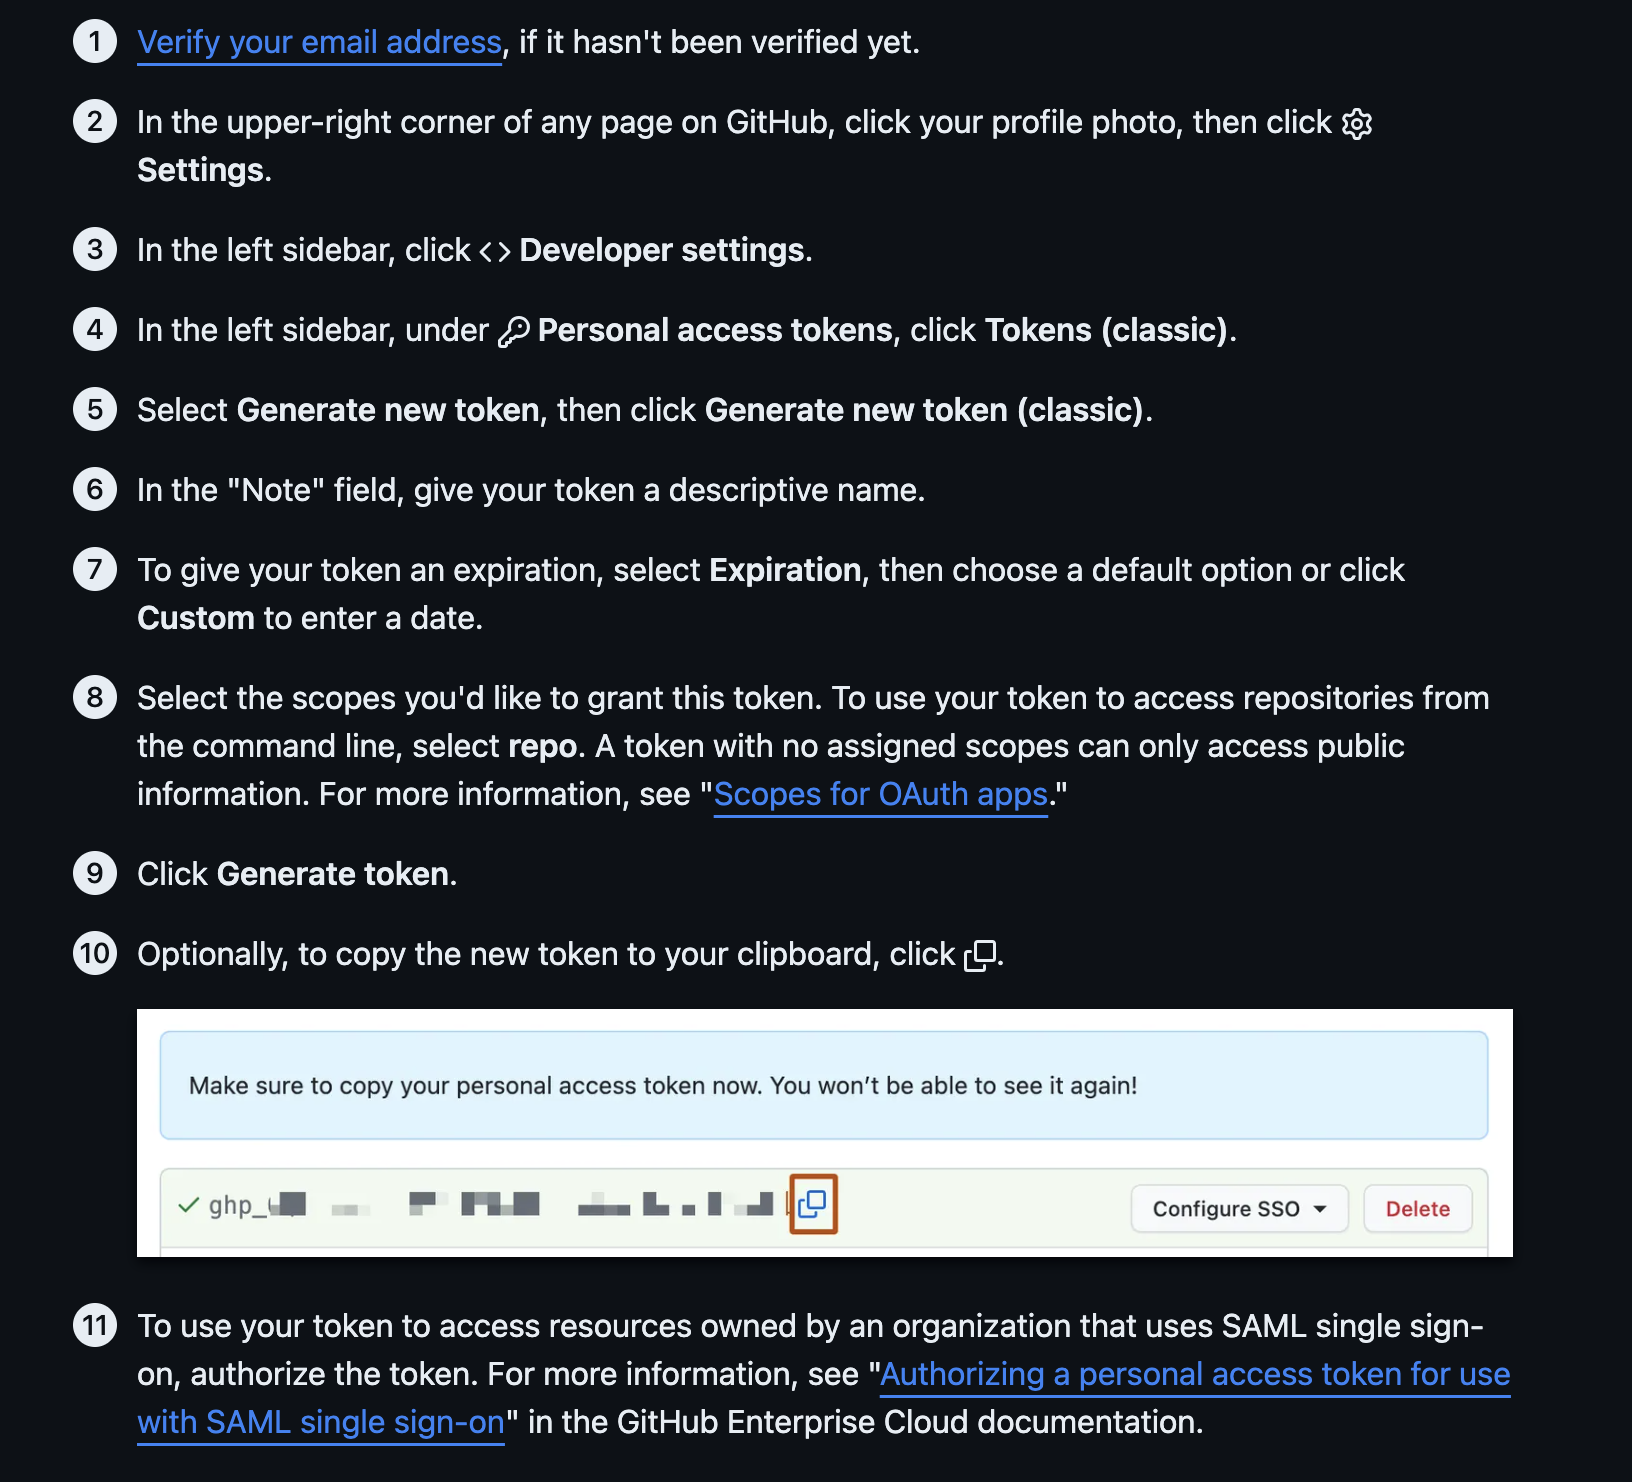
To generate an access token for a GitHub account, follow the steps from the Creating a personal access token (classic) section.
Refer to the Prerequisites section from Docker & Unreal Animation Pipeline Workflow for more details.
Pre-step 3. Set Kubernetes secret to access Epic Games resources#
Note
Refer to the Deployment for setting below secret with one-click script.
Use the access token created from Pre-step 2. Obtain GitHub Access Token to populate the k8s_secrets for the One-Click deployment of this app. Refer to Deployment for options on the deployment script. A snippet of the relevant section in the config-template.yaml is provided below.
app:
  configs:
    app_settings:
      k8s_secrets:
      ...
        - name: 'ghcr-docker-reg-secret'
          type: 'dockerconfigjson'
          registry_name: "ghcr.io"
          username: "{{ lookup('env', 'GITHUB_USERNAME', default=Undefined) }}"
          password: "{{ lookup('env', 'GITHUB_ACCESS_TOKEN', default=Undefined) }}"
      ...
Deployment#
Note
Ensure you have completed the Pre-steps before proceeding.
The sample Tokkio LLM-RAG - Unreal Engine helm chart is available here https://catalog.ngc.nvidia.com/orgs/nvidia/teams/ace/helm-charts/tokkio-1stream-with-ui. Follow the steps below to deploy this Helm chart.
Create a yaml file to specify the custom avatar setting (e.g.
ue_settings.yaml).ue_settings.yaml#tokkio-app: ia-unreal-renderer-microservice: applicationSpecs: deployment: initContainers: - env: - name: REMOTE_RESOURCE_PATH value: "{'metahumanPak': '', 'scenePak': '', 'unrealEngineProject': '<META_HUMAN_PROJECT_RESOURCE_PATH>'}" - name: DESTINATION_RESOURCE_PATH value: /home/interactive-avatar - name: NVIDIA_VISIBLE_DEVICES value: "<GPUS_TO_BE_USED>" envFrom: - secretRef: name: ngc-api-key-secret image: nvcr.io/nvidia/ace/ngc-resource-downloader:<VERSION> imagePullPolicy: IfNotPresent name: init volumeMounts: - mountPath: /home/interactive-avatar name: asset-volume
Replace the following placeholders as described below:
<META_HUMAN_PROJECT_RESOURCE_PATH>: MetaHuman project resource path<VERSION>: NGC resource downloader version available on NGC<GPUS_TO_BE_USED>:NVIDIA_VISIBLE_DEVICESvalue set for the Unreal Renderer microservice. E.g.:1,2,3.
Re-deploy the Tokkio app with the custom avatar setting using the Integrating Persistent Customization Changes without Rebuild section for more details.
Note
For a fresh deployment, refer to the Quickstart Guide section and use the above-mentioned ue_settings.yaml file as a value override file for deployment.