Initial Setup - First Boot#
This guide walks you through setting up your DGX Spark for the first time. You’ll choose how to access your system during the initial setup, and run the first-time setup utility to configure everything. The access method you choose is only for completing the initial setup - after setup is complete, you can access your DGX Spark any way you like: locally with a monitor and keyboard, over the local network from another computer, or a mix of both.
What You’ll Do#
This setup process includes:
Choosing how to access the system during initial setup (with a display, or as a network appliance)
Preparing your system and connections
Running the first-time setup utility to configure your system
Choose how to access your system during initial setup#
To complete the initial setup, you’ll need to access your DGX Spark. You can do this in one of two ways:
- With a Display (Local Setup)
Connect keyboard and mouse via USB or Bluetooth
Connect a display to work directly on the system
Follow the setup wizard on screen
- Over the Network (as a Network Appliance)
Access the system over your local network from another computer
Use another computer to complete setup via web browser
No Spark display or keyboard required for the setup process
Note
This choice is only about how you’ll complete the initial setup process. After setup is finished, you can access your DGX Spark however you prefer. You’re not locked into your original choice.
Get Ready#
Important
The DGX Spark device starts up immediately when power is applied. Please attach all peripherals (display, keyboard, mouse, network, etc.) before connecting the power supply.
Before starting, ensure you have:
A fast, reliable internet connection (Wi-Fi or Ethernet) to download required updates during the initial setup process. Connections using captive portals (such as hotel or airport Wi-Fi) or those prone to disconnections (like phone hotspots) are not recommended. If you do not have access to a stable connection, consider downloading the system recovery media and using System Recovery to install the latest software for your DGX Spark.
For Local Setup: A display, keyboard, and mouse connected (or available using Bluetooth).
For Network Setup: A computer on the same network to access the setup interface.
Power connected to the system (the system will start automatically when power is applied).
Note
Display Troubleshooting: Some displays may have trouble with Spark out of the box. If you are connecting over USB-C/DisplayPort and there is no display, try using HDMI instead.
Note
If you plan to use a wired network connection, plug in the network cable before starting the installation. This helps avoid connection issues later in the process.
Run the First-Time Setup#
The first-time setup utility will guide you through:
Powering on and initializing the system
Selecting your preferred setup mode
Downloading and installing critical updates
Completing your initial configuration
Warning
Critical: Do not shut down or reboot the system during the update process. The installation cannot be interrupted once the download begins, and powering down during updates can cause system damage.
Getting Started#
The way you start the installation depends on your chosen access method:
With a Display (Local Setup)
Power on the system
The first-time setup utility will start automatically on the connected display
Use your wired keyboard and mouse (already connected) to navigate
If a keyboard or mouse is not detected, you will be prompted to put your Bluetooth devices in pairing mode:
USB devices can be plugged in at any time and should start working, even if detected improperly. Bluetooth devices can be put into pairing mode and will generally still pair while on the “Get Started” screen (exception - keyboards that require a passcode to type in won’t work on this screen). Once you click on “Get Started,” Bluetooth pairing stops, so you will have to power cycle to try again.
Follow the on-screen prompts to complete the setup process
Over the Network (as a Network Appliance)
Power on the system. This creates a Wi-Fi hotspot that you will use to connect to the system and continue the setup process. The SSID and password for the Wi-Fi hotspot are printed on a sticker attached to the Quick Start Guide included with your DGX Spark’s packaging
From another computer, connect to the Spark’s Wi-Fi hotspot using the SSID and password provided on the Quick Start Guide. A captive portal page will open in the default web browser on your computer. If it does not open automatically, use your browser to navigate to the Spark’s system setup page listed on the Quick Start Guide.
Follow the on-screen prompts to continue the setup process.
When the DGX Spark joins your home network, its Wi-Fi hotspot will turn off and your computer will reconnect to the device through your Wi-Fi network to resume the setup process. If you are not able to connect to the DGX Spark after it joins your home network, you must connect a display/keyboard/mouse to continue.
Note
It may take as long as 10 minutes for the DGX Spark to install all of it’s updates and join your home network.
What to Expect During Setup#
The first-time setup utility will guide you through several configuration steps. Simply follow the on-screen prompts to complete each step.
Setup Process Steps:
Language and Time Zone Selection
Choose your preferred language and time zone settings for the system. Note that the input fields will filter as you type.
Keyboard Layout Selection (Local Setup only)
Select your keyboard layout (e.g. US keyboard vs. Russian keyboard). This screen only appears when using a display during setup.
Terms and Conditions
Review and accept the terms and conditions to continue with the installation.
User Account Creation
Create your username and password for system access.
Information Sharing Settings (Optional)
Configure analytics and crash reporting preferences. You can skip this step if desired.
Wi-Fi Network Selection
Select your Wi-Fi network. This step is automatically skipped if an Ethernet cable that is providing internet access is connected.
Wi-Fi Password
Enter the password for your selected Wi-Fi network.
Joining Wi-Fi Network
The system connects to your Wi-Fi network and tears down the access point. Your computer will automatically reconnect to your default network.
Note
Network Connection Issues:
If your computer automatically reconnects to the same network as the Spark, the installation should continue seamlessly
If not, you’ll need to connect your computer to the same network as the Spark while the setup app is waiting for the network setup process to complete
If the setup fails, you must connect a display/keyboard/mouse to continue
The modal instructs you to try to reconnect to the Spark’s hotspot and try again. This will work if the Spark actually failed to join the network (e.g. wrong password) versus your laptop can’t communicate with the Spark
If you DO NOT see the hotspot available when this error modal appears, that means the Spark did join the network but your laptop can’t communicate with it. This could be because:
Device isolation
You failed to join the same network as your Spark
mDNS does not work on your network due to its configuration (e.g. a complex corporate network)
Software Download and Installation
After connecting to the network, the system will automatically download and install the full software image. This process can take some time, and the system may reboot more than once before it’s complete. If you are setting up over the network from another computer, you will not be able to access the device during this time. The process may continue for up to 10 minutes after the interface shows that the device is rebooting to finish the setup
Warning
Do not shut down or reboot the system during this process. The installation cannot be interrupted once the download begins.
Installation Complete
The device will reboot automatically when installation is complete, and you can then use it normally.
Next Steps#
Congratulations! Your DGX Spark is now ready to use. Here are the recommended ways to access and start working with your system:
- Access Your System
Locally: Use your DGX Spark like any desktop computer with a monitor, keyboard, and mouse
Over the Network: Connect to your DGX Spark from another computer on the same network using the NVIDIA Sync tool (see NVIDIA Sync), SSH, or remote desktop
Mix Both: Use whatever access method fits your current workflow - you can switch freely between local and network access
Dashboard Access: Use the built-in DGX Dashboard for system monitoring, updates, and JupyterLab access. See DGX Dashboard for more information
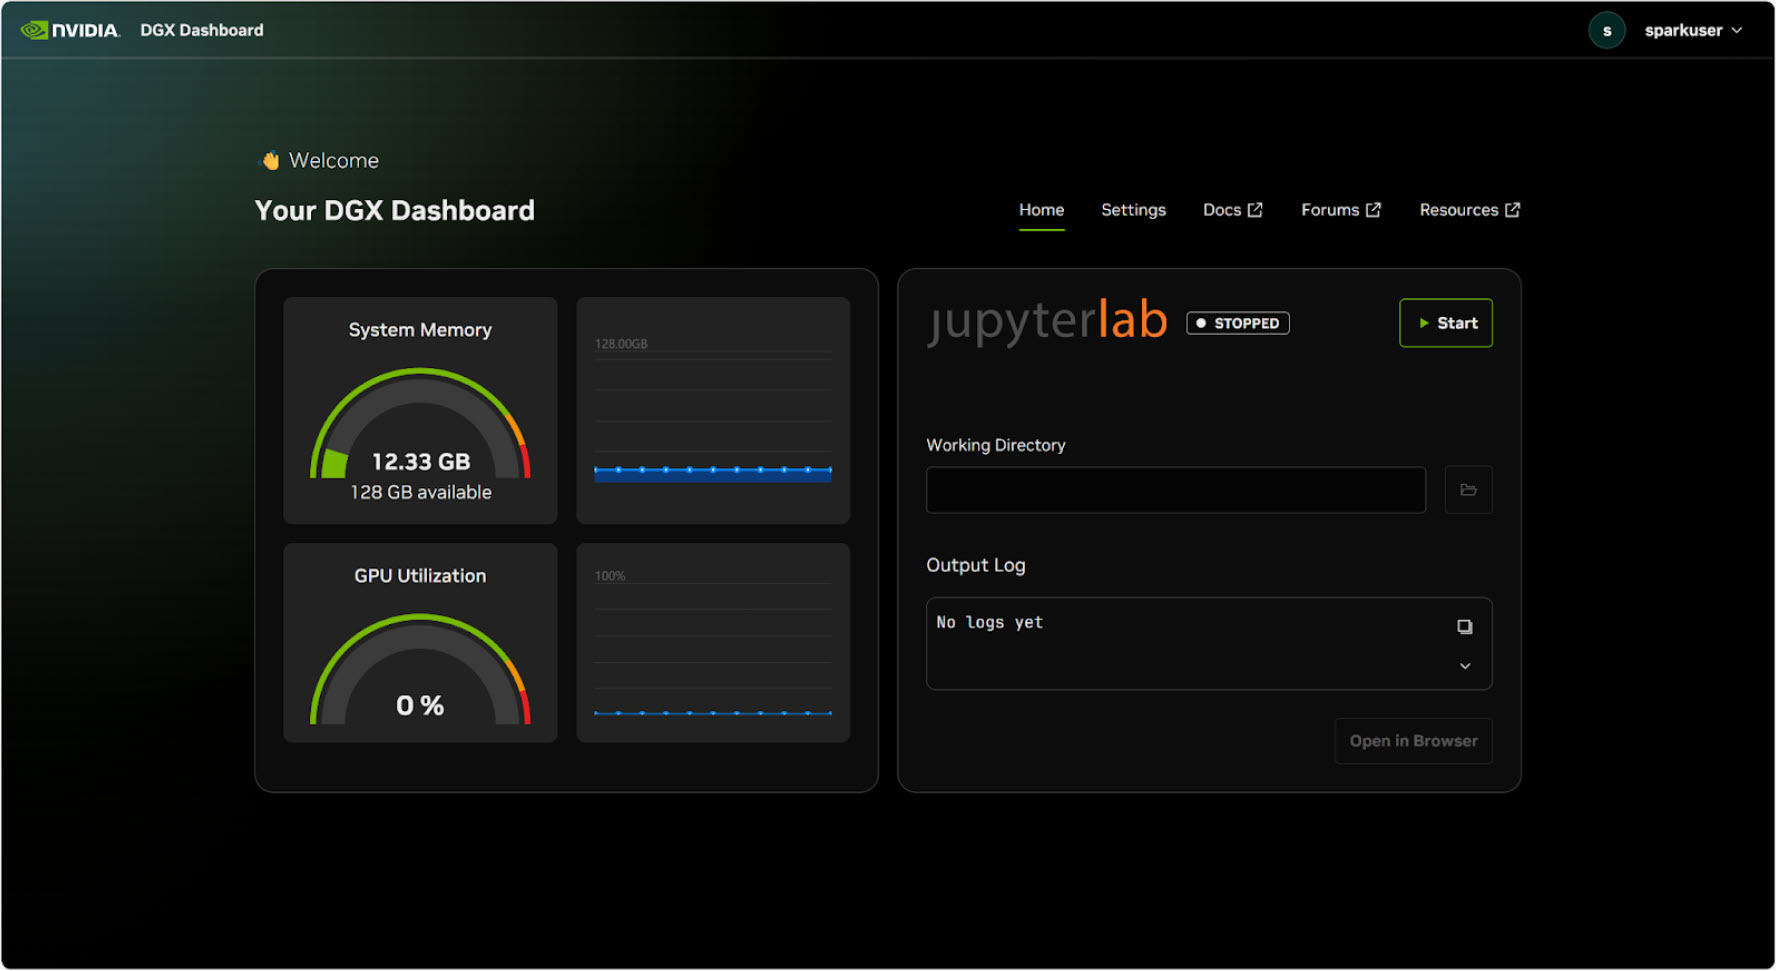
The DGX Dashboard provides an intuitive interface for system monitoring and development#
- Additional Resources
Visit the NVIDIA Spark Developer Portal at https://build.nvidia.com/spark for the latest guides, tutorials, and updates
Refer to DGX Spark Release Notes for the latest software updates and features
See Known Issues for troubleshooting common problems
Your DGX Spark is now ready to power your AI development and deployment workflows!