PXE Boot Setup#
The DGX Spark UEFI BIOS supports PXE boot. Several manual customization steps are required to get PXE to boot the DGX OS image or the DGX Spark recovery image.
Caution
This document is meant to be used as a reference. Explicit instructions are not given to configure the DHCP, HTTP, and TFTP servers. The end user’s IT team is expected to configure these servers to fit their company’s environment and security guidelines.
Requirements#
TFTP server
Software that provides TFTP service.
HTTP server
An HTTP server is used to transfer large files, such as the iso image and
initrd. alternatively, TFTP can be used for this purpose. HTTP is used in the example below.
DHCP server
Software that provides dynamic host configuration protocol (DHCP) service.
Note
The TFTP server, HTTP server, and DHCP server can all be configured on the same system, or they can each be on different systems.
linux bootloader
ip address:
<ftp ip>fully qualified host:
<ftp host>
This topic provides some guidance concerning how to set up a PXE boot environment for DGX systems.
For complete details, refer to online documentation for setting up a PXE boot server.
In this example, xinetd is used to provide TFTP service; dnsmasq is used to
provide DHCP service; and syslinux is used as the bootloader.
Overview of the PXE Server#
The PXE server requires configuration in the following areas:
bootloader (grub)
TFTP contents (the kernel and
initrd)In this example, TFTP is configured to serve files from
/local/tftp/. You will need to configure your TFTP server to serve files from/local/tftpor the directory you desire to use.HTTP contents (the iso image)
In this example, HTTP is configured to serve files from
/local/http/. You will need to configure your HTTP server to serve files from/local/httpor the directory you desire to use.DHCP
PXE Server Configuration for DGX OS Image#
In this example, the directory structure on the HTTP and TFTP server looks like this:
/local/
   http/
      base_os_7.0.0/
         base_os_7.0.0.iso

   tftp/
      baseos/
         vmlinuz
         initrd
      grub/
         grub.cfg
      grubnetaa64.efi.signed
Note
The vmlinuz and initrd files are specified relative to the TFTP root,
/local/tftp/; and the location of the ISO, base_os_7.0.0.iso, is relative to the HTTP
root, /local/http/.
Here, the DHCP and PXE servers are configured to use the above directory structure. The person responsible for deploying the PXE environment should change the directory names and structure to fit their infrastructure.
You can set up the directory structure on your HTTP and TFTP server similarly.
The contents of the /local/tftp/grub/grub.cfg file should look something like this:
set default=0
set timeout=5

menuentry 'Install BaseOS 7.0.0' {
   linux /baseos/vmlinuz fsck.mode=skip autoinstall ip=dhcp url=http://<Server IP>/base_os_7.0.0/base_os_7.0.0.iso nvme-core.multipath=n nouveau.modeset=0
   initrd /baseos/initrd
}
Note
The kernel boot parameters should match the contents of the corresponding ISO’s boot
menu found in /mnt/boot/grub/grub.cfg.
When the system being installed boots via PXE, boot files located on /local/tftp are
retrieved from the TFTP server. (In this example, the TFTP server is provided by the xinetd
service whose configuration file, /etc/xinetd.d/tftp, specifies that the boot files
are located on /local/tftp.) When a system is PXE booted, the grubnetaa64.efi.signedi file
that is designated in the DHCP server’s dhcpd.conf file is retrieved by TFTP transfer
(see Configure Your DHCP Server). By default, after the grubnetaa64.efi.signed is booted, the
PXE boot grub.cfg file, grub/grub.cfg in this example, provides menu options for
booting further. The PXE boot grub.cfg config file specifies the locations of the
kernel and initrd files relative to the tftp directory.
Configure the HTTP Directory:
Configure the HTTP file directory and ISO image by placing a copy of the Base OS 7.0.0 ISO in directory
/local/http/base_os_7.0.0/. In this example, the full path is/local/http/base_os_7.0.0/base_os_7.0.0.iso.Configure the TFTP Directory By Using the Following Steps:
Mount the Base OS 7.0.0 ISO. Assume your mount point is
/mnt:sudo mount -o loop /local/http/base_os_7.0.0/base_os_7.0.0.iso /mnt
Copy the kernel and
initrdfrom the ISO to the tftp directory:cp /mnt/casper/vmlinuz /local/tftp/baseos/vmlinuz cp /mnt/casper/initrd /local/tftp/baseos/initrd
Unmount the Base OS 7.0.0 ISO:
umount /mntDownload GRUB binaries and Copy it for PXE Booting into Place:
cd /tmp
wget -q http://ports.ubuntu.com/ubuntu-ports/dists/jammy/main/uefi/grub2-arm64/current/grubnetaa64.efi.signed
cp grubnetaa64.efi.signed /local/tftp/
PXE Server Configuration for Recovery Media#
In this example, the directory structure on the HTTP and TFTP server looks like this:
/local/
   http/
      fastos/
         usb.customer.tar.gz
   tftp/
      fastos/
         vmlinuz
         initrd
      grub/
         grub.cfg
      grubnetaa64.efi.signed
Note
The vmlinuz and initrd files are specified relative to the TFTP root,
/local/tftp/; and the location of the ISO, usb.customer.tar.gz, is relative to the HTTP
root, /local/http/.
Here, the DHCP and PXE servers are configured to use the above directory structure. The person responsible for deploying the PXE environment should change the directory names and structure to fit their infrastructure.
You can set up the directory structure on your HTTP and TFTP server similarly.
The contents of the /local/tftp/grub/grub.cfg file should look something like this:
set default=0
set timeout=5

menuentry "Install DGX Spark FastOS" {
    linux /fastos/vmlinuz nouveau.modeset=0 console=tty0 console=ttyS0,921600 sbsa_gwdt.action=1 noui pxeinstall=true fastos_usbimg_url=http://<Server IP>/fastos/usb.customer.tar.gz ip=dhcp static_ip=<static ip>:<gateway ip>
    initrd /fastos/initrd
}
When the system being installed boots via PXE, boot files located on /local/tftp are
retrieved from the TFTP server. (In this example, the TFTP server is provided by the xinetd
service whose configuration file, /etc/xinetd.d/tftp, specifies that the boot files
are located on /local/tftp.) When a system is PXE booted, the grubnetaa64.efi.signedi file
that is designated in the DHCP server’s dhcpd.conf file is retrieved by TFTP transfer
(see Configure Your DHCP Server). By default, after the grubnetaa64.efi.signed is booted, the
PXE boot grub.cfg file, grub/grub.cfg in this example, provides menu options for
booting further. The PXE boot grub.cfg config file specifies the locations of the
kernel and initrd files relative to the tftp directory.
Configure the HTTP Directory:
Configure the HTTP file directory and ISO image by placing a copy of the DGX OS exactly as
/local/http/usb.customer.tar.gz. Download the recovery media archive file (tar.gz format) from https://developer.nvidia.com/downloads/dgx-spark/dgx-spark-recovery-image-1.135.29.tar.gz and change its name tousb.customer.tar.gz.Configure the TFTP Directory By Using the Following Steps:
Untar the
usb.customer.tar.gzfile to the/tmpdirectory:tar xpfv /tmp/usb.customer.tar.gz
Copy the kernel and
initrdfrom the tarball to the tftp directory:cp /tmp/usbimg.customer/usb/vmlinuz /local/tftp/fastos/ cp /tmp/usbimg.customer/usb/initrd /local/tftp/fastos/
Download GRUB binaries and Copy it for PXE Booting into Place:
cd /tmp
wget -q http://ports.ubuntu.com/ubuntu-ports/dists/jammy/main/uefi/grub2-arm64/current/grubnetaa64.efi.signed
cp grubnetaa64.efi.signed /local/tftp/
TFTP and HTTP Server Verification#
After you have set up all elements of your PXE server, prior to doing a PXE install, verify that the TFTP and HTTP servers are working properly.
TFTP Server Verification
To verify that the TFTP server has been set up correctly, from a different system on the same subnet,
use tftp to get one of the files that will be obtained via tftp during the PXE boot. In this example,
the TFTP server has been set up to serve files from /local/tftp. The grub configuration file,
grub.cfg is located on /local/tftp/grub/grub.cfg; therefore, from the TFTP command prompt, request grub.cfg via
get grub/grub.cfg.
cd /tmp
tftp <TFTP_Server_IP>
get grub/grub.cfg
quit
HTTP Server Verification
To verify that the HTTP server has been set up correctly, use the wget command to get one of
the files that will be obtained via HTTP during the PXE boot. In this example, the HTTP server has been
set up to serve files from /local/http. The tarball, usb.customer.tar.gz,
is located on /local/http/fastos/usb.customer.tar.gz; therefore, test the HTTP request to
retrieve usb.customer.tar.gz by running the following commands:
cd /tmp
wget http://<HTTP Server IP>/fastos/usb.customer.tar.gz
Useful Parameters for Configuring Your System’s Network Interfaces#
static_ip=<static ip>:<gateway ip>: tells the initramfs to configure the system’s interfaces using a static IP address.
Parameters Unique to the Spark OS Installer#
usb.skipfw: Skips the firmware update step during the installation.usb.shell: Starts a shell instead of installing the OS.noui: Disables the user interface during the installation.autoinstall: Enables the autoinstall feature during the installation.
Configure Your DHCP Server#
The DHCP server is responsible for providing the IP address of the TFTP server and the name of the bootloader file in addition to the usual role of providing dynamic IP addresses.
The address of the TFTP server is specified in the DHCP configuration file as next-server, and the bootloader file is specified as filename.
The architecture option can be used to detect the architecture of the client system and to serve the correct version of the grub bootloader (x86, IA-32, ARM, and so on).
An example of the PXE portion of dhcpd.conf is:
class "pxeclients" {
  match if substring (option vendor-class-identifier, 0, 9) = "PXEClient";
    filename "grubnetaa64.efi.signed";
    next-server <TFTP_Server_IP>;
    option root-path "/local/tftp";
}
For example, this is a dhcpd.conf file:
authoritative;
default-lease-time 120;
max-lease-time 120;
ddns-update-style none;


subnet 192.168.99.0 netmask 255.255.255.0 {
pool {
   range 192.168.99.2;

# Required for PXE Boot
class "pxeclients" {
   match if substring (option vendor-class-identifier, 0, 9) = "PXEClient";
      filename "grubnetaa64.efi.signed";
      # TFTP Server IP address
      next-server 192.168.99.1;
      option root-path "/local/tftp/";
}

}
}
Enable PXE Boot on the DGX Spark#
Before enabling PXE Boot, you need to disable the secure boot feature in the UEFI menu or enroll the grubnetaa64.efi.signed in the UEFI menu.
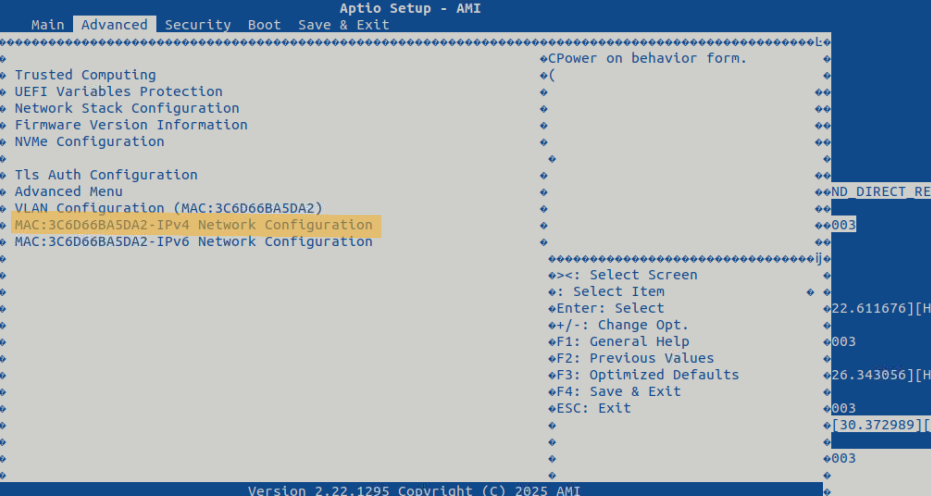
Enable PXE Boot on the DGX Spark by enabling it in Network Stack Configuration menu.
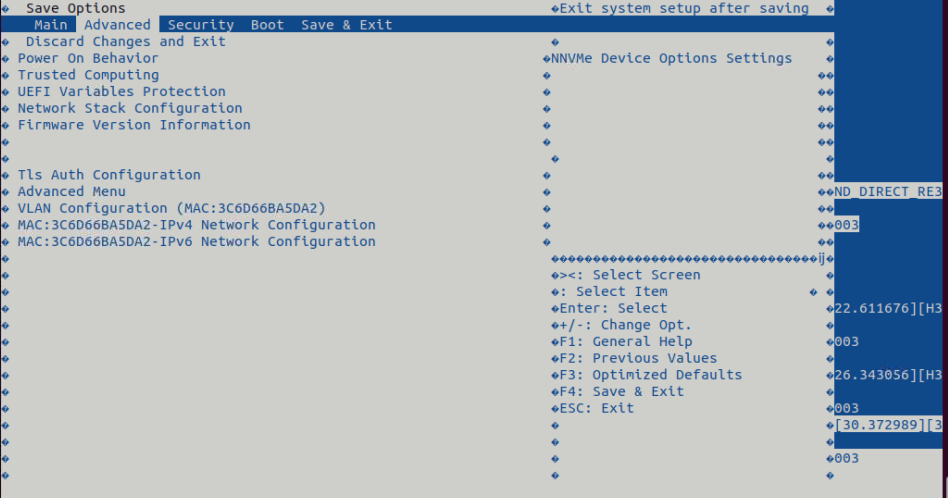
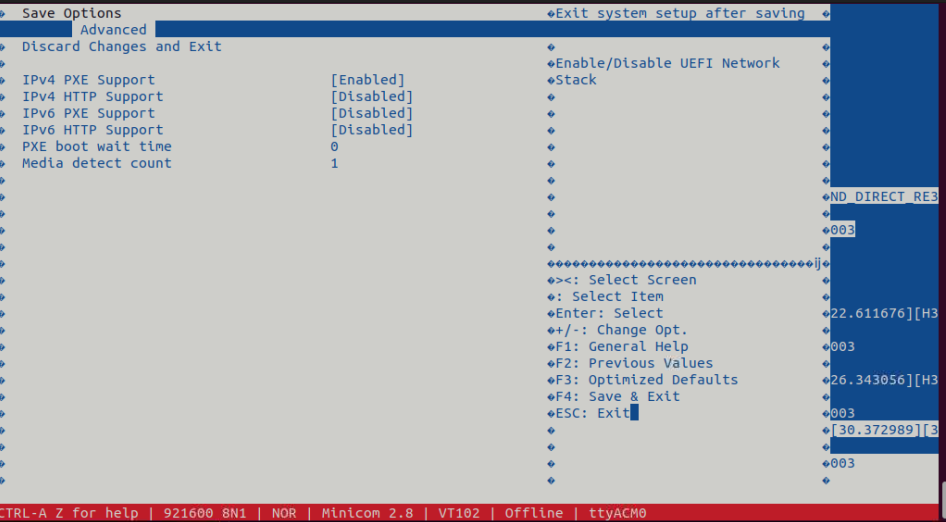
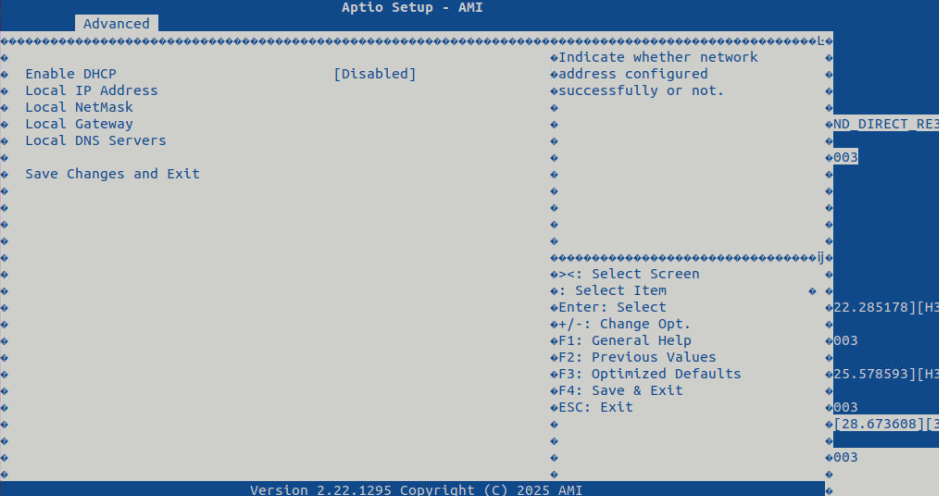
Select the NIC you want to use for PXE Boot and enable PXE Boot.
Save and Exit.
After you finished, you can use the UEFI boot menu to do PXE boot and modify the boot order. See https://docs.nvidia.com/dgx/dgx-spark-uefi/boot-tab.html.