Kubernetes Deployment#
Deploy Kubernetes with Kubespray#
If you install k8s with a non-HA configuration, which is fine for non-critical non-production installations you can use NVIDIA Cloud Native Stack, a collection of Ansible playbooks and scripts to roll out GPU enabled kubernetes installation. It’s much easier to set up, but it doesn’t support HA out of the box, so we will go with the standard way of deploying using kubespray.
Clone the Kubespray repository:
git clone https://github.com/kubernetes-sigs/kubespray
Next go into the cloned directory and copy the sample inventory folder:
cd kubespray/
cp -r inventory/sample/ inventory/mykube/
Configure the Inventory#
Do the following changes.
File inventory/mykube/inventory.ini:
# This inventory describe a HA typology with stacked etcd (== same nodes as control plane)
# and 3 worker nodes
# See https://docs.ansible.com/ansible/latest/inventory_guide/intro_inventory.html
# for tips on building your inventory

# Configure 'ip' variable to bind kubernetes services on a different ip than the default iface
# We should set etcd_member_name for etcd cluster. The node that are not etcd members do not need to set the value,
# or can set the empty string value.
[kube_control_plane]
k8s-1-cp1 ansible_host=10.185.105.125 ansible_user=nvidia etcd_member_name=etcd1
k8s-1-cp2 ansible_host=10.185.105.124 ansible_user=nvidia etcd_member_name=etcd2
k8s-1-cp3 ansible_host=10.185.105.127 ansible_user=nvidia etcd_member_name=etcd3

[etcd:children]
kube_control_plane

[kube_node]
rtxprosrv2 ansible_host=10.185.105.212 ansible_user=nvidia
Replace these example host names, IP addresses and the main usernames accordingly here above and in the rest of the section.
In the file inventory/mykube/group_vars/k8s_cluster/k8s-cluster.yml edit the following lines:
kube_service_addresses: 172.16.0.0/16
kube_pods_subnet: 172.17.0.0/16
kube_proxy_strict_arp: true
auto_renew_certificates: true
Note
The IP ranges of service and POD address spaces have to be defined by you! Feel free to adjust the rest of the kubernetes cluster parameters as you like.
In the file inventory/mykube/group_vars/k8s_cluster/addons.yml edit the following lines:
kube_vip_enabled: true
kube_vip_arp_enabled: true
kube_vip_controlplane_enabled: true
kube_vip_address: 10.185.105.90
As before, the exact IP address needs to be defined by you. Here we essentially create a static
IP address to act as a forwarder for our 3 control plane servers. It has to be in the same IP
subnet as the Kubernetes control plane IP interfaces you specified in
inventory/mykube/inventory.ini.
In the file inventory/mykube/group_vars/all/all.yml make the following changes:
loadbalancer_apiserver:
  address: 10.185.105.90
  port: 6443
The addressing here is consistent with the changes in inventory/mykube/group_vars/k8s_cluster/addons.yml.
Execute Kubespray in the Container#
Run:
docker run --rm -it \
  --mount type=bind,source="$(pwd)"/inventory/mykube,dst=/inventory \
  --mount type=bind,source="${HOME}"/.ssh/id_rsa,dst=/root/.ssh/id_rsa \
  quay.io/kubespray/kubespray:v2.28.0 bash
Followed by:
ansible-playbook --become -i /inventory/inventory.ini --private-key /root/.ssh/id_rsa cluster.yml
This will rollout a baseline kubernetes installation on the 3 control plane nodes and a worker
node. You can always extend the list of worker nodes in inventory/mykube/inventory.ini and
rerun the script above to update the cluster.
After the installation is done exit from the current container and ssh to one of the control
nodes, copy the kubeconfig from /etc/kubernetes/admin.conf on the remote control plane node
into your local ~/.kube/config. You may need to replace
https://lb-apiserver.kubernetes.local:6443 with the IP address, e.g.
https://10.185.105.90:6443 or add lb-apiserver.kubernetes.local into your DNS or hosts
entry.
Install kubectl and run some basic command to ensure the cluster is up and running and kubectl can connect to the control plane:
kubectl get nodes
Expected output:
NAME        STATUS   ROLES          AGE     VERSION
k8s-1-cp1   Ready    control-plane  6h44m   v1.32.5
k8s-1-cp2   Ready    control-plane  6h44m   v1.32.5
k8s-1-cp3   Ready    control-plane  6h44m   v1.32.5
rtxprosrv2  Ready    <none>         6h43m   v1.32.5
Longhorn Storage Class Provider#
Add the repository and update helm:
helm repo add longhorn https://charts.longhorn.io
helm repo update
Next you can either install longhorn to all nodes:
helm upgrade --install longhorn longhorn/longhorn -n longhorn-system
Or pick the nodes to hold the storage capacity. Execute:
kubectl label nodes k8s-1-cp1 node.longhorn.io/create-default-disk=true
kubectl label nodes k8s-1-cp2 node.longhorn.io/create-default-disk=true
kubectl label nodes k8s-1-cp3 node.longhorn.io/create-default-disk=true
Then the following values.yaml file needs to be created:
longhornManager:
  nodeSelector: {}

longhornDriver:
  nodeSelector: {}

longhornUI:
  nodeSelector:
    storage: "longhorn"

persistence:
  defaultClass: true

service:
  ui:
    type: LoadBalancer
    port: 80

defaultSettings:
  createDefaultDiskLabeledNodes: "true"
  defaultDataPath: "/var/lib/longhorn"

defaultBackupStore:
  backupTarget: "s3://k8s-backups@us-east-1/"
  backupTargetCredentialSecret: "credentials"
And then applied respectively:
helm upgrade --install longhorn longhorn/longhorn -n longhorn-system -f values.yaml
This should respectively place disks on the selected nodes, but leave other Longhorn components on all nodes.
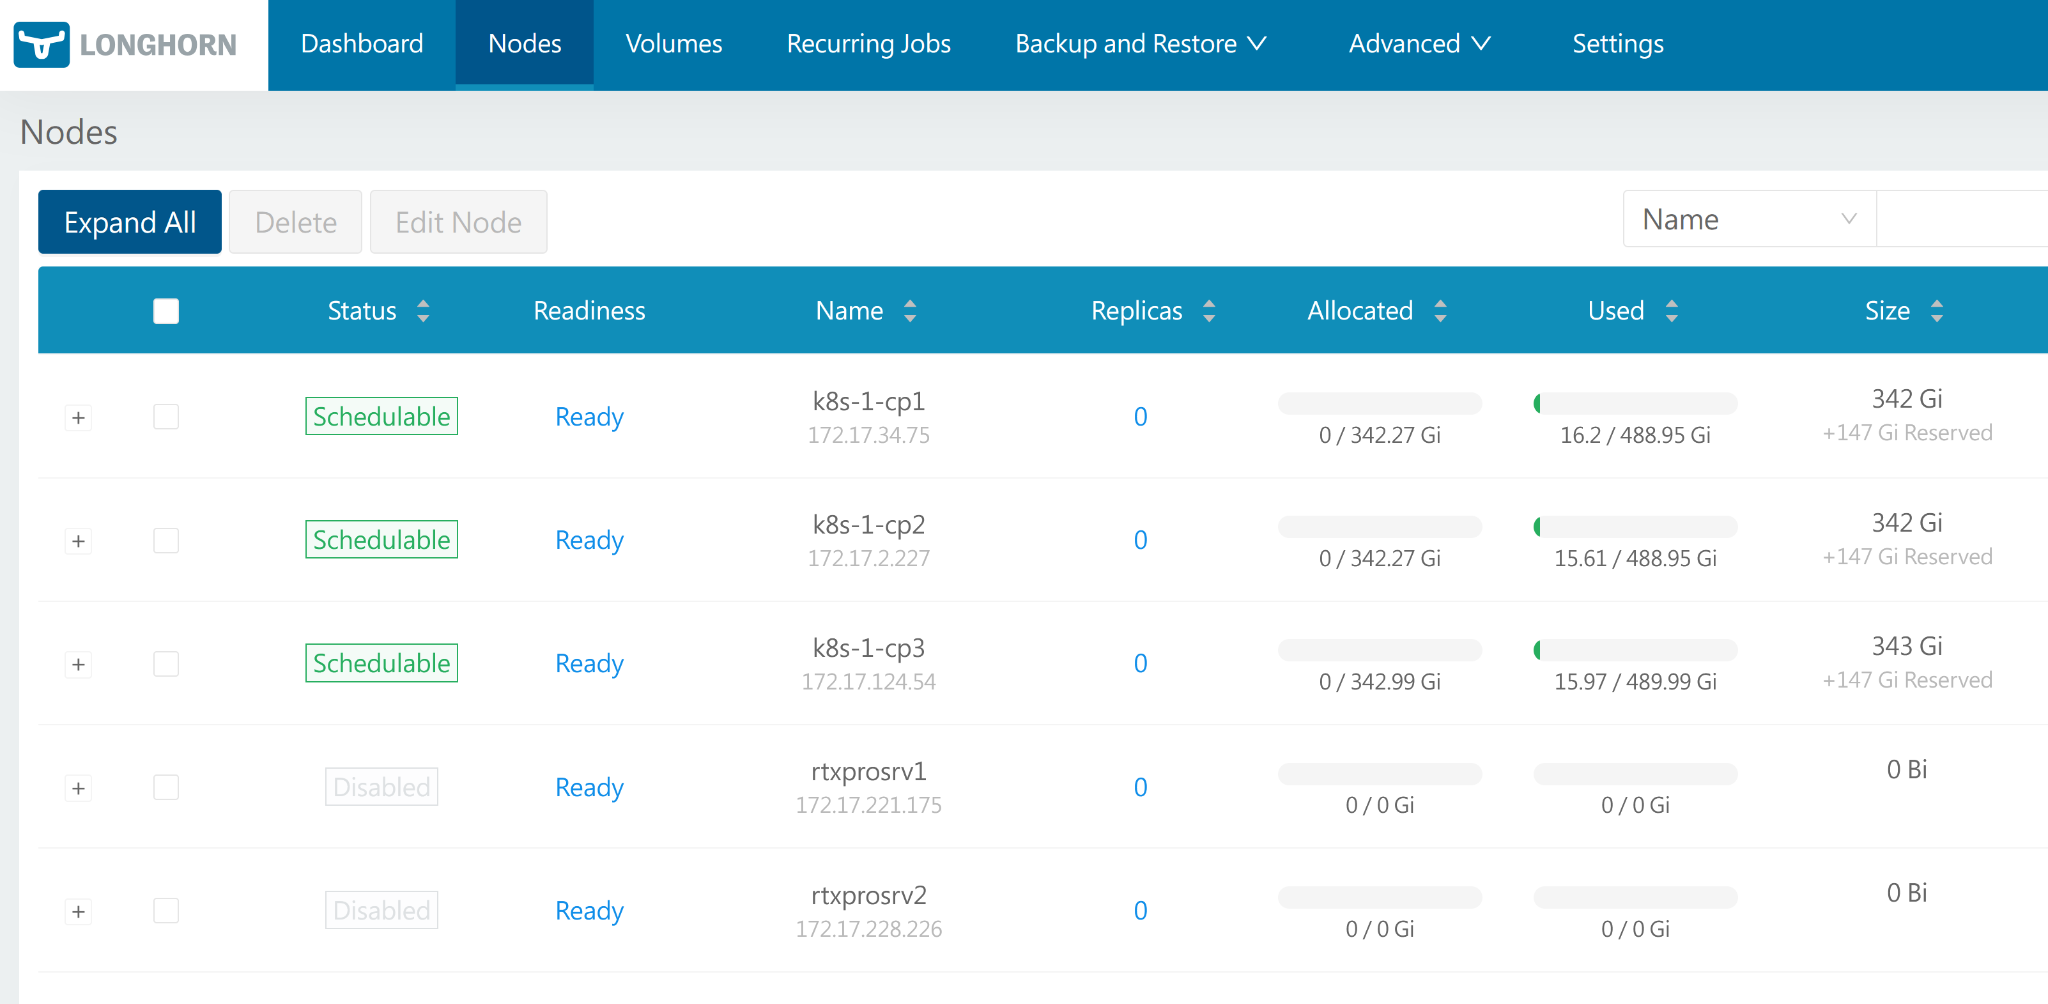
Figure 9 Longhorn dashboard showing nodes with schedulable storage on control plane nodes and worker nodes with storage disabled#
Next create a test.yaml file to test the RWO persistent volume claim:
apiVersion: v1
kind: PersistentVolumeClaim
metadata:
  name: test-pvc
spec:
  accessModes:
    - ReadWriteOnce
  resources:
    requests:
      storage: 1Gi
---
apiVersion: v1
kind: Pod
metadata:
  name: test-pvc-pod
spec:
  containers:
  - name: nginx
    image: nginx
    volumeMounts:
    - mountPath: "/usr/share/nginx/html"
      name: storage
  volumes:
  - name: storage
    persistentVolumeClaim:
      claimName: test-pvc
And apply it with kubectl apply -f test.yaml. This should lead to healthy pod creation with
attached PV / PVC:
kubectl get pod test-pvc-pod
Expected output:
NAME           READY   STATUS    RESTARTS   AGE
test-pvc-pod   1/1     Running   0          3m53s
GPU Operator Installation#
Normal Installation Procedure#
helm repo add nvidia https://helm.ngc.nvidia.com/nvidia \
  && helm repo update

helm install --wait --generate-name \
  -n gpu-operator --create-namespace \
  nvidia/gpu-operator \
  --version=v25.3.4
Installation Procedure with a Workaround for the Driver 580.82.07#
The driver version 580.82.07 at the time of the doc preparation requires a slightly different installation procedure to workaround a CUDA validation error. This issue is specific to the RTX PRO 6000 Blackwell Server Edition GPUs.
Create nvidia-uvm.conf with the following content:
uvm_disable_hmm=1
Create a config map out of the file:
kubectl create namespace gpu-operator
kubectl create configmap kernel-module-params -n gpu-operator \
  --from-file=nvidia-uvm.conf=./nvidia-uvm.conf
Install the GPU operator specifying the driver.kernelModuleConfig.name value:
helm install --wait --generate-name \
  -n gpu-operator --create-namespace \
  nvidia/gpu-operator \
  --version=v25.3.4 \
  --set driver.kernelModuleConfig.name="kernel-module-params"
HGX B200 Node#
On the HGX B200 node you must have ib_umad kernel mode installed. To do it once (works
until it’s rebooted) execute:
sudo modprobe ib_umad
To make it also get loaded on the node restart do:
echo ib_umad | sudo tee /etc/modules-load.d/ib_umad.conf
Firmware Version#
Installed nvfwupd-v2.0.8 and FW 25.09.1 from the
Enterprise Support Portal.
HGX B200’s first production support release for VBIOS is
97.00.88.00.xx.
HGX B200 is running VBIOS: 97.00.6E.00.07 now.
Install Essential Networking Modules#
apt-get install -y infiniband-diags
apt-get install -y nvlsm
Kubernetes Node Configuration#
Node Labeling#
Optionally one can label the worker nodes as such (not done during the default installation):
kubectl get nodes
NAME        STATUS   ROLES          AGE   VERSION
k8s-1-cp1   Ready    control-plane  24h   v1.32.5
k8s-1-cp2   Ready    control-plane  24h   v1.32.5
k8s-1-cp3   Ready    control-plane  24h   v1.32.5
rtxprosrv2  Ready    <none>         24h   v1.32.5
kubectl label node rtxprosrv2 node-role.kubernetes.io/worker=worker
NAME        STATUS   ROLES          AGE   VERSION
k8s-1-cp1   Ready    control-plane  24h   v1.32.5
k8s-1-cp2   Ready    control-plane  24h   v1.32.5
k8s-1-cp3   Ready    control-plane  24h   v1.32.5
rtxprosrv2  Ready    worker         24h   v1.32.5
Again optionally you can set up the cluster to avoid scheduling or executing non-GPU workloads on the GPU worker (effectively diverting all these workloads on the rest of the nodes) with:
kubectl taint nodes <gpu-node-name> nvidia.com/gpu=present:NoSchedule
or
kubectl taint nodes <gpu-node-name> nvidia.com/gpu=present:NoExecute
respectively.
Ingress Configuration#
Ingress is required for connectivity to any type of interactive workload. To address this need, we installed nginx-ingress with these commands. This will deploy an IngressClass that can be leveraged when creating service objects.
helm repo add ingress-nginx https://kubernetes.github.io/ingress-nginx
helm repo update

helm upgrade -i nginx-ingress ingress-nginx/ingress-nginx \
  --namespace nginx-ingress --create-namespace \
  --set controller.kind=DaemonSet
LoadBalancer Configuration#
To dynamically assign IP addresses to various services that need routable IP addresses, we deployed metalLB with these commands.
helm repo add metallb https://metallb.github.io/metallb
helm repo update
helm install metallb metallb/metallb -n metallb-system --create-namespace
Next we need to configure MetalLB to hand out IP addresses that we specify. To do this we
need to create a YAML file with the following settings and save it as metalLB_settings.yaml:
apiVersion: metallb.io/v1beta1
kind: IPAddressPool
metadata:
  name: my-ip-pool
  namespace: metallb-system
spec:
  addresses:
  - 10.185.105.50/32
  - 10.185.105.51/32
  - 10.185.105.52/32
  - 10.185.105.53/32
  - 10.185.105.54/32
  - 10.185.105.55/32
  - 10.185.105.56/32
  - 10.185.105.57/32
  - 10.185.105.58/32
  - 10.185.105.59/32
  autoAssign: true
  avoidBuggyIPs: true
---
apiVersion: metallb.io/v1beta1
kind: L2Advertisement
metadata:
  name: my-l2-advertisement
  namespace: metallb-system
spec:
  ipAddressPools:
  - my-ip-pool
Now we apply our settings and the LoadBalancer will be ready to hand out IP addresses to services requesting IP addresses from a LB:
kubectl create -f metalLB_settings.yaml
Prometheus Install#
Prometheus needs to be installed to be able to scrape metrics. Install with these commands:
helm repo add prometheus-community https://prometheus-community.github.io/helm-charts
helm repo update

helm install prometheus prometheus-community/kube-prometheus-stack \
  -n monitoring --create-namespace --set grafana.enabled=false