Step #1: Run the Workflow
In this lab, all of the workflow components have already been deployed, but some work is still needed from the user to replicate a production use case. In reality, a user would not explicitly run these steps; they’d run as scheduled in production.
First, open the SSH Console from the left pane, and check to make sure that the synthetic data generation and preparation has finished using the command below.
kubectl get jobs -n merlin

Next, we’ll manually create a training job from the cronjob. Currently, training is set to occur weekly each Sunday (a cronjob is setup to run). However, for our purposes of running the workflow as an example, we will run the cronjob manually.
First, get the name of the cronjob.
kubectl get cronjobs -n merlin
Then, using the name of the cronjob run:
kubectl create job --from=cronjob/<name-of-cronjob> train-job -n merlin
The train job will take a few minutes to run. Run the following command to check that the job completed successfully:
kubectl get jobs -n merlin

Once the train job has completed, you can open MinIO to view the models that were created. To do so, click the MinIO link in the left pane, and log in using the credentials below:
MinIO:
User: minioadmin
Password: {{ minio_password }}
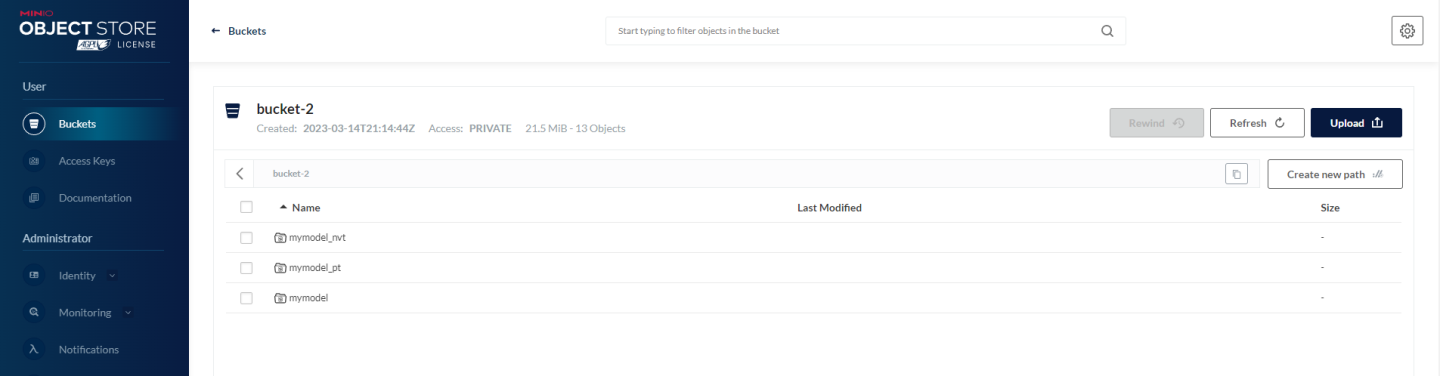
Once you’ve logged in, click the Browse button for bucket-2. You should see a few model files inside of the bucket:
Now we’re ready to run the models using Triton Inference server. Follow the steps below to load the models into Triton, using the SSH Console.
First, get the name of the inference deployment.
kubectl get deployments -o=jsonpath='{range .items[*]}{@.metadata.name}{"\n"}{end}' -n merlin | grep 'infer$'
Next, restart the deployment.
kubectl rollout restart deployment <deployment_name> -n merlin
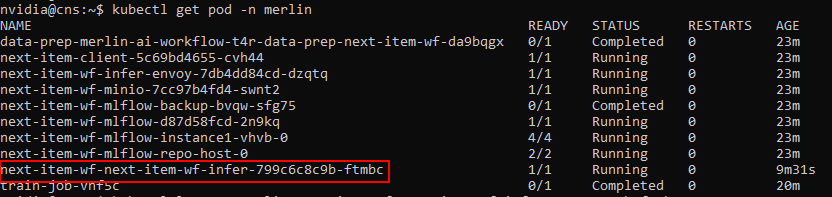
You can see if Triton loaded the models by looking at the logs of the pod that was deployed. First, get the name of the infer pod:
kubectl get pods -n merlin
Next, run the below command using the name of the infer pod.
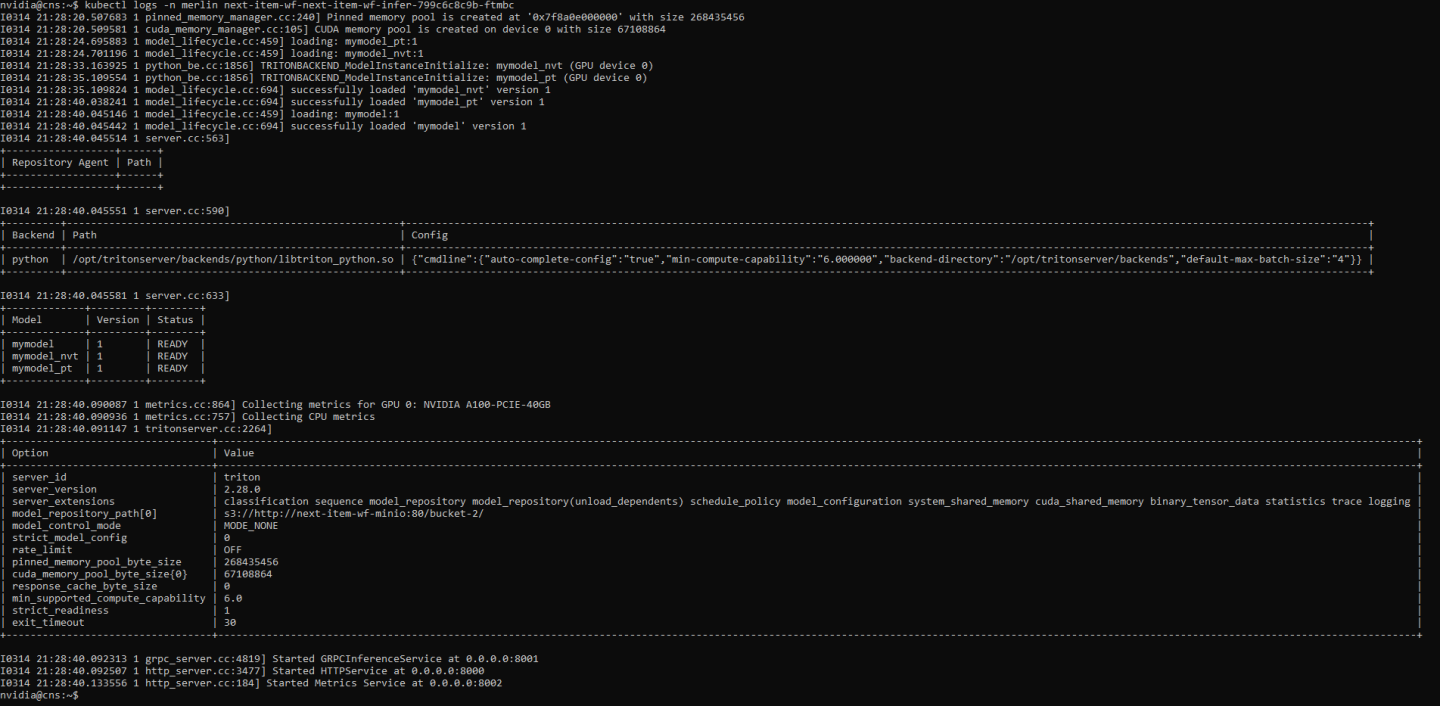
kubectl logs <pod-name> -n merlin
You should see logs indicating the model was loaded successfully.
Next, we’ll need to generate an access token to use for the client to authenticate with the Triton service. Run the following command in the SSH Console:
curl -k -L -X POST '{{ keycloak_token_endpoint }}' -H 'Content-Type: application/x-www-form-urlencoded' --data-urlencode 'client_id={{ keycloak_client_id }}' --data-urlencode 'grant_type=password' --data-urlencode 'client_secret={{ keycloak_client_secret }}' --data-urlencode 'scope=openid' --data-urlencode 'username={{ keycloak_realm_user }}' --data-urlencode 'password={{ keycloak_realm_user_password }}'
If needed, the information below can be used to manually configure Keycloak and/or generate the curl request according to the template below. A link to Keycloak is also provided in the left pane.
curl -k -L -X POST 'TOKEN_ENDPOINT' -H 'Content-Type: application/x-www-form-urlencoded' --data-urlencode 'client_id=CLIENT_ID' --data-urlencode 'grant_type=password' --data-urlencode 'client_secret=CLIENT_SECRET' --data-urlencode 'scope=openid' --data-urlencode 'username=USERNAME' --data-urlencode 'password=PASSWORD'
Admin User: admin
Admin Password: {{ keycloak_admin_password }}
Realm Name: {{ keycloak_realm }}
Realm User: {{ keycloak_realm_user }}
Realm Password: {{ keycloak_realm_user_password }}
Client ID: {{ keycloak_client_id }}
Client Secret: {{ keycloak_client_secret }}
Token Endpoint: {{ keycloak_token_endpoint }}
Once you’ve run the curl request, you should receive a JSON string like below
{"access_token":"eyJhbGc...","expires_in":54000,"refresh_expires_in":108000,"refresh_token":"eyJhbGci...","not-before-policy":0,"session_state":"e7e23016-2307-4290-af45-2c79ee79d0a1","scope":"openid email profile"}
Note down the
access_token, this field will be required later on in the workflow, within the Jupyter notebook.Now we’ll use the Jupyter notebook client to send a request to Triton. Open the Inference Client link from the left pane, then run through the steps in the notebook, making sure to note down the access token generated in the previous step.
After completing the notebook, we can check our monitoring dashboards to see the requests that were submitted. Click the Grafana link in the left pane, and log in using the credentials below.
Grafana:
User: admin
Password: {{ grafana_password }}
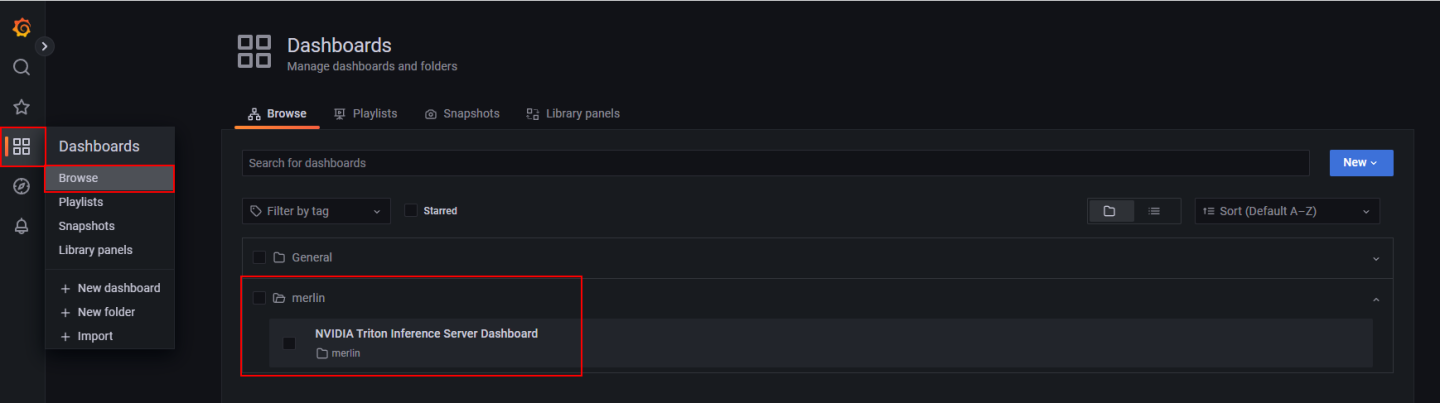
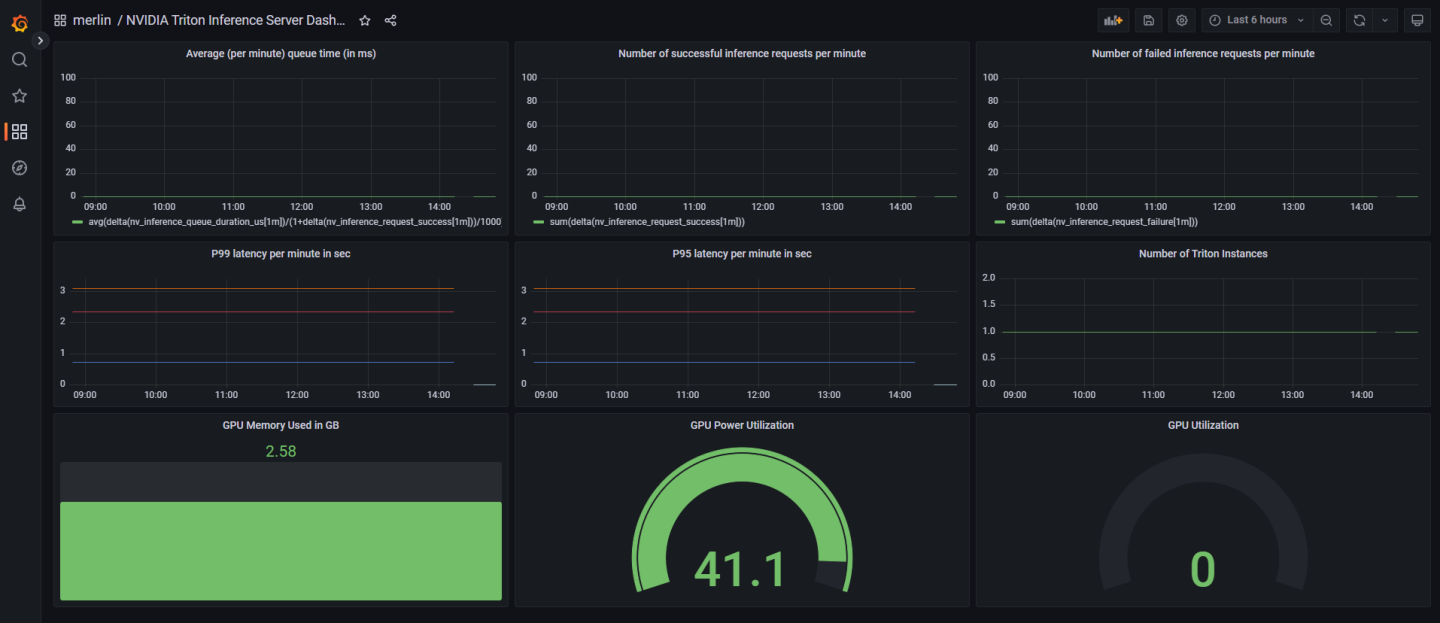
Select the Dashboards icon in the left navigation pane, select browse, expand the merlin folder, and click NVIDIA Triton Inference Server Dashboard.
Review the Triton metrics that are reported from the dashboard. Note the following metrics:
Average (per minute) queue time (in ms): Average cumulative time requests spend waiting in the scheduling queue (includes cached requests). Averaged across 1 minute.
Successful inference requests per minute: Number of successful inference requests received by Triton (each request is counted as 1, even if the request contains a batch).
# failed inference requests per minute: Number of failed inference requests received by Triton (each request is counted as 1, even if the request contains a batch).
P99 latency (per minute) (in seconds): 99th percentile request latency. Latency is computed for the total time spent in model inference backends.
P95 latency (per minute) (in seconds): 99th percentile request latency. Latency is computed for the total time spent in model inference backends.
# Triton Instances used
GPU memory (GB)
GPU power utiliation (watts)
Congrats! You’ve just completed running the Next Item Prediction AI Workflow. Feel free to explore the components deployed as a part of the solution, or proceed to the next section for next steps.