Installing a New NVOS Image
The default password for the admin user account is admin.
It is recommended to change the default password when logging in for the first time. ONIE includes options that allow to change the default password for the admin account automatically when installing a new NVOS image. Refer to ONIE Installation Options.
A new NVOS image can be installed using ONIE—an open source project (equivalent to PXE on servers)—that enables the installation of network operating systems (NOS) on bare metal switches.
Before installing NVOS, the switch may be in one of the two following states:
The switch does not contain an image (the switch is only running ONIE).
NVOS is already on the switch, but NVUE commands are to be used to reinstall NVOS or upgrade to a newer version.
The sections below describe some of the different ways to install the NVOS image. Steps show how to install directly from ONIE (if no image is on the switch) and from NVOS (if the image is already on the switch). For additional methods to find and install the NVOS image, see the ONIE Design Specification.
To get into ONIE, you need to interrupt the GRUB countdown screen by pressing the "ESC" or "F4" key and choose the appropriate menu entry.
The NVOS image can be downloaded from the NVIDIA Enterprise Support Portal.
Installing the NVOS image is destructive. Configuration files on the switch are not saved, so copy them to a different server before installation.
In the following procedures, the following is possible:
The NVOS image can be named using any of the ONIE naming schemes mentioned here
The
sudo onie-install -hcommand can be run to show the ONIE installer options
To install NVOS using a DHCP or web server with DHCP options, set up a DHCP/web server on a laptop and connect the eth0 management port of the switch to the laptop. After connecting the cable, the installation proceeds as follows:
The switch boots up and requests an IP address (DHCP request).
The DHCP server acknowledges and responds with DHCP option 114 and the location of the installation image.
ONIE downloads the NVOS image, installs, and reboots.
NVOS should now be running.

The most common way is to send DHCP option 114 with the entire URL to the web server (this can be the same system). However, there are other ways to use DHCP even if you do not have full control over DHCP. See the ONIE user guide for information on partial installer URLs and advanced DHCP options—both articles list more supported DHCP options.
Example DHCP configuration with an ISC DHCP server:
            subnet 172.0.24.0 netmask 255.255.255.0 {
  range 172.0.24.20 172.0.24.200;
  option default-url = "http://172.0.24.14/onie-installer-x86_64";
}
Example DHCP configuration with dnsmasq (static address assignment):
            dhcp-host=sw4,192.168.100.14,6c:64:1a:00:03:ba,set:sw4
dhcp-option=tag:sw4,114,"http://roz.rtplab.test/onie-installer-x86_64"
If a web server is not accessible, this free Apache example can be used.
Follow the steps below if logging into the switch on a serial console (ONIE), or log in on the console or with SSH (Install from NVOS).
Install from ONIE
Place the NVOS image in a directory on the web server.
Run the
onie-nos-installcommand:ONIE:/ #onie-nos-install http:
//10.0.1.251/path/to/nvos-amd64-25.01.0002.bin
Follow the steps below if logging into the switch on a serial console (ONIE), or log in on the console or with SSH (Install from NVOS) but no DHCP server is available.
A console connection is needed to access the switch. This procedure cannot be performed remotely.
Install from ONIE
ONIE is in discovery mode. Disable discovery mode with the following command:
onie# onie-discovery-stop
On older ONIE versions, if the
onie-discovery-stopcommand is not supported, run the following command:onie# /etc/init.d/discover.sh stop
Assign a static address to eth0 with the
ip addr addcommand:ONIE:/ #ip addr add
10.0.1.252/24dev eth0Place the NVOS image in a directory on your web server.
Run the installer manually (because there are no DHCP options):
ONIE:/ #onie-nos-install http:
//10.0.1.251/path/to/nvos-install-x86_64.bin
Follow the steps below if your laptop is on the same network as the switch eth0 interface but no DHCP server is available.
Install from ONIE
Set up DHCP or static addressing for eth0. The following example assigns a static address to eth0:
ONIE:/ #ip addr add
10.0.1.252/24dev eth0If static addressing is being used, disable ONIE discovery mode:
onie# onie-discovery-stop
On older ONIE versions, if the
onie-discovery-stopcommand is not supported, run the following:onie# /etc/init.d/discover.sh stop
Place the NVOS image into a TFTP or FTP directory.
If DHCP options are not being used, run one of the following commands (tftp for TFTP or ftp for FTP):
ONIE# onie-nos-install ftp:
//local-ftp-server/nvos-amd64-25.01.0002.binONIE# onie-nos-install tftp://local-tftp-server/nvos-amd64-25.01.0002.bin
Follow the steps below to install the NVOS image referencing a local file.
Install from ONIE
Set up DHCP or static addressing for eth0. The following example assigns a static address to eth0:
ONIE:/ #ip addr add
10.0.1.252/24dev eth0If you are using static addressing, disable ONIE discovery mode.
onie# onie-discovery-stop
On older ONIE versions, if the
onie-discovery-stopcommand is not supported, run the following:onie# /etc/init.d/discover.sh stop
- Use scp (secure copy protocol) to copy the NVOS image to the switch.
Run the installer manually from ONIE:
ONIE:/ #onie-nos-install /path/to/local/file/nvos-amd64-
25.01.0002.bin
Install from NVOS
Fetch the NVOS image on the switch.
admin
@nvos:~$ nv action fetch system image scp://<username>:<password>@<ip-address>/var/www/html/<new_image>admin
@nvos:~$ nv show system image files Available image file ------------------------- nvos-amd64-25.01.0003.binFrom the NVOS command prompt, using NVUE command, install the new image and follow the instruction on the screen.
admin
@nvos:~$ nv action install system image files nvos-amd64-25.01.0003.bin Operation will reboot the system. If you choose ‘y’, the system will install the image and reboot. If you choose ‘N’, the operation will abort without installing the image and without rebooting the system. Do you want tocontinue? [y/N]After reboot, run
nv show system imageto review your images.admin
@nvos:~$ nv show system image --view detail operational applied description ---------- ------------------- ------- ------------------------------ current nvos-25.01.0003Current running image next nvos-25.01.0003Next image to boot from partition1 nvos-25.01.0002Image installed on partition1partition2 nvos-25.01.0003Image installed on partition2
Copy the image from the host machine to the switch.
NoteNote: you must copy an image to the predefined directory: "/host/nos-images/"
user
@host:~$ scp <path-to-system-image> <switch-admin-username>@<switch-ip-address>:/host/nos-images/<desired-name>.binTo install the image login to the switch and perform steps 2-3 from the "Install from NVOS" section.
Follow the steps below to install the NVOS image using a USB drive.
Tip: Installing NVOS using a USB drive is not scalable. DHCP can scale to hundreds of switch installs with zero manual input, unlike USB installs.
Prepare for USB Installation
Download the appropriate NVOS image for your platform.
From a computer, prepare your USB drive by formatting it using one of the supported formats: FAT32, vFAT, or EXT2.
Optional: Prepare a USB drive inside NVOS
Insert the USB drive into the USB port on the switch running NVOS and log in to the switch. Examine output from
cat /proc/partitionsandsudo fdisk -l [device]to determine the location of your USB drive. For example,sudo fdisk -l /dev/sdb.These instructions assume the USB drive is the
/dev/sdbdevice, which is typical if inserting the USB drive after the machine is already booted. However, if the USB drive was inserted during the boot process, it is possible that the USB drive is the/dev/sdadevice. Make sure to modify the commands below to use the proper device for the USB drive.Create a new partition table on the USB drive. If the
partedutility is not on the system, install it withsudo -E apt-get install parted.sudo parted /dev/sdb mklabel msdos
Create a new partition on the USB drive:
sudo parted /dev/sdb -a optimal mkpart primary
0%100%Format the partition to your filesystem of choice using one of the examples below:
sudo mkfs.ext2 /dev/sdb1 sudo mkfs.msdos -F
32/dev/sdb1 sudo mkfs.vfat /dev/sdb1To use
mkfs.msdosormkfs.vfat, installation of thedosfstoolspackage from the Debian software repositories is needed, as they are not included by default.To continue installing NVOS, mount the USB drive to move files:
            sudo mkdir /mnt/usb
sudo mount /dev/sdb1 /mnt/usb
Copy the NVOS image to the USB drive, then rename the image file to
onie-installer-x86_64.Any of the ONIE naming schemes mentioned here can also be used.
When using a MAC or Windows computer to rename the installation file, the file extension can still be present. Make sure to remove the file extension so that ONIE can detect the file.
Insert the USB drive into the switch, then prepare the switch for installation:
If the switch is offline, connect to the console and power on the switch
If the switch is already online in ONIE, use the
rebootcommand
SSH sessions to the switch get dropped after this step. To complete the remaining instructions, connect to the console of the switch. NVOS switches display their boot process to the console; you need to monitor the console specifically to complete the next step.
Monitor the console and interrupt the GRUB countdown with the "ESC" or "F4" key when proposed, then select the ONIE option from the first GRUB screen shown below.

NVOS on x86 uses GRUB chainloading to present a second GRUB menu specific to the ONIE partition. No action is necessary in this menu to select the default option
ONIE: Install OS.
The switch recognizes the USB drive and mounts it automatically. NVOS installation begins.
After installation completes, the switch automatically reboots into the newly-installed instance of NVOS.
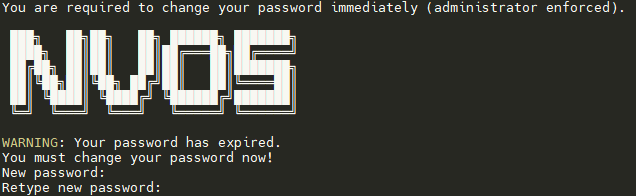
Once the NVOS image is successfully installed on the system, logging into the operating system becomes possible.
During the initial login to the NOS, a password change will be requested. This can be achieved by connecting to the switch via SSH and changing the password following the relevant message prompts.
Once the password has been changed, please save your configuration in order to retain the password during subsequent reboots.
If the switch is being managing only via ZTP, disregard the password change request.