Authentication Methods
UFM User Authentication is based on standard Apache User Authentication or Internal UFM Authentication Server.
Each Web Service client application must authenticate against the UFM server to gain access to the system.
The available authentication methods supported by UFM are as follows:
|
Authentication Method |
Description |
UFM Related Prefix |
REST API Reference |
|
Basic Authentication |
Based on user and password, provided by the client. This method is enabled by default. |
/ufmRest |
|
|
Session-Based Authentication |
A stateful authentication technique where sessions are used to keep track of the authenticated user. This method is enabled by default and is used by the UFM WebUI. |
/ufmRestV2 |
|
|
Client-Based Authentication |
Refers to an end user's device proving its own identity by providing a digital certificate that can be verified by a server in order to gain access to UFM resources |
/ufmRest |
|
|
Token-based authentication is a protocol which allows users to verify their identity, and in return receive a unique access token. To use UFM, the user should create a token using UFM Web UI or UFM REST API |
/ufmRestV3 |
||
|
Proxy authentication delegates the user authentication to a remote Proxy server. |
/ufmRestV3 |
N/A |
|
|
Microsoft Azure Authentication is a service provided by Microsoft Azure, the cloud computing platform of Microsoft. It is designed to provide secure access control and authentication for applications and services hosted on Azure. |
/ufmRestV2 |
N/A |
|
|
Kerberos is a protocol designed to authenticate service requests between trusted hosts over an untrusted network |
/ufmRestKrb |
N/A |
There are two optional services which can provide authentication handling of UFM.
Apache Web Server (used by default) - Standard Apache web server and supports the above-mentioned authentication methods.
UFM Authentication Server - a centralized HTTP server, is responsible for managing various authentication methods supported by UFM.
Configurations of the UFM Authentication Server
The UFM Authentication Server is designed to be configurable and is initially turned on by default.
Enabling the UFM Authentication Server provides a centralized service that oversees all supported authentication methods within a single service, consolidating them under a unified authentication API.
Apache utilizes the authentication server's APIs to determine a user's authentication status.
All activities of the UFM Authentication Server are logged in the authentication_service.log file, located at /opt/ufm/files/log.
To enable/disable the UFM Authentication Server, refer to Enabling UFM Authentication Server.
Token-based authentication is a protocol which allows users to verify their identity, and in return receive a unique access token. During the life of the token, users then access the UFM APIs that the token has been issued for, rather than having to re-enter credentials each time they need to use any UFM API.
Under the Settings section there is a tab titled called “Access Tokens”.
The functionality of the added tab is to give the user the ability to create new tokens & manage the existing ones (list, copy, revoke, delete):
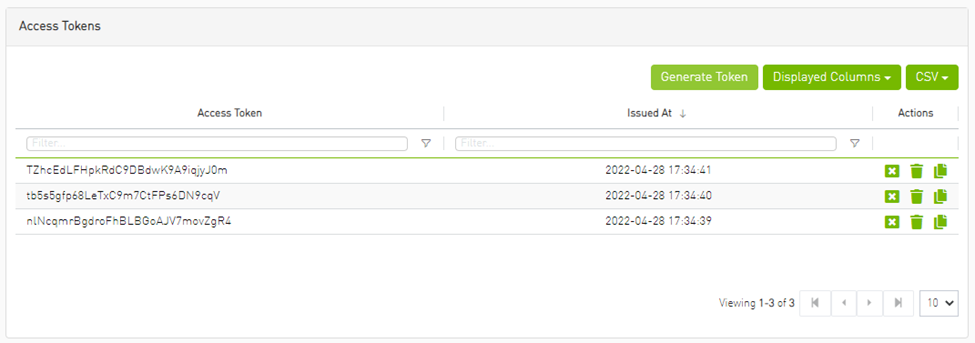
Actions:
|
Name |
Icon |
Description |
|
Revoke |

|
Revoke a specific token. Note
The revoked token will no longer be valid.
|
|
Delete |

|
Delete a specific token. |
|
Copy |

|
Copy specific token into the clipboard. |
Each user is able to list and manage only the tokens that have been created by themselves. Only the users with system_admin role will be able to create tokens.
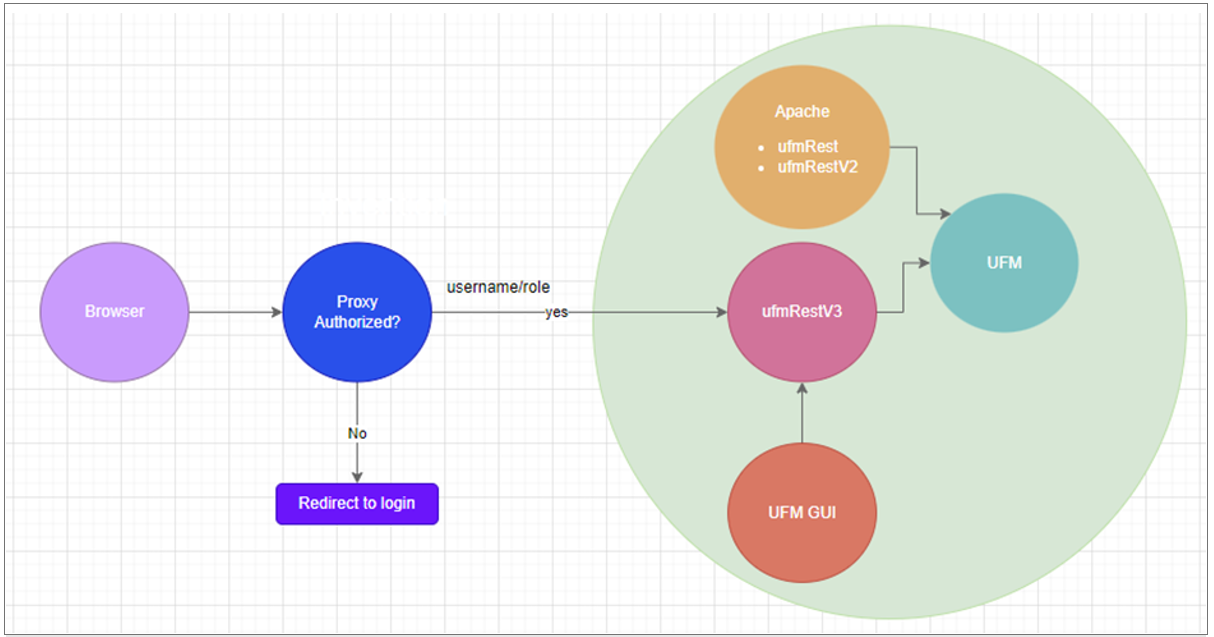
Delegating Authentication to a Proxy
To allow a custom user authentication, you can configure UFM to delegate the user authentication to a remote Proxy server. The remote Proxy server is written by the user, thus, allowing flexibility on deciding how the authentication is performed.
By default, the feature is disabled. To activate the feature, configure auth_proxy_enabled with true.
Proxy should use ufmRestV3 to send requests to UFM. The request header should contain a username and role. The available roles are System_Admin, Fabric_Admin, Fabric_Operator, and Monitoring_Only. If the request header is sent without a username or a role, it is rejected by the UFM.
For example:
            [AuthProxy]
# Defaults to false, but set to true to enable this feature
auth_proxy_enabled = true
# HTTP Header name that will contain the username
auth_proxy_header_name = X_WEBAUTH_USER
# HTTP Header name that will contain the user roles. The available roles are as follows: System_Admin, Fabric_Admin, Fabric_Operator, and Monitoring_Only
auth_proxy_header_role = X_WEBAUTH_ROLE

# Set to `true` to enable auto sign up of users who do not exist in UFM DB. Defaults to `true`.
auth_proxy_auto_sign_up = true
# Limit where auth proxy requests come from by configuring a list of IP addresses.
# This can be used to prevent users spoofing the X_WEBAUTH_USER header.
# This option is required
# Example `whitelist = 192.168.1.1, 192.168.1.0/24, 2001::23, 2001::0/120`
auth_proxy_whitelist =
The following chart describes the flow:
Microsoft Azure Authentication is a service provided by Microsoft Azure, the cloud computing platform of Microsoft. It is designed to provide secure access control and authentication for applications and services hosted on Azure.
UFM supports Authentication using Azure Active Directory, and to do so, you need to follow the following steps:
Register UFM in Azure AD Portal
To log in via Azure, UFM must be registered in the Azure portal using the following steps:
Log in to Azure Portal, then click "Azure Active Directory" in the side menu.
If you have access to more than one tenant, select your account in the upper right. Set your session to the Azure AD tenant you wish to use.
Under "Manage" in the side menu, click App Registrations > New Registration.

Provide the application details:
Name: Enter a descriptive name.
Supported account types: Account types that are allowed to login and use the registered application.
Redirect URL: select the app type Web, and Add the following redirect URL https://
/auth/login 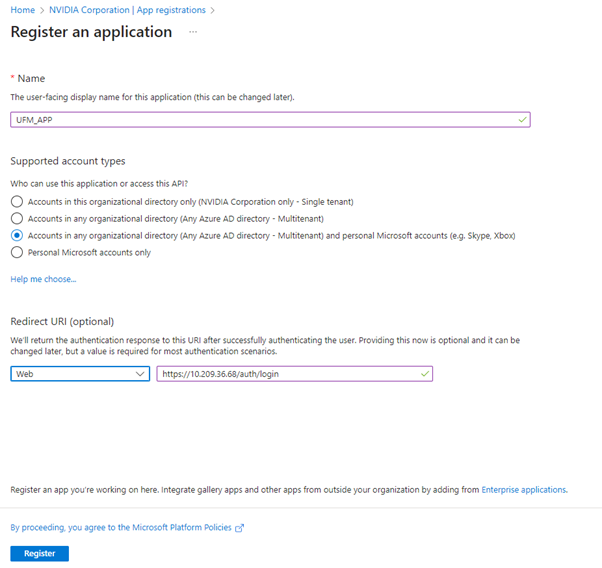
Then, click Register. The app’s Overview page opens.
Under Manage in the side menu, click Certificates & Secrets > New client secret.

Provide a description for the client secret and set an expiration time, then click "Add."
Copy the client secret key value which will be needed to configure the UFM with Azure AD (Please note that the value of the generated secret will be hidden and will not be able to be copied/read after you leave the page.
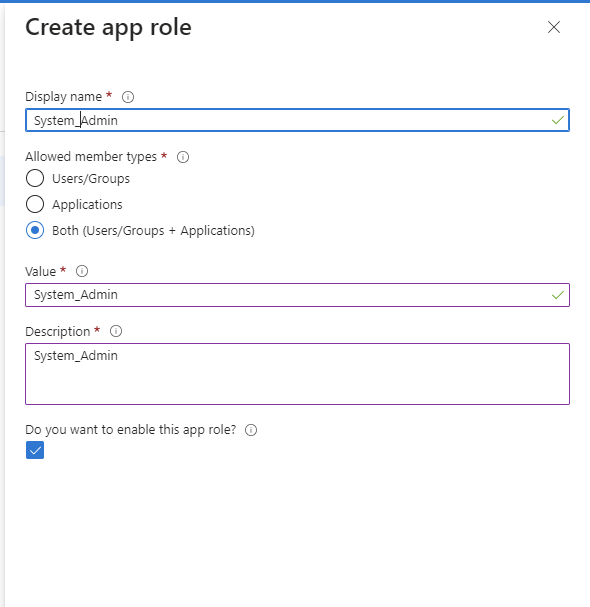
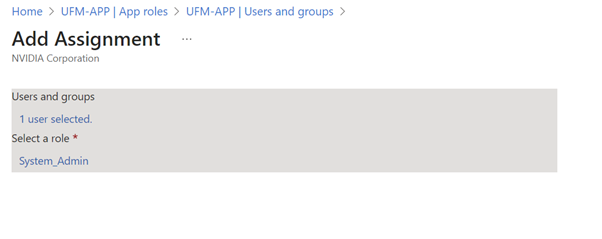
Under "Manage" in the side menu, click App roles > Create app role.
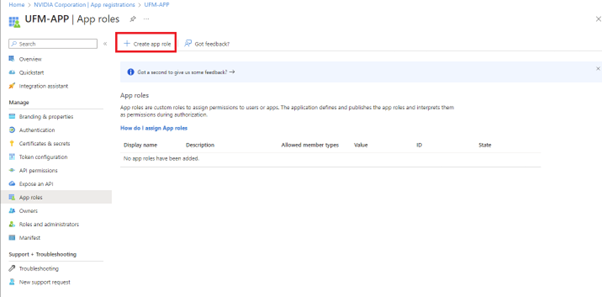
Provide the role details. Please note that the role value must be a valid UFM role; otherwise, the login will fail.
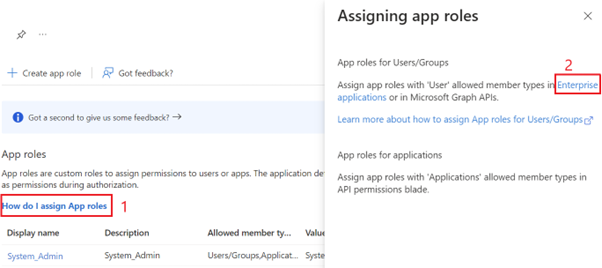
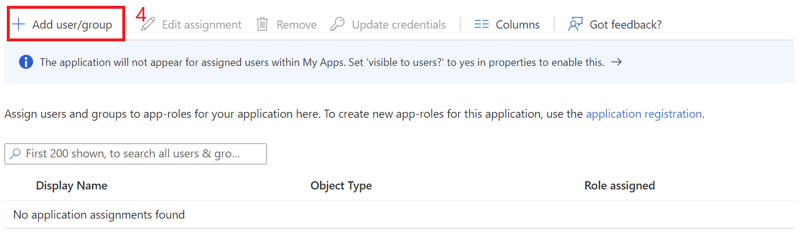
Assign the created role to the user. Follow the below steps:
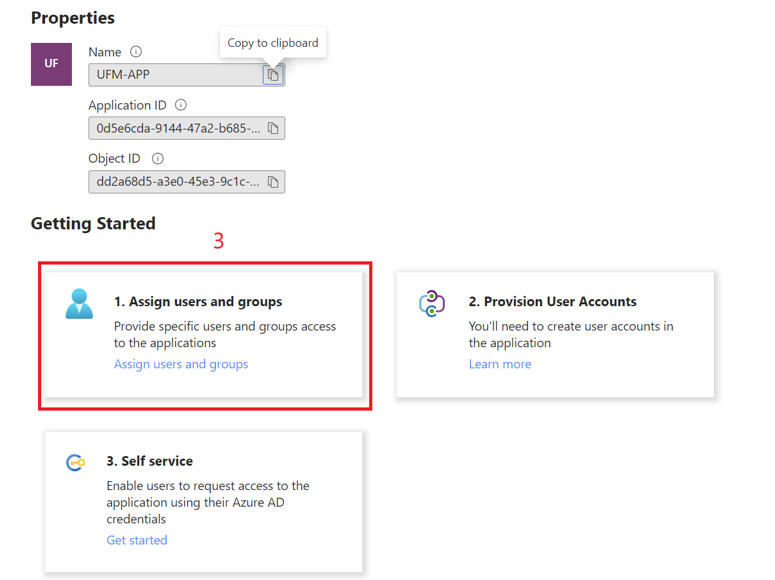
Click on "Overview" in the side menu to view the application information, such as tenant ID, client ID, and other details.
Enable Azure Authentication From UFM
Azure authentication is disabled by default. To enable it, please refer to Enabling Azure AD Authentication.
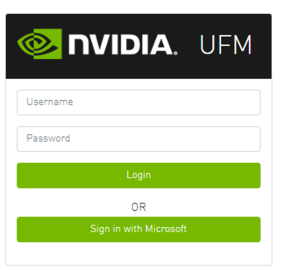
Azure Authentication Login Page
After enabling and configuring Azure AD authentication, an additional button will appear on the primary UFM login page labeled 'Sign In with Microsoft,' which will leads to the main Microsoft sign-in page:
Kerberos is a network authentication protocol designed to provide strong authentication for client-server applications by using secret-key cryptography.
The Kerberos protocol works on the basis of tickets, it helps ensure that communication between various entities in a network is secure. It uses symmetric-key cryptography, which means both the client and servers share secret keys for encrypting and decrypting communication.
To enable Kerberos Authentication, refer to Enabling Kerberos Authentication.
Setting Up Kerberos Server Machine
To set up a system as a Kerberos server, perform the following:
Install the required packages:
            #Redhat
sudo yum install krb5-libs krb5-server
# Ubuntu
sudo apt-get install krb5-kdc krb5-admin-server
Edit the Kerberos configuration file ‘/etc/krb5.conf’ to reflect your realm, domain and other settings:
            [libdefaults]
    default_realm = YOUR-REALM

[realms]
    YOUR-REALM = {
        kdc = your-kdc-server
        admin_server = your-admin-server
    }

[domain_realm]
    your-domain = YOUR-REALM
    your-domain = YOUR-REALM
Use the kdb5_util command to create the Kerberos database:
kdb5_util create -r YOUR-REALM -s
Add administrative principals:
Kadmin.local addprinc -randkey HTTP/YOUR-HOST-NAME
@YOUR-REALMStart KDC and Kadmin services:
            sudo systemctl start krb5kdc kadmin
sudo systemctl enable krb5kdc kadmin
Generate a keytab file. The keytab file contains the secret key for a principal and is used to authenticate the service.
kadmin.local ktadd -k /path/to/your-keytab-file HTTP/YOUR-HOST-NAME
@YOUR-REALMReplace /path/to/your-keytab-file with the actual path where you want to store the keytab file.
Setting Up Kerberos Client Machine
Follow the below steps to set up a system as a Kerberos client.
Install the required packages. When installing the UFM, the following packages will be installed as dependencies:
            #Redhat
krb5-libs krb5-workstation mod_auth_gssapi
# Ubuntu
krb5-config krb5-user libapache2-mod-auth-gssapi
Configure the /etc/krb5.conf file to reflect your realm, domain, local names map and other settings:
kinit -k -t /path/to/your-keytab-file HTTP/YOUR-HOST-NAME
@YOUR-REALM[libdefaults] default_realm = YOUR-REALM [realms] YOUR-REALM = { kdc = your-kdc-server admin_server = your-admin-server auth_to_local_names = { your-principle-name = your-local-user } } [domain_realm] your-domain = YOUR-REALM your-domain = YOUR-REALM
Copy the keytab file from the Kerberos server to the machine where your service runs (the client). It is important to ensure that it is kept confidential.
Please ensure that the keytab file exists and that Apache has the necessary read permissions to access the keytab file; otherwise, Kerberos authentication will not function properly.
Obtain a Kerberos ticket-granting ticket (TGT):
Enable Kerberos Authentication from UFM. Kerberos authentication is disabled by default. To enable it, please refer to Enabling Kerberos Authentication.
Test the Kerberos Authentication. You can use curl to test whether the user can authenticate to UFM REST APIs using Kerberos.
curl --negotiate -i -u : -k
'https://ufmc-eos01/ufmRestKrb/app/tokens'