Deployment Guide#
Virtual Machine (VM) Configuration#
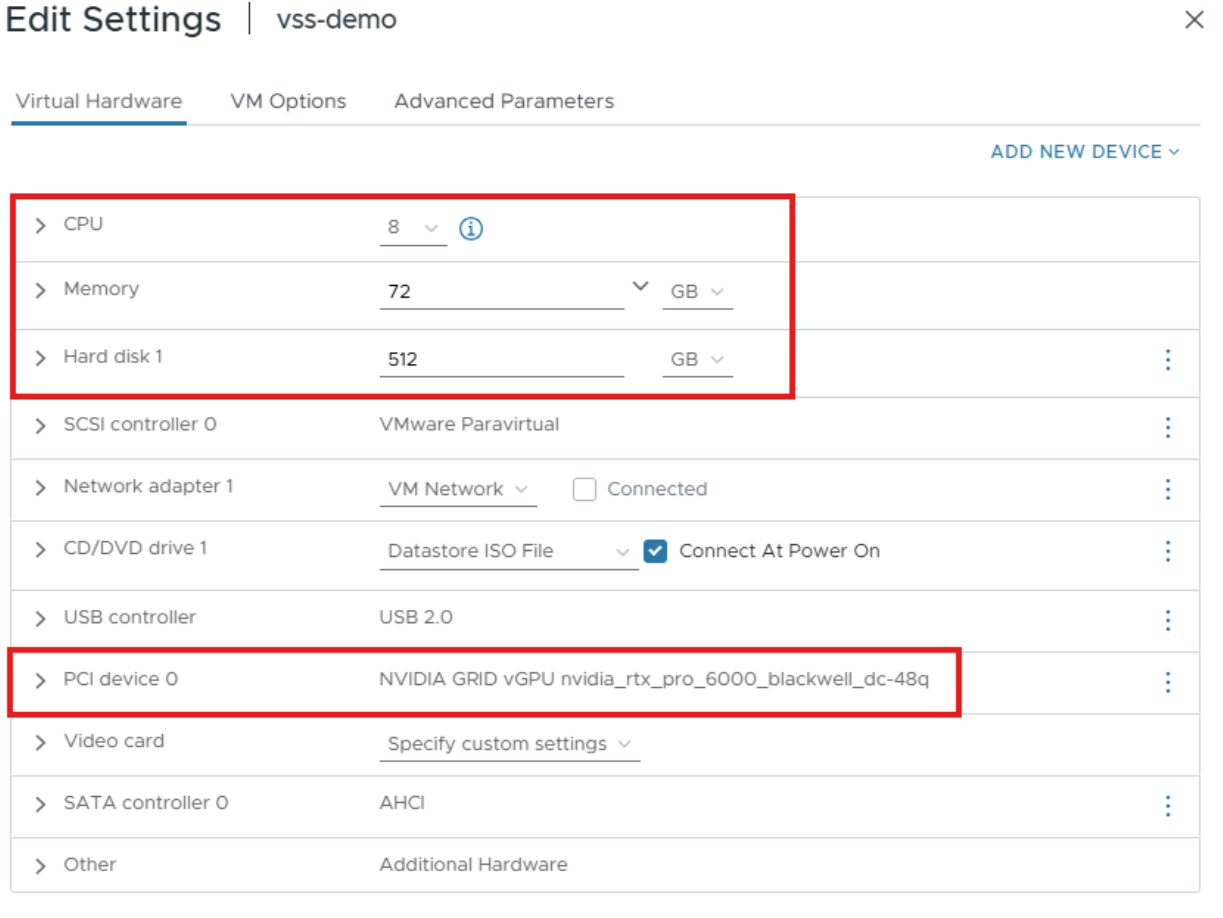
Set up a Linux VM in vCenter with the following configuration:
vCPU: 8 CPU
Memory: 72 GB
vGPU Profile: 48Q
Storage: 512GB
Install Ubuntu and set up the necessary dependencies listed below:
vGPU GRID Driver v19.0+
Docker v27.5.1+
Docker Compose v2.32.4+
NVIDIA Container Toolkit v1.13.5+
Open-vm-tools
Openssh-server
Dkms
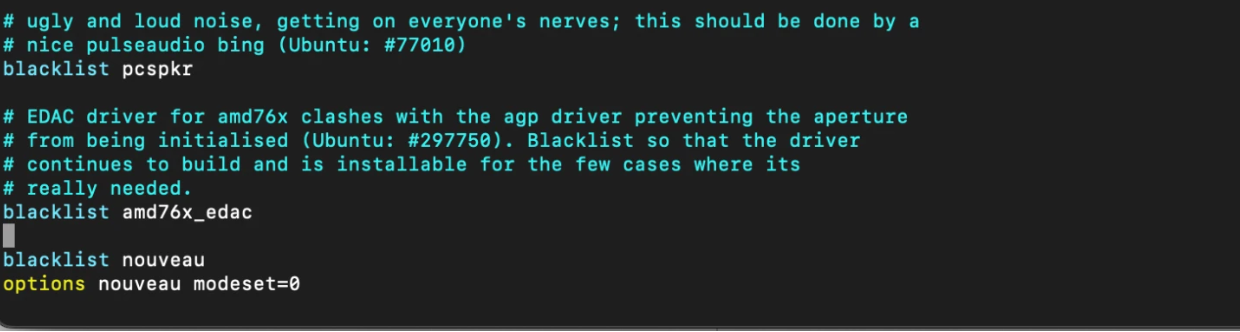
Blacklist nouveau driver
$ sudo vim /etc/modprobe.d/blacklist.conf
$ blacklist nouveau
$ options nouveau modeset=0
Update initramfs, then reboot.
$ sudo update-initramfs -u
$ sudo reboot
Install your preferred remoting protocol (i.e., NoMachine, Horizon, VNC). The rest of this guide will use NoMachine as the remote protocol.
Download and install NVIDIA vGPU software.
$ sudo dpkg -i nvidia-linux-grid-xxx_xxx.xx.xx_amd64.deb

Once the driver utility has completed installation, reboot, then run the
nvidia-smicommand to verify the driver has been installed correctly. Be sure to license the virtual machine.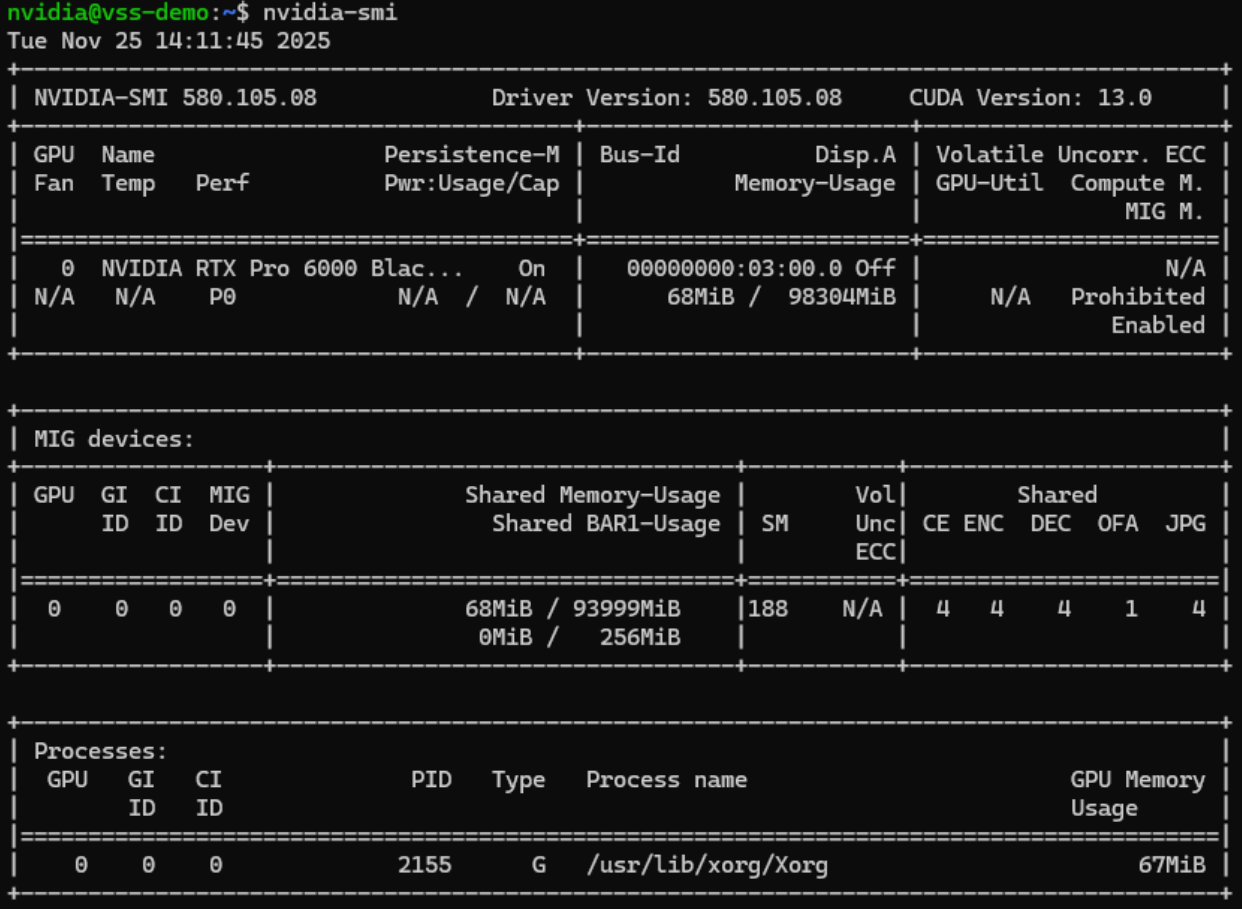
Configuring and Launching the Event Viewer#
Download the Video Search and Summarization repository from GitHub
$ git clone https://github.com/NVIDIA-AI-Blueprints/video-search-and-summarization.git
Create a Docker network that will be shared between VSS services and CV pipeline containers.
$ docker network create vss-shared-network
Log in to NVIDIA’s container registry using your NGC API Key
# Log in to NVIDIA Container Registry
docker login nvcr.io
# Username: $oauthtoken
# Password: <PASTE_NGC_API_KEY_HERE>
Change to the directory containing the Event Reviewer Docker Compose configuration.
$ cd ~/video-search-and-summarization/deploy/docker/event_reviewer/
Add your NGC_API_KEY to the .env file (replace $NGC_API_KEY with your own):
$ echo "NGC_API_KEY=$NGC_API_KEY" >> .env
Add your HF_TOKEN to the .env file (replace $HF_TOKEN with your own):
$ echo "HF_TOKEN=$HF_TOKEN" >> .env
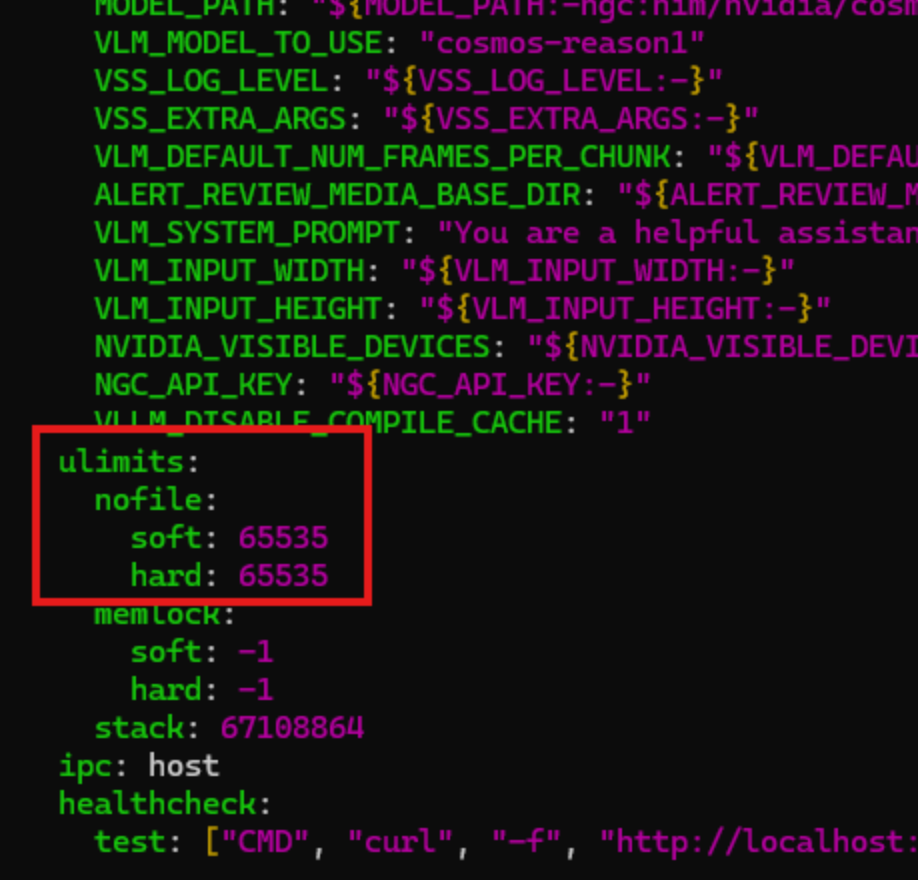
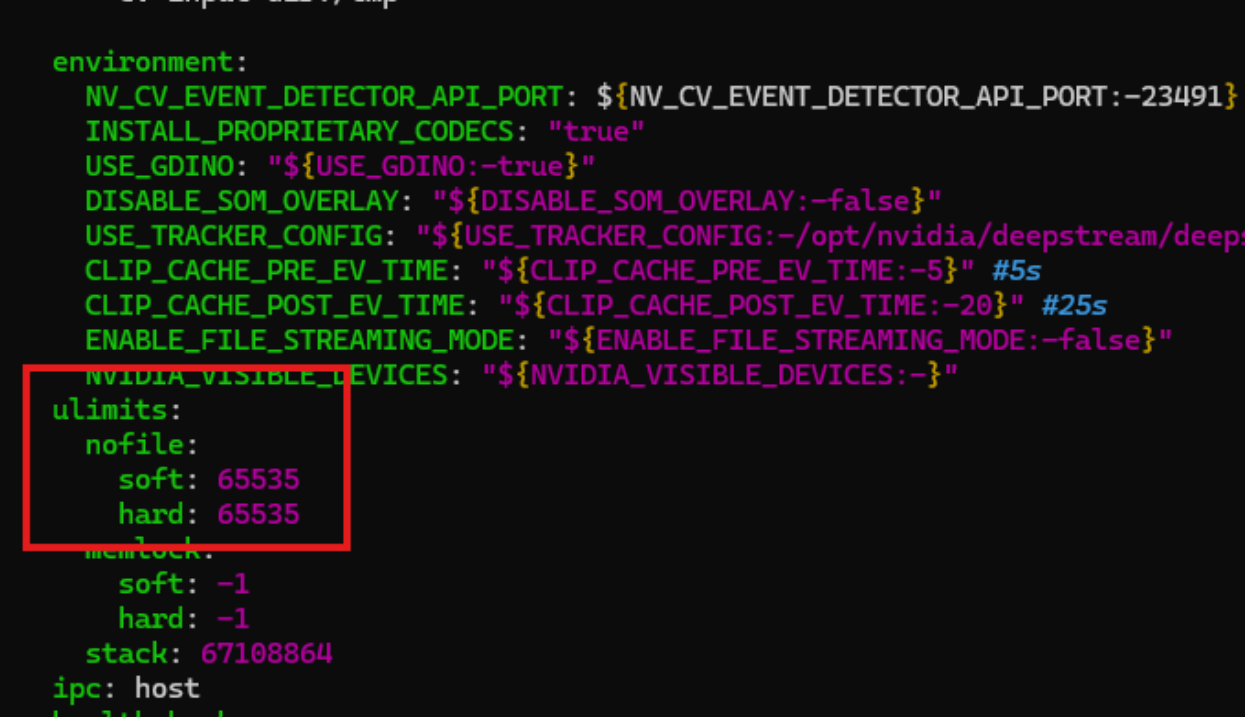
For this project, we will need to increase the number of open files. Edit the compose.yaml file and add the following lines in the services/via-server/ulimits section:
nofile:
    soft: 65535
    hard: 65535
Launch the complete VSS Event Reviewer stack including Alert Bridge, VLM Pipeline, Alert Inspector UI, and Video Storage Toolkit. Depending on your Internet connection, this could take 20 to 30 minutes to process.
$ ALERT_REVIEW_MEDIA_BASE_DIR=/tmp/alert-media-dir docker compose up

When you see the following, the containers have started up successfully and you can continue to the next section:

Configuring and Launching the Alert Inspector#
In a new terminal session, navigate to the computer vision event detector configuration.
$ cd ~/video-search-and-summarization/examples/cv-event-detector
As with the previous container, we will need to increase the number of open files for this container, too. Edit the compose.yaml file and add the following lines in the services/via-server/ulimits section:
nofile:
    soft: 65535
    hard: 65535
Launch the DeepStream computer vision pipeline and CV UI services.
$ ALERT_REVIEW_MEDIA_BASE_DIR=/tmp/alert-media-dir docker compose up
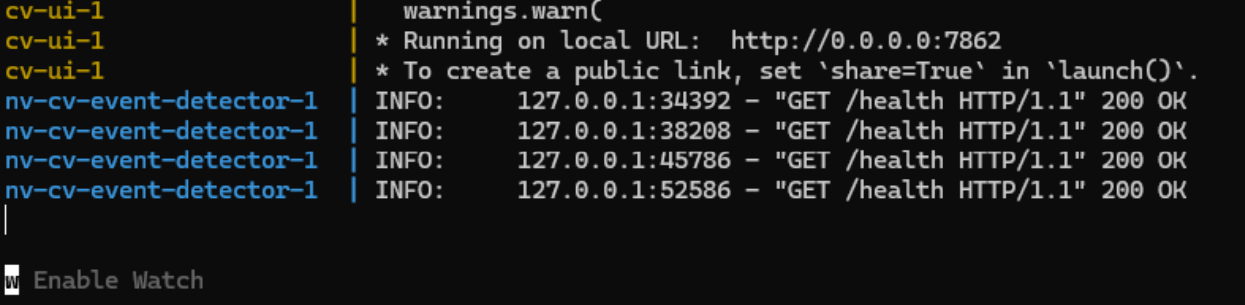
When you see the following, the containers have spun up successfully and you can continue on to the next step.
Run Crosswalk Example (simple options)#
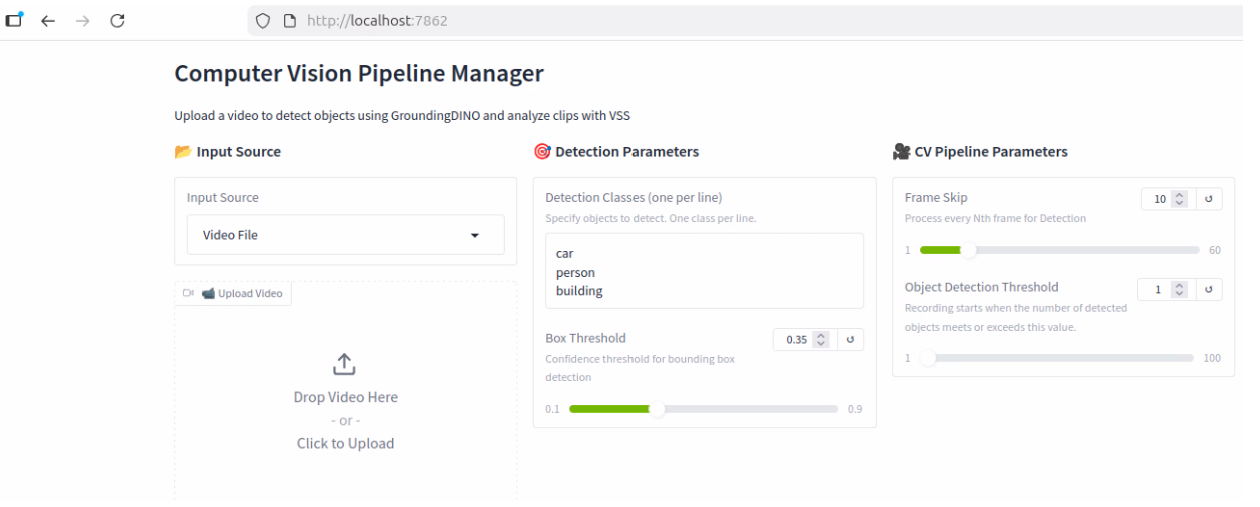
Open a web browser and navigate to the Event Inspector UI at http://localhost:7862
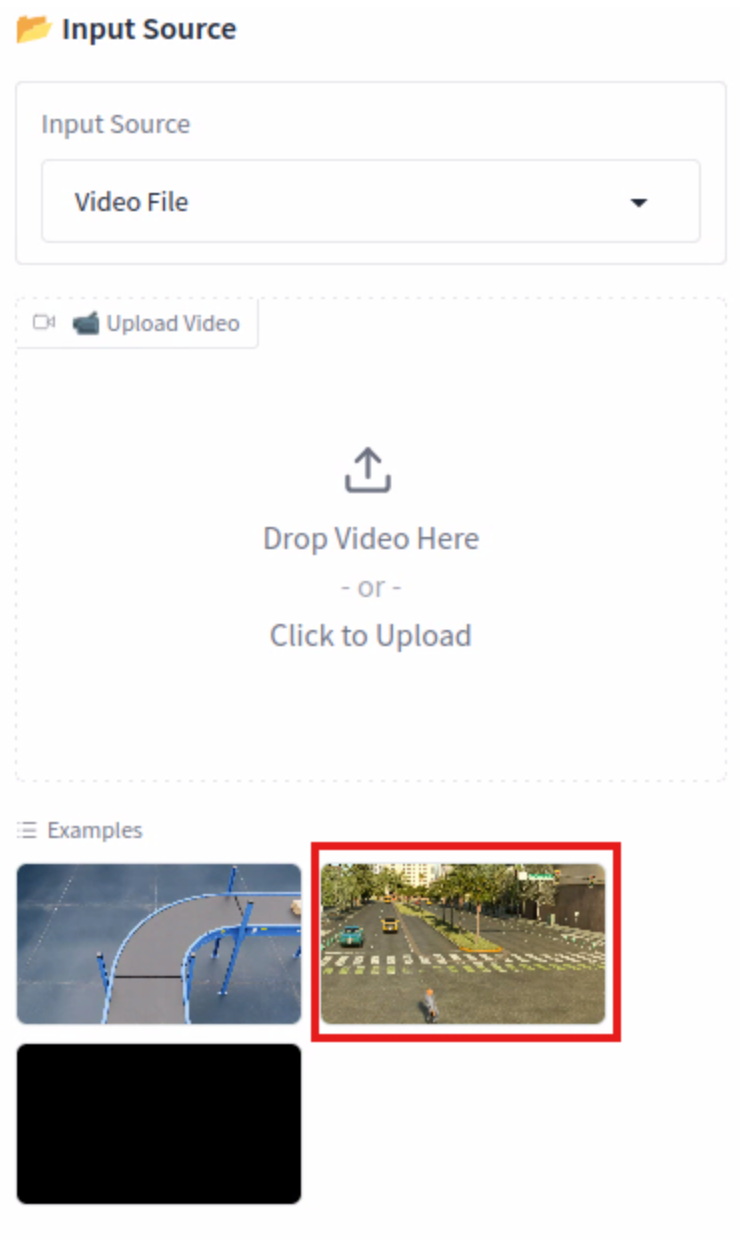
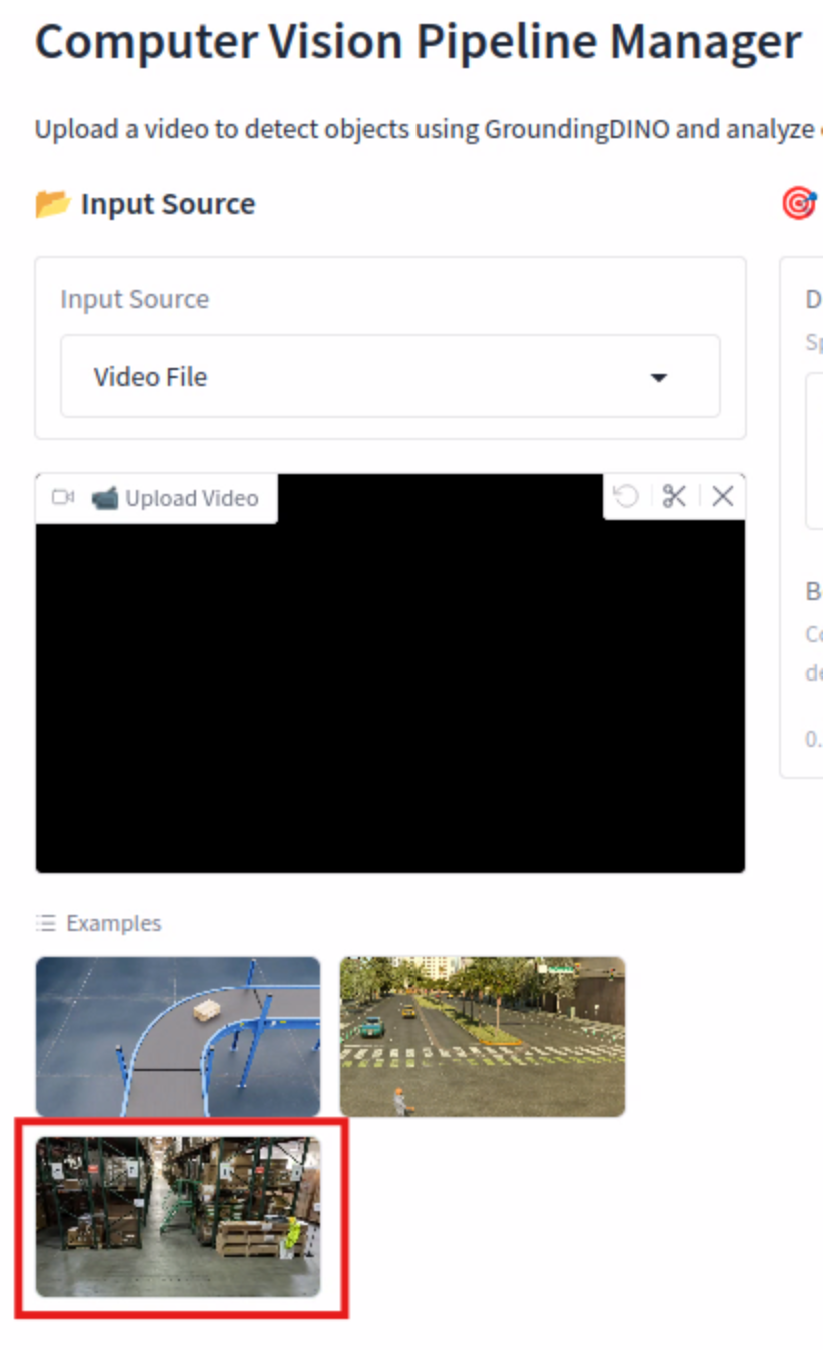
In the Examples section, click the video that shows a thumbnail of a street.
Explain the options (don’t click anything else)

CV Pipeline Parameters
Frame Skip - With the current setting, the CV model will be inspecting every 5th frame or every 5 seconds. This can help speed up the processing time, but if set too high, it could potentially miss an event
Object Detection Threshold - This setting is used to indicate how many objects detected, in this case one person, need to be found in the video before it starts to record events
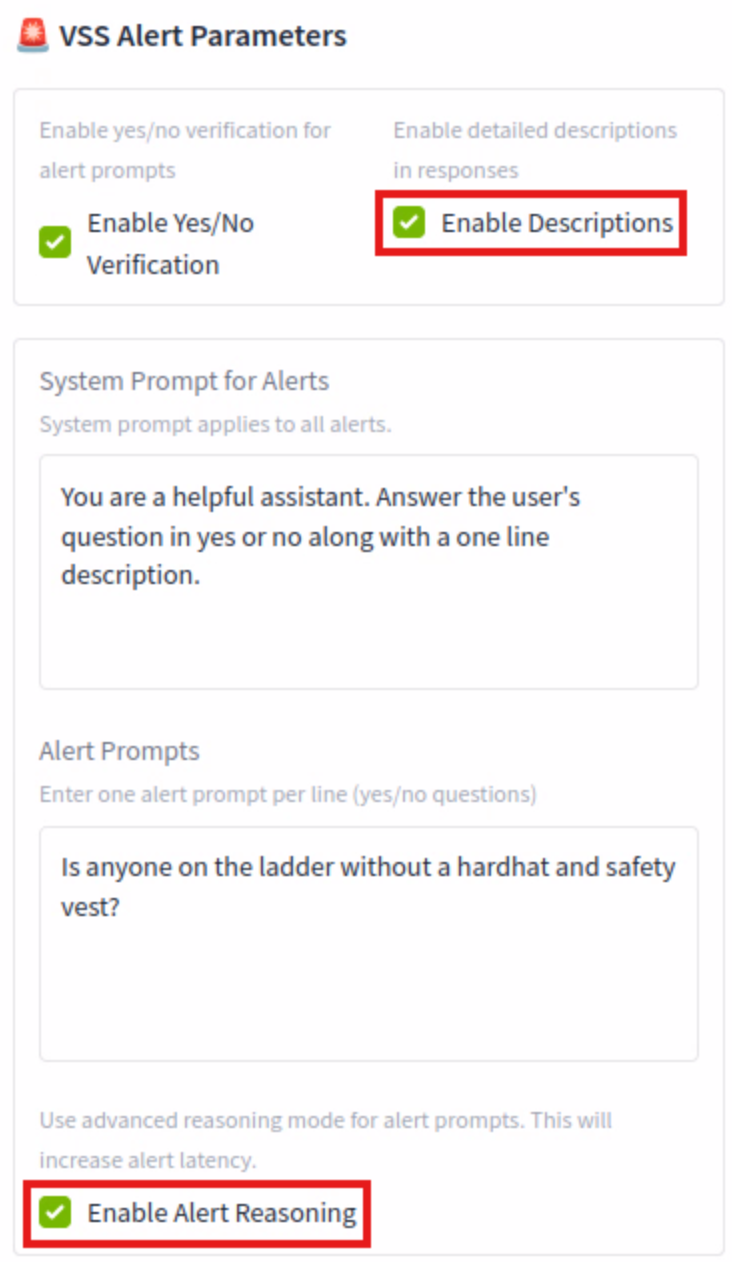
VSS Alert Parameters
Enable Yes/No verification (leave this checked) - The model will return either a Yes or No based on the condition
Enable Description (leave unchecked) - The model will add more details to the response. This will add more processing time
System Prompt for Alerts - A simple prompt telling the agent what to do
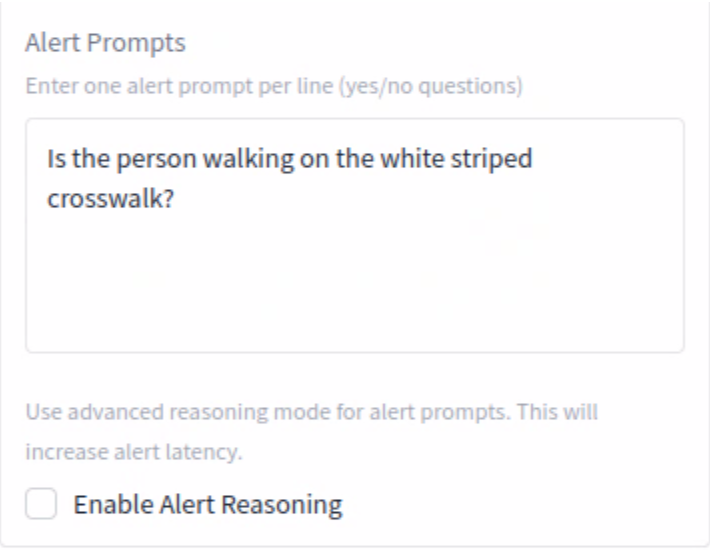
Alert Prompts
Alert Prompt - We are telling the agent what we want it to alert on, in this case, if it detects a person, are they using the crosswalk?
Enable Alert Reasoning (leave unchecked) - This allows the system to not only detect an object but to understand and narrate the context of an event, providing actionable insights and reducing the “noise” of irrelevant alerts. This will also add processing time.
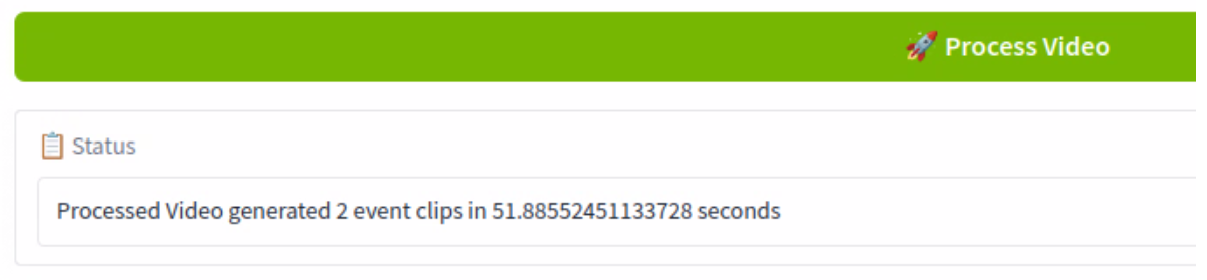
Click the green Process Video button

You can monitor the progress below the button. Note that the first time you process a video, there won’t be a progress bar. It should take about a minute to complete.
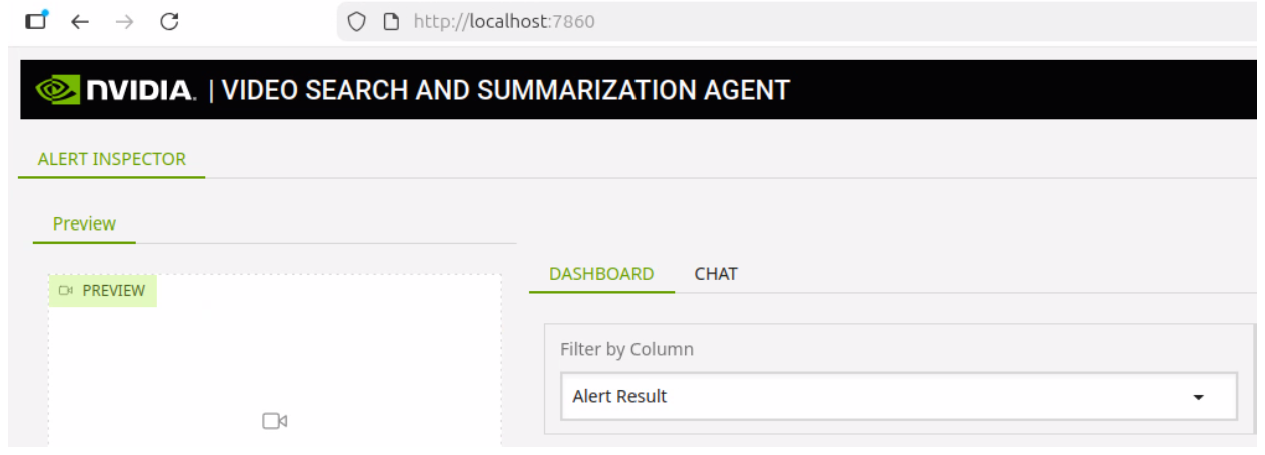
Open another tab in the browser and navigate to the Alert Inspector at http://localhost:7860
We can see the agent has found two instances of a person and alerted on whether or not they used the crosswalk.
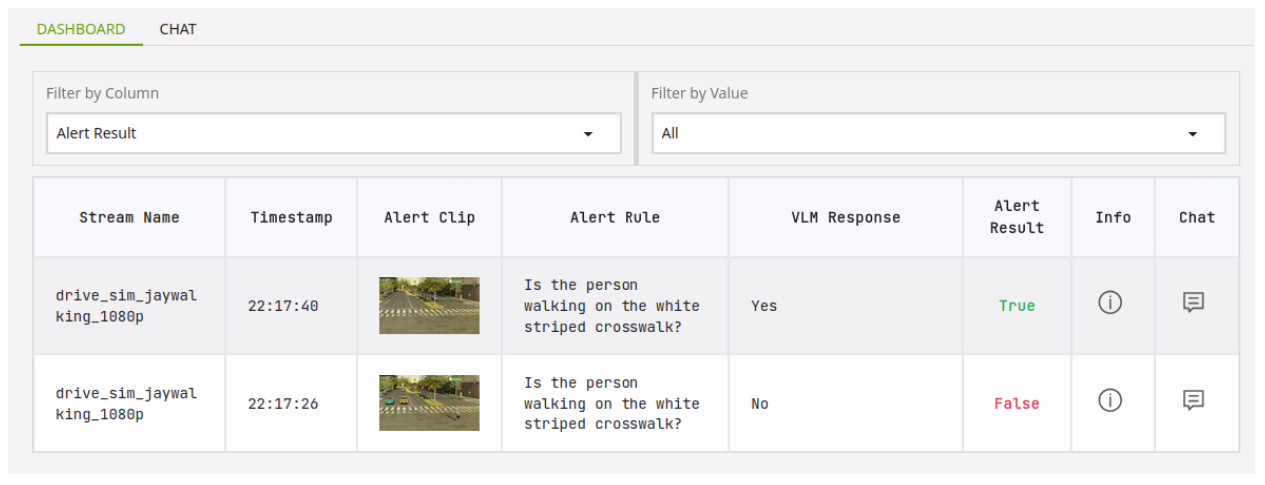
Click on the Chat icon next to the first entry. Note a video now loads in the Preview section.
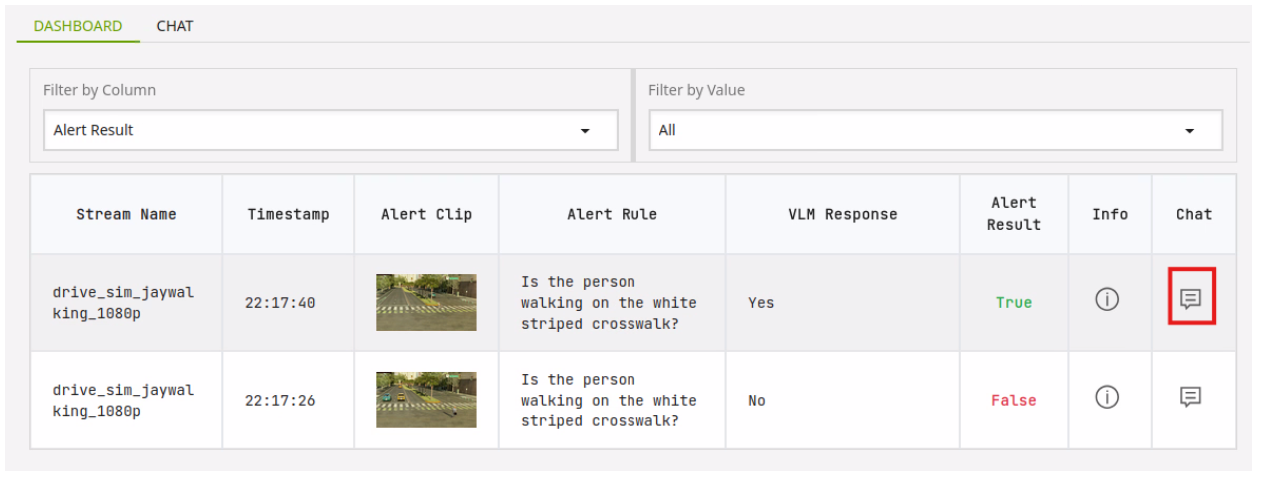
The video presented shows a short clip of when a person was detected crossing the street.
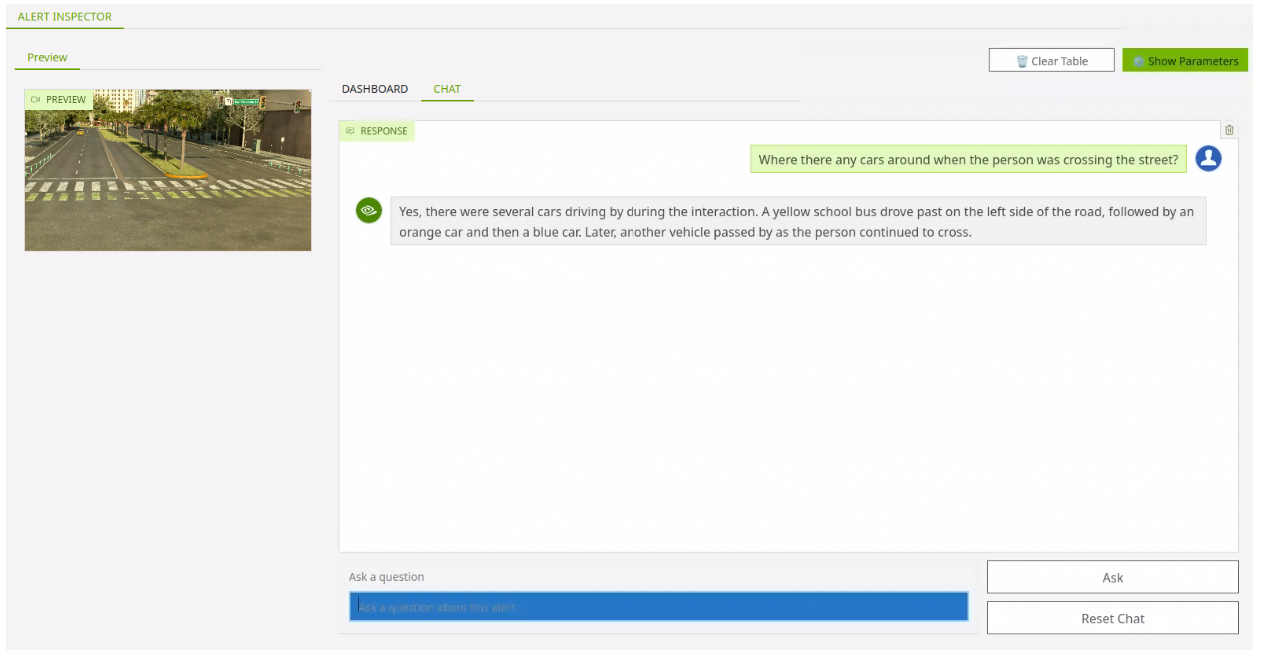
You can use the chat interface to ask a relevant question about what is happening in the video clip.
Run Warehouse Example (advanced options)#
Go back to the VSS as Inspector tab and click the last video thumbnail under Examples.
In the VSS Alert Parameters, click the box next to Enable Description and Enable Alert Reasoning. Click the Process Video button.
This process will take a bit longer as it is producing more detailed descriptions for the responses and using reasoning for each alert. When the process has completed, click over to the Video Search and Summarization Agent tab.
You can see we have a more detailed description in the VLM Response column with information on why the alert resulted in a true response.
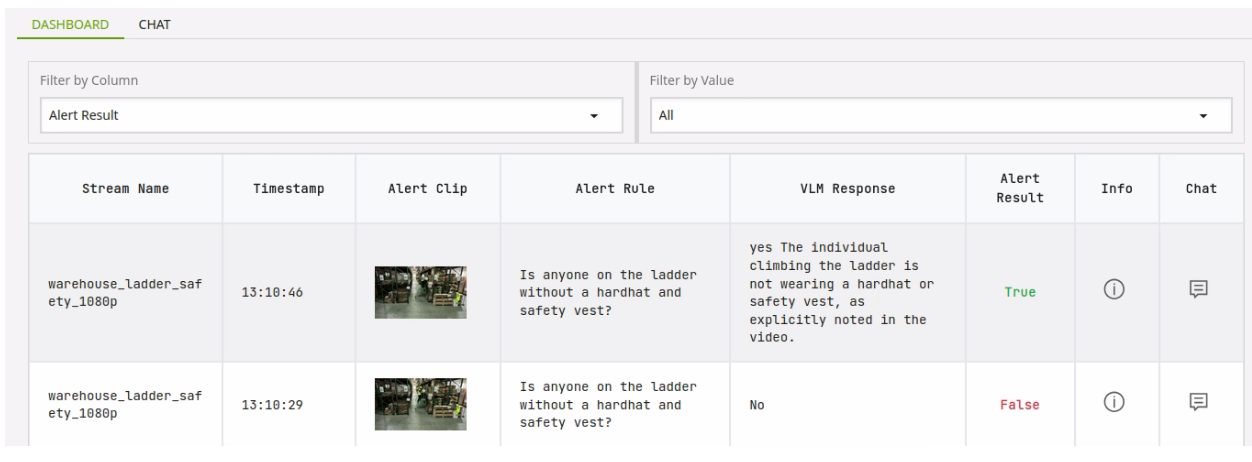
You can click the chat icon to see a short clip of what triggered the alert and ask questions related to it.