NVIDIA AI Enterprise Software#
NVIDIA vGPU Architecture#
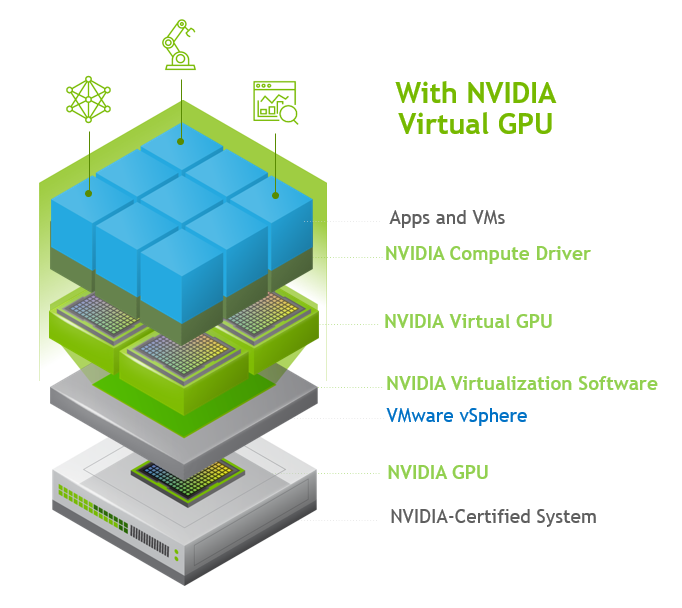
The high-level architecture of an NVIDIA virtual GPU enabled environment is illustrated in the figure below. Here, we have GPUs in the server, and the NVIDIA AI Enterprise Host Software (VIB) is installed on the host server. This software enables multiple VMs to share a single GPU, or if there are multiple GPUs in the server, they can be aggregated so that a single VM can access multiple GPUs. Physical NVIDIA GPUs can support multiple virtual GPUs (vGPUs) and be assigned directly to guest VMs under the control of NVIDIA’s AI Enterprise Host Software running in a hypervisor. Guest VMs use the NVIDIA vGPUs in the same manner as a physical GPU that has been passed through by the hypervisor. In the VM itself, vGPU drivers are installed which support the different license levels that are available.

NVIDIA AI Enterprise Host Software (VIB)#
The NVIDIA AI Enterprise Host Software host driver is the software driver that is installed on the hypervisor host that is responsible for communicating with the NVIDIA vGPU guest driver which is installed on the guest VM.
Important
NVIDIA AI Enterprise The vGPU Host Driver can be downloaded from the NGC Catalog. Use the search filters to quickly find the latest version.
Installing NGC Catalog CLI#
To access the NVIDIA AI Enterprise Host Software (VIB) and NVIDIA vGPU Guest Driver, you must first download and install NGC Catalog CLI. After the NGC Catalog CLI is installed, you will need to launch a command window and running the following commands to download software.
To install NGC Catalog CLI:
Enter the NVIDIA NGC website as a guest user.
In the top right corner, click Welcome Guest and then select Setup from the menu.
Click Downloads under Install NGC CLI from the Setup page.
From the CLI Install page, click the Windows, Linux, or MacOS tab, according to the platform from which you will be running NGC Catalog CLI.
Follow the instructions to install the CLI.
Open Command Prompt from the Run Box.
Verify the installation by entering
ngc --version. The output should beNGC Catalog CLI x.y.zwhere x.y.z indicates the version.Enter the following command
ngc config set. You will be prompted to enter your NGC API Key.
After the NGC Catalog CLI is installed, you will need to launch a command window and running the following commands to download software.
NVIDIA AI Enterprise Host Software (VIB)#
VMware ESXi
ngc registry resource download-version "nvidia/vgpu/vgpu-host-driver-X:X.X"
Note
Further information on NGC Catalog and Registry CLIs can be found here.
NVIDIA vGPU Guest Driver#
Ubuntu
ngc registry resource download-version "nvidia/vgpu/vgpu-guest-driver-X:X.X"
Added in version 1.1.
Red Hat Enterprise Linux 8.4 vGPU Guest Driver
ngc registry resource download-version "nvidia/vgpu/vgpu-guest-driver-X:X.X"
Note
Further information on NGC Catalog and Registry CLIs can be found here.