

Advanced Walkthrough: Use Your Own Container
Before starting this walkthrough, we recommend completing the Tutorial Project, available in your AI Workbench interface. The Tutorial introduces key AI Workbench concepts, such as working with projects, environments, and containerized applications.
By default, NVIDIA AI Workbench provides a selection of Default Base Containers for your projects. However, in some cases, you might want to create your own custom base container for reuse.
To do this, you need to: 1. Build a custom container image that meets AI Workbench compatibility requirements. 2. Apply image labels to ensure proper integration with AI Workbench. 3. Publish the container to a registry for use across projects.
After publishing your custom container, you can create a new AI Workbench project using it as the environment.
In this walkthrough, you set up a simple, non-default container to use as a base environment for AI Workbench projects. You use the Morpheus container (nvcr.io/nvidia/morpheus/morpheus:23.11-runtime) from NVIDIA’s NGC Catalog as the base for your custom container.
What You’ll Do in This Walkthrough
This walkthrough guides you through setting up a non-default container for AI Workbench projects. You’ll use the Morpheus container (nvcr.io/nvidia/morpheus/morpheus:23.11-runtime) from NVIDIA’s NGC Catalog as the base for your custom container.
In this walkthrough, you will:
- Start Your Dockerfile - Create a Dockerfile for your custom environment.
- Add Image Labels - Add AI Workbench-compatible labels to your container.
- Completed Dockerfile - Build and test your custom container.
- Build and Publish Your Container - Publish the container to a registry.
- Access and Use Your Container - Use the custom container in a new AI Workbench project.
Start Your Dockerfile
-
Open a new, empty Dockerfile and specify the container image and tag as follows. You see the full Dockerfile in a later step.
-
Install any system level dependencies you want in your base container, such as Git, Git LFS, and Vim.
-
Add any applications that you want to add to your custom container environment. In this example, you add a JupyterLab IDE.
Add Image Labels
You must provide image labels for your container in the Dockerfile. Labels are metadata that give information about your container to AI Workbench. For details, see Use a Custom Container Image.
Container image labels typically fall into one of a few categories:
-
Fairly standardized and can essentially be copy-pasted. For example,
schema-versionandjupyterlab. -
Fairly open-ended and up to user preference. For example,
nameanddescription. -
Require some simple container introspection. For example:
-
CUDA Version Labels
-
Package Manager Labels (apt)
-
Package Manager Labels (pip)
-
-
Add the image labels to your Dockerfile.
Completed Dockerfile
The complete Dockerfile for making the NVIDIA Morpheus container compatible with AI Workbench now looks like the following.
Build and Publish Your Container
Use the following procedure to build your container image and publish it to a container registry.
The build command builds an image that is compatible with your computer architecture. For example, if you build your image on an ARM macOS, you can’t use the image an AMD Ubuntu computer.
-
Run the following commands. Specify your registry and namespace. You can edit the image name and tag.
-
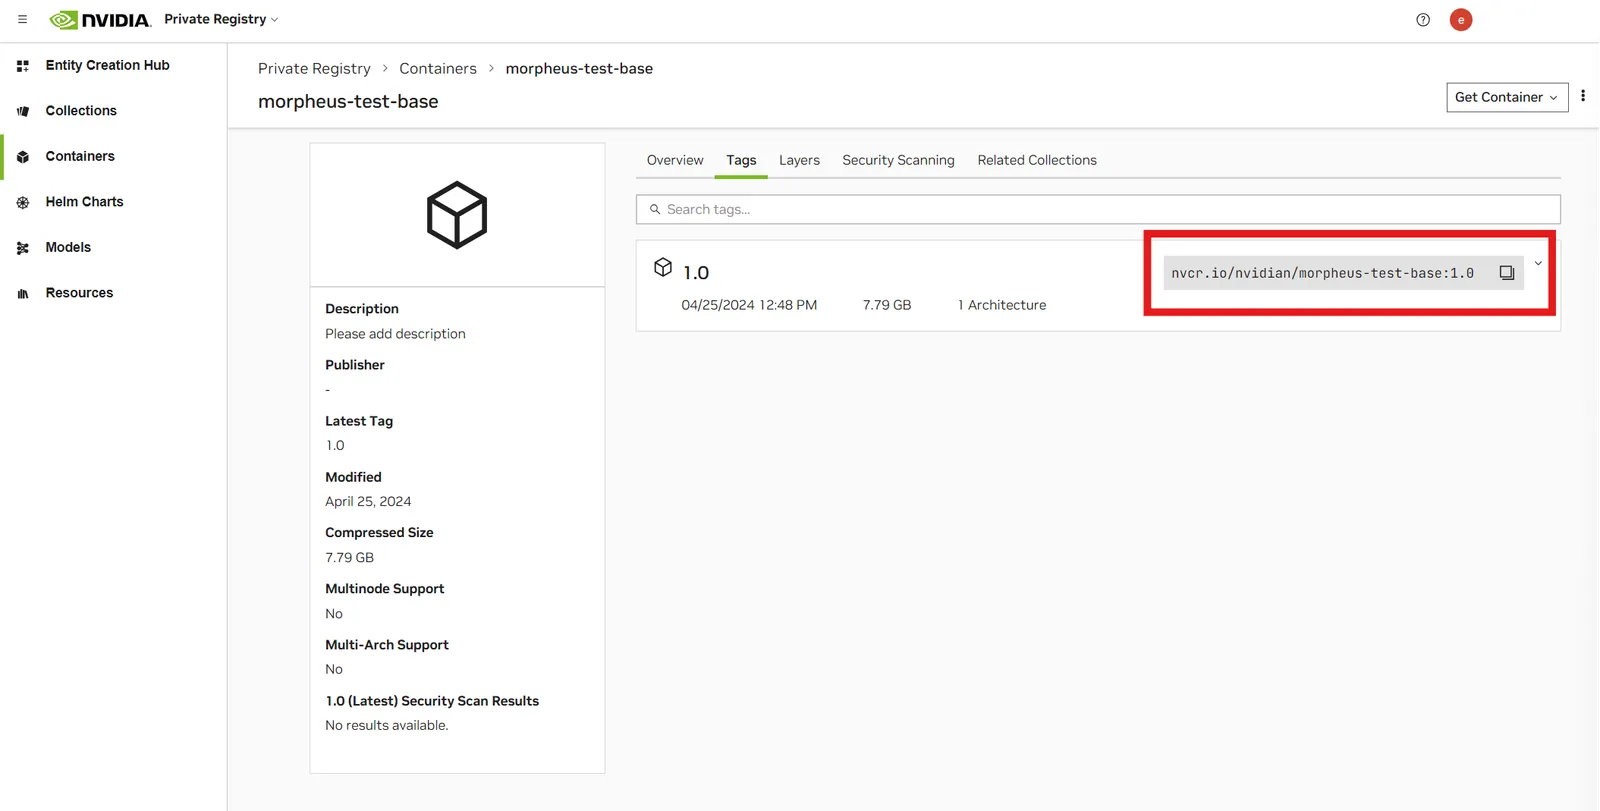
Copy the image tag. Here, we assume you have published the container to the private registry location
nvcr.io/nvidian/morpheus-test-base:1.0.
Access and Use Your Container
-
Inside AI Workbench, open a location and then click New Project.
-
Specify a Name and Description, and then click Next.
-
Click Custom Container.
-
Enter the location of your desired container registry, image, and tag, and then click Create Project
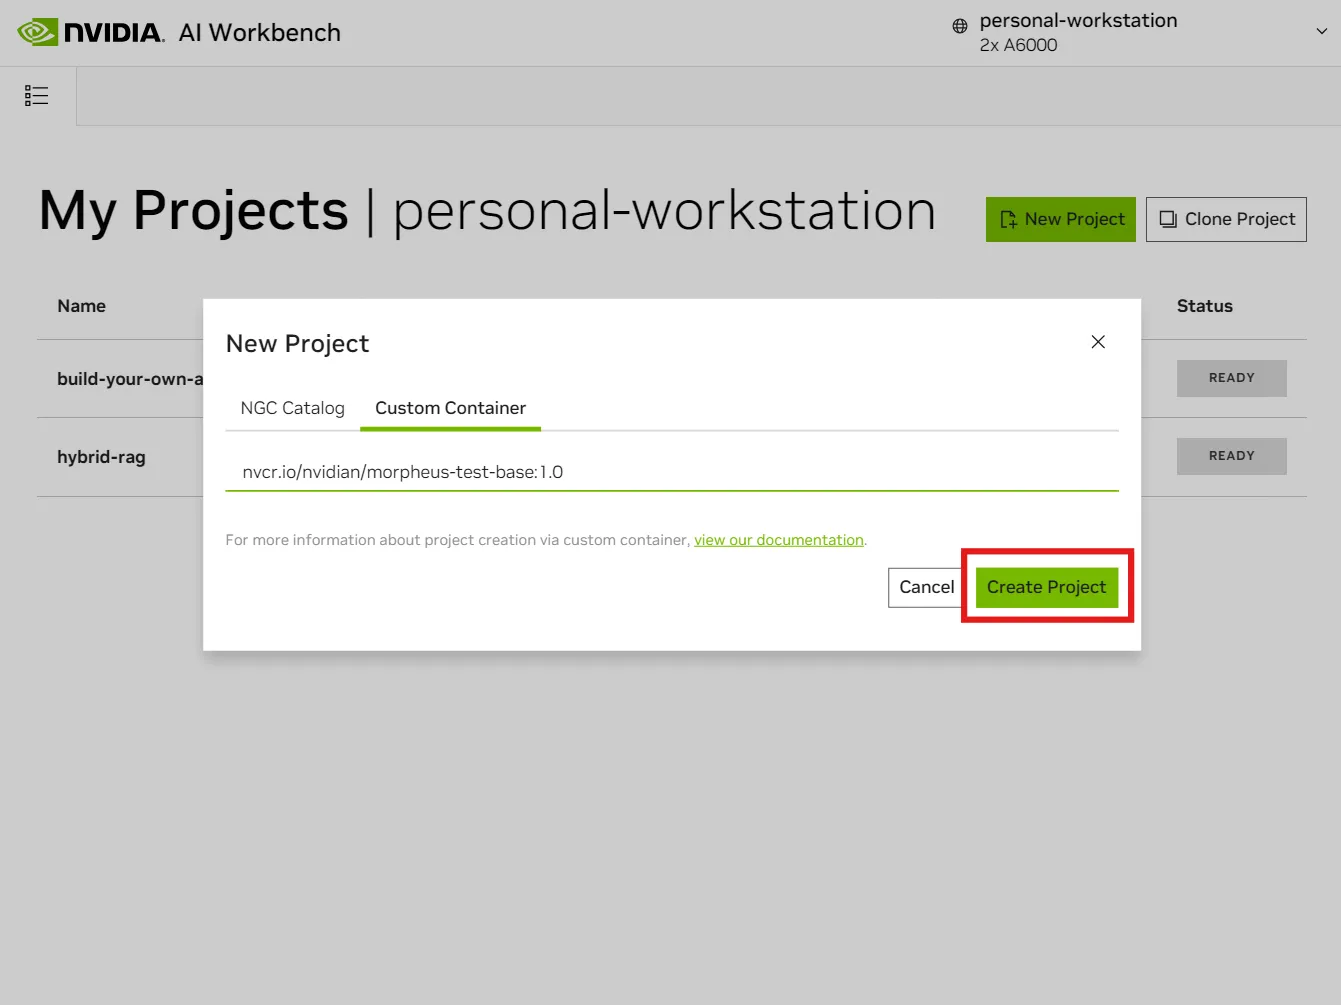
- AI Workbench automatically starts the container build process.
The container build process can take a few minutes depending on the size of your custom container.
If you encounter a build error, there may be something wrong in your image labeling. Edit the autogenerated
.project/spec.yamlto correct any errors in the build, and then transfer those changes to the container image labels of the Dockerfile to persist those fixes across all future projects using the container.