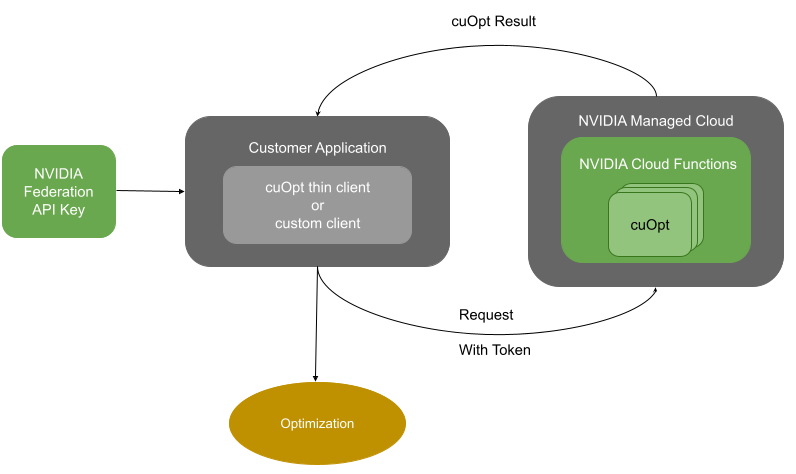
NVIDIA Managed Service Overview#
cuOpt is securely hosted by NVIDIA and uses the NVIDIA Identity Federation API Key to access the service, enabling you to easily adapt and experiment with cuOpt.
Quickstart Guide#
By the end of this quickstart, you will have set up your NGC account and installed the cuOpt thin client and you will be ready to run a cuOpt managed service example.
Step 1: NGC Account Setup#
GA (Routing only):#
Please contact NVIDIA Support for additional details.
EA - Early Access to LP/MIP:#
Please contact
cuopt@nvidia.comand share your interest to use Routing/LP/MILP as Managed service to get access.
An NGC org (organization) is a dedicated virtual instance used to enable and manage NVIDIA cloud services. Upon your approval to the cuOpt Cloud Service program, you are added to an NGC org that provides all the necessary access to NVIDIA cloud service.
To get started with the cuOpt service, first you will need to have an NGC account if you do not already have an account.
Sign up for a free NGC org through the NGC sign-in portal and create a new NVIDIA account.
Click on the link within the NGC Welcome email to accept the invitation to the org.
Note
Please refer to the NGC documentation for further details.
NGC catalog will be displayed as shown below, navigate to cuopt landing page by selecting
NGC Catalogdrop down and chooseCloud Functions.
Step 2: Setup the Python Environment#
Prior to setting up the Python thin client, we’ll create a Python virtual environment to use for the installation. This allows us to install any Python scripts or libraries specifically for this service.
Note
Supported OSes include Linux, WSL, and macOS.
First, ensure that Python 3.10 is installed on the system. You can check the version of Python that’s installed using the command below.
python3 --versionInstall the Python virtual environment package.
For installation on macOS, run:
pip3 install virtualenv
For installation on Ubuntu, run:
apt install python3.10-venv
Next, make sure you’re in a proper working directory, such as your home directory, and create a virtual environment within that directory.
1cd ~
2python3 -m venv cuopt-service-env
Activate the new environment by running the following command.
source cuopt-service-env/bin/activate
Proceed to the next step to download and set up the Python thin client into this environment.
Step 3: Installing Thin Client Using Pip Index#
Whenever thin clients need to be updated or installed, you can directly install it using NVIDIA pip index.
Requirements:
Please visit system requirements for thin client for managed-service for more information.
pip install --upgrade --extra-index-url https://pypi.nvidia.com cuopt-thin-client
Users can also write their own thin client, please refer to Build Your Own Thin Client.
For more information navigate to Managed Service Thin Client.
Step 4: Obtain Credentials for cuOpt Managed Service#
NVIDIA Identity Federation API Key#
Note
There are two types of API Keys, Personal API Keys and Service Keys. Service keys may only be created by Org Owners and are designed for use in automation. Most users will create a Personal API Keys.
The NVIDIA Identity Federation API Key is used to authenticate with cuOpt managed service.
Navigate to
NGC Catalogdrop down and chooseCloud Functions.Select the
shared functionstile to check the functions that are available.Note down the function id with name
cuopt-gafor GA andcuopt-eafor EA (LP/MIP).
For all org users:
Select the CLOUD FUNCTION tab on the left side panel and choose Functions.

Select Personal API Keys to generate the NVIDIA Identity Federation API Key.

Save this key and this can be managed from NGC.
This key provides access to cloud functions available at the time of its creation.
If a new cloud function is added later, then this key will not have access to that function.
You will need to create a new key to access new cloud functions.
Step 5: Adding Users to Your NGC Org#
Select Profile in the right corner -> Select
ORGANIZATION-> Users on the left side panel.
In this case, you will see the option to Add User in the right corner.

Select
Add Userand fill the details as shown below:Fill in the name and email-id.
Choose
Organizationunder Roles.Select the following roles:
CuOpt Service->CuOpt UserCloud Functions->ViewerIt is up to you whether you want to provide any admin authorities using Organization.
Choose Add Role on right side to add these settings.
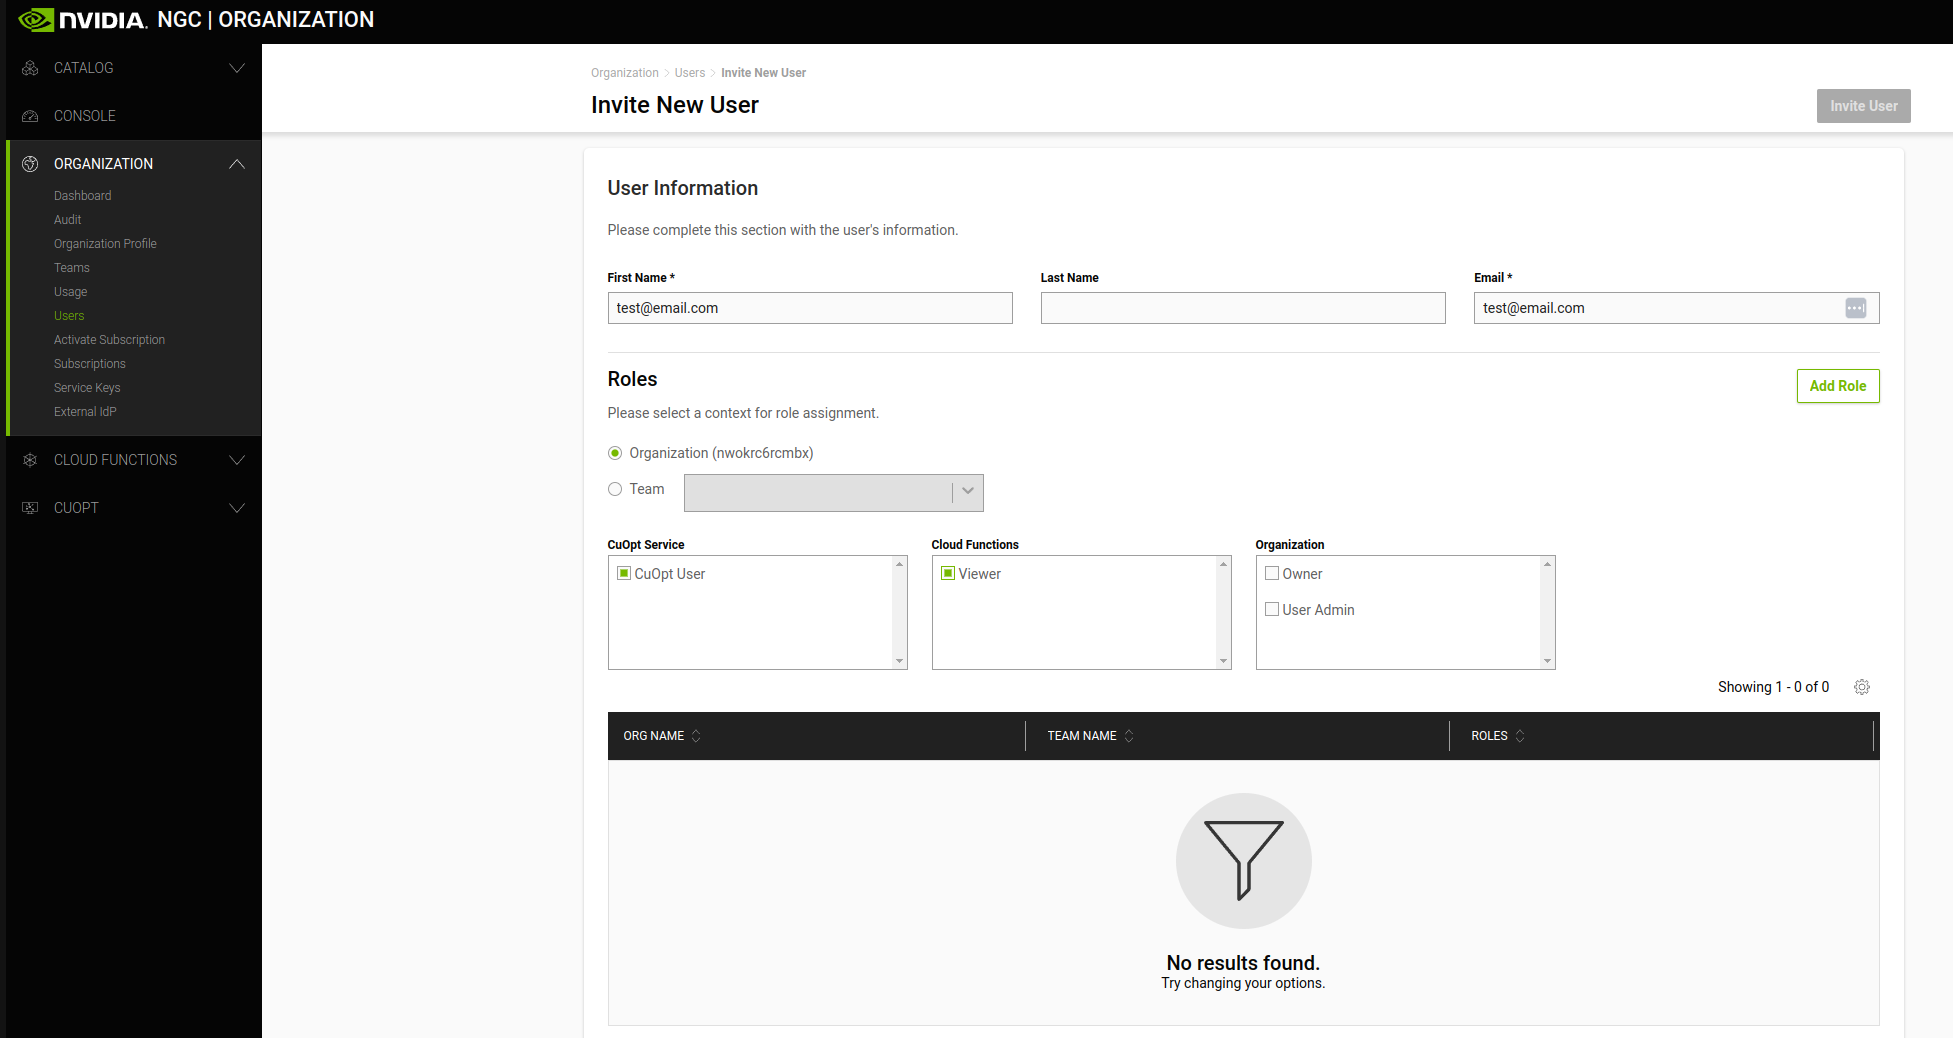
Ensure that only the following set of roles are set as shown below; delete the
Registry Readrole.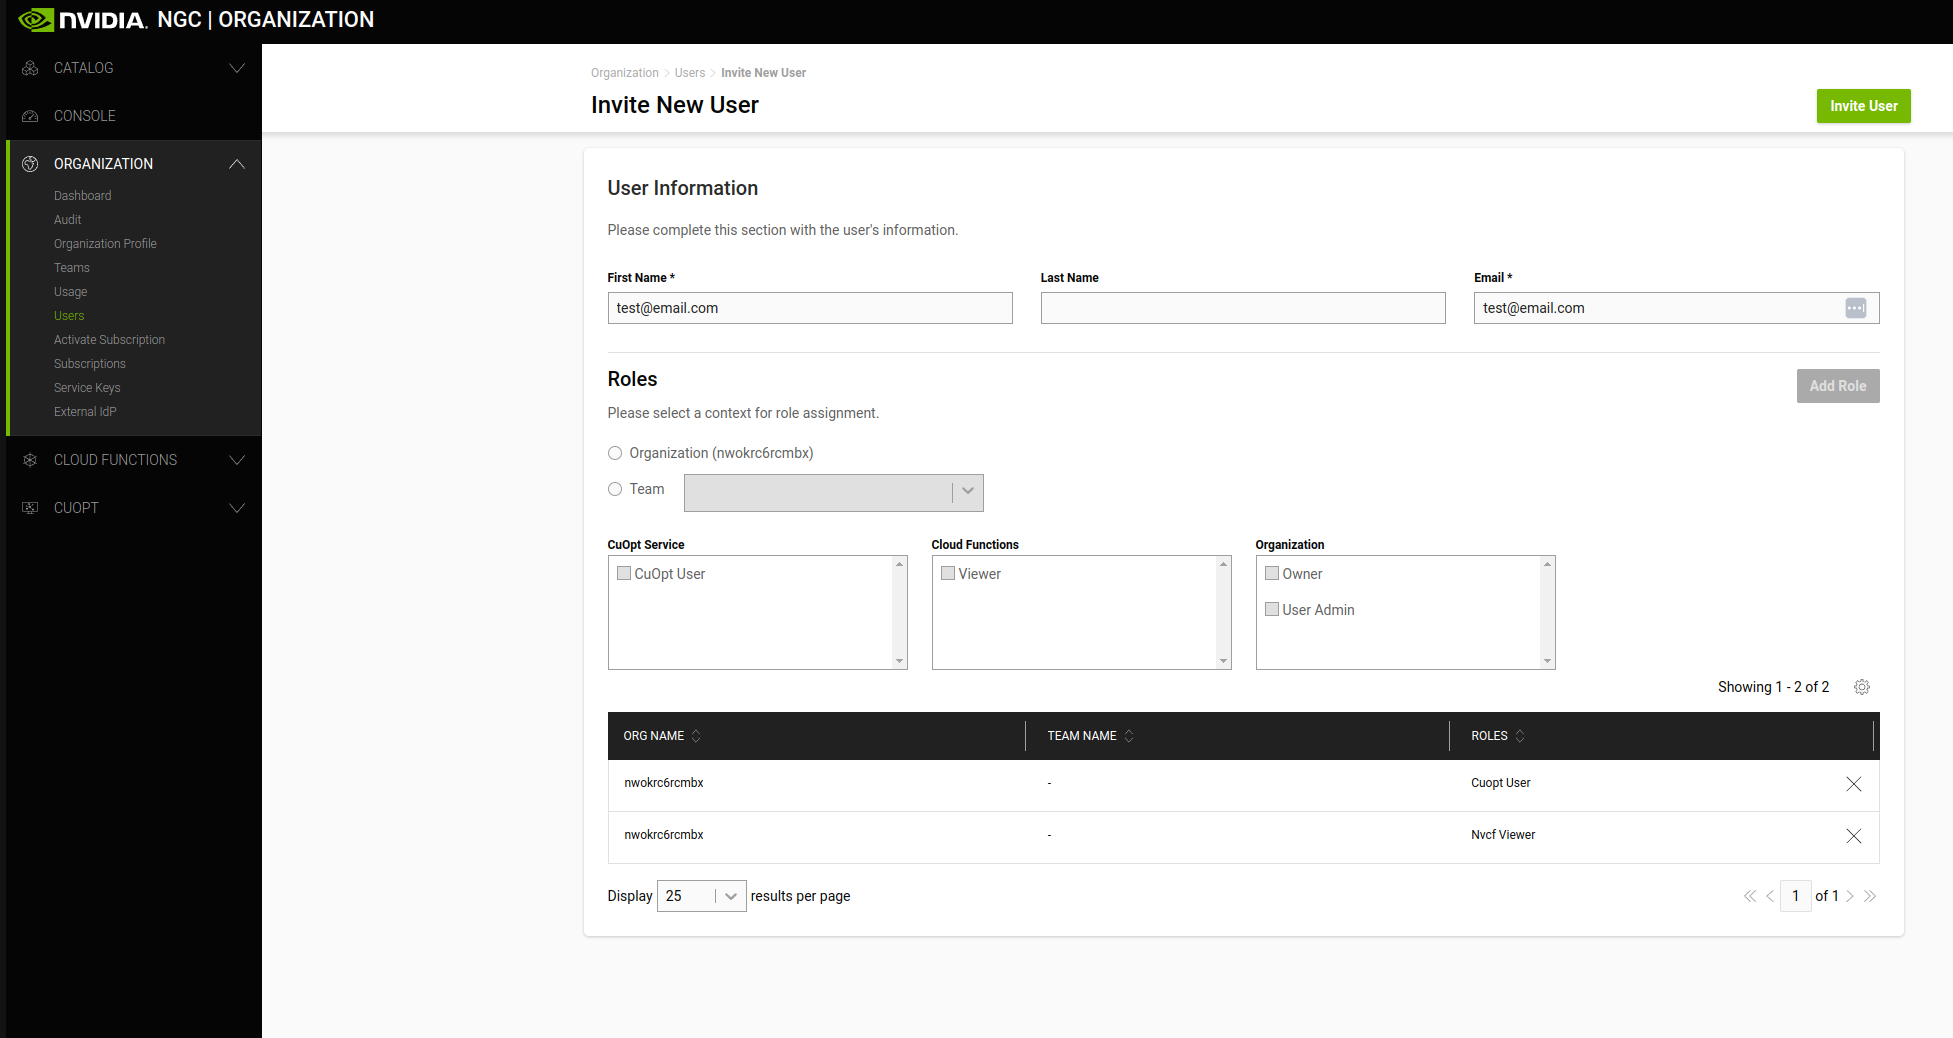
Select
Add Useron the top right corner to invite the user.For more information on adding users, visit the NGC documentation.
Step 6: Run a cuOpt Managed Service Example#
To solve a sample cuOpt problem please navigate to the cuOpt Thin Client Examples.