3. Cluster Administrator Guide#
Congratulations on your new DGX Cloud Create cluster!
This section provides Cluster Administrators with essential information for setting up and managing DGX Cloud Create clusters while supporting users. It covers the setup process specific to the DGX Cloud Create offering. For comprehensive administrative details, refer to the NVIDIA Run:ai Documentation.
3.1. Cluster Handover#
In preparation for your onboarding, you should have engaged with your NVIDIA Technical Account Manager (TAM). Your TAM will provide the required documentation to accomplish the following prior to an onboarding call:
Designate an administrator for NGC and NVIDIA Run:ai.
Federate your IdP with the NVIDIA identity federation service for Single Sign-On (SSO).
Specify a trusted Classless Inter-Domain Routing (CIDR) range for ingress/egress.
Provide Classless Inter-Domain Routing (CIDR) ranges for approved company networks to ensure cluster access.
(Optional) Configure private access connectivity to the cluster and NVIDIA Run:ai as described in (Optional) Private Access.
Set up their NGC Org for access to NGC Private Registry and AI Enterprise.
Register for the NVIDIA Enterprise Support Portal.
During your onboarding call, the following will be provided:
A URL endpoint to access the NVIDIA Run:ai cloud control plane.
A shared support channel (Slack or Teams) for yourselves and NVIDIA.
A kubeconfig file, required to set up CLI access to the cluster.
A URL for the cluster (within the kubeconfig file).
For more information about the handover and onboarding steps, see the Cluster Onboarding Guide.
3.2. Accessing your Cluster#
There are two ways that administrators can interact with a DGX Cloud Create cluster:
Using the NVIDIA Run:ai UI: NVIDIA will provide you with the URL and an initial user login to the cluster. This user will be given the role of Application Administrator. That individual will then be able to create departments and projects, invite other users, and assign them access rules.
Using the NVIDIA Run:ai CLI: To use the NVIDIA Run:ai CLI, you must first log in using the UI. After logging into the UI, users will be able to set up the CLI. To learn how to set up the NVIDIA Run:ai CLI, see CLI/API Setup Guide.
3.2.1. Accessing the NVIDIA Run:ai UI#
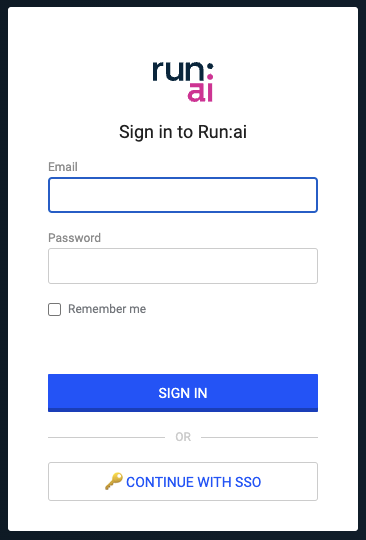
To access the NVIDIA Run:ai console in a browser:
Go to the cluster URL, as given to you by the TAM in onboarding instructions.
In the login dialog, click CONTINUE WITH SSO. Your SSO login page will open as a pop-up.
Enter your details. Once logged in, you will be taken to the NVIDIA Run:ai cluster overview page.
3.3. Managing Users#
NVIDIA Run:ai uses role-based access control (RBAC) to determine users’ access and ability to interact with cluster components. Each user can be assigned more than one role. See Cluster Users for more details on cluster user types.
3.3.1. Creating Users#
User management for DGX Cloud Create utilizes your existing identity provider (IdP) for authentication via NVIDIA’s identity federation service. As part of the onboarding process, your NVIDIA TAM should have worked with you to register your IdP with the service.
NVIDIA Run:ai access and role assignments are managed separately within the NVIDIA Run:ai platform.
Customer administrators cannot add local users or change the SSO configuration within NVIDIA Run:ai; they can only assign and remove roles.
After a role is assigned to a user within NVIDIA Run:ai, the user can log into NVIDIA Run:ai via SSO using the email address with their IdP account. The IdP email address must match the email associated with the assigned role in NVIDIA Run:ai.
Removing a user from your IdP does not automatically revoke their NVIDIA Run:ai access. To fully revoke a user’s access, their role must be removed within the NVIDIA Run:ai platform.
3.3.1.1. Assigning Roles in NVIDIA Run:ai#
Note
Only users with role Application Administrator, Editor, Department Administrator and Research Manager can assign roles within the cluster.
To assign a role:
From the NVIDIA Run:ai overview page, select the Tools & Settings menu in the top right corner.
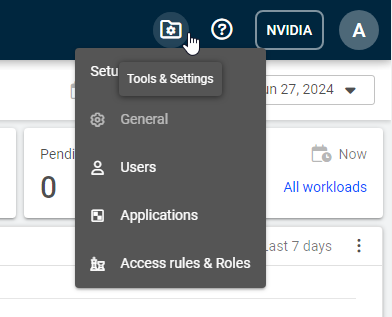
From the menu, select Access rules & Roles. You will be taken to the Access rules & Roles overview page.
Select + NEW ACCESS RULE to assign a new role to a user. The New Access rule pop-up will appear.
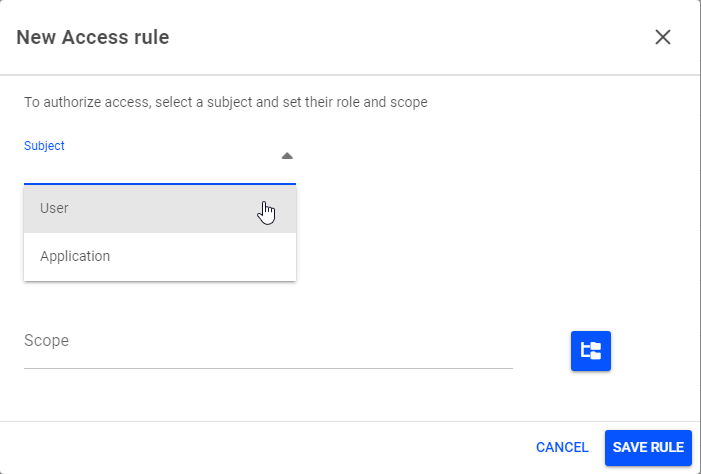
Under Subject, select User.

Enter the user email address associated with their SSO user account.
Select the role and the scope for the user to be invited, as described in the User Scopes section of the Overview Guide.
Note
You must notify the user their role and scope, as this determines what they can and cannot do within the cluster.
Click SAVE RULE to save the rule.
Now the user can log in to the NVIDIA Run:ai environment using the SSO option on the login screen, at the URL provided by their customer administrator or their NVIDIA TAM.
3.3.1.2. Access Rule Creation in NVIDIA Run:ai#
Important
Any user with the ‘CREATE’ permission on Access rules in the NVIDIA Run:ai Cluster can create additional permissions (Access rules) in any SCOPE they are a part of, at a ‘level’ equal to or lesser than their role in that SCOPE.
The following roles have the ‘Create’ Access Rule permissions:
Application Administrator
Department Administrator
Editor
Research Manager
Because the ability to create access rules is not restricted to a specific scope, it is important to manage and monitor the cluster users.
3.3.1.2.1. Example: Assigning Access Roles#
In this example we show a consequence of all Create Access Rule permissions being at cluster level even if they are granted at a specific department level.
Alice has a role of Editor in Department 1 and a L1 researcher in Department 2. Because Alice has the ‘CREATE’ access rule permission from her role in Department 1, Alice can add additional users to Project 2-A, with role L1 researcher or lower (including L2 researcher and Viewer). These new users can run jobs and use resources in the cluster. They can also access any credentials scoped to Project 2-A.
However, the administration of Department 2 may not be aware that Alice has an Editor role in Department 1. Therefore, do not assume that Alice has the authority to add users to Project 2-A, especially if it contains proprietary information.
3.4. Managing Departments and Projects#
To prepare your cluster for users to run workloads, you must set up the following:
Departments
Projects
Refer to NVIDIA Run:ai Departments for a detailed introduction to departments and projects.
3.4.1. Departments#
Departments allow you to associate quotas with different teams and groups of users. Users are members of a department, and all projects must be created within a department.
Note
Only users with the role of Application Administrator and Editor can create and manage departments.
3.4.1.1. Modifying the Default Department#
When your DGX Cloud Create cluster is provisioned, a “default” department will be created. However, this department won’t have any resource quota allocated to it, so no workloads can be run within the department.
Note
Only users with the role of Application Administrator and Editor can modify departments.
To add quota to the default department:
In the NVIDIA Run:ai UI, navigate to the Departments overview page using the left navigation menu.
Click the ‘default’ department entry. The blue ‘selected’ menu should appear at the top of the page.
Click EDIT to access the Edit department page.
(Optional) Rename the department.
In the Quota management section, select how many GPU devices, CPU cores, and how much CPU memory the department should be allocated.
Click SAVE to update the department. You will be taken back to the Departments overview page and the new quotas should be shown in the values in the table.
3.4.1.2. Creating a Department#
Having multiple departments in your cluster allows you to manage groups of projects and set quotas for separate groups.
Note
Only users with the role of Application Administrator and Editor can create departments.
You can create a department using the following steps:
Navigate to the Departments overview page.
Click + NEW DEPARTMENT. You will be taken to the New department creation page.
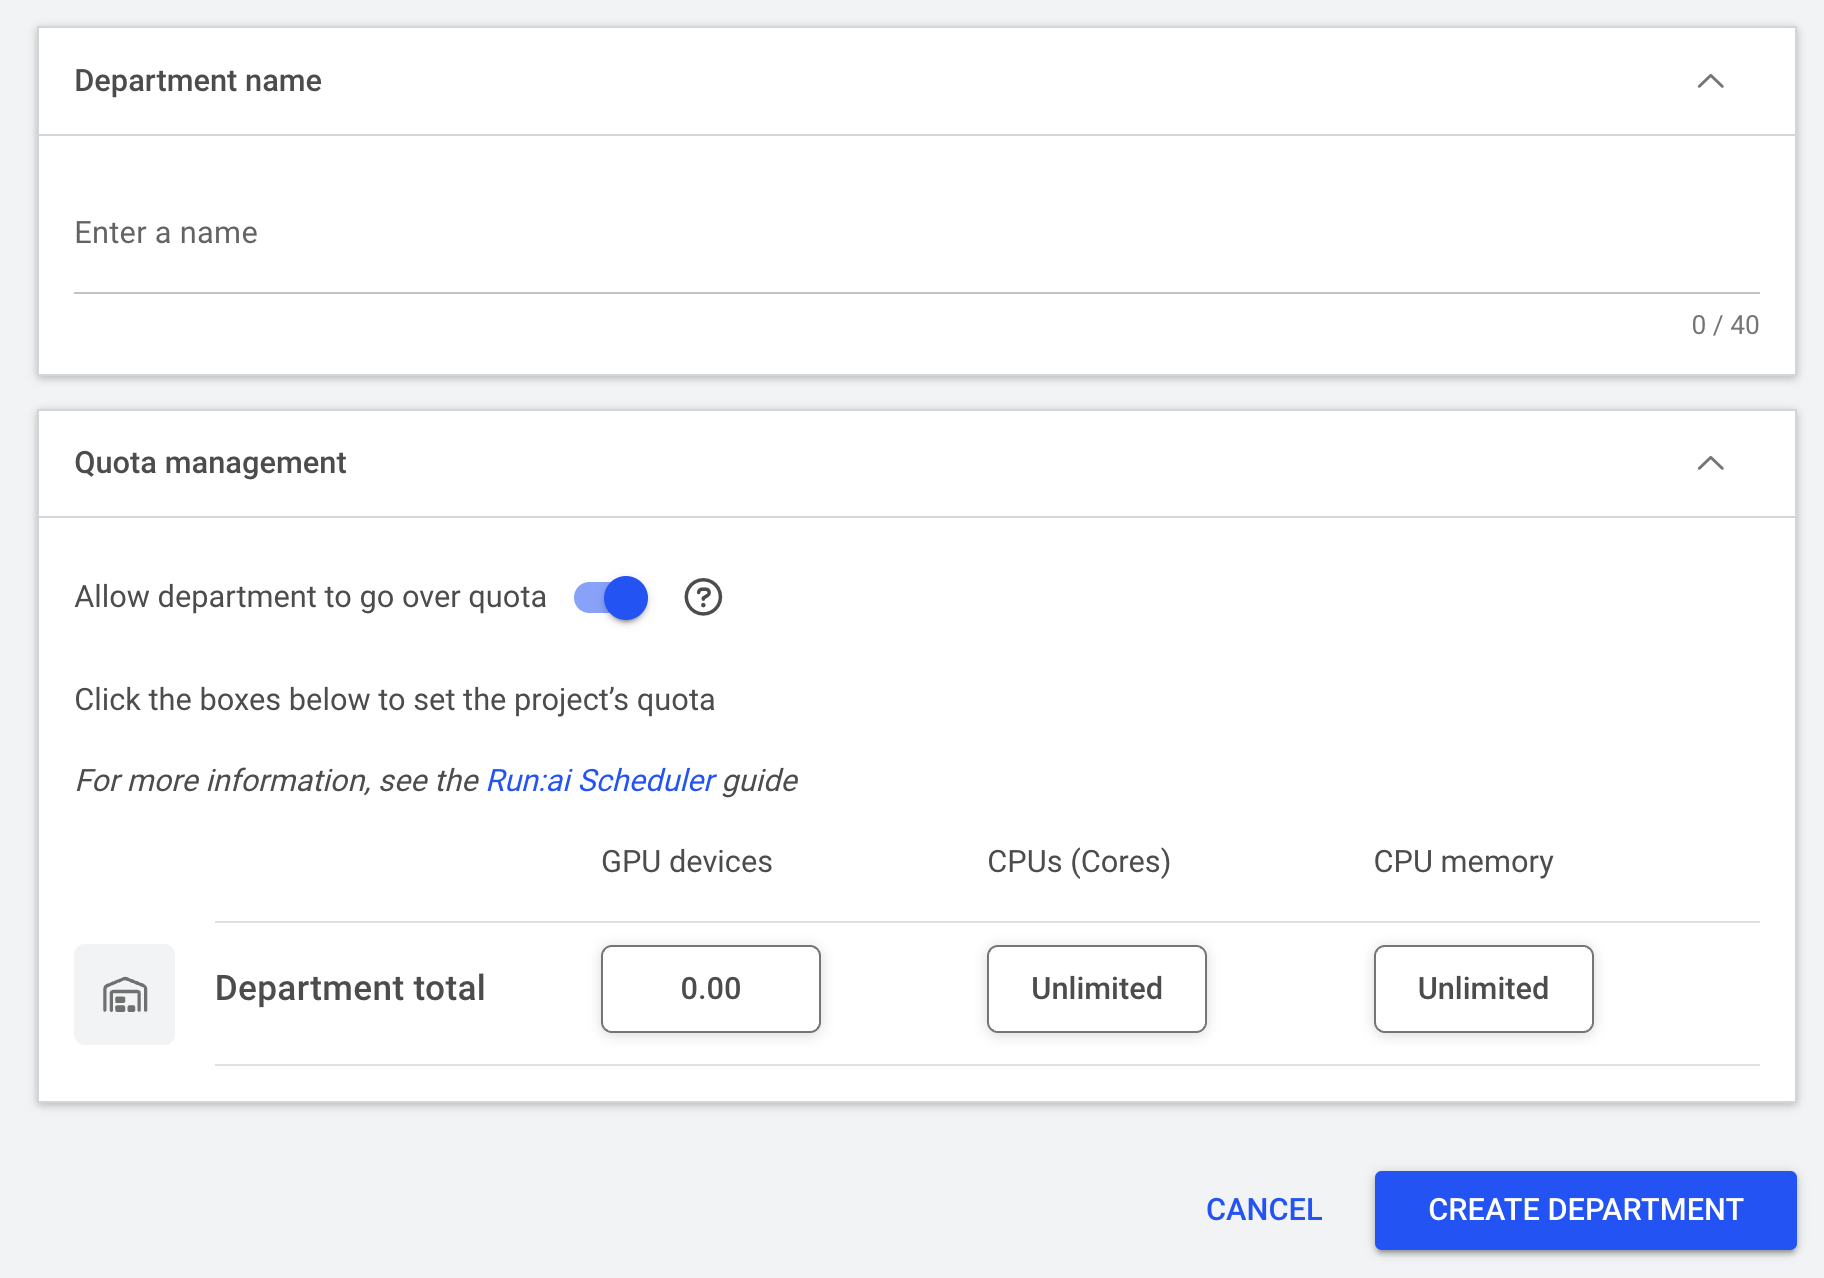
Enter a department name.
Select a quota for the department. You should also select a quota for each of the three options: GPU devices, CPU cores and CPU Memory.
Select whether you will Allow department to go over quota. If the department is allowed to go over quota, it will use spare GPUs available in the cluster, when available, beyond the quota listed.
Click CREATE DEPARTMENT to save. You will be taken back to the Departments overview page.
3.4.2. Projects#
Projects are used to implement resource allocation, and define clear guardrails between different research initiatives. Groups of users (or in some cases, an individual) are associated with a project and can then run workloads within that project, against a fixed project allocation.
All projects are associated with a department. It is important to take note of the department’s quota limits, as these will impact the allocation and quota of any project associated with that department.
Multiple users can be scoped into the same project. Project-level information, including credentials, are visible to all users in that project.
3.4.2.1. Creating a Project#
Note
Only users with the role of Application Administrator, Department Administrator, Editor and Research Manager can create projects.
To create a project:
Navigate to the Projects overview page.
Click + NEW PROJECT. You will be taken to the New project creation page.
Select a department under which the project will be created. The project will be viewable to all users within this department.
In the Project name section, enter a name for the project.
In the Quota management section, select the total number of resources that can be used by the project.
(Optional) Use the scheduling rules drop-down menu to set up any rules for the cluster.
Click CREATE PROJECT. You will be taken to the Projects overview page, where you can see the status of your newly created project.
3.4.2.2. Editing a Project#
Note
Only users with the role of Application Administrator, Department Administrator, Editor and Research Manager can edit projects.
You can update the project by clicking on the checkbox to the left of the project name, then clicking Edit on the menu bar at the top of the projects overview page. This will take you back to the project creation page, and you can update any entries as required.
3.4.2.3. Updating Access to Projects#
Note
Only users with the role of Application Administrator, Department Administrator, Editor and Research Manager can update access to Projects.
If a user has access to a department and a new project is created within that department, they will automatically be granted access to the project.
To update access to a project:
From the Projects overview page, click on the checkbox to the left of the project name.
Click ACCESS RULES on the menu bar at the top of the Projects overview page. This will bring up a pop-up where you can enter additional user email addresses to grant them access to the project.
3.5. Managing Compute Resources#
In NVIDIA Run:ai, a compute resource is a resource request consisting of CPU devices, memory, and (optionally) GPUs and GPU Memory. When a workspace is requested, with a specific compute resource, the scheduler looks for those requested resources, and if they are available the workspace will be launched with access to those resources.
You can view the compute resources available within your cluster by navigating to Compute Resources from the left navigation menu in the NVIDIA Run:ai UI.
Note
Only users with the role of Application Administrator, Compute Resource Administrator, Data Source Administrator, Department Administrator, Editor, L1 Researcher and Research Manager can create and manage compute resources.
As a cluster admin, you should ensure that when first given your cluster, the compute resources pre-loaded within your cluster are sensible for your users and their use cases. We recommend that you:
Remove any cluster resources that are using partial GPUs. GPU splitting is not possible on your DGX Cloud Create cluster.
Set up a CPU only compute resource.
Set up 1 (one) and 8 GPU compute resources.
These suggestions are only guidelines and you will likely require alternative compute resources for your teams. For instructions on how to set up compute resources, follow the instructions below.
3.5.1. Creating a New Compute Resource#
Note
Only users with the role Application Administrator, Compute Resource Administrator, Department Administrator, Editor, L1 Researcher and Research Manager can create new compute resources.
To create a new compute resource:
Navigate to the Compute Resources overview page using the left navigation menu.
Click + NEW COMPUTE RESOURCE. You will be taken to the New compute resource creation page.
Set a Scope for the resource. All users with access to create workloads within that scope will be able to use that compute resource.
Give your compute resource a name and description.
Under the Resources section of the page, select the number of CPUs and GPU devices per pod, as well as memory for both CPU and GPU devices.
Note
Partial GPUs is not supported on your DGX Cloud Create cluster.
Once you have filled in the page, Click CREATE COMPUTE RESOURCE. You will be taken to the Compute resource overview page, where your new compute resource will appear in the resources list.
3.6. Managing Your Storage Utilization (CLI)#
Note
The Kubernetes admin role as described in Advanced Kubernetes Usage for Admins is required for this section. For more information about this role, contact your cluster admin, or your NVIDIA TAM.
DGX Cloud Create provides a storage utilization resource named RunaiDGXCStorage. To check the current storage utilization and available quota, run the
following command on the cluster using the previously noted cluster role:
kubectl get runaidgxcstorages -n dgxc-tenant-cluster-policies
This command will display a summary of the storage quota allocated and used within your cluster.
NAME                   STORAGECLASSES                    QUOTAUSEDPCT   QUOTA             QUOTAUSED       STORAGECONSUMED
dgxc-enterprise-file   dgxc-enterprise-file, lustre-sc   97.21%         301200.000000Gi   292807.8175Gi   3529.7871Gi
For a more detailed listing of storage allocation, including individual PersistentVolume storage, run the following command:
kubectl describe runaidgxcstorages -n dgxc-tenant-cluster-policies
This command will produce a more verbose output, showing details like the example below:
pvc-fb3366ff-e909-46b7-bbc5-bdab282037cc:
  Capacity:       1200Gi
  Creation Time:  2024-10-04T23:30:10Z
  File Shares:
    fs-09b5f2919e0eb7555:
      Name:      fs-09b5f2919e0eb7555
      Orphaned:  true
      Values:
        free_bytes:          1114.218994Gi
        free_bytes_percent:  92.85
        used_bytes:          85.781006Gi
        used_bytes_percent:  7.15
  Location:                  us-east-1
  Name:                      pvc-fb3366ff-e909-46b7-bbc5-bdab282037cc
  State:                     AVAILABLE
  Tier:                      SSD
DGX Cloud Create has more advanced storage control features which are explained in detail in the Storage User Guide.
3.7. Retrieving the Kubernetes Configuration File (CLI)#
Note
The Kubernetes admin role as described in Advanced Kubernetes Usage for Admins is required for this section. For more information about this role, contact your cluster admin, or your NVIDIA TAM.
If you are a cluster admin and already have access to the DGX Cloud Create cluster via the NVIDIA Run:ai and Kubernetes CLIs, you can retrieve a new kubeconfig by
running the following command:
kubectl get cm -n runai ssokubeconfig -o json | jq -r '.data.kubeconfig'
You can then provide this kubeconfig to new users and researchers for CLI access to the cluster.
3.8. Configuring the Ingress/Egress CIDRs for the Cluster (CLI)#
Note
The Kubernetes admin role as described in Advanced Kubernetes Usage for Admins is required for this section. For more information about this role, contact your cluster admin, or your NVIDIA TAM.
For cluster admins, an API has been made available so you can update the CIDRs that have been added to the IP allowlist to access the cluster. This can be used to add additional users and their networks to the cluster. More information about the IP allowlist can be found here: Cluster Ingress and Egress.
To add additional CIDRs to the IP allowlist, run the following commands:
kubectl edit runaidgxcnetworkpolicies -n dgxc-tenant-cluster-policies
This will open your editor and show any existing CIDR ranges that you can add, delete, or modify.
apiGroup: runai.dgxc.nvidia.com/v1beta1
kind: RunaiDGXCNetworkPolicy
metadata:
  name: dgxc-tenant-network-policy
  namespace: dgxc-tenant-cluster-policies
spec:
  egressPolicy:
    permittedCIDR:
    - 172.32.0.0/11
    - 172.64.0.0/10
    - 172.128.0.0/9
    - 192.128.0.0/11
    - 192.160.0.0/13
  ingressPolicy:
    permittedCIDR:
    - 172.32.0.0/11
    - 172.64.0.0/10
    - 172.128.0.0/9
    - 192.128.0.0/11
    - 192.160.0.0/13
  clusterAccessPolicy:
    permittedCIDR:
    - 172.32.0.0/11
    - 172.64.0.0/10
    - 172.128.0.0/9
    - 192.128.0.0/11
    - 192.160.0.0/13
Note that we have used arbitrary public CIDR ranges in this example. As part of the onboarding process, you can specify your own CIDR ranges if you would like to restrict access to within a corporate VPN. Also note that we have specified an egressPolicy object, which may or not apply, to your corporate networking rules and could be considered optional. In other words, many workloads may need to freely access public internet locations such as NVIDIA’s NGC or Hugging Face.
3.9. Exporting Kubernetes API Server Audit Logs to External Storage (CLI)#
Note
The Kubernetes admin role as described in Advanced Kubernetes Usage for Admins is required for this section. For more information about this role, contact your cluster admin, or your NVIDIA TAM.
You can modify the RunaiDGXCLogExporter CRD to send the Kubernetes API server logs to your own storage bucket.
Important
Make sure to keep the target storage bucket in the same region as your DGXC cluster.
3.9.1. Get Writer Principal from CRD#
$ kubectl -n dgxc-tenant-cluster-policies get runaidgxclogexporters/dgxc-tenant-log-exporter -o yaml
apiVersion: runai.dgxc.nvidia.com/v1beta1
kind: RunaiDGXCLogExporter
metadata:
  creationTimestamp: "2024-11-20T06:28:53Z"
  generation: 1
  name: dgxc-tenant-log-exporter
  namespace: dgxc-tenant-cluster-policies
  resourceVersion: "17786"
  uid: 891dba9b-ae4b-425f-a957-f71c9b8526ce
spec:
  destination: ""
  logTypes:
  - apiserver-audit
status:
  conditions:
  - lastTransitionTime: "2024-11-20T06:28:54Z"
    message: ""
    reason: Initialized
    status: "True"
    type: Initializing
  - lastTransitionTime: "2024-11-20T06:28:54Z"
    message: Destination not specified.
    reason: NoDestination
    status: "False"
    type: Exporting
  writerPrincipal: arn:aws:iam::38149190002:role/t007-system-nodes (AWS)
  writerPrincipal: principal://iam.googleapis.com/projects/... (GCP)
Note
In the YAML above, the writerPrincipal entries for both AWS and GCP are shown for illustration purposes only. In the actual CRD, there will be only one writerPrincipal per cluster.
3.9.2. Create Object Bucket in Customer Account#
Note
You can assign writer permissions in different ways for each cloud service provider (CSP). The examples below illustrate one possible option for AWS and GCP.
AWS:
Navigate to the Console, select S3, and then click Create Bucket.
Use default settings or customize according to customer preference.
Open the bucket.
Go to Properties and get the ARN for the bucket, e.g.,
arn:aws:s3::bucket-name.Go to Permissions and add the following policy with the writer principal (from step 1) and the bucket ARN (from step 4).
{
    "Version": "2012-10-17",
    "Statement": [
        {
            "Sid": "PolicyForAllowUploadWithACL",
            "Effect": "Allow",
            "Principal": {
                "AWS": [
                    "arn:aws:iam::38149190002:role/t007-system-nodes"
                ]
            },
            "Action": "s3:PutObject",
            "Resource": "arn:aws:s3::bucket-name/*",
            "Condition": {
                "StringEquals": {
                    "s3:x-amz-acl": "bucket-owner-full-control"
                }
            }
        }
    ]
}
GCP:
Navigate to the Console, select Cloud Storage, and then click Create Bucket.
Use default settings or customize according to customer preference.
Open the bucket.
Go to Permissions and click Grant Access.
Use the principal from the writer principal (from step 1) and assign the role Storage Object Creator, then click Save.
3.9.3. Update CRD to Set Destination Field#
Set the destination field to the bucket name:
$ kubectl -n dgxc-tenant-cluster-policies patch runaidgxclogexporters/dgxc-tenant-log-exporter --type merge -p '{"spec": {"destination": "bucket-name"}}'
Wait 15 minutes for synchronization, then verify CRD status:
$ kubectl -n dgxc-tenant-cluster-policies get runaidgxclogexporters/dgxc-tenant-log-exporter -o yaml
apiVersion: runai.dgxc.nvidia.com/v1beta1
kind: RunaiDGXCLogExporter
metadata:
  creationTimestamp: "2024-11-20T06:28:53Z"
  generation: 4
  name: dgxc-tenant-log-exporter
  namespace: dgxc-tenant-cluster-policies
  resourceVersion: "822790"
  uid: 891dba9b-ae4b-425f-a957-f71c9b8526ce
spec:
  destination: bucket-name
  logTypes:
  - apiserver-audit
status:
  conditions:
  - lastTransitionTime: "2024-11-20T06:28:54Z"
    message: ""
    reason: Initialized
    status: "True"
    type: Initializing
  - lastTransitionTime: "2024-11-20T23:03:54Z"
    message: ""
    reason: Success
    status: "True"
    type: Exporting
  watermark: "2024-11-20T22:45:00Z"
  writerPrincipal: arn:aws:iam::38149190002:role/t007-system-nodes (AWS)
  writerPrincipal: principal://iam.googleapis.com/projects/... (GCP)
3.9.4. Check Audit Logs in Cloud Bucket#
Verify that audit logs are correctly appearing in the cloud bucket.
3.10. Restricting Container Image Access#
Note
A privileged user with the proper role assigned to view, edit, create and delete polices within NVIDIA Run:ai is required. Application Administrator, Department Administrator, or System Administrator roles have these privileges by default.
NVIDIA Run:ai allows administrators to restrict access to container images within the cluster using NVIDIA Run:ai Policies. To get started, navigate to Policies in the menu bar and click New Policy. Set the following parameters.
Cluster: Select the target cluster for the policy.
Scope: Scope of the policy, usually set at a project level.
Workload Type: Select Workspace or Training.
The YAML example below restricts images to the nvcr.io container registry for PyTorch and NeMo.
rules:
  image:
    options:
      - value: nvcr.io/nvidia/pytorch:25.01-py3
      - value: nvcr.io/nvidia/nemo:24.12
After applying the policy to the project, test it by creating a new Workspace or Training job in the console, using the same parameters specified in the policy. You will notice that only container images from the policy will be selectable.
For more details, refer to NVIDIA Run:ai policy references and examples.
3.11. Managing Cluster Updates and Upgrades#
As stated in the Shared Responsibility section of Product Overview, NVIDIA is responsible for all cluster updates and upgrades provided as part of the DGX Cloud Create managed service.
These updates and upgrades can be either disruptive or non-disruptive. Before an update or upgrade takes place, your NVIDIA TAM will reach out to notify you of the coming update or upgrade.
In the case of a non-disruptive update or upgrade, the TAM will communicate the scope and anticipated time window of the work.
In the case of a disruptive update or upgrade, the TAM will communicate the scope of the work and, if possible, enable you to select a time window from a range of options. It may not always be possible to provide a range of options for the maintenance time window depending on the scope of the work.
For disruptive updates or upgrades that incur downtime, NVIDIA has put the following rules in place:
For clusters with 20 GPU nodes or fewer, surge upgrades are performed with the maxUnavailable attribute set to 100%.
For clusters with greater than 20 GPU nodes, the entire GPU node pool is torn down and recreated using automation.