4. Cluster User Guide#
Welcome to your DGX Cloud Create cluster! This section of the guide is targeted at practitioners who want to run workloads on the cluster. For complete NVIDIA Run:ai documentation, refer to the NVIDIA Run:ai Documentation Library.
4.1. Logging Into Your Cluster#
There are two ways to interact with a DGX Cloud Create cluster:
Using the NVIDIA Run:ai UI: Your cluster administrator should provide you with a URL to access the cluster. Use this URL to log in to the NVIDIA Run:ai UI.
Using the NVIDIA Run:ai CLI: This option is limited to certain user types. To use the NVIDIA Run:ai CLI, you must first log in using the UI. To learn how to set up the CLI, visit CLI/API Setup Guide.
4.1.1. Accessing the NVIDIA Run:ai UI#
To access the NVIDIA Run:ai console in a browser, follow these steps:
Go to the cluster URL given to you by your cluster admin.
In the login dialog, click Continue with SSO. Your SSO login dialog will open.
Enter your details. Once logged in, you will be taken to the NVIDIA Run:ai Cluster Overview page.
4.1.2. Overview#
After logging into the NVIDIA Run:ai UI, you will be taken to the NVIDIA Run:ai Overview page.

The Overview page displays key metrics about your cluster, including resource utilization and the number of allocated GPU devices. The name of your cluster is listed in the top navigation bar.
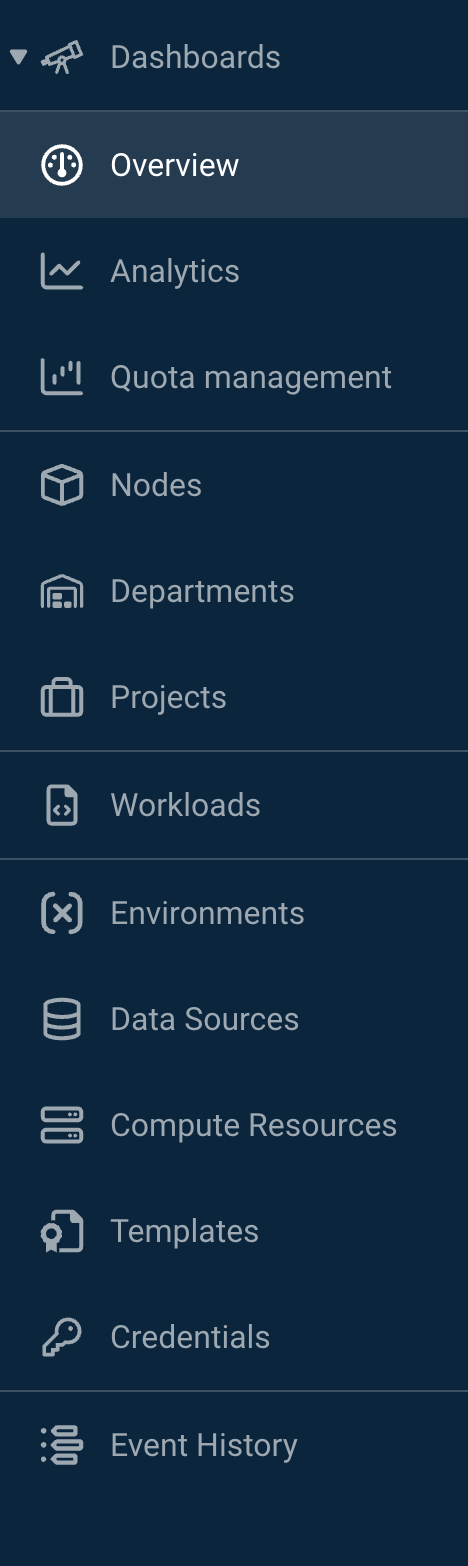
The left navigation menu provides quick access to different sections of the UI. Use it to navigate to the Projects, Workloads, Departments, and Nodes pages.
For more information about analytics, quota management, and nodes, visit the Run AI documentation.
4.2. Understanding Your Role and Scope#
When working in NVIDIA Run:ai, your user roles determine the actions you can perform within the cluster. This section explains how to identify your role and understand your permissions. You may be assigned multiple roles within a single cluster.
4.2.1. Learning Your User Role(s)#
Your cluster administrator should have informed you of your assigned role(s) when you first received the cluster URL. If you haven’t received this information, contact your cluster administrator.
To view the permissions and actions allowed by your user type, visit the NVIDIA Run:ai RBAC documentation.
4.3. Managing Workloads#
A workload is a computational job or task that you submit to the cluster for execution. There are two types of workloads enabled on your DGX Cloud Create cluster:
Workspaces - interactive environments best suited for development and exploration of data and code.
Trainings - distributed training jobs which are not interactive.
Note
Inference is not enabled in the cluster, and the deprecated Jobs workload has not been validated.
Workloads run within a project scope and can consume a range of resources. Detailed information about these resources is available in the next section of this guide. Here is a brief overview of the resources:
Environments - A workload must have an environment. An environment acts as a container, holding libraries, requirements, and optionally code and data.
Compute Resources - A workload requires allocated compute resources, which determine the number of CPUs and GPUS it can utilize.
Volumes - Volumes can be associated with a job, giving access to your data. They are dedicated to specific workloads and cannot be transferred.
Data Sources - You can connect to a range of data sources including Git and Persistent Volume Claims (PVCs). Data sources are created separately from workloads, and can be used between different workloads, if desired.
Credentials - Credentials scoped at the project level will automatically be injected into any workload running in the project.
Templates - Templates allow you to pre-fill the workload creation form and save it for use by users in the project at a later date. This is useful for frequently used workloads.
In the next sections, we cover each of these workload components in more detail.
We also provide full examples of creating and launching a variety of workloads in the Interactive Workload Examples guide.
4.4. Managing Environments#
NVIDIA Run:ai environments specify container URLs as well as image pull policies and entry commands for the containers. All workloads must specify an environment.
When creating an environment, you can specify the scope, indicating which departments and projects can view and use it.
4.4.1. Creating a New Environment#
Note
Only users with the role Application Administrator, Department Administrator, Editor, Environment Administrator, L1 Researcher and Research Manager can create environments.
To create a new environment using the NVIDIA Run:ai UI:
In the left navigation menu, select Environments. You will be taken to the Environments overview page which shows information on existing environments in the cluster.
Click + NEW ENVIRONMENT in the top left of the page. You will be taken to the New environment creation page.
Select a Scope for the environment. This determines which clusters, departments, groups or projects can deploy the environment.
Enter an Environment name and description.
Insert the URL for a container image, and select the pull policy for the image.
Select the architecture and type of the workload.
(Optional) Select connections for your tools.
(Optional) Under the Runtime settings drop-down menu, set any commands and arguments for running the container in the pod. Add any environment variables and a working directory for the container.
Note
When using a container image, it’s important to be aware of your container’s launch command or entry point.
(Optional) Under the Security menu, set additional Linux capabilities for the container and indicate whether the UID, GID and groups should be taken from the image or from a custom location.
Click CREATE ENVIRONMENT. You will be taken back to the Environments overview page where your environment is listed in the table.
4.4.2. Editing an Environment#
Note
Only users with the role Application Administrator, Department Administrator, Editor, Environment Administrator, L1 Researcher and Research Manager can edit environments.
You can edit an existing environment by creating an ‘edited copy.’ To edit an environment, from the Environment overview page in the UI:
Click on the environment you wish to edit. The menu bar will appear at the top of the page.
Click COPY & EDIT. You will be taken to the New environment overview page, which will be pre-filled with the selected environment details.
Edit the environment as you wish, then click CREATE ENVIRONMENT.
4.5. Managing Data Storage on the Cluster#
Within NVIDIA Run:ai, there are two types of storage:
Data Sources - persistent storage which can be attached to workloads.
Volumes - non-persistent storage which is created at the launch of the workload and persists only while the workload is running.
In the next sections, we will cover data sources and volumes in more detail and give examples of using these storage types to access and read data.
DGX Cloud Create provides a GCP Filestore for persistent storage in the current release. The Filestore has several storage classes available to users.
4.5.1. Data Sources#
Data sources are persistent general-purpose storage or connections to external data, like a Git repository.
The data sources supported by DGX Cloud Create are:
Persistent Volume Claim (PVC) (refer to details below)
Git
ConfigMap
DGX Cloud Create does not support these data sources:
NFS
S3 Bucket
Host path
When creating any data source, it needs to be assigned a scope, defining which projects and departments can use or connect to the data source. The following section gives more details on the supported data sources.
4.5.1.1. PVC#
A Persistent Volume Claim (PVC) is a Kubernetes request for storage capacity initiated by a user. In the context of a NVIDIA Run:ai data source, the PVC is a pool of storage that can be provisioned against a set of available storage types in the DGX Cloud Create deployment, with varying capabilities and capacity.
PVC data sources should be used conceptually as a high performance shared directory for storing data that needs to be accessed in each project or namespace for your workloads.
Important
Creating a PVC counts against the storage quota available for your cluster. Care should be taken to ensure that each PVC is used efficiently, to not exhaust your total available storage quota too quickly.
Your DGX Cloud Create cluster is provisioned with storage control features that encapsulate the tier-based storage classes provided by the CSP as described
here in the Storage User Guide. The dgxc-enterprise-file storage class is recommended for most workloads since it provides the highest performance.
The dgxc-standard-file (if available) provides smaller storage increments at lower performance. The use of any other CSP storage classes is unsupported.
See this Enterprise Storage Profiles section for the profiles for dgxc-enterprise-file for AWS and GCP.
Note
For information on total storage capacity available for each storage class, or current storage utilization, refer to Managing Your Storage Utilization (CLI) in Advanced Usage.
4.5.1.1.1. Creating a PVC#
Note
Only users with the role Application Administrator, Data Source Administrator, Department Administrator, Editor, L1 Researcher and Research Manager can create a PVC.
To create a PVC from the NVIDIA Run:ai UI:
From the Data Sources overview page, click + NEW DATA SOURCES. A drop-down menu will appear.
From the drop-down menu, select PVC. You will be taken to the New data source creation page.
Set a Scope for the PVC, and enter a name and description.
Important
PVC Data Sources created at the cluster or department level do not replicate data across projects or namespaces. Each project or namespace will be provisioned as a separate PVC replica with different underlying PVs; therefore, the data in each PVC is not replicated.
Fill out the Data mount section of the form:
Select a Storage class. Be sure to review the DGX Cloud Create recommended storage classes.
Select the access mode configuration for the PVC - either read/write by one node, read only by many nodes, or read/write by many nodes.
Specify a claim size to ensure a minimum capacity for the PVC.
Note
The PVC may be larger than necessary, depending on the minimum partition size of the underlying storage. Refer to the table above when provisioning storage greater than 1 TiB to ensure compatibility with the target storage class.
Choose the Filesystem option as the Volume mode.
Note
The Block Volume mode is unsupported. Selecting it may lead to errors when launching a workload that uses the resulting PVC.
Specify a Container path to define what path the PVC will be accessible from in a running job.
Note
If you do not specify a
/scratchvolume, one will be provisioned implicitly for GPU-based compute resources using ephemeral storage.(Optional) In the Restrictions pane, you can use the toggle switch to make the storage read-only if desired.
Note
This is an alternative to the PVC access mode configuration.
Click CREATE DATA SOURCE. You will be taken to the Data sources overview page, where you can view your new PVC data source.
Note
When creating a new data source, you can also select an existing PVC. This PVC can be created using the K8s API or kubectl on the cluster directly. For more information on interacting with the K8s cluster, refer to Setting up Your Kubernetes Configuration File.
4.5.1.2. Git#
Git is a version control system (VCS) used to manage iterative code modification and collaboration within a software project. As a NVIDIA Run:ai data source, it takes a public or private git repository and makes it available inside a workload as a filesystem path.
4.5.1.2.1. Creating a Git Data Source#
Note
Only users with the role Application Administrator, Data Source Administrator, Department Administrator, Editor, L1 Researcher and Research Manager can create a Git data source.
To create a Git data source within your NVIDIA Run:ai cluster using the UI:
From the Data sources overview page, click + NEW DATA SOURCE. A drop-down menu will appear.
From the drop-down menu, select Git. You will be taken to the New data source creation page.
Set the scope for the Git data source.
Enter a name and a description into the relevant fields.
Fill in the URL for the Git repository, and optionally specify the branch.
Select relevant credentials to the data source. These are required if the Git repository is private. (You can create the necessary credentials in the NVIDIA Run:ai Credentials web interface).
Set the Container path. This defines the path from which the Git data source will be accessible in a running job.
Note
If you do not specify a
/scratchvolume, one will be provisioned implicitly for GPU-based compute resources using ephemeral storage.Click CREATE DATA SOURCE. You will be taken to the Data sources overview page, where your new data source will be shown in the table.
4.5.1.3. ConfigMap#
A ConfigMap is a Kubernetes object used to store non-confidential data as key-value pairs. As a NVIDIA Run:ai data source, it takes a ConfigMap that exists in the NVIDIA Run:ai Kubernetes cluster and makes it available inside a workload as a file.
Note
Only users with the role Application Administrator, Data Source Administrator, Department Administrator, Editor, L1 Researcher and Research Manager can create a Configmap.
To create a Configmap in your NVIDIA Run:ai cluster from the UI:
From the Data sources overview page, click NEW DATA SOURCE. A drop-down menu will appear.
From the drop-down menu, select ConfigMap. You will be taken to the New data source creation page.
Select a Scope for the ConfigMap.
Note
ConfigMaps can only be scoped at the individual project level. You cannot select the whole cluster or a department as the scope for a ConfigMap.
Enter a name and description.
From the ConfigMap name drop-down menu, select a ConfigMap which exists on your NVIDIA Run:ai Kubernetes cluster.
Set the Container path, which defines what path the ConfigMap will be accessible from in a running job.
Note
If you do not specify a
/scratchvolume, one will be provisioned implicitly for GPU-based compute resources using ephemeral storage.Click CREATE DATA SOURCE. You will be taken to the Data sources overview page, where the new ConfigMap will appear in the table.
4.5.2. Scratch/Ephemeral Storage#
Workloads can use ephemeral local storage for scratch space, caching, and logs. The lifetime of local ephemeral storage does not extend beyond the life of the individual pod. It is exposed to pods through the container’s writable layer, logs directory, and EmptyDir volumes. The data in an EmptyDir volume is preserved across container crashes.
When a user submits a job which requires a GPU, an EmptyDir on the local SSD of the node is attached to the pod as a scratch disk. The /scratch directory appears to have 6TiB, which is the total storage on the node; however, each Pod is limited to 200 GiB. If the Pod exceeds this 200 GiB limit, it will be evicted from the node (i.e., terminated).
CPU-only workloads do not get a /scratch directory provisioned.
4.6. Setting Up Credentials for Accessing Registries and Data#
The NVIDIA Run:ai UI supports credentials for accessing containers and applications that are otherwise gated. The supported credential types on your cluster are:
Docker registries
Access keys
Usernames and passwords
Generic secret
When you add credentials to your cluster, you must select a scope. The credentials are then usable by any workload which is deployed at that scope level. The smallest scope which can be applied is the project-level scope. There is no user-specific scoping available for credentials.
As part of your subscription to DGX Cloud Create, you are granted access to the NVIDIA GPU Cloud (NGC) Catalog. The NGC Catalog contains GPU-accelerated AI models and SDKs that enable you to infuse AI into your applications at speed of light.
4.6.1. Accessing Your NGC Org#
Your cluster administrator can invite you to NVIDIA GPU Cloud (NGC). Once you have received the invitation, follow the instructions in the email to set up your account.
4.6.2. Setting Up Your NGC API Key#
To generate your NGC API key, follow these steps:
Log into NGC.
Click on your user account menu at the top right of the screen and select Setup.
Click Generate Personal Key and generate the key in the new form that opens. Save the displayed key in a safe place as this will only be shown once and is required for future steps.
4.6.3. Adding NGC Credentials to the NVIDIA DGX Cloud Create Cluster#
NGC API Keys can be used for a variety of different purposes, from authenticating to the registry and pulling containers, to retrieving resources and models from NGC within workloads. Depending on what the key will be used for, you will need to create different credentials according to the instructions below.
4.6.3.1. Adding a Docker Registry Credential#
This credential will be used for pulling containers from NGC onto the cluster.
Note
Only users with the role Application Administrator, Credentials Administrator, Department Administrator, Editor and L1 Researcher can add credentials to the cluster.
To add NGC Credentials to the NVIDIA Run:ai Cluster:
Access the Credentials page from the NVIDIA Run:ai left navigation menu.
Click + NEW CREDENTIALS and select Docker registry from the drop down menu. You will be taken to the New credential creation page.
Select the Scope for your NGC credential. The secret will be usable by any workload launched within the scope. For example, if your scope is set at the department level, all workloads launched in any project associated with that department can use the secret, regardless of which user created the credential, or launched the workload.
Enter a name and description for the credential. This will be visible to any cluster user.
Select New secret.
For username, use
$oauthtoken.For password, paste your token.
Under Docker Registry URL, enter
nvcr.io.Click CREATE CREDENTIALS. Your credentials will now be saved in the cluster.
4.6.3.2. Adding a Generic Secret Credential#
This credential can be used and mounted within workloads and used as environment variables within the containers for accessing resources on NGC.
Note
Only users with the role Application Administrator, Credentials Administrator, Department Administrator, Editor and L1 Researcher can add credentials to the cluster.
To add NGC Credentials to the NVIDIA Run:ai Cluster:
Access the Credentials page from the NVIDIA Run:ai left navigation menu.
Click + NEW CREDENTIALS and select Generic secret from the drop down menu. You will be taken to the New credential creation page.
Select the Scope for your NGC credential. The secret will be usable by any workload launched within the scope. For example, if your scope is set at the department level, all workloads launched in any project associated with that department can use the secret, regardless of which user created the credential, or launched the workload.
Enter a name and description for the credential. This will be visible to any cluster user.
Select New secret.
For key, use
NGC_API_KEY.For value, paste your token.
Click CREATE CREDENTIALS. Your credentials will now be saved in the cluster.
4.6.4. Adding Git Credentials#
To add Git credentials to your DGX Cloud Create Cluster, you must first create a Personal Access Token from your Git server, and give access to the desired repositories as part of the creation process. You can create a token on GitHub by following these instructions, and similarly by following these instructions on GitLab.
Note
Only users with the role Application Administrator, Credentials Administrator, Department Administrator, Editor and L1 Researcher can add credentials to the cluster.
Once you have generated a Personal Access Token, add your credentials to your NVIDIA Run:ai cluster by following these instructions:
Access the Credentials page from the NVIDIA Run:ai left navigation menu.
Click + NEW CREDENTIALS and select Username & password from the drop down menu. You will be taken to the New credential creation page.
Select the Scope for your credential. The secret will be usable by any workload launched within the scope.
Enter a name and description for the credential. This will be visible to any cluster user.
Select New secret.
For username, use your Git username.
For password, paste your Personal Access Token.
Click CREATE CREDENTIALS. Your credentials will now be saved in the cluster.
4.7. Setting Up Templates#
Templates are used to pre-define commonly used workloads. They make it quick and easy to launch a workload based on pre-set instructions.
Note
Only users with the role Application Administrator, Credentials Administrator, Department Administrator, Editor, L1 Researcher, Research Manager and Template Administrator can add credentials to the cluster.
To create a template, navigate to the Templates overview page from the left navigation menu then:
Click + NEW TEMPLATE. The New Template Creation page will open.
Set the Scope for the template. This determines which departments and projects will be able to use this template.
Enter a template name and description.
Select or create an Environment for your template to use.
Choose a compute resource.
(Optional) Select values for Volumes and Data Sources.
Once you have selected all your desired settings for the template, click CREATE TEMPLATE. You will be taken back to the Templates overview page.
Once created, templates can be selected for use as part of the New Workload creation process.