Managing Self-Encrypting Drives on DGX Station A100#
The DGX OS software supports the ability to manage self-encrypting drives (SEDs), including setting an Authentication Key to lock and unlock DGX Station A100 system drives.
You can manage only SED data drives, and the software cannot be used to manage OS drives, even if the drives are SED-capable.
Overview#
The SED management software is provided in the nv-disk-encrypt package.
The software supports the following configurations:
DGX Station A100 systems where all data drives are self-encrypting drives.
Only SEDs used as data drives are supported.
The software will not manage SEDs that are OS drives.
The software provides the following functionality:
Identifies eligible drives on the system.
Allows you to assign authentication keys (passwords) for each SED as part of the initialization process.
The software can also generate random passwords for each drive.
The passwords are stored in a password-protected vault on the system.
Once initialized, SEDs are locked upon power loss, such as a system shutdown or drive removal.
Locked drives get unlocked after power is restored and the root file system is mounted.
Provides functionality to export the vault.
Provides functionality for erasing the drives.
Provides the ability to revert the initialization.
Installing the nv-disk-encrypt Package#
Use the package manager to install the nv-disk-encrypt package.
You can also optionally install the TPM2 tools package and reboot the system. The TPM tools package is required if you plan use the TPM2 to store security keys.
Update the packages.
$ sudo apt update
Install the
nv-disk-encryptpackage.$ sudo apt install -y nv-disk-encrypt
Install
tpm2-tools.$ sudo apt install -y tpm2-tools
Reboot the system.
$ sudo reboot
If you plan to use TPM2, ensure that you enable it. See Enabling the TPM for more information.
Configuring Trusted Computing#
This section provides information about how to configure trusted computing.
The DGX Station A100 system BIOS provides setup controls to configure the following Trusted Computing (TC) features:
Trusted Platform Module
DGX Station A100 incorporates Trusted Platform Module 2.0 (TPM 2.0), which can be enabled from the system BIOS and used with the
nv-disk-encrypttool.After this module is enabled, the tool uses the TPM for encryption and then stores the vault and SED authentication keys on the TPM instead of on the file system. Using the TPM is preferred because it allows the vault data to persist even if the system gets re-imaged.
Block SID
Certain drives that are shipped with the DGX Station A100 system might support the Block SID authentication feature, which prevents malicious actors from taking ownership of drives and blocking others from using the drives. By default, the DGX BIOS will send the Block SID request.
In these setups, enable the Disable Block Sid feature in the BIOS before proceeding with the initialization steps.
Determining Whether Drives Support Block SID#
The drive model is a good indicator of whether the drive supports this feature.
Run the following command and look for the KCM6DRUL3T84 model string.

Enabling the TPM and Preventing the BIOS from Sending Block SID Requests#
Here are the instructions to enable the TPM and prevent the SBIOS from sending Block SID request. You can select which task to perform because each task is independent of the other.
Reboot the DGX Station A100.
To enter the BIOS Setup, in the NVIDIA splash screen, press [Del] or [F2].
On the Advanced tab, scroll to Trusted Computing and press [Enter].
Complete one of the following tasks:
To enable TPM, scroll to Security Device and select Enabled.
To disable Block SID, scroll to Disable Block Sid and select Enabled.
To continue the boot process, save and exit the BIOS Setup .
If you disabled Block SID, you will be prompted to disable issuing a Block SID Authentication command.
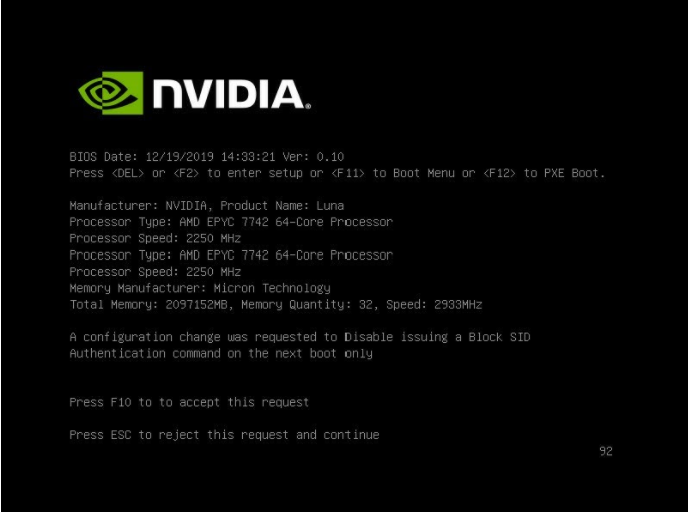
Press F10 to confirm.
After the system boots, you can initialize the drive encryption.
Initializing the System for Drive Encryption#
Here is some information about how you can initialize your DGX system for drive encryption.
Note
Before you initialize drive encryption, see Configuring Trusted Computing and, if necessary, complete the configuration instructions.
Initialize the system for drive encryption using the nv-disk-encrypt command.
$ sudo nv-disk-encrypt init [-k <your-vault-password>] [-f <path/to/ json-file>] [-g] [-r]
Here are the options:
klets you create the vault password within the command. Otherwise, the software will prompt you to create a password before proceeding.-flets you specify a JSON file that contains a mapping of passwords to drives.See Example 1: Passing in the JSON File for more information.
-ggenerates random salt values (stored in /etc/nv-disk-encrypt/.dgxenc.salt) for each drive password. NVIDIA strongly recommends using this option for best security, otherwise the software will use a default salt value instead of a randomly generated one.-rgenerates random passwords for each drive.This avoids the need to create a JSON file or the need to enter a password one by one during the initialization.
Enabling Drive Locking#
Here is some information about how to enable drive locking.
After initializing the system for SED management, use the nv-disk-encrypt command to enable drive locking by issuing the following command:
$ sudo nv-disk-encrypt lock
After initializing the system and enabling drive locking, when the drives lose power, the drives will be locked. After power is restored to the system, and the system is rebooted, the system will automatically unlock each drive.
Initialization Examples#
This section provides information about some initialization examples.
Example 1: Passing in the JSON File#
This section provides information about a method that specifies the drive/password mapping ahead of time.
By using the method in this example, you can simultaneously initialize several drives at a time, and after issuing the initialization command, and avoid entering a password for each drive.
Determining the Drives Can be Managed as Self Encrypting#
Review the storage layout of the DGX system to determine which drives are eligible to be managed as SEDs.
$ sudo nv-disk-encrypt info
The default output shows which drives can be used for encryption and which drives cannot be used.
The following example output snippet shows drives than can be used for encryption. Notice SED capable = Y and Boot disk = N.
Disk(s) that can be used for encryption
+------+------+------+-------------------------------------------------------------
|    Name   | Serial |       Status                                            |
+------+------+------+-------------------------------------------------------------
| /dev/nvme3n1 | xxxxx1 | SED capable = Y, Boot disk = N, Locked = N, Lock Enabled = N, MBR done = N |

| /dev/nvme6n1 | xxxxx2 | SED capable = Y, Boot disk = N, Locked = N, Lock Enabled = N, MBR done = N |

| /dev/nvme9n1 | xxxxx3 | SED capable = Y, Boot disk = N, Locked = N, Lock Enabled = N, MBR done = N |
The following example output shows drives than cannot be used for encryption. SED capable = Y and Boot disk = Y, or SED capable = N.
Disk(s) that cannot be used for encryption
+------+------+------+-------------------------------------------------------------
|    Name   | Serial  |      Status                                            |
+------+------+------+-------------------------------------------------------------
| /dev/nvme0n1 | xxxxx1  | SED capable = Y, Boot disk = Y, Locked = N, Lock Enabled = N, MBR done = N |

| /dev/sr0     | xxxxx2  | SED capable = N, Boot disk = N, Locked = N, Lock Enabled = N, MBR done = N |

| /dev/nvme1n1 | xxxxx3  | SED capable = Y, Boot disk = Y, Locked = N, Lock Enabled = N, MBR done = N |

| /dev/sda     | unknown | SED capable = N, Boot disk = N, Locked = N, Lock Enabled = N, MBR done = N |
You also can specify the output be presented in JSON format by using the -j option.
$ sudo nv-disk-encrypt info -j
The drives that can be used for encryption are indicated by the following:
"sed_capable": true,
"used_for_boot": false
The drives that t be used for encryption are indicated by both of the following options:
"sed_capable": true,
"used_for_boot": true
"sed_capable": false,
Creating the Drive/Password Mapping JSON File#
You can create the drive/password mapping JSON file and use this file to initialize the system.
Create a JSON file that lists all the eligible SED-capable drives that you want to manage.
These are the list of drives that you obtained completing the task in Determining Which Drives Can be Managed as Self-Encrypting.
The following example shows the format of the JSON file:
{
"/dev/nvme2n1":
"<your-password>",
"/dev/nvme3n1":
"<your-password>",
"/dev/nvme4n1":
"<your-password>",
"/dev/nvme5n1":
"<your-password>",
}
Note
You must follow the syntax exactly.
Passwords must consist of only upper-case letters, lower-case letters, digits, and/or these special characters:
~,:,@,%,^,+,=,_, and,.
Initialize the system and enable locking.
The following command assumes you have placed the JSON file in the
/tmpdirectory:$ sudo nv-disk-encrypt init -f /tmp/<your-file>.json -g $ sudo nv-disk-encrypt lock
When prompted, enter a password for the vault.
Passwords must consist of only upper-case letters, lower-case letters, digits, and/or these special characters:
~,:,@,%,^,+,=,_, and,.For security purposes, delete the JSON file in the temporary location.
Example 2: Generating Random Passwords#
This section provides information about how to generate random passwords.
The following command uses the -k and -r options, so you will not be prompted to enter passwords. After you pass the vault password into the command, the command instructs the tool to generate random passwords for each drive.
$ sudo nv-disk-encrypt init -k <your-vault-password> -g -r
$ sudo nv-disk-encrypt lock
The vault password must consist of only upper-case letters, lower-case letters, digits, and/or these special characters: ~, :, @, %, ^, +, =, _, and ,.
Example 3: Specifying Passwords One at a Time When Prompted#
This example provides information about how you can specify passwords one at a time.
If there are a small number of drives or you don’t want to create a JSON file, issue the following:
$ sudo nv-disk-encrypt init -g
$ sudo nv-disk-encrypt lock
The software prompts you to enter a password for the vault, and then a password for each eligible SED.
Passwords must consist of only upper-case letters, lower-case letters, digits, and/or these special characters: ~, :, @, %, ^, +, =, _, and ,.
Disabling Drive Locking#
Here is some information about how to disable drive locking.
To disable drive locking at any time after you initialize, run the following command:
$ sudo nv-disk-encrypt disable
This command disables locking on all drives.
You can run the initial set up again at any time after this process is complete.
Exporting the Vault#
Here is some information about how you can export the vault.
To export all drive keys to a file, use the export function.
Tip
When you run this command, you must include the vault password.
$ sudo nv-disk-encrypt export -k <your-vault-password>
The /tmp/secrets.out file contains the mapping of disk serial numbers to drive passwords.
Erasing Your Data#
Explain the benefits of the task, the purpose of the task, who should perform the task, and when to perform the task in 50 words or fewer.
Stop cachefilesd and unmount the RAID array
Caution
When you complete this task, all data will be lost. On DGX Station A100 systems, these drives generally form a RAID 0 array, which will also be destroyed when you perform an erase.
After you initialize the system for SED management, use the nv-disk-encrypt command to erase data on your drives .
To completely stop the RAID, issue the following commands:
$ systemctl stop cachefilesd
$ sudo umount /raid
$ sudo mdadm --stop /dev/md1
Complete the erase.
$ sudo nv-disk-encrypt erase
This command does the following:
Sets the drives in an unlocked state.
Disables locking on the drives.
Removes the RAID 0 array configuration.
To rebuild the RAID, issue the following command:
$ sudo /usr/bin/configure_raid_array.py -c -f
Clearing the TPM#
If you lost your TPM password, you cannot access the TPM contents. The only way to access TPM again is to clear the contents. After clearing the TPM, you need to initialize the vault and SED authentication keys again.
To clear the TPM, complete the following steps:
Reboot the DGX Station A100.
To enter the BIOS Setup, in the NVIDIA splash screen, press [Del] or [F2].
On the Advanced tab, scroll to Trusted Computing and press [Enter].
Clear TPM2.
Scroll to Trusted Computing and press [Enter].
Scroll to Pending Operation and press [Enter].
In the Pending Operation dialog box, select TPM Clear, and then press [Enter].
Save and exit the BIOS Setup.
Changing Disk Passwords, Adding Disks, or Replacing Disks#
The steps in this process can be used to change or rotate passwords, add disks, or replace disks.
Disable SED management.
Add or replace drives as needed and then rebuild the RAID array.
Refer to Recreating the Cache RAID 0 Volume for instructions.
To enable SED management and assign passwords, see Initializing the System for Drive Encryption.
Recovering a Lost Key#
NVIDIA recommends that you back up your keys and store the keys in a secure location.
If you lose the key that was used to initialize and lock your drives, you cannot unlock the drive. The only way to recover is to perform a factory-reset, which will result in data loss.
SED drives come with a PSID printed on the label. This value can only be obtained by physically examining the drive as shown in the following image.

To specify the PSID and reset the drive, run the following sedutil-cli command:
$ sudo sedutil-cli --yesIreallywanttoERASEALLmydatausingthePSID <your- drive-PSID> /dev/nvme3n1