BlueField-3 I/O Bay Replacement#
This topic describes how to replace the NVIDIA® BlueField®-3 card in the NVIDIA DGX™ B300 system.
Caution
Static Sensitive Devices: Ensure to observe best practices for electrostatic discharge (ESD) protection. Ensure that personnel and equipment are connected to a common ground, such as wearing a wrist strap connected to the chassis ground and placing components on static-free work surfaces.
BlueField-3 I/O Bay Replacement Overview#
Identify the failed BlueField-3 I/O card.
Get a replacement BlueField-3 I/O bay from NVIDIA Enterprise Support.
Ensure that the system is shut down.
Label all cables and unplug them from the motherboard tray.
Slide the motherboard tray out until it locks in place.
Remove the motherboard lid.
Replace the BlueField-3 I/O bay.
Install the motherboard lid.
Slide the motherboard back into the system.
Connect all cables using the labels as a reference.
Power on the system.
Send the failed unit to NVIDIA Enterprise Support using the packaging provided.
Prepare the System for Replacement#
Identify which BlueField-3 I/O card to replace.
Use the
sudo nvsm show healthcommand or network tools to determine the failed card.Contact NVIDIA Enterprise Support to request a replacement.
When you receive the replacement, power off the system.
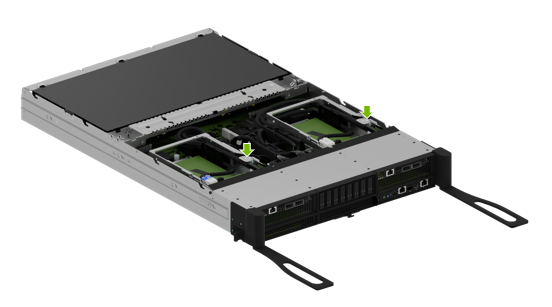
Pull out the motherboard following the instruction in Motherboard Tray - Opening and Closing.
Based on the output from the
nvsmcommand, identify which card needs to be replaced, the card in right I/O bay or left I/O bay.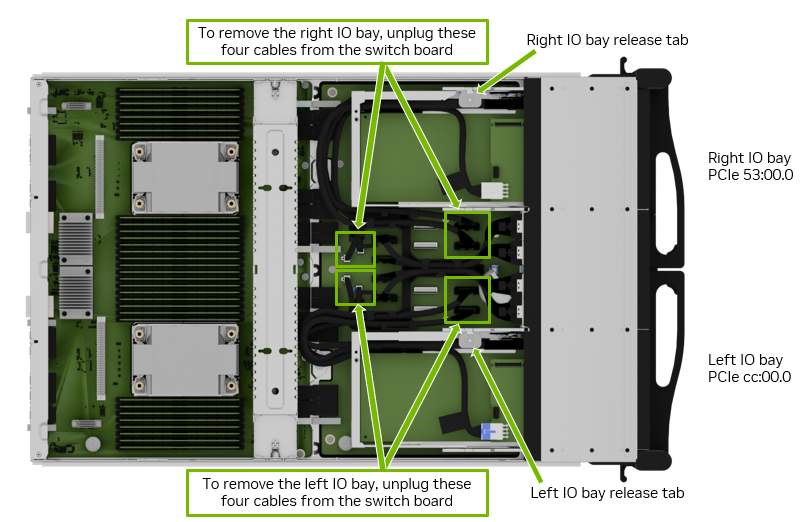
Note
Each cable is labeled to ensure it is connected to the correct position after the procedure.
Replace the BlueField-3 I/O Bay#
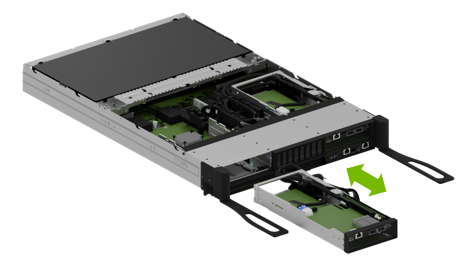
After the four cables have been unplugged, press the corresponding release tab and push the bay towards the front.
Carefully route the cables through the opening as the BlueField-3 I/O bay is moved out of the motherboard tray.
Finish pulling the old I/O bay out of the motherboard tray.
Route the cables of the new IO bay through the opening before carefully pushing the new IO bay into the slot.
Reconnect the BlueField-3 I/O Card#
After inserting the IO bay into the tray, ensure it locks in place, checking the tab has locked.
Connect the two power cables and the two PCIe cables to their correct connectors on the switchboard, following the labels on each cable end.
This example illustrates the cabling for the left I/O bay.
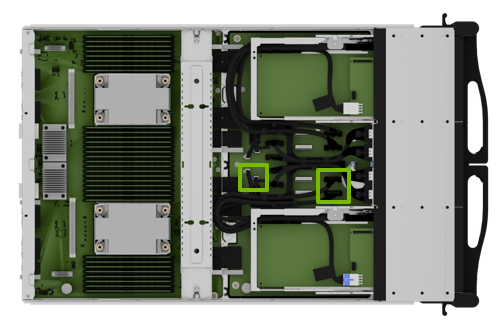
To identify the correct connections, refer to this table that maps BlueField-3 card connectors to their corresponding board connectors.
BlueField-3 I/O Board
Left Slot Installation
Right Slot Installation
Cable Label P2
Board connector J9
Board connector J3
Cable Label P3
Board connector J10
Board connector J4
Power on the System and Confirm the Replacement#
Insert the motherboard tray following the instructions in Motherboard Tray - Opening and Closing.
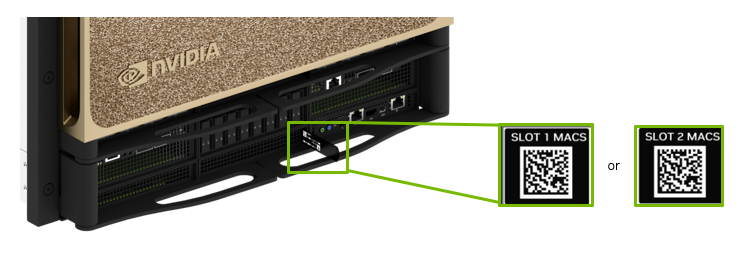
Install the updated MAC address labels on the motherboard tray.
Determine whether the left PCIe or right PCIe label is needed.
Pull out the motherboard tray label, remove the existing label, and apply the new one.
Inform the system administrator of this change so they can update the network systems or switches accordingly.
Choose one of the following labels to replace the label previously associated with the old BlueField-3 I/O bay.
Note
If the left I/O bay was replaced, attach the Slot 1 label to the left side of the pull tab.
If the right I/O bay was replaced, attach the Slot 2 label to the right side of the pull tab.
Power on the system and log in.
Confirm the new BlueField-3 I/O card is healthy using the OS networking tools or the
nvsmcommand.sudo nvsm show health
Use the packaging from the new card to send the failed card to NVIDIA Enterprise Support.