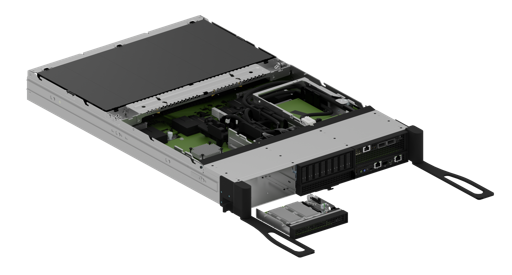
M.2 Boot Drive Assembly Replacement#
When you must replace both M.2 operating system drives, a replacement assembly, which includes both M.2 NVMe drives, should be ordered.
M.2 Boot Drive Assembly Replacement Overview#
This is a high-level overview of the procedure to replace the boot drive riser assembly.
Note
If your organization purchased a media retention policy, you might be able to keep the failed drives for destruction. Check with NVIDIA Enterprise Support on the status of the policy for specifics.
Identify the failed M.2 boot drive assembly.
Get a replacement from NVIDIA Enterprise Support.
Power off the system.
Label all cables and unplug them from the motherboard tray.
Pull out the motherboard tray.
Remove the lid.
Remove the left BlueField-3 IO bay.
Pull out the M.2 bay.
Install the new M.2 bay.
Install the left BlueField-3 I/O bay.
Install the motherboard lid.
Slide the motherboard tray into the system.
Connect all the cables using the labels as a reference.
Power on the system and reinstall the system.
Ship the failed unit to NVIDIA Enterprise Support using the packaging provided.
Preparing the System for Replacement#
This failure is hard to diagnose because the system does not boot as both boot drives are unavailable.
Caution
Wear an ESD strap during any procedure that involves touching electronic components.
Identify the failed M.2 drive assembly using the OS tools or the
nvsmcommand.sudo nvsm show health
Contact NVIDIA Enterprise Support to request a replacement.
After the replacement arrives from NVIDIA, power off the system.
Pull out the motherboard tray following the instructions in Motherboard Tray - Opening and Closing.
Remove the left BlueField-3 I/O bay to access the M.2 NVMe boot drives below.
Note
Each cable is labeled to ensure it is connected to the correct position after the procedure.
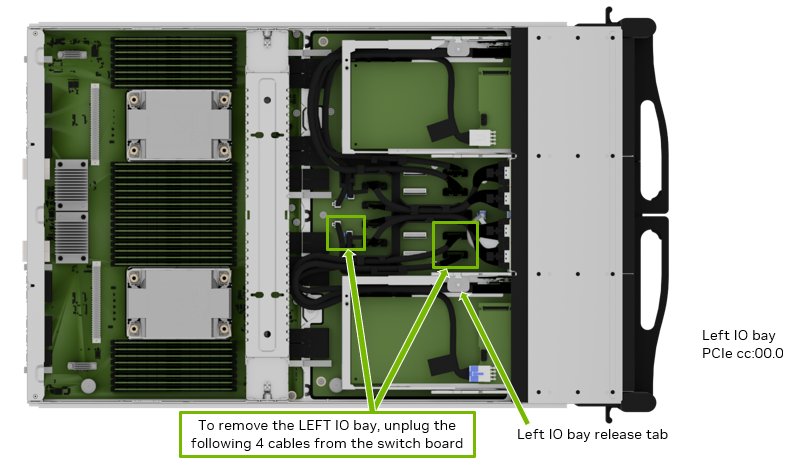
Remove the BlueField-3 I/O Bay#
After the four cables have been unplugged, press the left release tab and push the bay towards the front.
Carefully route the cables through the opening as the I/O bay is moved out of the motherboard tray.
Finish pulling the old I/O bay out of the motherboard tray.
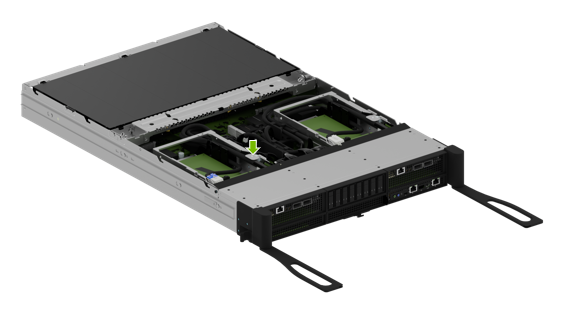
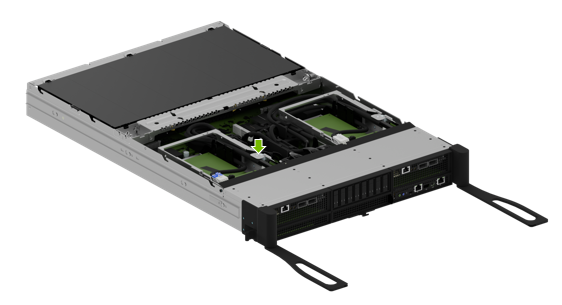
Ensure the motherboard tray levers remain fully extended, as shown in the illustration, so the M.2 bay can be pulled out.
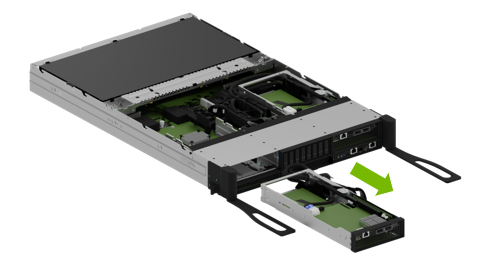
Release the M2 Bay#
Ensure the ejection levers are fully extended to prevent obstruction before removing the M.2 bay from the motherboard.
Release the latch on the M.2 bay as shown in the illustration and then pull the bay out the front to eject it.
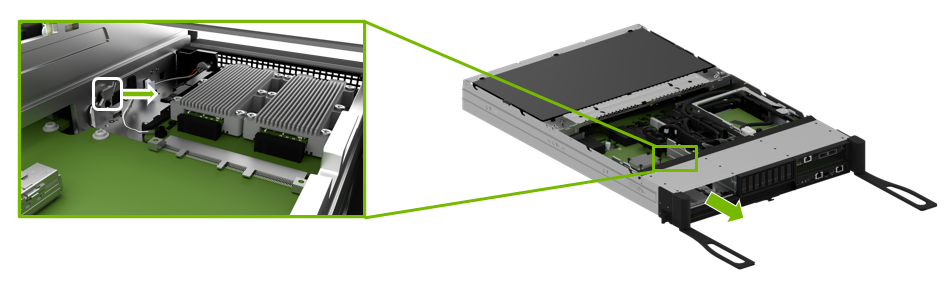
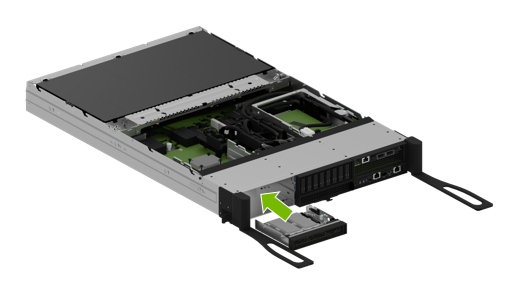
Insert the M.2 Drive Bay and Reconnect the I/O Bay#
After the replacement is complete, ensure the ejection levers are completely open. Insert the M.2 drive bay into the corresponding lower slot until it locks in place.
Carefully route all the cables through the opening in the motherboard tray slot.
After inserting the I/O bay into the tray, ensure it locks in place, checking the tab has locked.
Connect the two power cables and the two PCIe cables to their correct connectors on the switchboard, following the labels on each cable end.
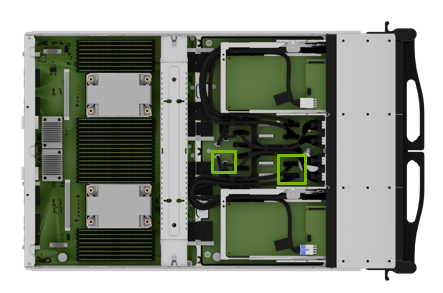
To identify the correct connections, refer to this table that maps BlueField-3 card connectors to their corresponding board connectors.
BlueField-3 I/O Board
Left Slot Installation
Right Slot Installation
Cable Label P2
Board connector J9
Board connector J3
Cable Label P3
Board connector J10
Board connector J4
Reinstall the System and Complete the Procedure#
Insert the motherboard tray following the instructions in Motherboard Tray - Opening and Closing.
Power on the system and log in.
Reinstall the system from a USB drive, using the BMC or booting it from BCM.
Refer to the instructions in the DGX OS 7 User Guide.
Confirm the system is healthy by running the
nvsmcommand.sudo nvsm show health
Send the failed M.2 drive bay to NVIDIA Enterprise Support using the packaging provided.