DC-SCM Module Replacement#
This topic describes how to replace the DC-SCM module in the NVIDIA DGX™ B300 system.
Caution
Static Sensitive Devices: Ensure to observe best practices for electrostatic discharge (ESD) protection. Ensure that personnel and equipment are connected to a common ground, such as wearing a wrist strap connected to the chassis ground and placing components on static-free work surfaces.
DC-SCM Module Replacement Overview#
This is a high-level overview of the procedure to replace a DC-SCM module.
Confirm the DC-SCM is not functional.
Get a replacement DC-SCM from NVIDIA Enterprise Support.
Power off the system.
Unplug all motherboard cables.
Pull out the motherboard.
Remove the lid.
Remove the right BlueField-3 I/O bay.
Pull out the DC-SCM bay.
Install the new DC-SCM module.
Install the right BlueField-3 I/O bay.
Install the motherboard lid.
Slide the motherboard tray into the system.
Connect all the cables.
Power on the system and confirm the DC-SCM is functional.
Send the failed unit to NVIDIA Enterprise Support using the packaging provided.
Prepare for Replacement#
Caution
Wear an ESD strap during any procedure that involves touching electronic components.
Contact NVIDIA Enterprise Support to help triage if the DC-SCM module is not functioning.
When the new part arrives, power off the system.
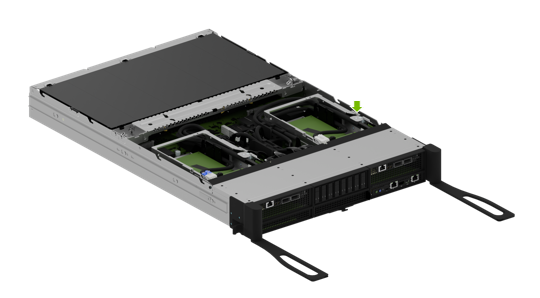
Follow the instructions to pull out the motherboard and remove the lid in Motherboard Tray - Opening and Closing.
Remove the right BlueField-3 I/O bay to access the DC-SCM module below.
Note
Each cable is labeled to ensure it is connected to the correct position after the procedure.
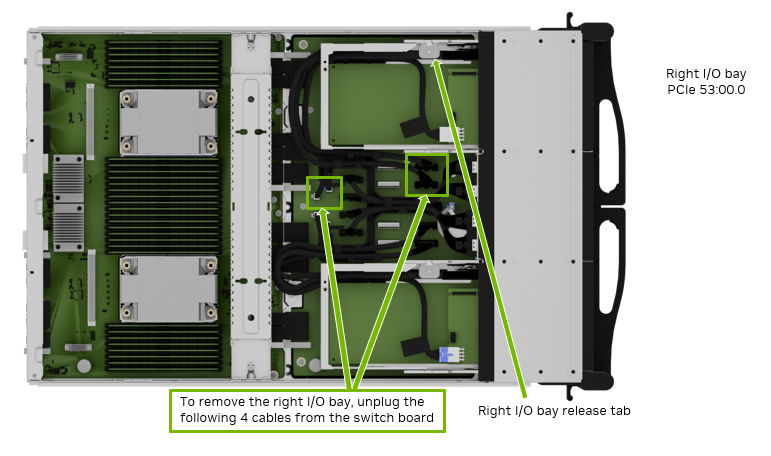
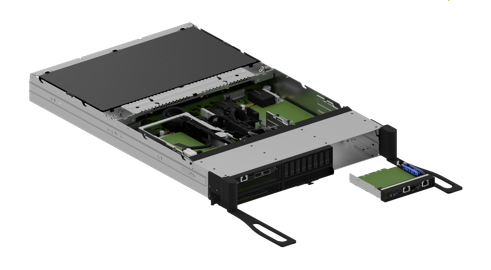
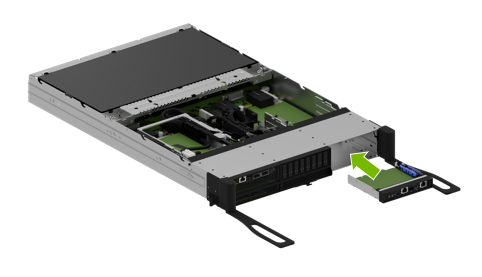
Remove the BlueField-3 I/O Bay#
After the four cables have been unplugged, press the right release tab and push the bay towards the front.
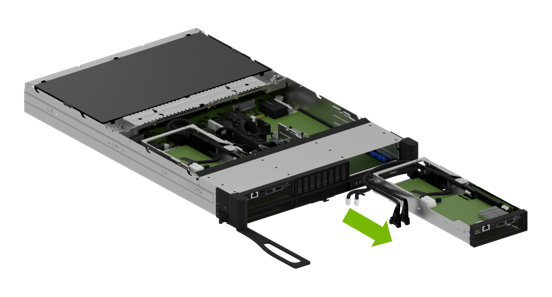
Carefully route the cables through the opening as the I/O bay is moved out of the motherboard tray.
Finish pulling the old I/O bay out of the motherboard tray.
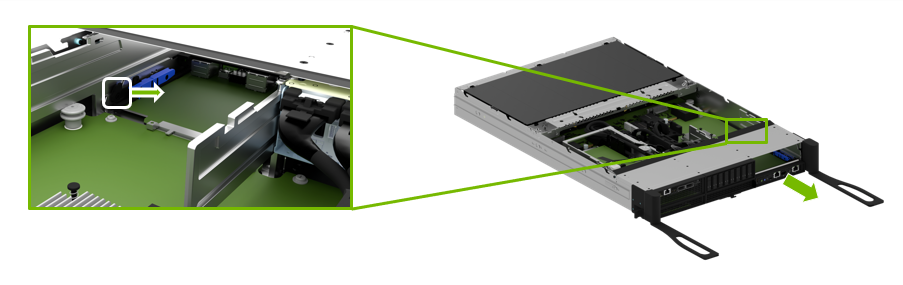
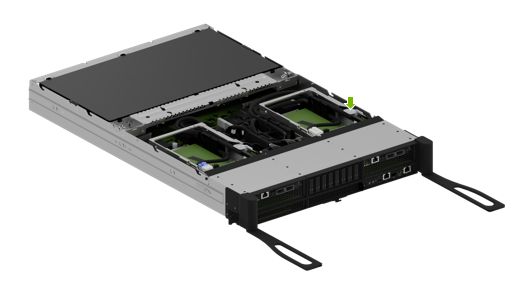
Ensure the motherboard tray levers remain fully extended, as shown in the illustration, so the DC-SCM module can be pulled out.
Remove the DC-SCM Module#
Ensure the ejection levers are fully extended to prevent obstruction before removing the DC-SCM module from the motherboard.
Release the latch on the DC-SCM module as shown in the illustration and then pull the bay out the front to eject it.
Insert the DC-SCM Module into the Tray#
To install the new DC-SCM, ensure the ejection levers are fully open. Insert the DC-SCM into the lower slot until it locks into place.
Reconnect the I/O Bay#
Route all cables carefully through the opening in the motherboard tray slot.
After inserting the I/O bay into the tray, ensure it locks in place by checking that the tab is secure.
Connect the two power cables and the two PCIe cables to their correct connectors on the switchboard, following the labels on each cable end.
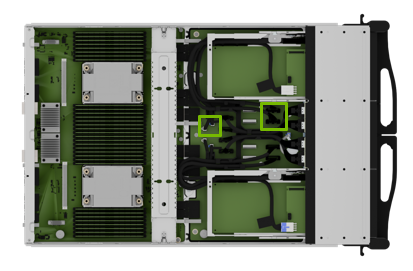
To identify the correct connections, refer to this table that maps BlueField-3 card connectors to their corresponding board connectors.
BlueField-3 I/O Board
Left Slot Installation
Right Slot Installation
Cable Label P2
Board connector J9
Board connector J3
Cable Label P3
Board connector J10
Board connector J4
Integrate the New DC-SCM and Complete the Installation#
Insert the motherboard following the instructions in Motherboard Tray - Opening and Closing.
Power on the system.
Update the system firmware to the latest version.
Confirm the system is healthy by running the
nvsmcommand.sudo nvsm show health
Send the failed DC-SCM module to NVIDIA Enterprise Support using the packaging provided.