Level Logic
Level logic mainly consists of adding and changing levels.
Determine Type of Level Mod
To determine which files need to be created in the Mods folder, decide if you’d like to swap out the entire game, add levels while leaving the existing ones, or just swap out a specific level.
Replace a Single Level
Simplest
Most likely to cooperate with other mods
A current game will be lost from the rotation
NOTE: Subscribing to multiple mods that override the same level will result in only one mod becoming active.
Adding an Additional Level
All original levels will still be in the game rotation
NOTE: Subscribing to multiple mods with level additions will result in only one mod becoming active (because the top, persistent level must be overriden with this method).
Full Game Replacement
- Everything in the game is replaced by the mod content
Level Setup
Replacing a Single Level
This method is the simplest way to try out your new level. It comes at the cost of removing one of the current levels in the rotation.
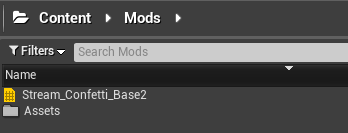
- Copy a sublevel from Content/Maps/Sublevels/UserVRSublevels to Content/Mods (ie. Stream_Confetti_Base2)
- Make sure it has the exact same name as the level that already exists. Any changes to the level in Content/Mods will be in your level mod.
Adding an Additional Level
This method allows the user to add an additional level into VR Funhouse, while maintaining all the current levels in rotation. The downside to this method is the need to cook all the assets included in the game, for every level.
- Copy UserVR_base2.umap from Content/Maps to Content/Mods
- Make sure the name remains UserVR_base2.umap
- In the Levels Tab, select Create New (or Add Existing) to add a new level
- Name this new level
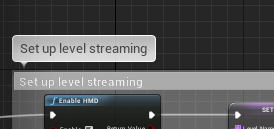
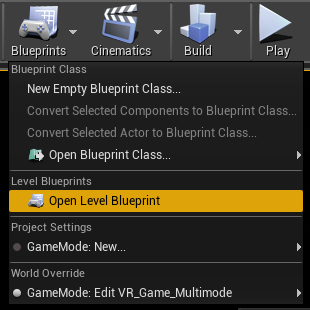
- Open the Level Blueprint
- Navigate to the section named Set Up Level Streaming
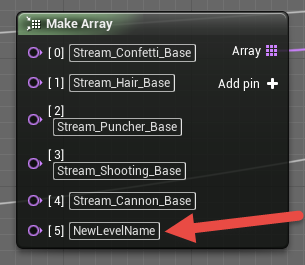
- Find the Make Array node that lists all the levels
- Type in the exact name of your new level
Full Game Replacement
This will let the user create an entirely new game.
Copy LoadingLevel.umap from Content/UI/ to Content/Mods (ensure that the name does not change)
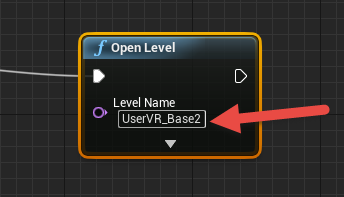
Open the Level Blueprint
In the “Open Level” node, replace “UserVR_Base2” under level name with a name for a new level you have or will create (in the Mods folder).
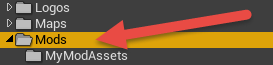
Mods Folder
All new or modified assets and levels to be included in your mod need to be placed into the VRFunhouse/Content/Mods folder.
Assets and levels in the top level of the Mods Folder will override the same-named file in the original project.
- Assets and levels that have been changed or you would like to directly replace will go here.
New assets that are referenced by your mod may be placed in subfolders within the Mods folder.
When moving these assets, you should make sure to use the “Move Here” option.
Do this by clicking and dragging your files to the appropriate sub-folder. When you release the mouse, you will get to option to Move or Copy.

NOTE: If you did not create your new assets and levels under the Mods Folder structure initially...
- Move any referenced assets and levels to your subfolders first.
- Then, move the level that you modded.
- You may need to right-click and select “Fix up Redirectors in folder” on the Mods Folders and the folders where your assets were moved from.
Helpful Tips
Below are some solutions to common issues that you may face.
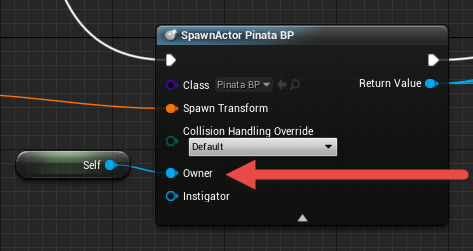
“Objects from my mod persist in the levels after it.”
Make sure any objects that are spawned in your mod have their ownership set to “self.” If there is no owner, the persistent level will be assigned as the owner.