Re-enable USB stick installation#
If you want to use the installation USB stick on a Jetson AGX Thor Developer Kit that has been used or set up before, you need to perform a special operation on UEFI setup menu.
Overview#
When to use this workaround#
You want to use a previously used or set up device
You want a fresh start and need to reinstall the BSP (*Jetson Linux*) on the same device
You received a used Jetson AGX Thor Developer Kit and want to instal with the USB stick
Something went wrong in the BSP installation process and you are starting over
Why this workaround is needed#
During the USB stick installation, the SOC Display Hand-Off mode is required to enable display output, so we must use UEFI framebuffer with the hand-off mode set to Auto. However, for the regular OS usage after the installation, to ensure compatibility with the GPU display driver in JetPack 7.0 (BSP 38.2)), it resets the SOC Display Hand-Off mode to Never.
The issue stems from the fact that the current GPU display driver does not properly support hand-off mode.
Jetson AGX Thor Developer Kit has UEFI firmware (38.0.0-gcid-41245178) and its setting flashed at the factory in such way it is ready for the installation with the USB stick.
But once the installation is done, the SOC Display Hand-Off mode is reset to Never, so it requires the manual re-enabling if to use the USB installation stick again.
The workaround - Interim Solution#
Required UEFI change: Enable SOC Display Hand-Off Mode#
Turn on the Jetson AGX Thor Developer Kit by pressing the power button (the middle button in the row).
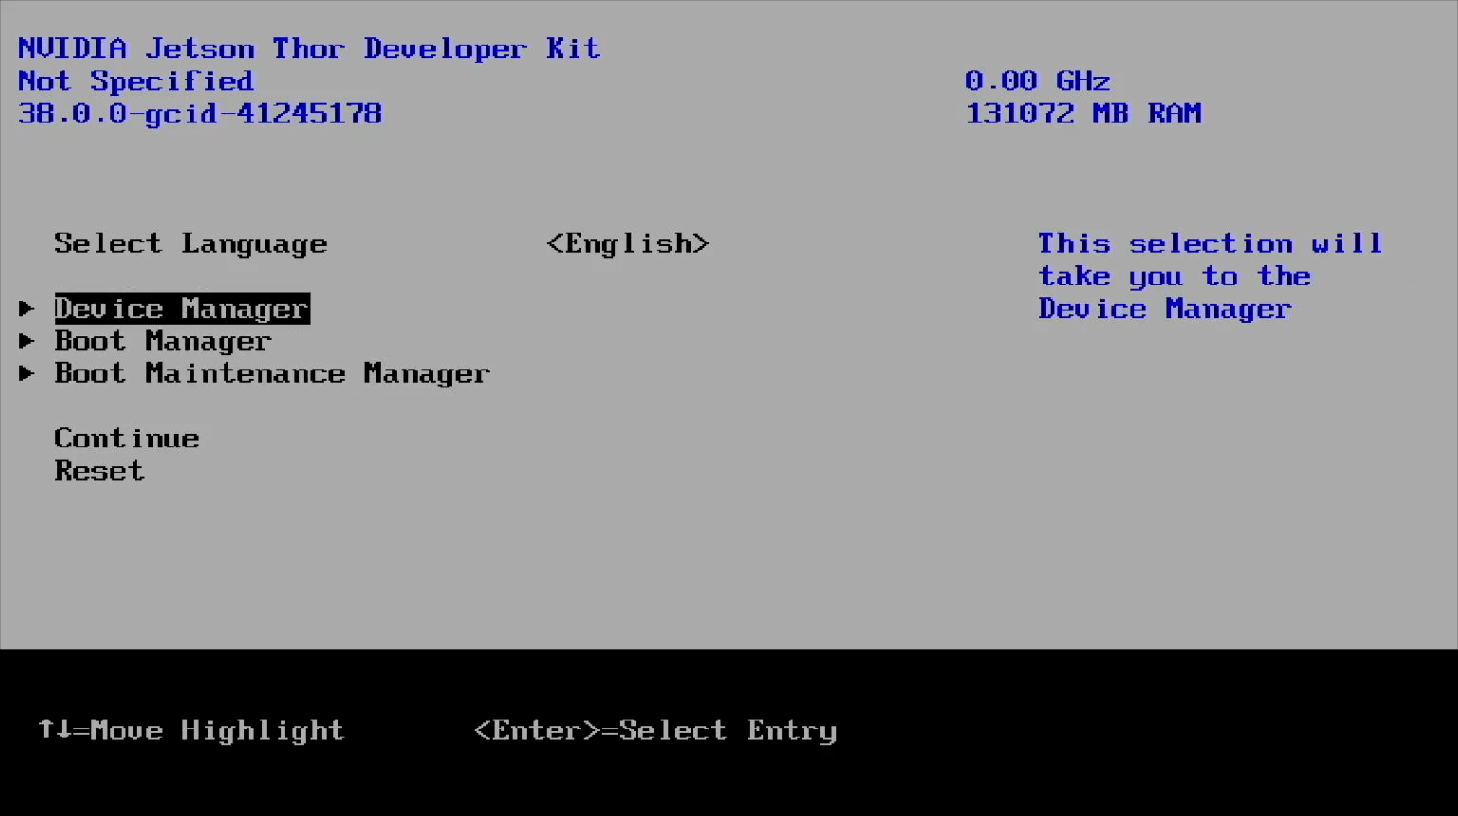
While on the NVIDIA logo screen (when a display is attached) or the pre-boot options screen (in headless mode), hit Esc key repeatedly to enter into the UEFI setup menu.

Select Device Manager by hitting ↑ (up) and ↓ (down) keys, and press Enter key.
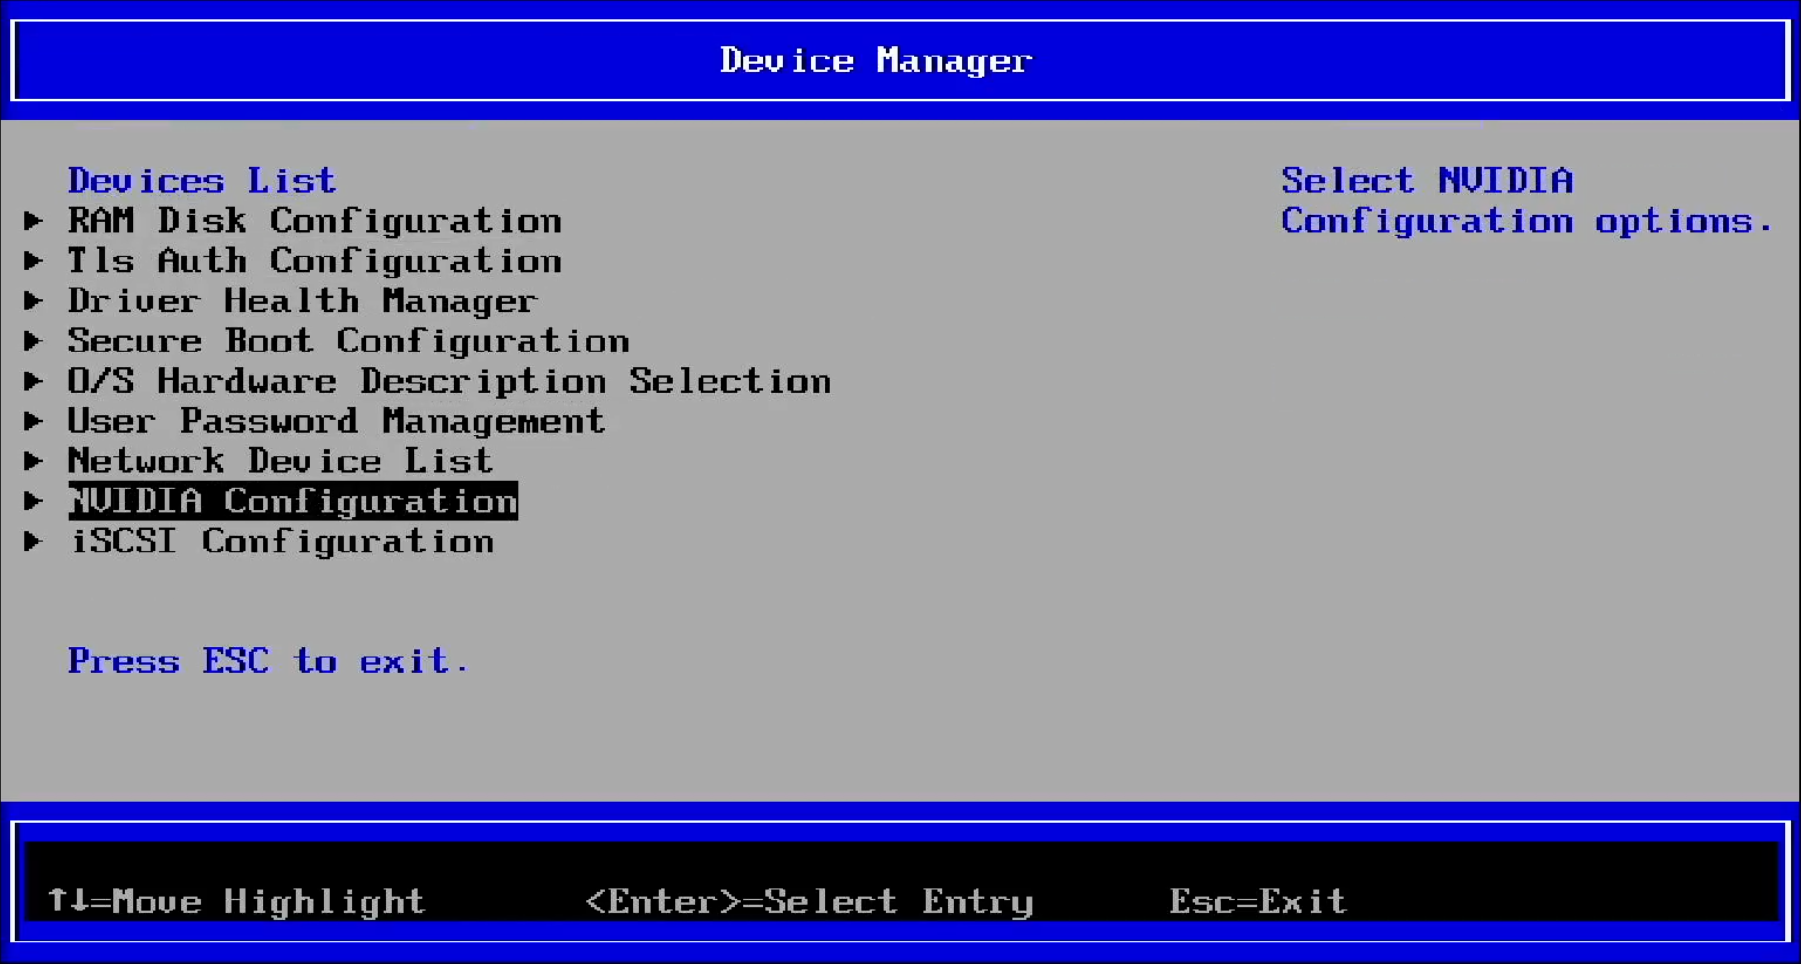
Select NVIDIA Configuration by hitting ↑ (up) and ↓ (down) keys, and press Enter key.
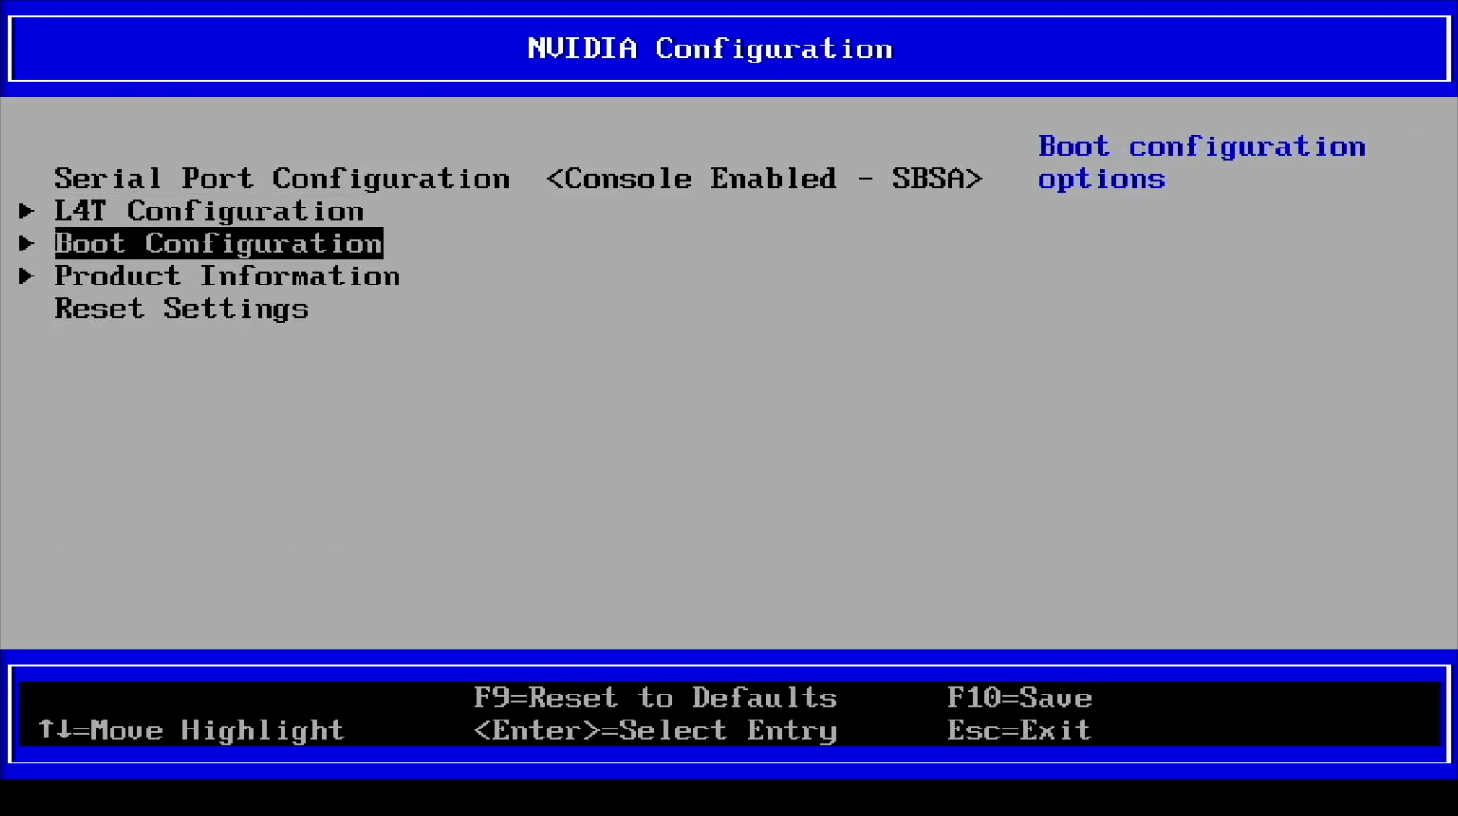
Select Boot Configuration by hitting ↑ (up) and ↓ (down) keys, and press Enter key.
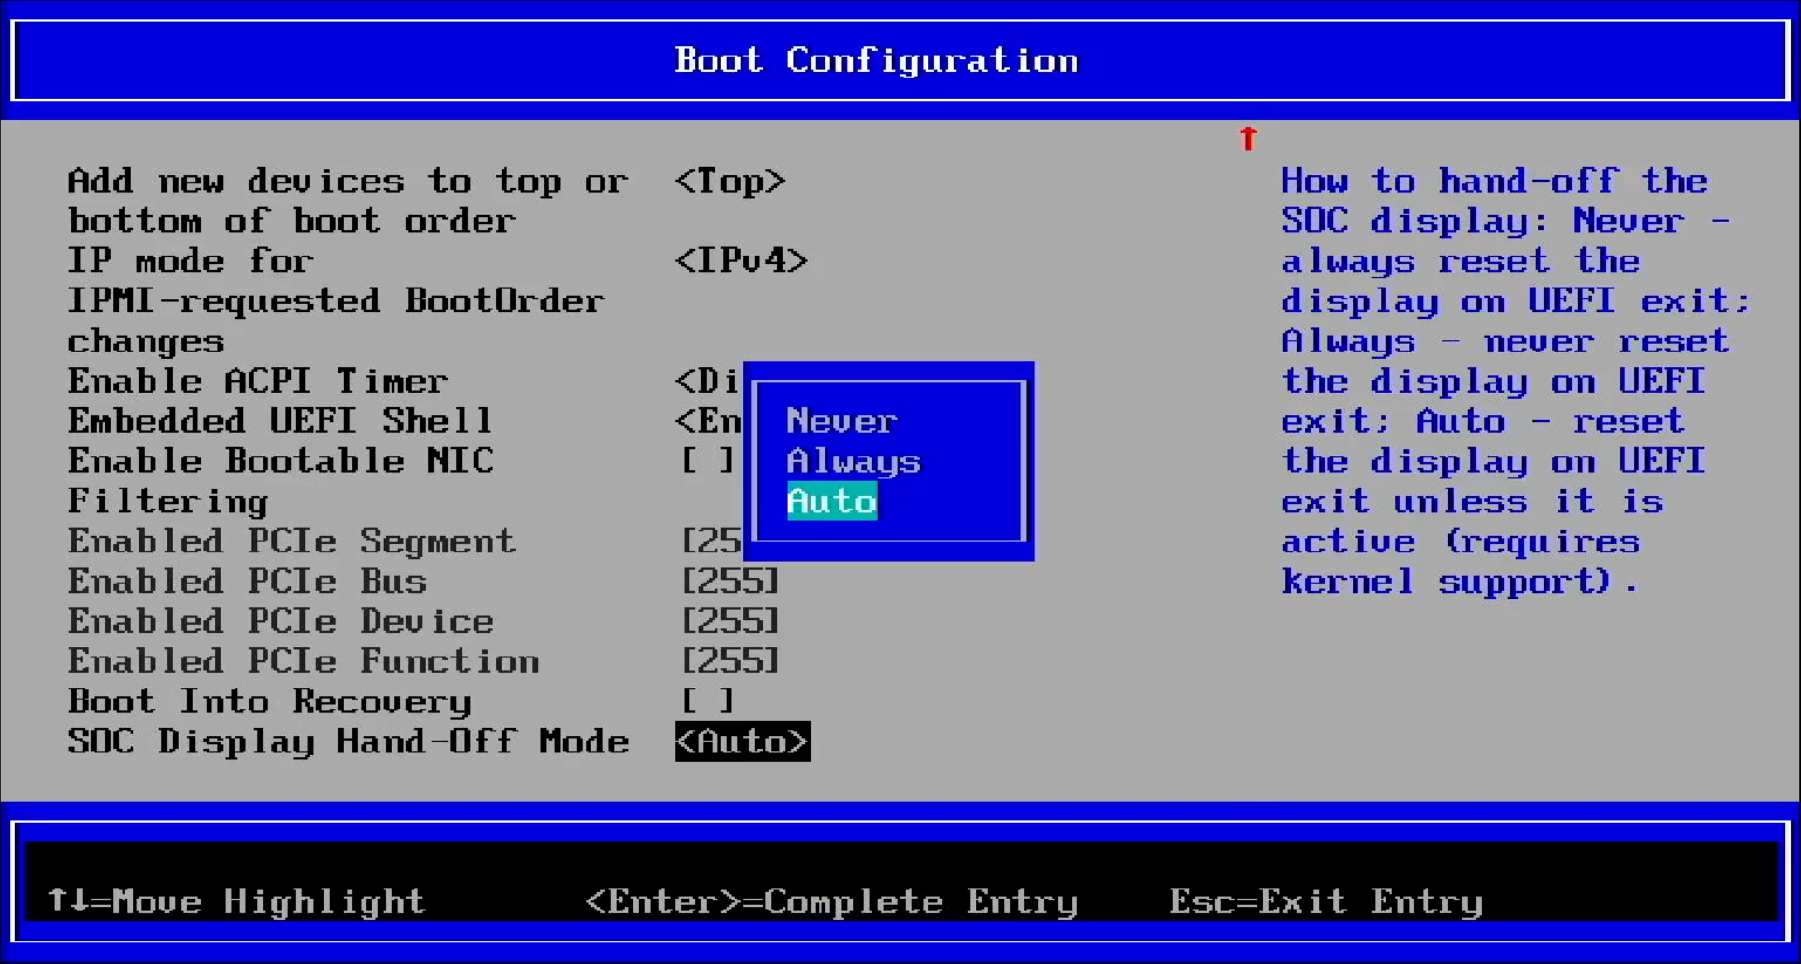
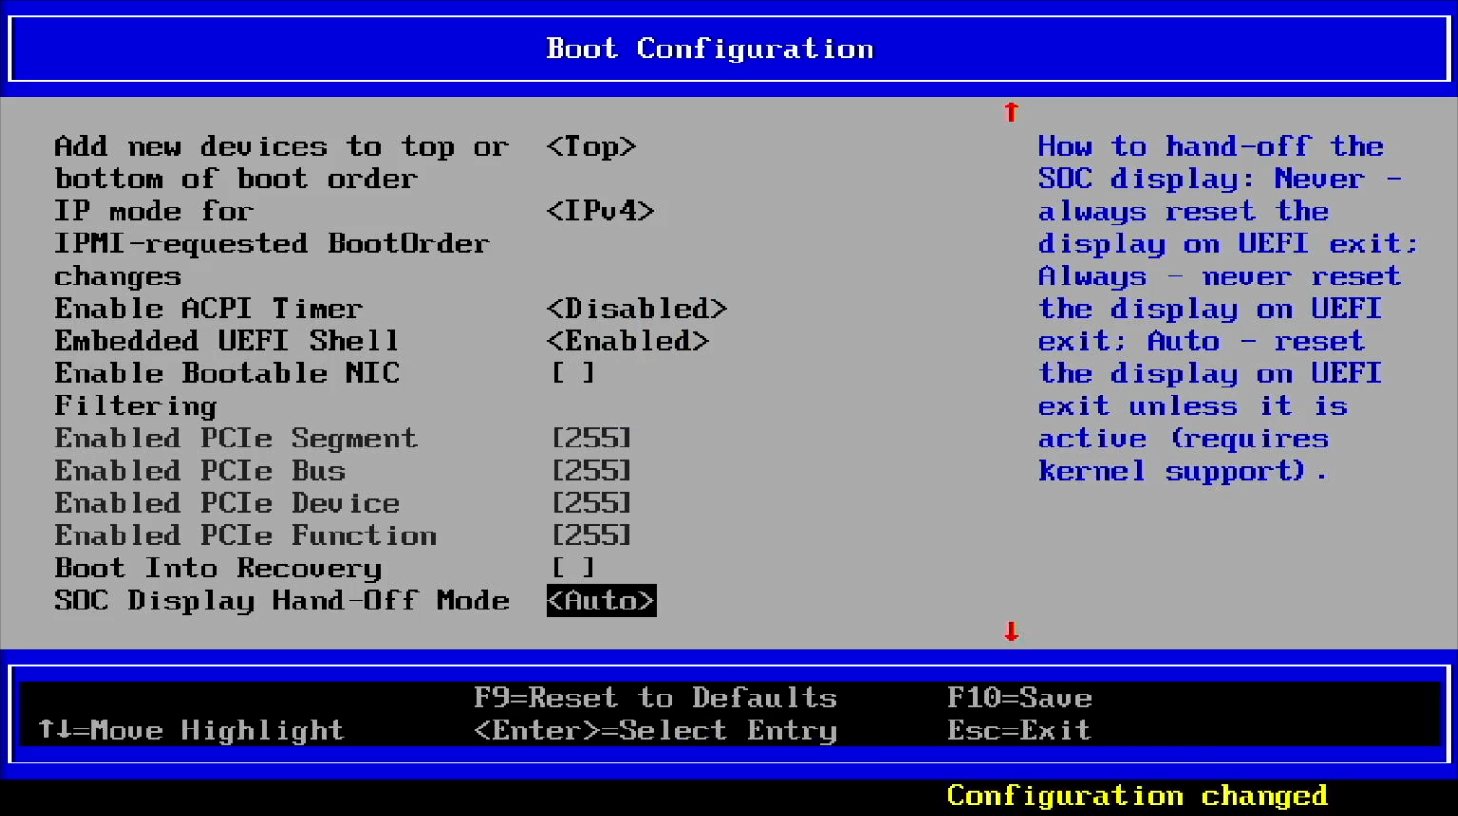
Scroll to the next screen by hitting ↓ (down) key repeatedly and select SOC Display Hand-Off Mode, then press Enter key.
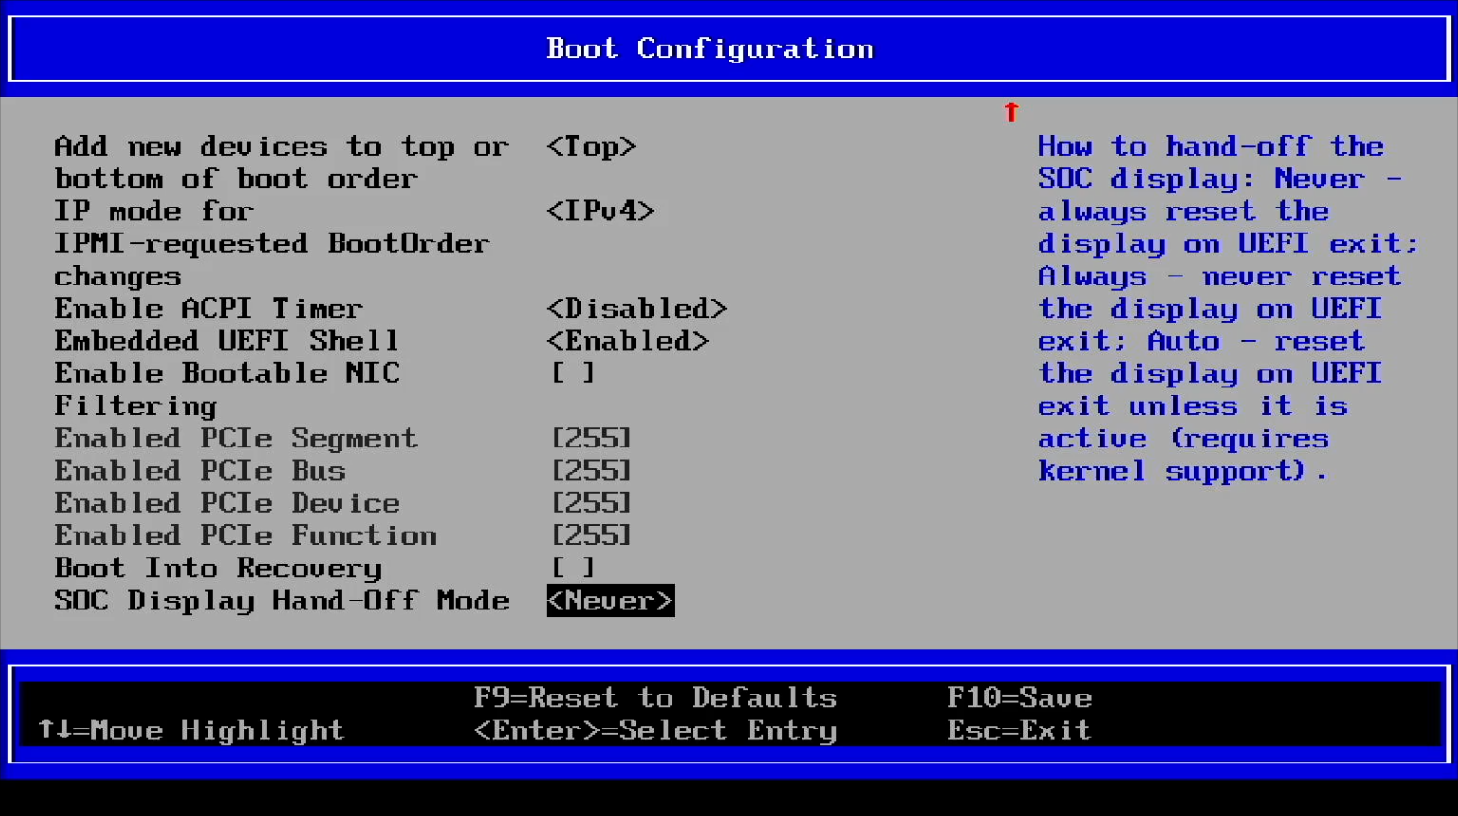
Change the mode to Auto by hitting ↓ (down) key and press Enter key. (The original setting should have been Never)
Save the change
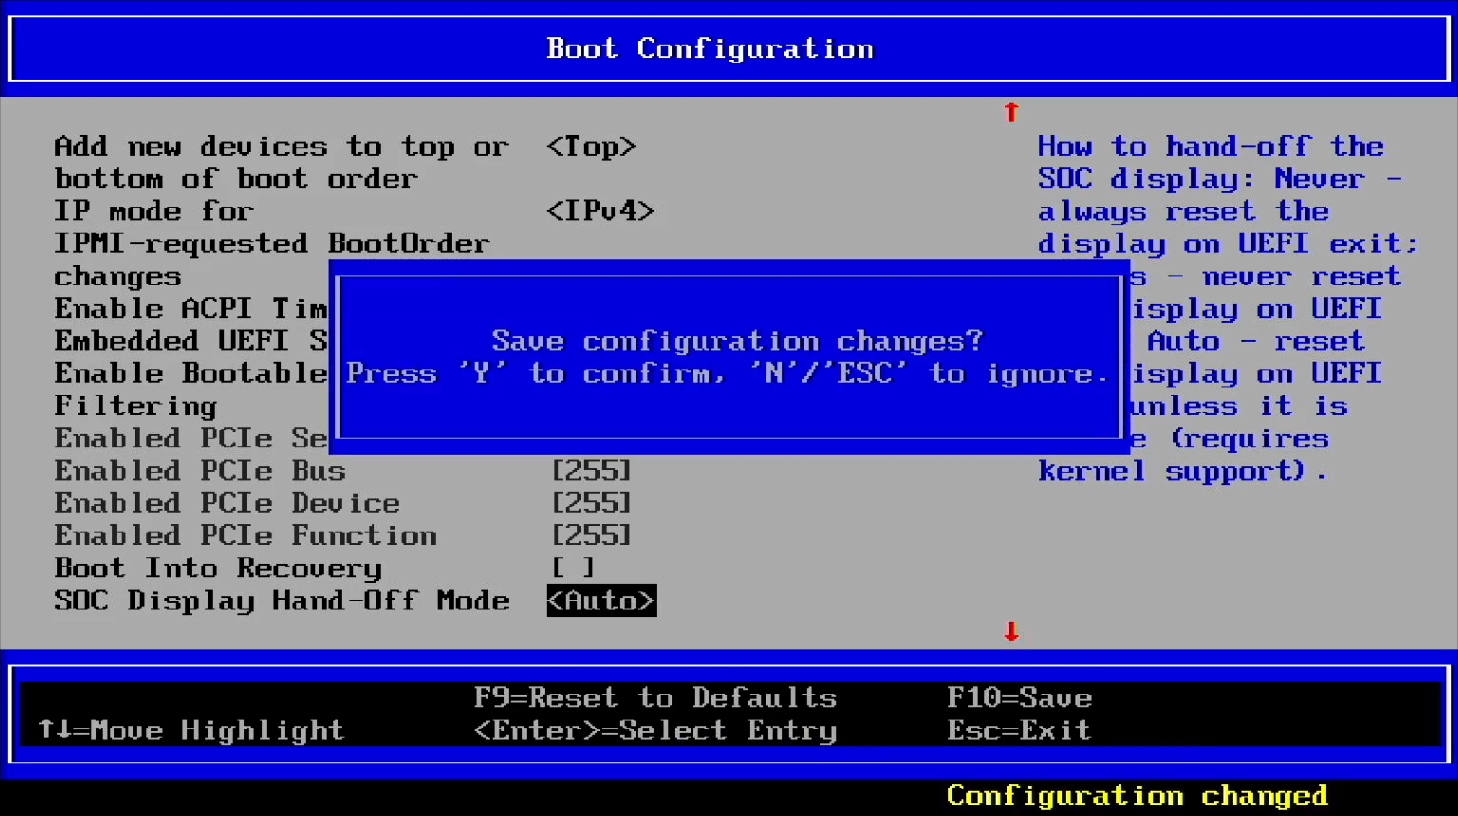
Press F10 key to save the change.
Press y key to confirm the change.
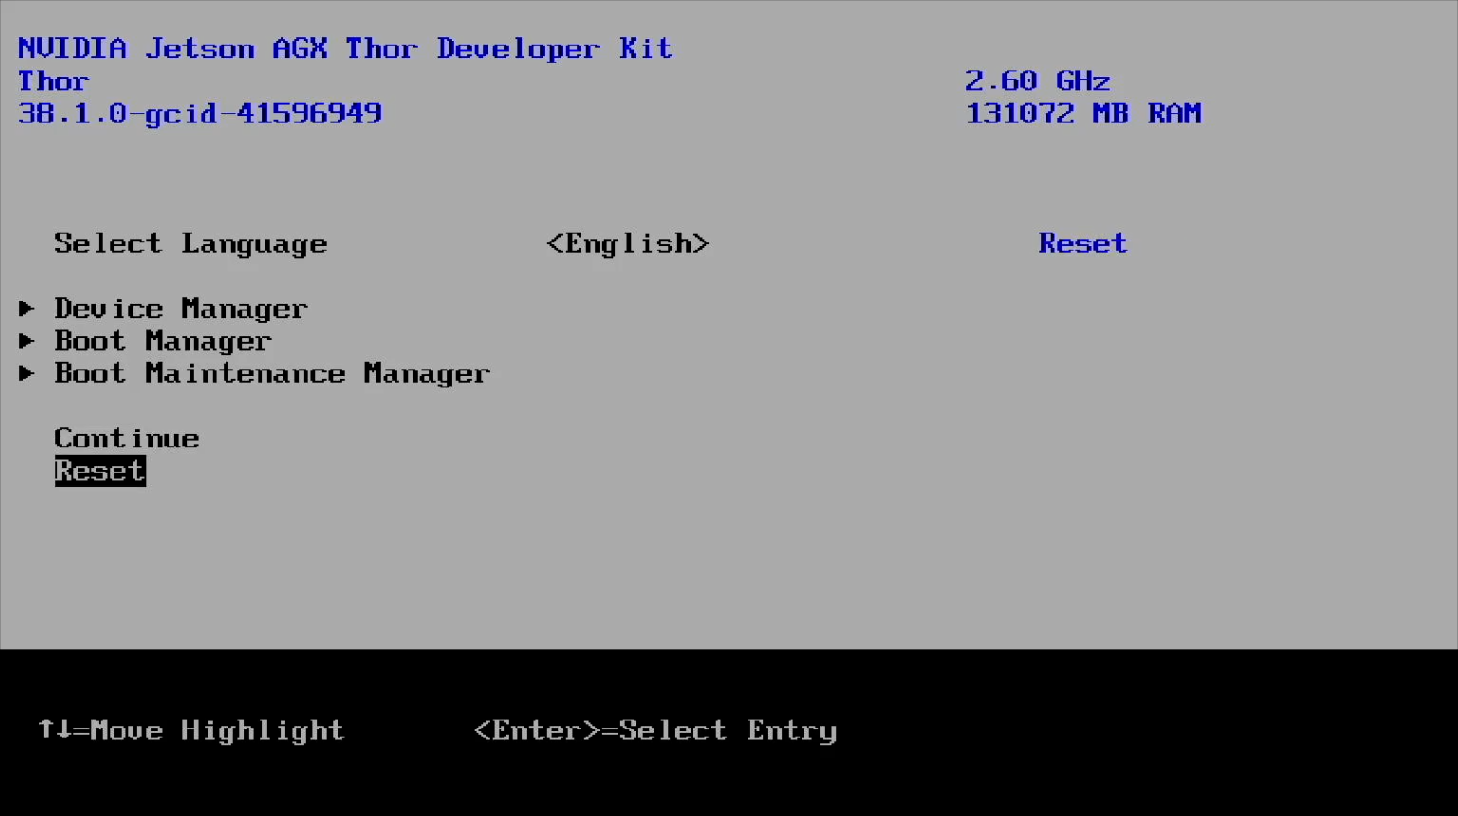
Press Esc key multiple times to exit to the top menu of UEFI setup menu.
Select Reset by hitting ↑ (up) and ↓ (down) keys, and press Enter key.
Now you should be able to use the USB stick installation again by following the same process as described in the Quick Start Guide.
The USB stick installer sets the SOC Display Hand-Off mode back to Never for the regular OS usage, so you don’t need to manually reset this setting again.