Running Churn Benchmark
Connect to System Console using the left-hand menu link.
Connect to the sparkrunner pod.
kubectl exec --stdin --tty sparkrunner-0 -- /bin/bash
cd to /home/spark/spark-scripts and execute the
/home/spark/spark-scripts/lp-runjupyter-etl-gpu.shor/home/spark/spark-scripts/lp-runjupyter-etl-cpu.shin the System Console.In the left menu open up the Desktop link and click the VNC connect button.

Open the web browser in the Linux desktop.

Browse to 172.16.0.10:30002.
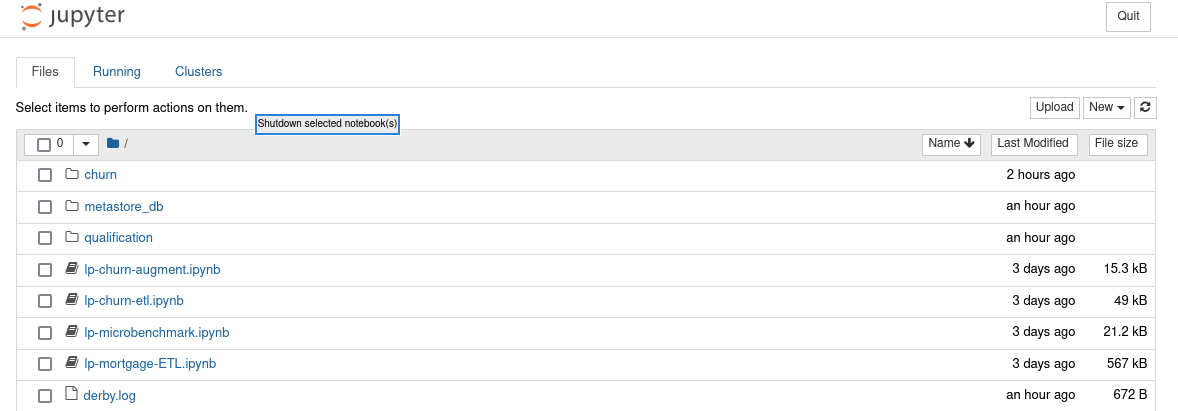
You should see the list above.
Create dataset for use with ETL job.
Open another System Console and run the following commands.
            cd `mount | awk -F ':' '/spark-rapids-claim/ {print $2}'|grep var | awk '{print $1}'`
mkdir -p churn/input
mkdir -p churn/output
chmod 777 churn/*
Open a bash session into the running container.
kubectl exec --stdin --tty sparkrunner-0 -- /bin/bash
Copy the seed file.
            cp /home/spark/WA_Fn-UseC_-Telco-Customer-Churn-.csv /data/churn/input
exit
Click the
lp-churn-augment.ipynblink to start the Jupyter notebook. Note
NotePlease “trust” the notebook before you run it.

Validate the creation of the Churn Benchmark pods with the following command
Open another System Console.
kubectl get pods | grep app-name
The output should look similar to this.
            app-name-79d837808b2d2ba5-exec-1   1/1     Running   0          31m
app-name-79d837808b2d2ba5-exec-2   1/1     Running   0          31m
app-name-79d837808b2d2ba5-exec-3   1/1     Running   0          31m
If you see that your pods are in a PENDING status then the previous pods did not close properly. You can remove those pods with the following command:
kubectl delete pod app-name-XXXX
Run the notebook by clicking Cell -> Run All.

Confirm the creation of the Churn dataset.
Review output of notebook.


In the System Console run (should see approximately 21G of data).
du -h --max-depth=1

Click the
lp-churn-etl.ipynblink to start the Juypter notebook.Run the notebook by clicking Cell -> Run All

Note the timing for the benchmark so you can compare to your CPU run time.

Stop the notebook you started in step 1 by pressing ctrl-c in the System Console window that you started the notebook. Answer Y when asked if you want to “Shutdown this notebook server?”.
Run the same Churn Benchmark using only CPUs.
Execute the
lp-runjupyter-etl-cpu.shscript.
Compare the differences between the two outputs.
You must close the notebook tab and then shutdown the notebook to start another session. If this is not done you will not be able to start another spark session.