Isaac Lab Setup#
Overview#
First let’s set up an external template project, and briefly cover the ways you can work with an installation of Isaac Lab. You can pick which option works best for you, depending on the hardware available to you.
Installing Isaac Lab#
If you already have Isaac Lab installed, you can skip this step.
If you’re just getting started, we recommend our Brev Launchable

If you don’t have a GPU compatible with Isaac Lab, or want to leverage cloud resources, you can also use NVIDIA Brev to pay for compute by the hour. The dockerfile can also be run locally, if you have local GPU resources and drivers. Visit the README and project repo here to learn more.
To install with local GPU resources - Workstation Install:
If you haven’t installed Isaac Lab already, you can follow these instructions to get started.
Check here for the most recent system requirements.
Video describing the Linux installation process
If you have questions about GPU drivers on Linux, check the specs in the guide above and read this troubleshooting guide.
Now that our installation is ready, let’s start creating the Isaac Lab task for our UR10 robot.
Configuring the UR10 Robot and Gripper Model#
Our task#
For today’s module, imagine you’ve been asked to train a particular robot configuration: a UR10 robot, with a Robotiq 2F-140 gripper. The policy we’re training will make this robot’s current pose match a commanded goal pose.
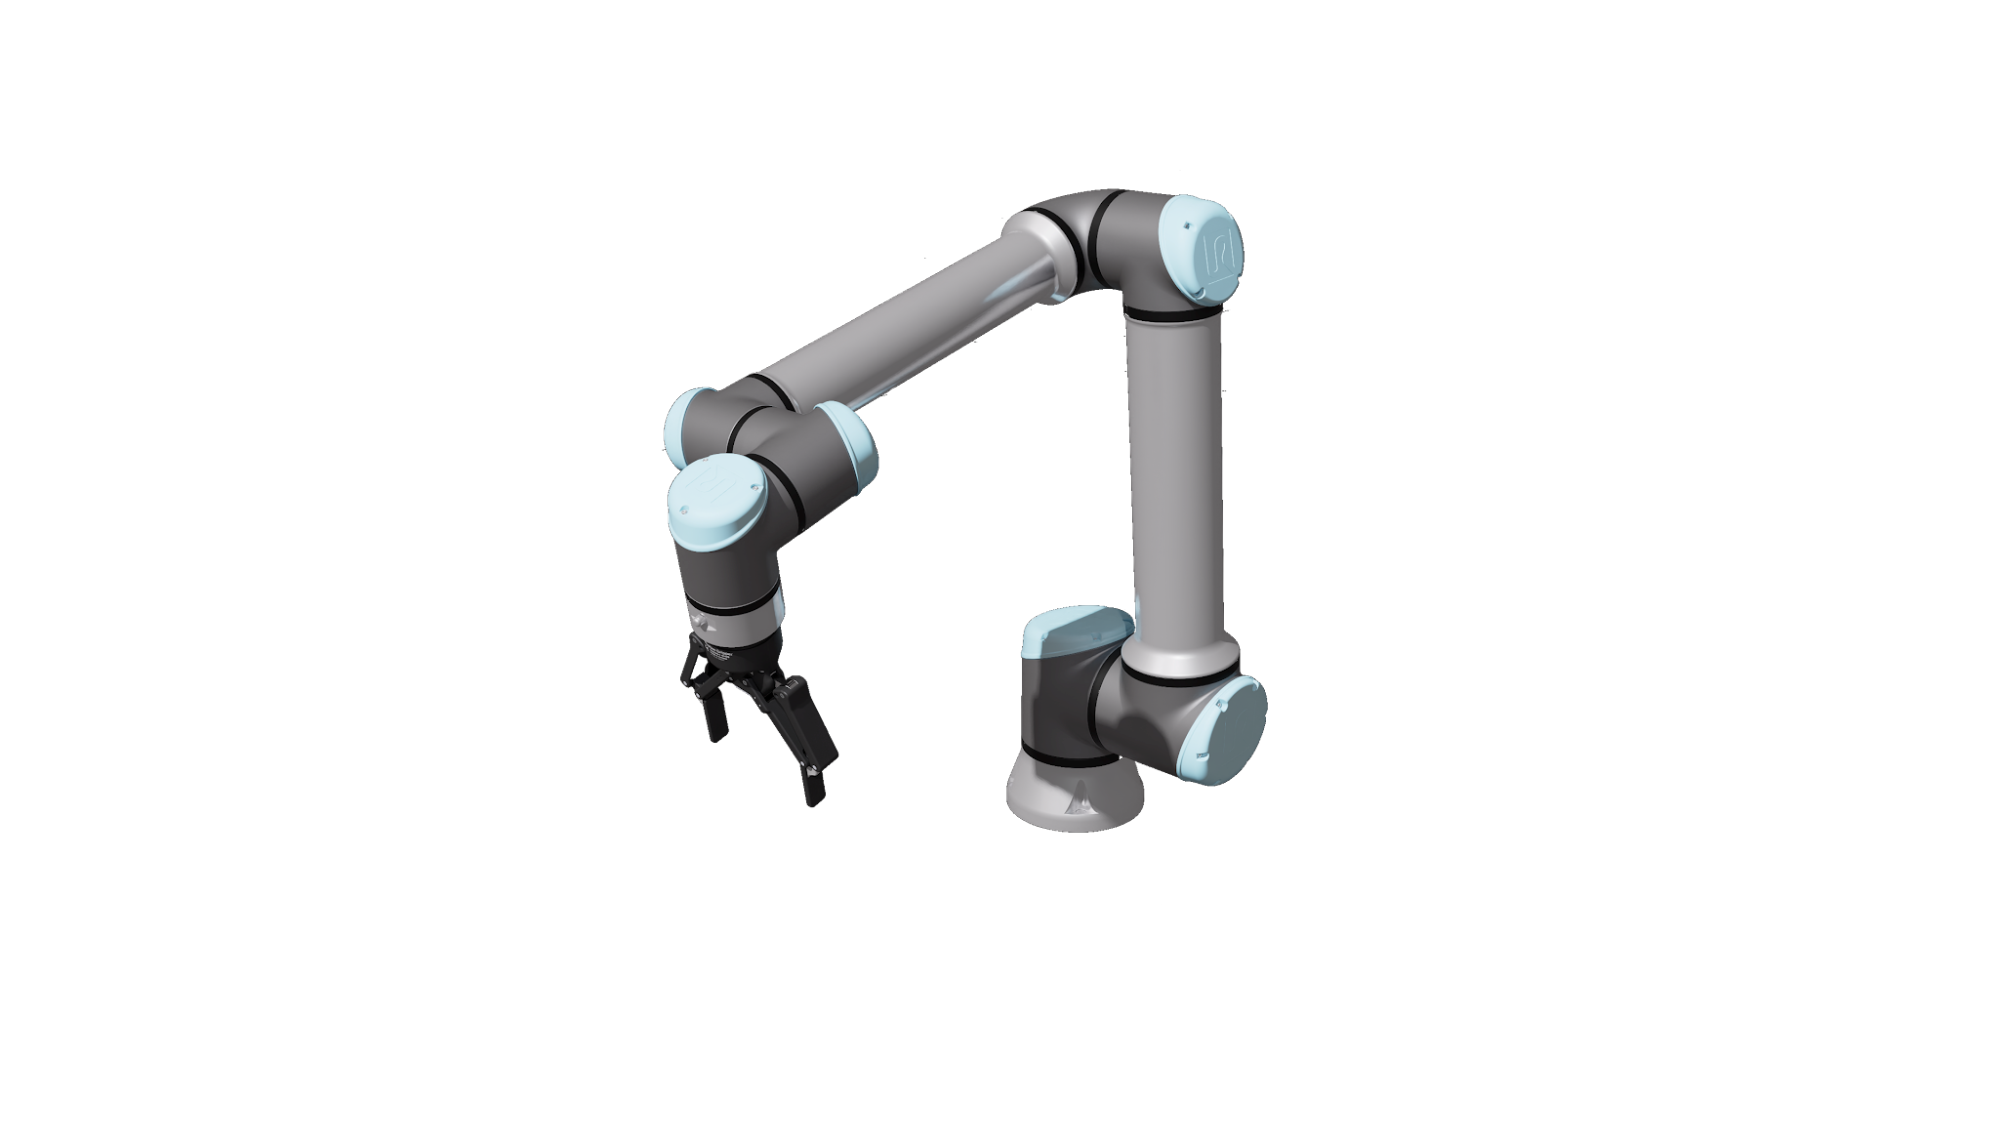 This is the Universal Robots UR10 robot With a Robotiq 2F-140 gripper attached, in Isaac Sim.
We’ll begin by configuring a USD file of our custom robot configuration in Isaac Sim, then create a Python configuration class for this robot using the Isaac Lab framework.
OpenUSD provides many powerful features for robotics and simulation applications, some of which we’ll use today. For example, using references of existing robot models will allow us to combine the existing gripper and robot models, non-destructively.
Tip
Understanding OpenUSD’s fundamentals, such as references, payloads, and strength ordering, will superpower your robotics and 3D workflow journey. Isaac Sim, and Omniverse are built on OpenUSD to implement features that empower collaboration, non-destructive editing, and more.
Visit our Learn OpenUSD Learning Path here for more training.
As we go through this process, remember: Isaac Sim is the simulator that Isaac Lab is built on. We set up our robot in Sim, then we train it with Lab, then we can go back to Sim for further validation.
Tip
If you’re only interested in the Isaac Lab material for this module, you can use a premade asset and skip this unit. However, this module is useful for demonstrating how to prepare custom assets.
Add Robot USD as Reference#
Open a new terminal.
Navigate to the Isaac Lab folder.
Launch Isaac Sim by running the following command:
Linux:
./isaaclab.sh --sim
Windows:
.\isaaclab.bat --sim
Note
You can easily launch Isaac Sim from your Isaac Lab environment using this command above, but if you have it installed as a standalone binary, you can launch it there too.
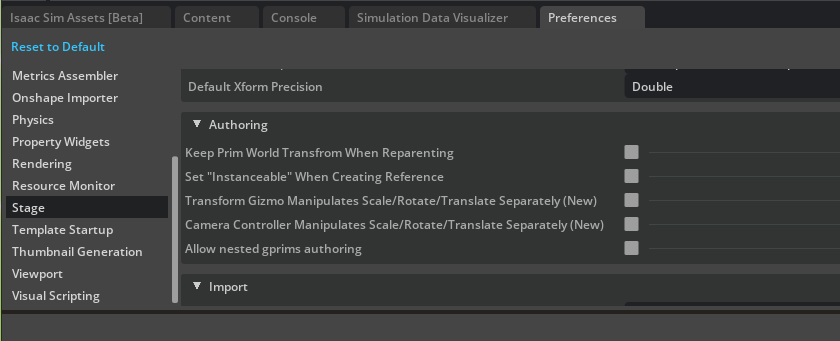
Navigate to Edit > Preferences and find the Stage option in the left of the panel.
Under Import, set the Drag & Drop USD Method to reference. This will let us add USD assets to our stage as references instead of payloads.
Next, go back to the Content browser and navigate to
/Isaac/IsaacLab/Robots/UniversalRobots/UR10/.Select
ur10_instanceable.usdand drag it into the Stage panel. This will add it as a reference in the current stage.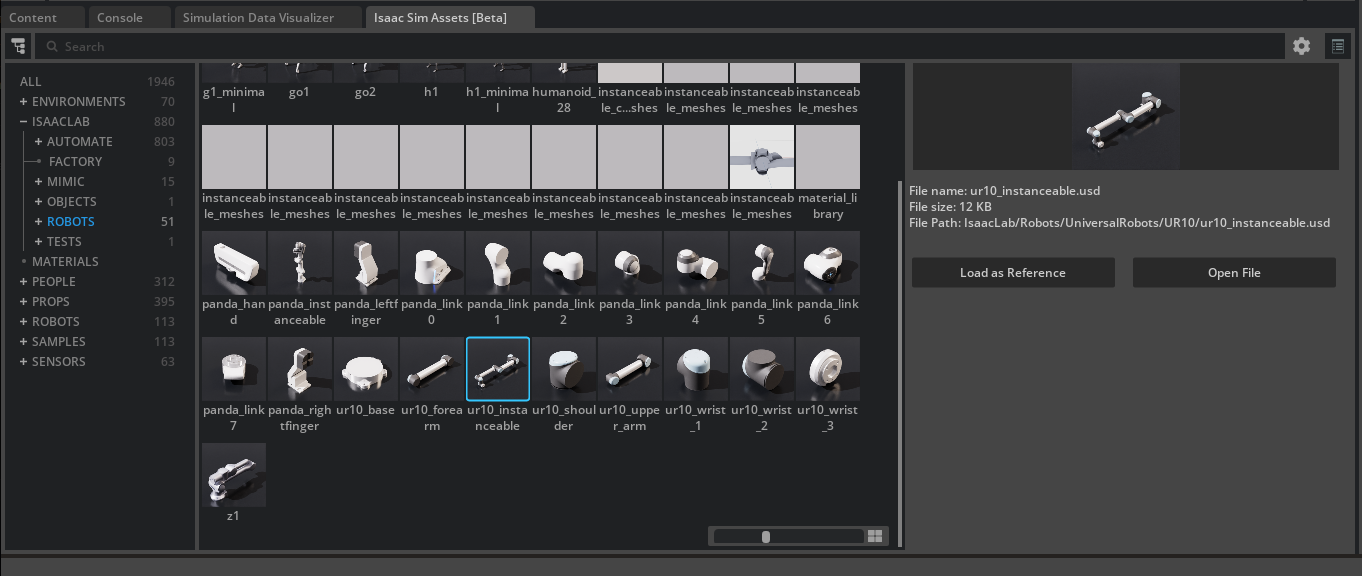
Add Gripper USD as Reference#
Let’s repeat this process for the Robotiq 2F-140 gripper.
In the left side of the Content browser, navigate to
/Isaac/Robots/Robotiq/2F-140/.Select
Robotiq_SF_140_physics_edit.usdand drag it into your Stage panel, just as we did before.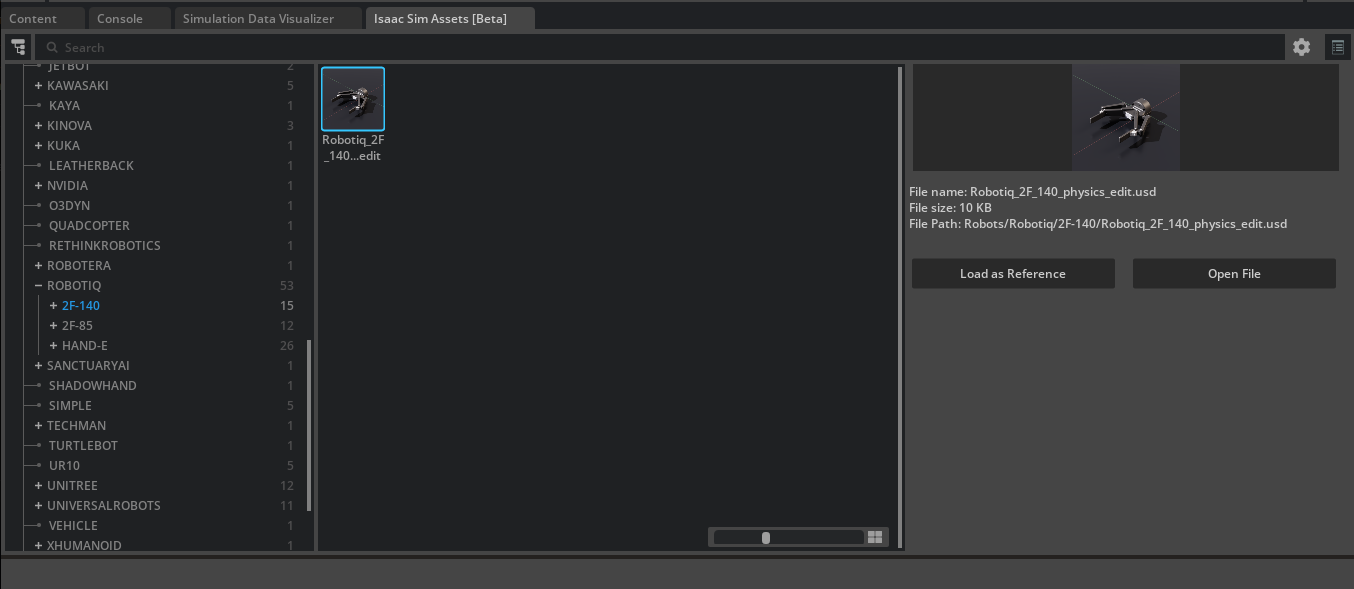
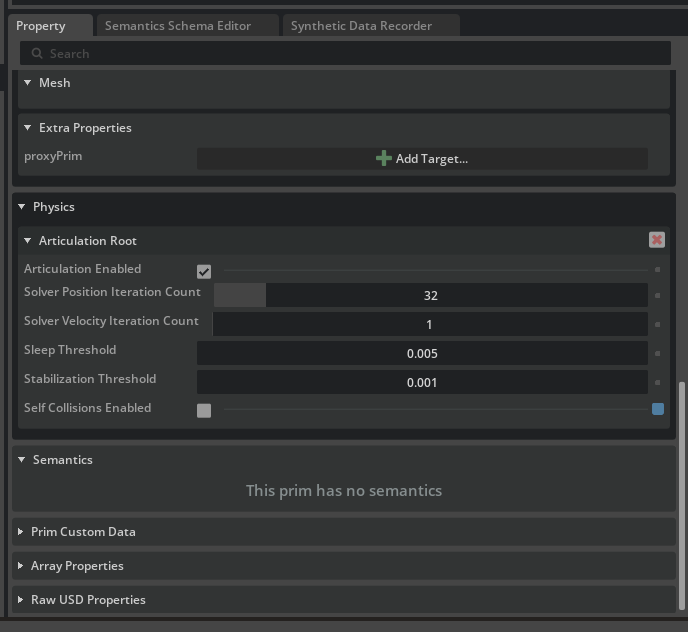
Remove extra articulation root#
In the Stage panel, find and select
Robotiq_2F_140_physics_edit.Now in the Property editor, find the Physics Articulation Root and click the red
Xicon to remove it. We only want a single articulation for the robot.
Next, we need to combine these two. There are several ways to do this, we’ll show you a simple, manual way to attach them. We will place the gripper at the correct location in space, then join it physically to the robot with a Fixed Joint.
Connect the Gripper to the Robot#
Placing the gripper at the end of the robot#
Go to Edit > Preferences
Under Stage > Authoring, find Keep World Transform When Reparenting, and disable it
Note
If you’re using Isaac Sim 5.0, your settings may have a dropdown instead. Set Keep World Transform When Reparenting to Ask.
In the Stage panel, drag the gripper prim under
ur10_instanceable/ee_linkto parent the gripper to the end of the robot.In Isaac Sim 5.0, select Keep Prim Transform when prompted.
Now the gripper is located at the end of the robot! For organization, we’ll reorganize the stage, but first let’s reset our preferences setting.
We’ll change this setting temporarily to reparent the end effector to the end of the robot, also known as the “end effector” link. It’s a bit of a trick that saves us some work here.
Go to Edit > Preferences.
Under Stage, find Keep World Transform When Reparenting and re-enable it.
Drag the gripper Xform
Robotiq_2F_140_physics_editback ontoWorld.In Isaac Sim 5.0, your settings should still be set to Ask. Select Inherit Parent Transform when prompted.
On Parenting#
Prims in a USD stage are placed into a hierarchy, and we call placing a prim “under” another one to be the process of parenting. By default, parenting a prim in applications developed on Omniverse like Isaac Sim maintains the original prim’s world transform. In other words, it doesn’t move after being reparented.
Great, now our USD file is legible and the gripper is placed correctly!
But while the gripper is positionally at the end of the robot, it is not attached in a physics sense. If we hit play, the gripper will simply fall into the abyss. Try this, and then press play to reset it.
Making a physics connection#
To physically connect the gripper, we need to also join it to the robot’s articulation, or series of joints, using physics.
Press the + sign next to the robot and gripper Xforms to expand them.
Select the ee_link prim of the robot.
Control-select the robotiq_base_link of the gripper.
Right click on either of them, and choose Create > Physics > Joint > Fixed Joint.
Note
Selecting in this order creates a joint from the end of the robot to the gripper, vs the other way around. You can change the order after joint creation if needed, this just saves a step.
Save the USD file as
UR-with-gripper.usdIf using the Brev Launchable, we recommend saving in
/workspace/.Press the Play button on the left panel of Isaac Sim. Notice how the gripper no longer falls into the abyss!
Now we’re ready to head into an Isaac Lab project, and configure this robot for training.
Tip
This is just one way to connect the gripper to the robot. To learn how to use the Robot Assembler, check out the Isaac Sim docs.
Tip
If you had any trouble preparing this asset, you’re welcome to use this premade asset!