Checking Your Customization Job Metrics#
After completing a customization job, you can monitor its performance through training and validation metrics. You can access these metrics in three ways:
Using the API
Through MLflow (optional)
Using Weights & Biases (optional)
Note
The time to complete this tutorial is approximately 10 minutes.
Prerequisites#
Platform Prerequisites#
New to using NeMo Platform?
All platform resources—models, datasets, customization jobs, and more—must belong to a workspace. Workspaces provide organizational and authorization boundaries for your work. Within a workspace, you can optionally use projects to group related resources.
If you’re new to the platform, start with the Quickstart to learn how to deploy, customize, and evaluate models using the platform end-to-end.
If you’re already familiar with workspaces and how to upload datasets to the platform, you can proceed directly with this tutorial.
For more information, see Workspaces and Projects.
NeMo Customizer Prerequisites#
Platform Setup Requirements and Environment Variables
Before starting, make sure you have:
NeMo Platform deployed (see Quickstart)
The
nemo-platformPython SDK installed (pip install nemo-platform)(Optional) Weights & Biases account and API key for enhanced visualization
Set up environment variables:
# Set the base URL for NeMo Platform
export NMP_BASE_URL="http://localhost:8080"  # Or your deployed platform URL

# Optional: Weights & Biases for experiment tracking
export WANDB_API_KEY="<your-wandb-api-key>"
Initialize the SDK:
import os
from nemo_platform import NeMoPlatform

client = NeMoPlatform(
    base_url=os.environ.get("NMP_BASE_URL", "http://localhost:8080"),
    workspace="default",
)
Tutorial-Specific Prerequisites#
Completed customization job with a valid ID
(Optional) Access to NeMo with MLflow tracking enabled
Available Metrics#
Each customization job tracks two key metrics:
Training Loss: Calculated during training, logged every 10 steps (default, configurable via hyperparameters)
Validation Loss: Calculated during validation, logged at each validation interval
Viewing Your Metrics#
Using the API#
Get job status and training metrics using the Customization Service:
import os
from nemo_platform import NeMoPlatform

client = NeMoPlatform(
    base_url=os.environ.get("NMP_BASE_URL", "http://localhost:8080"),
    workspace="default",
)

# Get job status with metrics
job_name = "my-sft-job"
status = client.customization.jobs.get_status(
    name=job_name,
    workspace="default"
)

print(f"Job: {status.name}")
print(f"Status: {status.status}")

# Check training step progress
for step in status.steps or []:
    if step.name == "customization-training-job":
        for task in step.tasks or []:
            details = task.status_details or {}
            print(f"Training Phase: {details.get('phase')}")
            print(f"Step: {details.get('step')}/{details.get('max_steps')}")
            print(f"Epoch: {details.get('epoch')}/{details.get('num_epochs')}")
            print(f"Training Loss: {details.get('loss')}")
            print(f"Validation Loss: {details.get('val_loss')}")
            print(f"Learning Rate: {details.get('lr')}")
            print(f"Gradient Norm: {details.get('grad_norm')}")
The response includes training progress and metrics including loss, learning rate, and validation loss.
Using MLflow#
If your deployment has MLflow tracking enabled:
Access the MLflow UI at your cluster’s MLflow tracking URL
Locate your experiment by the output model name
Find the run using your customization job ID
View detailed metrics, including training and validation loss curves, under the “Metrics” tab
Note
MLflow integration is configured at the cluster level. Contact your administrator if you need access to the MLflow UI or if MLflow tracking is not enabled for your deployment.
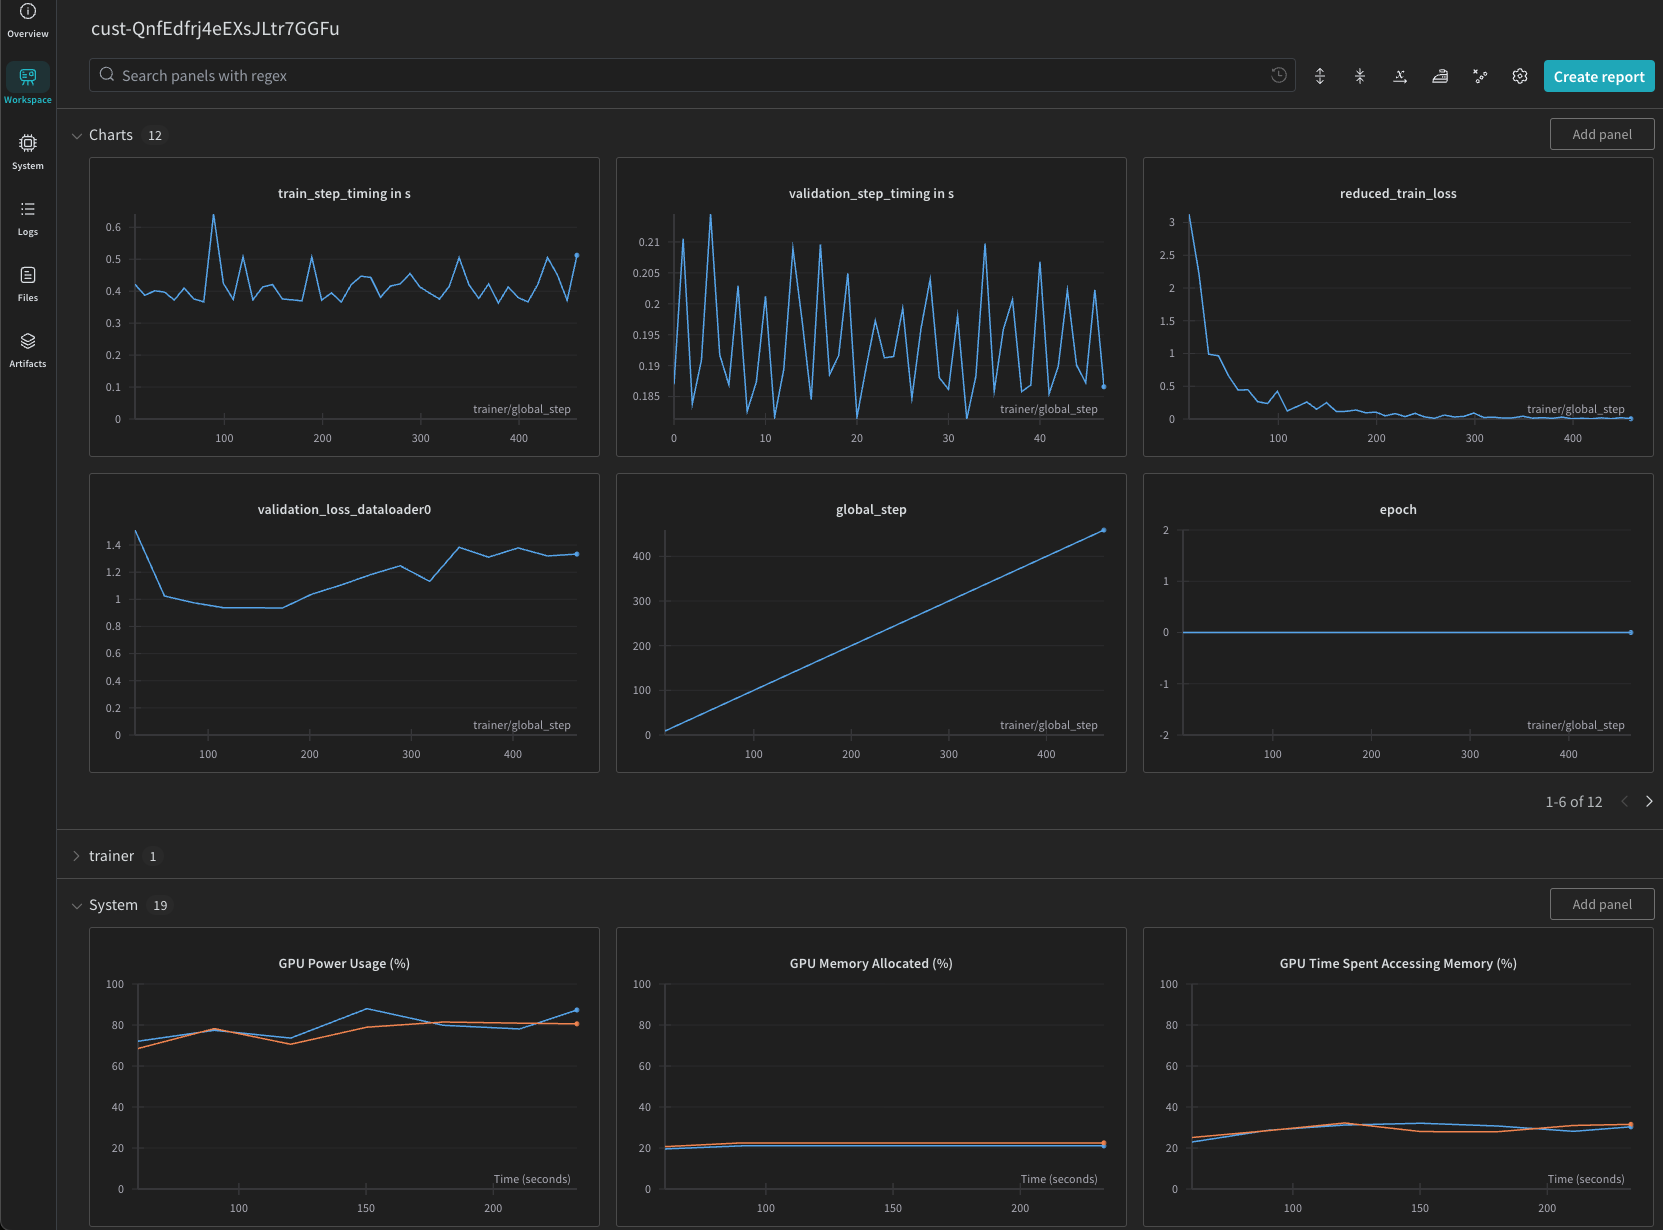
Using Weights & Biases#
If your customization job was created with W&B integration enabled (see Weights & Biases Integration):
Go to wandb.ai and navigate to your project
Find the run corresponding to your customization job
View training and validation loss curves, learning rate schedules, and other metrics under the run’s dashboard
client = NeMoPlatform( base_url=os.environ.get(“NMP_BASE_URL”, “http://localhost:8080”), workspace=”default”, )
Create a customization job with W&B integration#
job = client.customization.jobs.create(
    name="my-wandb-job",
    workspace="default",
    spec={
        "model": "default/llama-3-2-1b",
        "dataset": "fileset://default/my-dataset",
        "training": {
            "type": "sft",
            "peft": {"type": "lora"},
            "epochs": 3,
            "batch_size": 16,
            "learning_rate": 1e-4
        },
        "integrations": {
            "wandb": {
                "project": "my-finetuning-project",
                "entity": "my-team",
                "tags": ["fine-tuning", "llama"],
                "api_key_secret": "my-wandb-key"
            }
        }
    }
)

print(f"Created job: {job.name}")
print(f"Status: {job.status}")
The api_key_secret field references a stored secret containing your WANDB_API_KEY.
Use the secret name (e.g., "my-wandb-key") to resolve it from the request workspace.
To create the secret, see Weights & Biases Keys.
Then view your results at wandb.ai under your project.
Note
The W&B integration is optional and must be configured when creating the customization job. When enabled, training metrics are sent to W&B using your API key. While we encrypt your API key and don’t log it internally, please review W&B’s terms of service before use.