

Environments
Environments are one type of workload assets. An environment consists of a configuration that simplifies how workloads are submitted and can be used by AI practitioners when they submit their workloads.
An environment asset is a preconfigured building block that encapsulates aspects for the workload such as:
- Container image and container configuration
- Tools and connections
- The type of workload it serves
Environments Table
The Environments table can be found under Workload manager in the NVIDIA Run:ai platform.
The Environment table provides a list of all the environment defined in the platform and allows you to manage them.
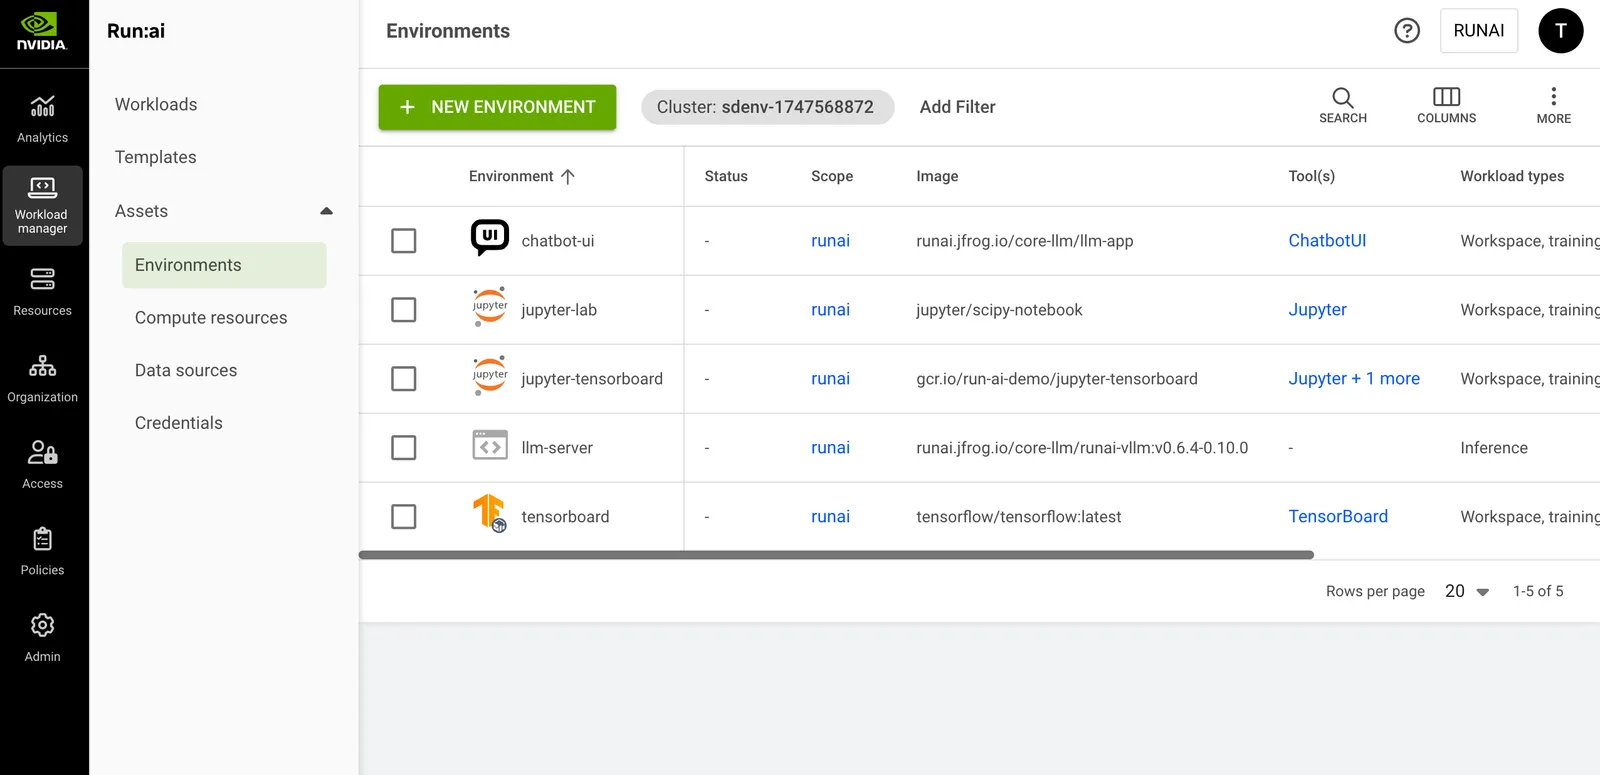
The Environments table consists of the following columns:
Tools Associated with the Environment
Click one of the values in the tools column to view the list of tools and their connection type.
Workloads Associated with the Environment
Click one of the values in the Workload(s) column to view the list of workloads and their parameters.
Customizing the Table View
- Filter - Click ADD FILTER, select the column to filter by, and enter the filter values
- Search - Click SEARCH and type the value to search by
- Sort - Click each column header to sort by
- Column selection - Click COLUMNS and select the columns to display in the table
- Download table - Click MORE and then Click Download as CSV. Export to CSV is limited to 20,000 rows.
Environments Created by NVIDIA Run:ai
When installing NVIDIA Run:ai, you automatically get the environments created by NVIDIA Run:ai to ease up the onboarding process and support different use cases out of the box. These environments are created at the scope of the account.
Note
The environments listed below are available based on your cluster settings. Some environments, such as vscode and rstudio, are only available in clusters with host-based routing.
Adding a New Environment
Note
- NGC catalog is disabled by default. If unavailable, your administrator must enable it under General settings → Workloads → NGC catalog.
- To select an image from the NGC private registry**,** your administrator must configure it under General settings → Workloads → NGC private registry.
Environment creation is limited to specific roles
To add a new environment:
- Go to the Environments table
- Click +NEW ENVIRONMENT
- Select under which cluster to create the environment
- Select a scope
- Enter a name for the environment. The name must be unique.
- Optional: Provide a description of the essence of the environment
- Set the environment image:
- Select Custom image and enter the Image URL. If a token or secret is required to pull the image, it is possible to create it via user credentials of type docker registry. These credentials are automatically used once the image is pulled (which happens when the workload is submitted)
- Select from the NGC catalog and choose the image name and tag from the dropdown.
- Select from the NGC private registry and then set how to access the registry:
- Select a registry from the dropdown.
- Under Source, select Shared secret.
- The Type field is fixed to NGC API key.
- Under Credential name, select an existing credential from the dropdown.
- Set the image pull policy - the condition for when to pull the image from the registry
- Set the workload architecture:
- Standard
Only standard workloads can use the environment. A standard workload consists of a single process. - Distributed
Only distributed workloads can use the environment. A distributed workload consists of multiple processes working together. These processes can run on different nodes.- Select a framework from the list.
- Standard
- Set the workload type:
- Workspace
- Training
- Inference
- When inference is selected, define the endpoint of the model by providing both the protocol and the container’s serving port
- Optional: Set the connection for your tool(s). The tools must be configured in the image. When submitting a workload using the environment, it is possible to connect to these tools
- Select the tool from the list (the available tools varies from IDE, experiment tracking, and more, including a custom tool for your choice)
- Select the connection type
- External URL
- Auto generate
A unique URL is automatically created for each workload using the environment - Custom URL
The URL is set manually
- Auto generate
- Node port
- Auto generate
A unique port is automatically exposed for each workload using the environment - Custom URL
Set the port manually
- Auto generate
- Set the container port
- External URL
- Optional: Set a command and arguments for the container running the pod
- When no command is added, the default command of the image is used (the image entrypoint)
- The command can be modified while submitting a workload using the environment
- The argument(s) can be modified while submitting a workload using the environment
- Optional: Set the environment variable(s)
- Click +ENVIRONMENT VARIABLE
- Enter a name
- Select the source for the environment variable
- Custom
- Enter a value
- Leave empty
- Add instructions for the expected value if any
- Credentials - Select an existing credential as the environment variable
- Select a credential name
To add new credentials to the credentials list, and for additional information, see Credentials. - Select a secret key
- Select a credential name
- ConfigMap - Select a predefined ConfigMap
- Select a ConfigMap name
To create a ConfigMap in your cluster, see Creating ConfigMaps in advance. - Enter a ConfigMap key
- Select a ConfigMap name
- Custom
- The environment variables can be modified and new variables can be added while submitting a workload using the environment
- Optional: Set the container’s working directory to define where the container’s process starts running. When left empty, the default directory is used.
- Optional: Set where the UID, GID and supplementary groups are taken from, this can be:
- From the image
- From the IdP token (only available in an SSO installations)
- Custom (manually set) - decide whether the submitter can modify these value upon submission.
- Set the User ID (UID), Group ID (GID) and the supplementary groups that can run commands in the container
- Enter UID
- Enter GID
- Add Supplementary groups (multiple groups can be added, separated by commas)
- Disable Allow the values above to be modified within the workload if you want the above values to be used as the default
- Set the User ID (UID), Group ID (GID) and the supplementary groups that can run commands in the container
- Optional: Select Linux capabilities - Grant certain privileges to a container without granting all the privileges of the root user.
- Click CREATE ENVIRONMENT
Editing an Environment
To edit an existing environment:
- Select the environment you want to edit
- Click Edit
- Update the environment and click SAVE ENVIRONMENT
Note
- The already bound workload that is using this asset will not be affected.
- llm-server and chatbot-ui environments cannot be edited.
Copying an Environment
To copy an existing environment:
- Select the environment you want to copy
- Click MAKE A COPY
- Enter a name for the environment. The name must be unique.
- Update the environment and click CREATE ENVIRONMENT
Deleting an Environment
To delete an environment:
- Select the environment you want to delete
- Click DELETE
- On the dialog, click DELETE to confirm
Note
The already bound workload that is using this asset will not be affected.
Using CLI
To view the available actions on environments, see the environment CLI v2 reference.
Using API
Go to the Environment API reference to view the available actions