Creating Your First vGPU Virtual Desktop
This section describes how to:
Creating a Virtual Machine in vSphere
Installing Microsoft Windows
Installing VMware Tools
Customize Windows settings
Install Horizon Agent and Horizon Direct Connection on the VM
Adjust additional VM settings and enable VM console access
Enable the NVIDIA vGPU and finalize the installation
These instructions assist in creating a VM from scratch to support NVIDIA vGPUs. This VM may be used as a gold master image to create additional VMs. Use the following procedure to configure a vGPU VM for a single guest desktop:
Open the vSphere Web Client:
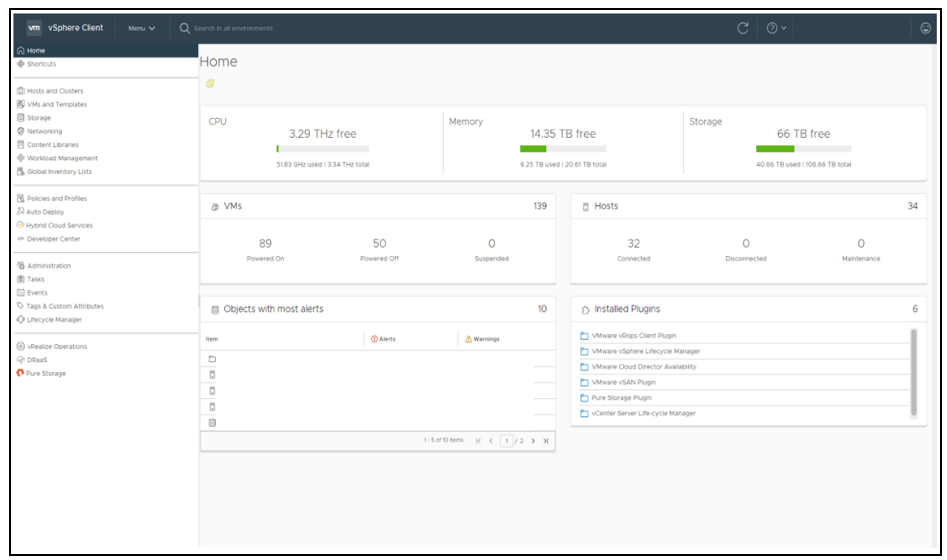
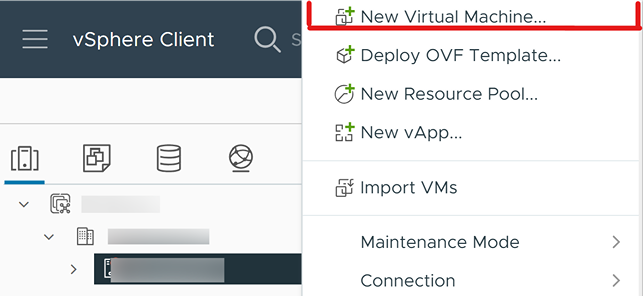
From the vSphere Web Client’s Home page, select Hosts and Clusters. Right-click the host or cluster location the VM will be created. Select New Virtual Machine.
From the Select a creation type tab, select Create a new virtual machine and click Next.

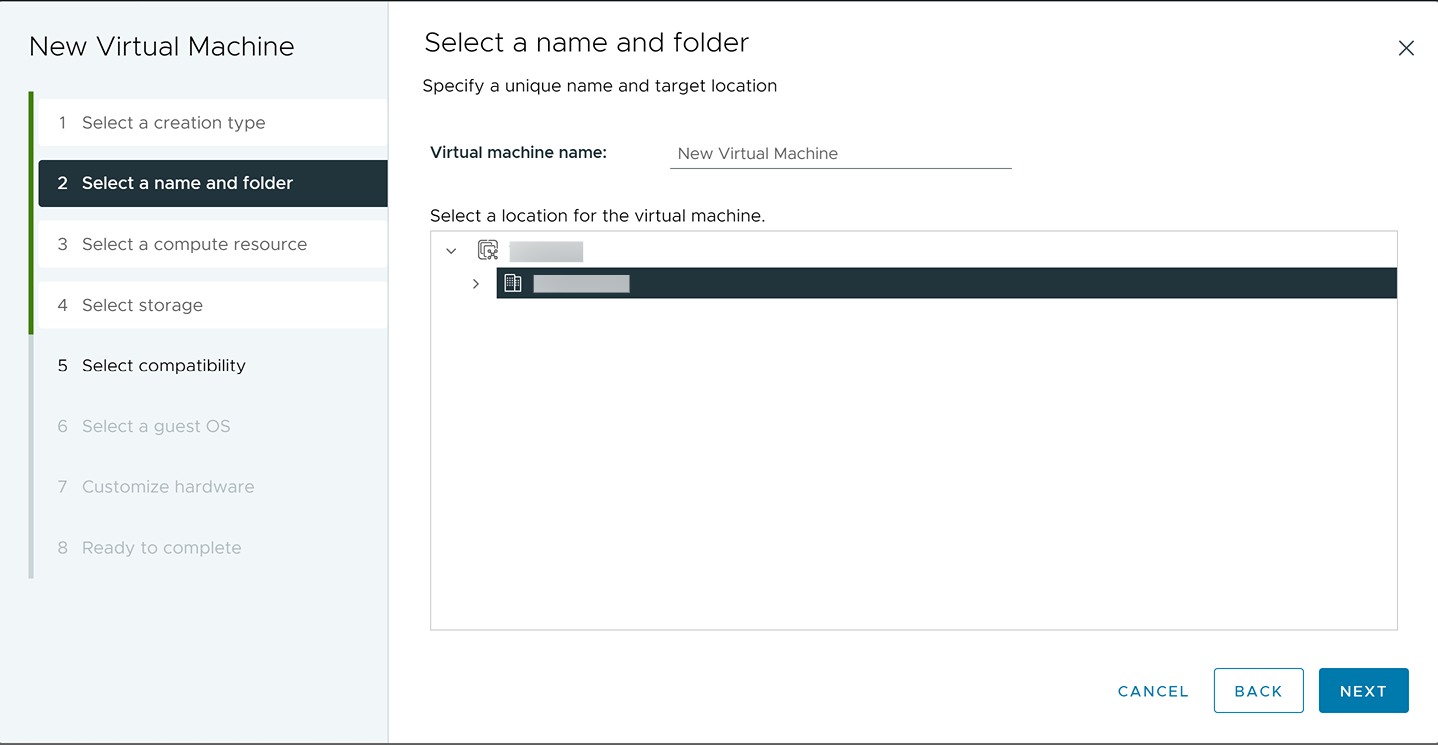
Enter a name for the virtual machine. Choose the location to host the virtual machine using the collapsible tree under the label. Select a location for the virtual machine, then click Next to continue.
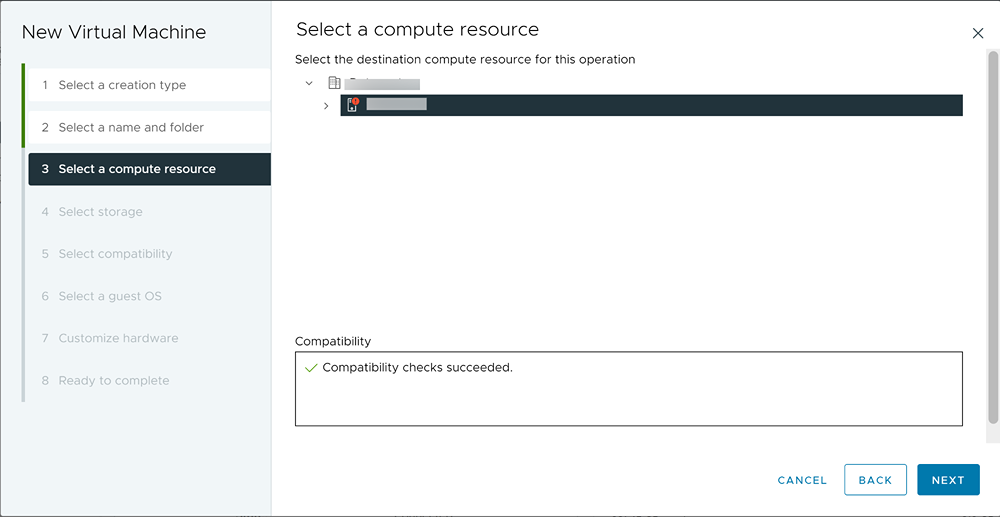
Select a compute resource to run the VM.
The compute resource you select must include an installed, correctly configured NVIDIA adapter that supports vGPU operations. Click Next to continue. vSphere prompts you to select a storage resource:
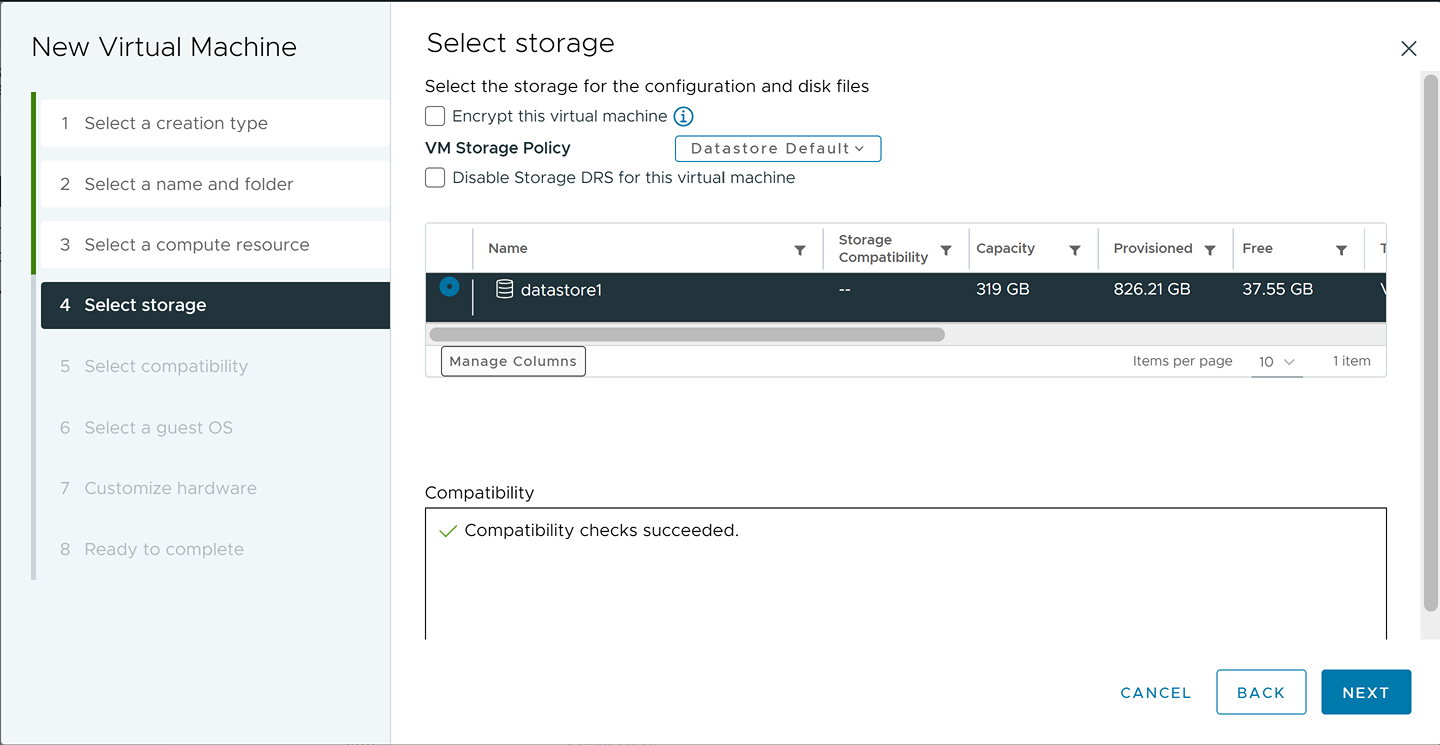
Select the datastore to host the virtual machine, then click Next to continue. vSphere prompts you to select compatibility for the vGPU:
Select the compatibility for this virtual machine, then click Next to continue:

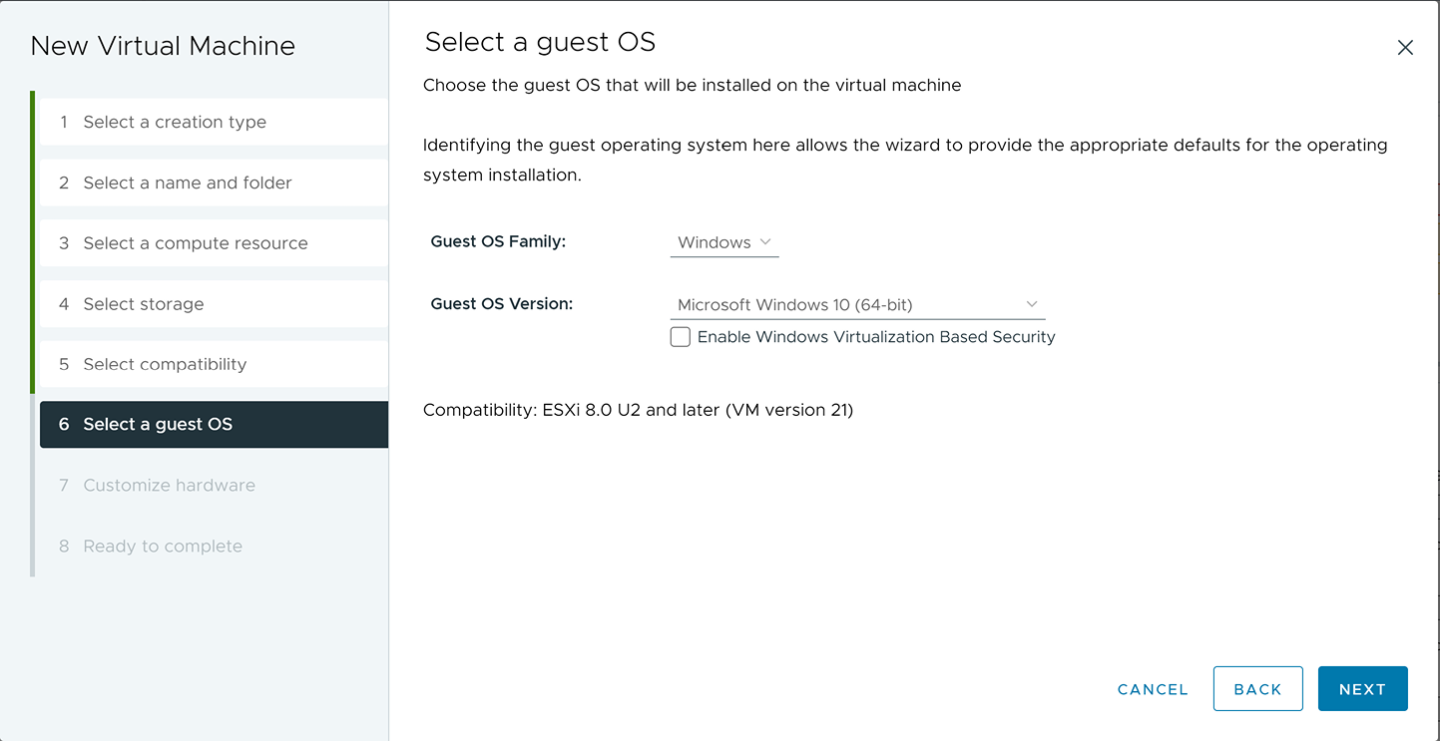
Select the appropriate Windows OS from the Guest OS Family and Guest OS Version dropdowns, then click Next to continue. vSphere prompts you to customize the vGPU’s virtual hardware:
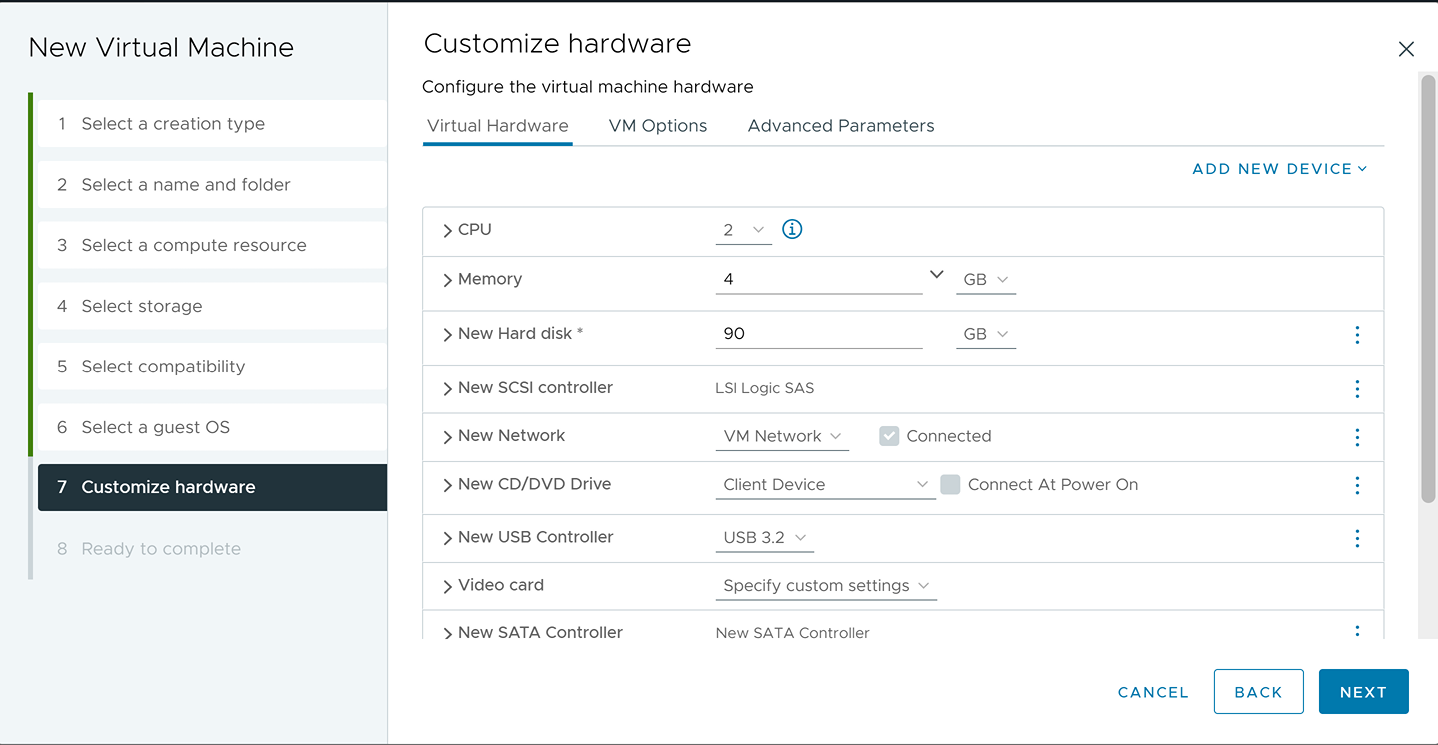
Set the virtual hardware based on your desktop workload requirements, then click Next to continue. vSphere displays a summary of the settings you have selected
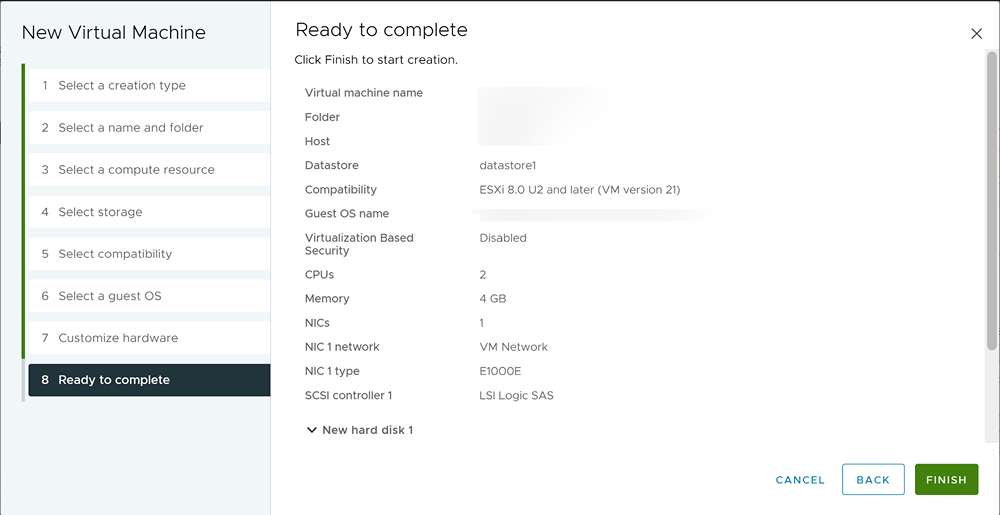
Review the new virtual machine’s configuration. If any of the settings are wrong, click Back and correct them. When all of the settings are right, click Finish.
Windows 11 is used to capture content for this section in the guide. Text, images, and screen layout may differ from version to version. Refer here for the Windows 11 requirements.
To install Microsoft Windows on the virtual machine, follow the steps below.
Select the virtual machine, right-click it, and select Edit Settings.
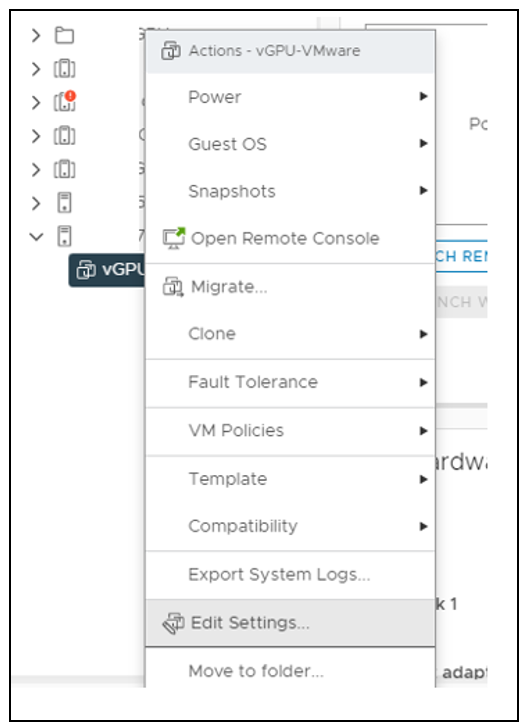
vSphere displays the Edit Settings window.
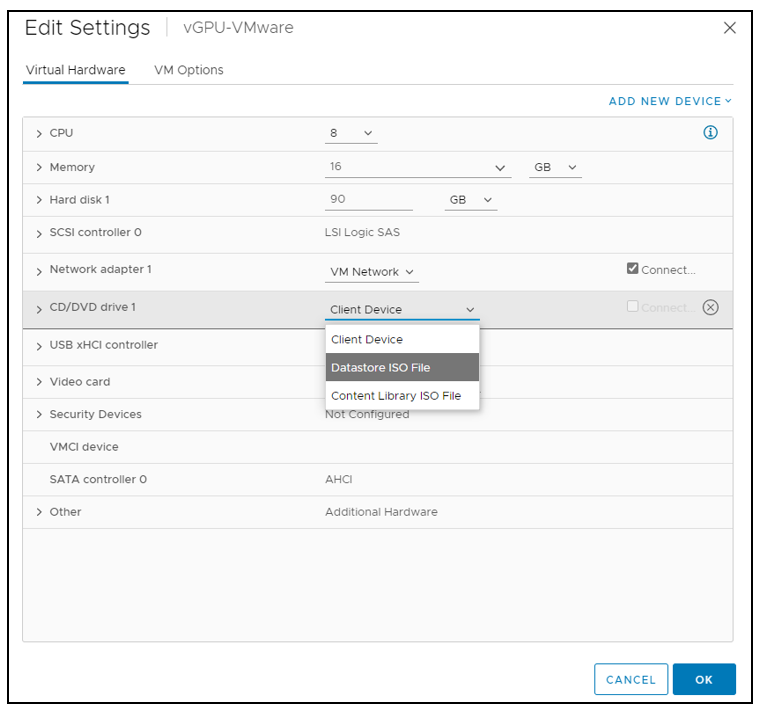
Click the dropdown list opposite the label “CD/DVD drive 1” and select an appropriate data source for CD/DVD media. (This example uses a Datastore ISO file.) Check the Connect checkbox to the right of the CD/DVD drive 1 dropdown to connect the ISO file to the VM’s virtual CD/DVD drive.
Click the caret next to CD/DVD drive 1. vSphere expands the tree entry to reveal the details of the virtual device. Check the Connect At Power On checkbox to connect the ISO file to the VM’s virtual CD/DVD drive at boot time, then click the Browse button to the right of “CD/DVD Media.”
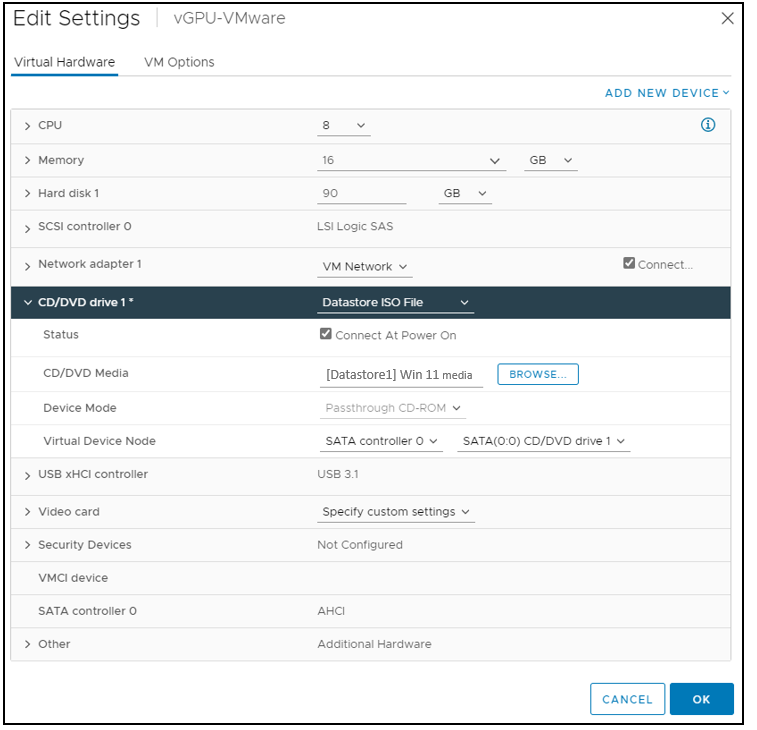
Check the Connect At Power On checkbox to connect the ISO file to the VM’s virtual CD/DVD drive at boot time, then click the Browse button to the right of “CD/DVD Media.” vSphere opens a Select File window.
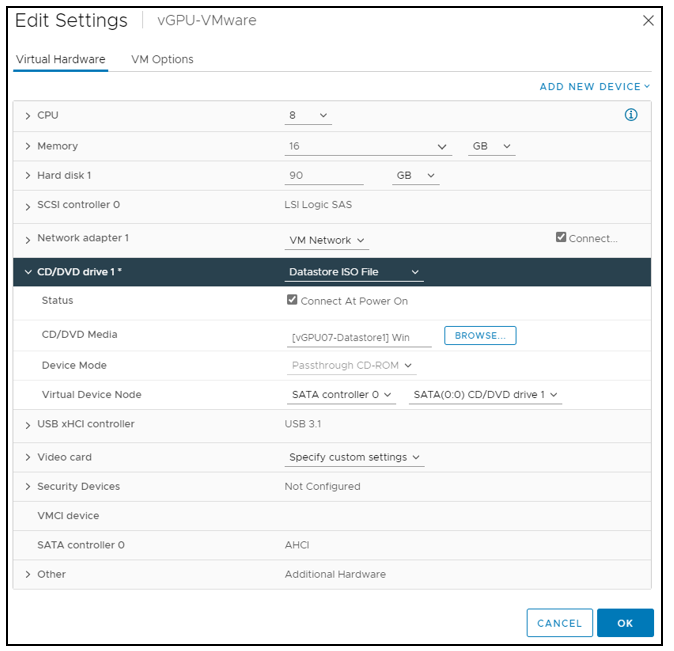
Navigate to and select the OS ISO file for installation. Click OK to select the file.

Right-click the virtual machine, select Power>Power On to start the virtual machine, boot the ISO file, and install the operating system.
The virtual machine boots from the selected ISO file.
NoteSuppose you create a new virtual machine and use vSphere Web Client’s VM console functionality. In that case, the mouse may not be usable in the virtual machine until after both the operating system and the VMware tools have been installed.
Perform a Custom (fresh) installation of Microsoft Windows 11 on the virtual machine.
NoteDuring installation, Windows reboots the VM several times.
When Windows is installed, disconnect the ISO from the VM.
Go through the initial Windows setup wizard to name the computer, create a local account, set the time zone, choose the update installation policy, etc.
Windows 11 is now installed on the virtual machine.
After installing the Microsoft Windows OS on the virtual machine, you must install VMware Tools. VMware Tools is a suite of utilities that enhances the performance of virtual machines and their guest operating systems and improves the management of virtual machines. VMware tools provide many benefits for the VM and the Guest OS; Benefits include improved network adapter, Smoother mouse experience, copying and pasting, drag and drop files, Sound quality, and the ability to take quiesced snapshots of the Guest OS. Refer to the VMware Tools Services page for more information.
The VMware Tools Administration document describes the necessary steps for Manually Installing VMware Tools on Windows.
After going through the manual installation process in the provided link, VMware Tools is installed on the virtual machine.
If you join a VM to a Windows Active Directory domain, you can manage it as you would any physical desktop in the domain.
Customize Windows on the virtual machine as follows:
-
Join the domain
-
Add appropriate Domain groups to Local Administrators
Adding a VM to the domain:
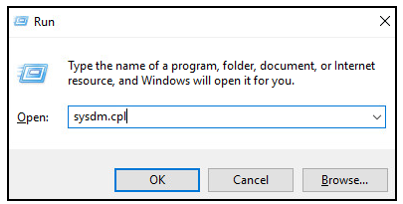
In the Windows Desktop. Open the Run dialog box by pressing the Windows-Logo Key + R. Type “sysdm.cpl” and press enter in the command box. The System Properties window opens.
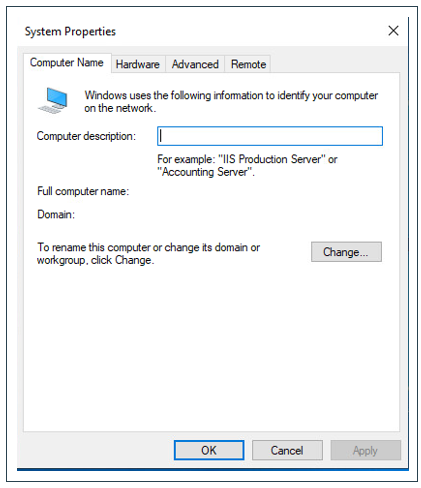
Enter a Computer description in the System Properties window (Optional). Select the change button.
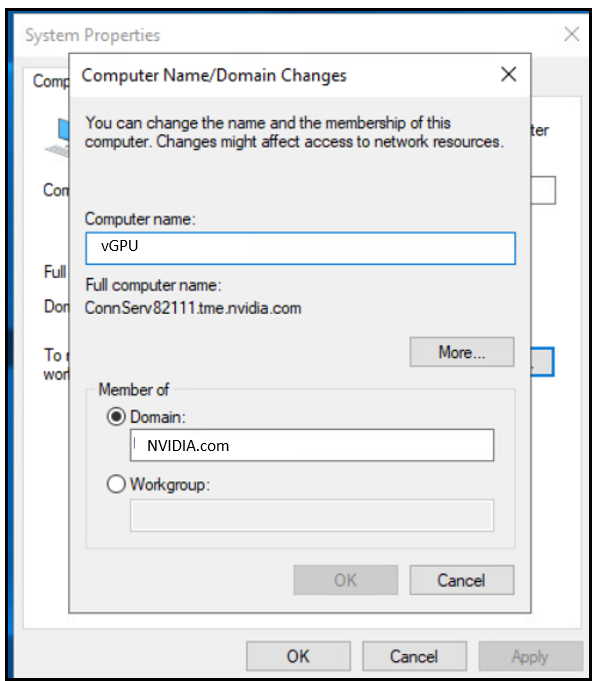
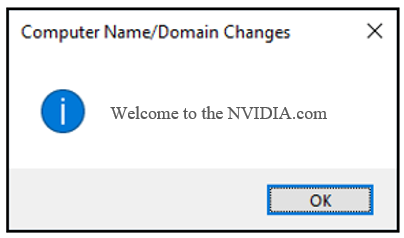
The Computer Name/Domain Changes window opens. Enter an appropriate name in the Computer name field. Select Domain and enter a proper name in the Domain name field.
NoteThe names in the illustration are examples and are not necessarily appropriate for your VM.
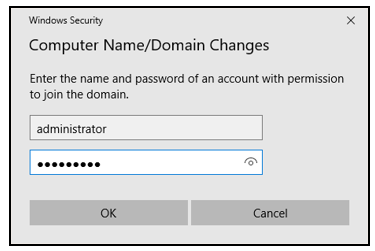
Enter your domain administrator credentials in the Windows Security window, click OK. If the credentials are valid, Windows sets the domain name as you have specified it and opens a “Welcome…” window.
Click OK to close the Domain Welcome window.
Windows displays a “You must restart your computer…” window.
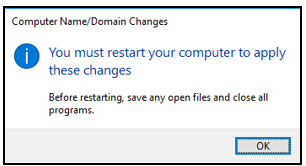
Click OK. The VM reboots when you close the System Properties window.
You must install the correct version of the Horizon Agent for your virtual machine.
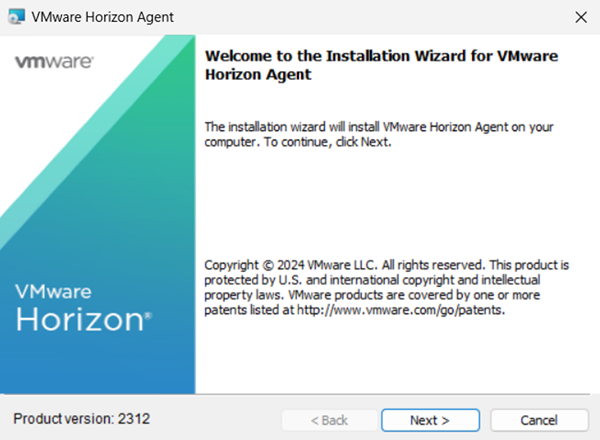
VMware Horizon 8 2312 is used to capture content for this guide. Text, images, and screen layout may differ from version to version.
To install Horizon Agent on your VM:
On the virtual machine where the software will be installed, download the VMware Horizon 8 2111 software and extract the installers.
-
For 64-bit virtual machines, install
VMware-Horizon-Agent-x86_64-2312-8.12.0-23142606.
-
Launch the installer. It displays the “VMware Horizon Agent” Welcome window. Select Next.
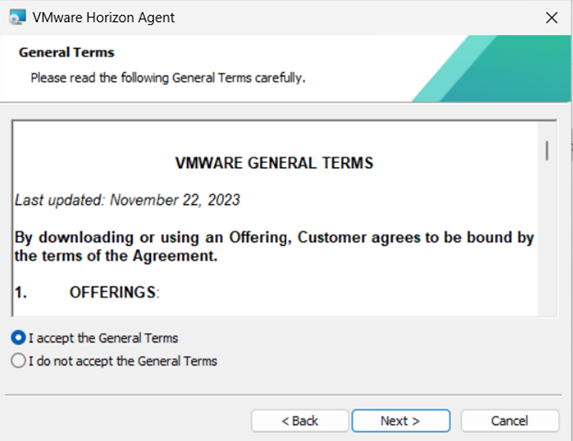
The installer displays the License Agreement screen. Select the “I accept the terms…” radio button. Then click Next.
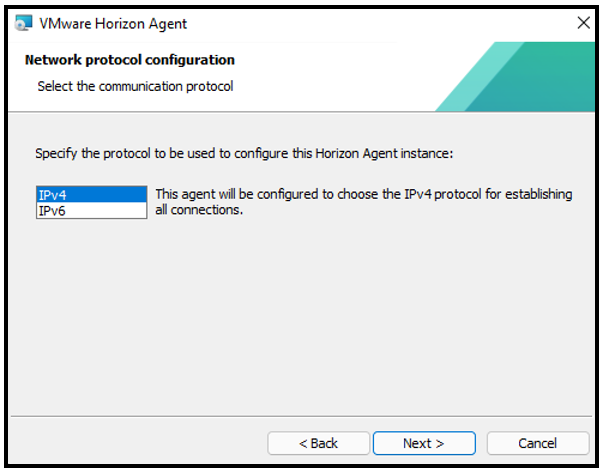
The installer displays the Network protocol configuration screen. Choose the appropriate network protocol (typically IPv4), then click Next to continue.
The installer displays the Custom Setup window. Accept all default options; click Next.
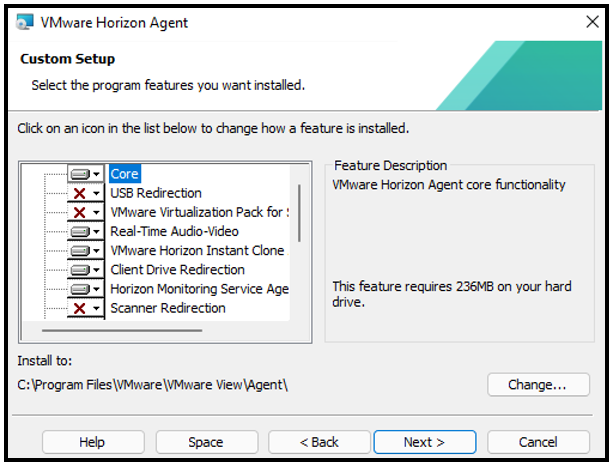 Note
NoteThe Horizon Agent Custom Setup Options article should be used to learn more about the default options and additional custom options.
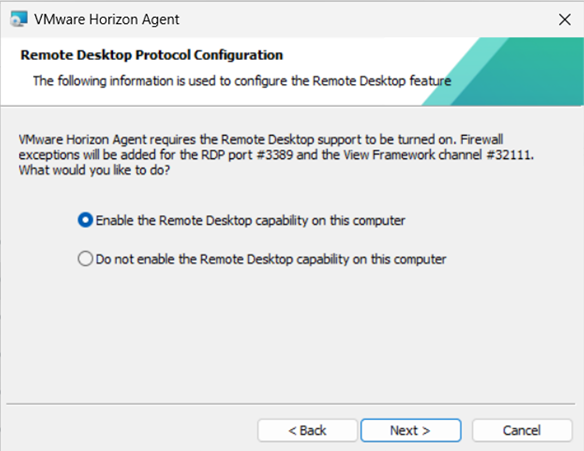
Enable Remote Desktop capability, then click Next.
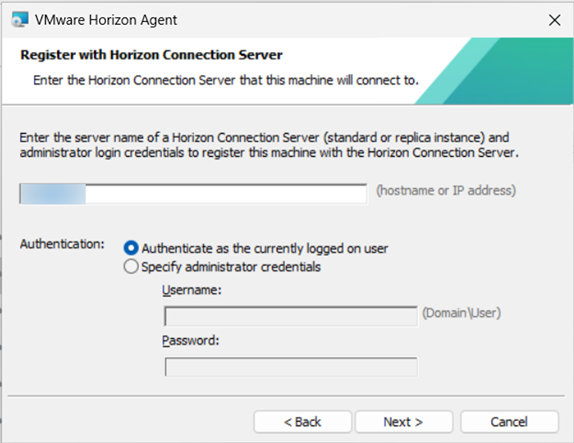
Enter the server name of your Horizon Connection Server and administrator login credentials to register your machine with the Horizon Connection Server, then click Next.
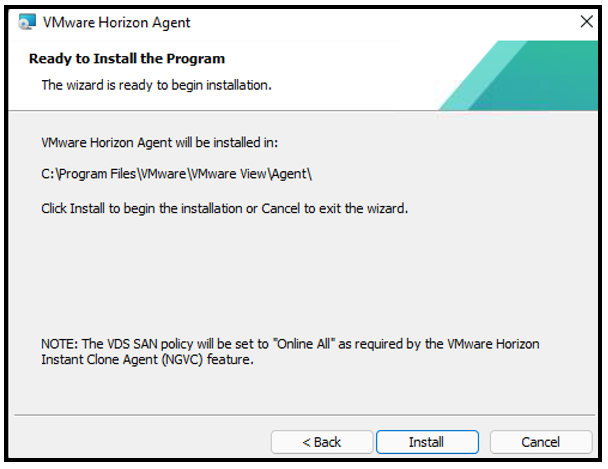
The installer displays the Ready to install the program window. Select Install to continue. The installer installs Horizon Agent on the VM.
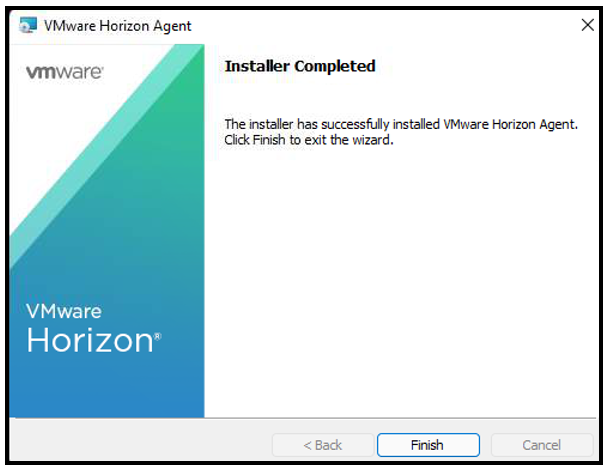
The Installer Completed window shows the installation completed successfully. Select Finish to close the installer. The installer prompts you to reboot.
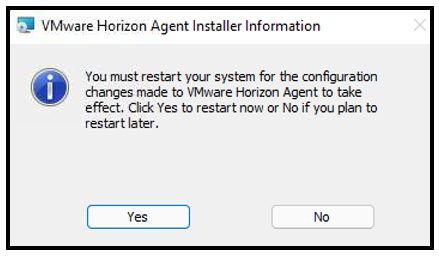
The installer prompts you to reboot. Select Yes to reboot the VM.
VMware Horizon Agent is installed on the Virtual machine.
The Horizon Direct Connection agent is a helpful tool for debugging when you configure the virtual machines with a vGPU. Install the correct version for your VM.
You must install the correct version of the Horizon Agent Direct-Connect for your virtual machine
VMware Horizon 8 2312 is used to capture content for this guide. Text, images, and screen layout may differ from version to version.
To install the Horizon Agent Direct-Connect on your VM follow the steps below.
On the virtual machine, download the VMware Horizon 8 2312 software and extract the installers.
-
For 64-bit virtual machines, install
VMware—Horizon-Agent-Direct-Connection-x86_64-8.12.0-23142606
-
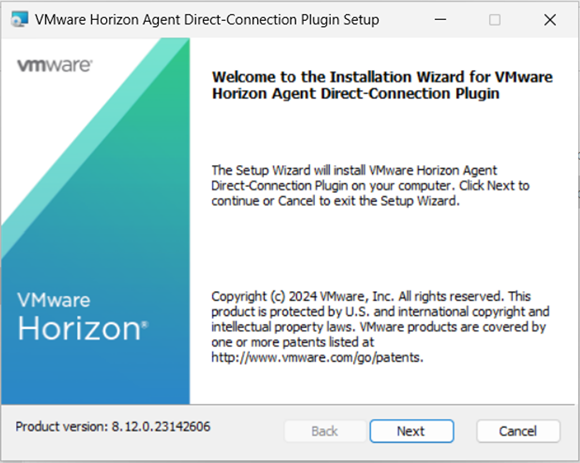
Launch the installer. It displays the VMware Horizon Agent Direct-Connect Plugin Setup window. Select Next.
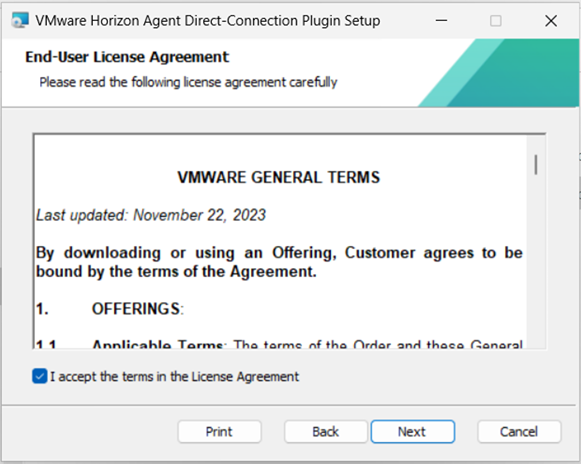
The installer displays the License Agreement screen. Select the “I accept the terms…” radio button. Then click Next.
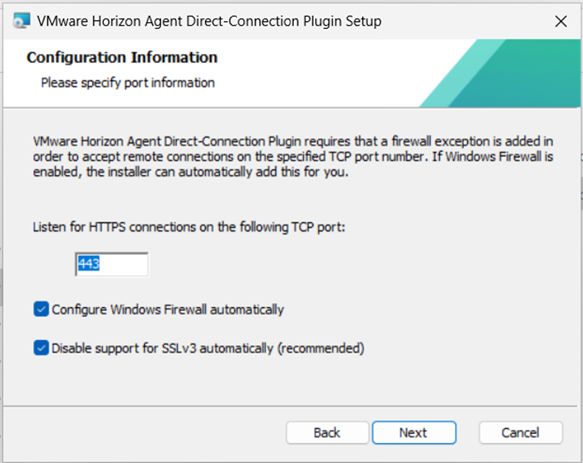
Enter an appropriate port number in the Listen for HTTPS connections field. The default HTTPS port number is 443; however, you can use a different port.
Check the Configure Windows Firewall automatically checkbox. Then click Next to continue.
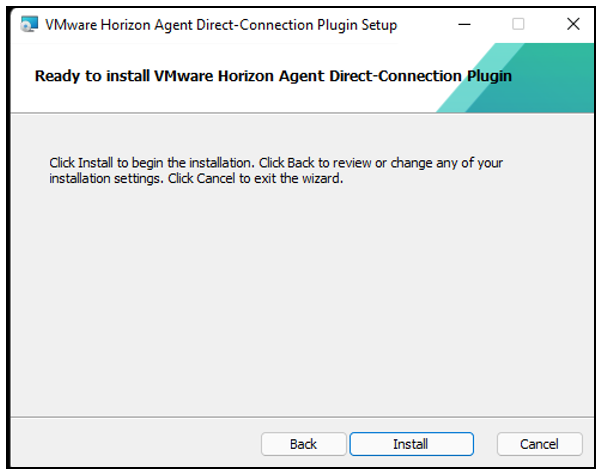
The installer displays the Ready to install VMware Horizon Agent Direct-Connection Plugin window. Select Install to continue. The installer installs Horizon Agent Direct-Connect on the VM.
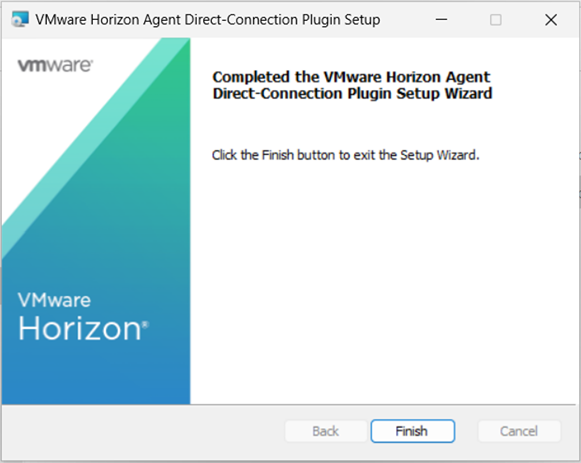
The Installer Completed window shows the installation completed successfully. Select Finish to complete the install.
When Windows has fully booted, test the Direct Connection using the installed VMware Horizon client by adding a server, entering the IP address of the VM, and logging in to the VM with the appropriate credentials when you are prompted to do so.
Horizon Direct Connection is installed on the virtual machine.
Windows OS Optimization Tool for VMware Horizon is VMWare’s official release of the Optimization Tool.The Windows OS Optimization Tool provides the easiest way to optimize windows desktops and server master images for VMware Horizon. The optimization tool includes customizable templates to enable or disable Windows system services and features across multiple systems, per VMware recommendations and best practices. Since most Windows system services are enabled by default, the optimization tool can easily disable unnecessary services and allow features to improve performance.
You can perform the following actions using the VMware OS Optimization Tool:
-
Local analysis and optimization
-
Remote analysis
-
Optimization history recording and rollback
-
Template management
Review the VMware Horizon Optimization Guide for Windows for OS-specific tweaks.
With the release of Windows OS Optimization Tool for Horizon version 1.0 (2111), a single template is built that includes support for all versions of Windows 10, Windows 11, Windows Server 2019, and Windows Server 2022.
VMware recommends using this tool in a development lab before running in a production environment.It would be best to understand the recommended settings before applying any changes, as this could have adverse effects and can cause damage to your deployment.
Perform the following additional tasks on the virtual machine as required in preparation for configuring its vGPU:
These instructions assume that the VM is for proof-of-concept only and that disabling the firewall poses only a minimal security breach. Always follow your established security procedures and best practices when setting up security for a production machine or for any environment that can be accessed from outside your network.
The following steps will enable vGPU support for Windows OS virtual machines and Linux OS virtual machines. The virtual machine settings must be edited.
Power down the VM.
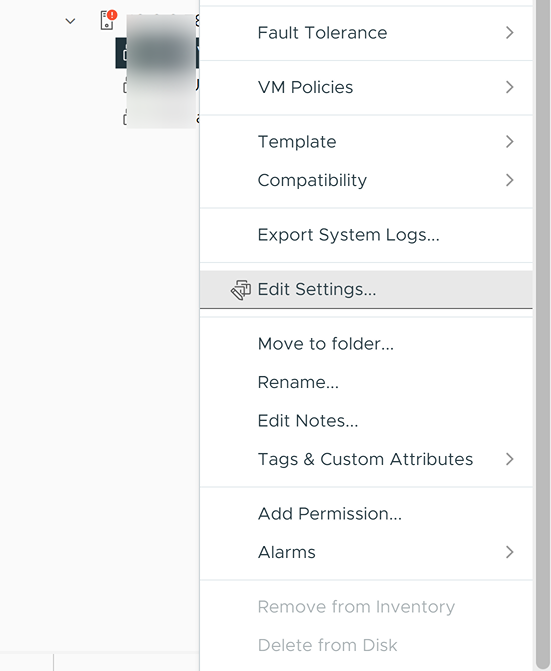
Click on your VM in the inventory window: Right-click your VM and select Edit Settings.
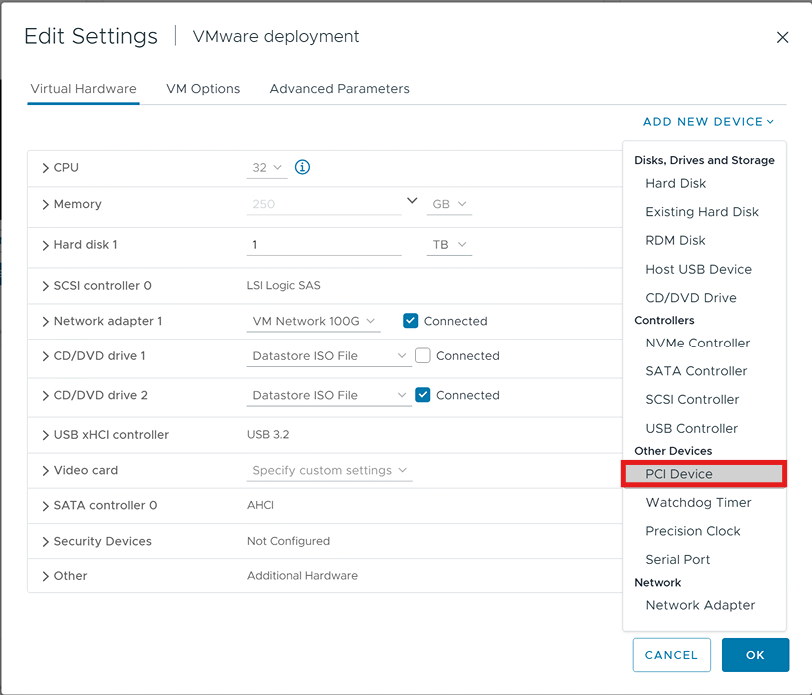
Select Add New Device, then Select PCI device from the dropdown menu.
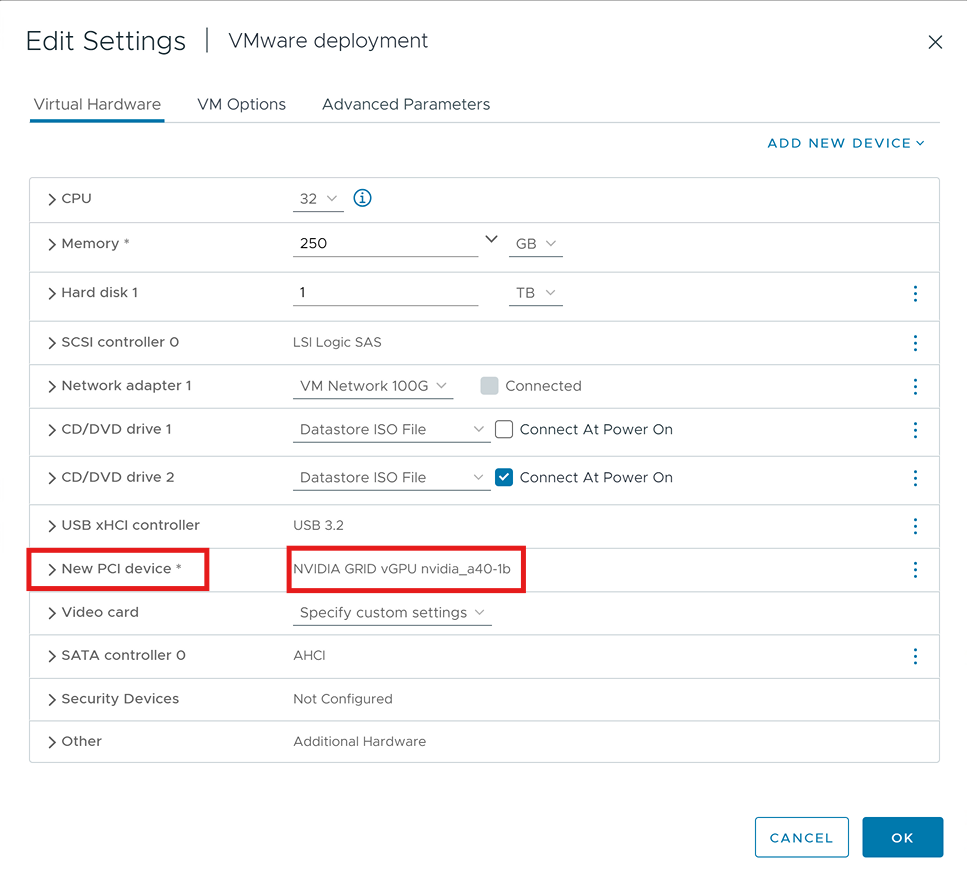
The new PCI device shows that an NVIDIA vGPU device has been added.
Expand the New PCI device, expand the NVIDIA GRID VGPU Profile dropdown and select your vGPU Profile.
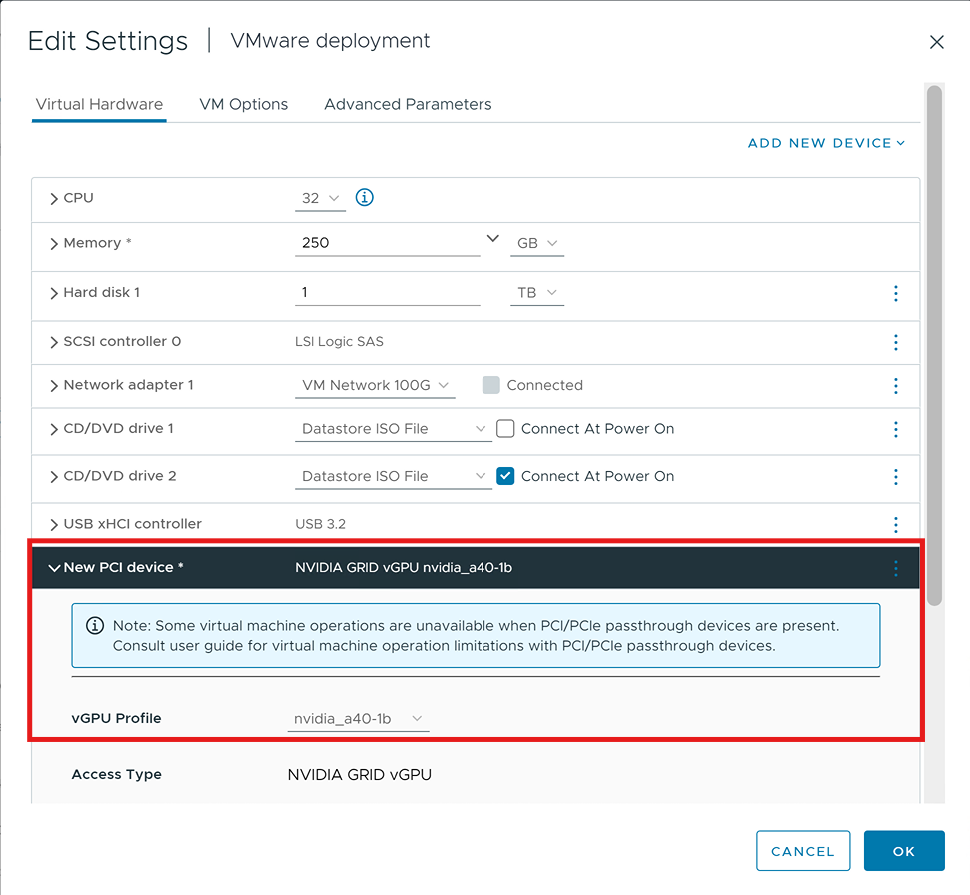
Click OK to complete the configuration.
After you create a Microsoft Windows virtual machine on the hypervisor and boot the VM, you must install the NVIDIA vGPU software display driver to enable GPU operation fully.
To install the NVIDIA driver in Microsoft Windows:
Start the virtual machine, then connect to it using either VMware Remote Console through the vSphere Web Client or VMware Horizon Client (via Direct Connection).
The first time you boot the VM after enabling an NVIDIA vGPU, it displays a dialog warning requesting that you restart the computer to apply changes. Click Restart Later to continue booting the VM.
Do not reboot the VM if older NVIDIA drivers are installed. Doing so would produce a blue screen.
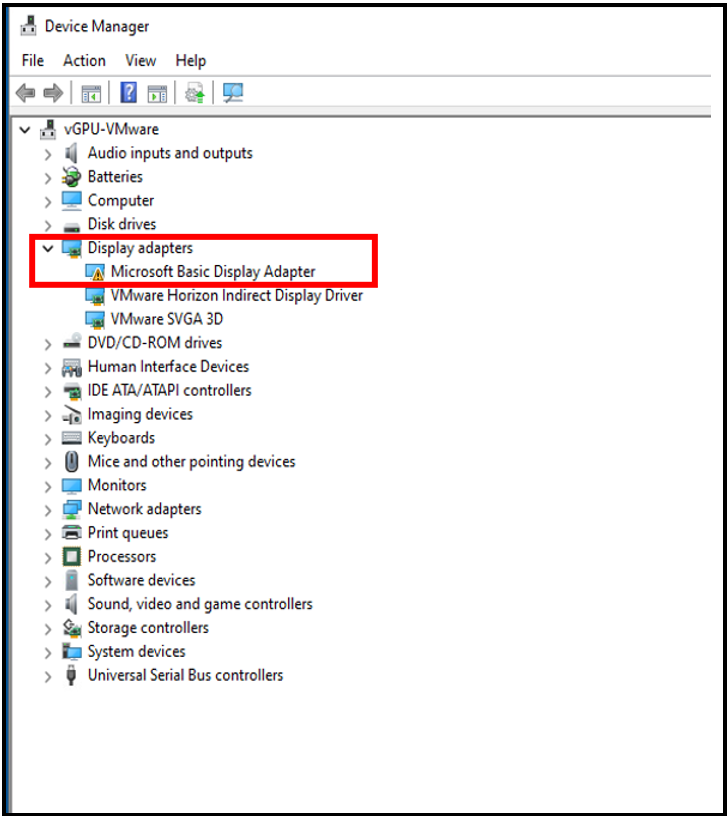
Log in to Windows and open Device Manager.
The window’s “Display adapters” section shows a “Microsoft Basic Display Adapter” with an exclamation point on its icon to indicate a driver problem. This is normal.
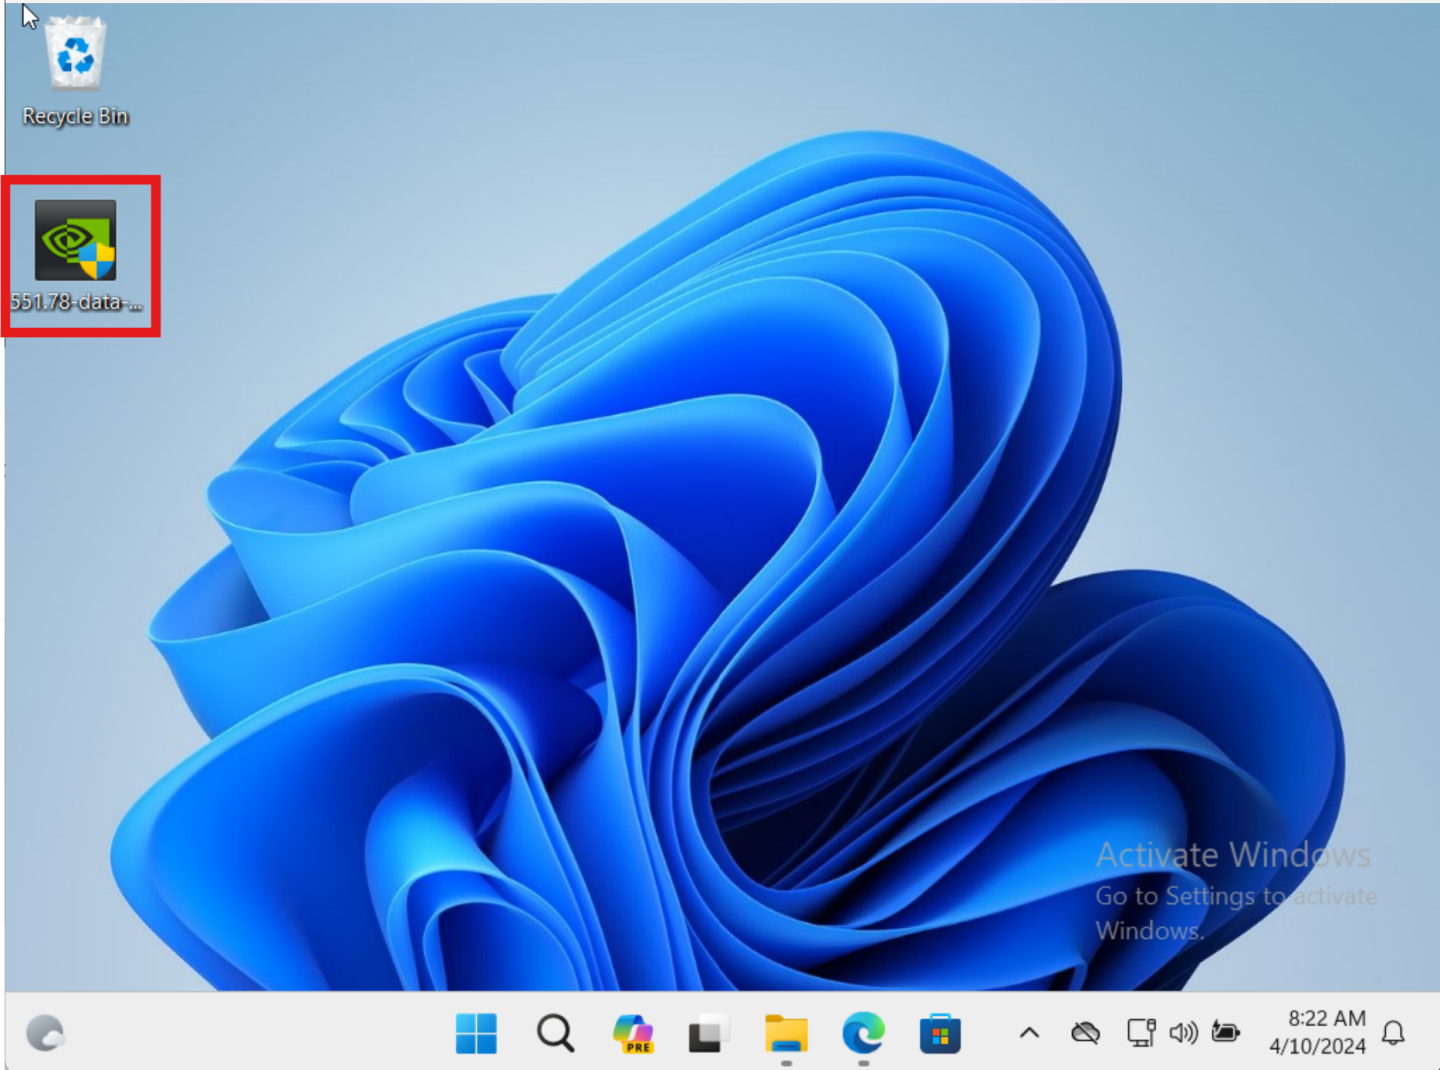
Locate the NVIDIA driver and double-click its Setup icon to launch it.
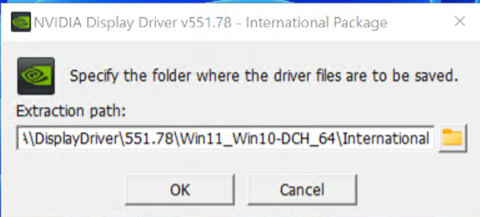
NVIDIA recommends that the installer share volume that the VM can mount for quick access.
Click OK to accept the default driver directory.
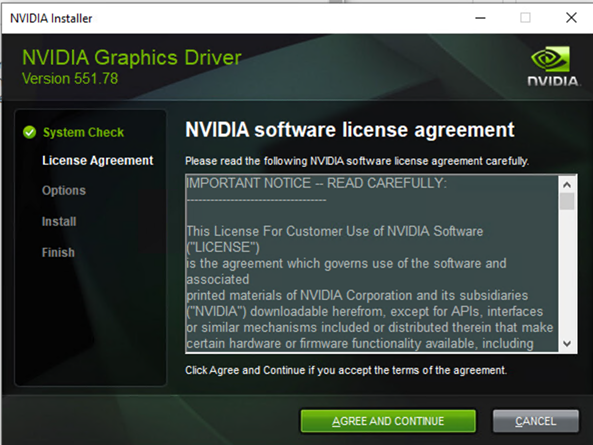
Read through the NVIDIA software license agreement. Click OK to Agree and Continue.
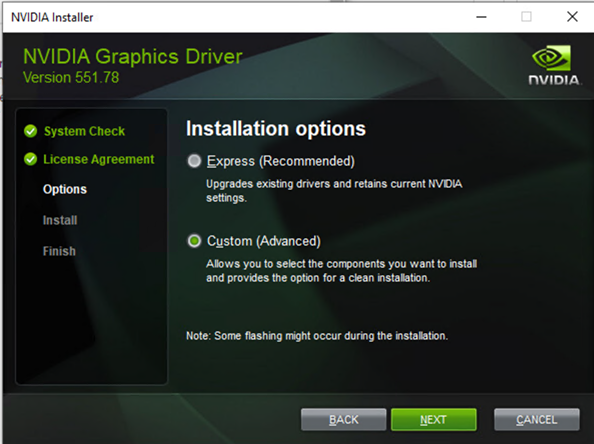
Click the Custom (Advanced) radio button, then click Next. The installer displays the Custom installation options screen:
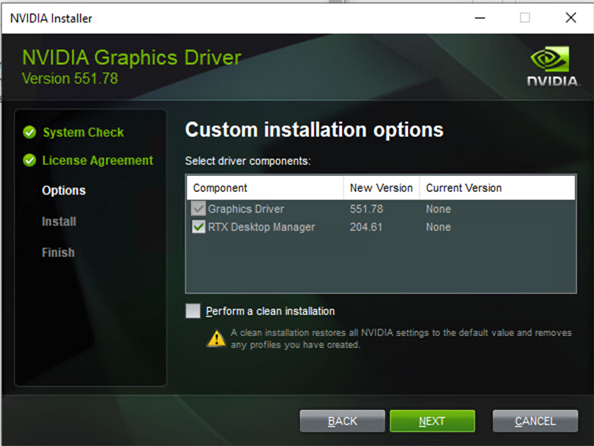
Check the Perform a clean installation checkbox, then click Next. The installer begins installing the driver.
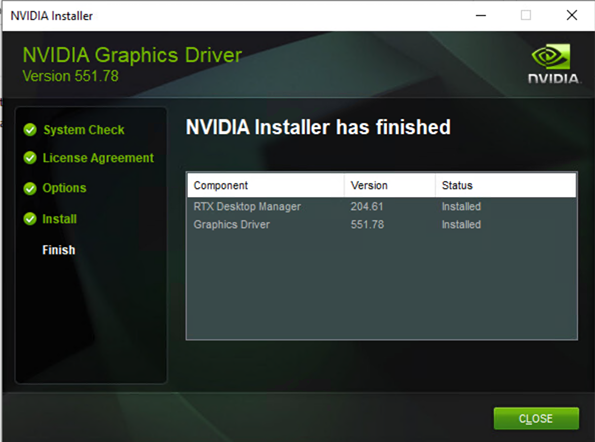
Click Restart Now to restart the VM and complete the install.
After restarting the VM, the mouse cursor may not track properly using VNC or the VMware Remote Console (VMRC). In that case, use the View Agent Direct-Connect (VADC) to connect directly to the VM.
Create a Linux VM configured with a virtual GPU. This section will install the vGPU driver and license the vGPU software for full functionality within the VM.
In this guide, the Ubuntu 22.04 LTS operating system is used. It is important to note there are two Ubuntu ISO types: Desktop and Live Server. The Desktop version includes a graphical user interface (GUI), while the Live Server version only operates via a command line. This document uses the Live Server version 22.04 (amd64 architecture) of Ubuntu. If needed, a GUI can be installed later.
Installing the vGPU Driver in the Ubuntu VM
After you have created the Linux VM on the hypervisor and have booted the VM, install the NVIDIA vGPU software graphics driver in the VM to enable GPU operations fully.
64-bit Linux guest VMs are supported only on Q-series, C-series, and B-series NVIDIA vGPU types. They are not supported on A-series NVIDIA vGPU types.
The procedure for installing the driver is the same in a VM and bare metal.
Prerequisites
Installing the NVIDIA vGPU software display driver for Linux requires:
-
Compiler toolchain
-
Kernel headers
To install the NVIDIA vGPU driver for Linux
Use WinScp to copy the NVIDIA vGPU software Linux driver package to the Ubuntu vGPU VM.
The NVIDIA vGPU driver for Linux uses this naming convention or a similar one:
NVIDIA-Linux_x86_64-550.54.15-grid.runLog in to the VM and check for updates.
$ sudo apt-get update
Install the GCC Complier and make the tool in the terminal.
$ sudo apt-get install build-essential
Navigate to the directory containing the NVIDIA Driver .run file. Then, add the Executable permission to the NVIDIA Driver file using the
chmodcommand.$ cd /vgpu-driver/ NVIDIA-Linux_x86_64-550.54.15-grid.run $ sudo chmod +x NVIDIA-Linux_x86_64-550.54.15-grid.run
Run the driver installer as the root user from a console shell and accept the defaults.
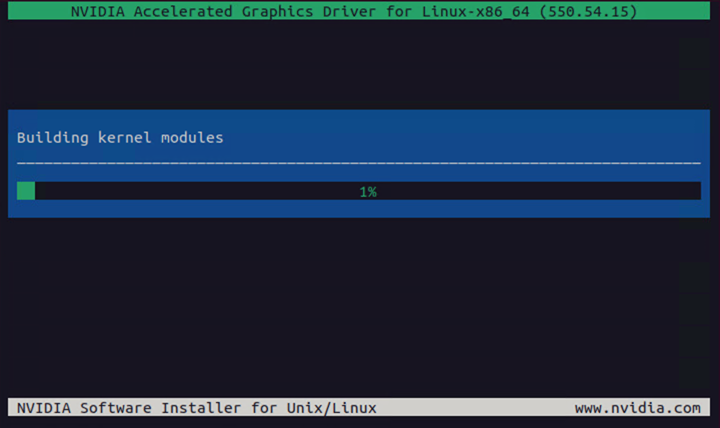
$ sudo sh ./NVIDIA-Linux_x86_64-550.54.15-grid.run
When the installer prompts you; accept the option to update the X configurationfile
Xorg.confNoteScreenshots are based on the X OS.
Select OK to close the installer when the install is finished.
Reboot the system and log in.
$ sudo reboot
Verify that the NVIDA vGPU driver is operational by running the
nvidia-smicommand$ nvidia-smi Wed Apr 10 12:34:21 2024 +---------------------------------------------------------------------------+ | NVIDIA-SMI 550.54.15 Driver Version: 550.54.15 CUDA Version: N/A | |-------------------------------+--------------------+----------------------+ | GPU Name Persistence-M| Bus-Id Disp.A | Volatile Uncorr. ECC | | Fan Temp Perf Pwr:Usage/Cap| Memory-Usage | GPU-Util Compute M. | | | | MIG M. | |===============================+====================+======================| | 0 NVIDIA A16-4Q On | 00000000:02:03.0 Off | 0 | | N/A N/A P8 N/A / N/A | 448MiB / 3932MiB | 0% Default | | N/A | +-----------------------------+----------------------+----------------------+ +---------------------------------------------------------------------------+ | Processes: GPU Memory| | GPU GI CI PID Type Process name Usage | |===========================================================================| | No running processes found | +---------------------------------------------------------------------------+
To use an NVIDIA vGPU software licensed product, each client system to which a physical or virtual GPU is assigned must obtain a license from the NVIDIA License System. A client system can be a VM configured with an NVIDIA vGPU, a VM configured for GPU pass through or a physical host to which a physical GPU is assigned in a bare-metal deployment.
Client Configuration Token
The client config token is a file that must be copied to the licensed client’s default location when generated. The client system requests a license from the service instance using the Client Configuration token. Information within the client configuration token identifies the service instance, license server, and fulfillment conditions used to serve a license in response to the licensed client request.
The final phase of the NVIDIA vGPU configuration uses the Horizon Client to directly connect to the VM with the View Direct-Connect Agent (VADC) and verify the VMs settings.
To finalize the installation:
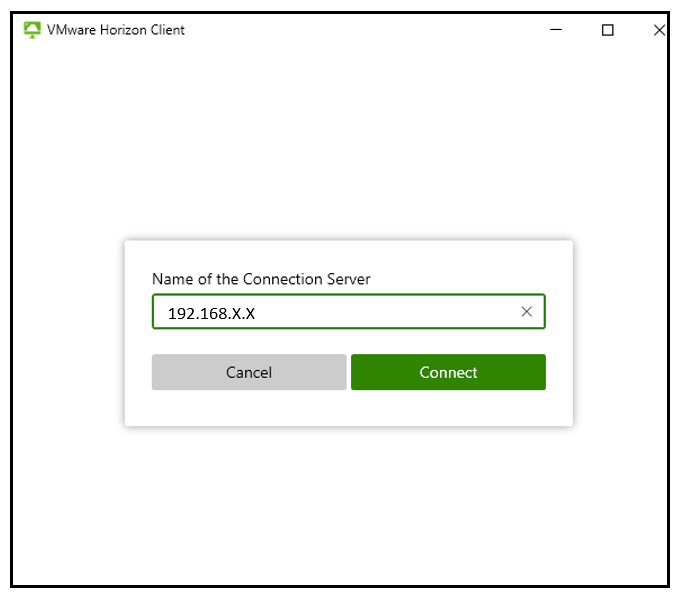
Start the VMware Horizon Client. Click Add Server to register a new virtual machine connection.

Enter the virtual machine’s IP address in the Connection Server field, click Continue. (You are connecting directly to a desktop, so do not enter the Horizon Connection Broker address at this time.)
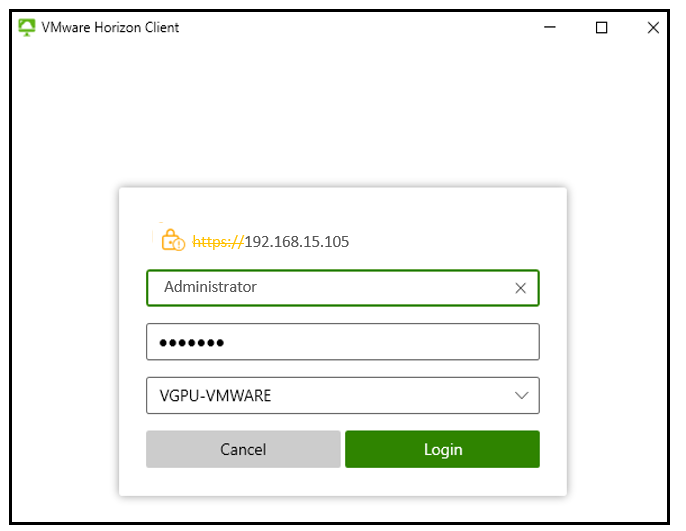
Enter the local username and password (or the domain user and password if the virtual machine is a domain member), then click Login.
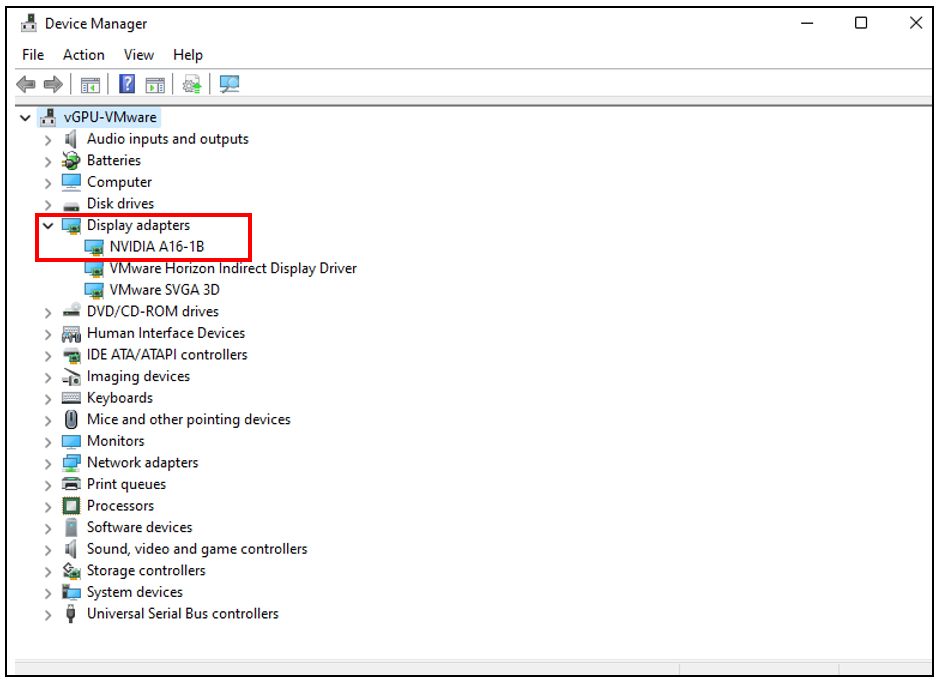
Open the Device Manager on the virtual machine and expand the Display Adapters. Confirm that the display adapter is now the NVIDIA vGPU.
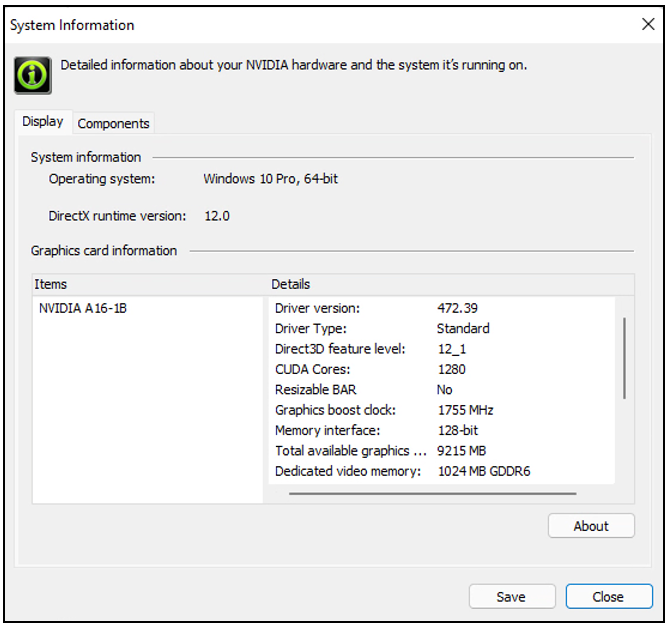
Right-click the desktop and select NVIDIA Control Panel. Click the System Information link in the bottom left corner of the window
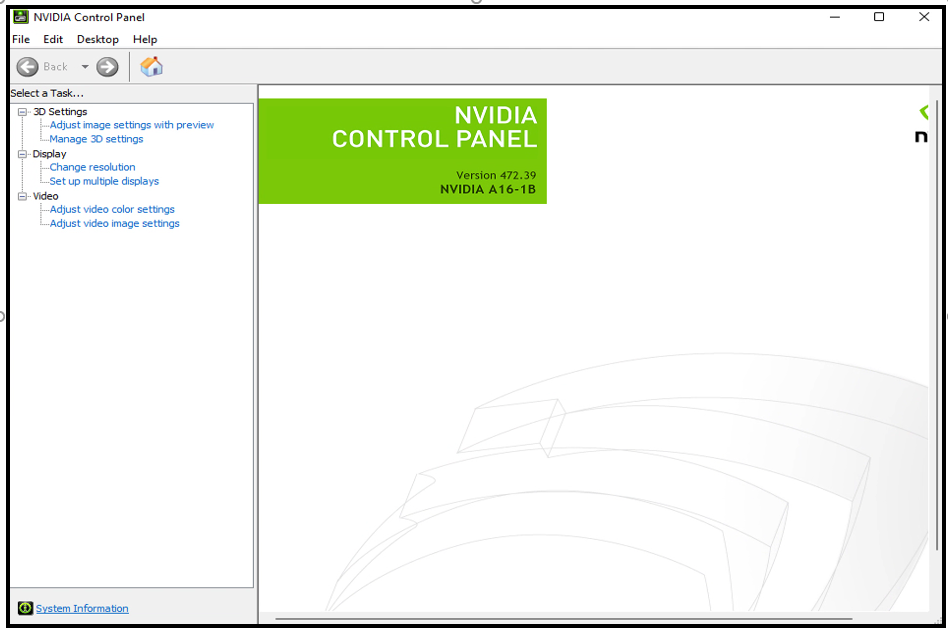
Confirm that the DirectX and graphics card driver versions are correct in the System Information window, then click Close.
If you plan to use this VM as a gold master image, release the DHCP address before logging out and shutting down. Open a command prompt and enter:
C...> ipconfig /release
At this point, you lose connectivity to the VM. Use the vSphere Web Client to shut down the guest OS.
The vGPU enabled virtual machine is ready to be the image for the desktop pools. The next step is to build and deploy a Horizon vGPU Desktop Pool.