VMware vSphere Installation and vGPU Configuration#
Note
This guide uses VMware vSphere 9. For earlier versions, please refer to the official Broadcom documentation.
Installing VMware ESXi and vCenter#
To install and set up ESXi, follow the instructions from the official Broadcom documentation.
To deploy and configure vCenter, follow the instructions from the official Broadcom documentation.
Configuring MIG for vGPU#
Starting with vGPU 19.0, MIG-backed vGPU is supported on VMware vSphere 9.0, allowing vGPUs to be created from individual MIG slices and assigned to virtual machines. This model combines MIG’s hardware-level spatial partitioning with the temporal partitioning capabilities of vGPU, offering flexibility in how GPU resources are shared across workloads.
More information on MIG-backed vGPU is available here.
To configure and manage MIG-backed vGPU, refer to the following:
NVIDIA vGPU Configuration#
NVIDIA vGPU Manager#
You need to install and configure the NVIDIA vGPU Manager. See Installing and Configuring the NVIDIA Virtual GPU Manager for detailed instructions.
Selecting the Correct vGPU Profiles#
Select the appropriate vGPU profile based on your user’s needs and application requirements. More information can be found in the vGPU Sizing and Selection guides.
Creating Your First vGPU VM#
Start by creating the VM, then configure the VM with vGPU.
Installing the NVIDIA Graphics Driver#
After the VM is created and assigned a vGPU, install the NVIDIA vGPU Software Graphics Driver inside the VM. Instructions are available here.
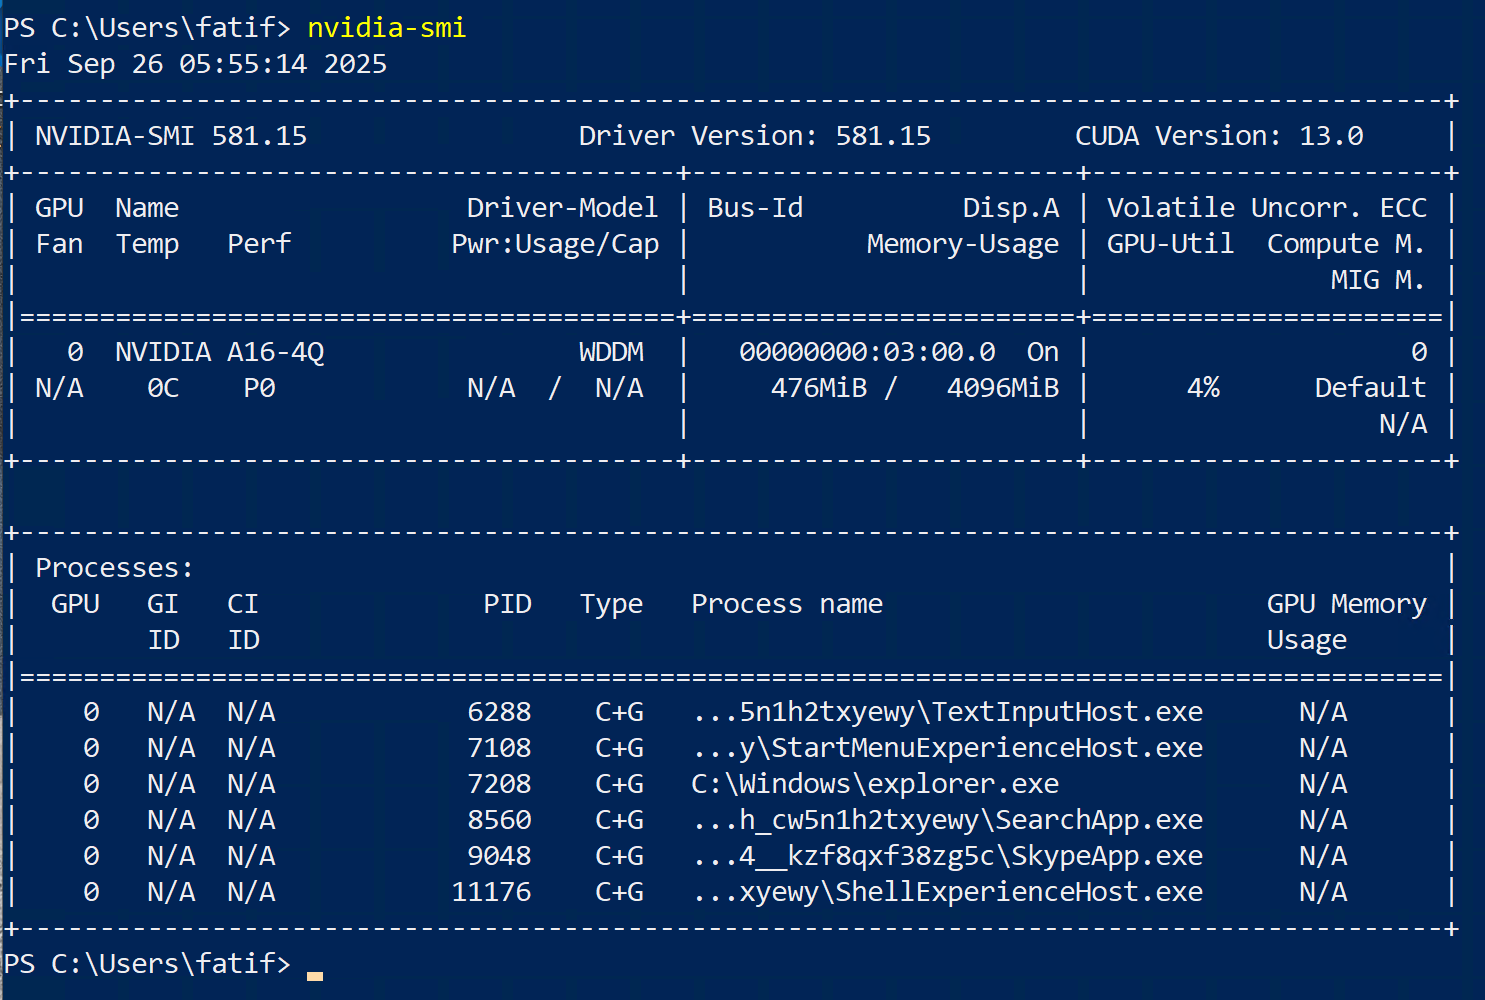
Once completed, you can verify that the vGPU has been successfully added by running nvidia-smi inside PowerShell or the command prompt window in the VM.
Configuring Licensing#
The NVIDIA License System serves licenses to NVIDIA software products. To activate licensed functionalities, a licensed client leases a software license served over the network from an NVIDIA License System service instance. The NVIDIA License System Documentation explains how to install, configure, and manage licenses for virtual GPU software.
To configure a license client of the NVIDIA license system, start by generating a client configuration token, then follow these instructions.
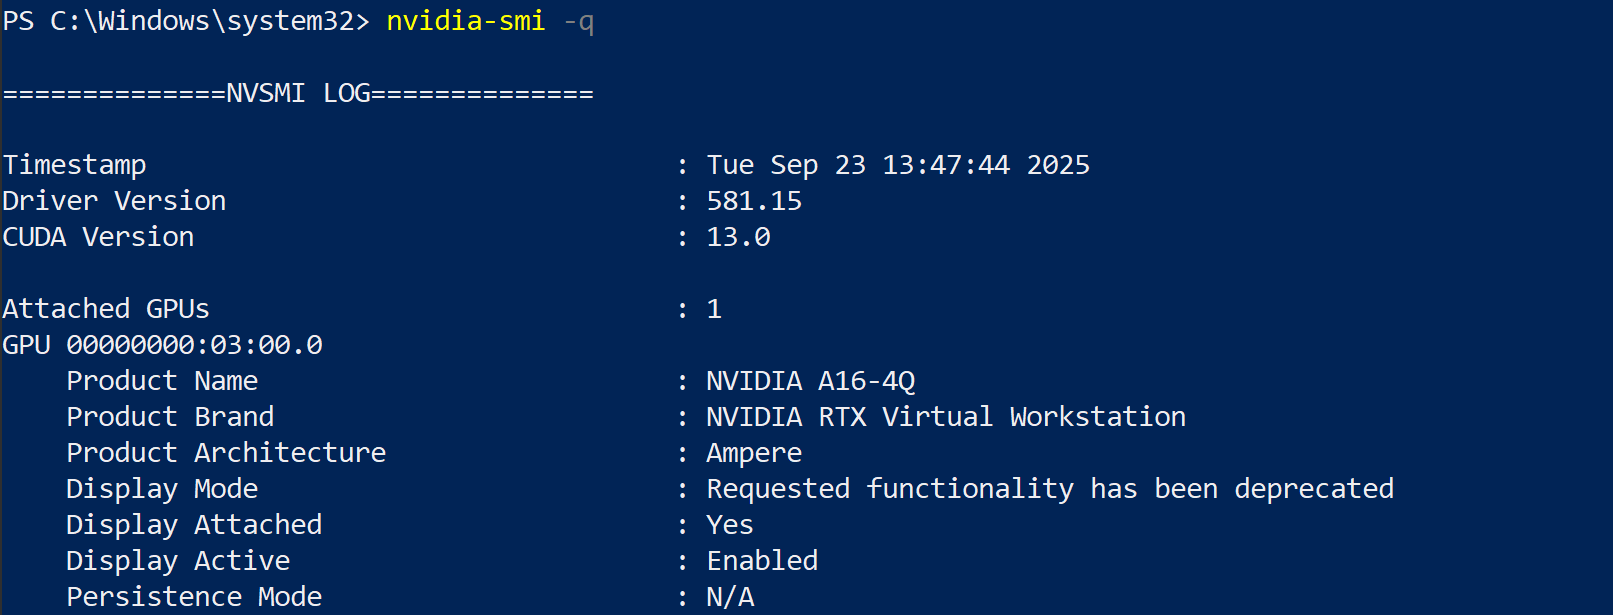
To verify the license status, run nvidia-smi -q from the command line. You should see Licensed under Licensed Status in the vGPU Software Licensed Product.
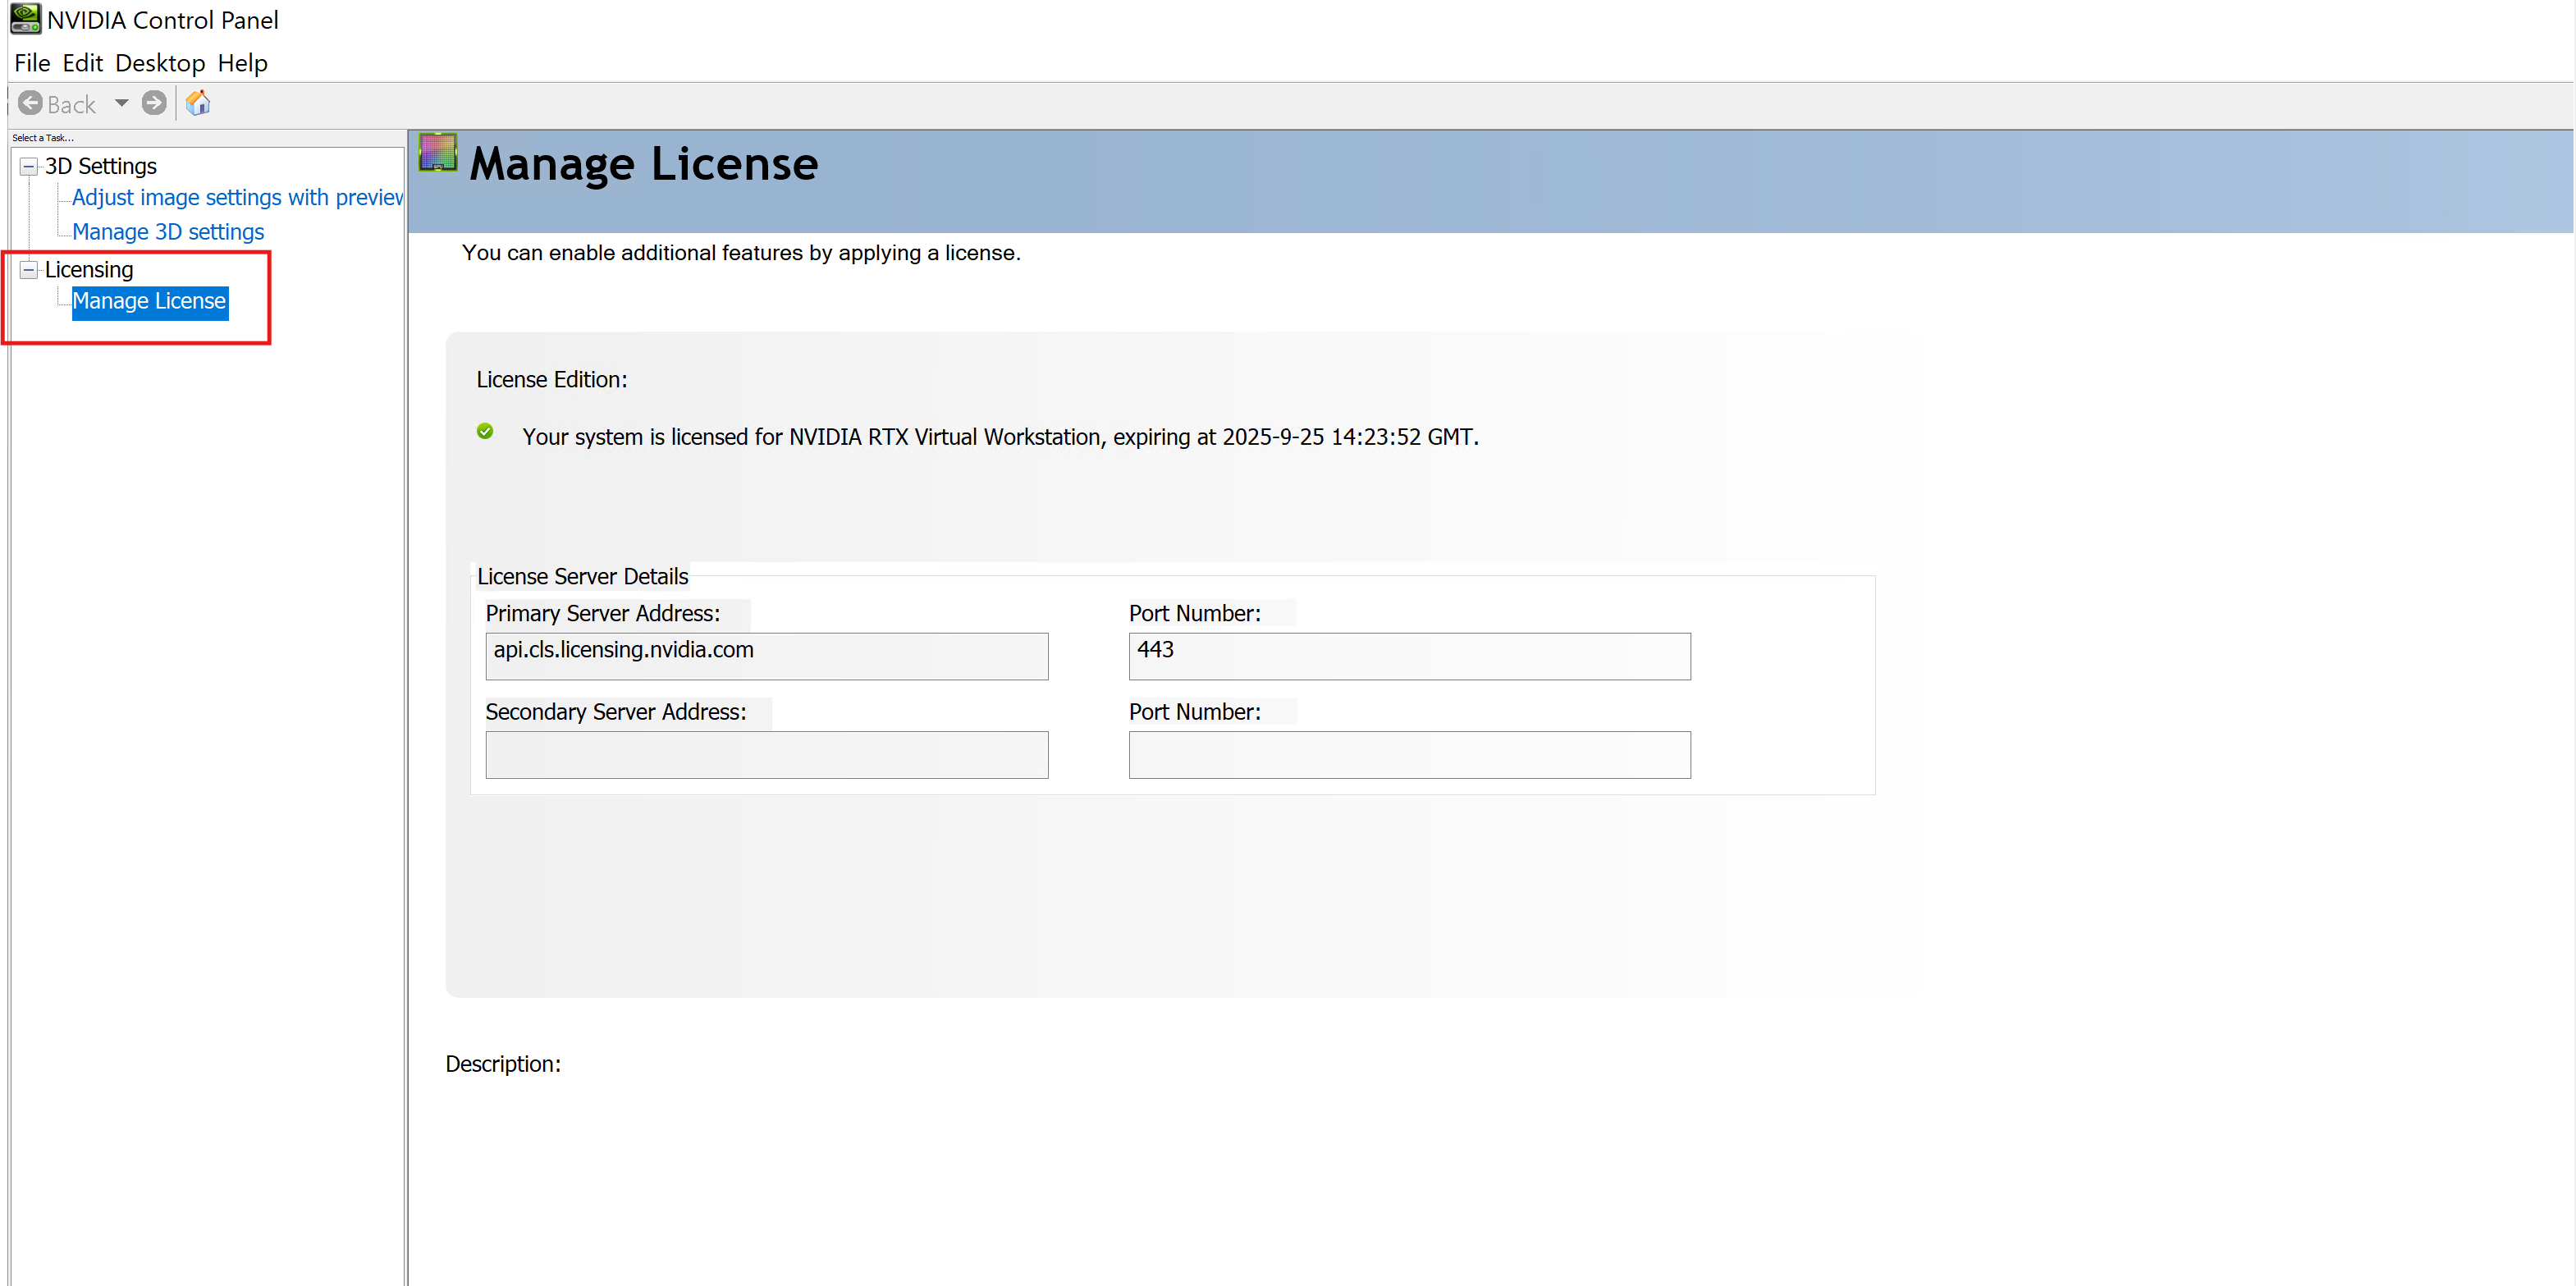
You can also verify the license status through the NVIDIA Control Panel under Licensing → Manage License.
For troubleshooting issues, you can check the log files.
Managing the vGPU-enabled VM#
Modifying and Removing vGPU Configurations:
To modify GPU assignment for GPU-enabled VMs, see Modifying GPU Assignment for vGPU-Enabled VMs.
To configure vGPU plugin parameters, see Setting vGPU Plugin Parameters on VMware vSphere.
To configure GPUs in mixed-size mode, see Putting a GPU into Mixed-Size Mode.
To modify MIG-backed vGPU configurations from a guest VM, see Modifying a MIG-Backed vGPU’s Configuration from a Guest VM.
To manage the NVIDIA GPU Management Daemon on VMware vSphere, see Managing the NVIDIA GPU Management Daemon for VMware vSphere.
Migrating and Monitoring:
To migrate a VM configured with vGPU, see Migrating a VM with vGPU.
To use vMotion with vGPU see Configuring VMware vMotion with vGPU for VMware vSphere.
To suspend and resume a VM with vGPU, see Suspending and Resuming a VM with vGPU.
To monitor MIG-backed vGPU activity, see Monitoring MIG-backed vGPU activity.
Configuring GPU Pass-Through:
To configure GPU pass-through on VMware vSphere, see Using GPU Pass-Through.
Enabling Unified Memory:
To enable unified memory for a vGPU, see Enabling Unified Memory on VMware vSphere.