ARCore Client (Android)
The NVIDIA CloudXR SDK includes a sample ARCore client for AR streaming, which is designed to work with Android tablets and phones that support the ARCore SDK. The client collects motion data from the Android device and sends it to the CloudXR server as ‘pose’ data. The server renders scene frames based on the client position, and streams them to the client. The client decodes the video (and alpha when provided) streamed from the CloudXR server and blends it with the Android device’s camera view.
Note
Note that there is nothing preventing a non-AR scene, which we can call ‘2D-VR’, where you move in a 3D space and can ‘look around’ with the camera. However, moving/translocating in the space would require some custom coding for user input.
This sample was started based on the hello_ar_c sample application from the ARCore SDK.
Building the ARCore Client
In the below instructions {cxr-root} is the path to the CloudXR SDK.
Note
On Windows you may need to move the SDK to the top level of your drive due to path length restrictions. You’ll get strange errors from the build process about files not existing, but will also note that the paths being shown are extremely long.
Unzip the ARCore SDK into the
{cxr-root}\Sample\Android\GoogleARfolder, resulting in the contents being in a subfolder like{cxr-root}\Sample\Android\GoogleAR\arcore-android-sdk-1.26.0. To simplify next steps, we will use{arcore-root}to refer to that directory.Go to https://github.com/NVIDIA/CloudXR/tree/master/arcore-android-sdk/samples/hello_cloudxr_c and download the entire hello_cloudxr_c project and place it in
{arcore-root}\samples, at the same level as the ARCore SDK samples.Copy the Google Oboe SDK .AAR file (
oboe-1.5.0.aar) into the{arcore-root}\samples\hello_cloudxr_c\libsfolder.Copy the CloudXR SDK client package, which is the
CloudXR.aarfile, from{cxr-root}\Client\Lib\Androidto the{arcore-root}\samples\hello_cloudxr_c\libs.Run Android Studio.
Complete one of the following tasks:
Select Open existing Android Studio project on the Welcome screen.
Click File > Open.
Navigate to
{arcore-root}\samplesand select thehello_cloudxr_cproject/folder to open.Select Build > Make Project.
This process should generate an .apk file in the {arcore-root}\samples\hello_cloudxr_c\build\outputs\apk\debug directory that can be used to debug or be installed manually.
Note
If build fails with an error about manifest, in the lower-left side, select File > Settings > Experimental and deselect the Only sync the active variant checkbox.
Note
To build from the command-line, run gradlew build from a command prompt in the hello_cloudxr_c folder.
Prepare the device for running/debugging
Place the device in developer mode and allow USB connection in debug mode on the device.
Use a USB cable to connect the Android device to the development system.
If prompted on the device to allow connections, select Allow.
Installing the ARCore Client
Note
This section is only necessary should you want to manually install from command-line. If running through Android Studio, it will take care of the installation, so you can skip ahead to Running the ARCore Client.
In a Command Prompt window, navigate to the folder that contains the .apk file that was created by building the sample application.
Use ADB to install the application from the release .apk file.
adb.exe install -r <APK name>.apk
Note
By default, the
ADB.exeprogram is installed by Android Studio inC:\Users\{username}\AppData\Local\Android\Sdk\platform-toolsWhen the installation is complete, ADB responds with a Success message.
If you are building from the command-line with Gradle, it can do the installation: gradlew installRelease
Running the ARCore Client
Note
See Command-Line Options, for more information about our command-line/launch options system, and a complete list of all the available options, and How to Launch on Android for more detailed instructions on the various methods for starting Android applications.
Start SteamVR or one of the test servers (see CloudXR Tools for Testing) on the server system.
Launch the CloudXR ARCore Client app on your Android device (via whichever method you choose).
When prompted, enter the IP address of the CloudXR server or accept a previously entered value.
Once you see the camera view, you should slowly turn the camera from side to side or up and down until it sufficiently visualizes the target ‘ground plane’ on the screen as a series of connected white dots.
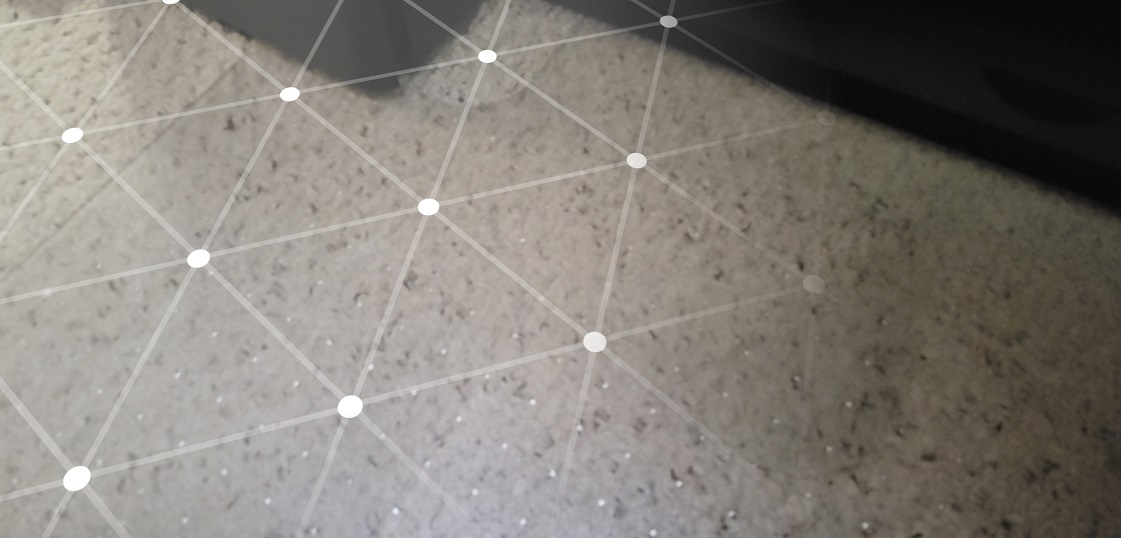
ARCore Surface Detection
Touch the grid to select an anchor point for the AR world.
Wait until the app connects to the server, and starts streaming.
For SteamVR, you will get whatever is configured as your home view, or whatever VR application was already running on the server.
Note
To stream CloudXR with AR content, the server application provides the main scene in the left eye that contains the RGBA data. The alpha channel in the data indicates the regions that should be blended with live camera content.
The right eye data is ignored, but because OpenVR requires the submission of both eyes we recommend that the application also submit the left eye texture as the right eye texture by using the same texture handle, or optionally submit a small dummy texture for the right eye.
In the
{cxr-root}\TestTools\ArCubeSeverfolder, a basic OpenVR server application,ar_test.exe, is provided to help illustrate and validate AR streaming in SteamVR. After the connection is established, startar_test.exeon the server to see a huge 3D grid of textured cubes blended into the current camera view.To reset the anchored point in the camera view, press and hold your finger on the screen for a few seconds.
This step resets the anchored position and allows you to scan and set a new root anchor position.
Note
The ARCore sample has extra command-line options beyond all the defaults. See ARCore Client Command-Line Options for more information.