The BMC Web User Interface#
Use the BMC Web User Interface (BMC Web UI) to perform common tasks for your NVIDIA IGX BMC module.
Note
The BMC User Interface (BMC Web UI) is only available for BMC firmware version 24.04-11-v3.2 or newer. For older BMC Firmware, you can use :ref:’Manage your BMC from the command line <manage-your-bmc-from-command-line>’.
Common tasks include the following:
Connect to the BMC Web UI#
Use the following procedure to connect to the BMC Web UI over https.
Open any browser and enter <BMC_IP> followed by the BMC credentials as below,
1https://<BMC_IP>/         # Replace <BMC_IP> with the actual IP.
2Enter BMC Username.
3Enter BMC Password.
Click “Login” button to access Web UI.
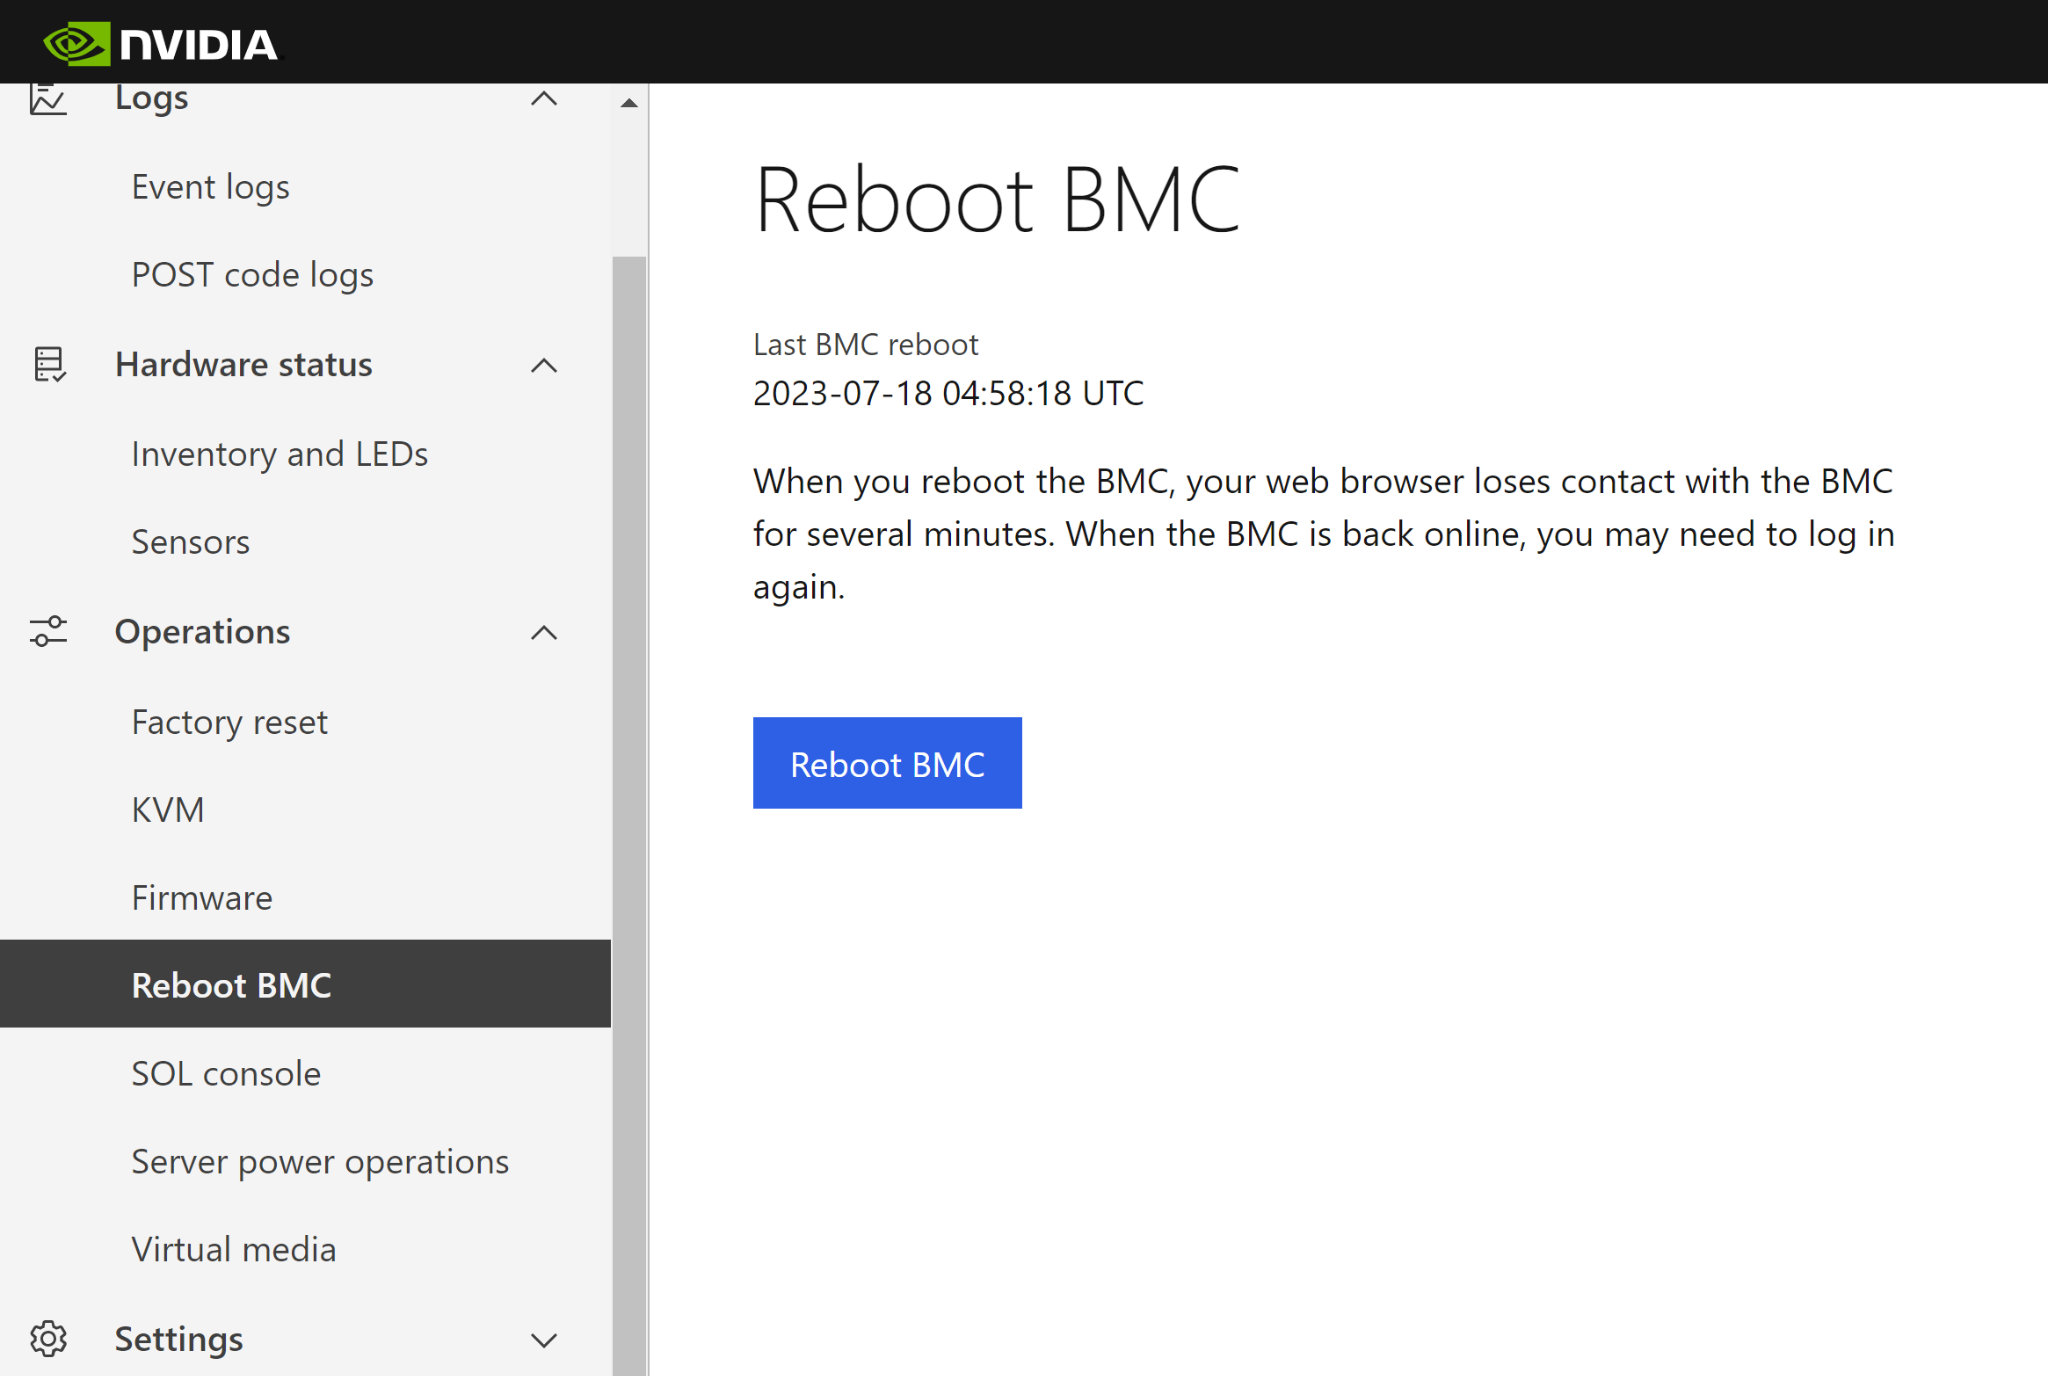
Reboot your BMC#
Use the following procedure to reboot your BMC.
In the BMC Web UI, go to Operations > Reboot BMC, and then click Reboot BMC.
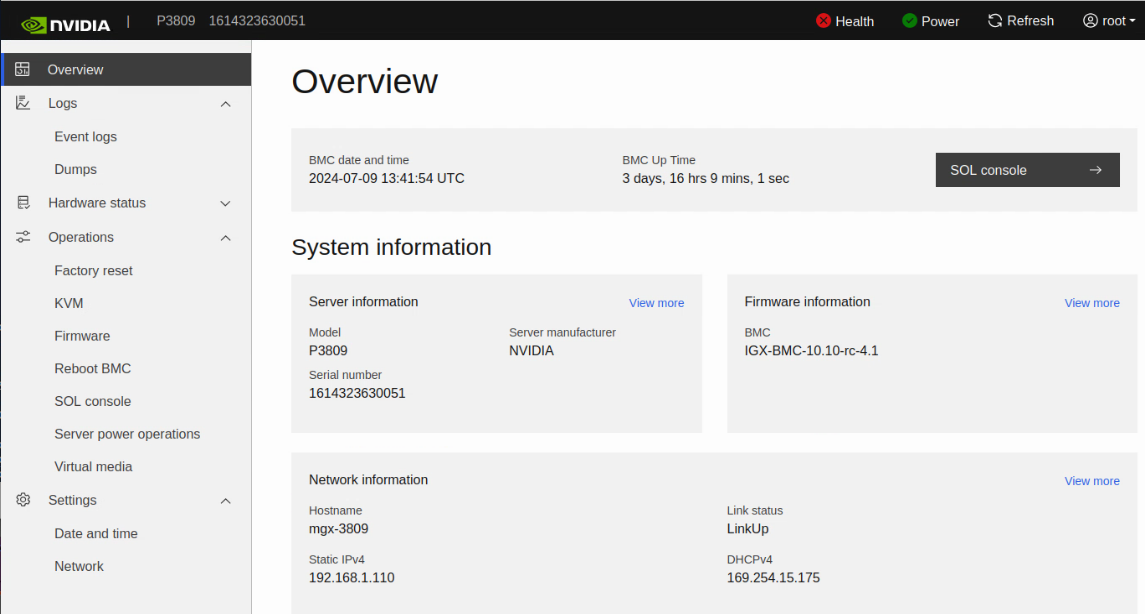
Open the UART console#
In the BMC Web UI, go to Overview, and then click SOL console. The Serial over LAN (SOL) console appears.
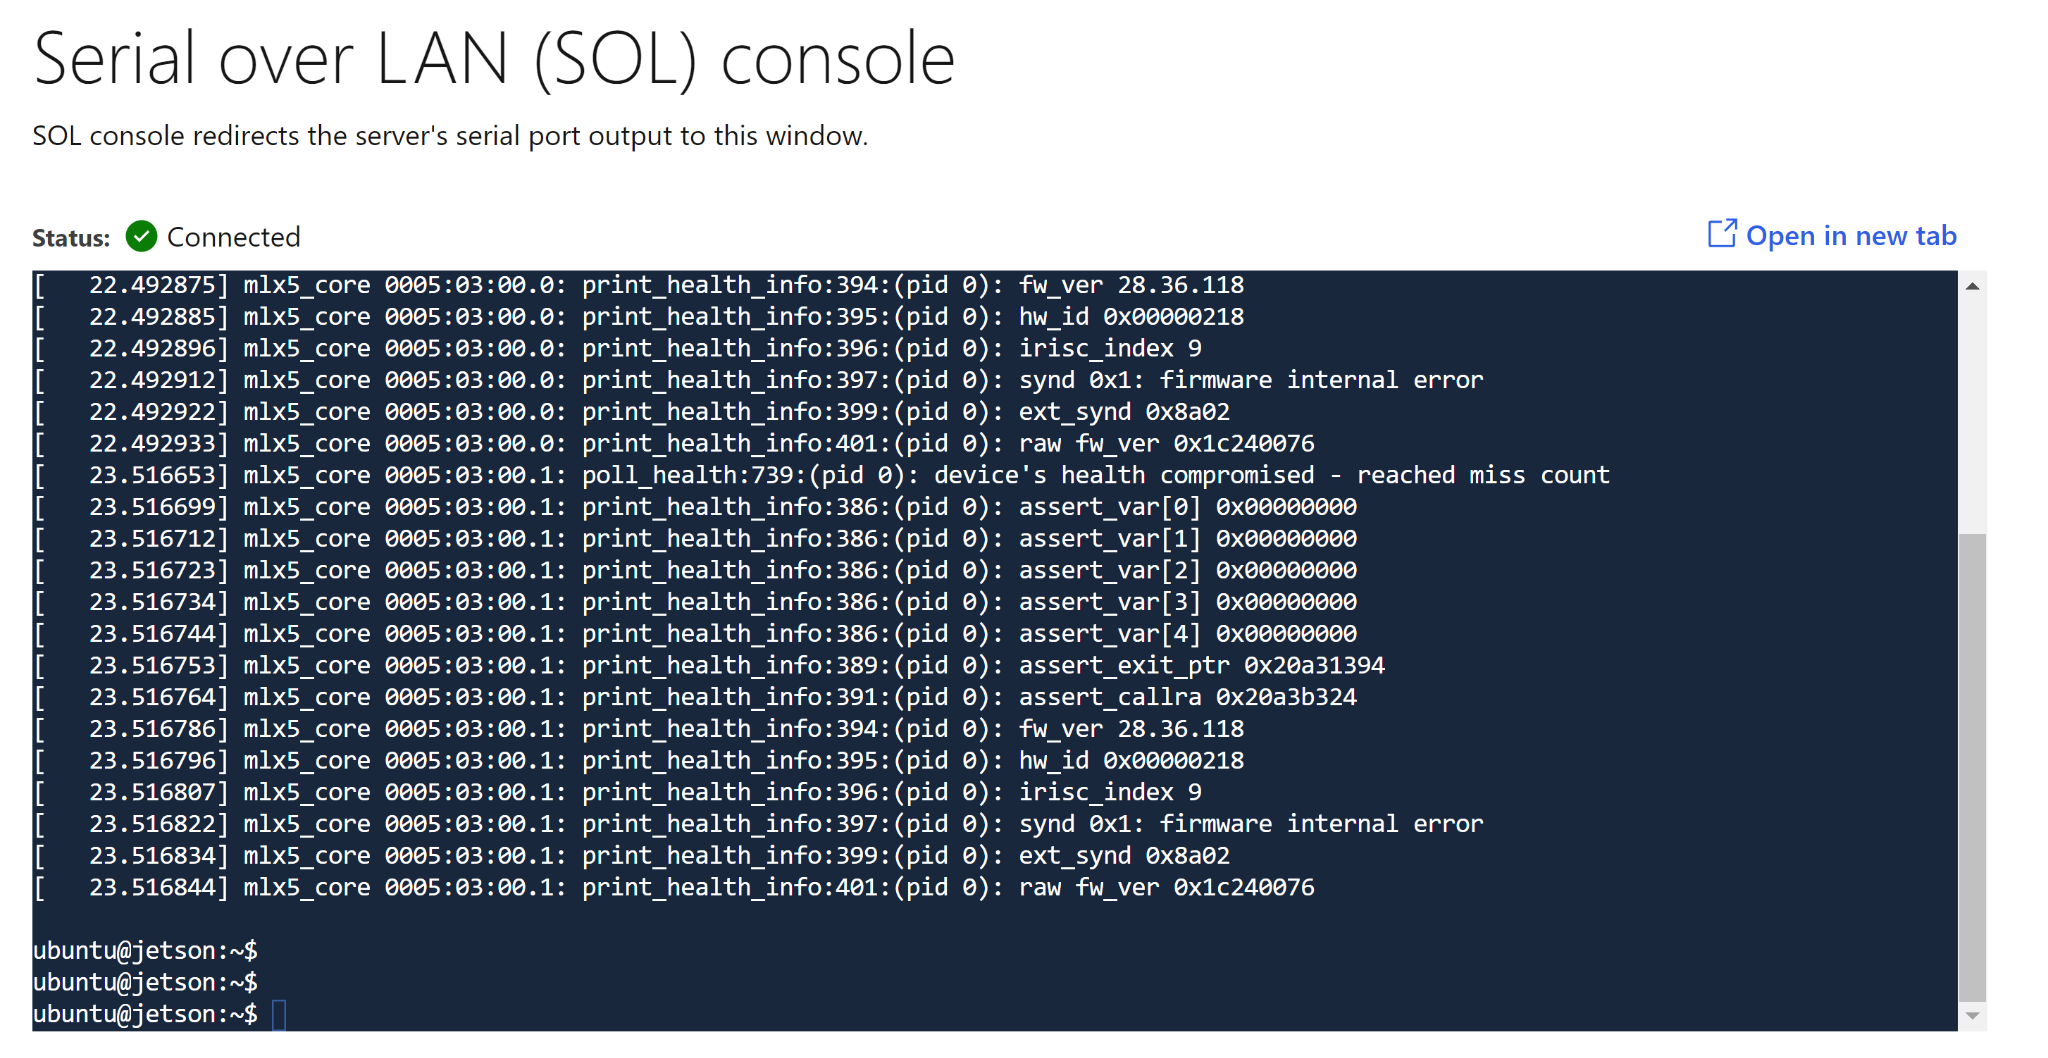
(Optional) Click Open in new tab.
Get the BMC firmware#
Download igx_fw_for_webui_update_R36.x.x.tbz2 from the IGX Download Center.
On your host computer, extract the downloaded BMC Firmware package using archive utility or use the below command from shell,
1tar -xvf igx_fw_for_webui_update_R36.x.x.tbz2
Note
Check bmc/README for information about release versions and dates.
Identify ERot/Non-ERot from webUI#
Note
For older BMC versions where webUI is not supported, the BMC type can be checked, using Determine whether your BMC Module is ERoT or Non-ERoT.
Use the following procedure to identify ERot/Non-ERot from webUI
Open BMC Web UI, go to Hardware status > Inventory.
Toggle down System, check the Secure boot.

If Secure boot value is:
Yes - ERot
No - Non-ERot
Update your BMC firmware#
Before Updating the BMC Firmware, Update ERoT firmware to the latest version. Use the following procedure to update your BMC firmware.
If you have not already, download and untar the current IGX firmware.
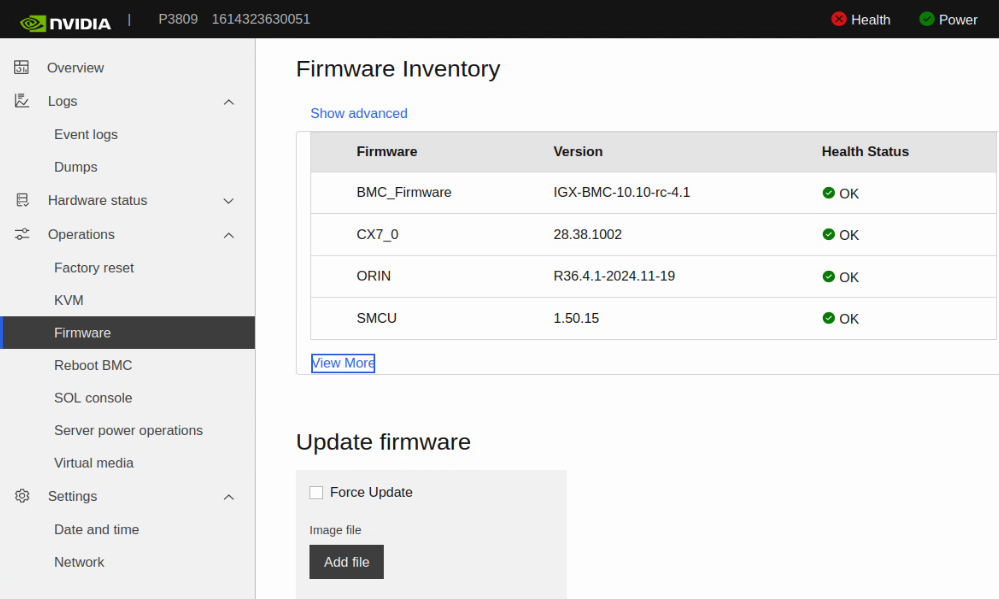
In the BMC Web UI, go to Operations > Firmware.
Click Add file and select the correct file for BMC Firmware update
Choose the correct file for your BMC:
Warning
Verify whether your BMC platform is ERoT or Non-ERoT before you update the firmware, and choose the correct file. If you choose the wrong file, your BMC is put in a non-recoverable state.
External Root of Trust (ERoT) hardware is part of the BMC module for the NVIDIA IGX_Host Board Kit, which is intended for production. Because the NVIDIA IGX Developer Kit is not for intended production, it is provided without ERoT hardware.
To determine whether your BMC Module is ERoT or Non-ERoT, see Identify ERot/Non-ERot from webUI.
If your BMC module is ERoT, select the file
igx-bmc-apfw-erot.fwpkg.If your BMC module is non-ERoT, select the file
igx-bmc-apfw-non_erot.fwpkg.
Note
For ERoT BMC, it is recommended to update the ERoT firmware first, Update your IGX BMC’s ERoT firmware.
Click Start update.
After you see the firmware update complete message, Reboot your BMC.
Update your IGX BMC’s ERoT firmware#
Use the following procedure to update your IGX BMC’s ERoT firmware.
Download
bmc_fw_R36.x.x_aarch64.tbz2to your Linux host computer from the IGX Download Center.Unzip the tbz2 file.
1tar -xvf bmc_fw_R36.x.x_aarch64.tbz2
cec1736-ecfw-rel-prod.fwpkg is available inside the bmc/fw/ecfw/ folder
In the BMC Web UI, go to Operations > Firmware.
Click Add file and select the file
cec1736-ecfw-rel-prod.fwpkgfrom your computer.
Click Start update.
After you see the firmware update complete message, Reboot your BMC.
Power cycle your IGX using the back panel toggle button.
Check your ERoT Firmware, Update Your ERoT Firmware.
Update your MCU firmware#
Use the following procedure to update your MCU firmware.
Warning
This firmware update is only supported for C01 boards. See Software Releases to identify your board version.
If you have not already, download and untar the current IGX firmware.
In the BMC Web UI, go to Operations > Firmware.
Click Add file and Select the file
smcu-flash.fwpkgfrom your computer.Click Start update. After the update is complete, a notification appears in the user interface.
Warning
The IGX seems turned off during the MCU firmware update, but you see it on after the update is complete. Do not power cycle the IGX during the update.
After the update completes, use the intructions in Perform power operations to reboot the device.
Update your QSPI firmware#
Use the following procedure to update your QSPI firmware.
Warning
Only Production IGX supports QSPI firmware update through the BMC Web UI. Pre-production IGX, such as TS3, is not supported.
If you have not already, download and untar the current IGX firmware.
In the BMC Web UI, go to Operations > Firmware.
Click Add file and Select the file
igx-qspi-flash.fwpkgfrom your computer.
Click Start update. After the update is complete, a notification appears in the user interface.
Update your CX7 firmware#
Currently, you can update your CX7 firmware either from the command line, or from the web interface when the IGX_Host is up and available for login. For details, see Update Your CX7 (NBU) Firmware.
Perform power operations#
Use the following procedure to perform power operations.
In the BMC Web UI, go to Operations > Server Power Operations. The current power status of the server appears.
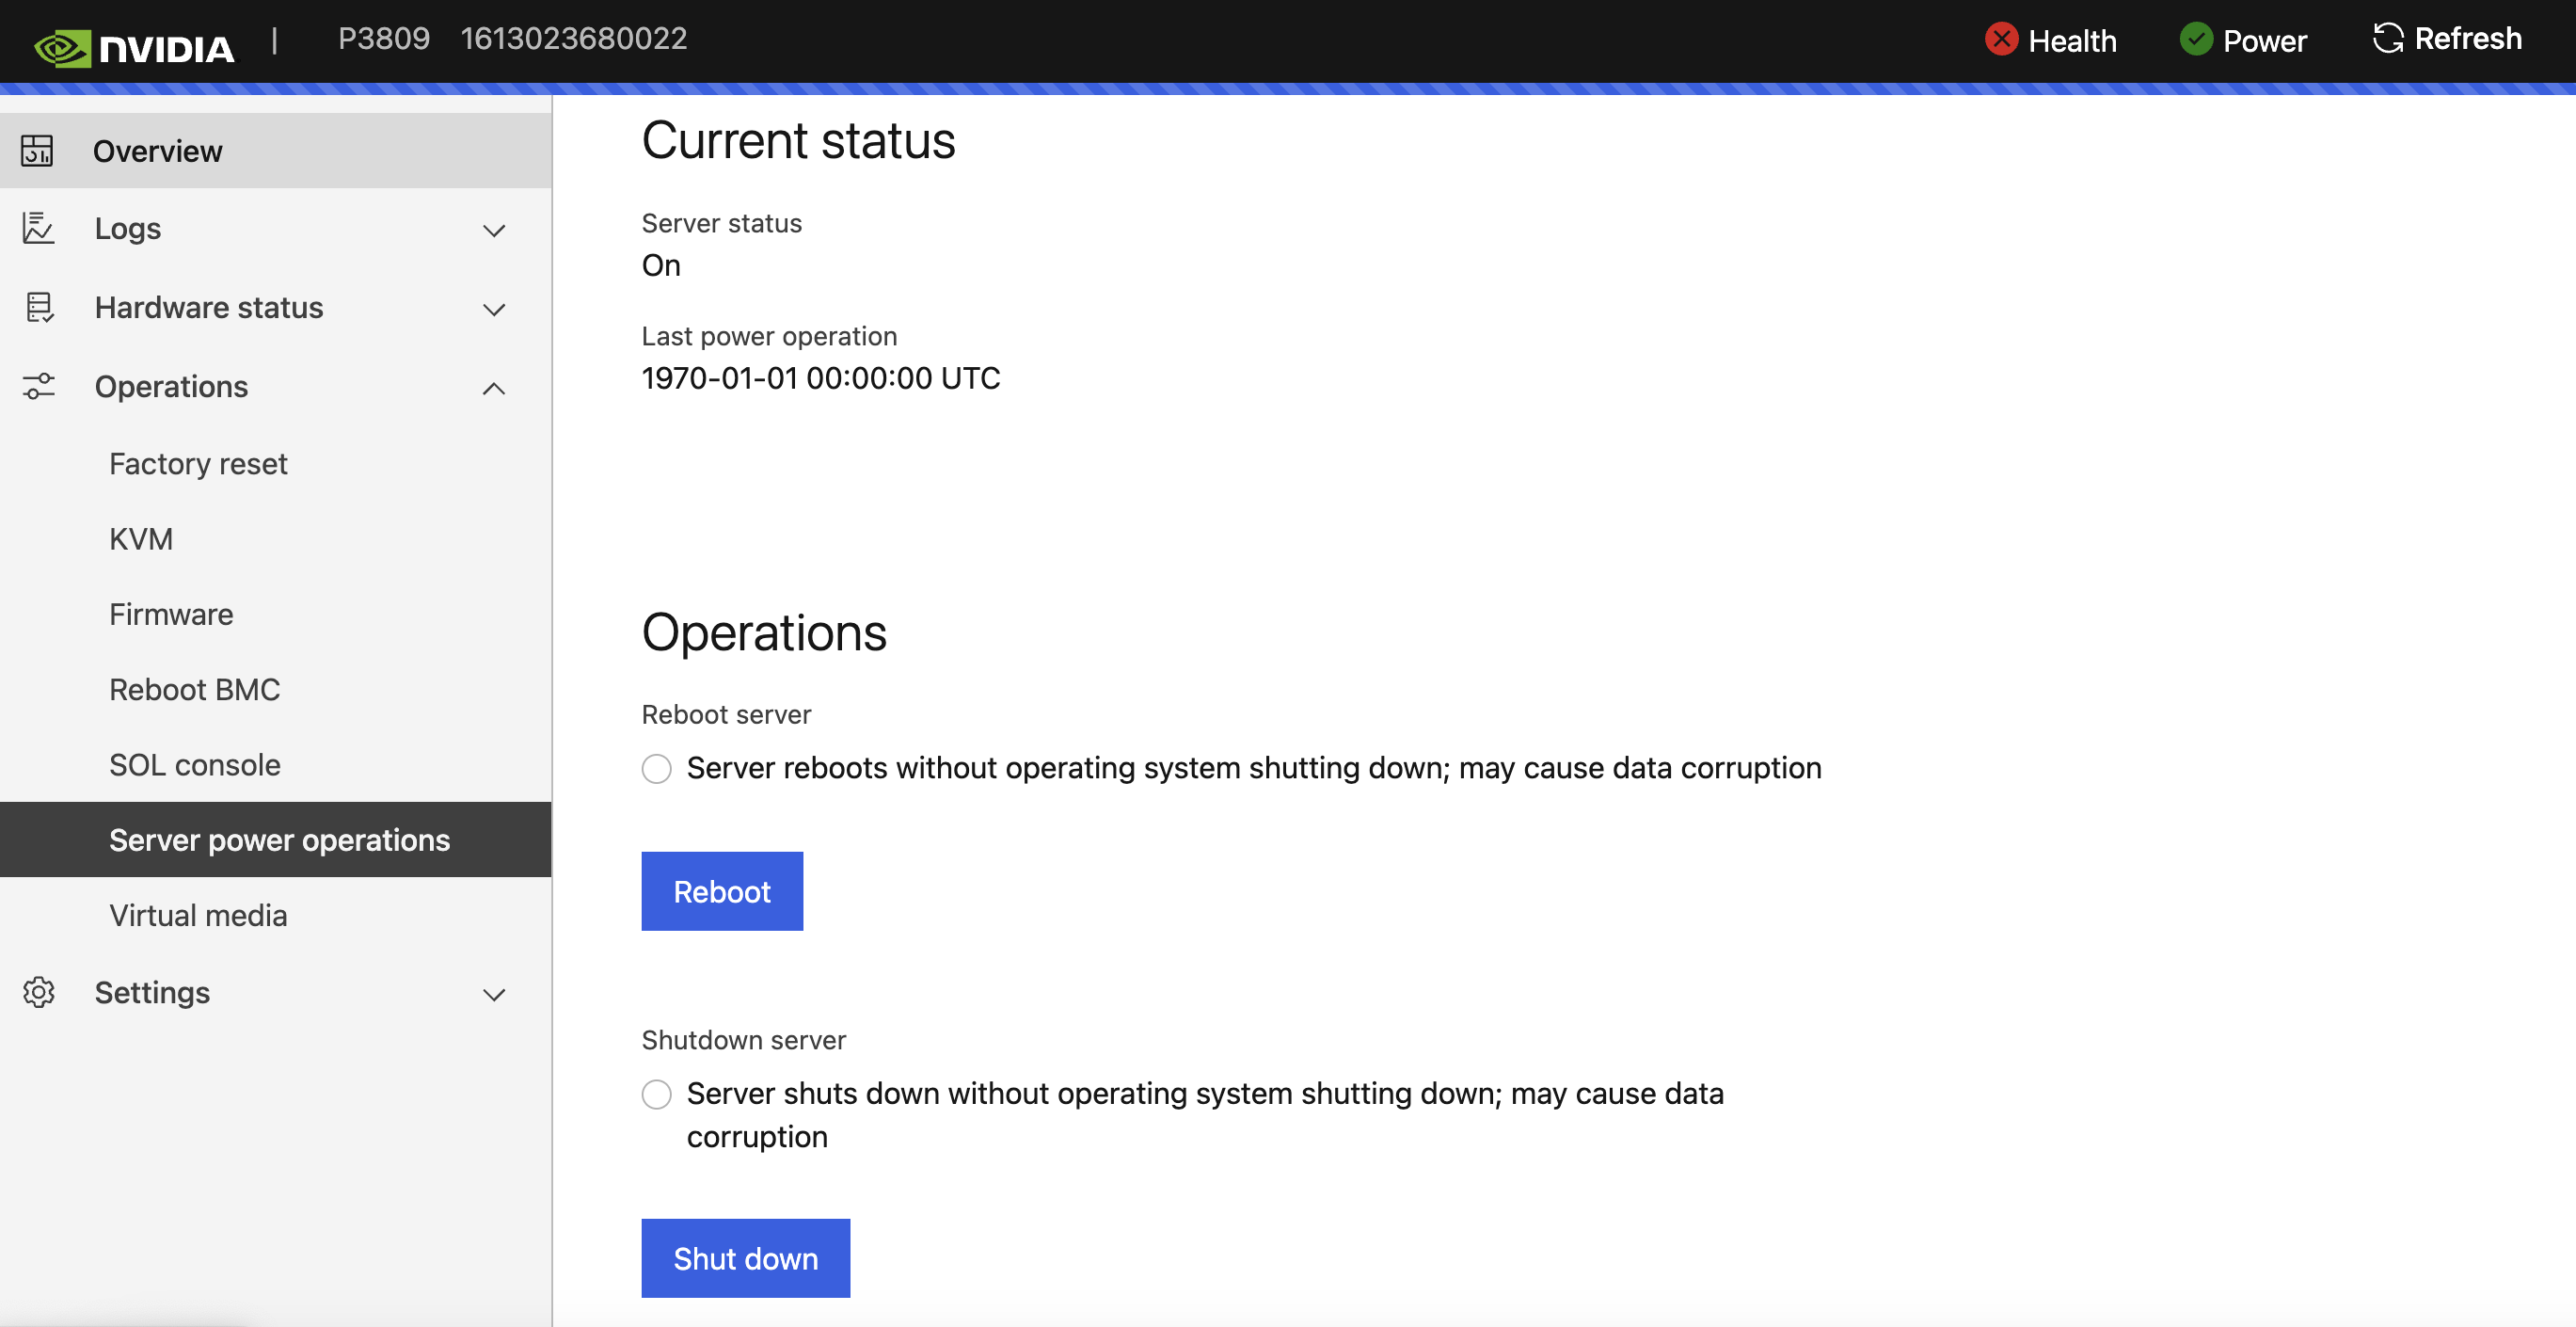
(Optional) If the server is On, you can click Reboot or Shut down.
(Optional) If the status is Off, you can click Power on to start the server.
View the temperature of your BMC#
Use the following procedure to read the temperature of your BMC.
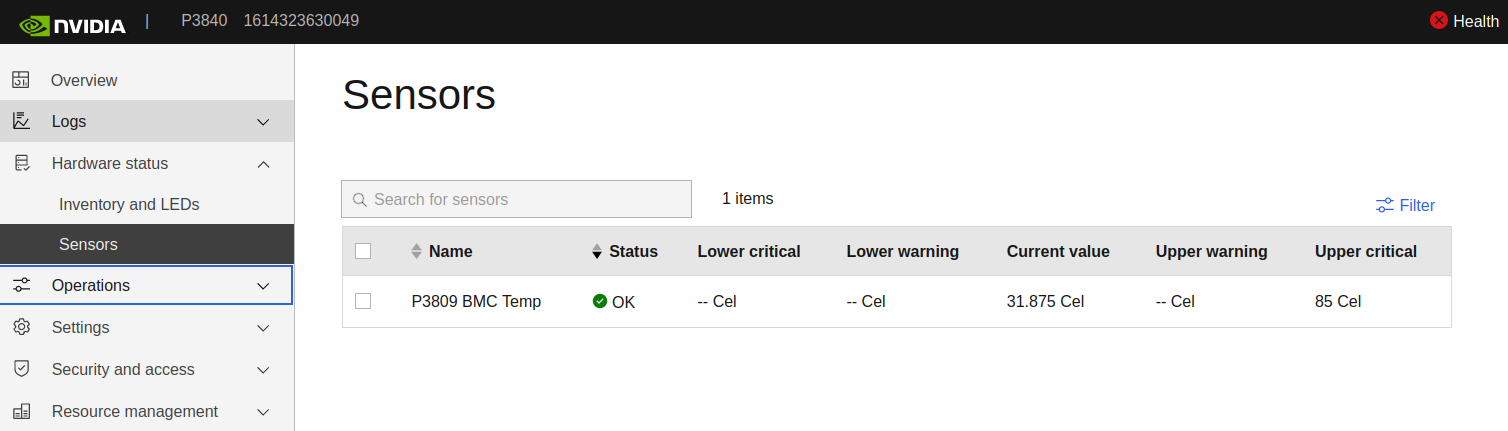
In the BMC Web UI, go to Hardware status > Sensors. Sensor data appears.
Install IGX OS using virtual media#
Use the following procedure to install your IGX OS
In the BMC Web UI, go to Operations > Virtual media.
Click Add File, upload the latest IGX OS (.iso) image, and then click Start.
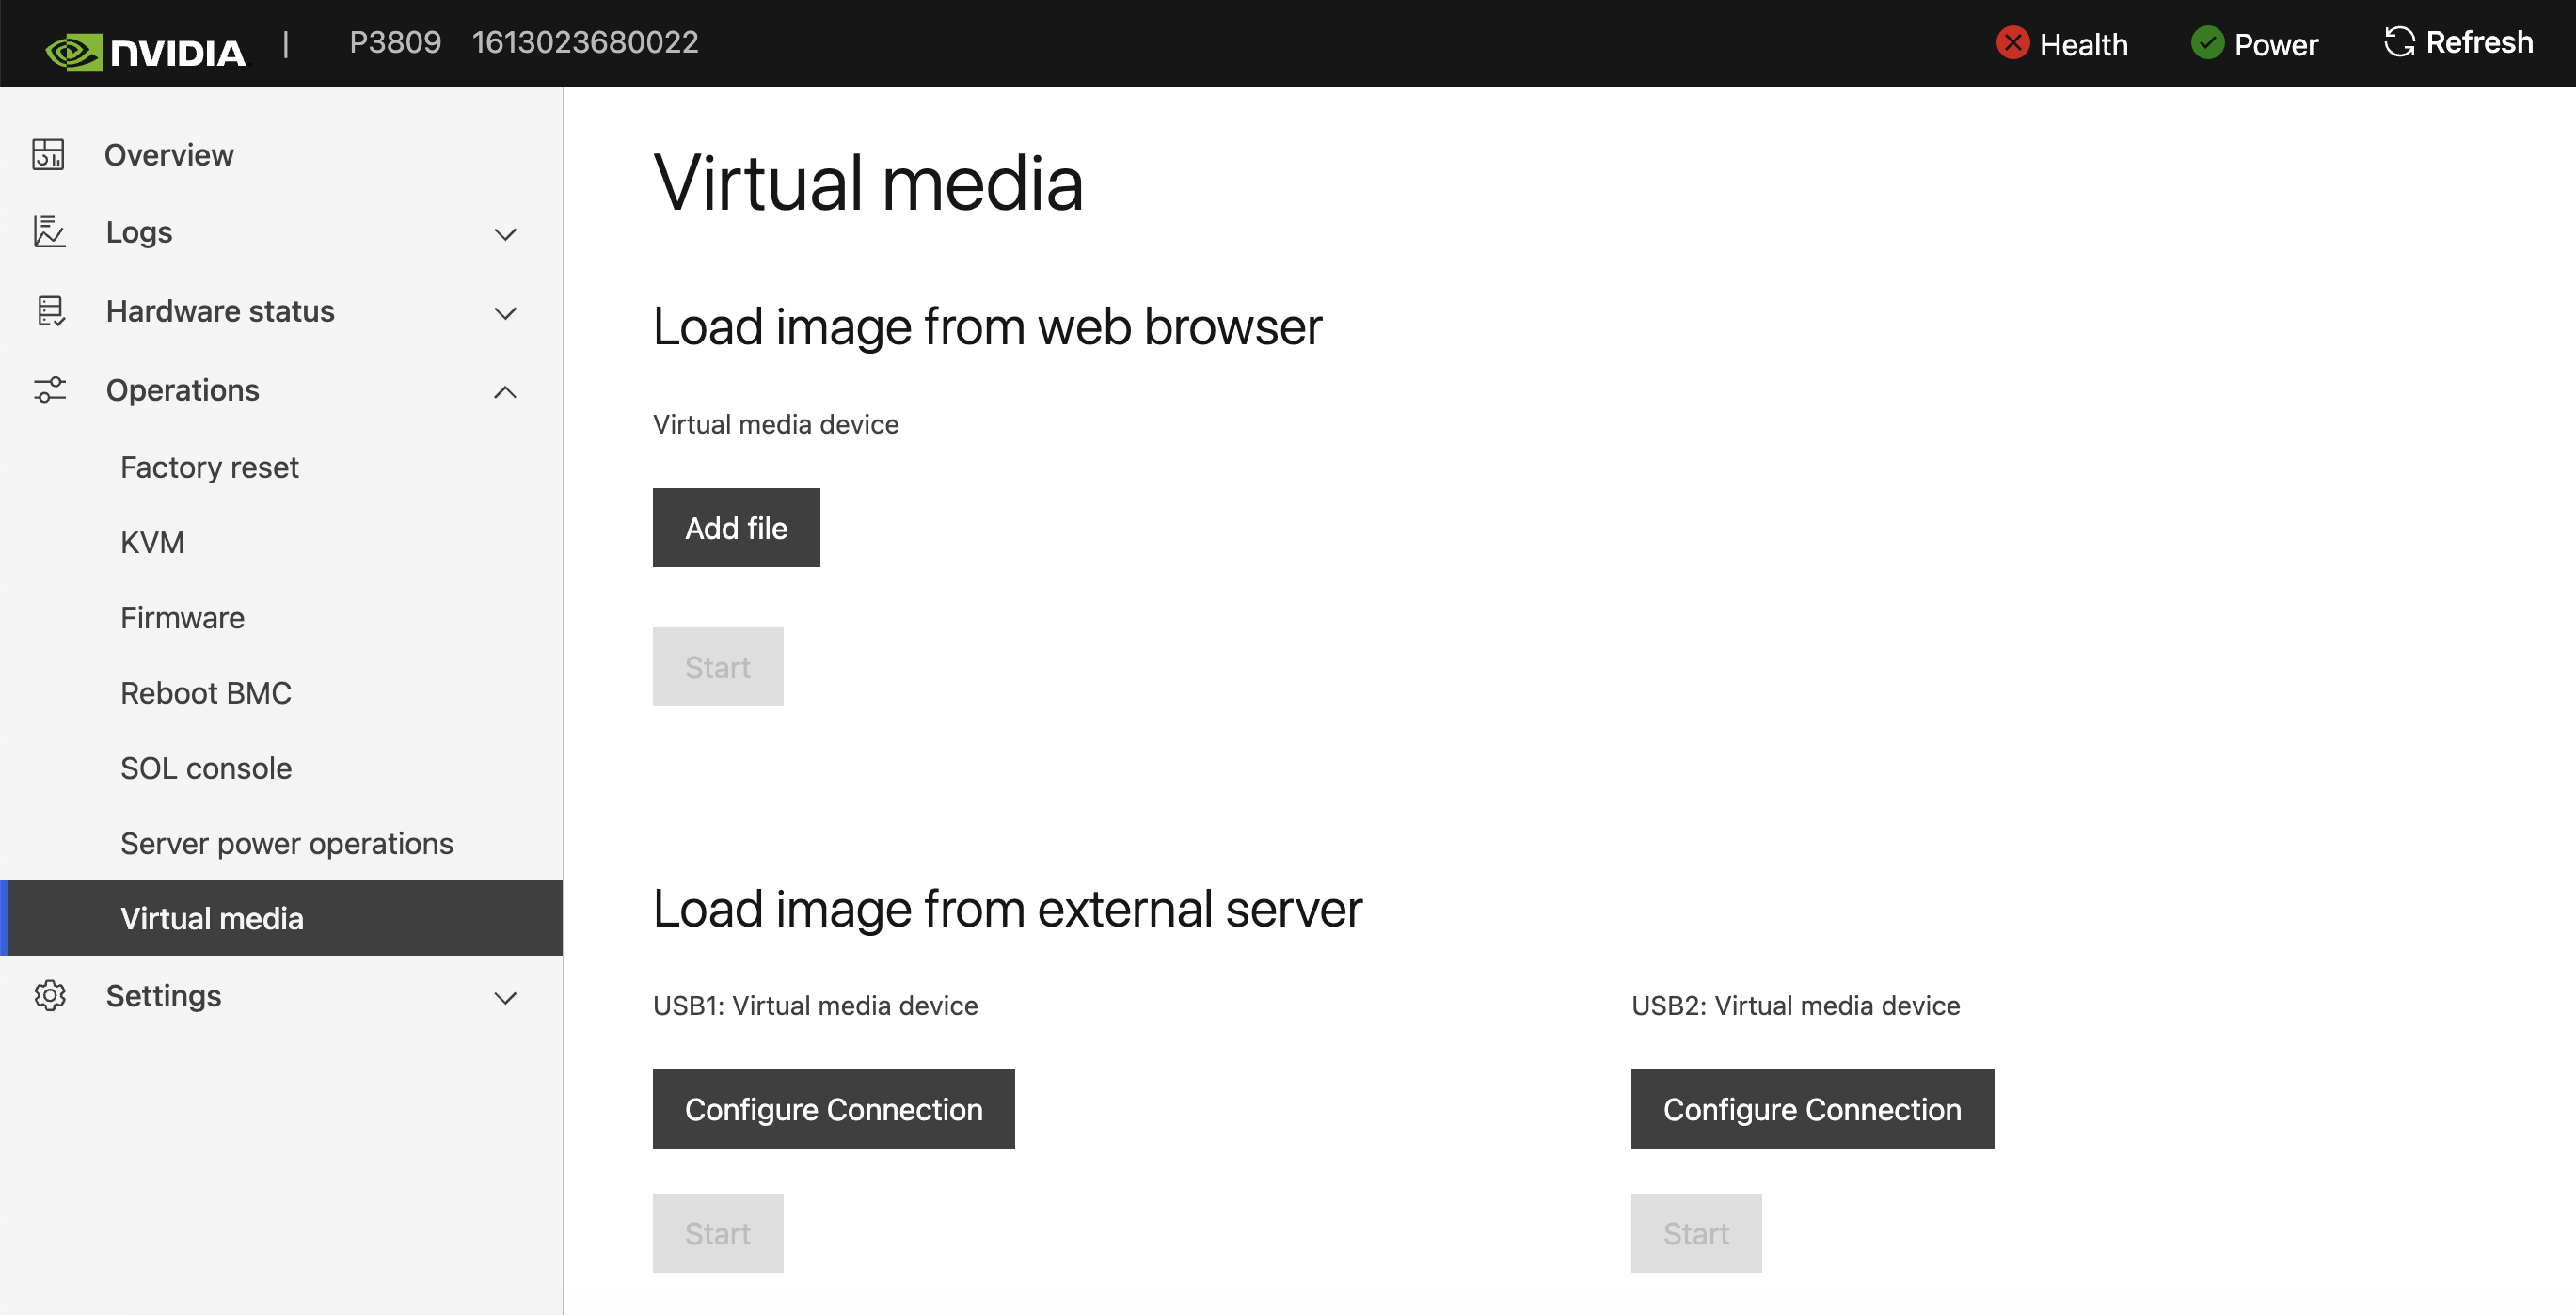
Warning
Make sure BMC can access the internet when using Load image from external server
If IGX OS is already installed on your IGX_Host, open a console (BMC SOL) or a terminal on the desktop and run the following code to verify the USB virtual media.
lsusb
You should see output similar to the following.
Bus 001 Device 007: ID 1d6b:0104 Linux Foundation Multifunction Composite Gadget
Use the intructions in Perform power operations to reboot the device.
Wait until the UEFI starts, and then press ESC. The UEFI menu appears.
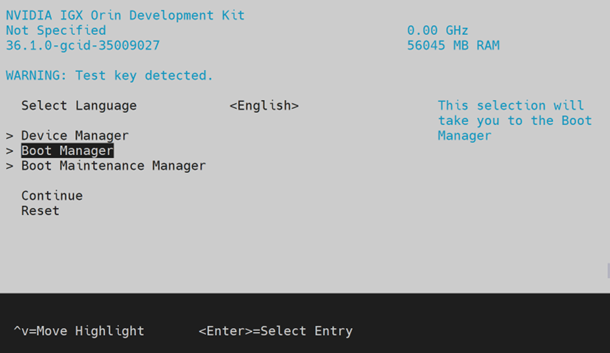
Select Boot Manager, and then press ENTER. The Boot Manager appears.
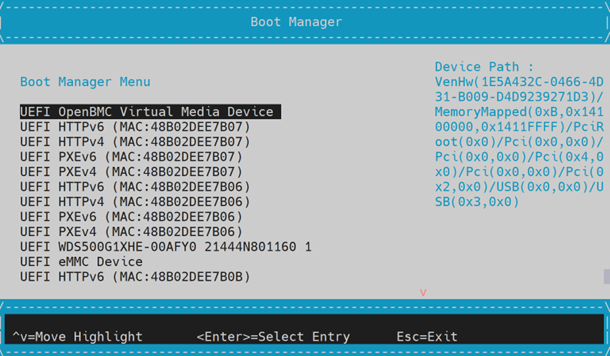
Select OpenBMC Virtual Media Device, then press ENTER.
Connect a Monitor to iGPU DP port if iGPU IGX OS is intended to install, or one of dGPU DP ports if dGPU IGX OS is intended to install.
Install IGX OS, or edit the options by using the
ekey prior to installation.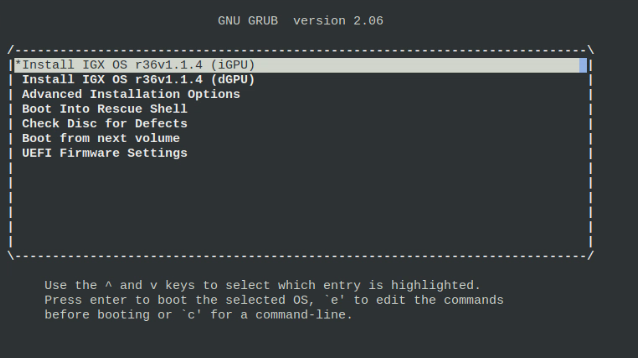
From connected Monitor, use the IGX conencted keyboard and mouse to acknowledge Nvidia License, set timezone, create user account and password to finsih up the IGX OS installation.
Using IGX KVM#
Warning
IGX KVM works with BMC 4.2 or higher version only, when a physical display is not connected.
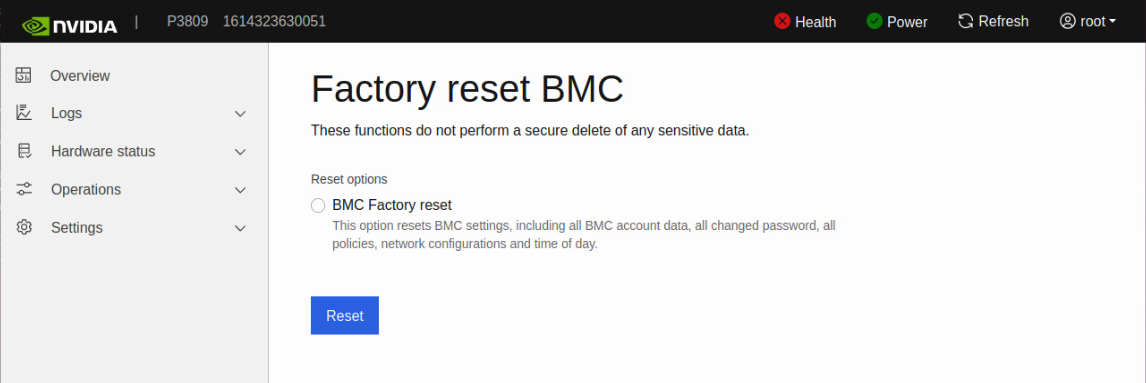
Factory reset your BMC#
Use the following procedure to reset your BMC.
In the BMC Web UI, go to Operations > Factory reset.
Choose BMC Factory reset and then click Reset.