Quick Start Guide#

Overview#
This guide walks through the first-time setup flow for Jetson Orin Nano Developer Kit using the Jetson ISO installation method available with JetPack 7.2.
Jetson ISO lets you install the Jetson BSP (Jetson Linux) directly on the developer kit without using an Ubuntu host PC. On Jetson Orin Nano Developer Kit, you still need to provide the target storage for the installation, such as a microSD card or a NVMe SSD.
Attention
Starting with JetPack 7.2, SD Card images are no longer supported. Do not flash the Jetson ISO to a microSD card — write it to a USB flash drive, then use it to install Jetson Linux onto your microSD card or NVMe SSD.
Attention
Jetson’s bootable installation USB stick employs a very minimal version of Linux and is made purely for the purpose of installing the Jetson BSP (Jetson Linux) on Jetson Orin Nano Developer Kit.
Unlike Canonical’s official Ubuntu installation USB, it does NOT offer the capability of booting into full Jetson BSP for the purpose of test drive, thus it is not “Live USB” stick in that sense.
Important
JetPack 7.2 installation requires JetPack 6.x-generation Jetson UEFI/QSPI firmware on the developer kit. If your developer kit still has older factory firmware, complete the JetPack 6.x update path before booting the JetPack 7.2 Jetson ISO.
See JetPack 6.x Update Path for the detailed JetPack 6.x update path.
What You’ll Need#
Included in the box:
Jetson Orin Nano Developer Kit
Power supply (19 V)
Quick start and support card
Prepare the following items:
A laptop or PC (Windows, Mac, or Linux) with at least 25GB of storage space.
A USB flash drive, 16GB or larger.
Target storage for Jetson Linux:
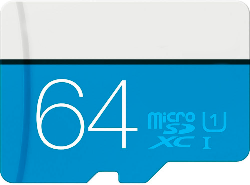
microSD card, 64GB UHS-1 or larger recommended.
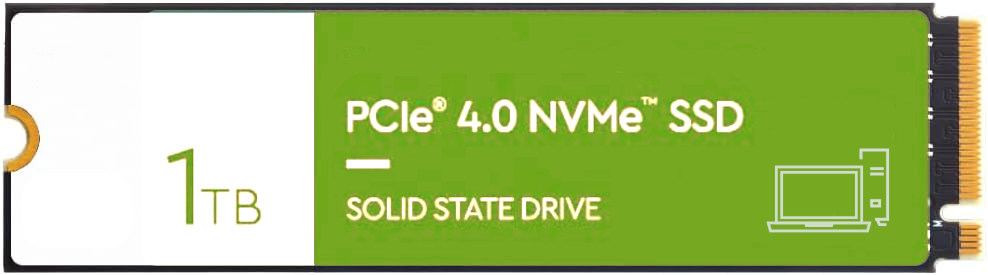
NVMe SSD.
Note
Jetson Orin Nano Developer Kit does not include removable storage in the box, so choose either a microSD card or a NVMe SSD before starting setup.
Overall Flow#
Use Jetson ISO for the JetPack 7.2 path. For JetPack 6.x, see JetPack 6.x Update Path.
Steps#
Target Storage Prerequisite#
Jetson ISO installs Jetson Linux onto storage attached to the developer kit. Install one of the following target storage devices before booting the installer.
|
microSD card: 64GB UHS-1 or larger recommended. |
|
NVMe SSD: Optional, but recommended if you want more capacity and better storage performance. |
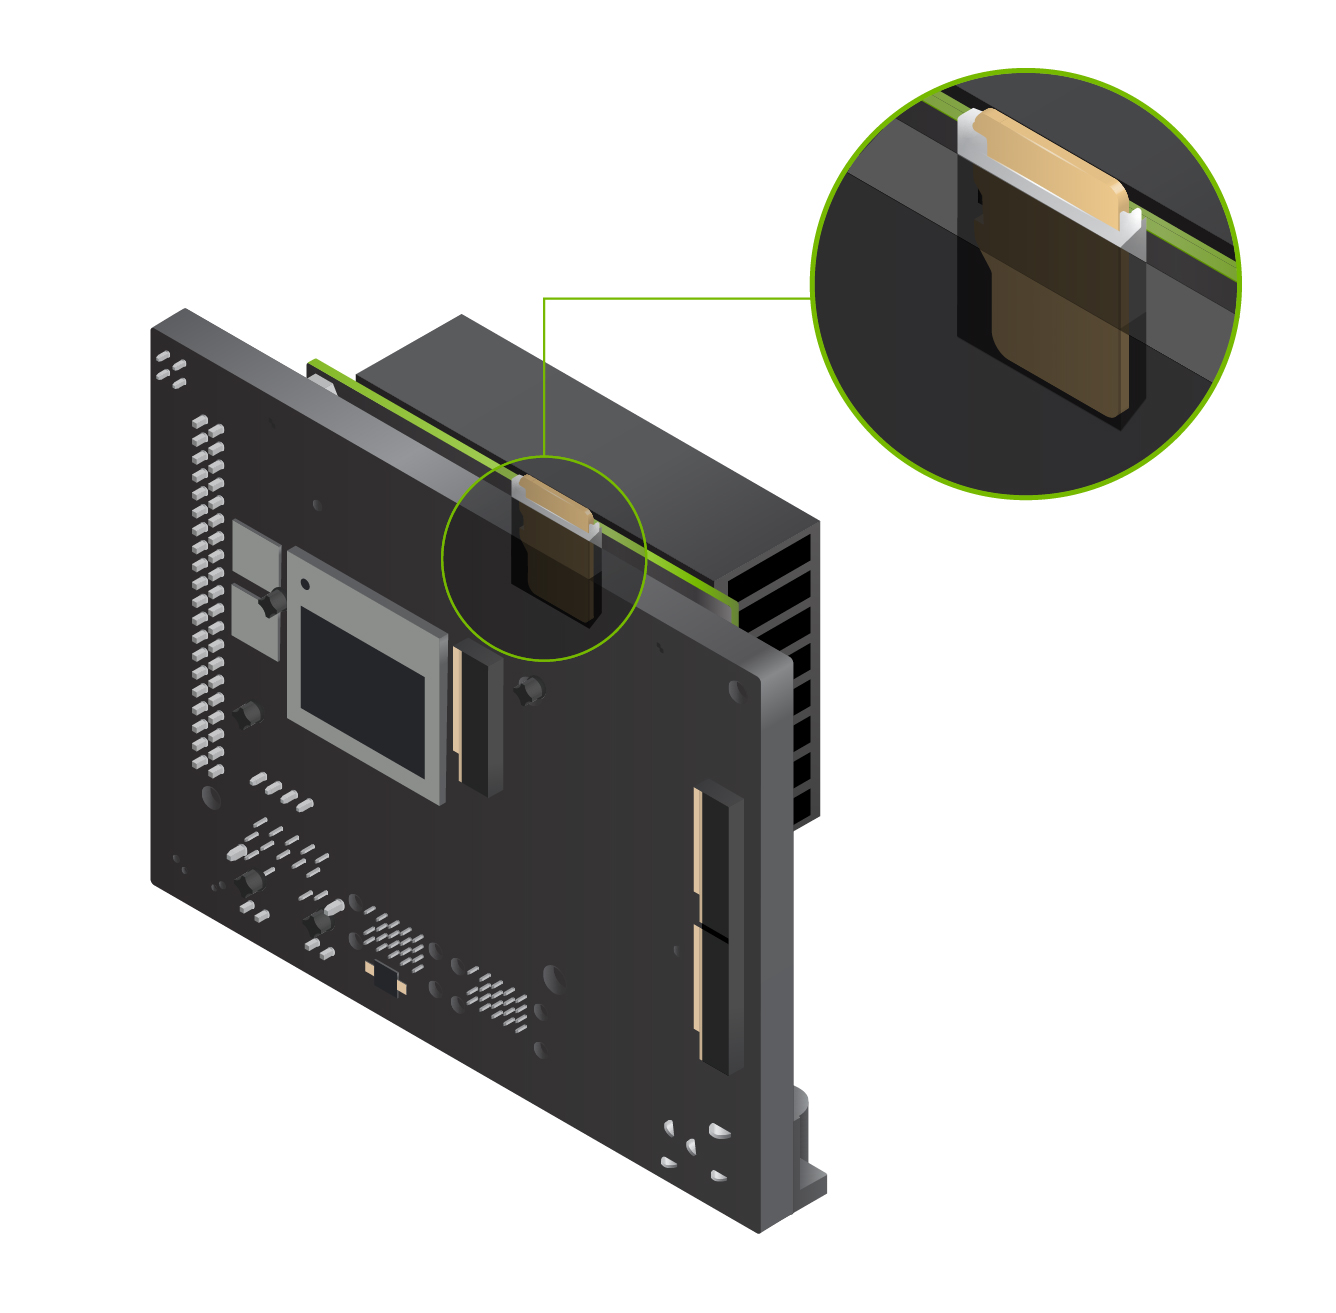
Use a 64GB or larger UHS-1 microSD card. Insert it into the slot on the underside of the Jetson Orin Nano module before booting the Jetson ISO installer.
Use a NVMe SSD if you want more capacity and better storage performance for AI models, containers, datasets, and project files.
Install the NVMe SSD on the developer kit carrier board before booting the Jetson ISO installer. See Hardware Layout for storage connector details.
Firmware Gate#
Complete Step 1 on the developer kit before starting the JetPack 7.2 setup path.
1️⃣ Confirm Jetson UEFI firmware version#
Before starting the JetPack 7.2 Jetson ISO path, confirm whether your developer kit already has JetPack 6.x-generation Jetson UEFI/QSPI firmware.
Important
Do not skip this check.
If the developer kit firmware is ready for JetPack 7.2: continue with Step 2.
If the developer kit still has older factory firmware: complete the JetPack 6.x Update Path first, then return to this JetPack 7.2 path.
Check the firmware version using one of the following methods.
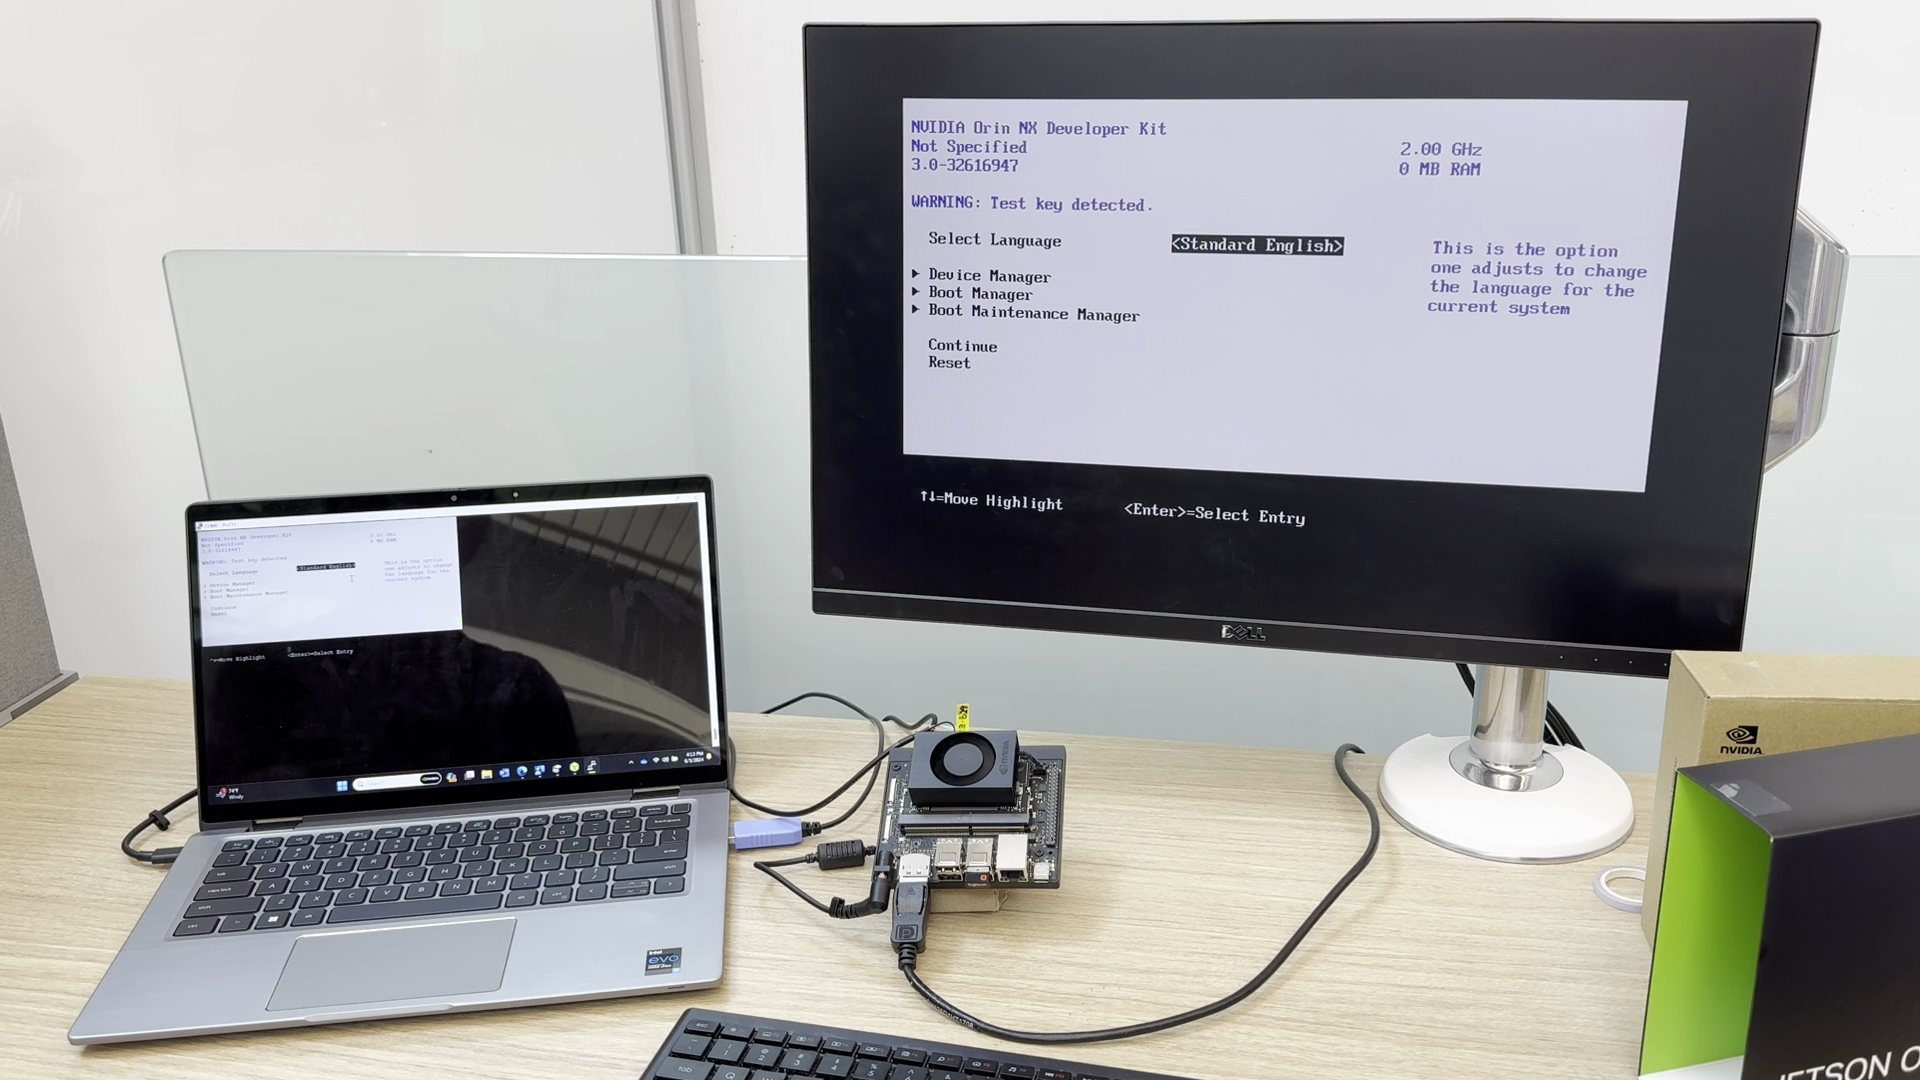
Connect a DisplayPort monitor and USB keyboard to the developer kit.
Connect the included 19V power supply.
Repeatedly press Esc after the NVIDIA boot splash appears.
In the UEFI setup menu, check the firmware version line near the top of the screen.
If the firmware version is newer than
36.0, continue with Step 2.
Use this method if you do not have a monitor attached.
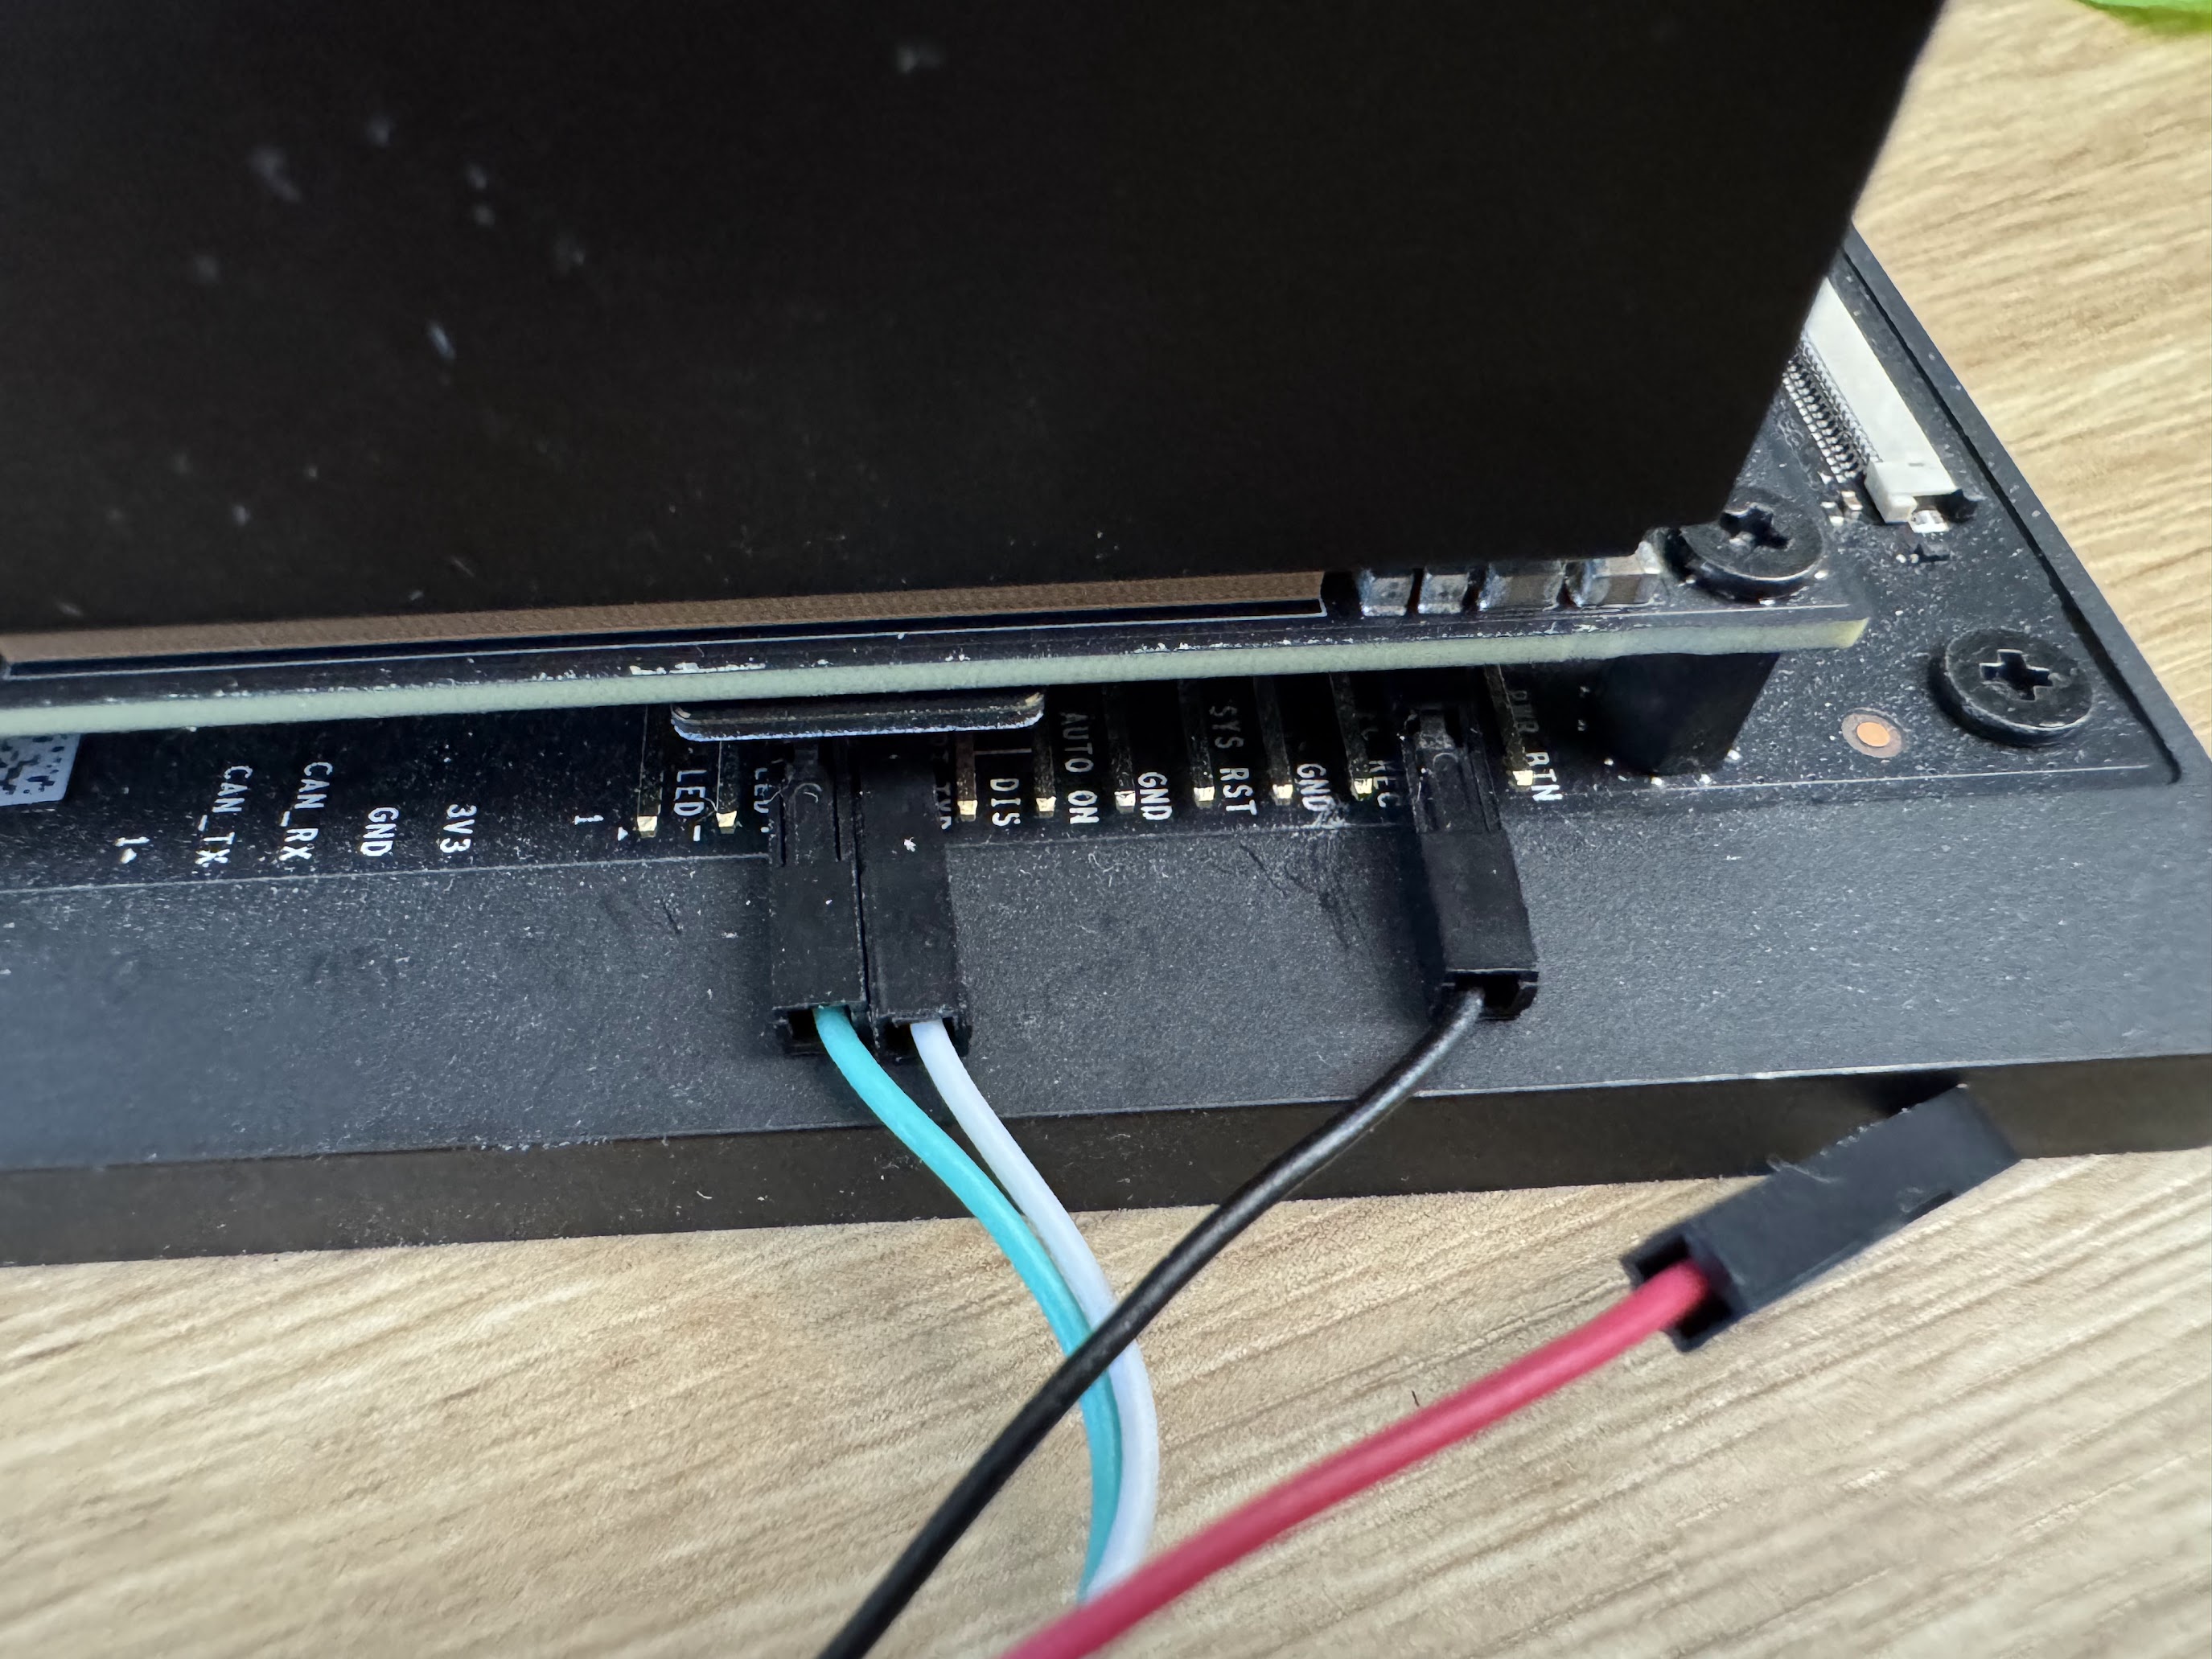
Connect a USB to TTL serial cable to the Button Header on the carrier board.
RXDpin 3 connects to the adapter TX wire.TXDpin 4 connects to the adapter RX wire.GNDpin 7 connects to the adapter ground wire.
Open a serial console on your PC.
Connect the included 19V power supply.
Repeatedly press Esc in the serial console.
In the UEFI setup menu, check the firmware version line near the top of the output.
Note
For Button Header details, see the Jetson Orin Nano Developer Kit Carrier Board Specification from the Jetson Download Center.
This method is less precise and is useful only as a quick check.
Boot with the target JetPack boot media.
Wait for the installer or Ubuntu first-boot setup.
If the display remains black or drops to a UEFI shell, the developer kit may have firmware that is too old for the target JetPack release.
Warning
Avoid repeatedly booting incompatible JetPack boot media or leaving the device at a black screen for an extended time. Power off the developer kit and use the JetPack 6.x update path.

Determine whether the JetPack 6.x update path is required:
If the firmware version is older than 36.0, complete the JetPack 6.x Update Path before booting the JetPack 7.2 Jetson ISO.
If the firmware version is 36.x or newer, continue with Step 2.
PC-side Operation#
Complete Steps 2 and 3 on your laptop or PC.
2️⃣ Download ISO image#
First, you need to download the Jetson BSP installation media (”Jetson ISO”) image file from NVIDIA’s website.
Direct Download Link:
Jetson ISO (r39.2)
Alternatively, you can go to the JetPack Download Page, find the latest JetPack version, and download the Jetson ISO image file on to your laptop or PC.
3️⃣ Create Jetson ISO USB#
To install Jetson BSP (Jetson Linux) on your Jetson Orin Nano Developer Kit, first create an installation media by writing the downloaded ISO image to a USB stick.
Caution
You cannot just simply copy the ISO image file to the USB stick on your OS, such as Windows Explorer or Mac Finder. You need to create a bootable USB stick using special software.
In this guide, we will use Balena Etcher to create a bootable USB stick.
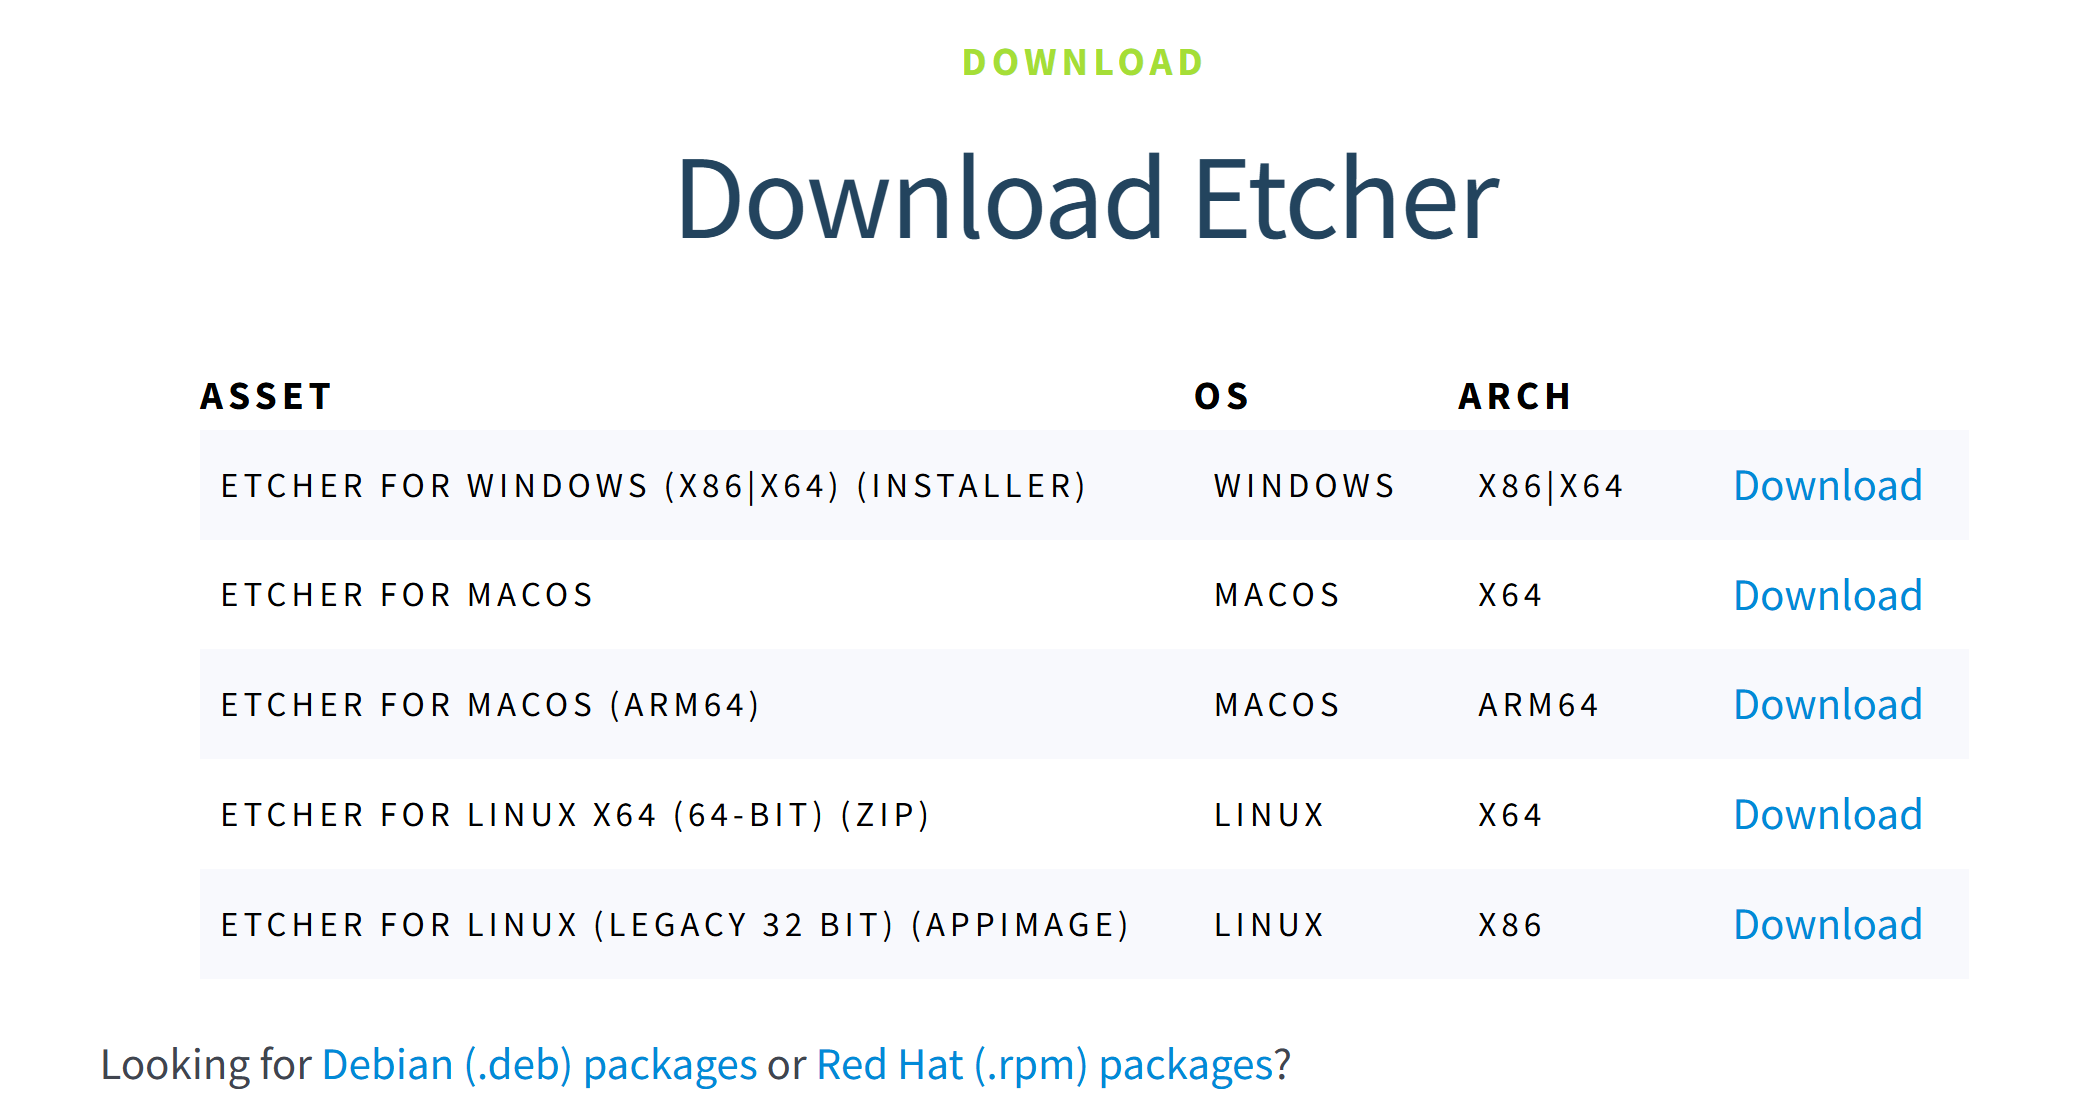
If you don’t have Etcher installed / downloaded yet
Go to https://etcher.balena.io/#download-etcher and download the Etcher software for your OS, if you have not downloaded or installed it yet.
Once you start Etcher, select the downloaded ISO image file, and select the USB stick you want to write the ISO image to.
Device-side Operation#
Complete Steps 4 and 5 on Jetson Orin Nano Developer Kit.
4️⃣ Unbox and connect the developer kit#
Included in the box:
Jetson Orin Nano Developer Kit
Power supply (19 V)
Quick start and support card
The developer kit exposes the following commonly used interfaces:
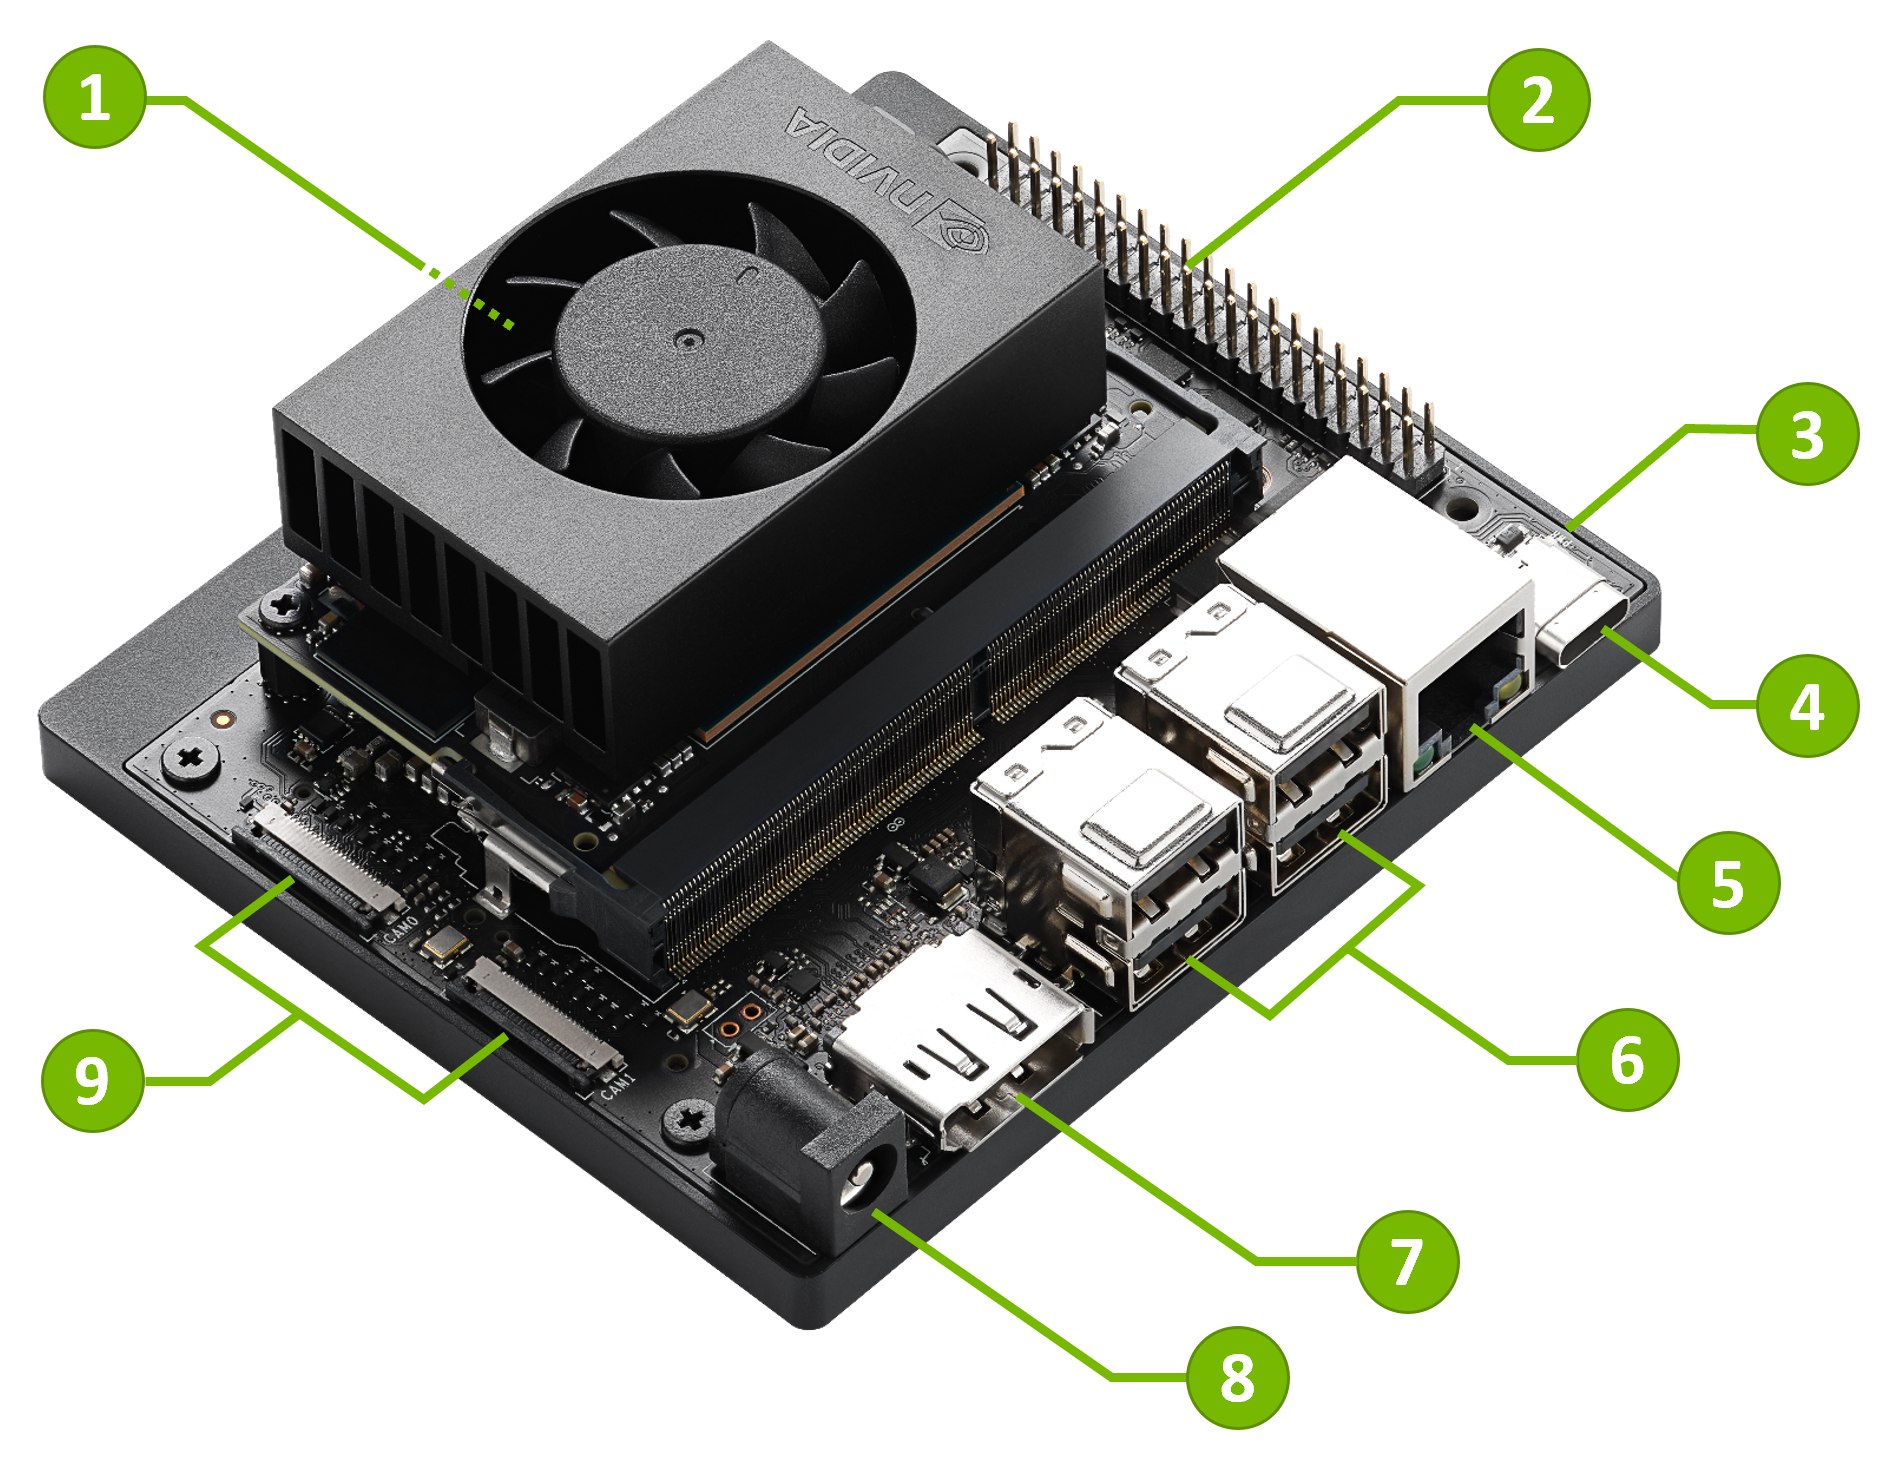
Use one of the following setup styles.
Connect a DisplayPort monitor.
Connect a USB keyboard and mouse.
Insert the bootable Jetson ISO USB flash drive into a USB port.
Make sure the target storage, microSD card or NVMe SSD, is installed.
Connect the included 19 V power supply. The developer kit powers on automatically.
A green LED next to the USB-C connector lights as soon as the developer kit powers on.
Advanced users can use a USB to TTL serial cable for headless access.
Connect the serial cable to the Button Header on the carrier board.
Open a serial console on your PC.
Insert the bootable Jetson ISO USB flash drive into a USB port.
Make sure the target storage, microSD card or NVMe SSD, is installed.
Connect the included 19 V power supply.
For Button Header details, see the Jetson Orin Nano Developer Kit Carrier Board Specification from the Jetson Download Center.
5️⃣ Boot Jetson ISO and install Jetson Linux#
When the developer kit powers on, it should boot from the Jetson ISO USB flash drive automatically.
Important
It’s highly recommended to explicitly select the USB flash drive using the Boot Manager in the UEFI menu to boot the Jetson ISO:
Press Esc when the NVIDIA logo boot splash screen appears.
Use the arrow keys to select Boot Manager, then press Enter.
Use the arrow keys to select your USB disk, then press Enter to boot from it.
Press Esc in the serial console while the pre-boot options are shown.
Use the arrow keys to select Boot Manager, then press Enter.
Use the arrow keys to select your USB disk, then press Enter to boot from it.
After the developer kit boots the Jetson ISO, the installer takes you through a QSPI firmware (capsule) update and then the Jetson Linux (BSP) installation. Follow the three steps below in order.
5.1 Press Y on the firmware update confirmation#
Important
This is the most commonly missed step. If your developer kit still has
JetPack 6.x-generation QSPI firmware (for example, 36.x), the installer first
prompts you to update it, before the Jetson Linux installation begins. You must
press Y to confirm.
The prompt only waits 30 seconds and is easy to miss in real time. If it times out and the installation continues without the update, the install fails later. If that happens, restart the installation and press Y when the prompt appears.
When the installer detects outdated QSPI firmware, it shows the capsule update options. Press Y to accept and start the update:
The short clip below shows the confirmation prompt — note it’s counting down from 30 seconds.
5.2 Observe the UEFI capsule updates#
After you confirm, the UEFI capsule update runs. The update is applied in two passes, and the developer kit may reboot between or after them — this is expected. Wait for both passes to finish before the installer continues.
The video below shows the capsule update running through both passes:
5.3 Install the BSP on your storage target#
After the capsule update completes, the installer continues to the Jetson Linux (BSP) installation:
At the Jetson BSP installation GRUB menu, select Install Jetson ISO r39.2.
Select the target storage device, either the installed microSD card or NVMe SSD.
Confirm the install operation.
Wait for the installation to complete.
Reboot when prompted.
Caution
The installation erases the selected target storage device. Confirm that you selected the intended microSD card or NVMe SSD before starting the install.
The clip below shows the BSP installation onto a microSD card target:
6️⃣ Boot from target storage and finish initial setup#
After Jetson Linux is installed, remove the Jetson ISO USB flash drive if the installer prompts you to do so, then boot from the installed target storage.
When you boot Jetson Linux for the first time, complete the initial software setup:
Review and accept the NVIDIA Jetson software EULA.
Select system language, keyboard layout, and time zone.
Connect to a network.
Create a username, password, and computer name.
Log in.
After logging in, the Ubuntu desktop appears and the developer kit is ready for development.
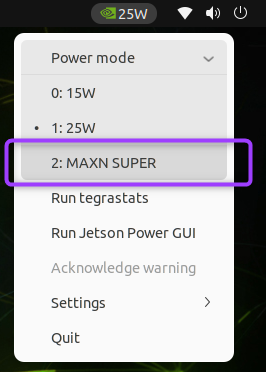
Unlock Super Performance#
The default power mode is typically 25W. To enable maximum performance:
Click the current power mode in the Ubuntu desktop top bar.
Select Power Mode.
Choose MAXN SUPER.
JetPack 6.x Update Path#
If you want to use an older Jetson Linux or JetPack release instead of the JetPack 7.2 Jetson ISO flow, see JetPack 6.x Update Path.
Next Steps#
Continue with BSP Setup for installation method details.
Continue with JetPack SDK Setup for JetPack component installation.
Review Hardware Layout for connector and interface details.
Visit the NVIDIA Jetson Developer site for platform downloads and resources.
Ask questions or share projects on the NVIDIA Jetson Forums.