BSP Setup#
BSP Installation#
The Jetson Linux BSP provides the boot firmware, Linux kernel, Ubuntu root file system, NVIDIA drivers, and low-level platform support for Jetson Orin Nano Developer Kit.
For JetPack 7.2, the recommended first-time setup path is Jetson ISO. On Jetson Orin Nano Developer Kit, Jetson ISO is supported only for JetPack 7.2. Jetson ISO lets you boot an installation USB flash drive and install Jetson Linux directly on target storage attached to the developer kit, such as a microSD card or a NVMe SSD.
Important
JetPack 7.2 installation requires JetPack 6.x-generation Jetson UEFI/QSPI firmware on Jetson Orin Nano Developer Kit. If the kit still has older factory firmware, complete the JetPack 6.x update path before booting the JetPack 7.2 image. See JetPack 6.x Update Path.
Note
Unlike Jetson AGX Thor Developer Kit, Jetson Orin Nano Developer Kit does not include target storage in the box. Prepare either a microSD card or a NVMe SSD before installing Jetson Linux.
Installation Options#
Jetson ISO |
SDK Manager |
Flash script |
|
|---|---|---|---|
Short summary |
USB installation media that installs Jetson Linux to microSD or NVMe SSD |
GUI workflow for flashing and optional JetPack components |
Command-line workflow using Jetson Linux tools |
Host PC |
Windows, macOS, or Linux computer to create USB media |
Ubuntu x86_64 host PC |
Ubuntu x86_64 host PC |
Target storage |
microSD card or NVMe SSD installed on the developer kit |
microSD card, NVMe SSD, or other supported target |
microSD card, NVMe SSD, or other supported target |
Best for |
JetPack 7.2 only, for first-time setup without an Ubuntu host PC |
Guided setup, recovery, and JetPack component installation |
Automation and advanced flashing |
Covered here |
Starter guidance below |
Starter guidance below |
Option 1. Jetson ISO Installation USB#
Supported only for JetPack 7.2 on Jetson Orin Nano Developer Kit.
This method is illustrated in Quick Start Guide.
Option 2. NVIDIA SDK Manager#
Use NVIDIA SDK Manager when you want a guided host-PC workflow for flashing Jetson Linux, updating firmware, and installing JetPack components.
Choose SDK Manager when:
You have an Ubuntu 20.04 or 22.04 x86_64 host PC available.
You want to flash firmware and a supported JetPack release in one guided workflow.
You want to install Jetson Linux directly to a NVMe SSD instead of using a microSD card.
You need to recover or reflash a developer kit from Force Recovery Mode.
You prefer a host-driven flow instead of Jetson ISO.
SDK Manager Toolbox#
Prepare these items before starting the SDK Manager method.
Item |
Requirement |
|---|---|
Host PC |
x86 PC running Ubuntu 22.04 or Ubuntu 20.04. |
Target storage |
microSD card, 64GB or larger, or NVMe SSD. |
Flashing supply |
USB cable for the USB-C port on Jetson Orin Nano Developer Kit and a jumper pin or metal paper clip. |
Display or console |
DisplayPort monitor and USB keyboard, DisplayPort-to-HDMI display path and USB keyboard, or USB to TTL serial cable. |
Account and network |
Internet access and an NVIDIA Developer Program account. |
|
microSD card: 64GB or larger. |
|
NVMe SSD: Recommended for better storage performance. |
Overall Flow#
0. Install SDK Manager#
Install SDK Manager on the Ubuntu host PC. For more information, see the NVIDIA SDK Manager documentation and the Download and Run SDK Manager page.
Select the tab that matches your Ubuntu host version.
wget https://developer.download.nvidia.com/compute/cuda/repos/ubuntu2204/x86_64/cuda-keyring_1.1-1_all.deb
sudo dpkg -i cuda-keyring_1.1-1_all.deb
sudo apt-get update
sudo apt-get -y install sdkmanager
wget https://developer.download.nvidia.com/compute/cuda/repos/ubuntu2004/x86_64/cuda-keyring_1.1-1_all.deb
sudo dpkg -i cuda-keyring_1.1-1_all.deb
sudo apt-get update
sudo apt-get -y install sdkmanager
Launch SDK Manager:
sdkmanager
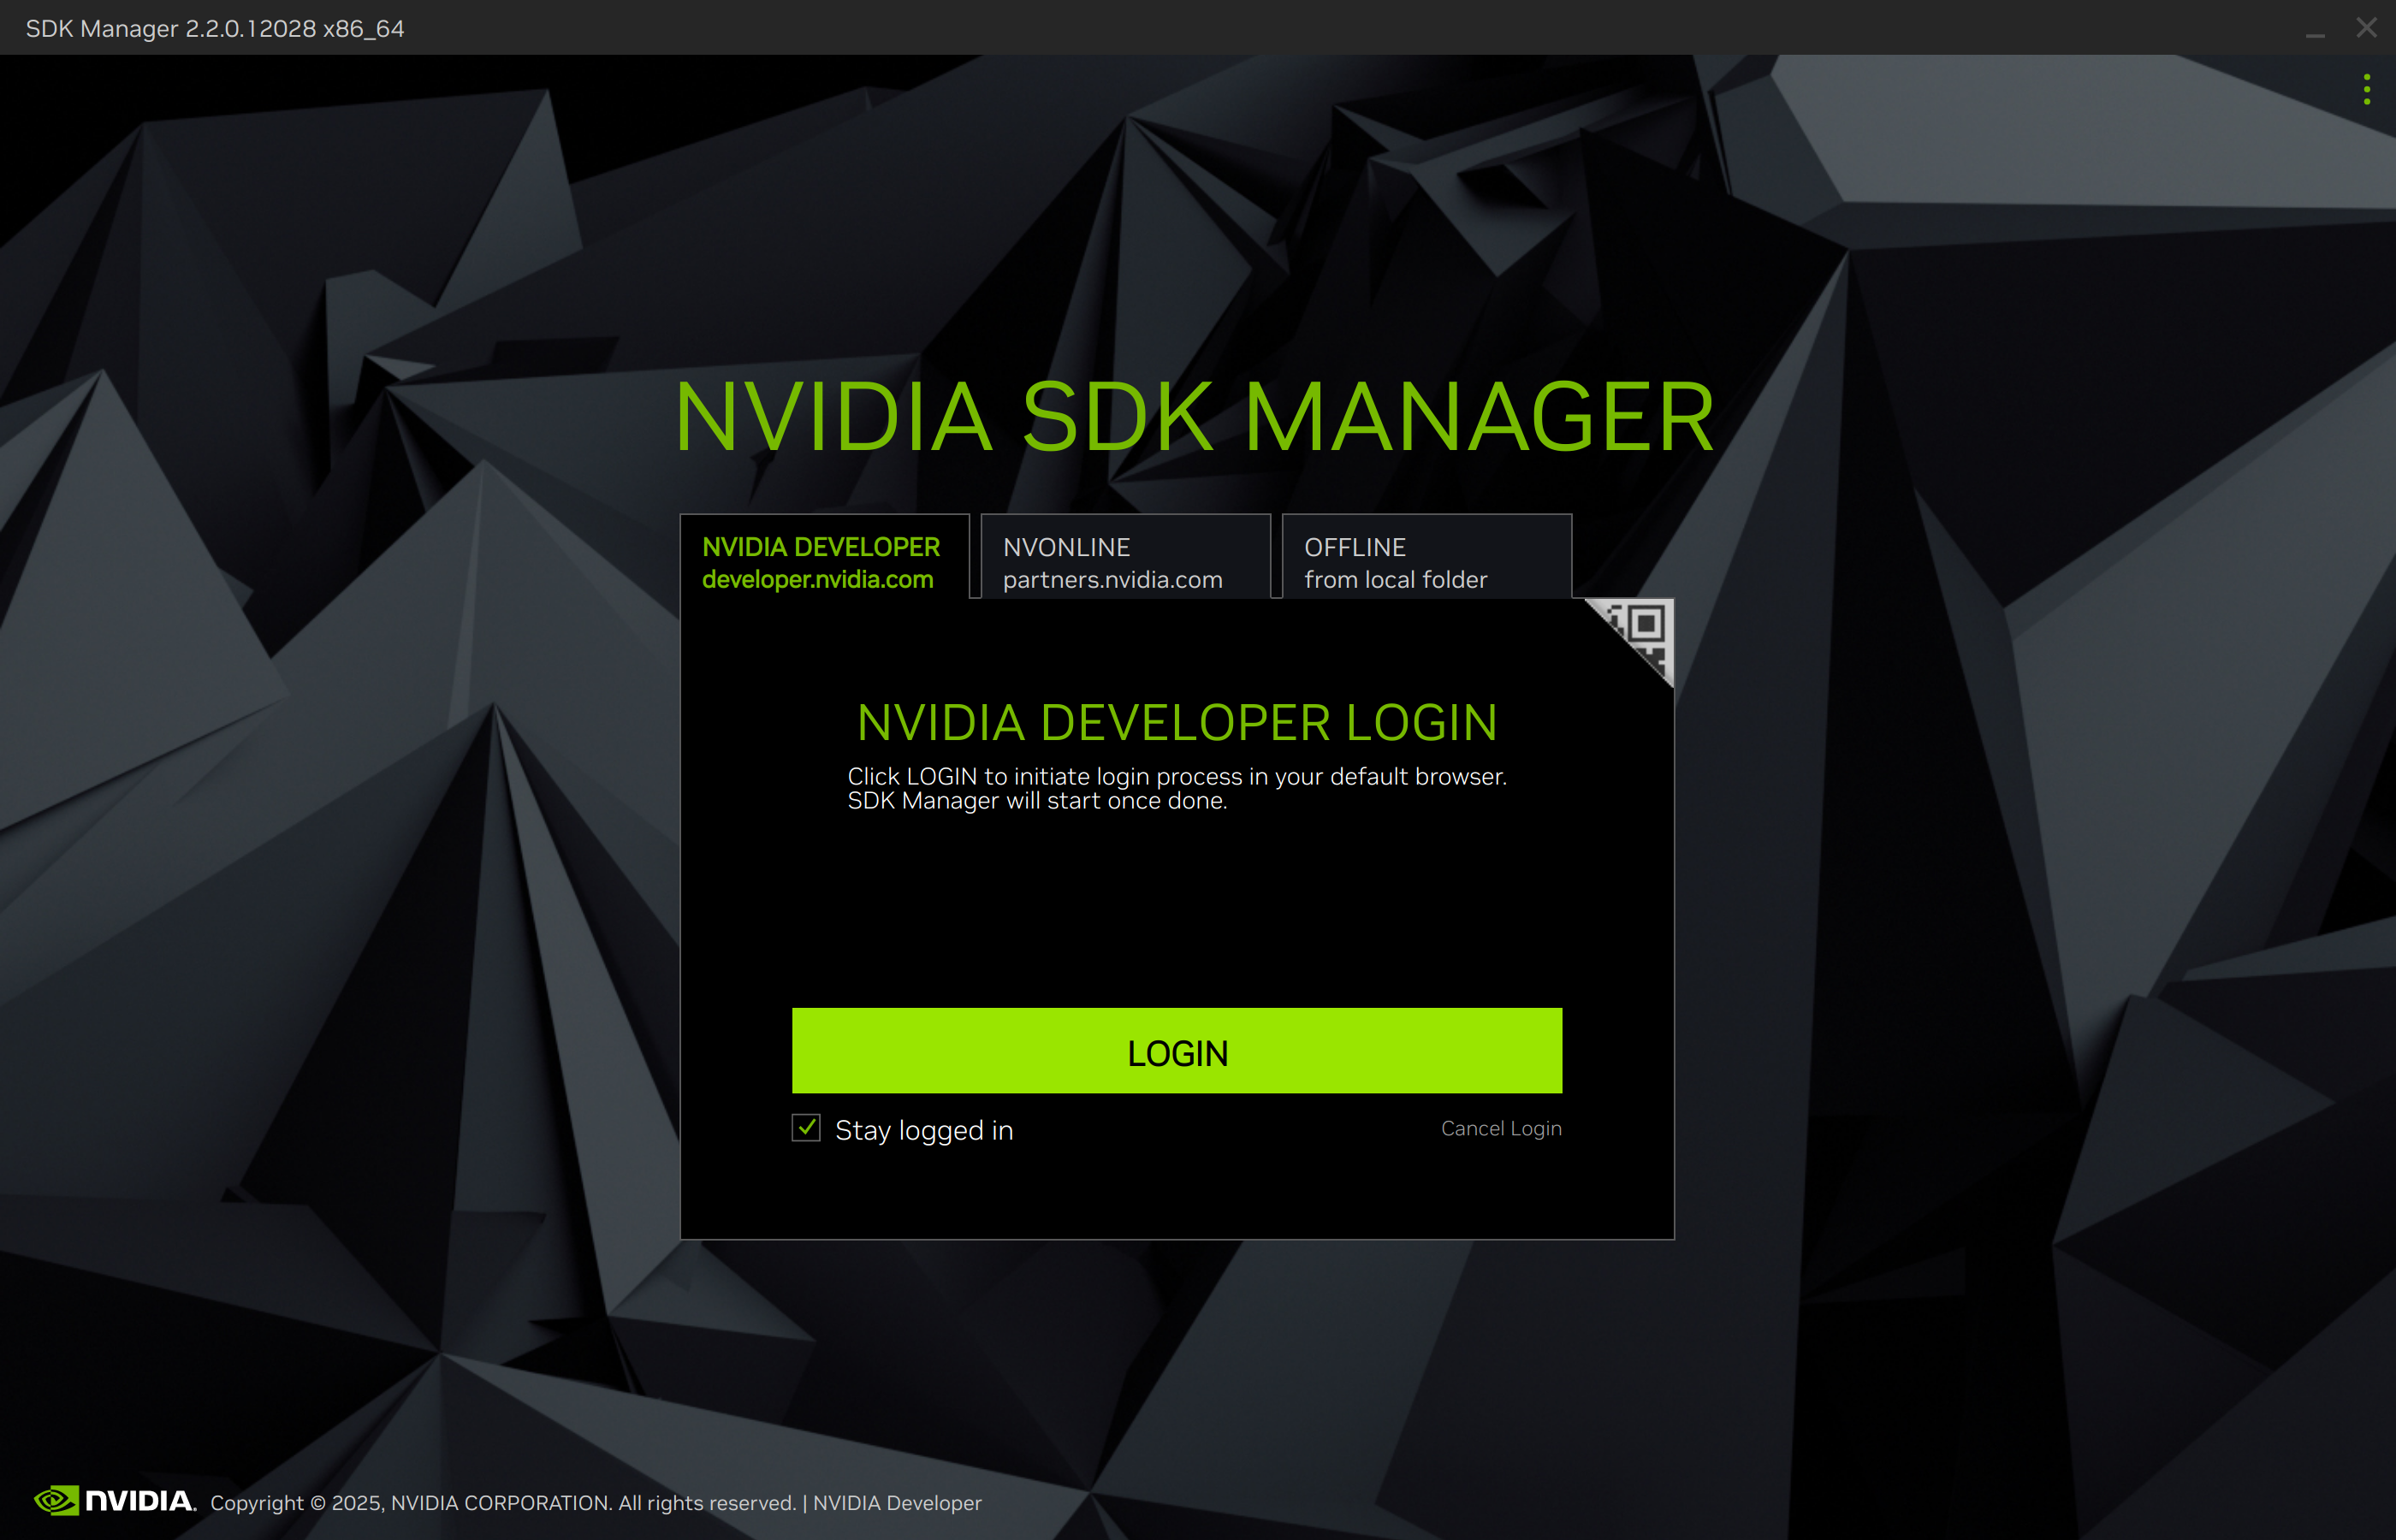
First time using SDK Manager
When using SDK Manager for the first time, log in with your NVIDIA Developer credentials. Select Stay logged in, then click LOGIN.
A browser window opens. Enter the email address registered with your NVIDIA Developer account.
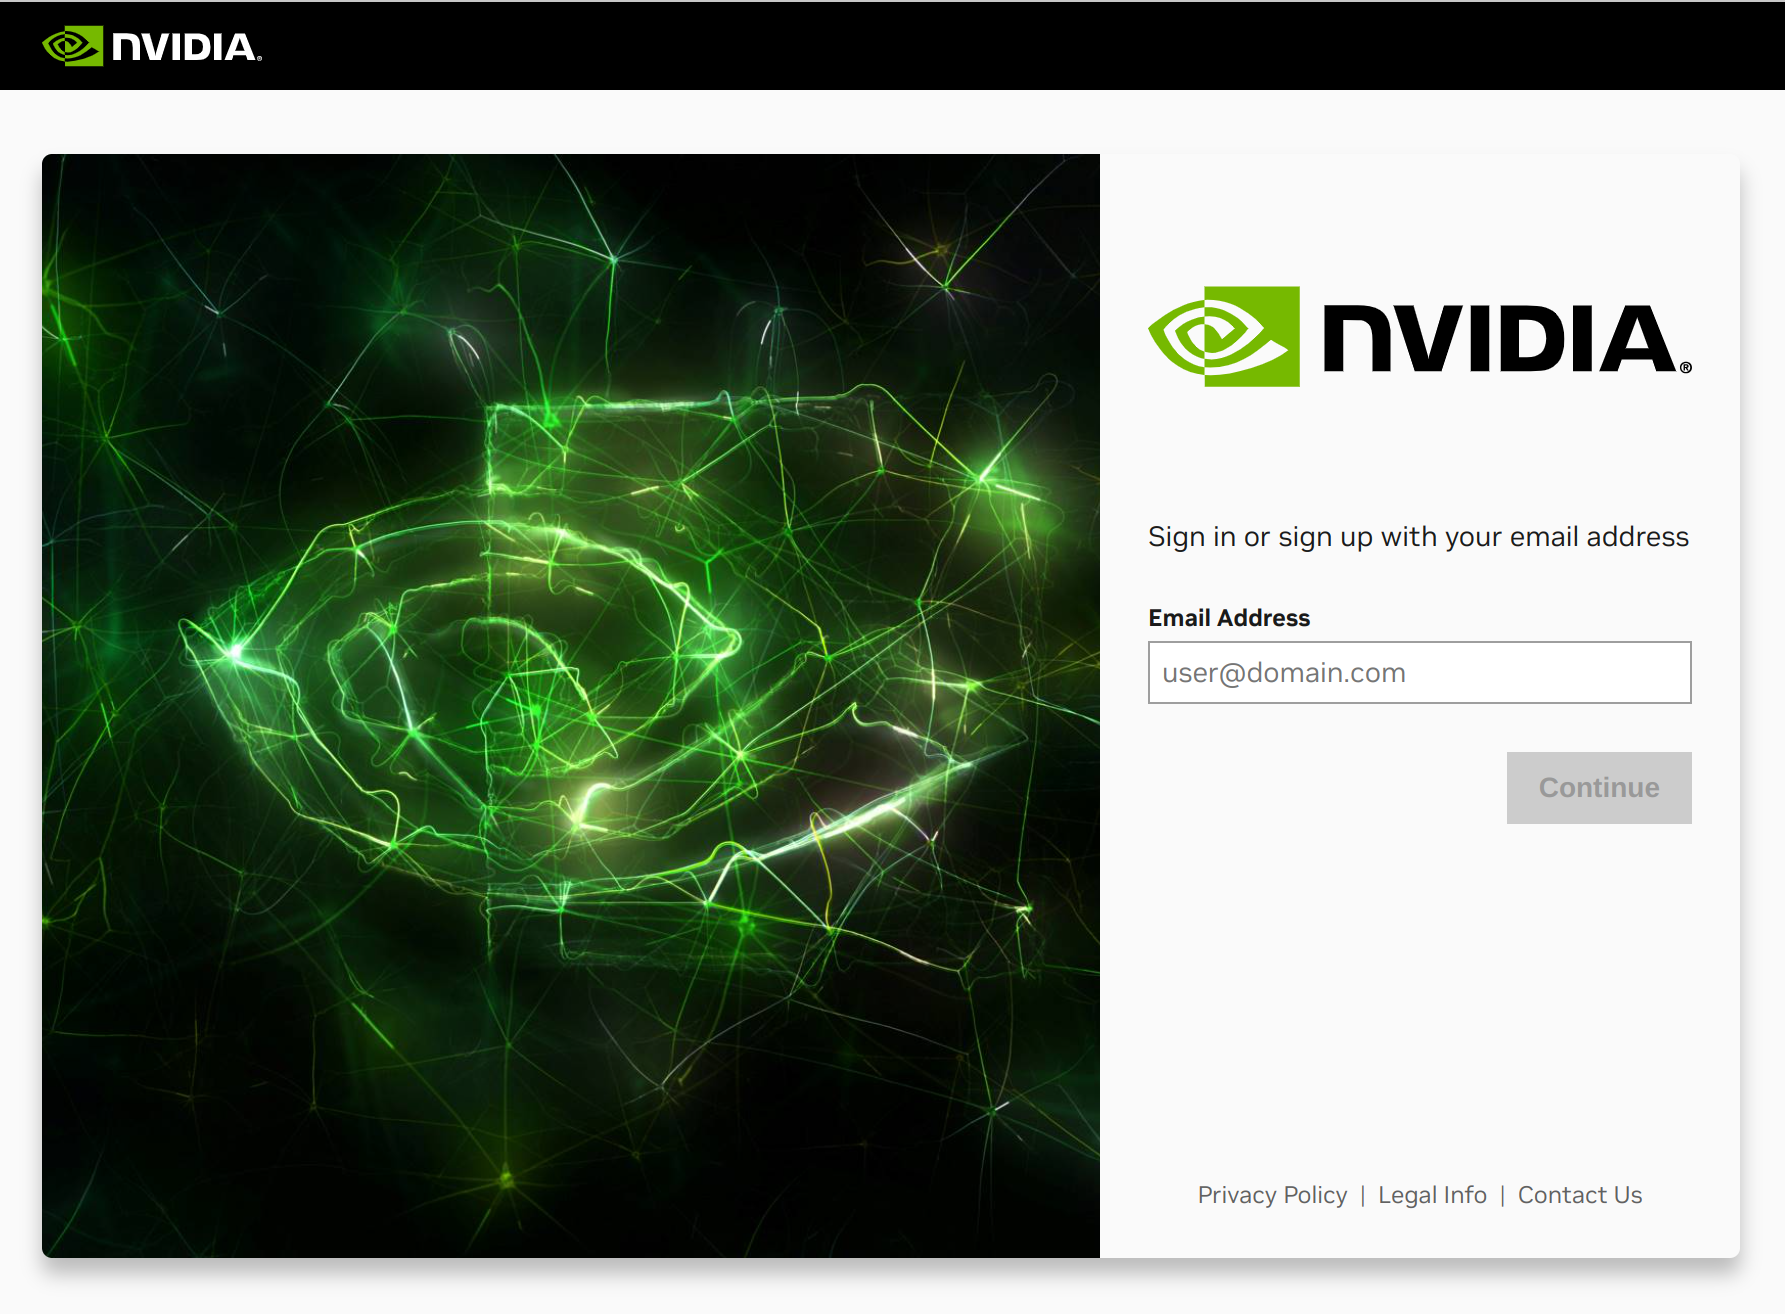
Two-factor authentication may appear.
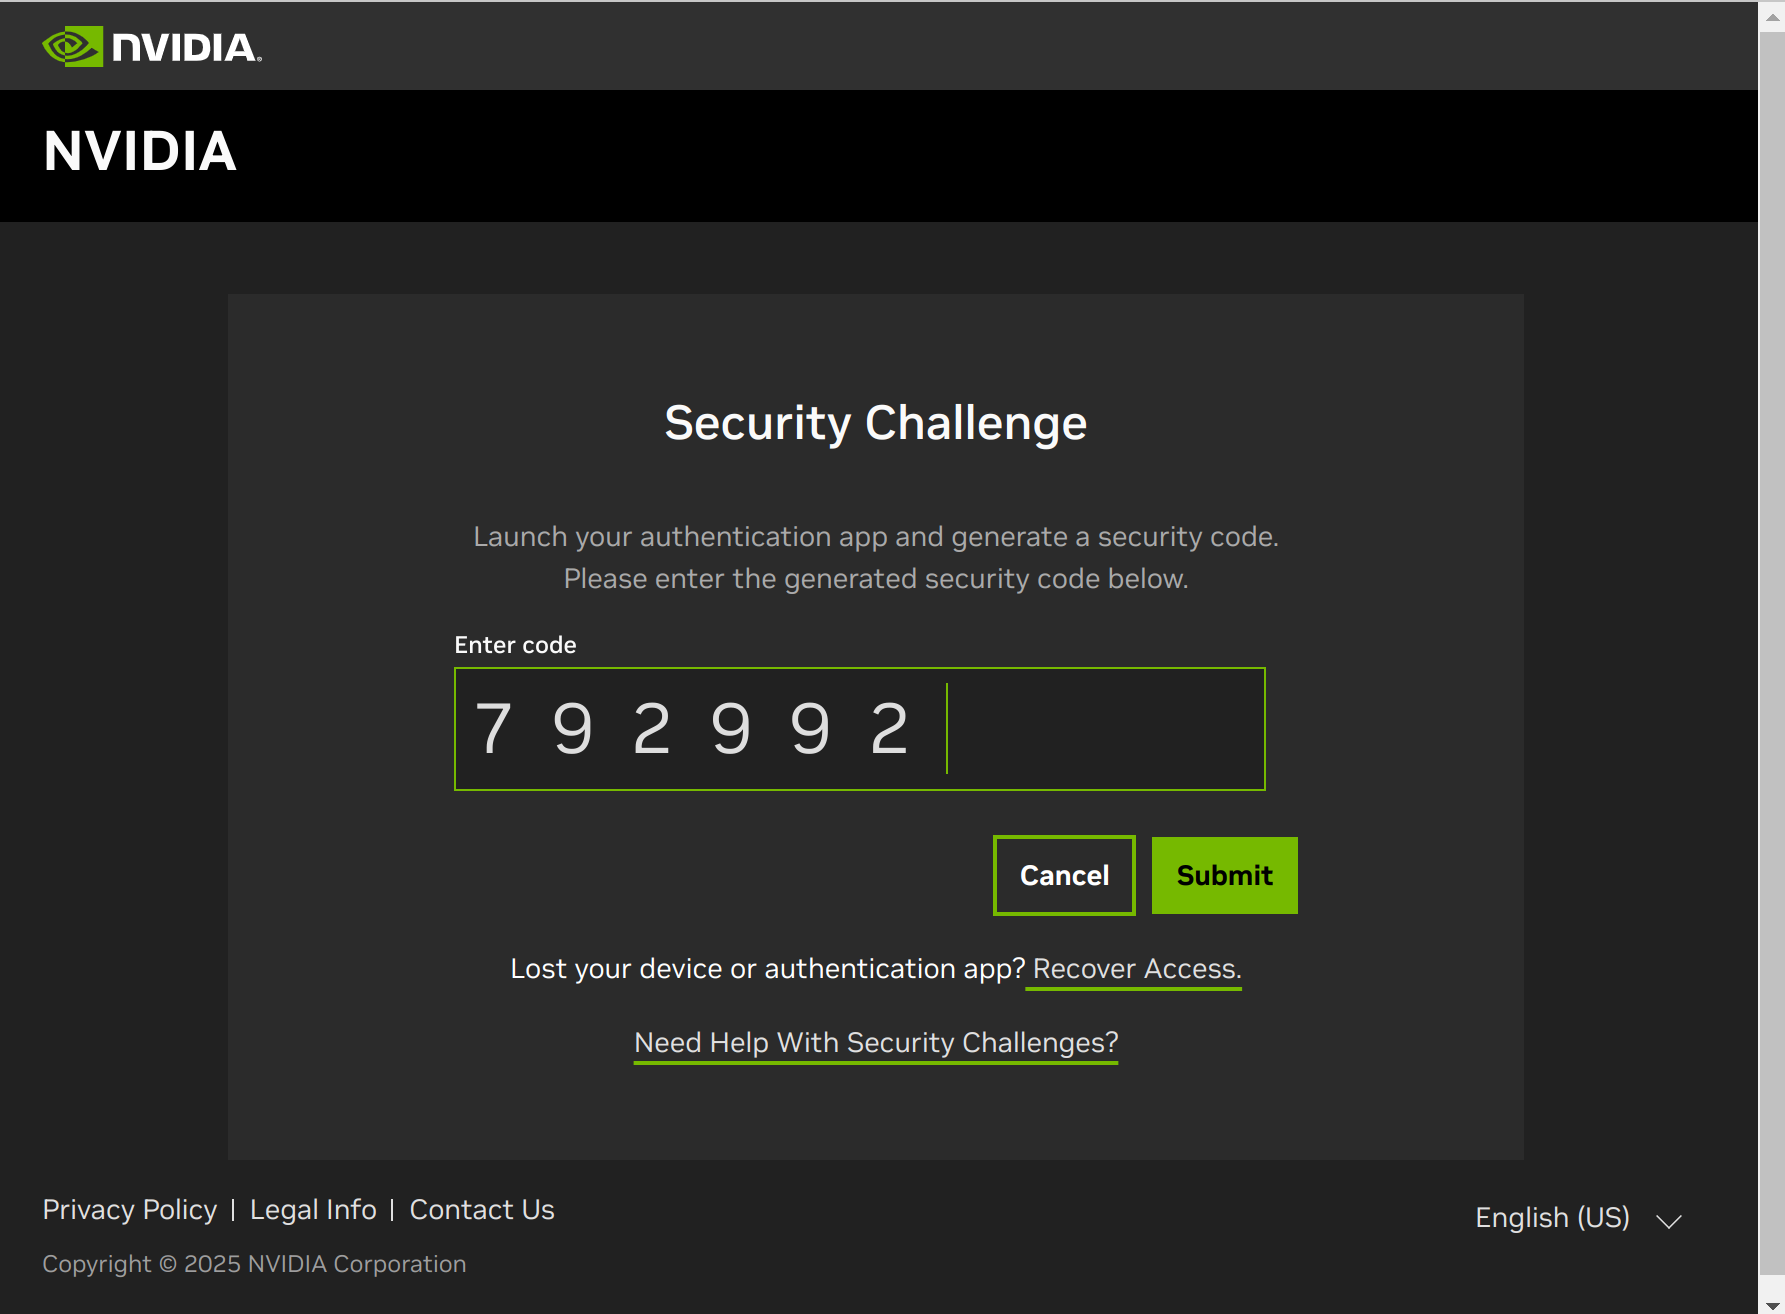
After authentication, the browser redirects back to SDK Manager.
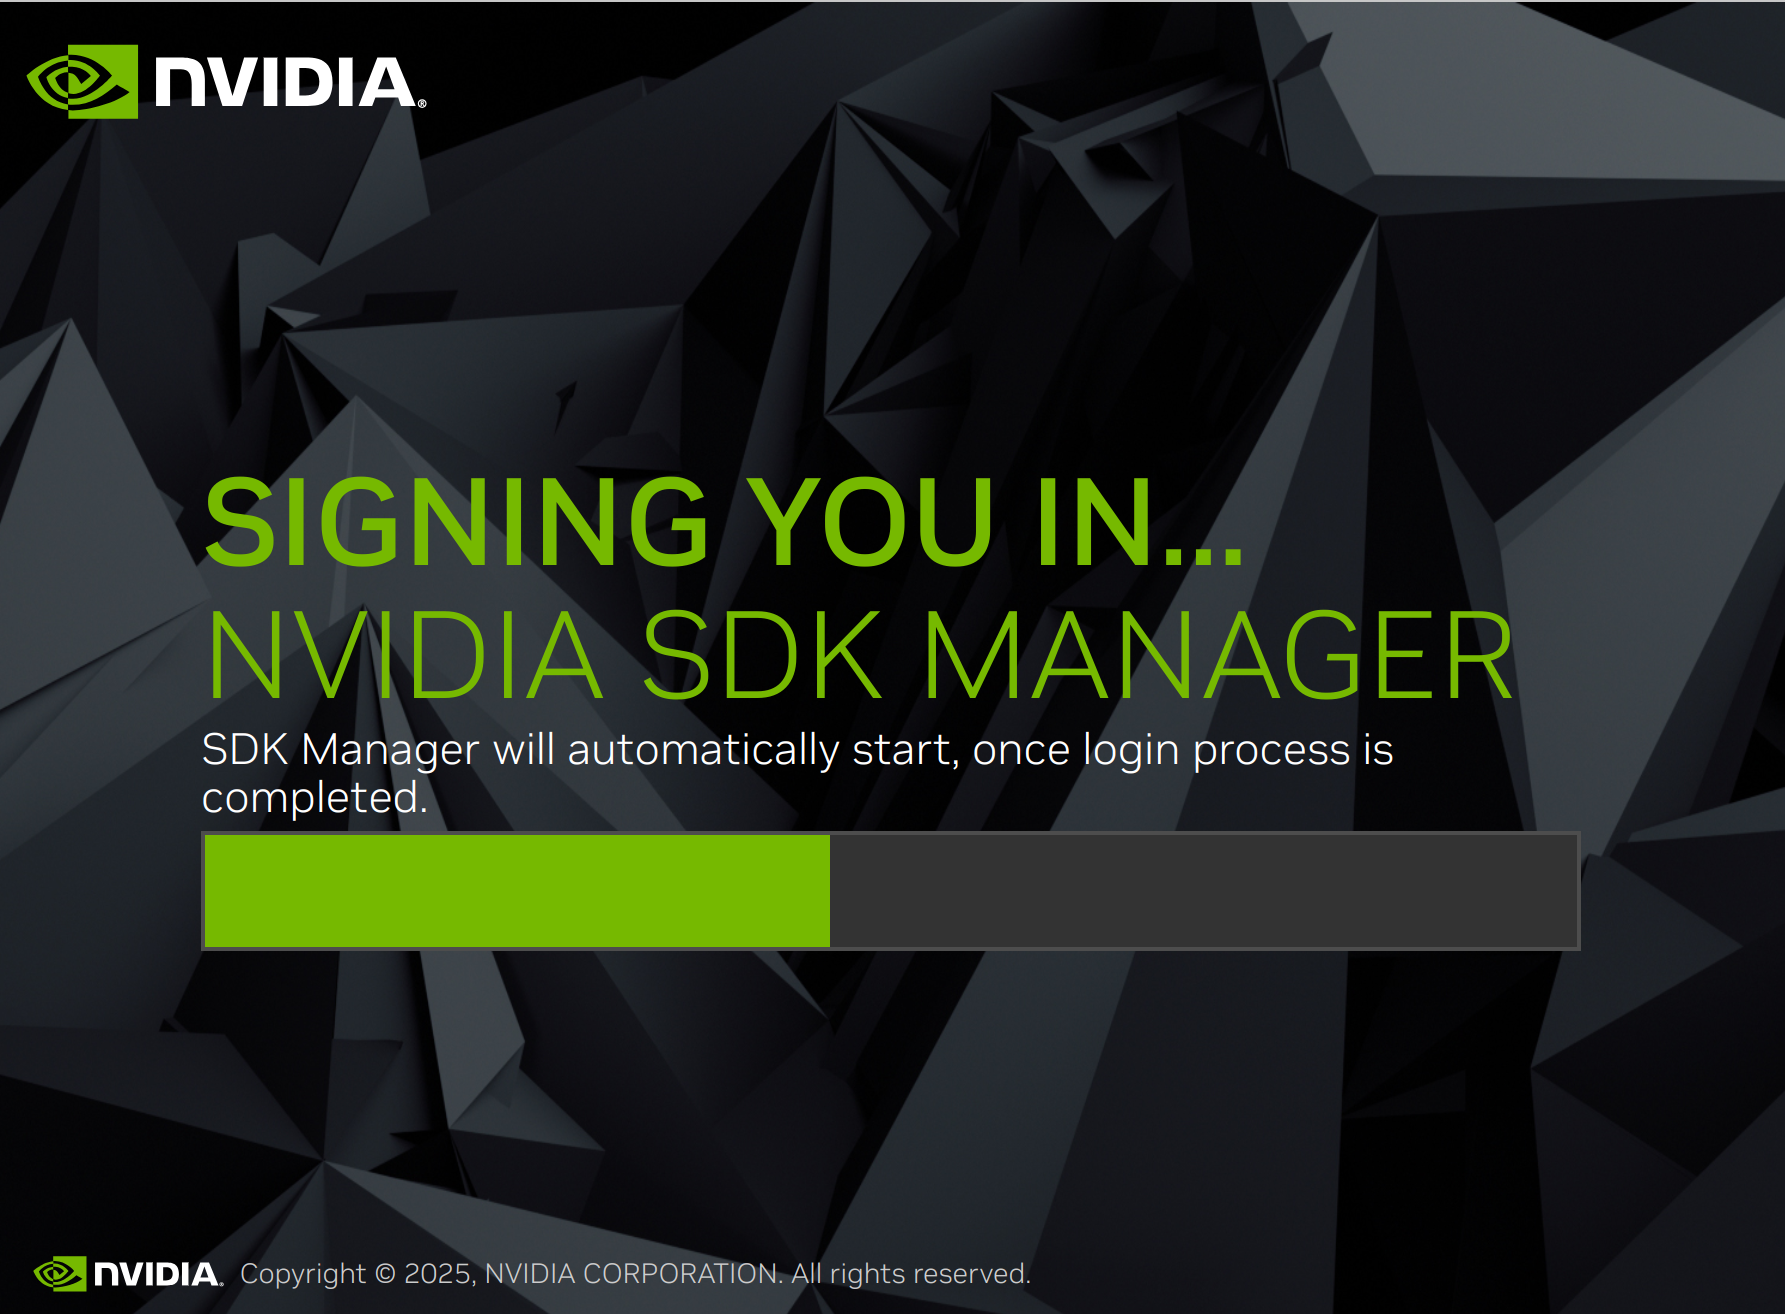
SDK Manager completes the login.
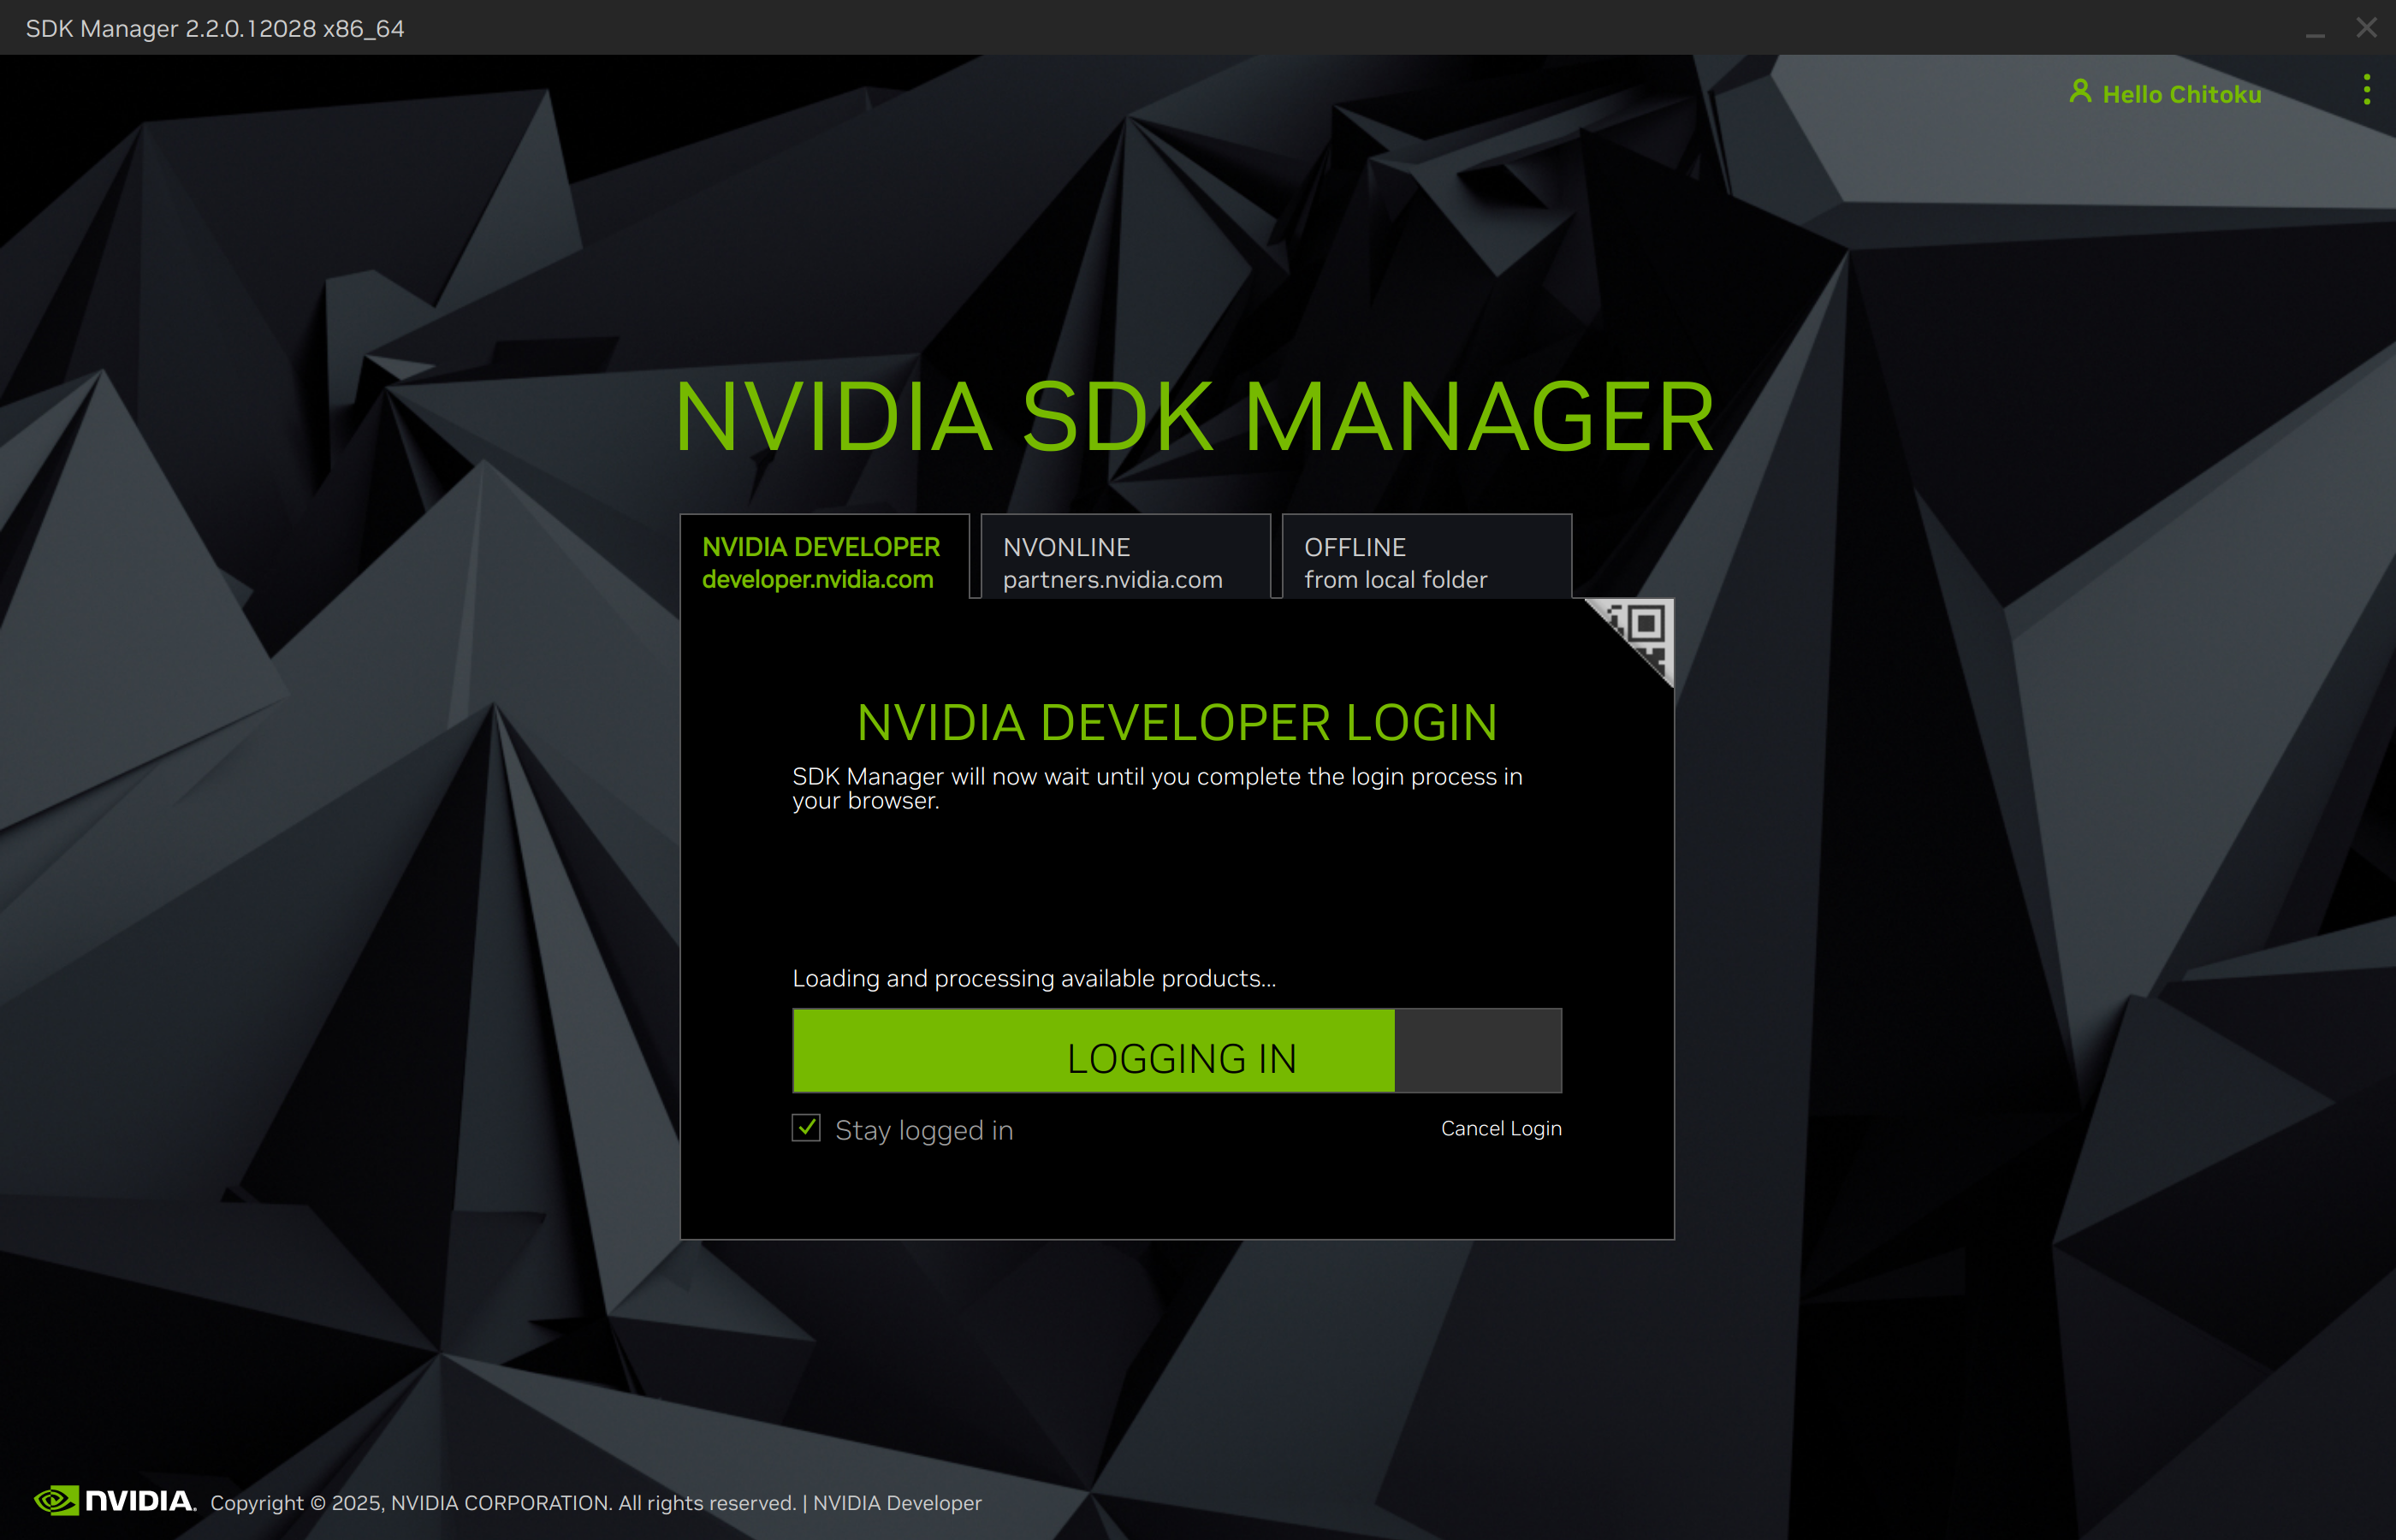
After login completes, SDK Manager is ready.
1. Connect the Target Hardware#
After SDK Manager is running, connect Jetson Orin Nano Developer Kit to the Ubuntu host PC and power it on in Force Recovery Mode.
Connect Jetson Orin Nano Developer Kit to the host PC with a USB cable.
Note
Connect the USB cable to the USB-C port on the developer kit carrier board.
Short pin 9 and pin 10 of the
J14header located below the Jetson module with a jumper pin, then insert the DC power supply plug into the DC jack to power on the developer kit.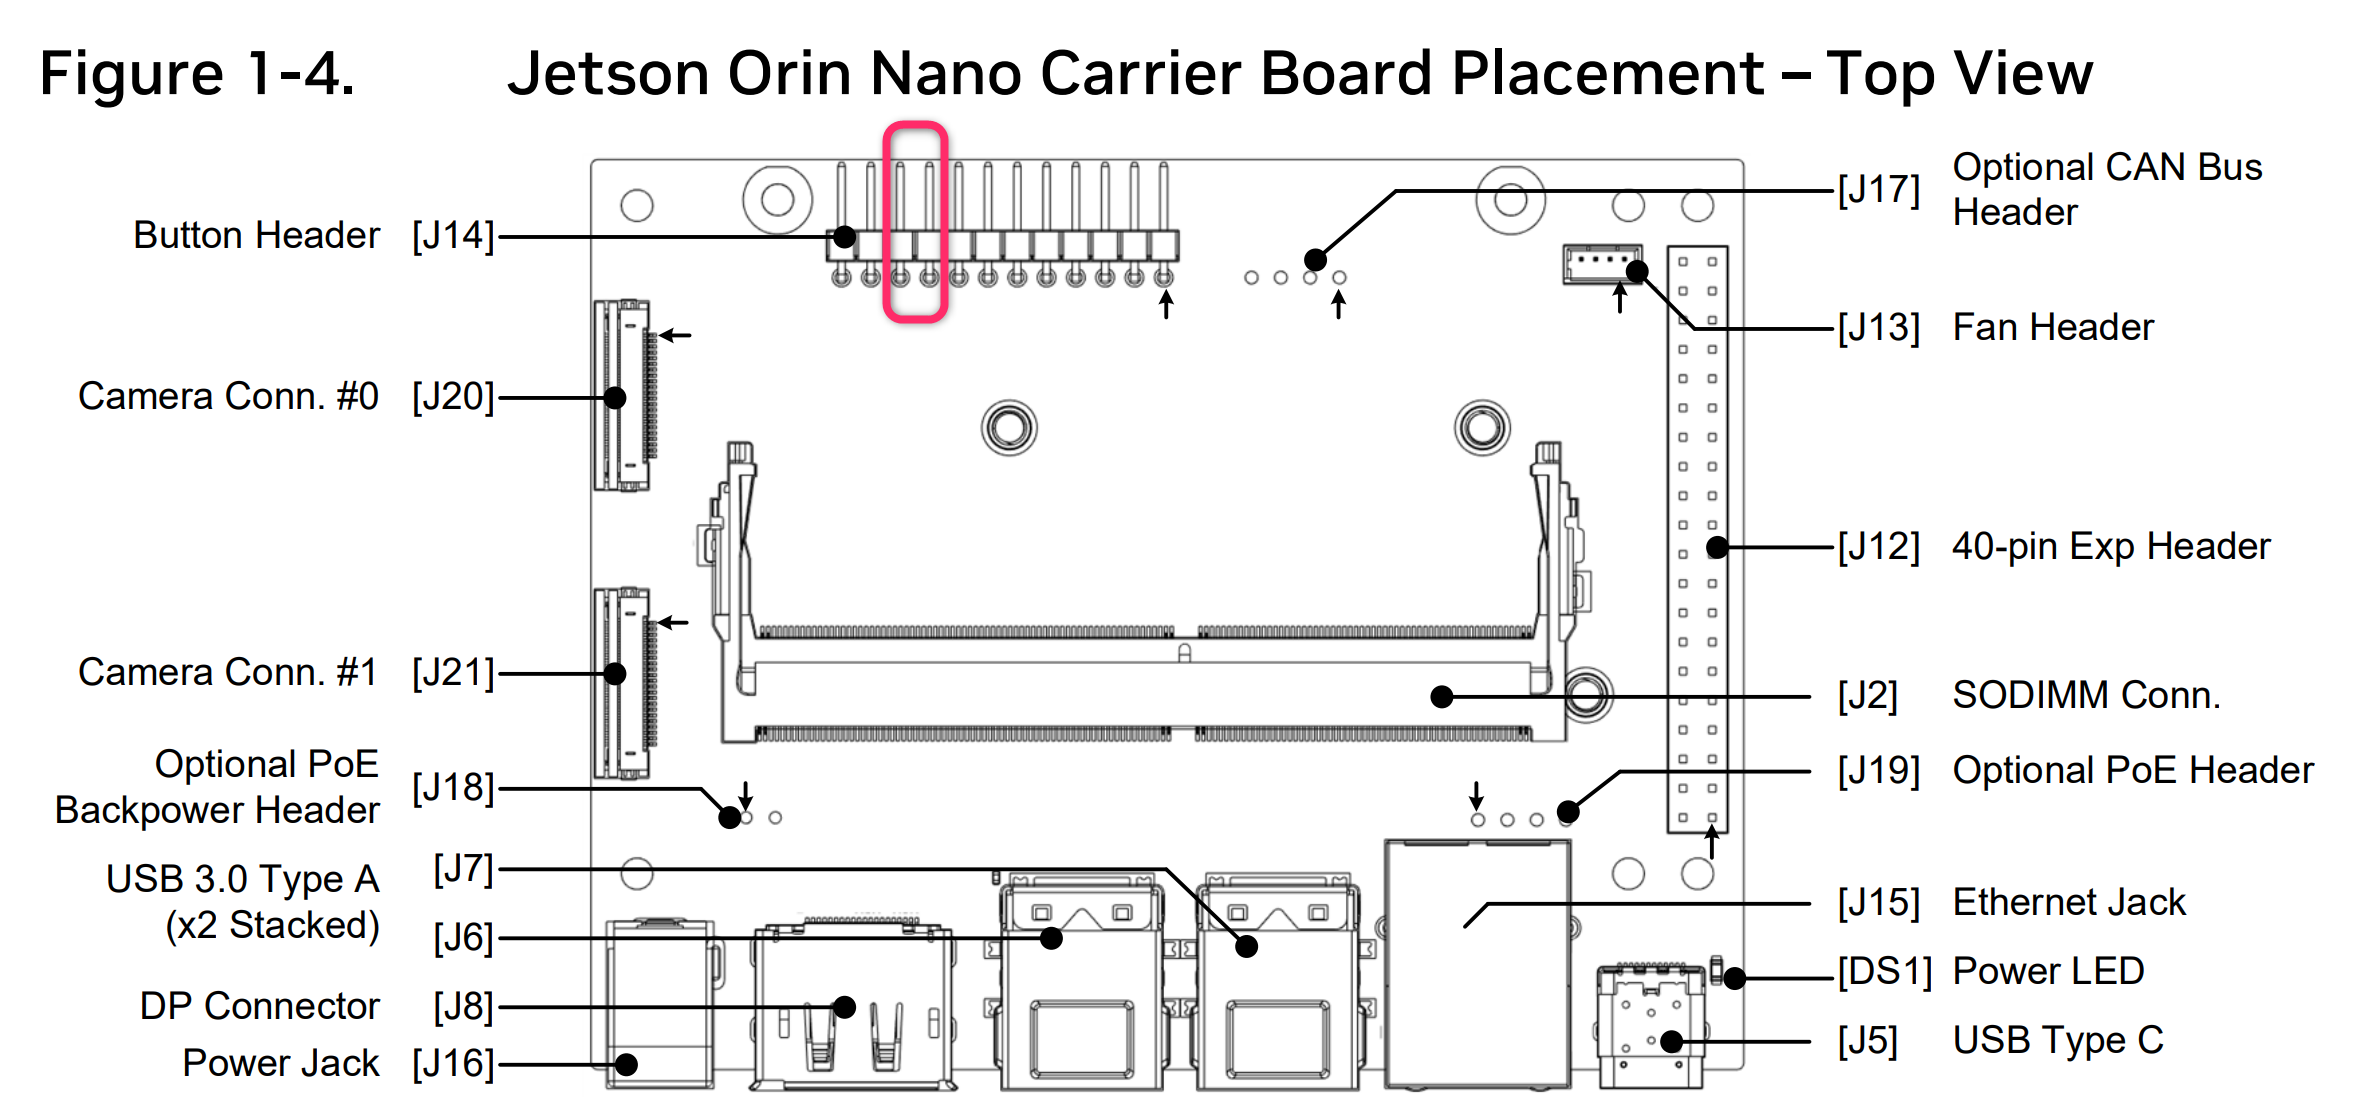
You can also use a metal paper clip.

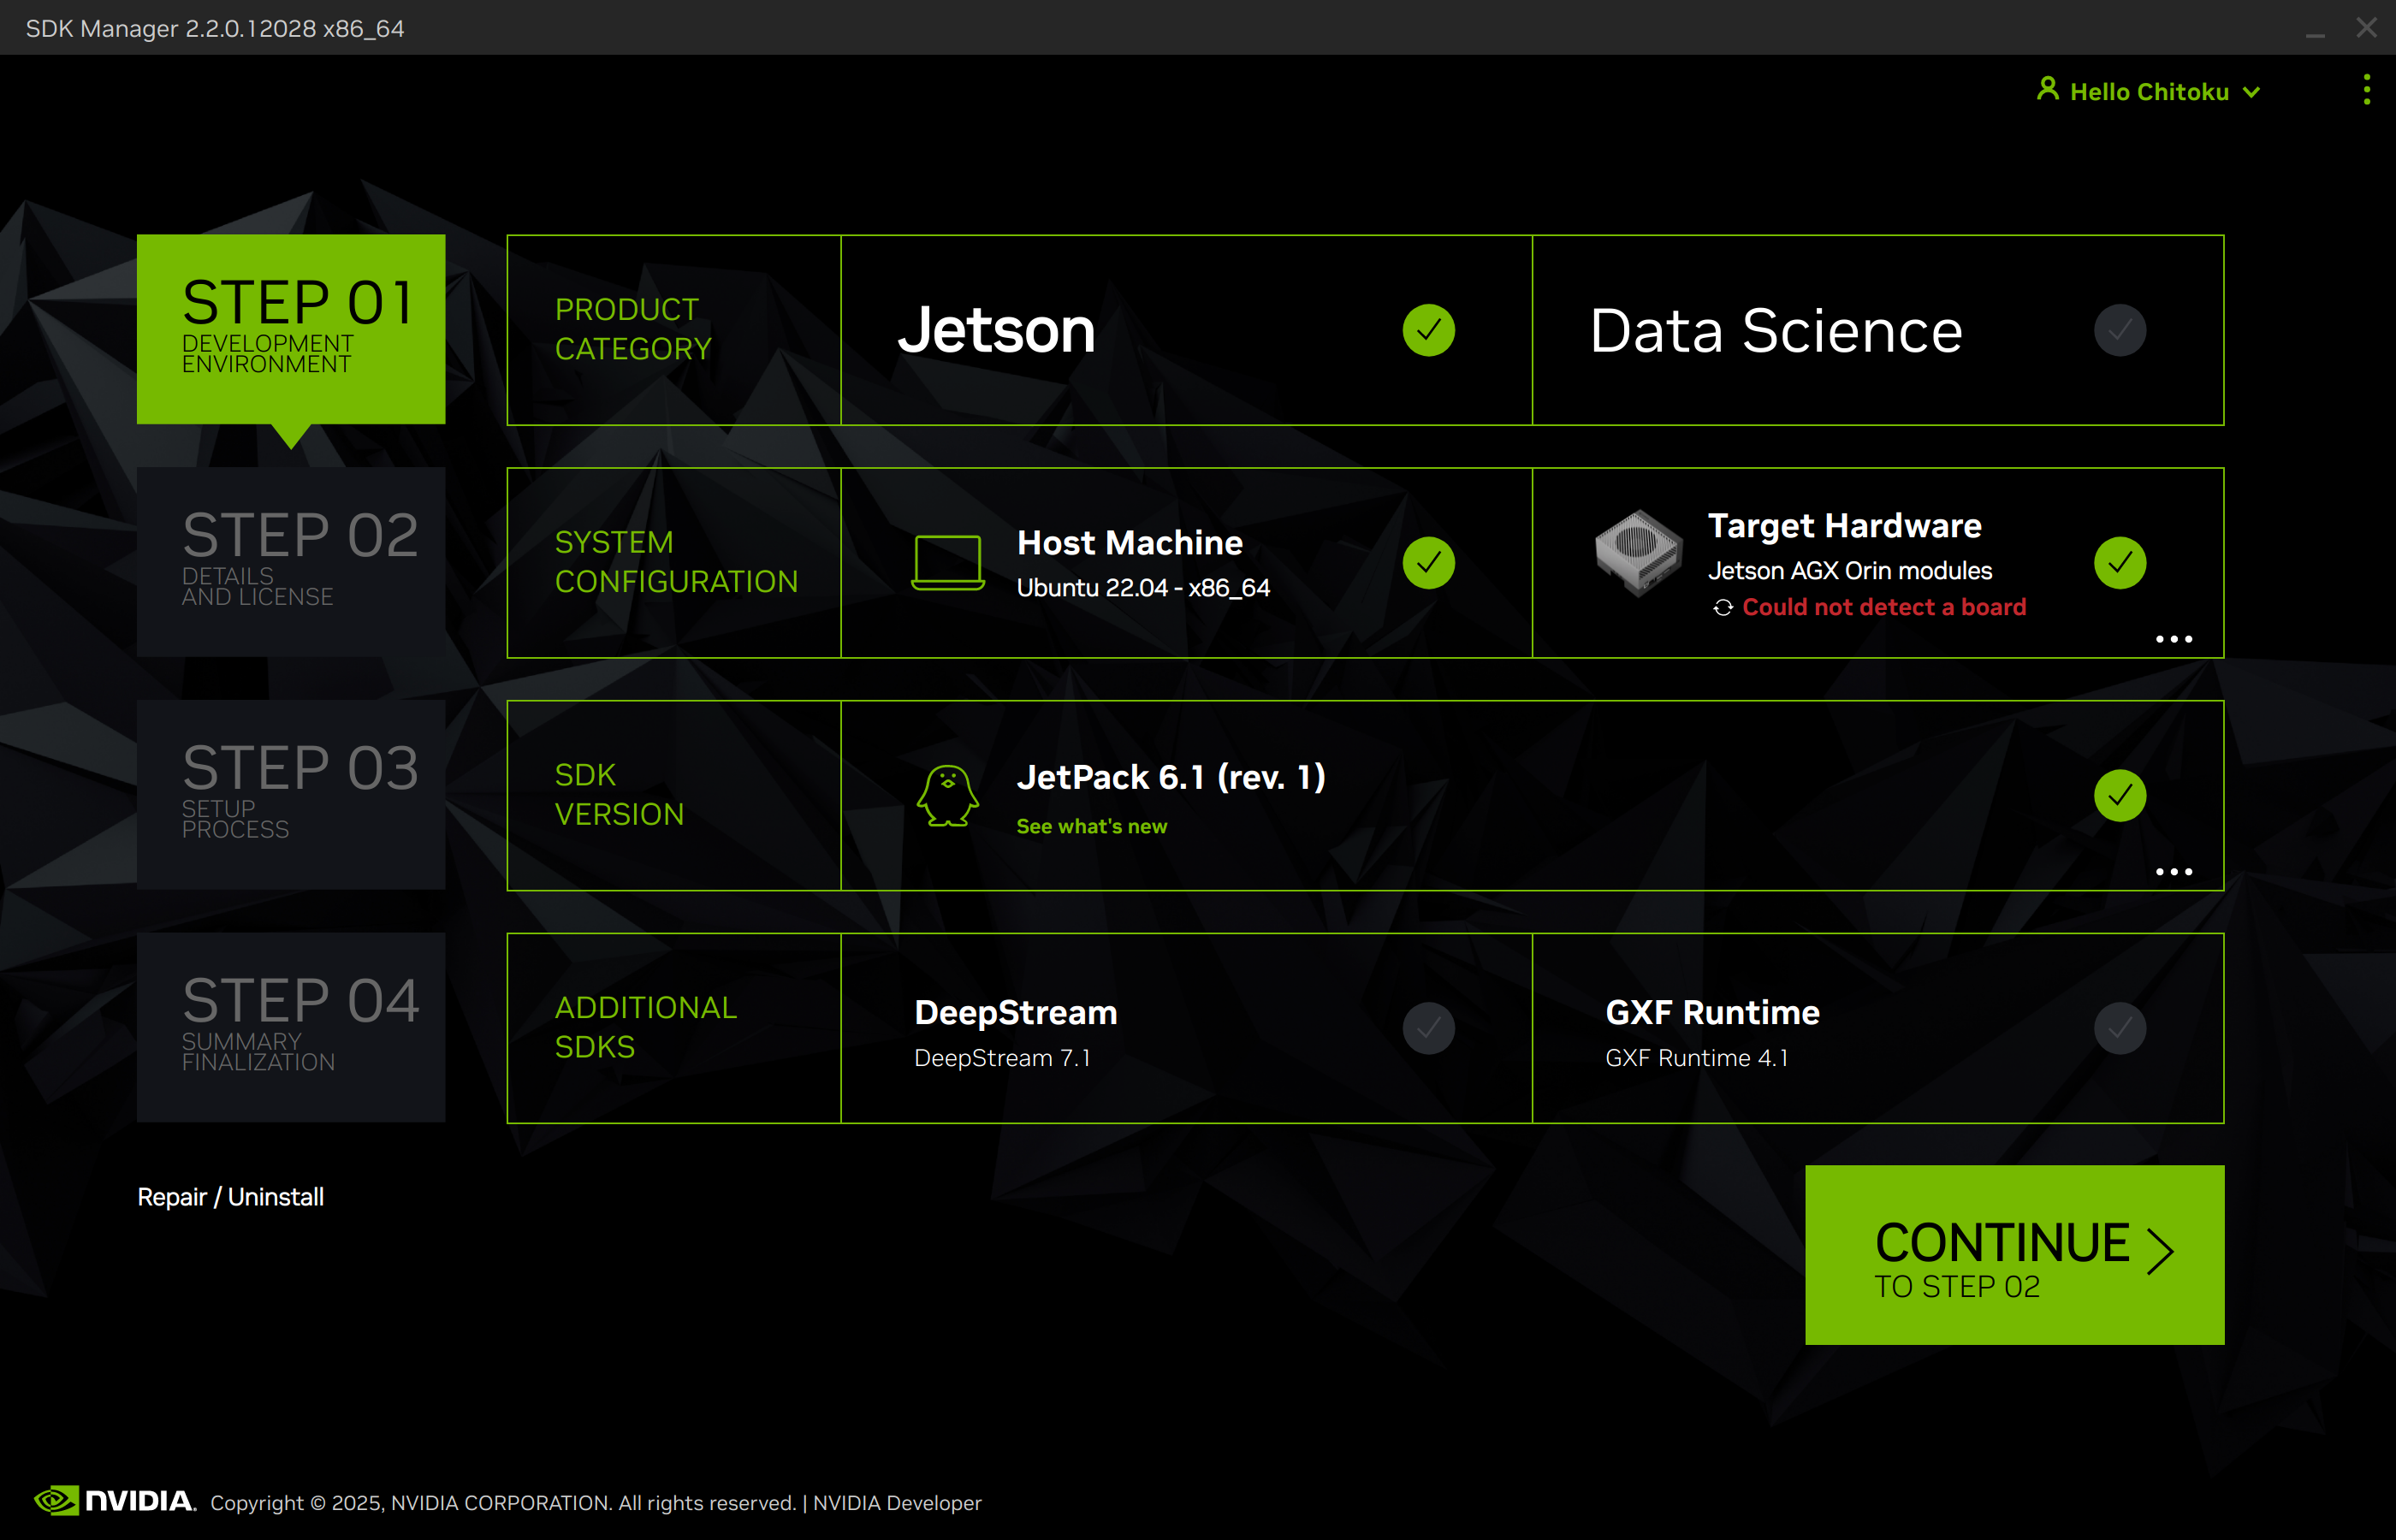
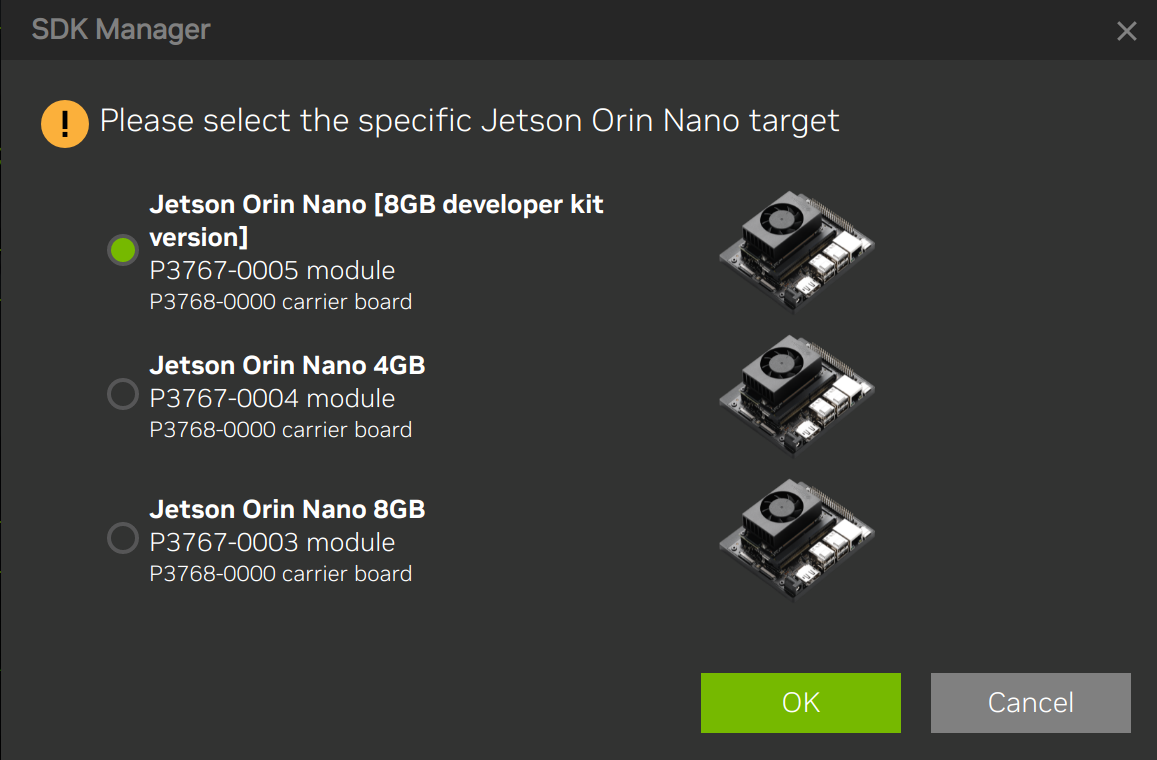
In SDK Manager, select Jetson Orin Nano [8GB developer kit version] and click OK.
Clear Host Machine so only the Jetson target remains selected.
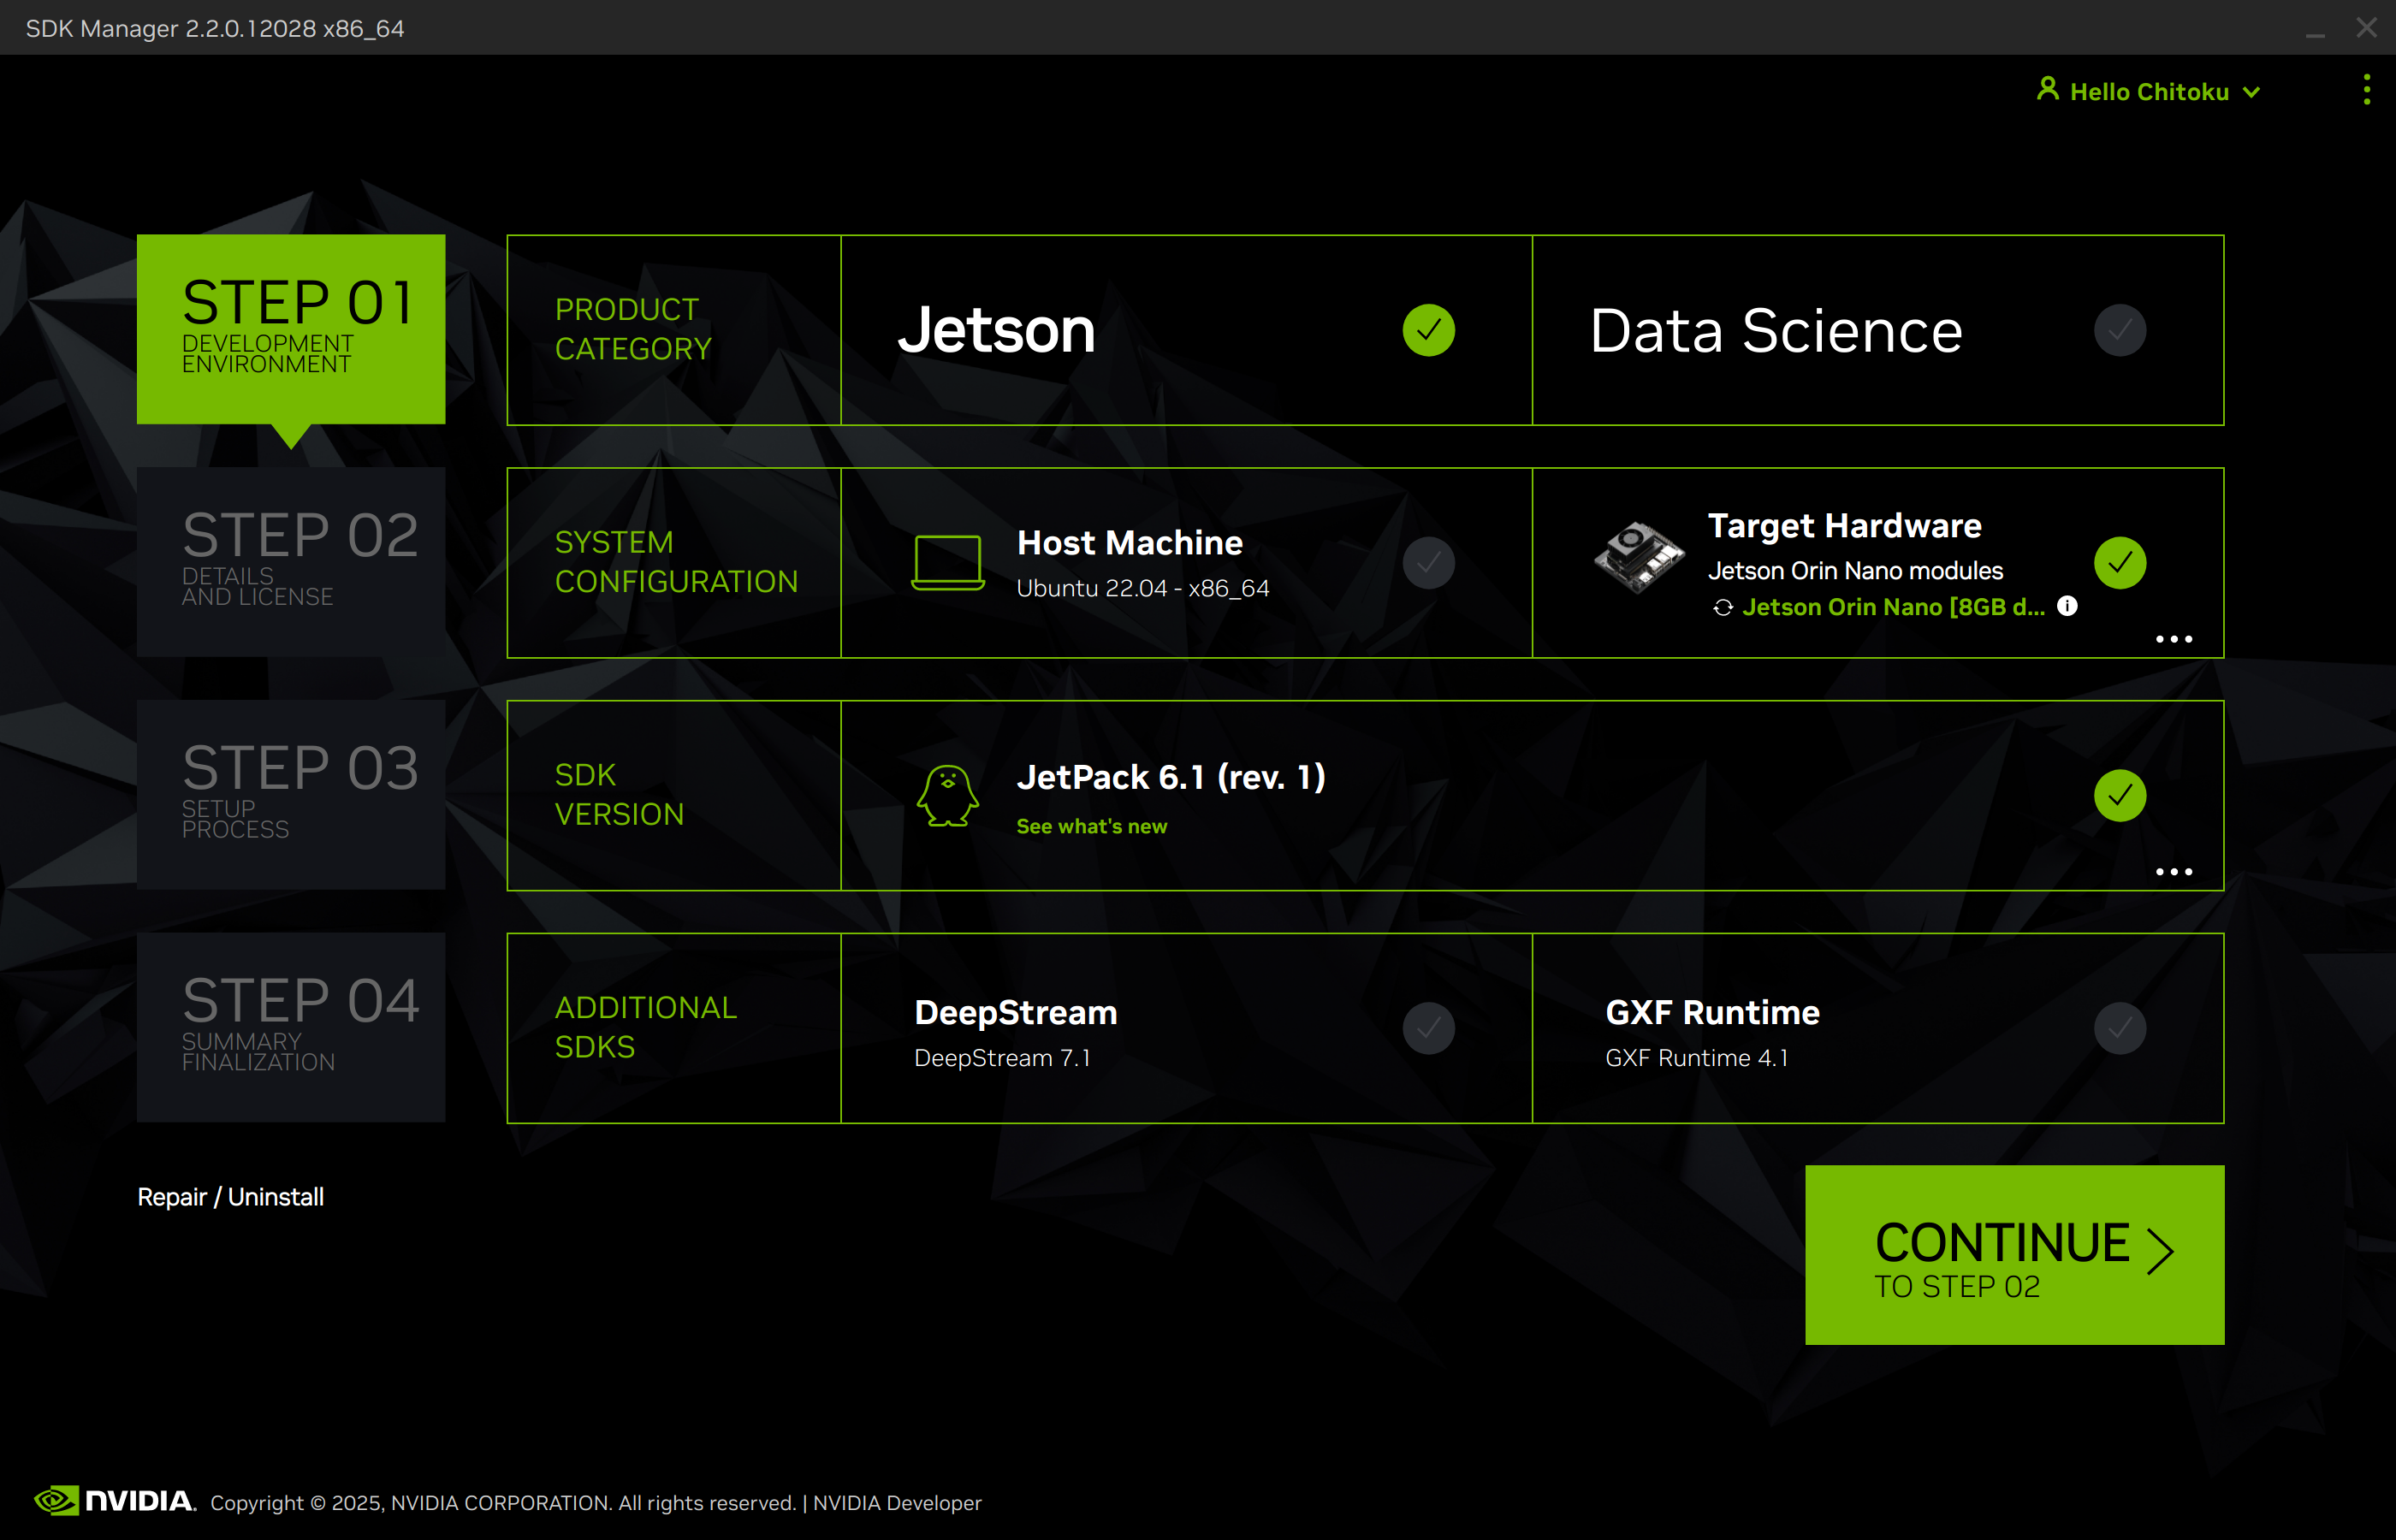
Click Continue.
2. Select Software Components to Install#
Keep only Jetson Linux selected and clear the other components if you only want to flash the BSP.
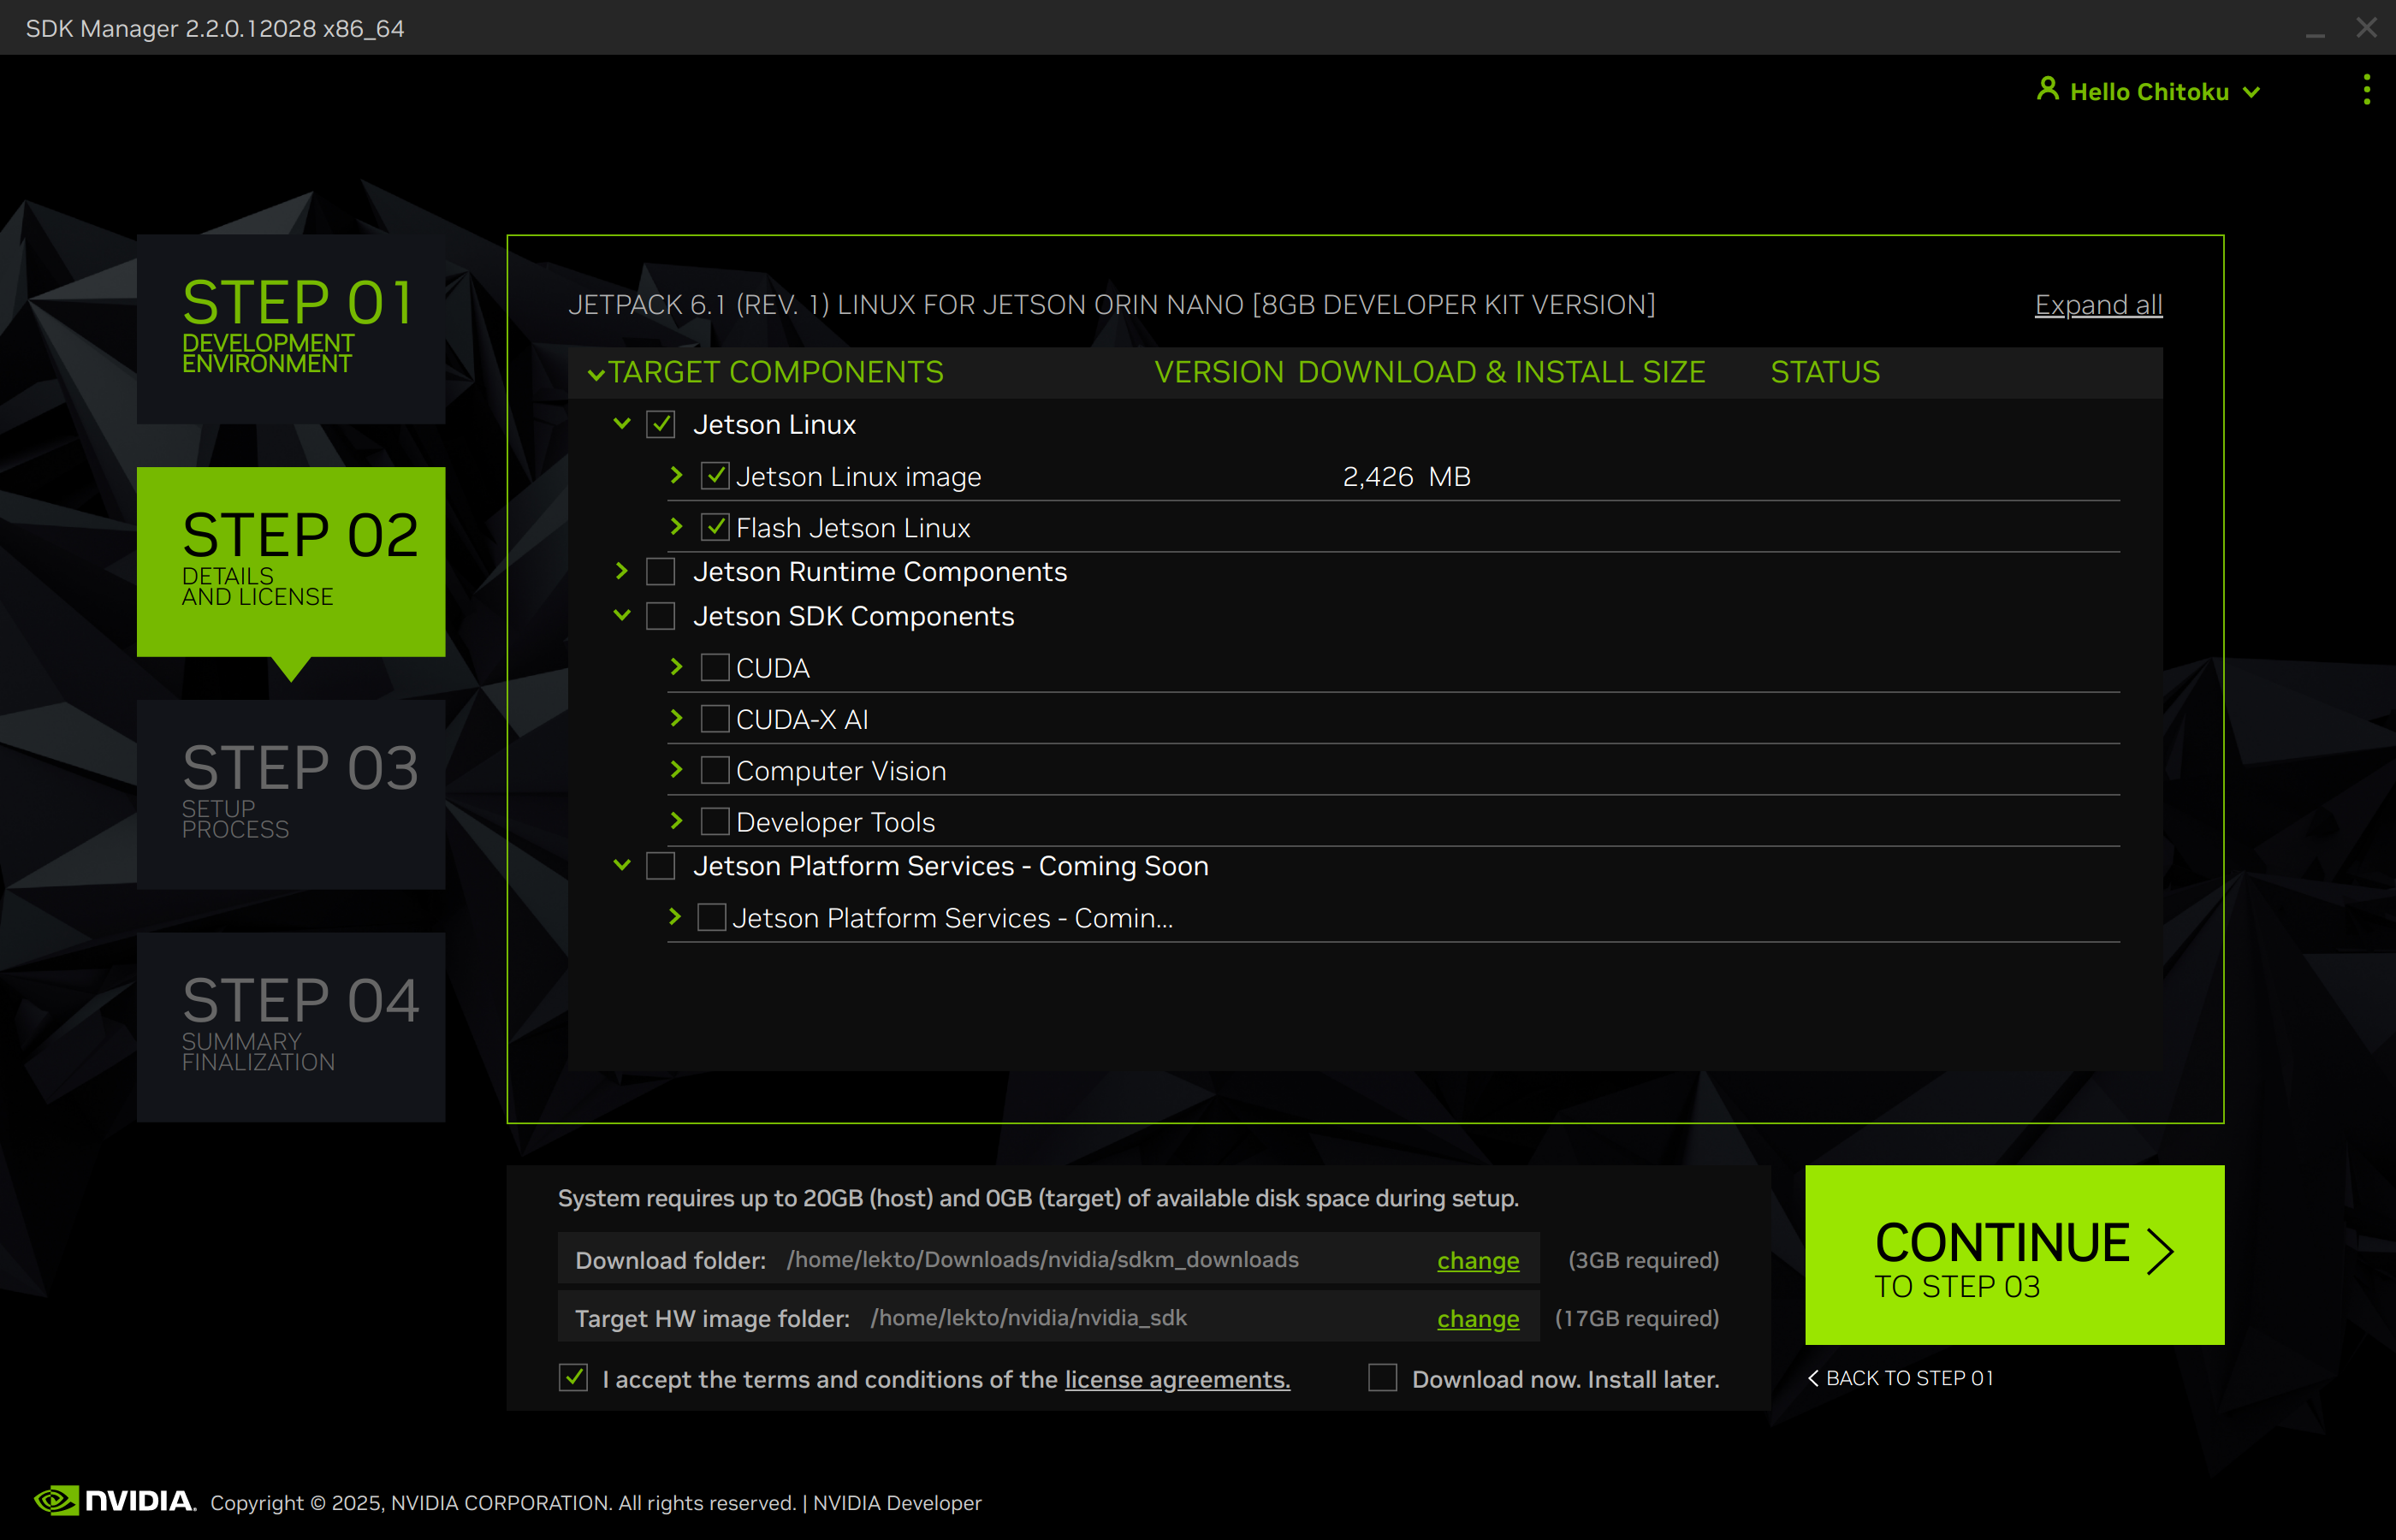
Select I accept the terms and conditions of the license agreements.
Click Continue.
Enter your host PC
sudopassword when prompted.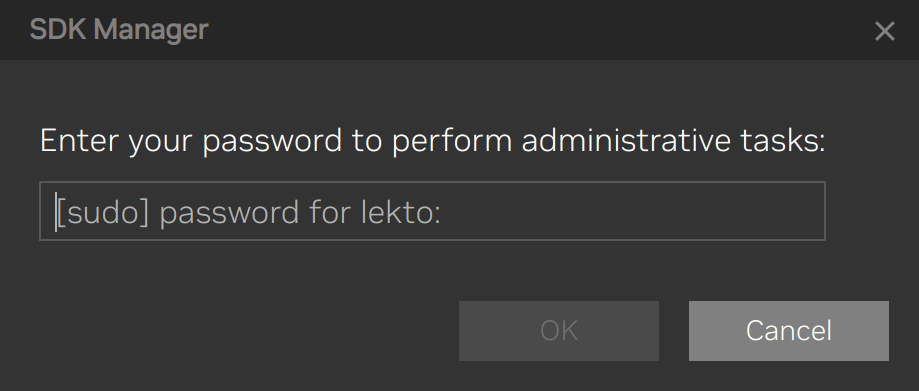
3. Download on Host PC#
SDK Manager downloads the BSP package and root file system package.
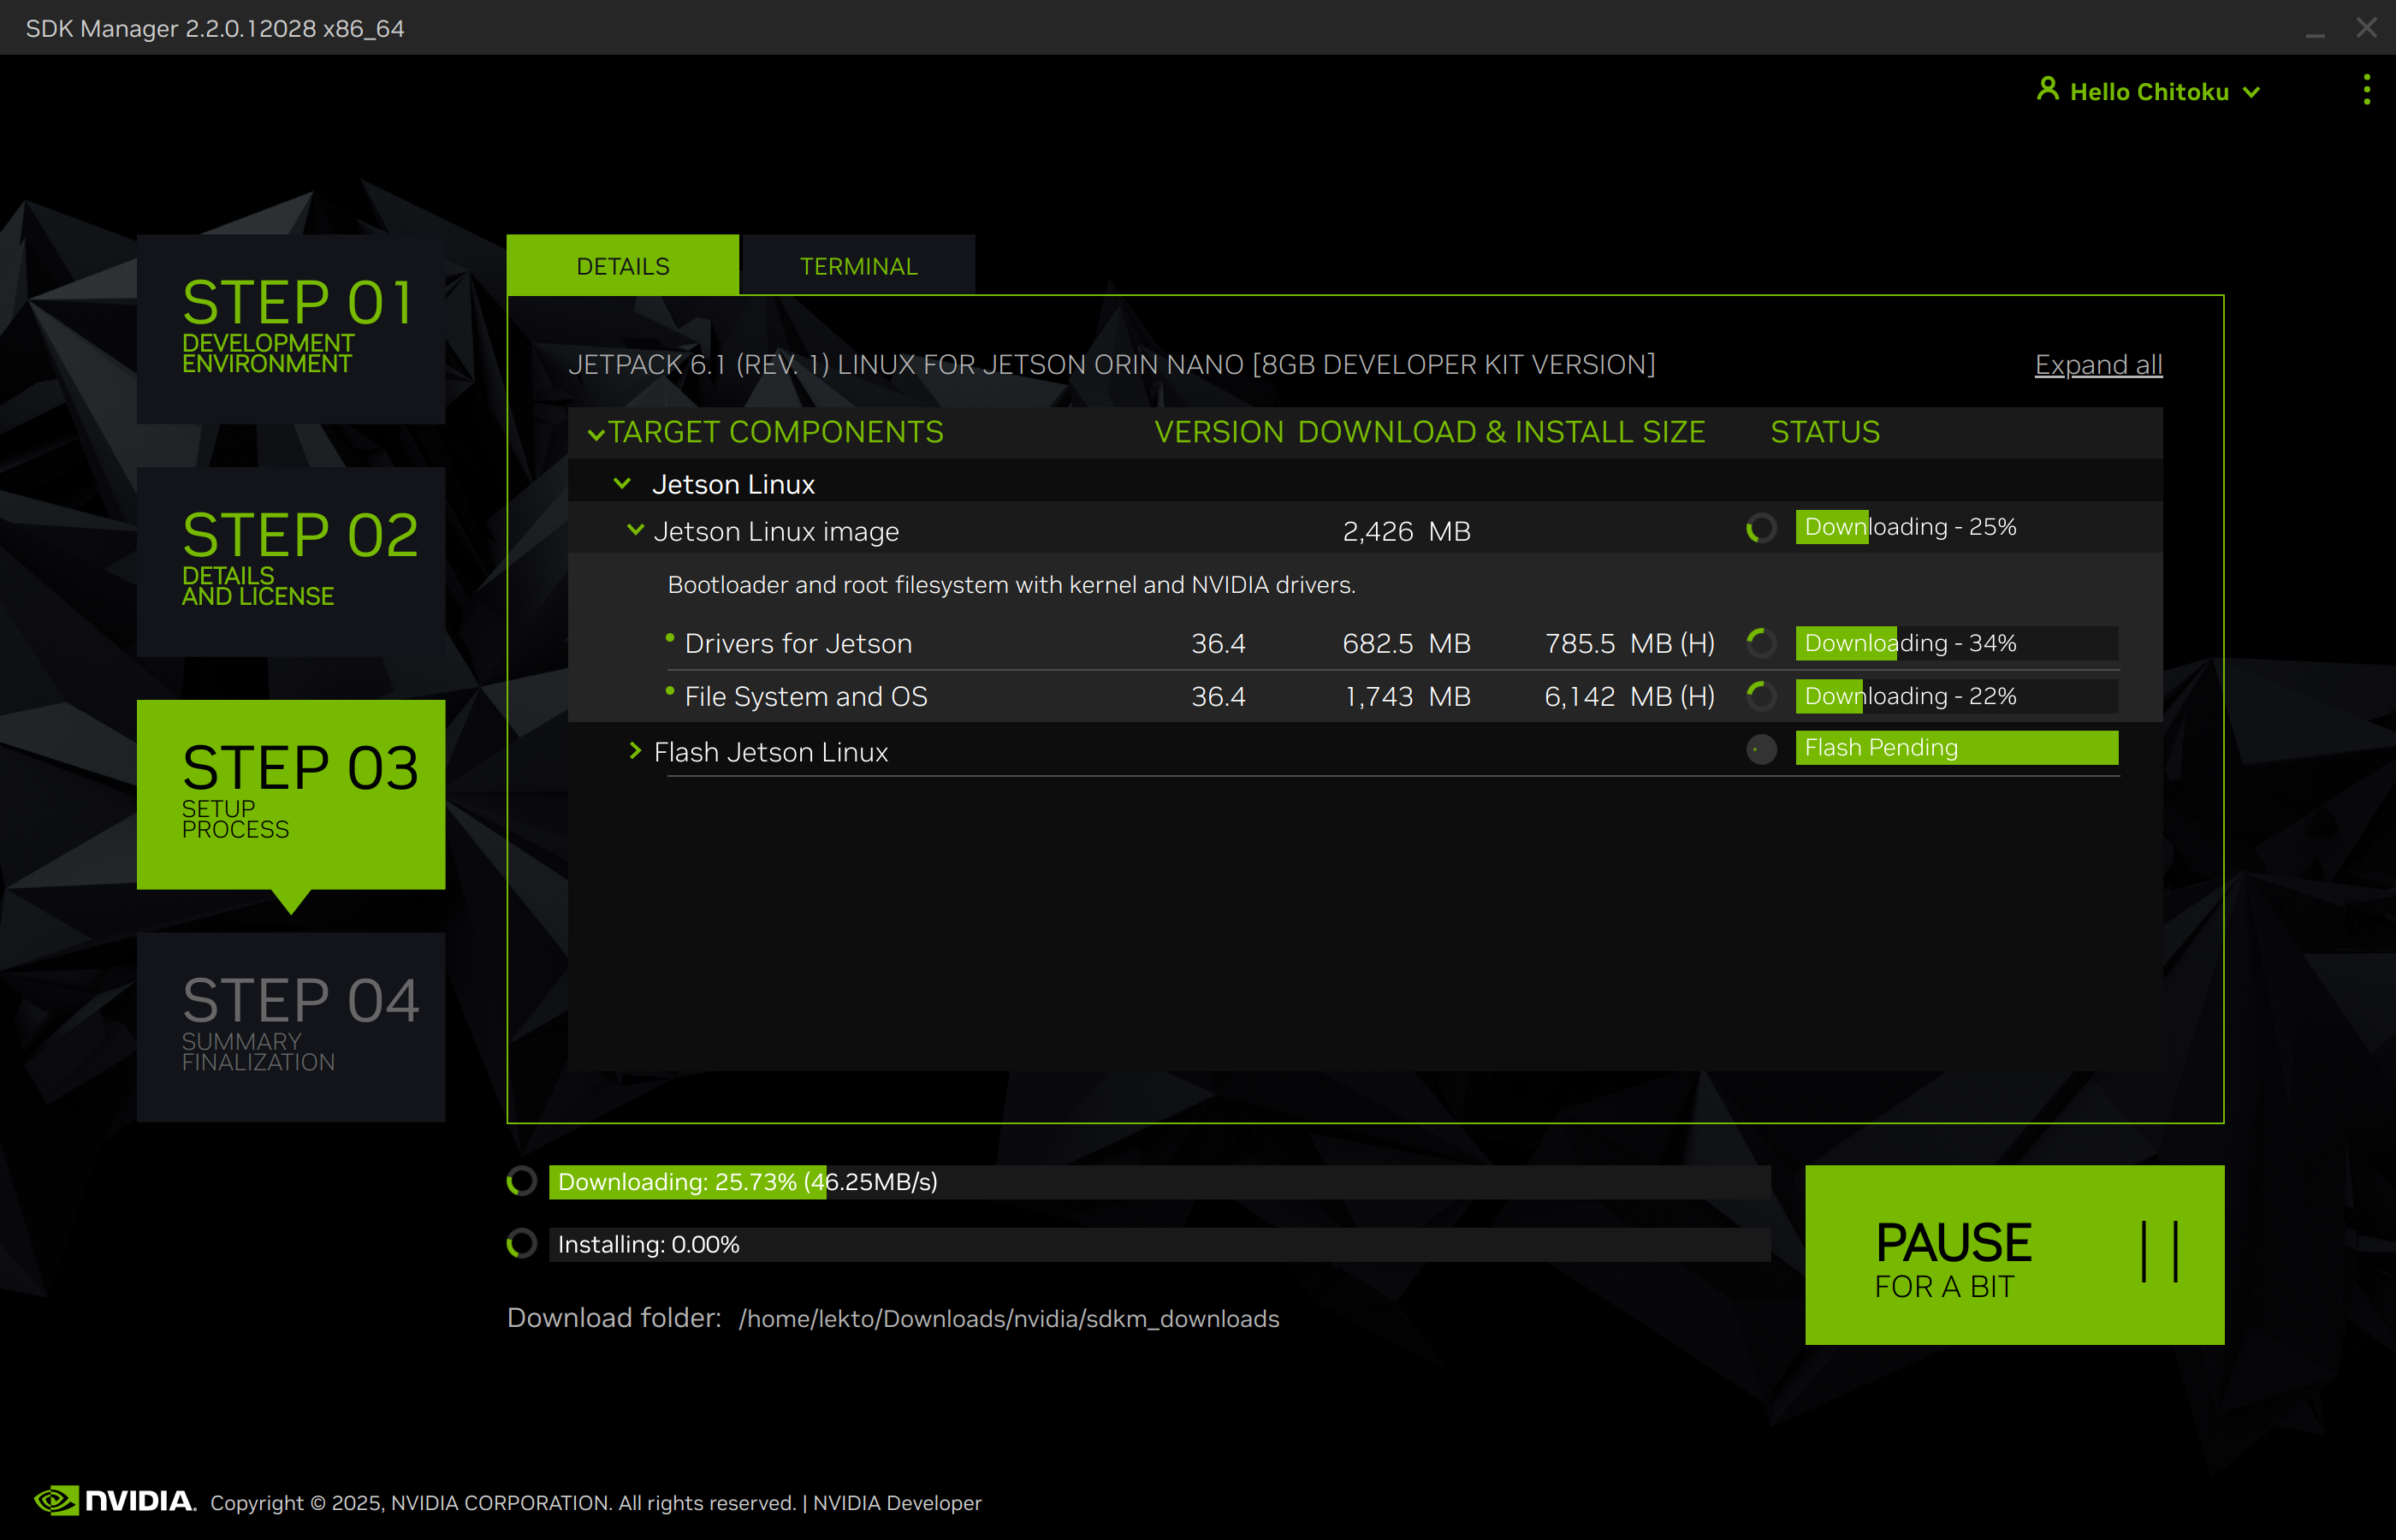
After downloads complete, SDK Manager extracts the packages and generates the images to flash.
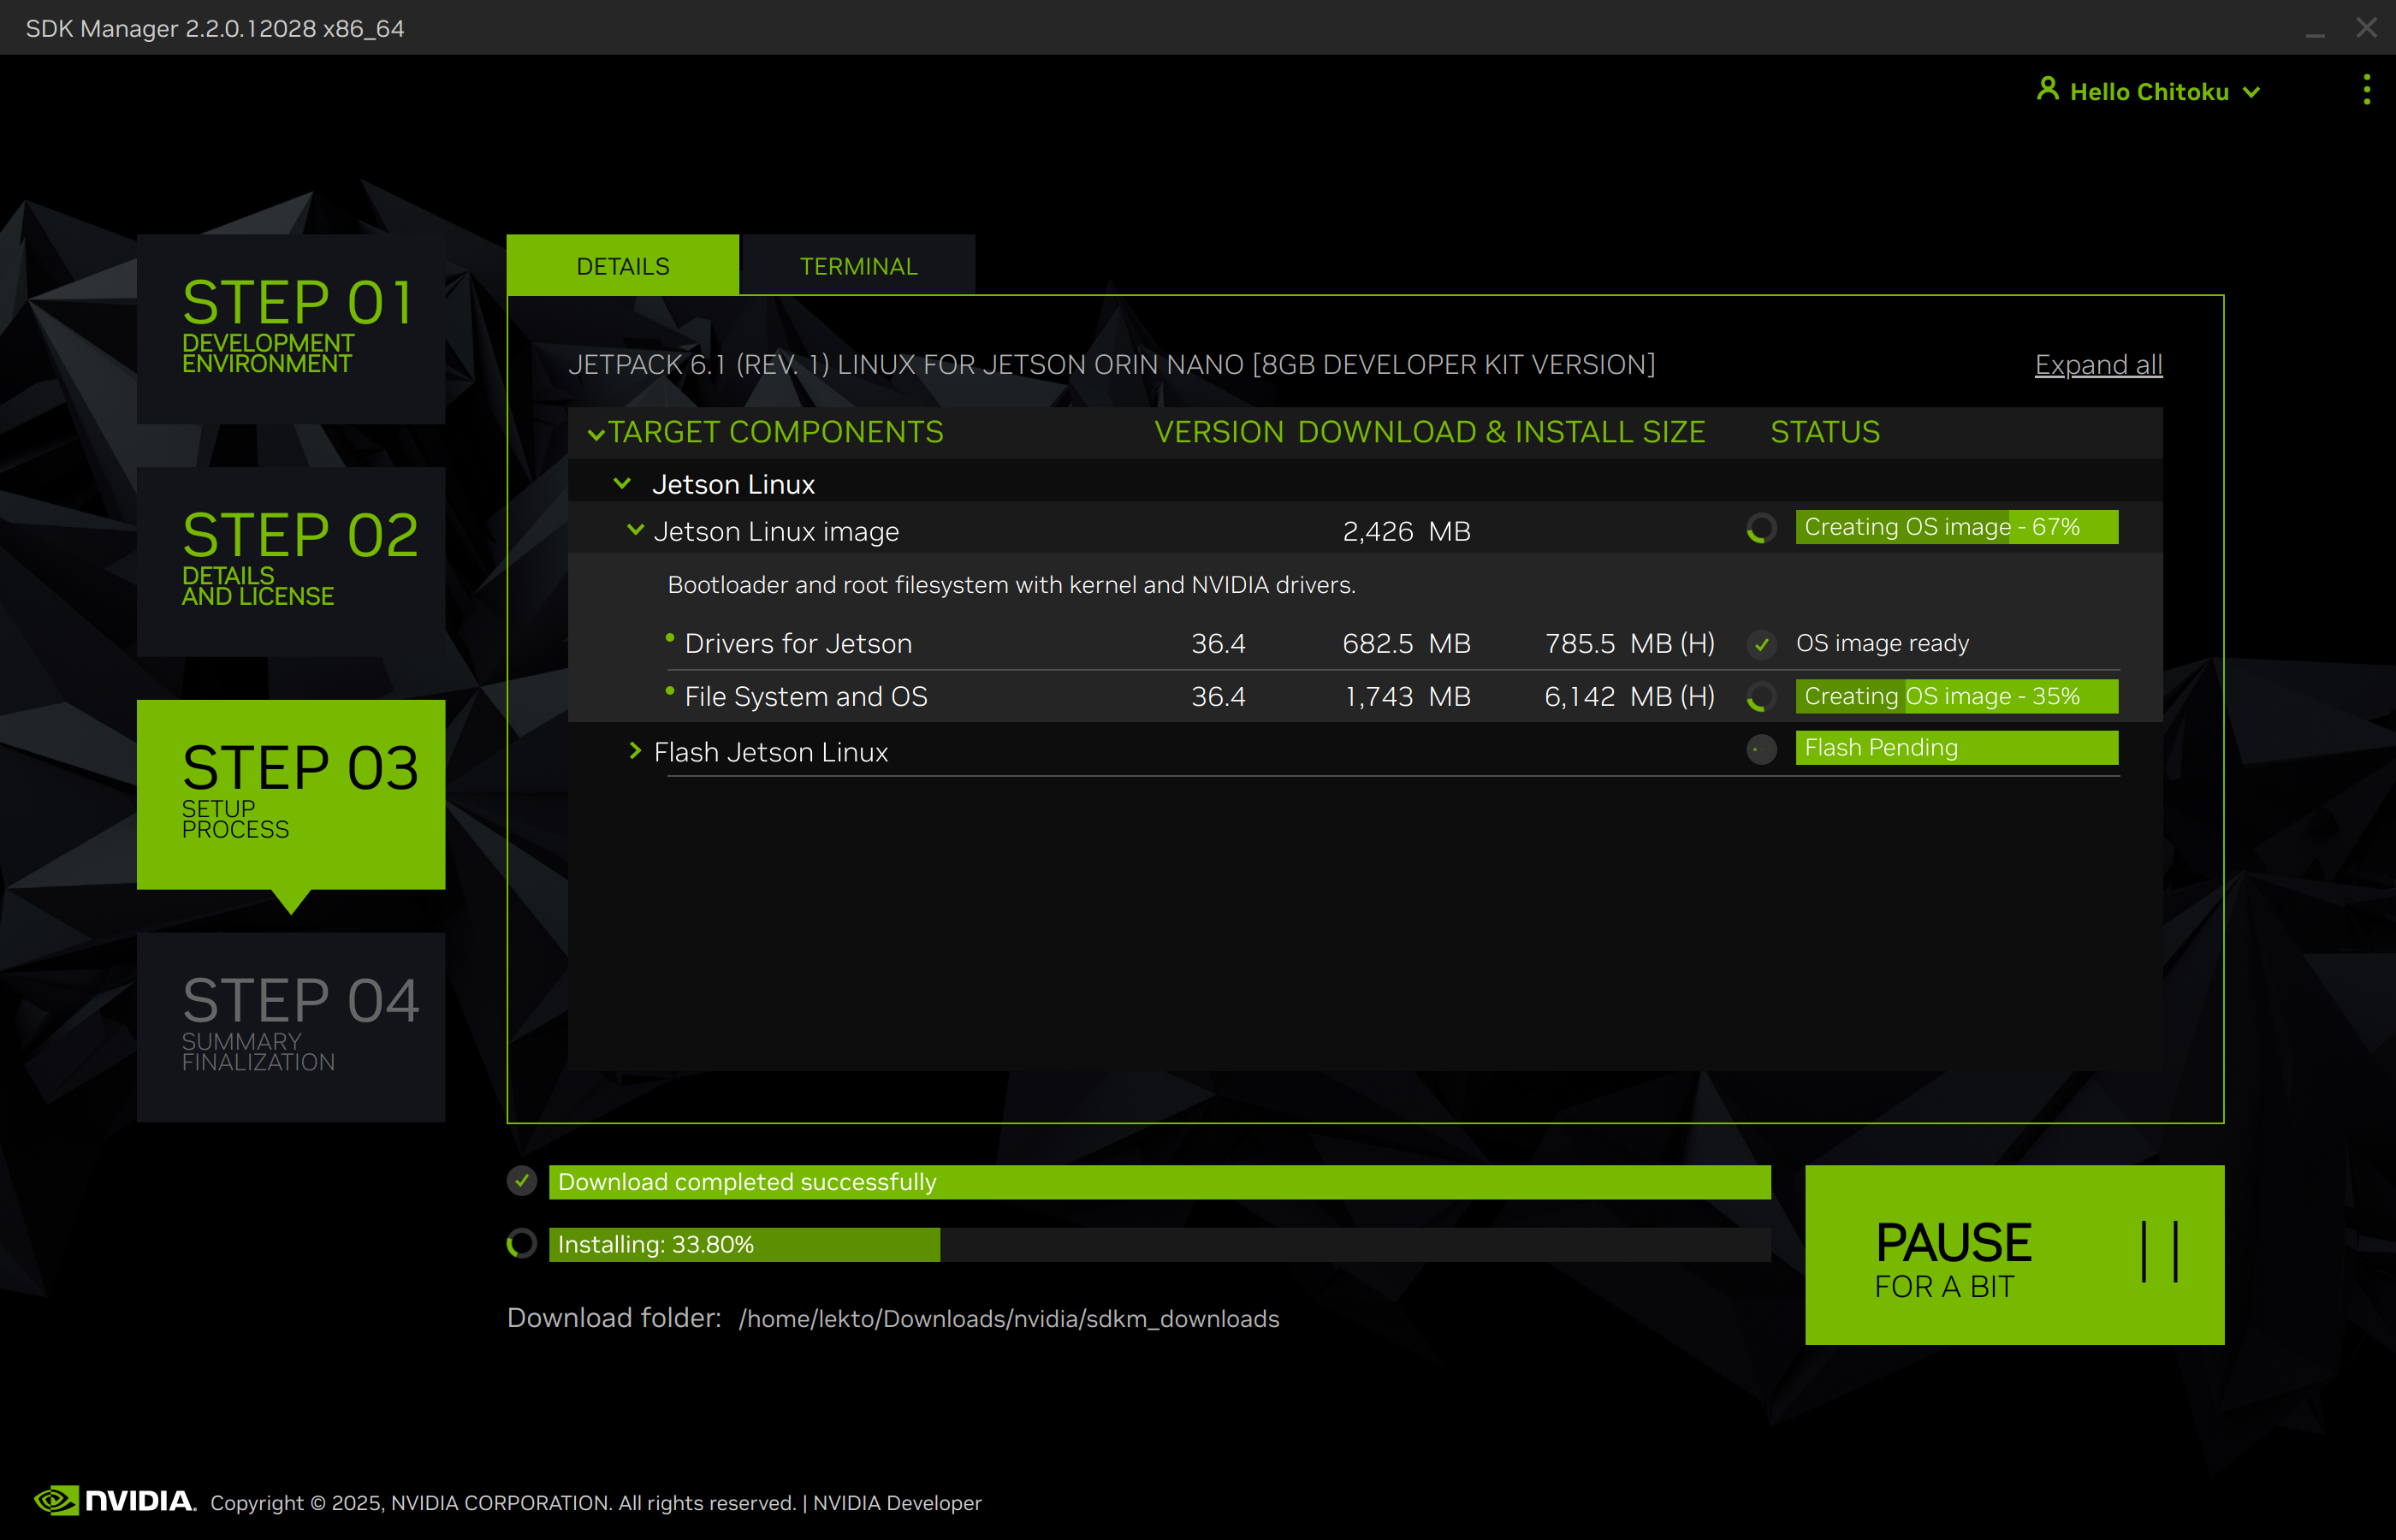
When the images are ready, SDK Manager opens the flashing prompt.
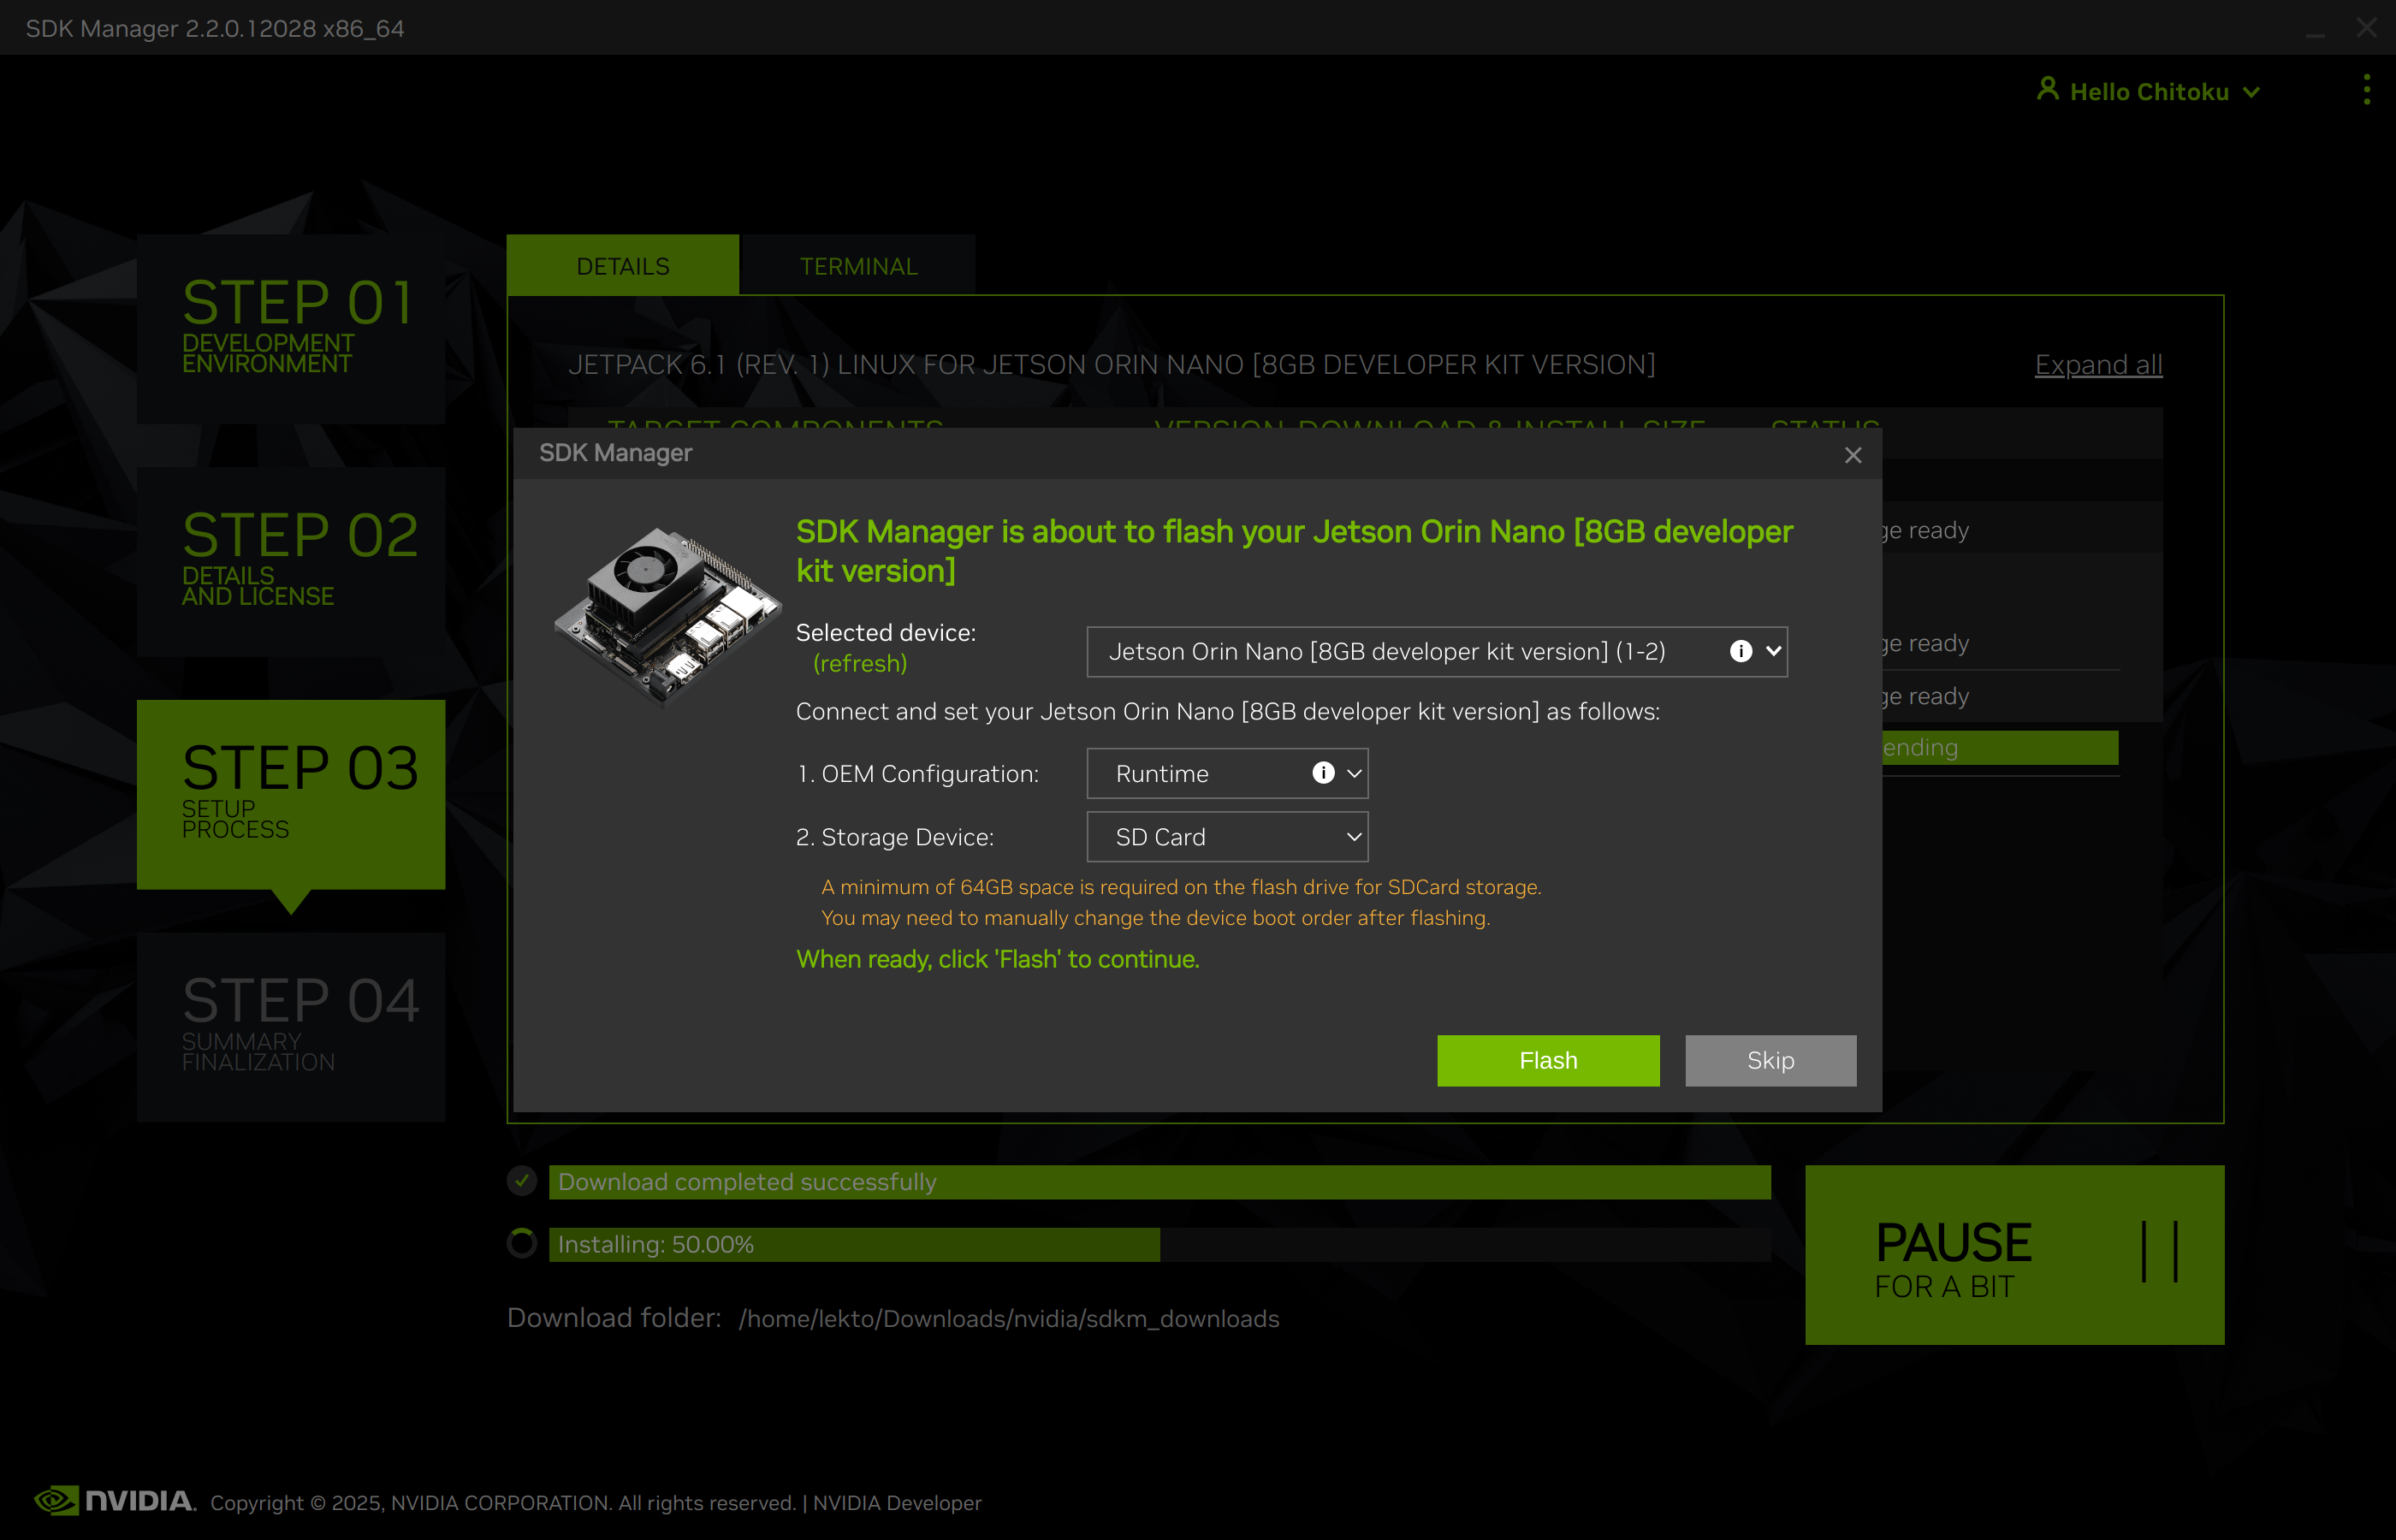
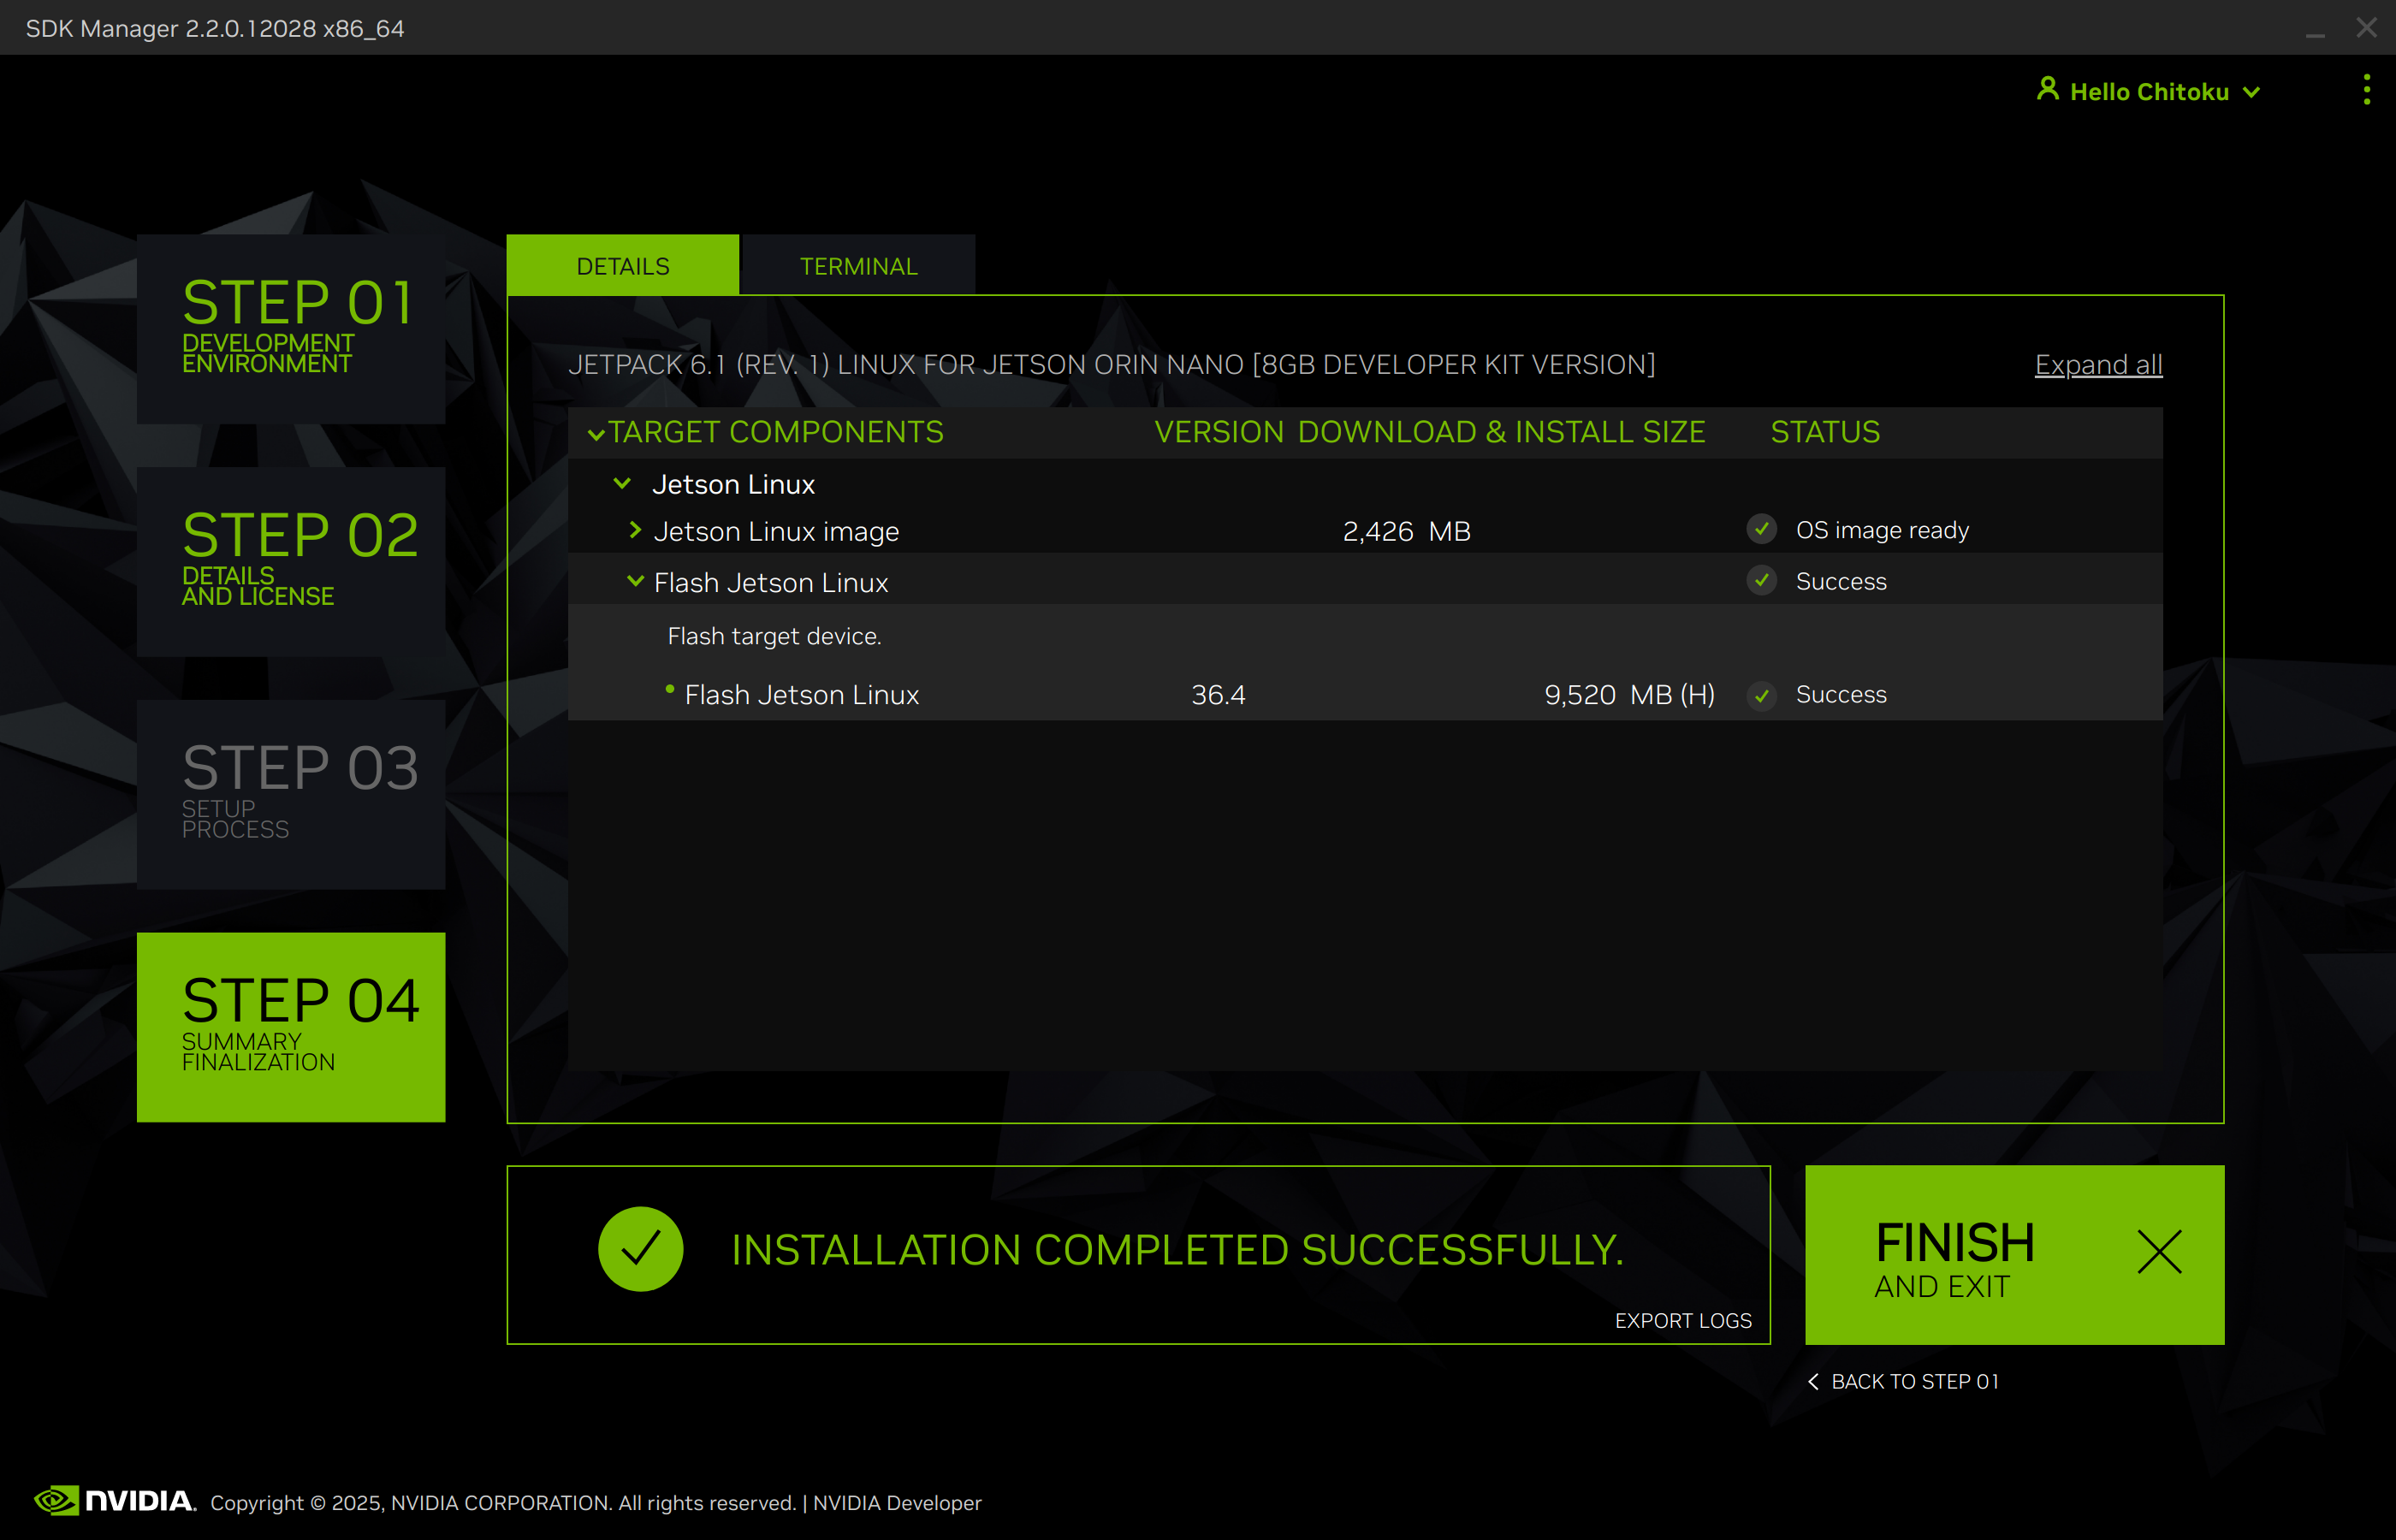
4. Flash#
In the flashing prompt, select Runtime for OEM Configuration.
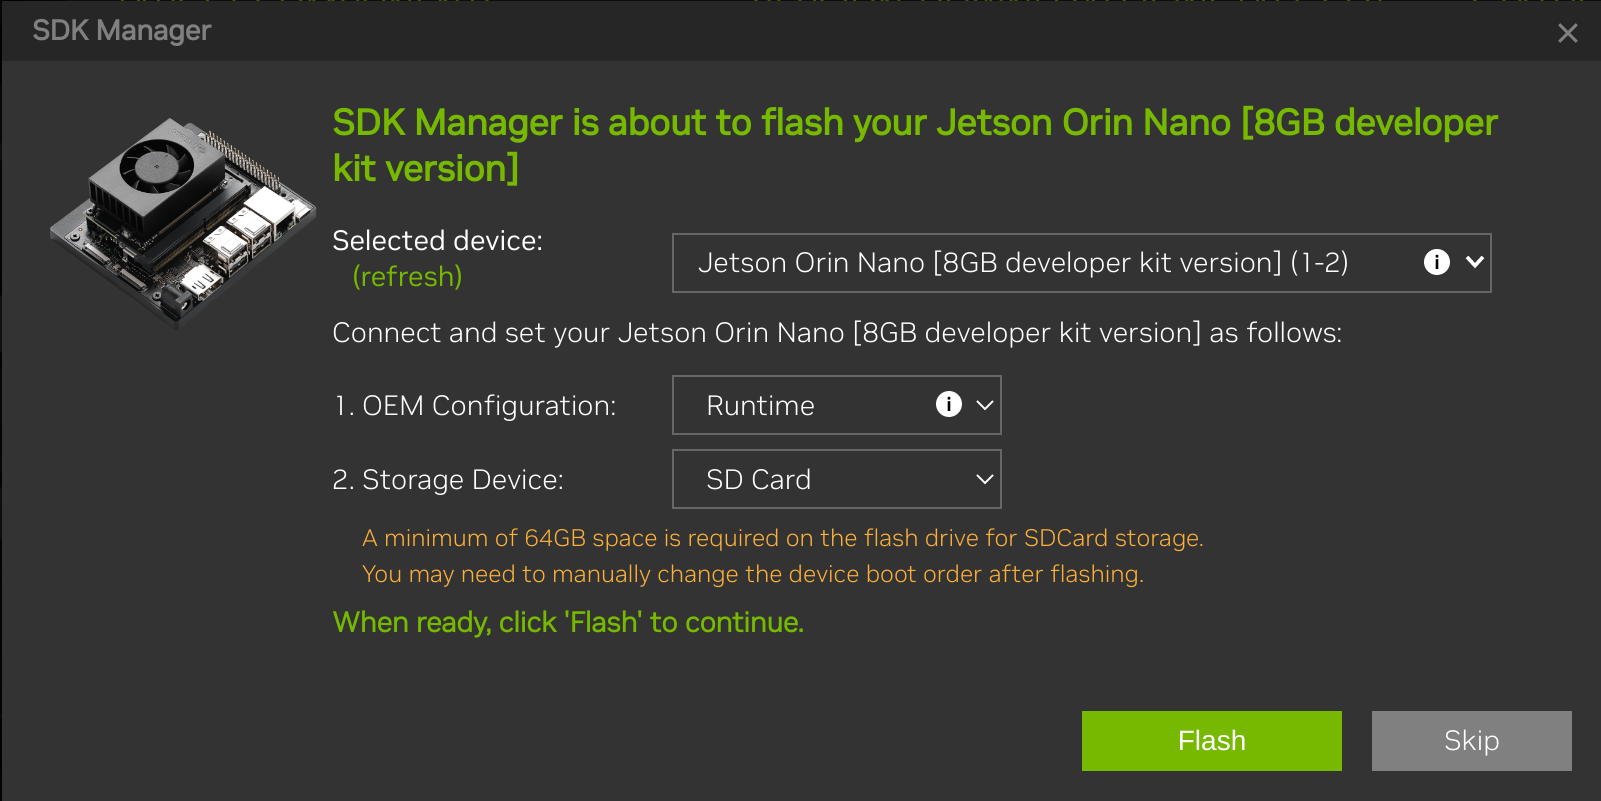
Select NVMe to flash Jetson Linux to a NVMe SSD, or select SD Card to flash to a microSD card.
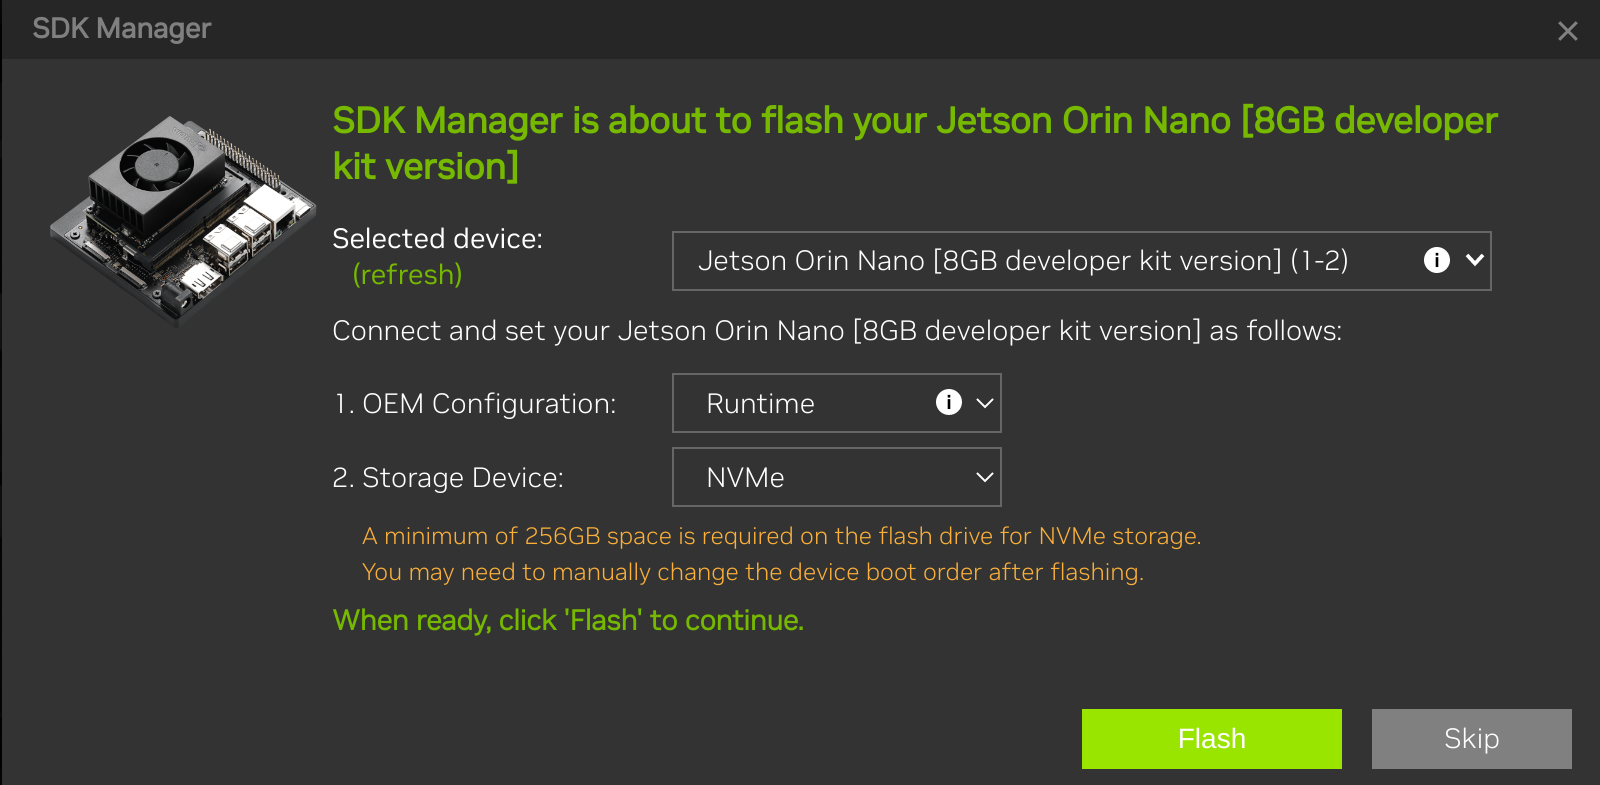
Click Flash.
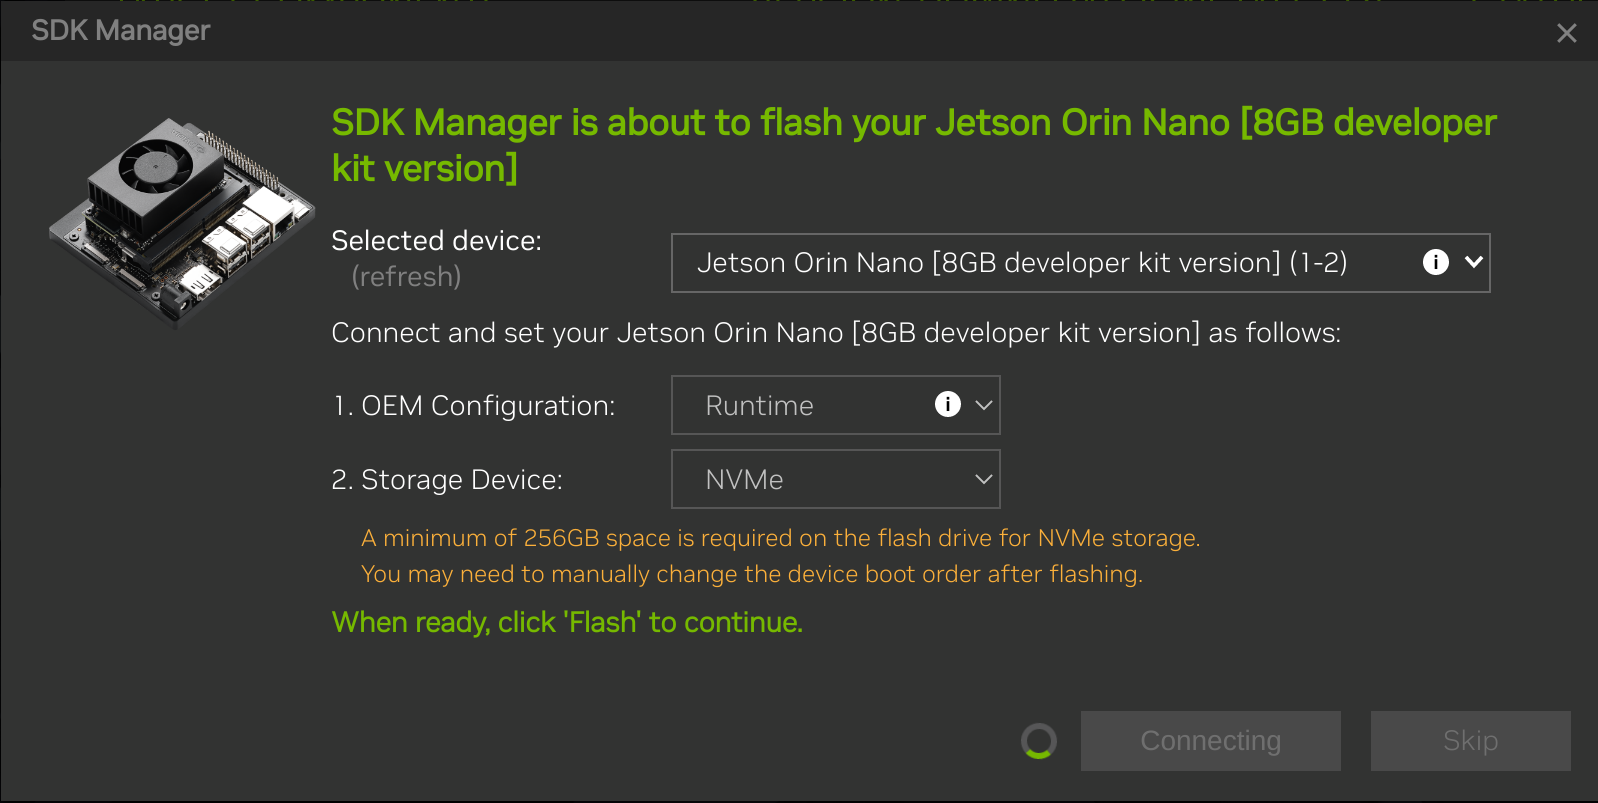
Watch the flash progress.
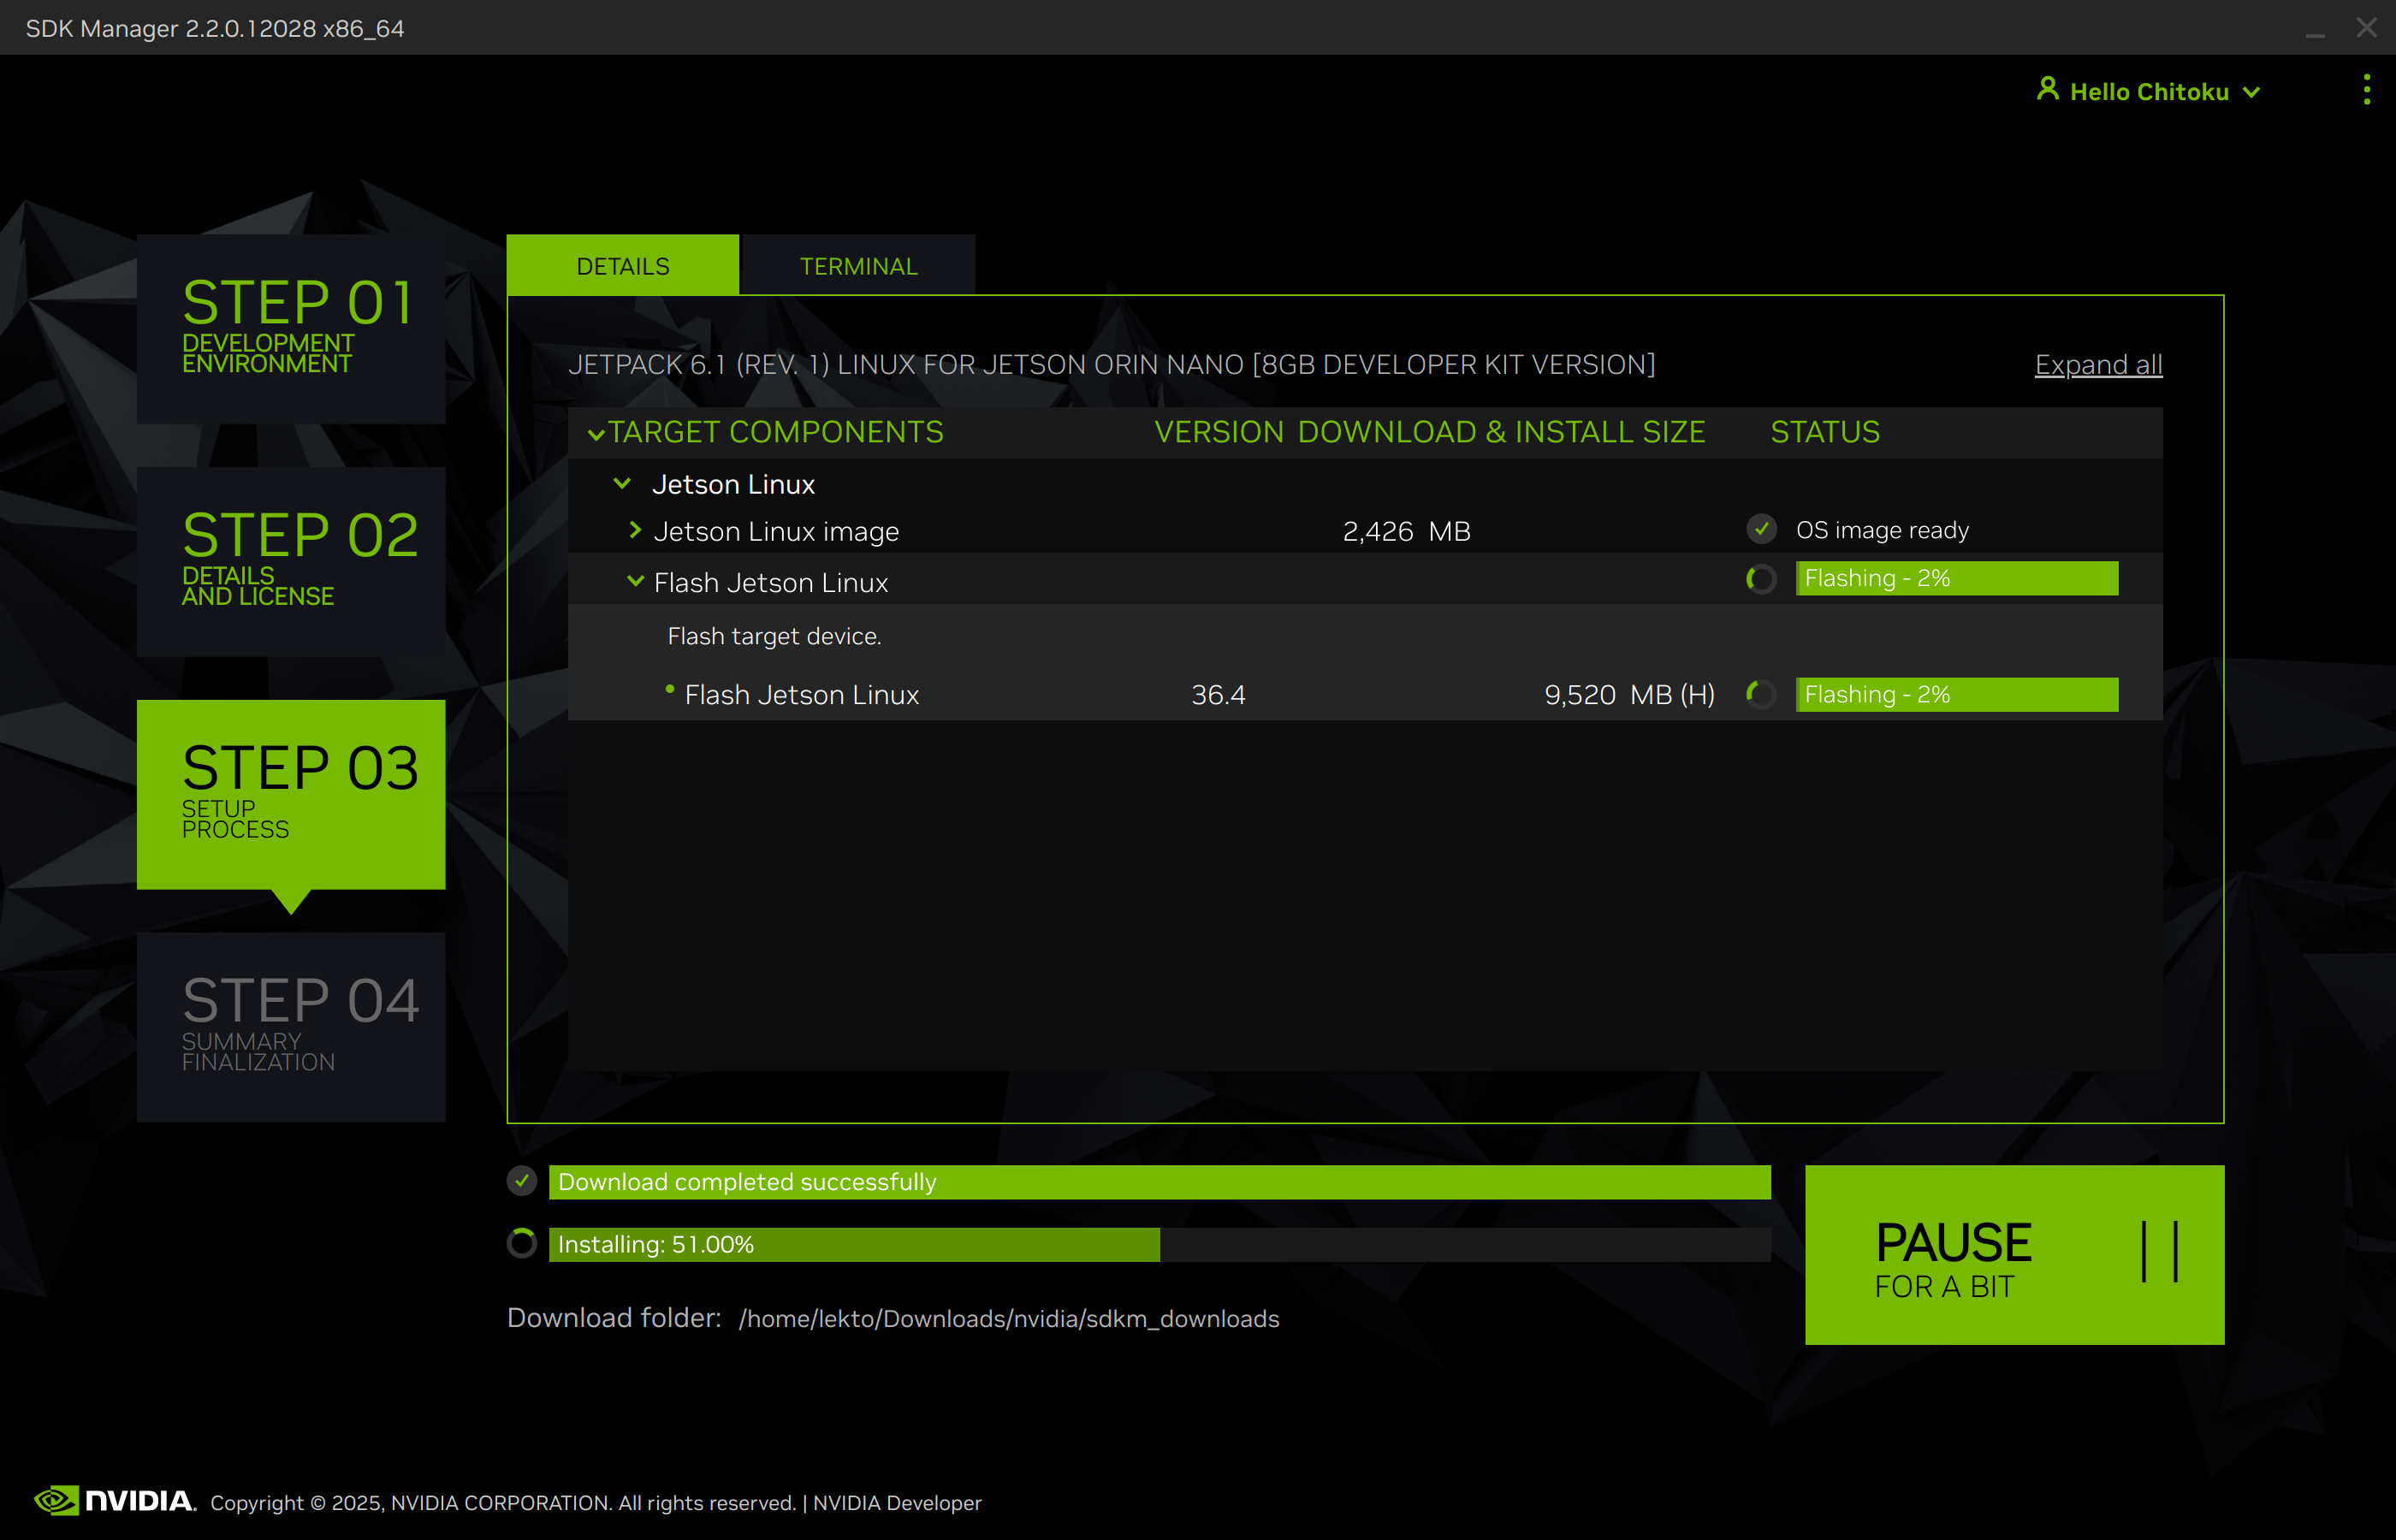
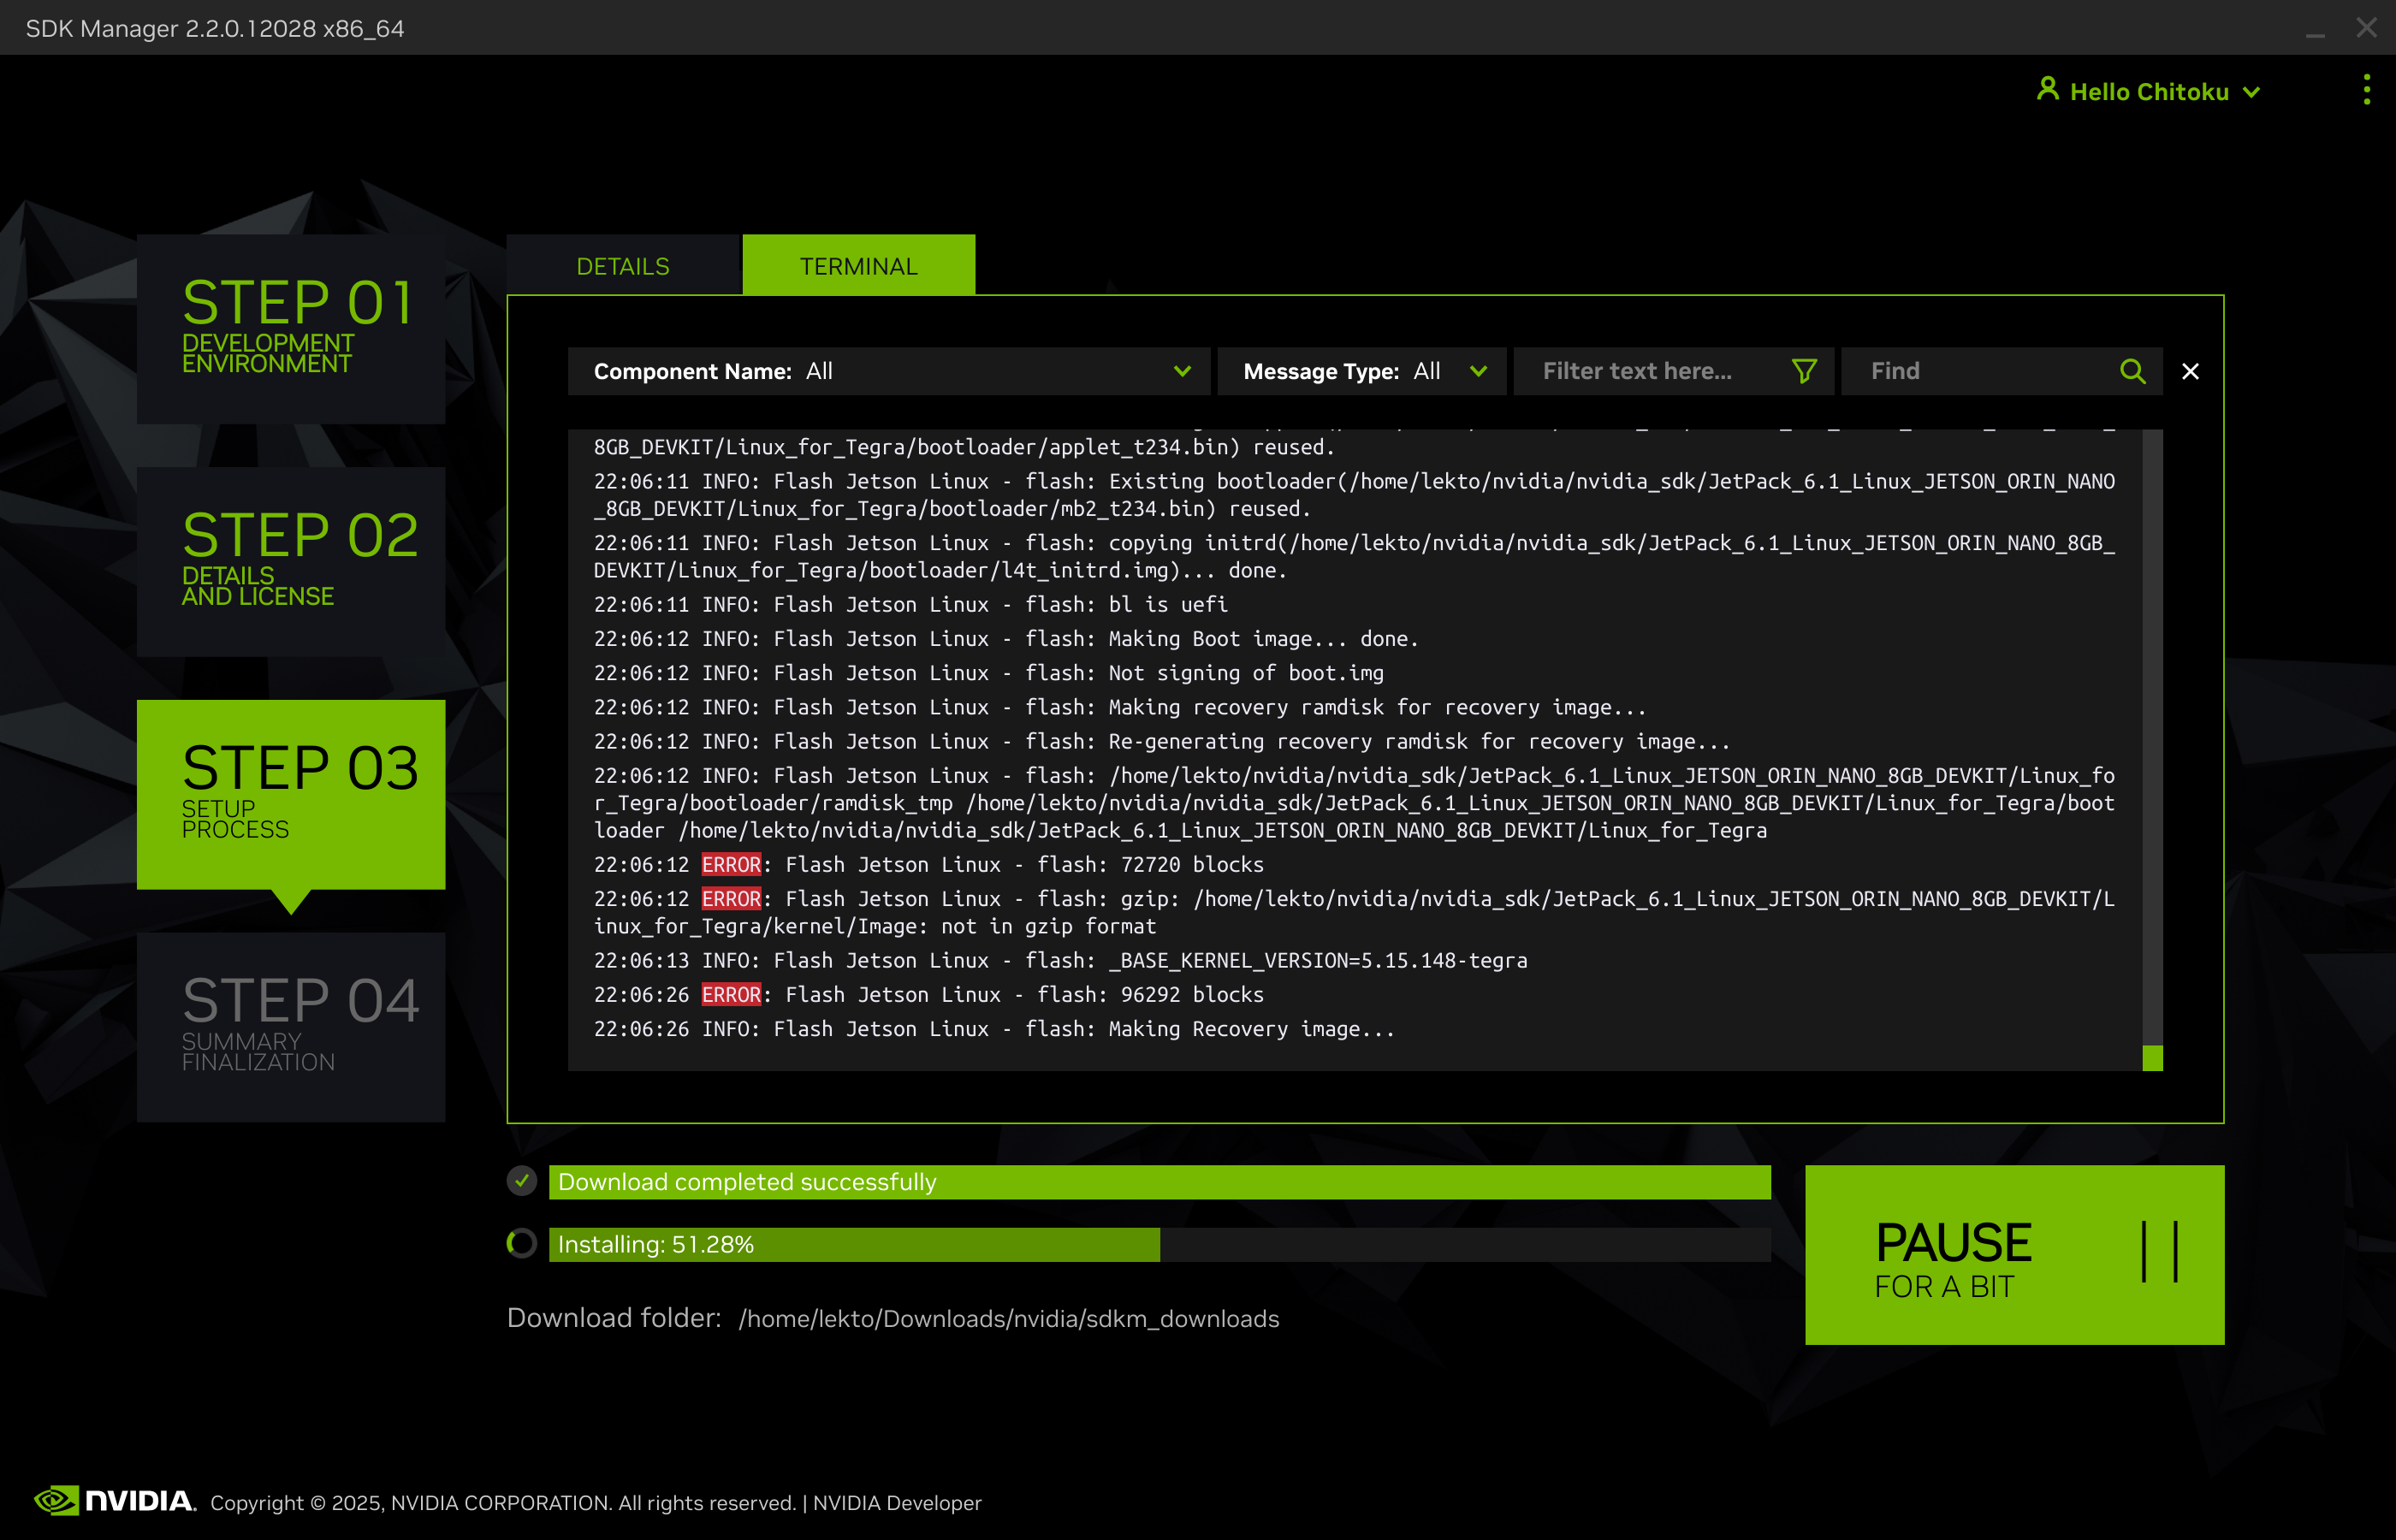
Confirm that flashing completes successfully.

5. Boot and Initial Setup#
Remove the jumper from the
J14header if it is still installed.Connect display and input peripherals, or connect a USB to TTL serial cable for headless setup.
Power cycle the developer kit by unplugging the power supply and plugging it back in.
The developer kit boots Jetson Linux from the target storage selected in SDK Manager.
Complete the initial software setup, also called
oem-config.
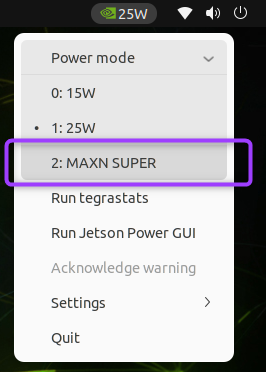
Switch to MAXN SUPER Mode#
The default power mode on JetPack 6.2 is typically 25W. To enable maximum performance:
Click the current power mode in the Ubuntu desktop top bar.
Select Power Mode.
Choose MAXN SUPER.
Next Steps for SDK Manager Setup#
After Jetson Linux boots, use SDK Manager again if needed to install optional JetPack components such as CUDA, developer tools, samples, or additional runtime packages.
Option 3. Flash Script#
Use the Jetson Linux flashing tools when you need a command-line workflow.
Download the Jetson Linux Driver Package and sample root file system for the JetPack release you plan to use.
Extract the Driver Package on an Ubuntu x86_64 host PC.
Extract the sample root file system into
Linux_for_Tegra/rootfs.Run
apply_binaries.shfromLinux_for_Tegra.Put the developer kit into Force Recovery Mode.
Run the appropriate flash command for the Jetson Orin Nano Developer Kit target.
Refer to the Jetson Linux Developer Guide for target names and detailed flashing commands.
Force Recovery Mode#
Force Recovery Mode is required when flashing the developer kit from a host PC.
Power off the developer kit.
Press and hold the Force Recovery button.
Connect power, or press the power button if needed.
Release the Force Recovery button after the host PC detects the device.
Use lsusb on the Ubuntu host PC to confirm that an NVIDIA USB device is present before starting the flash operation.