NVIDIA Mission Control autonomous hardware recovery Installation Guide#
NVIDIA Mission Control autonomous hardware recovery automates the testing, diagnosis, and repair of your SuperPODs. NVIDIA Mission Control autonomous hardware recovery is delivered as a component of the mission control product. The core capabilities of NVIDIA Mission Control autonomous hardware recovery are as follows:
Automated Baseline Testing (GB200 only) NVIDIA Mission Control autonomous hardware recovery provides a “one click” mechanism to validate the SuperPOD hardware. For GB200, this includes tray, rack, and multi-rack testing. A comprehensive set of reports is included to facilitate tracking of the cluster bring-up progress.
Automated Health Checks (GB200 only) NVIDIA Mission Control autonomous hardware recovery provides a full suite of automated health checks that detect failures at the tray, rack, and system levels for GB200. In addition, system-wide health checks are performed by integrating with the UFM and NetQ network control planes.
Automated Break/Fix Workflows (coming soon) (GB200 only) NVIDIA Mission Control autonomous hardware recovery will provide a series of Break/Fix workflows to handle tray (GB200) failures. In addition, for GB200, NVIDIA Mission Control autonomous hardware recovery will include rack (NVL72) level Break/Fix. The Break/Fix workflows execute a series of diagnostic steps to determine the cause of the failure and potential repair steps. These diagnostics include OneDiags/IST field diags to facilitate RMA.
Firmware Upgrade (GB200/GB300) NVIDIA Mission Control autonomous hardware recovery provides functionality for upgrading, cycling, and verifying firmware and the corresponding OS. Firmware can be upgraded for Compute trays, Switches, Mellanox networking, and NVOS.
Note: Health Checks, and Break/Fix are GB200‑only and GB300 currently only has Firmware Upgrade support.
Deployment Diagram#
NVIDIA Mission Control autonomous hardware recovery leverages an agent based architecture with a stateful backend. The NVIDIA Mission Control autonomous hardware recovery agent is deployed on all computers managed by NVIDIA Mission Control autonomous hardware recovery e.g. on the compute nodes, the Kubernetes worker nodes, and/or on the BCM headnodes. The agent is installed in BCM’s image for distribution to the managed computers. The NVIDIA Mission Control autonomous hardware recovery backend runs on the admin Kubernetes nodes in the control plane. It is installed to the control plane via helm. For failover purposes, the backend includes a primary and secondary replica. Data is synchronized between the primary and secondary. Other Mission Control components (e.g. autonomous job recovery (AJR) or BCM) integrate with NVIDIA Mission Control autonomous hardware recovery via the backend’s APIs. There is no direct communication to the agents i.e. all usage of NVIDIA Mission Control autonomous hardware recovery is intermediated by the backend.
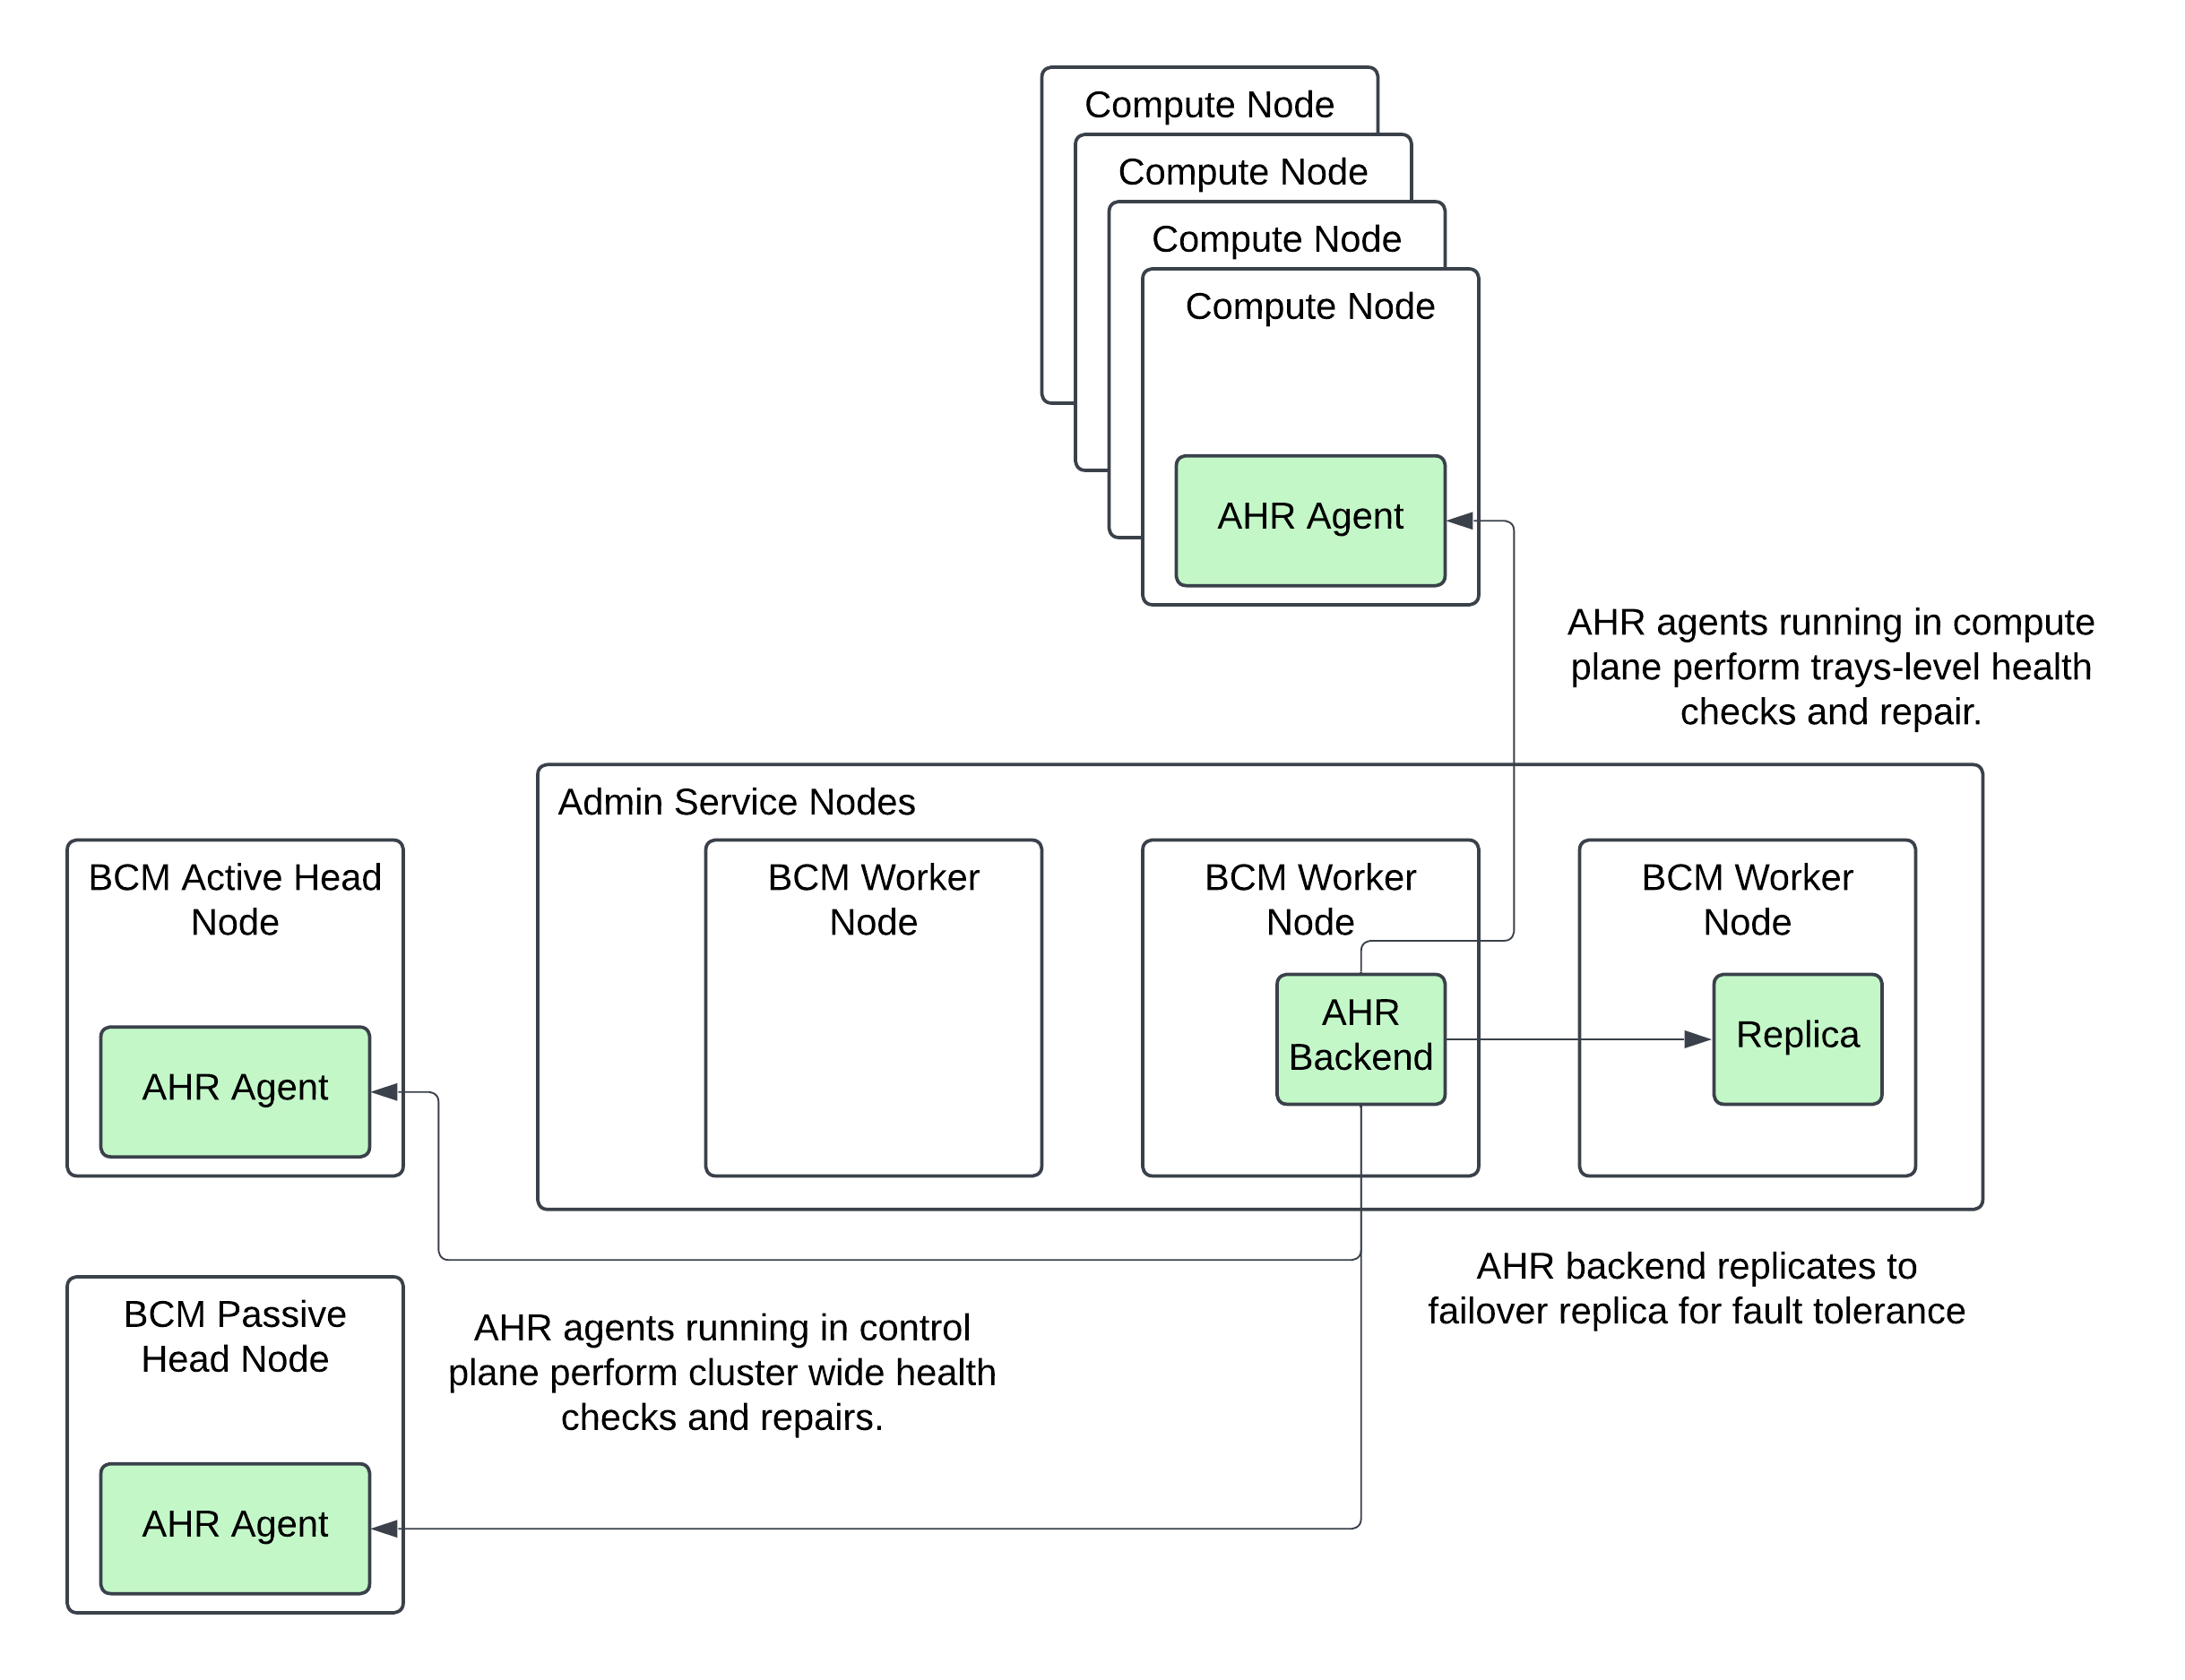
Figure: Mission Control overall architecture. NVIDIA Mission Control autonomous hardware recovery components in green.
Prerequisites#
BCM#
BCM license that allows AHR installation
At least 1 BCM user created for initial login to assign the AHR Administer permission to other users
Worker nodes for NVIDIA Mission Control autonomous hardware recovery backend#
CPU: 16 cores minimum
Memory: 32 GB minimum
Local storage:
500 GB available on the existing filesystem of the node for AHR backend application files
20 GB available under
/varfor AHR container images
Object storage (choose one of the following):
Local Ceph on the worker node — One storage device with at least 1.5 TB capacity and no existing filesystem. RAID devices are supported if no filesystem is present.
External object storage — Any S3-compatible service such as AWS S3, MinIO, Rook/Ceph, Wasabi, SeaweedFS, or Dell ECS. Setup details using AWS IAM credentials are captured in both the BCM TUI wizard installation or manual installation procedures. Provision AWS IAM credentials before starting the installation. The credentials will require the following permissions at a minimum:
{
  "Version": "2012-10-17",
  "Statement": [
    {
      "Sid": "S3BucketAdmin",
      "Effect": "Allow",
      "Action": "s3:*",
      "Resource": [
        "arn:aws:s3:::onprem-org-shoreline-mdkey-mr-*",
        "arn:aws:s3:::onprem-org-shoreline-mdkey-mr-*/*",
        "arn:aws:s3:::ss-arc-*-onprem-local*",
        "arn:aws:s3:::ss-arc-*-onprem-local*/*",
        "arn:aws:s3:::ss-arc-system-metadata-*",
        "arn:aws:s3:::ss-arc-system-metadata-*/*"
      ]
    },
    {
      "Sid": "AllowListAllBuckets",
      "Effect": "Allow",
      "Action": "s3:ListAllMyBuckets",
      "Resource": "arn:aws:s3:::*"
    }
  ]
}
NGC Token#
The software artifacts required for the deployment and operation of AHR are stored on NGC (NVIDIA GPU Cloud). For this reason an NGC token is necessary for the installation process to pull the required resources such as the Helm charts and the container images.
To obtain a valid NGC API token from the NGC console, you will need to have a subscription with the appropriate entitlement for artifacts in the NVIDIA Mission Control NGC collection of the NGC Catalog.
If your organization’s subscription hasn’t been activated yet, follow the instructions here to do so (must be organization owner): https://docs.nvidia.com/ngc/latest/ngc-user-guide.html#activating-your-subscription-offer-dependent
Once the organization’s subscription has been activated, sign in as the organization owner: https://docs.nvidia.com/ngc/latest/ngc-user-guide.html#sign-in-account-owner
Once you’ve successfully gained access to the NGC console, generate an NGC API token (choose one):
Service Key: https://org.ngc.nvidia.com/service-keys
Personal API Key: https://docs.nvidia.com/ngc/latest/ngc-user-guide.html#generating-a-personal-api-key
Make sure to select NGC Catalog under Services Included when creating your personal key:
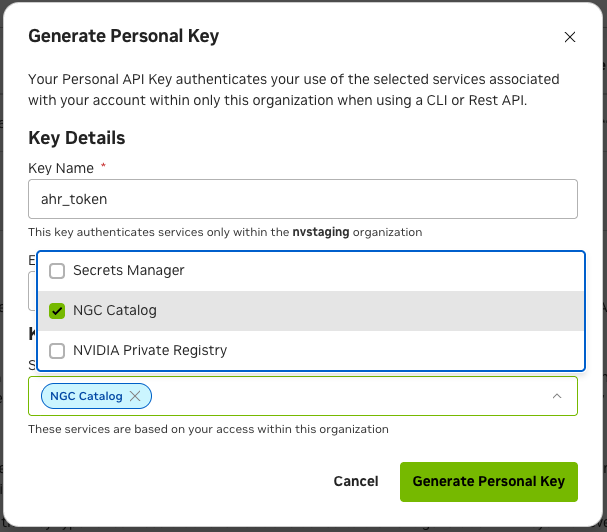
Save this token somewhere safe, as it will be referenced in later sections of this document.
Kubernetes control plane#
Kubernetes is deployed and configured with the
cm-kubernetes-setupwizard
Certificates for AHR endpoints#
AHR provides a web-based interface and additional endpoints for managing its operations. As part of the standard installation, AHR employs Transport Layer Security (TLS) encryption to protect all communications. You have the option to configure the environment’s TLS certificates with either a publicly-trusted certificate or a self-signed certificate.
Using publicly-trusted TLS certificates#
Choose a domain that will be used for the application’s endpoints in the customer’s environment, e.g. ahr.customer-domain.com.
Option 1: Have the customer’s IT team generate a wildcard certificate by a trusted certificate authority for the domain that was chosen, e.g. the certificates for the
ahr.customer-domain.comdomain would be forahr.customer-domain.com, *.ahr.customer-domain.com.Option 2: You can generate a publicly-trusted wildcard certificate yourself using a service like Let’s Encrypt with the certbot binary. Certificates generated this way must be rotated every 90 days so a certificate managed by the customer’s IT team (Option 1) is preferred. Instructions on how to generate a publicly-trusted certificate can be found in the Appendix’s Generating a publicly trusted tls certificate section
Using self-signed TLS certificates#
Alternatively, you can use a self-signed certificate. During the installation via BCM TUI Wizard, the installer provides an option to generate and configure a self-signed certificate automatically.
If you are going to be following the manual installation procedure, you will need to follow the instructions for manually generating self-signed certificates prior to proceeding with the installation.
DNS resolution for AHR UI access#
Add A records for the following AHR endpoints to the DNS zone for your TLS certificate domain (<ahr-domain>). These records are required to access the AHR UI from your local browser. Contact your DNS administrator to create these records. Both endpoints should resolve to the BCM headnode’s external or floating IP address (the IP you used to SSH to the BCM headnode):
<ahr-domain>api.<ahr-domain>
If you do not have access to the DNS zone for <ahr-domain>, you can use your local /etc/hosts file for local domain resolution by appending the following to /etc/hosts:
<headnode-ip> <ahr-domain>
<headnode-ip> api.<ahr-domain>
NVIDIA Mission Control autonomous hardware recovery Installation via BCM TUI Wizard#
The BCM TUI Wizard helps automate the installation of the AHR backend and agents across the cluster. If a manual installation procedure is desired, the instructions for that can be found in the appendix of this document.
Backend and Agent Installation#
Before you begin the installation of AHR with the BCM TUI Wizard, you will need to create the
autonomous-hardware-recoverynamespace with a specific label to allow container pulls from non-local registries. Run the following command to define the namespace in a file titledahr-namespace.yamlcat <<EOF > ahr-namespace.yaml apiVersion: v1 kind: Namespace metadata: name: autonomous-hardware-recovery labels: zarf.dev/agent: ignore EOF
then run the following to apply the definition:
kubectl apply -f ahr-namespace.yaml --kubeconfig /root/.kube/config-k8s-admin
You will also need to create a BCM user with which to deploy the AHR application with by running the following command. Make sure to replace
<strong-password>with a new valuecmsh -c 'user; add ahr; set password <strong-password>; commit;'
From the active BCM headnode, run the
cm-mission-control-setupcommand and selectNVIDIA Mission Control autonomous hardware recovery Menu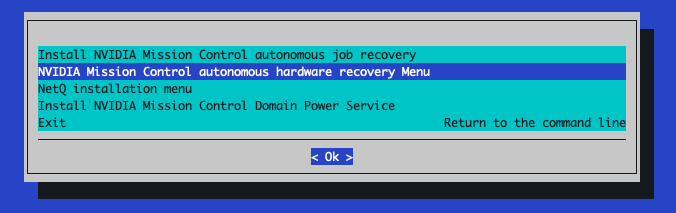
If this is the first time
cm-mission-control-setupis run on this headnode, you will also get a screen like the following:
Select
< Ok >to proceed each time this screen appears.Choose
Install or Upgradeand then select< OK >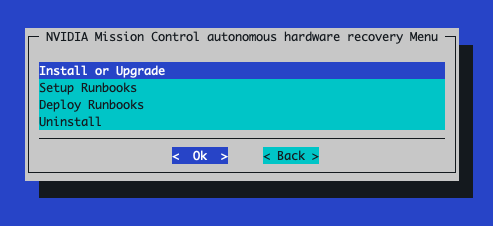
When prompted to select user, select the
ahruser you just created: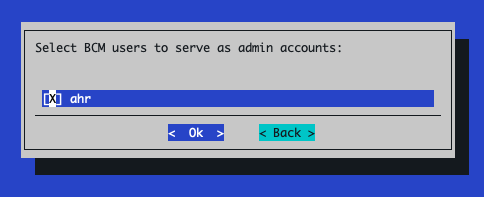
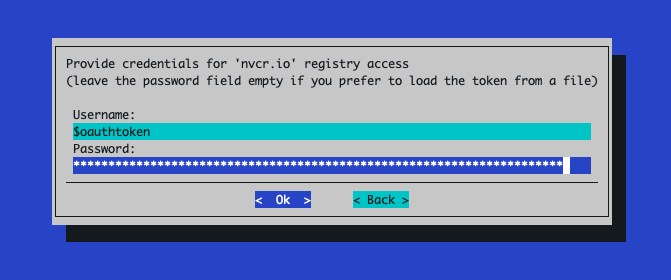
Use the NGC token you obtained in the Prerequisites section to provide credentials for the nvcr.io registry
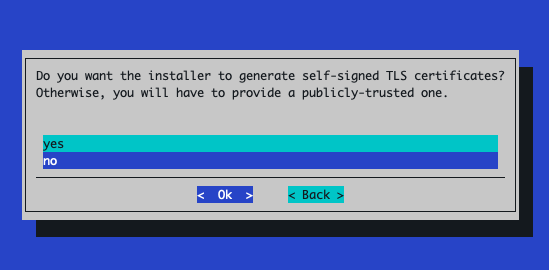
If you’d like the installer to create self-signed TLS certificates to be used for your environment, select yes at the following screen. Otherwise, select no to provide your own publicly-trusted certificates
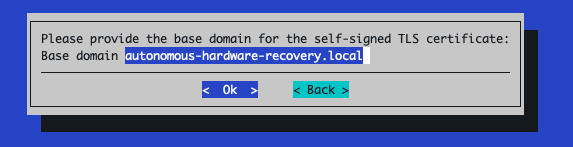
If
yesis selected:Enter the base domain that will be used to derive all AHR endpoint URLs:
If
nois selected:When prompted for a wildcard TLS certificate, use the
ahr.crtandahr.keyfiles obtained from the Prerequisites section of this document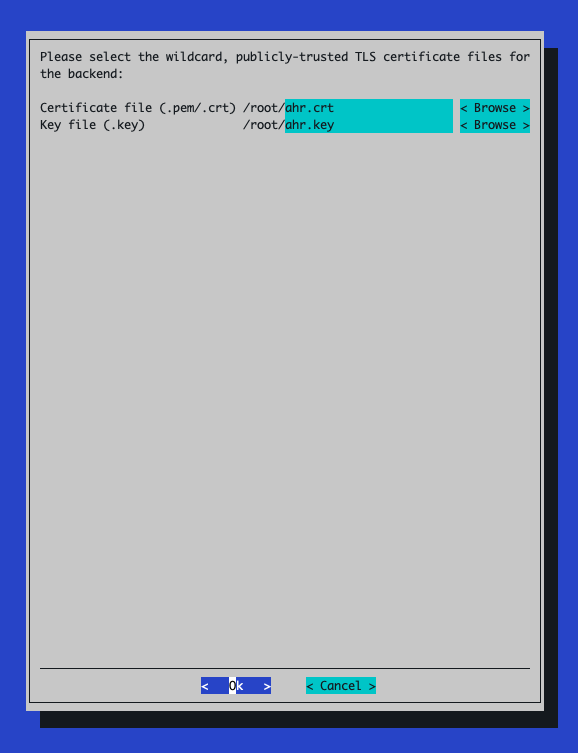
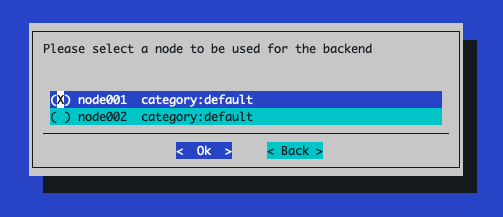
Select the node to be used for the AHR backend pod
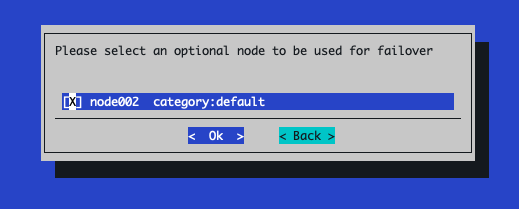
(Optional) Select a different node to be used as the failover node. More information on the failover feature can be found in the NVIDIA Mission Control autonomous hardware recovery Failover section of this document
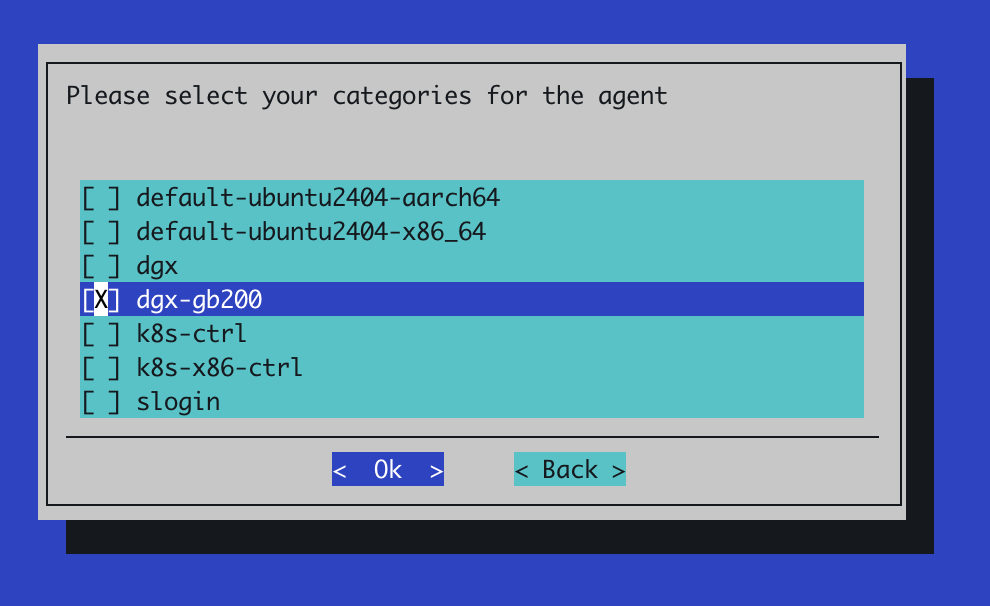
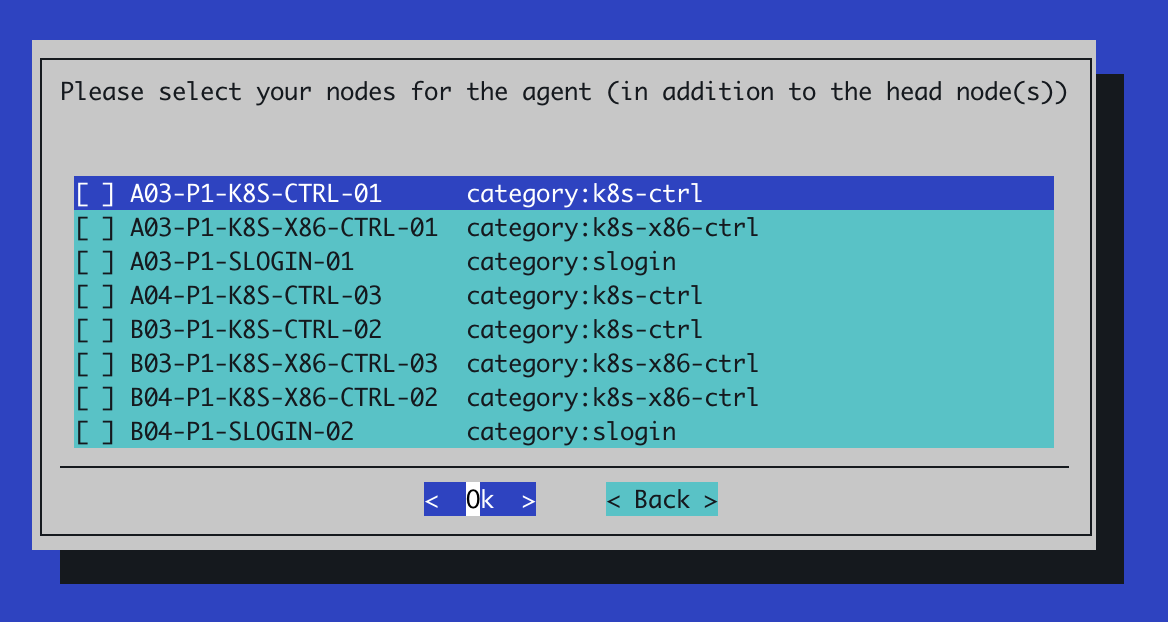
Select the node categories for the agent installation. These are usually the category of node used for the GPU nodes in your environment and, if present, the category used for your slurm controller nodes
If prompted to select additional nodes for the agent, select any other individual nodes you would like to install the AHR agent on
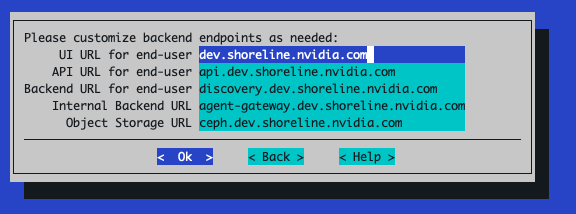
You can customize the URLs used for the AHR backend endpoints but the populated defaults are typically fine. These use the domain associated with the TLS certificates
Selecting
Okwill attempt to verify that DNS resolution is working correctly for the endpoints listed in the preceding step. If there is an issue with DNS resolution for those endpoints, you can safely ignore them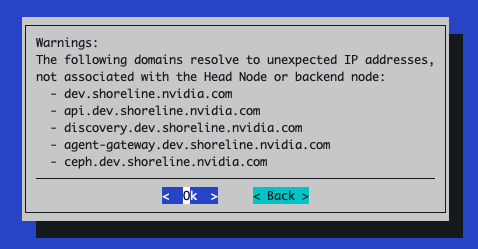
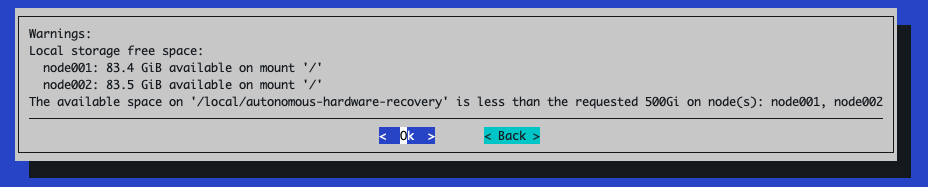
For storage configuration, the default sizes are typically sufficient but verify that each storage path is correctly specified. The Object Storage path should reference a storage device or partition without any filesystem on it, while the Local Storage path can reference any directory on the node selected to be used for the AHR backend pod. If the directory doesn’t already exist on the node, the installer will create it for you
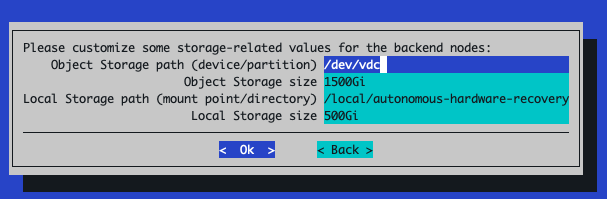
If there isn’t enough space on the mounted device for Local Storage path as requested, a warning like the following will appear
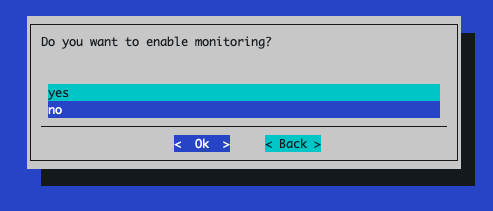
When prompted to enable monitoring, select No
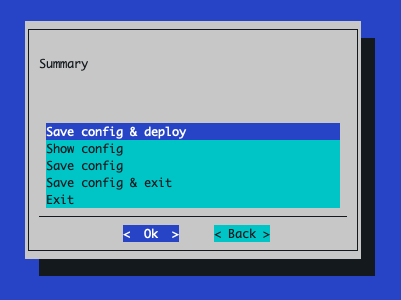
The next screen depends on which option was chosen for object storage during the prerequisites section of the document
If the Local Ceph on the worker node option was chosen, simply select Save config & deploy:
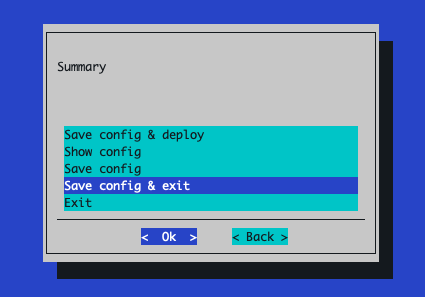
If the External object storage was chosen, you will need to select Save config & exit
Then, you’ll need to adjust this config so it leverages your external object storage solution. First, backup the original config file just in case
export CONFIG_FILE_PATH=<relative-or-absolute-path-of-saved-config-file>
cp $CONFIG_FILE_PATH $CONFIG_FILE_PATH.orig
Next, you’ll need to inject new values into the
cm-mission-control-setupconfig to account for your external object storage solution.export AWS_REGION=<region-in-which-object-storage-buckets-will-get-created> # If using AWS S3, set this to https://s3.<region>.amazonaws.com export AWS_ENDPOINT_URL=<storage-service-endpoint-url>
Select the tab that matches how you want to provide S3 credentials, then run each code block in that tab:
export ACCESS_KEY_ID=<aws-access-key-id>
export SECRET_ACCESS_KEY=<aws-secret-access-key>
if ! grep -q 'use_external_ceph' cm-mission-control-setup.conf; then
    awk -v access_key="$ACCESS_KEY_ID" -v secret_key="$SECRET_ACCESS_KEY" -v aws_region="$AWS_REGION" -v endpoint_url="$AWS_ENDPOINT_URL" '
        /^[[:space:]]*init_values:[[:space:]]*$/ { init_found = 1; print; next }
        init_found && /^[[:space:]]*data:[[:space:]]*$/ {
            print;
            print "              use_external_ceph: true"
            print "              aws_region: " aws_region
            if (endpoint_url != "") {
                print "              aws_endpoint_url: " endpoint_url
            }
            print "              aws_secret:"
            print "                access_key: " access_key
            print "                secret_key: " secret_key
            init_found = 0; next
        }
        { print }' $CONFIG_FILE_PATH > $CONFIG_FILE_PATH.tmp
    if [ -f $CONFIG_FILE_PATH.tmp ]; then
        mv $CONFIG_FILE_PATH.tmp $CONFIG_FILE_PATH
    fi
fi
export K8S_SECRET_NAME=<name-of-existing-secret-containing-S3-creds>
export K8S_SECRET_ACCESS_KEY_KEY=<name-of-key-within-the-secret-for-the-access-key>
export K8S_SECRET_SECRET_KEY_KEY=<name-of-key-within-the-secret-for-the-secret-key>
if ! grep -q 'use_external_ceph' cm-mission-control-setup.conf; then
    awk -v access_key_key="$K8S_SECRET_ACCESS_KEY_KEY" -v secret_key_key="$K8S_SECRET_SECRET_KEY_KEY" -v aws_region="$AWS_REGION" -v secret_name="$K8S_SECRET_NAME" -v endpoint_url="$AWS_ENDPOINT_URL" '
        /^[[:space:]]*init_values:[[:space:]]*$/ { init_found = 1; print; next }
        init_found && /^[[:space:]]*data:[[:space:]]*$/ {
            print;
            print "              use_external_ceph: true"
            print "              aws_region: " aws_region
            if (endpoint_url != "") {
                print "              aws_endpoint_url: " endpoint_url
            }
            print "              ceph_secret:"
            print "                name: " secret_name
            print "                access_key: " access_key_key
            print "                secret_key: " secret_key_key
            init_found = 0; next
        }
        { print }' $CONFIG_FILE_PATH > $CONFIG_FILE_PATH.tmp
    if [ -f $CONFIG_FILE_PATH.tmp ]; then
        mv $CONFIG_FILE_PATH.tmp $CONFIG_FILE_PATH
    fi
fi
Run the installer with your modified config file
cm-mission-control-setup -c $CONFIG_FILE_PATH
Monitoring and Observability Installation#
Once the AHR backend has been successfully deployed using cm-mission-control-setup, you will want to deploy the AHR observability resources to the BCM-managed Grafana instance.
Set the appropriate values for your environment’s Grafana instance as environment variables.
GRAFANA_ENDPOINT- This is the URL that will be used to access the Grafana instance deployed in the NVIDIA Mission Control environment and is where observability resources specific to the autonomous hardware recovery backend will be deployed to (dashboards and alerts). Set this to the external or floating IP of the active headnode in the formathttps://<external-ip>/grafana.Note
If you are running an airgapped environment, the headnode’s external IP may not be routable from inside the Kubernetes pod network. In that case, use the Kubernetes-internal Grafana service URL instead, in the form
http://<service-name>.<namespace>.svc.cluster.local:<port>. The internal service serves at root/without TLS — do not append/grafana.To find the correct service name, namespace, and port for your environment, run:
kubectl get svc -A --kubeconfig /root/.kube/config-k8s-admin | grep grafana
For example, if the output shows service
kube-prometheus-stack-grafanain namespaceprometheuson port80, the URL would behttp://kube-prometheus-stack-grafana.prometheus.svc.cluster.local:80.You can verify the URL is reachable from the ops-tool pod with:
kubectl exec -n autonomous-hardware-recovery \
  $(kubectl get pod -n autonomous-hardware-recovery -l app=shoreline-ops-tool \
    -o jsonpath='{.items[0].metadata.name}') \
  -c ops-tool -- curl -sS -o /dev/null -w "%{http_code}" \
  "http://<service-name>.<namespace>.svc.cluster.local:<port>/api/health"
A
200response confirms connectivity.GRAFANA_USER- A user with permissions to provision dashboards and alerts via API to the Grafana instance deployed in the NVIDIA Mission Control environment. This can be retrieved with the following command:kubectl --kubeconfig /root/.kube/config-k8s-admin --namespace prometheus get secrets kube-prometheus-stack-grafana -o jsonpath="{.data.admin-user}" | base64 -d ; echo
GRAFANA_PASSWORD- The password for the user defined forGRAFANA_USER. This can be retrieved with the following command:kubectl --kubeconfig /root/.kube/config-k8s-admin --namespace prometheus get secrets kube-prometheus-stack-grafana -o jsonpath="{.data.admin-password}" | base64 -d ; echo
Replace the placeholder values with your environment-specific values:
export GRAFANA_ENDPOINT=https://<headnode_ip>/grafana
export GRAFANA_USER="admin"
export GRAFANA_PASSWORD="xxxxx"
Create
values-observability.yamlfile by running the following command:cat <<EOF > values-observability.yaml data: enable_monitoring: true fluent_bit: disable: true servicemonitor: enable: true namespace: prometheus labels: release: "kube-prometheus-stack" grafana: deploy_alerts: true deploy_dashboards: true url: "$GRAFANA_ENDPOINT" user: "$GRAFANA_USER" password: "$GRAFANA_PASSWORD" EOF
Upgrade the backend by merging the values in the
values-observability.yamlfile with the existing values used for the AHR backend installation:helm upgrade backend \ shoreline-onprem-backend/shoreline-onprem-backend \ -f values-observability.yaml \ --reuse-values \ --version "$(helm get values --kubeconfig /root/.kube/config-k8s-admin \ -n autonomous-hardware-recovery backend | grep platform_ver | cut -d '-' -f 2)" \ --namespace autonomous-hardware-recovery \ --kubeconfig /root/.kube/config-k8s-admin
Note
For airgapped environments where the Helm chart is stored locally, use the local chart tarball instead:
helm upgrade backend \
    /cm/local/apps/autonomous-hardware-recovery/var/charts/shoreline-onprem-backend-"$(helm get values \
        --kubeconfig /root/.kube/config-k8s-admin \
        -n autonomous-hardware-recovery backend | grep platform_ver | cut -d '-' -f 2)".tgz \
    -f values-observability.yaml \
    --reuse-values \
    --namespace autonomous-hardware-recovery \
    --kubeconfig /root/.kube/config-k8s-admin
Restart the ops-tool deployment to trigger dashboard and alert provisioning. The Grafana provisioning scripts run at container startup, so the ops-tool pod must be restarted after updating the Helm values:
kubectl rollout restart deployment shoreline-ops-tool -n autonomous-hardware-recovery --kubeconfig /root/.kube/config-k8s-admin
The dashboards should now be visible in Grafana under the autonomous hardware recovery folder.
Runbook Setup and Deployment#
From the active BCM headnode, run the
cm-mission-control-setupcommand and selectNVIDIA Mission Control autonomous hardware recovery MenuChoose
Setup Runbooksand then select< OK >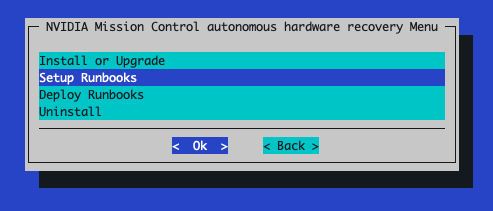
Select the runbooks version to publish

Select Save config & deploy:
Once the installer has completed, rerun the
cm-mission-control-setupcommand and selectNVIDIA Mission Control autonomous hardware recovery MenuChoose
Deploy Runbooksand then select< OK >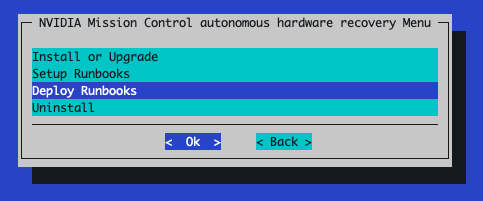
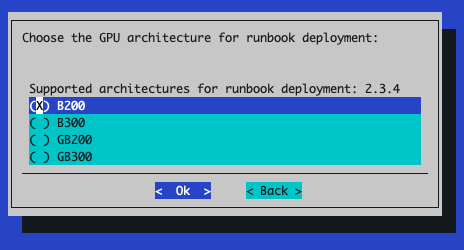
Select the appropriate GPU architecture for the nodes in your environment:
The next prompt shows a summary of what will be deployed (summary of
tofu plan). Selectyesto deploy the resources.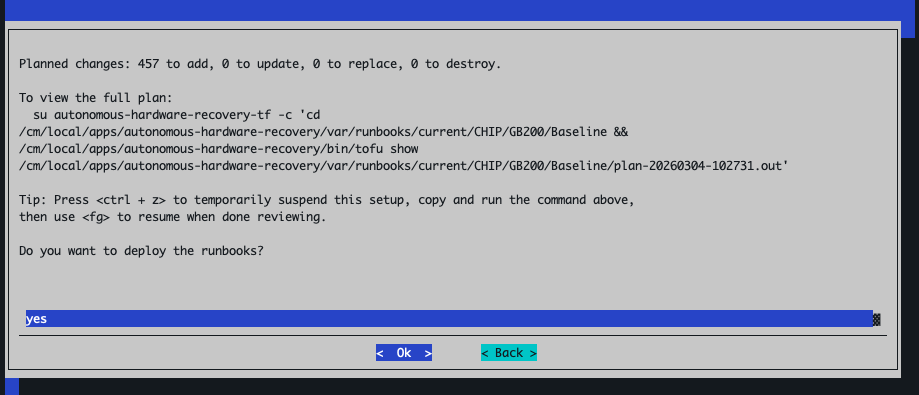
Select
Save config & deploy:After the runbooks deployment completes, select
Closeto exit: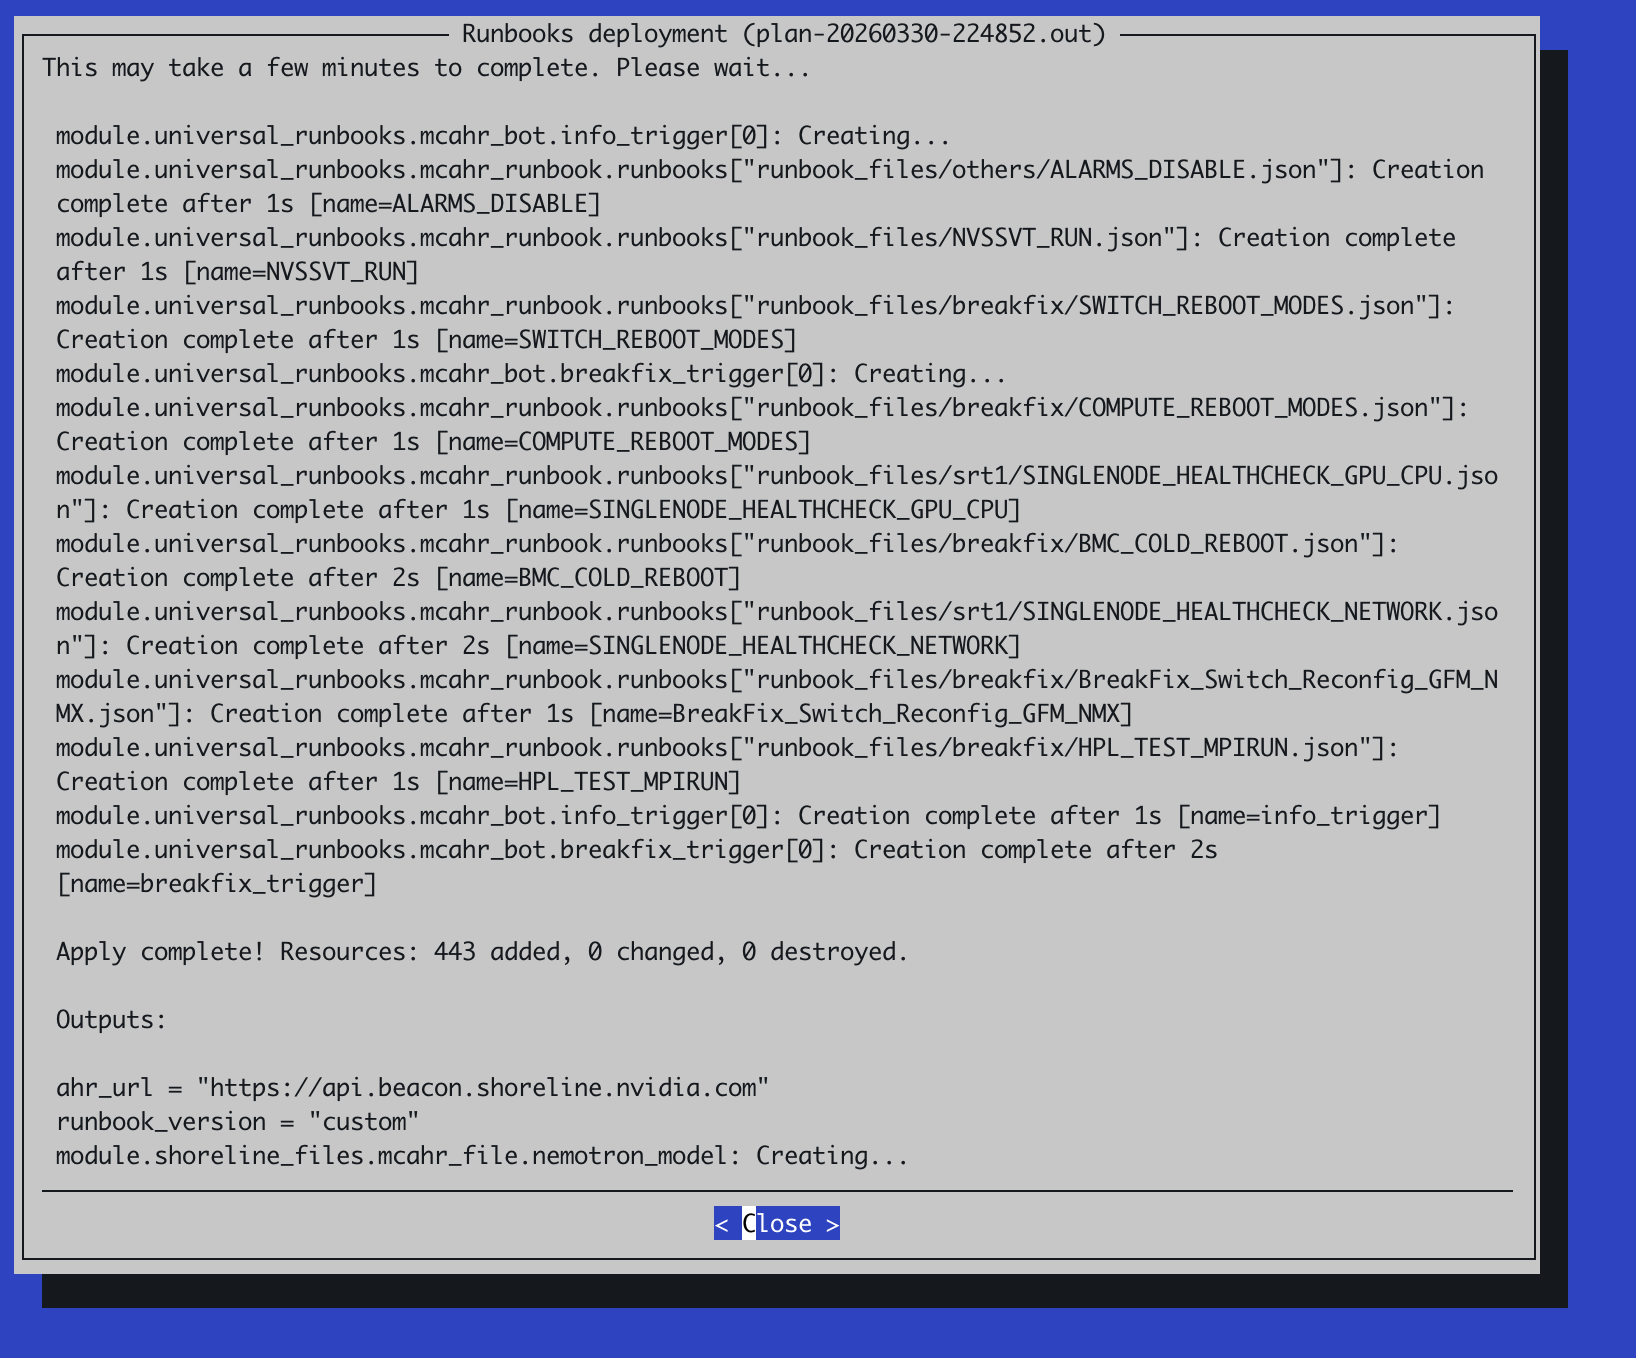
Post Runbook Deployment Configuration#
After the TUI-based installation completes, configure certificate access and container capabilities to enable runbook execution. These steps apply to GB200, GB300, B200, and B300 environments.
Configure CM API Certificate Access
The AHR agent requires BCM Cluster Manager (CM) API certificates to execute runbooks. If the
autonomous-hardware-recoveryuser does not have these certificates, runbook execution will fail with the following error:Failed to get cluster setup: CMMain::getClusterSetup, rpc: No error (0), http: 640, aborted: 0, error: Your certificate (profile:autonomous-hardware-recovery) does not allow access to CMMain::getClusterSetup
Copy the CM
admincertificates to theautonomous-hardware-recoveryuser’s home directory on all headnodes. Run the following command from the primary headnode:pdsh -g headnode 'AGENT_USER=autonomous-hardware-recovery && \ HOME_DIR=$(getent passwd ${AGENT_USER} | cut -d: -f6) && \ sudo mkdir -p ${HOME_DIR}/.cm && \ sudo cp /root/.cm/admin.key ${HOME_DIR}/.cm/admin.key && \ sudo cp /root/.cm/admin.pem ${HOME_DIR}/.cm/admin.pem && \ sudo chown ${AGENT_USER}:${AGENT_USER} ${HOME_DIR}/.cm ${HOME_DIR}/.cm/admin.pem ${HOME_DIR}/.cm/admin.key'
Set Enroot Container Capabilities
AHR runbooks use enroot to launch containers on the nodes running the AHR agent. Without the required Linux capabilities, container startup will fail with the following error:
enroot-aufs2ovlfs: failed to set capabilities: Operation not permitted
Set the required Linux capabilities for Enroot in each software image that has the AHR agent installed:
Set the agent category to apply the capabilities to:
export AGENT_CATEGORY=<name-of-agent-category-with-ahr-agent-installed>
Resolve the software image path and set the necessary capabilities inside the software image:
export AGENT_IMAGE_PATH=$(cmsh -c "category; use $AGENT_CATEGORY; get softwareimage" | xargs -I{} cmsh -c "softwareimage; use {}; get path" | grep "^/")

systemd-nspawn --directory=$AGENT_IMAGE_PATH --chdir=/root bash -c \
  "setcap cap_sys_admin,cap_mknod=ep /usr/bin/enroot-aufs2ovlfs && \
  setcap cap_sys_admin,cap_mknod=ep /usr/bin/enroot-mksquashovlfs"
Push the updated image to all nodes in the category:
cmsh -c "device; imageupdate -w -c $AGENT_CATEGORY"
Initial Login to the NVIDIA autonomous hardware recovery UI#
Accessing the AHR UI requires proper DNS resolution for the UI and API endpoints. Refer to the DNS Resolution for AHR UI access section in the prerequisites for DNS setup instructions.
If this environment was setup with self-signed TLS certificates, you will need to import the root
ca.crtfile to any browser trying to access the AHR UI to ensure your browser trusts this certificate. If the environment was setup with publicly-trusted TLS certificates provided to the installer, you can skip this step and move right to step 2.Copy the contents of the
root-ca.crtfile to a location on the machine with the browser:cat /cm/local/apps/autonomous-hardware-recovery/etc/certs/root-ca.crtthen on the machine with the browser:
vi ca.crt
To trust the self-signed CA certificate in Firefox, follow these steps:
Open Firefox and go to Preferences (or Options on Windows).
Navigate to Privacy & Security and scroll down to the Certificates section.
Click View Certificates.
In the Certificate Manager window, select the Authorities tab.
Click Import.
Choose your self-signed CA certificate file (e.g.,
ca.crt).When prompted, check “Trust this CA to identify websites”.
Click OK to complete the import.
To trust the self-signed CA certificate in Chrome, follow these steps:
Open Chrome and navigate to
chrome://settings/certificatesUnder Custom, click on Installed by you
Next to Trusted Certificates, click Import
Select the self-signed CA certificate file -
ca.crt
In a browser, navigate to
https://<ahr-domain>/, using the domain you configured in the Prerequisites section. Log in using your BCM LDAP credentials.You will need to enable the
Administerrole for the relevant users:Navigate to the Access Control page in the left sidebar.
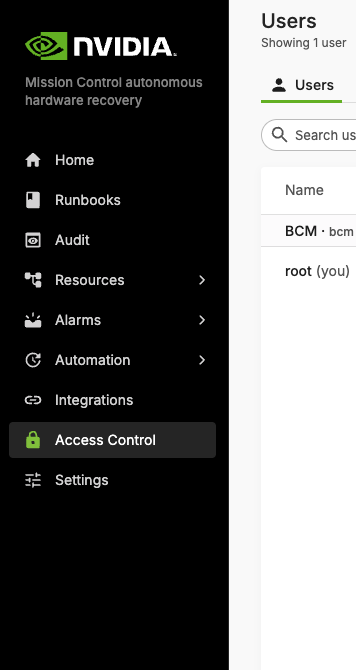
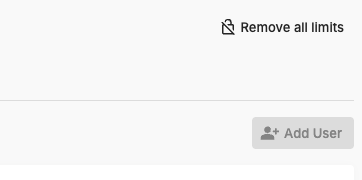
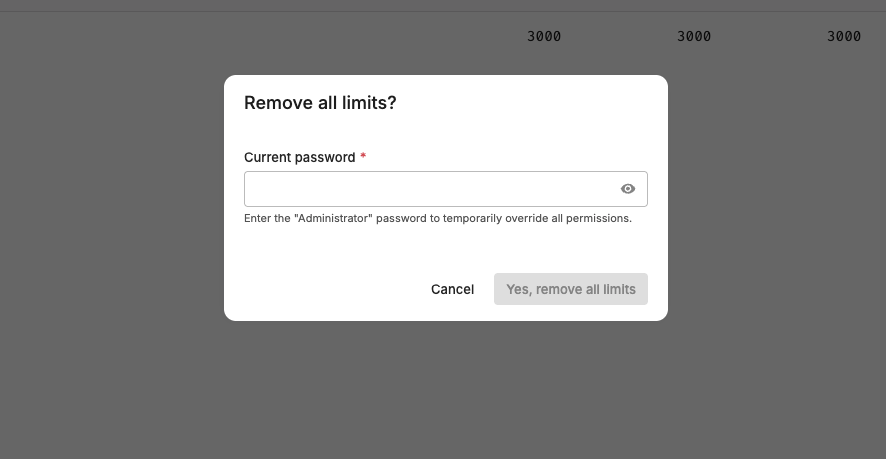
In the top right corner, click the Remove all limits button.
Enter the default password admin.
The bottom of your left sidebar should now say
Elevated privilegesfor your user.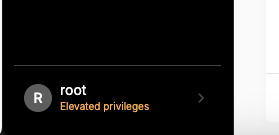
The Remove all limits button should now say Change Administrator password. Click this button to immediately change the default password to another value and save it somewhere safe.
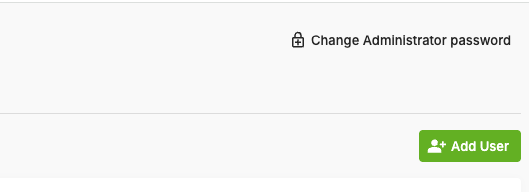
You can now grant the
Administerrole to other users by clicking Manage permissions and enabling the Administrator toggle.
Backend Health and Agent Connectivity#
To verify that the backend is running and agents are successfully registered:
Log in to the NVIDIA Mission Control Autonomous Hardware Recovery portal using your credentials, and navigate to the Runbooks section.

Click New Runbook in the top-right corner. You should see a screen similar to the following example:

In the central page, click Op Statement to create your first cell to query the resource.
Type
hostin the cell as your query and press Enter.Node inventory comes from the BCM API, so the query shows all nodes, as in the following example:
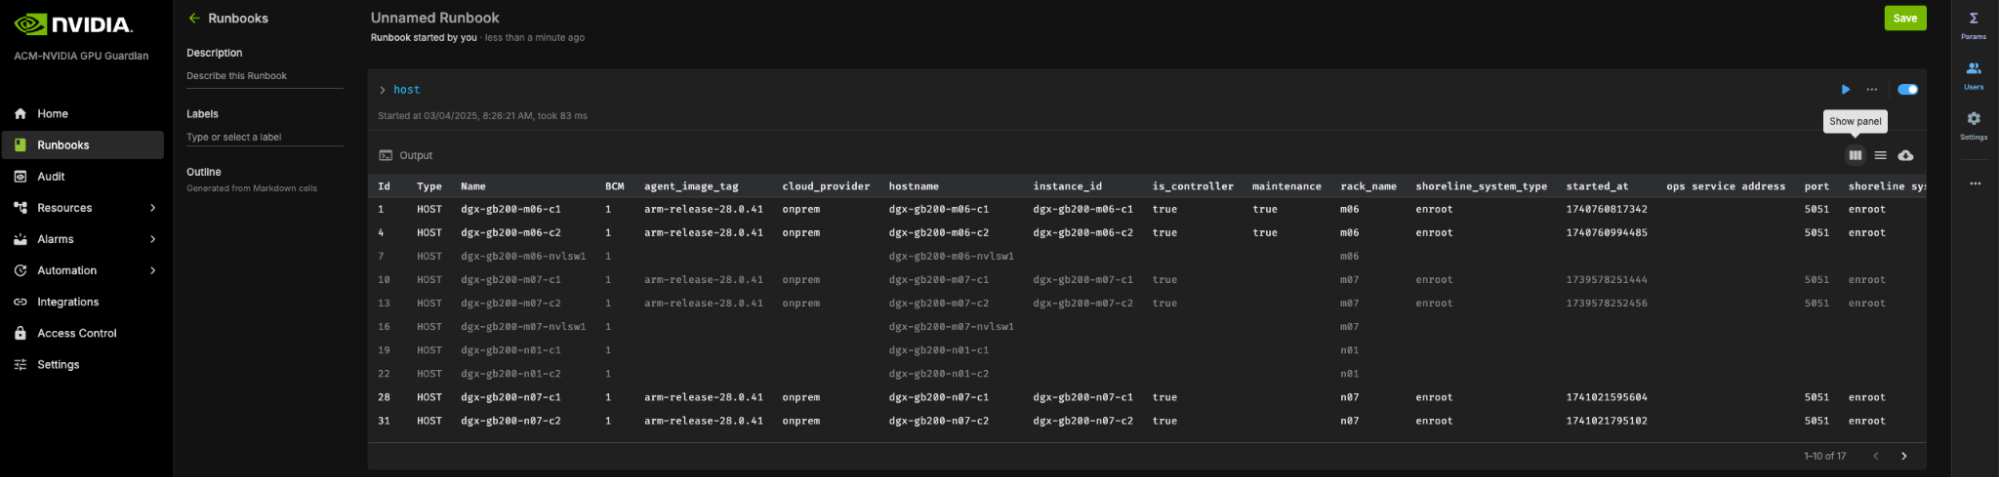
Greyed out resources are not connected to the AHR backend. Resources that appear in black are connected to the AHR backend.
NVIDIA Mission Control autonomous hardware recovery Uninstallation via BCM TUI Wizard#
From the active BCM headnode, run the
cm-mission-control-setupcommand and selectNVIDIA Mission Control autonomous hardware recovery MenuChoose
Uninstalland then select< OK >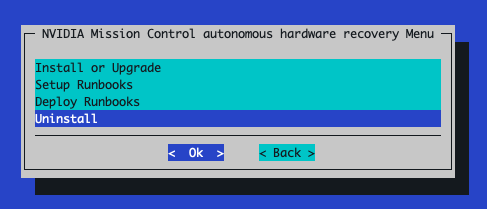
The next screen will ask you to confirm the deletion of all AHR data in the cluster. The default selection is
nohere so make sure to selectyesafter reading the confirmation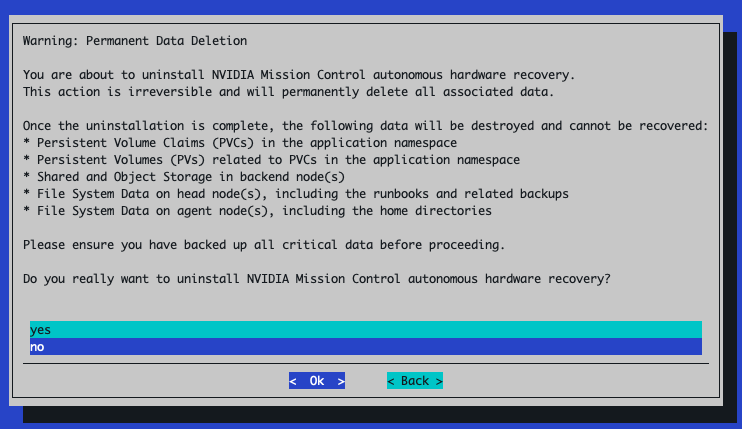
Select Save config & deploy:
When choosing where to save the config file, give the file a different name than the config file originally used for the installation. For example, if the file for the installation was saved as
cm-mission-control-setup.conf, you might want to name this file something likecm-mission-control-setup_uninstall.conf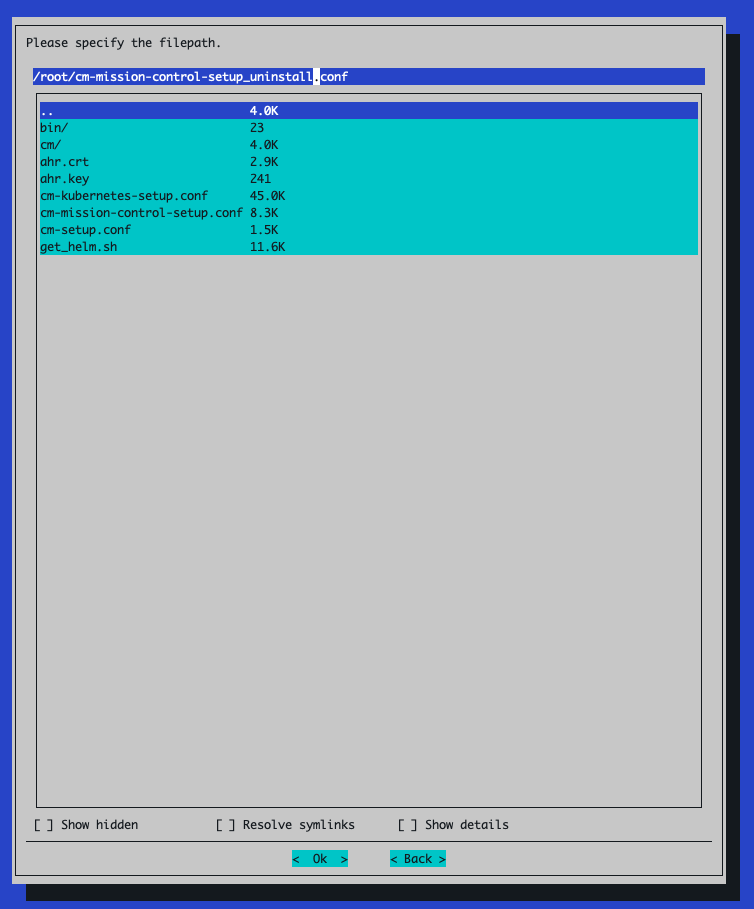
After
cm-mission-control-setupfinishes, remove the cached Helm repo credential from the primary headnode:helm repo remove shoreline-onprem-backend
AHR Appendix#
Generating a publicly-trusted TLS certificate#
The following example demonstrates how to generate a certificate when your domain is managed with Route53 as your public DNS provider:
Generate wildcard certificates using certbot. Note: You need someone who can add DNS records to the customer’s DNS zone present when running this command. Replace the value with the correct domain when setting the
AHR_DOMAINvariable.export AHR_DOMAIN=ahr.customer-domain.com
apt-get update && apt-get install -y certbot

certbot certonly --manual \
  --preferred-challenges dns \
  --debug-challenges --agree-tos \
  -d "*.${AHR_DOMAIN}","${AHR_DOMAIN}"
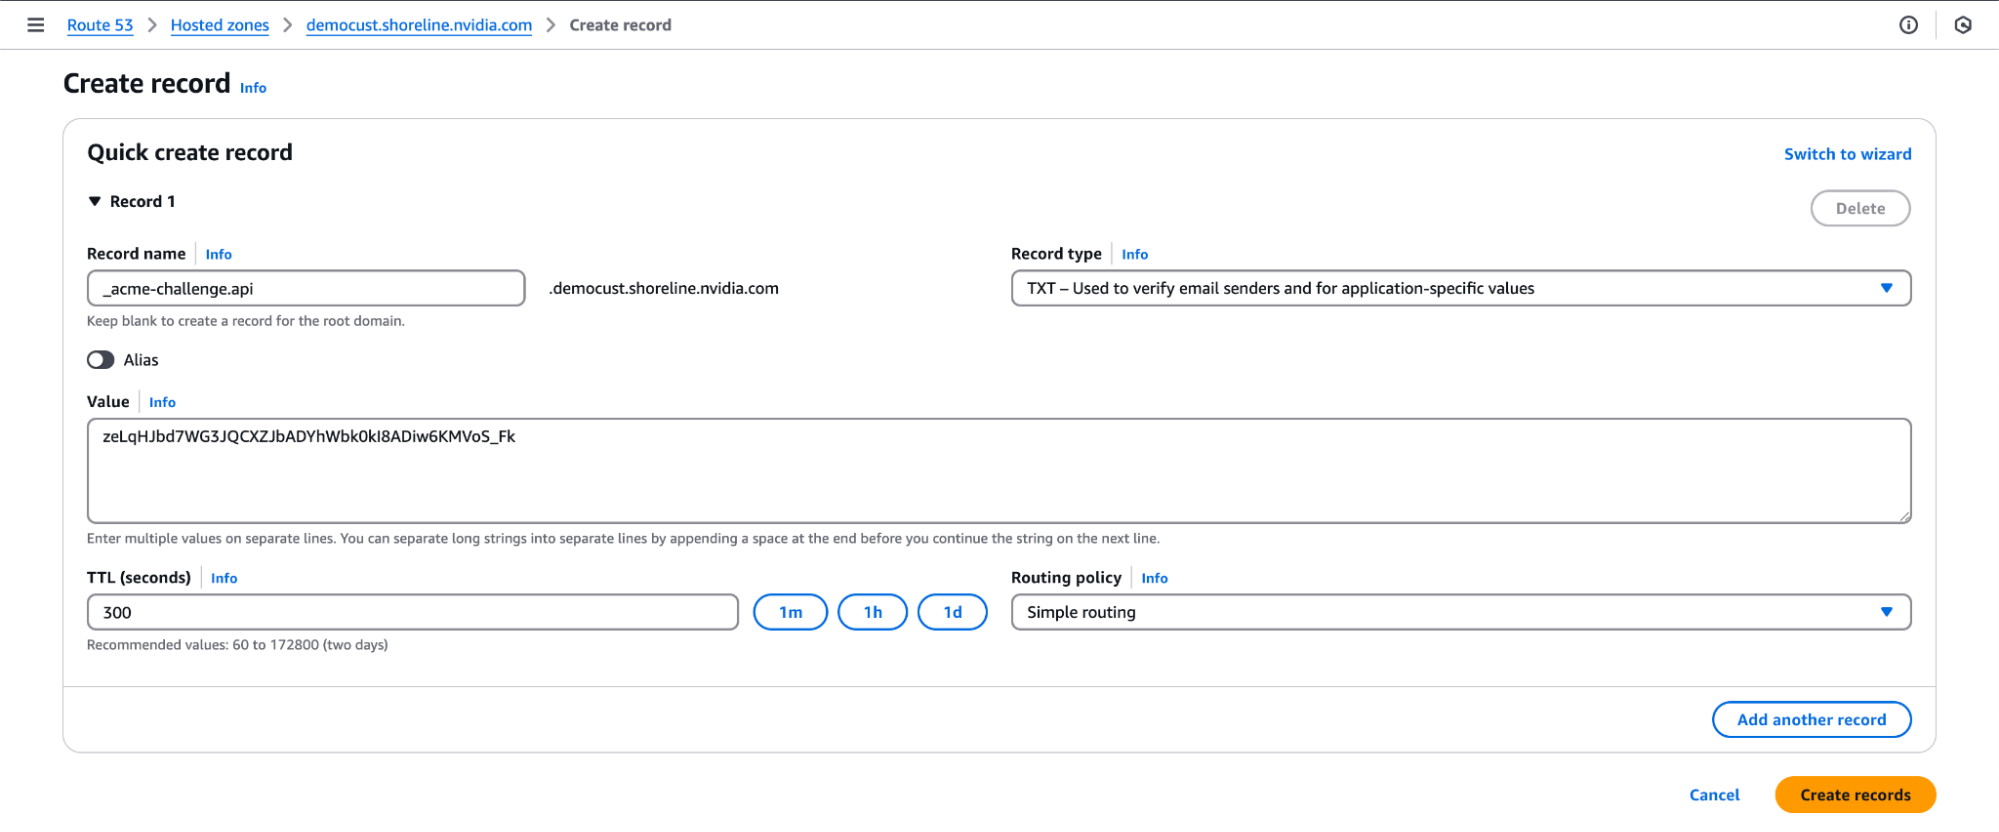
Two TXT records will be produced. Add both to the DNS zone under the same entry (DNS standards allow for multiple distinct TXT records with the same name). Sample output of a DNS record to be added:
Please deploy a DNS TXT record under the name:

_acme-challenge.ahr.customer-domain.com.

with the following value:

zeLqHJbd7WG3JQCXZJbADYhWbk0kI8ADiw6KMVoS_Fk
After you add all the DNS TXT records to your public DNS, you should see a message like this:
Successfully received certificate.
Certificate is saved at: /etc/letsencrypt/live/ahr.customer-domain.com/fullchain.pem
Key is saved at:         /etc/letsencrypt/live/ahr.customer-domain.com/privkey.pem
This certificate expires on 2025-07-24.
These files will be updated when the certificate renews.
Copy the generated certs to a directory named by domain in the local directory for easy access:
sh -c "cd /etc/letsencrypt/live/; tar -chf - ${AHR_DOMAIN}" | tar -xvf -
Save the copied
.keyand.crtfiles from the new directory somewhere safe; you will need them in a later installation step.cp ${AHR_DOMAIN}/privkey.pem ahr.key cp ${AHR_DOMAIN}/fullchain.pem ahr.crt
Later on, if installing AHR via the BCM TUI wizard, you will need this cert/key pair present in the directory from which
cm-mission-control-setupis to be run.
NVIDIA Mission Control autonomous hardware recovery Installation - Manual Procedure#
Backend Install#
Run the following steps on the BCM headnode to install the NVIDIA Mission Control autonomous hardware recovery backend on the Kubernetes. In this section, we will resolve the NVIDIA Mission Control autonomous hardware recovery endpoints, create some k8s artifacts for NVIDIA Mission Control autonomous hardware recovery, and install the NVIDIA Mission Control autonomous hardware recovery backend with Helm.
Before you begin the installation of AHR with the BCM TUI Wizard, you will need to create the
autonomous-hardware-recoverynamespace with a specific label to allow container pulls from non-local registries. Run the following command to define the namespace in a file titledahr-namespace.yamlcat <<EOF > ahr-namespace.yaml apiVersion: v1 kind: Namespace metadata: name: autonomous-hardware-recovery labels: zarf.dev/agent: ignore EOF
then run the following to apply the definition:
kubectl --kubeconfig /root/.kube/config-k8s-admin apply -f ahr-namespace.yaml
You will also need to create a BCM user with which to deploy the AHR application with by running the following command. Make sure to replace
<strong-password>with a new valuecmsh -c 'user; add ahr; set password <strong-password>; commit;'
Ensure the required API token permissions to the NVIDIA Mission Control autonomous hardware recovery profile exist in BCM
Check if the autonomous-hardware-recovery profile exists via
cmsh. It should already be present in the listcmsh -c 'profile list'
Example output:
Name (key)                    Services
----------------------------- -----------------------------------------------------------
admin
autonomous-hardware-recovery  CMDevice,CMUser
autonomous-job-recovery       CMDevice
bootstrap
cmhealth                      CMMon,CMMain,CMJob,CMDevice
cmpam                         CMJob,CMMain
litenode                      CMDevice,CMStatus,CMSession,CMMain,CMMon,CMNet,CMPart
monitoringpush                CMMon
mqtt                          CMDevice,CMMon,CMPart
node                          CMDevice,CMStatus,CMCert,CMSession,CMMain,CMPart,CMNet,CMP+
portal                        CMMain,CMKube,CMGui,CMJob,CMPart,CMMon,CMSession
power                         CMDevice,CMStatus,CMMain,CMJob
prs                           CMDevice,CMMon,CMJob
readonly                      CMKube,CMEtcd,CMDevice,CMStatus,CMNet,CMPart,CMMon,CMJob,C+
If the profile doesn’t exist, please reach out to NVIDIA support
Check if the certificate and key are present for the
autonomous-hardware-recoveryprofile. The certificate and key should already be present in/cm/local/apps/autonomous-hardware-recovery/etc/asautonomous-hardware-recovery.pemandautonomous-hardware-recovery.key. If the certificate and key are missing, generate them using the command below:root@headnode:~# cmsh [headnode]% cert [headnode->cert]% help createcertificate Name: createcertificate - Create a new certificate Usage: createcertificate <key-length> <common-name> <organization> <organizational-unit> <locality> <state> <country> <profile> <sys-login> <days> <key-file> <cert-file> Arguments: key-file Path to key file that will be generated cert-file Path to pem file that will be generated root@headnode:~# cmsh [headnode]% cert [headnode->cert]% createcertificate 2048 AHR "" "" "" "" US autonomous-hardware-recovery "" 36500 /cm/local/apps/autonomous-hardware-recovery/etc/autonomous-hardware-recovery.key /cm/local/apps/autonomous-hardware-recovery/etc/autonomous-hardware-recovery.pem
Verify that the
autonomous-hardware-recoveryprofile contains the following token permissions, and add any that are missing:GET_NVDOMAIN_INFO_TOKEN
GET_SYSINFO_COLLECTOR_TOKEN
GET_NETWORK_TOPOLOGY_TOKEN
GET_DEVICE_TOKEN
GET_GROUP_TOKEN
GET_RACK_TOKEN
[root@ts-tr-multiarch ~]# cmsh
[ts-tr-multiarch]% profile
[ts-tr-multiarch->profile]% use autonomous-hardware-recovery
[ts-tr-multiarch->profile[autonomous-hardware-recovery]]% get tokens
GET_DEVICE_TOKEN
GET_RACK_TOKEN
[ts-tr-multiarch->profile[autonomous-hardware-recovery]]% append tokens GET_NVDOMAIN_INFO_TOKEN
[ts-tr-multiarch->profile*[autonomous-hardware-recovery*]]% append tokens GET_SYSINFO_COLLECTOR_TOKEN
[ts-tr-multiarch->profile*[autonomous-hardware-recovery*]]% append tokens GET_NETWORK_TOPOLOGY_TOKEN
[ts-tr-multiarch->profile*[autonomous-hardware-recovery*]]% append tokens GET_GROUP_TOKEN
[ts-tr-multiarch->profile*[autonomous-hardware-recovery*]]% commit
Setup TLS certificates
Using the TLS certificates that were obtained from the Prerequisites section of this document, run the following to create K8s secrets for the certificates
kubectl create secret tls shoreline-api-certificate \
  --namespace=autonomous-hardware-recovery \
  --cert=ahr.crt \
  --key=ahr.key \
  --kubeconfig /root/.kube/config-k8s-admin

kubectl create secret tls shoreline-app-certificate \
  --namespace=autonomous-hardware-recovery \
  --cert=ahr.crt \
  --key=ahr.key \
  --kubeconfig /root/.kube/config-k8s-admin

kubectl create secret tls shoreline-discovery-certificate \
  --namespace=autonomous-hardware-recovery \
  --cert=ahr.crt \
  --key=ahr.key \
  --kubeconfig /root/.kube/config-k8s-admin

kubectl create secret tls shoreline-ceph-certificate \
  --namespace=autonomous-hardware-recovery \
  --cert=ahr.crt \
  --key=ahr.key \
  --kubeconfig /root/.kube/config-k8s-admin
Set the following environment variables in your environment
Note
Replace the placeholder values with your environment-specific values:
export AHR_DOMAIN=<domain-used-in-tls-certs>
export ACTIVE_HEADNODE_IP=<ip-of-active-headnode>
export AHR_BACKEND_NODE=<worker-node-hostname>
export AHR_OBJECT_STORAGE_PATH=<filepath> # ex. /dev/vdc
export AHR_SHARED_STORAGE_PATH=/local/autonomous-hardware-recovery

# only include the following two lines if you are installing the environment with failover enabled
export AHR_FAILOVER_NODE=<worker-node-hostname>
export AHR_FAILOVER_OBJECT_STORAGE_PATH=<filepath>

export GRAFANA_ENDPOINT=https://<headnode-ip>/grafana
export GRAFANA_USER="admin"
export GRAFANA_PASSWORD="xxxxx"
export AHR_NGC_TOKEN=nvapi-XXXXXXX
# NMC 2.3 AHR versions, leave these as is
export AHR_VERSION=29.1.82
export AHR_PLATFORM_VER=release-$AHR_VERSION
export AHR_UI_VER=stable-29.1.52
AHR_DOMAIN- base domain used during TLS certificate creationAHR_BACKEND_NODE- worker node hostname where NVIDIA Mission Control autonomous hardware recovery backend pods will be installedAHR_FAILOVER_NODE(optional) - worker node hostname where NVIDIA Mission Control autonomous hardware recovery secondary/failover pods will be installedAHR_OBJECT_STORAGE_PATH- path to a dedicated unformatted disk (no filesystem) on theAHR_BACKEND_NODEworker node to be used for object storageAHR_FAILOVER_OBJECT_STORAGE_PATH(optional) - path to a dedicated unformatted disk (no filesystem) on theAHR_FAILOVER_NODEworker node to be used for object storageACTIVE_HEADNODE_IP- IP address of the active headnode/cm/local/apps/python3/bin/python3 -c ' import pythoncm.cluster, pythoncm.entity c = pythoncm.cluster.Cluster() kc = c.get_by_name("k8s-admin", "KubeCluster") hn = c.active_head_node() phn = c.passive_head_node() net = kc.internalNetwork if phn: vips = ( {i.ip for i in hn.interfaces if i.childType == "NetworkAliasInterface" and i.network == net} & {i.ip for i in phn.interfaces if i.childType == "NetworkAliasInterface" and i.network == net} ) if vips: print(vips.pop()); exit() for i in hn.interfaces: if i.childType != "NetworkAliasInterface" and i.network == net: print(i.ip); exit() '
GRAFANA_ENDPOINT- This is the URL that will be used to access the Grafana instance deployed in the NVIDIA Mission Control environment and is where observability resources specific to the autonomous hardware recovery backend will be deployed to (dashboards and alerts). Set this to the external or floating IP of the active headnode in the formathttps://<external-ip>/grafana.Note
If you are running an airgapped environment, the headnode’s external IP may not be routable from inside the Kubernetes pod network. In that case, use the Kubernetes-internal Grafana service URL instead, in the form
http://<service-name>.<namespace>.svc.cluster.local:<port>. The internal service serves at root/without TLS — do not append/grafana.To find the correct service name, namespace, and port for your environment, run:
kubectl get svc -A --kubeconfig /root/.kube/config-k8s-admin | grep grafana
For example, if the output shows service
kube-prometheus-stack-grafanain namespaceprometheuson port80, the URL would behttp://kube-prometheus-stack-grafana.prometheus.svc.cluster.local:80.You can verify the URL is reachable from the ops-tool pod with:
kubectl exec -n autonomous-hardware-recovery \
  $(kubectl get pod -n autonomous-hardware-recovery -l app=shoreline-ops-tool \
    -o jsonpath='{.items[0].metadata.name}') \
  -c ops-tool -- curl -sS -o /dev/null -w "%{http_code}" \
  "http://<service-name>.<namespace>.svc.cluster.local:<port>/api/health"
A
200response confirms connectivity.GRAFANA_USER- The user with permissions to provision dashboards and alerts via API to the Grafana instance deployed in the NVIDIA Mission Control environment. This can be retrieved with the following command:kubectl --kubeconfig /root/.kube/config-k8s-admin --namespace prometheus get secrets kube-prometheus-stack-grafana -o jsonpath="{.data.admin-user}" | base64 -d ; echo
GRAFANA_PASSWORD- The password for the user defined forGRAFANA_USER. This can be retrieved with the following command:kubectl --kubeconfig /root/.kube/config-k8s-admin --namespace prometheus get secrets kube-prometheus-stack-grafana -o jsonpath="{.data.admin-password}" | base64 -d ; echo
AHR_NGC_TOKEN- The NGC token obtained from the Prerequisites of the document.
Note
Environments using external object storage instead of a local Ceph deployment will also need some additional environment variables set. Run the first code block below, then select the tab that matches how you want to provide S3 credentials for your object storage configuration and run the code blocks in that tab:
export AWS_REGION=<region-in-which-object-storage-buckets-will-get-created>
# If using AWS S3, would set the following line to https://s3.<region>.amazonaws.com
export AWS_ENDPOINT_URL=<storage-service-endpoint-url>
export ACCESS_KEY_ID=<aws-access-key-id>
export SECRET_ACCESS_KEY=<aws-secret-access-key>
export K8S_SECRET_NAME=<name-of-existing-secret-containing-S3-creds>
export K8S_SECRET_ACCESS_KEY_KEY=<name-of-key-within-the-secret-for-the-access-key>
export K8S_SECRET_SECRET_KEY_KEY=<name-of-key-within-the-secret-for-the-secret-key>
Resolve the NVIDIA Mission Control autonomous hardware recovery endpoints via the local DNS server (bind9) on all headnodes. Run the following commands from the active headnode.
Ensure the
namedconfiguration on all headnodes is referencing thenamed.conf.includefilepdsh -g headnode 'grep -Fxq "include \"/etc/bind/named.conf.include\";" /etc/bind/named.conf || \ echo "include \"/etc/bind/named.conf.include\";" >> /etc/bind/named.conf'
Create a zone file with DNS A records for each of the required NVIDIA Mission Control autonomous hardware recovery endpoints, then distribute it (along with the matching
named.conf.includezone block) to all headnodes.export BACKEND_NODE_INTERNAL_IP="$(kubectl --kubeconfig /root/.kube/config-k8s-admin get nodes "$AHR_BACKEND_NODE" -o jsonpath='{.status.addresses[?(@.type=="InternalIP")].address}')" # Create the zone file on the active headnode cat << EOT > /etc/bind/autonomous-hardware-recovery.zone \$TTL 86400 @ IN SOA ns.$AHR_DOMAIN. admin.$AHR_DOMAIN. ( 2024053001 ; Serial 3600 ; Refresh 1800 ; Retry 604800 ; Expire 86400 ) ; Minimum TTL ; @ IN NS ns.$AHR_DOMAIN. ns IN A $ACTIVE_HEADNODE_IP @ IN A $BACKEND_NODE_INTERNAL_IP api IN A $BACKEND_NODE_INTERNAL_IP ceph IN A $BACKEND_NODE_INTERNAL_IP discovery IN A $BACKEND_NODE_INTERNAL_IP agent-gateway IN A $BACKEND_NODE_INTERNAL_IP EOT # Distribute the zone file to all headnodes pdcp -g headnode /etc/bind/autonomous-hardware-recovery.zone /etc/bind/autonomous-hardware-recovery.zone # Create the zone block snippet on the active headnode cat << EOT > /tmp/ahr-named-zone-block.conf zone "$AHR_DOMAIN" IN { type master; file "autonomous-hardware-recovery.zone"; }; EOT # Distribute the snippet and append it to named.conf.include on all headnodes (only if not already present) pdcp -g headnode /tmp/ahr-named-zone-block.conf /tmp/ahr-named-zone-block.conf pdsh -g headnode "grep -q 'zone \"$AHR_DOMAIN\"' /etc/bind/named.conf.include 2>/dev/null || cat /tmp/ahr-named-zone-block.conf >> /etc/bind/named.conf.include" pdsh -g headnode 'rm -f /tmp/ahr-named-zone-block.conf' rm -f /tmp/ahr-named-zone-block.conf # Restart named on all headnodes pdsh -g headnode 'systemctl restart named'
Create the
shoreline-backendconfigurationoverlaycmsh -c "configurationoverlay; add shoreline-backend; set priority 500; append nodes $AHR_BACKEND_NODE; commit"
Note
If setting this environment up with failover enabled, you will also need to apply the configurationoverlay to the failover node by running:
cmsh -c "configurationoverlay; use shoreline-backend; append nodes $AHR_FAILOVER_NODE; commit"
Create the
generic::shoreline_backendrole and assign it to theshoreline-backendconfigurationoverlay/cm/local/apps/python3/bin/python3 << 'PYEOF' import pythoncm.cluster, pythoncm.entity c = pythoncm.cluster.Cluster() overlay = c.get_by_name('shoreline-backend', 'ConfigurationOverlay') role = pythoncm.entity.GenericRole(name='generic::shoreline_backend') role.excludeListSnippets = [ pythoncm.entity.ExcludeListSnippet( name='Default1', modeUpdate=True, modeSync=True, modeFull=False, modeGrab=False, modeGrabNew=False, noNewFiles=False, excludeList=[ '/local/autonomous-hardware-recovery', ], ), ] if existing := overlay.get_role_by_name('generic::shoreline_backend'): existing.excludeListSnippets = role.excludeListSnippets else: overlay.roles += [role] overlay.commit() print('Done') PYEOF
Add the
shoreline-backendlabelset to theshoreline-backendconfigurationoverlaycmsh -c "kubernetes; use k8s-admin; labelsets; add shoreline-backend; set labels node-role.kubernetes.io/ingress=; append overlays shoreline-backend; commit"
Patch the existing
ingress-nginxHelm release to run as a DaemonSet on nodes with thenode-role.kubernetes.io/ingresslabel, withhostPortenabled:META=$(helm list -n ingress-nginx --kubeconfig /root/.kube/config-k8s-admin -o json | jq -r '.[0]') && \ CHART=$(helm search repo "$(echo $META | jq -r '.chart' | sed 's/-[0-9].*//')" --kubeconfig /root/.kube/config-k8s-admin -o json | jq -r '.[0].name') && \ VERSION=$(echo $META | jq -r '.chart' | grep -oP '(?<=-)\d+\..*') && \ helm upgrade ingress-nginx "$CHART" \ --namespace ingress-nginx \ --kubeconfig /root/.kube/config-k8s-admin \ --version "$VERSION" \ --reuse-values \ --wait \ --set controller.kind=DaemonSet \ --set 'controller.nodeSelector.node-role\.kubernetes\.io/ingress=' \ --set controller.hostPort.enabled=true \ --set controller.hostPort.ports.http=80 \ --set controller.hostPort.ports.https=443
Then run:
while [ -z "$(kubectl --kubeconfig /root/.kube/config-k8s-admin get endpoints ingress-nginx-controller -n ingress-nginx -o jsonpath='{.subsets[0].addresses[0].ip}' 2>/dev/null)" ]; do echo "Waiting..."; sleep 5; done
Move on to the next step only once this command exits.
Create a
values.yamlfile for the AHR backend Helm chart. Run the first code block below, then select the tab that matches your object storage configuration and run the code blocks in that tab:FAILOVER_BLOCK="" FAILOVER_OBJ_STORAGE_BLOCK="" if [ -n "$AHR_FAILOVER_NODE" ]; then FAILOVER_BLOCK=$(cat <<INNER enable_failover: true backend_node_failover: "$AHR_FAILOVER_NODE" # local storage requirements on failover backend node shared_storage_path_failover: "/local/autonomous-hardware-recovery" shared_storage_size_failover: "500Gi" INNER ) FAILOVER_OBJ_STORAGE_BLOCK=$(cat <<INNER object_storage_path_failover: "$AHR_FAILOVER_OBJECT_STORAGE_PATH" object_storage_size_failover: "1500Gi" INNER ) fi
cat <<EOF > values.yaml
global:
  platform_ver: "$AHR_PLATFORM_VER"
  ui_ver: "$AHR_UI_VER"
  api_endpoint: "api.$AHR_DOMAIN"
  app_endpoint: "$AHR_DOMAIN"
  discovery_endpoint: "discovery.$AHR_DOMAIN"
  agent_gateway_endpoint: "agent-gateway.$AHR_DOMAIN"
  ceph_endpoint: "ceph.$AHR_DOMAIN"
  registry: "nvcr.io/nvidia/nv-mission-control"
  customer_id: "shorelinecust"
data:
  imageCredentials:
    password: "$AHR_NGC_TOKEN"
  bcm_headnode_ip: "$ACTIVE_HEADNODE_IP"
  backend_node: "$AHR_BACKEND_NODE"

  # local storage requirements on primary backend node
  shared_storage_path: "/local/autonomous-hardware-recovery"
  shared_storage_size: "500Gi"
  object_storage_path: "$AHR_OBJECT_STORAGE_PATH"
  object_storage_size: "1500Gi"

$FAILOVER_BLOCK
$FAILOVER_OBJ_STORAGE_BLOCK

  # monitoring and observability
  enable_monitoring: true # set to false to skip observability deployment
  servicemonitor:
    enable: true
    namespace: "prometheus"
    labels:
      release: "kube-prometheus-stack"
  fluent_bit:
    disable: true
  grafana:
    deploy_dashboards: true
    deploy_alerts: true
    url: "$GRAFANA_ENDPOINT"
    user: "$GRAFANA_USER"
    password: "$GRAFANA_PASSWORD"

  # container specific settings
  backend:
    limits:
      cpu: 8
      memory: 12Gi
    requests:
      cpu: 8
      memory: 12Gi
  ops_tool:
    BCM_ADMIN_ACCOUNTS: "['ahr']"
EOF
SECRET_BLOCK=""
if [ -n "$ACCESS_KEY_ID" ] && [ -n "$SECRET_ACCESS_KEY" ]; then
  SECRET_BLOCK=$(cat <<INNER
  aws_secret:
    access_key: "$ACCESS_KEY_ID"
    secret_key: "$SECRET_ACCESS_KEY"
INNER
  )
elif [ -n "$K8S_SECRET_NAME" ] && [ -n "$K8S_SECRET_ACCESS_KEY_KEY" ] && [ -n "$K8S_SECRET_SECRET_KEY_KEY" ]; then
  SECRET_BLOCK=$(cat <<INNER
  ceph_secret:
    name: "$K8S_SECRET_NAME"
    access_key: "$K8S_SECRET_ACCESS_KEY_KEY"
    secret_key: "$K8S_SECRET_SECRET_KEY_KEY"
INNER
  )
fi
cat <<EOF > values.yaml
global:
  platform_ver: "$AHR_PLATFORM_VER"
  ui_ver: "$AHR_UI_VER"
  api_endpoint: "api.$AHR_DOMAIN"
  app_endpoint: "$AHR_DOMAIN"
  discovery_endpoint: "discovery.$AHR_DOMAIN"
  agent_gateway_endpoint: "agent-gateway.$AHR_DOMAIN"
  ceph_endpoint: "ceph.$AHR_DOMAIN"
  registry: "nvcr.io/nvidia/nv-mission-control"
  customer_id: "shorelinecust"
data:
  imageCredentials:
    password: "$AHR_NGC_TOKEN"
  bcm_headnode_ip: "$ACTIVE_HEADNODE_IP"
  backend_node: "$AHR_BACKEND_NODE"

  # local storage requirements on primary backend node
  shared_storage_path: "/local/autonomous-hardware-recovery"
  shared_storage_size: "500Gi"

$FAILOVER_BLOCK

  # external object storage
  use_external_ceph: true
  aws_region: "$AWS_REGION"
  aws_endpoint_url: "$AWS_ENDPOINT_URL"
$SECRET_BLOCK

  # monitoring and observability
  enable_monitoring: true # set to false to skip observability deployment
  servicemonitor:
    enable: true
    namespace: "prometheus"
    labels:
      release: "kube-prometheus-stack"
  fluent_bit:
    disable: true
  grafana:
    deploy_dashboards: true
    deploy_alerts: true
    url: "$GRAFANA_ENDPOINT"
    user: "$GRAFANA_USER"
    password: "$GRAFANA_PASSWORD"

  # container specific settings
  backend:
    limits:
      cpu: 8
      memory: 12Gi
    requests:
      cpu: 8
      memory: 12Gi
  ops_tool:
    BCM_ADMIN_ACCOUNTS: "['ahr']"
EOF
Install the NVIDIA Mission Control autonomous hardware recovery backend helm chart with the
values.yamlfile that was just createdhelm repo add shoreline-onprem-backend \ https://helm.ngc.nvidia.com/nvidia/nv-mission-control \ --username='$oauthtoken' \ --password=${AHR_NGC_TOKEN} helm repo update helm upgrade --install backend \ shoreline-onprem-backend/shoreline-onprem-backend \ --namespace autonomous-hardware-recovery \ --version $AHR_VERSION \ --kubeconfig /root/.kube/config-k8s-admin \ -f values.yaml
The command will exit relatively quickly but it will take some time for all the AHR backend pods to initialize and stabilize - up to 15 minutes.
[Only if using self-signed certificates] Complete the post-install backend configuration steps.
Once all the backend pods are in the
Runningstate, you will need to login to the AHR UI to configure the BCM Connectivity integration so AHR has access to query the BCM API. Example output of the AHR backend pods in theRunningstate:# kubectl get pods -n autonomous-hardware-recovery NAME READY STATUS RESTARTS AGE shoreline-backend-0 1/1 Running 1 (8m13s ago) 12m shoreline-backup-29603545-fvn4b 0/1 Completed 0 10m shoreline-backup-29603550-7hg6j 0/1 Completed 0 5m9s shoreline-backup-29603555-cnf6s 0/1 Completed 0 9s shoreline-frontend-7b897569d5-wd5vk 1/1 Running 0 12m shoreline-local-path-provisioner-7b9cdc8c46-ttl7b 1/1 Running 0 12m shoreline-openbao-6fd644886-s2pjh 1/1 Running 0 12m shoreline-ops-tool-6c8774876c-nrhkg 2/2 Running 0 12m shoreline-system-metadata-5f5dcd6d6f-lw654 1/1 Running 0 12m shoreline-ui-579654749d-6xf7q 1/1 Running 0 12m shorelinebackend-otel-collector-56985447bd-ssw6x 1/1 Running 0
Note - integration configuration must happen before agent installation and requires
Administerpermission (set by default viaAHR_BCM_ADMIN_ACCOUNTSduring backend install)In a browser, navigate to
https://<ahr-domain>/, using the domain you configured in the Prerequisites section (same as what was set for theAHR_DOMAINenvironment variable earlier. Log in using your BCM LDAP credentials.You will need to enable the
Administerrole for the relevant users:Navigate to the Access Control page in the left sidebar.
In the top right corner, click the Remove all limits button.
Enter the default password admin.
The bottom of your left sidebar should now say
Elevated privilegesfor your user.
The Remove all limits button should now say Change Administrator password. Click this button to immediately change the default password to another value and save it somewhere safe.
You can now grant the
Administerrole to other users by clicking Manage permissions and enabling the Administrator toggle.
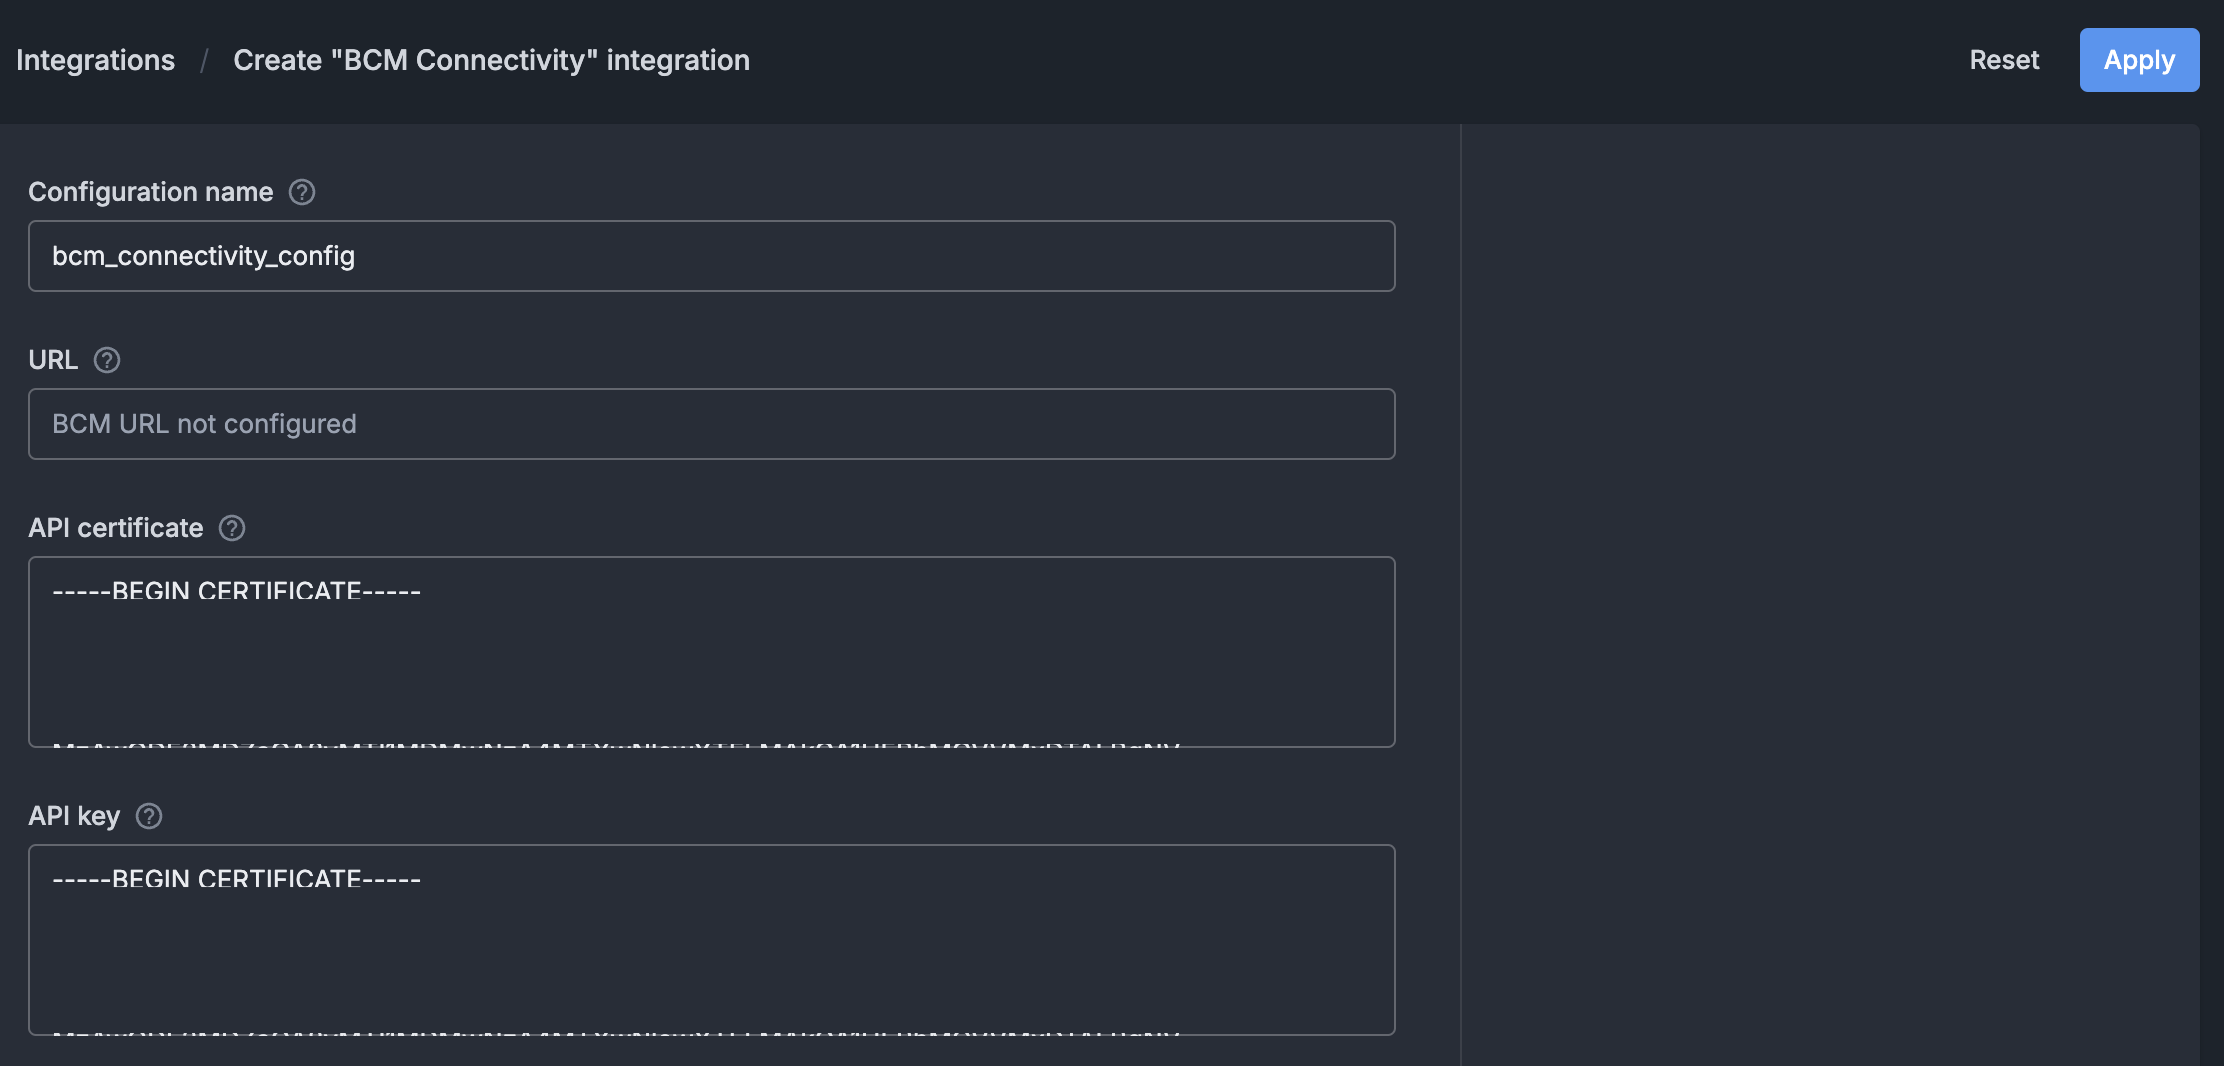
From the left menu bar, select “Integrations”.
Click the “Configure” button within the “BCM Connectivity” tile.
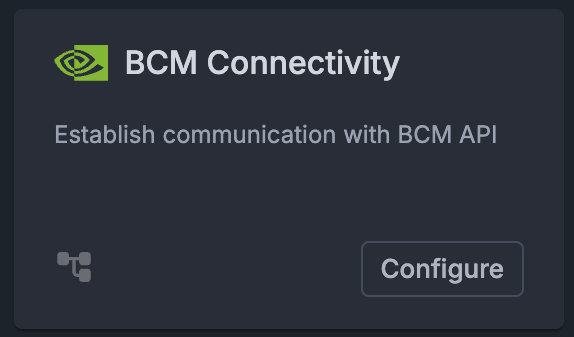
On the BCM Connectivity configuration page:
Enter a name for the integration (e.g., bcm_connectivity_configuration).
Set the “API certificate” field to the content of the
/cm/local/apps/autonomous-hardware-recovery/etc/autonomous-hardware-recovery.pemfile. Run the following on the BCM headnode to view the contents of the file:cat /cm/local/apps/autonomous-hardware-recovery/etc/autonomous-hardware-recovery.pemSet the “API key” field to the content of the
/cm/local/apps/autonomous-hardware-recovery/etc/autonomous-hardware-recovery.keyfile. Run the following on the BCM headnode to view the contents of the file:cat /cm/local/apps/autonomous-hardware-recovery/etc/autonomous-hardware-recovery.keyClick the “Apply” button on the top right.
To check the BCM Connectivity integration health, a user with the
Administerpermission should click on the “Test” button on the top right.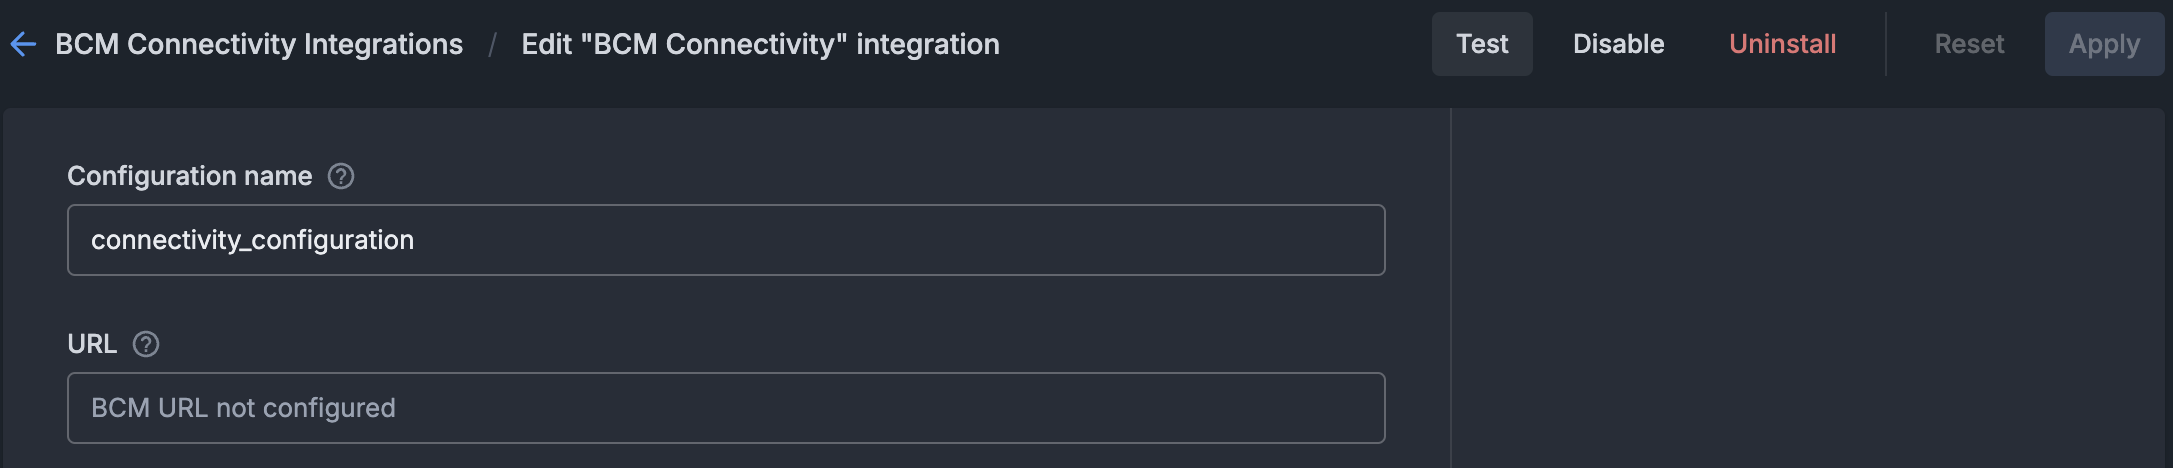
Agent Install#
Install NVIDIA Mission Control autonomous hardware recovery agents on 2 types of node: BCM headnode and BCM compute nodes
Installation on headnodes#
On BCM headnodes, NVIDIA Mission Control autonomous hardware recovery agents are installed directly. The following steps create the agent configuration and install the agent package. Run all commands on the primary headnode.
Get agent secret from backend pod and set
CUSTOMER_ID,AHR_DISCOVERY_URL,AHR_NGC_TOKEN, andAHR_UID_GIDexport AHR_VERSION=29.1.82 export AHR_AGENT_SECRET=$(kubectl --kubeconfig /root/.kube/config-k8s-admin exec -it -n autonomous-hardware-recovery deploy/shoreline-ops-tool -c ops-tool -- cat /mnt/ops-tool-data/agent_secret | tr -d '\r' | xargs echo -n) export CUSTOMER_ID=$(kubectl --kubeconfig /root/.kube/config-k8s-admin get configmap shoreline-variables -n autonomous-hardware-recovery -o jsonpath="{.data.CUSTOMER_ID}") export AHR_DISCOVERY_URL=$(kubectl --kubeconfig /root/.kube/config-k8s-admin get configmap shoreline-variables -n autonomous-hardware-recovery -o jsonpath="{.data.DISCOVERY_ENDPOINT}") # get the uid/gid of the autonomous-hardware-recovery user if it exists # otherwise, get the highest unused uid/gid amongst all the nodes in the bcm cluster export AHR_UID_GID=$(/cm/local/apps/python3/bin/python3 -c " import pwd, pythoncm.cluster, pythoncm.entity try: pw = pwd.getpwnam('autonomous-hardware-recovery') print(pw.pw_uid) except KeyError: c = pythoncm.cluster.Cluster() roots = [si.path for si in c.get_by_type(pythoncm.entity.SoftwareImage) if hasattr(si, 'path') and si.path] + ['/'] uids, gids = set(), set() for root in roots: for f, idx in [('/etc/passwd', 2), ('/etc/group', 2)]: path = root.rstrip('/') + f try: ids = {int(line.split(':')[idx]) for line in open(path) if len(line.split(':')) > idx} except: ids = set() if f == '/etc/passwd': uids |= ids else: gids |= ids if phn := c.passive_head_node(): import exec_helpers with exec_helpers.SSHClient(host=phn.hostname) as conn: for cmd, s in [('cat /etc/passwd', uids), ('cat /etc/group', gids)]: s |= {int(line.split(':')[2]) for line in conn.check_call(cmd).stdout_str.splitlines() if len(line.split(':')) > 2} print(next((i for i in range(999, 99, -1) if i not in uids and i not in gids), '')) ") && echo "AHR_UID_GID=$AHR_UID_GID" env | grep AHR
Set
AHR_NGC_TOKENto the NGC token obtained from the Prerequisites of the document.export AHR_NGC_TOKEN=nvapi-xxxxx
Download and install the Mellanox GPG on all headnodes in the cluster
pdsh -g headnode 'ARCH=$(dpkg --print-architecture) && \
  REPO_ARCH=$([ "$ARCH" = "amd64" ] && echo "x86_64" || echo "arm64-sbsa") && \
  OS_VERSION=$(lsb_release -rs) && \
  DOCA_OS="ubuntu${OS_VERSION}" && \
  REPO_URL="https://linux.mellanox.com/public/repo/doca/3.2.1/${DOCA_OS}/${REPO_ARCH}" && \
  curl -fsSL "${REPO_URL}/GPG-KEY-Mellanox.pub" | gpg --batch --yes --dearmor -o /usr/share/keyrings/cm-mellanox-archive-keyring.gpg && \
  echo "deb [signed-by=/usr/share/keyrings/cm-mellanox-archive-keyring.gpg] ${REPO_URL}/ /" > /etc/apt/sources.list.d/cm-mellanox.list && \
  apt-get update'
Create the
autonomous-hardware-recoveryuser on headnodes and in software imagespdsh -g headnode "getent group autonomous-hardware-recovery > /dev/null 2>&1 || addgroup --system --gid $AHR_UID_GID autonomous-hardware-recovery && \ id -u autonomous-hardware-recovery > /dev/null 2>&1 || \ adduser --system --uid $AHR_UID_GID --home /home/autonomous-hardware-recovery --ingroup autonomous-hardware-recovery --shell /bin/bash autonomous-hardware-recovery" # In each software image for IMG in $(cmsh -c "softwareimage; foreach * (get path)"); do systemd-nspawn --quiet --directory=$IMG bash -c \ "getent group autonomous-hardware-recovery > /dev/null 2>&1 || addgroup --system --gid $AHR_UID_GID autonomous-hardware-recovery && \ id -u autonomous-hardware-recovery > /dev/null 2>&1 || adduser --system --uid $AHR_UID_GID --home /home/autonomous-hardware-recovery --ingroup autonomous-hardware-recovery --shell /bin/bash autonomous-hardware-recovery" done
Create the
shoreline-agentconfigurationoverlayHEADNODES=$(cmsh -c "device; list -t HeadNode" | awk '$1=="HeadNode"{print $2}' | sort -u | tr '\n' ',' | sed 's/,$//') cmsh -c "configurationoverlay; add shoreline-agent; set priority 500; append nodes $HEADNODES; commit"
Create the
generic::shoreline_agentrole and assign it to theshoreline-agentconfigurationoverlay/cm/local/apps/python3/bin/python3 << 'PYEOF' import os, pythoncm.cluster, pythoncm.entity AHR_VERSION = os.environ["AHR_VERSION"] AHR_AGENT_SECRET = os.environ["AHR_AGENT_SECRET"] AHR_DISCOVERY_URL = os.environ["AHR_DISCOVERY_URL"] AHR_UID_GID = os.environ["AHR_UID_GID"] AHR_NGC_TOKEN = os.environ["AHR_NGC_TOKEN"] c = pythoncm.cluster.Cluster() overlay = c.get_by_name('shoreline-agent', 'ConfigurationOverlay') role = pythoncm.entity.GenericRole(name='generic::shoreline_agent') role.services = ['shoreline'] role.excludeListSnippets = [ pythoncm.entity.ExcludeListSnippet( name='Default1', modeUpdate=True, modeSync=True, modeFull=True, modeGrab=True, modeGrabNew=True, noNewFiles=True, excludeList=[ '/cm/local/apps/slurm/var/epilogs/60-epilog-ahr.sh', '/cm/local/apps/slurm/var/prologs/60-prolog-ahr.sh', '/home/autonomous-hardware-recovery/.config/enroot/*', '/home/autonomous-hardware-recovery/scripts/slurm/*', '/run/shoreline/*', '/var/lib/shoreline/agent/databases/*', '/var/lib/shoreline/agent/onprem/*', '/var/lib/shoreline/agent/scraper.yml', '/var/lib/shoreline/enroot-cache/*', '/var/lib/shoreline/enroot-data/*', '/var/lib/shoreline/shoreline_runbooks/*', ], ), pythoncm.entity.ExcludeListSnippet( name='Default2', modeUpdate=True, modeSync=True, modeFull=False, modeGrab=True, modeGrabNew=True, noNewFiles=True, excludeList=[ '/etc/shoreline/agent_ssh/*', ], ), ] role.extraEnvironment = [] for k, v in { 'version': AHR_VERSION, 'backend_address': AHR_DISCOVERY_URL, 'secret': AHR_AGENT_SECRET, 'pkg_registry_url': 'https://api.ngc.nvidia.com/v2/org/nvidia/team/nv-mission-control/resources', 'pkg_registry_password': AHR_NGC_TOKEN, 'registry_username': '$oauthtoken', 'registry_password': AHR_NGC_TOKEN, 'agent_registry': 'nvcr.io', 'registry_ca_cert_path': '', 'image': 'nvidia/nv-mission-control/shoreline-agent', 'username': 'autonomous-hardware-recovery', 'home_dir': '/home/autonomous-hardware-recovery', 'uid': AHR_UID_GID, 'gid': AHR_UID_GID, 'agent_files_directory': '/var/lib/shoreline/agent', 'ssh_port': '22', 'customer_id': 'shorelinecust', }.items(): env = pythoncm.entity.GenericRoleEnvironment() env.name = k env.value = str(v) role.extraEnvironment.append(env) if existing := overlay.get_role_by_name('generic::shoreline_agent'): existing.services = role.services existing.excludeListSnippets = role.excludeListSnippets existing.extraEnvironment = role.extraEnvironment else: overlay.roles += [role] overlay.commit() print('Done') PYEOF
Create agent.config
cat <<EOF > /cm/local/apps/autonomous-hardware-recovery/etc/agent.config
### Agent Information
AGENT_VERSION=$AHR_VERSION
BACKEND_ADDRESS=$AHR_DISCOVERY_URL:443
SECRET=$AHR_AGENT_SECRET
CUSTOMER_ID=$CUSTOMER_ID

### Enroot Configuration
USE_ENROOT=1
FORCE_ON_PREM=true
ALLOW_SUDO=true

### NVCR
PKG_PATH_D="https://api.ngc.nvidia.com/v2/org/nvidia/team/nv-mission-control/resources/shoreline_vm_package_distro/versions"
SHORELINE_PKG_DEB="\${PKG_PATH_D}/\${AGENT_VERSION}-enroot/files/shoreline_\${AGENT_VERSION}-enroot.deb"
PKG_CURL_CMD="-L -H 'Authorization: Bearer ${AHR_NGC_TOKEN}'"
AGENT_IMAGE=nvidia/nv-mission-control/shoreline-agent
AGENT_IMAGE_TAG='release-${AHR_VERSION}-multiarch-lt'
AGENT_REGISTRY=nvcr.io
DOCKER_USERNAME=\\\$oauthtoken
DOCKER_TOKEN='$AHR_NGC_TOKEN'

### OTHER Config
AGENT_FILES_DIRECTORY='/var/lib/shoreline/agent'
SSH_PORT='22'
AGENT_MOUNT_ON_PREM=true
DISCOVER_GPU=true
DISCOVER_GPU_ONCE=true
AGENT_NAME_SCRIPT=/usr/lib/shoreline/bcmAgentName.sh
SKIP_TAGS_REGEX="^(hostname|driver_version|bus_id|gpu_serial|uuid)$"
MAX_ALARM_QUERY_WORKERS=10
AGENT_MEMORY_LIMIT=1G
NODE_IP=127.0.0.1
AGENT_UID=$AHR_UID_GID
AGENT_GID=$AHR_UID_GID
AGENT_USER='autonomous-hardware-recovery'
AGENT_GROUP='autonomous-hardware-recovery'
AGENT_USER_HOME_DIR='/home/autonomous-hardware-recovery'
REGISTRATION_BACKOFF_INITIAL_DELAY=30000
REGISTRATION_BACKOFF_MAX_DELAY=900000
SYSTEM_USER_NAME=NVIDIA
PERMISSIONS_USER_NAME=NVIDIA
EOF
Copy the installation script and
agent.configfile to all headnodespdsh -g headnode 'mkdir -p /etc/shoreline' pdcp -g headnode /cm/local/apps/autonomous-hardware-recovery/etc/agent.config /etc/shoreline/agent.config
Download agent Debian package and install on all headnodes
PACKAGE_URL="https://api.ngc.nvidia.com/v2/org/nvidia/team/nv-mission-control/resources/shoreline_vm_package_distro/versions/${AHR_VERSION}-enroot/files/shoreline_${AHR_VERSION}-enroot.deb"
PACKAGE_DIR="/cm/local/apps/autonomous-hardware-recovery/var/packages"

pdsh -g headnode \
  "mkdir -p $PACKAGE_DIR && \
   curl -sS --fail-with-body -L \
     -H 'Authorization: Bearer $AHR_NGC_TOKEN' \
     '$PACKAGE_URL' \
     --output '$PACKAGE_DIR/shoreline_${AHR_VERSION}-enroot.deb'"

pdsh -g headnode \
  "DEBIAN_FRONTEND=noninteractive apt install -y /cm/local/apps/autonomous-hardware-recovery/var/packages/shoreline_$AHR_VERSION-enroot.deb --option Dpkg::Options::=--force-confmiss"
Restart the
shorelineservice on all headnodesUSERNAME="autonomous-hardware-recovery" pdsh -g headnode \ "test -d /etc/shoreline && chown -R ${USERNAME}:${USERNAME} /etc/shoreline || true && \ test -d /var/lib/shoreline && chown -R ${USERNAME}:${USERNAME} /var/lib/shoreline || true && \ systemctl daemon-reload && systemctl restart shoreline"
If both the backend and agent have been configured properly, the agents will register successfully on the backend. For instructions on verifying backend health and agent connectivity, refer to Backend Health and Agent Connectivity.
Installation on GPU nodes via BCM software image#
On BCM compute nodes, NVIDIA Mission Control autonomous hardware recovery agents are installed as part of a BCM software image. The following steps configure BCM to monitor and start the NVIDIA Mission Control autonomous hardware recovery agent service, create the agent configuration, run the install script within the software image, and sync the image to all compute nodes that share it. Run this procedure on the primary headnode only after the agent has been installed on the headnodes in the cluster.
Note
You will need to run through this procedure for each agent node category the AHR agent needs to be installed on.
Set the appropriate agent category to reference in the commands
export AGENT_CATEGORY=<category-of-node-to-install-ahr-agent-on>
export AHR_VERSION=29.1.82
export AGENT_IMAGE_PATH=$(cmsh -c "category; use $AGENT_CATEGORY; get softwareimage" | xargs -I{} cmsh -c "softwareimage; use {}; get path" | grep "^/")
Append the selected agent node category to the
shoreline-agentconfigurationoverlaycmsh -c "configurationoverlay; use shoreline-agent; append categories $AGENT_CATEGORY; commit"
Copy
agent.configfile and agent Debian package created during the agent installation on headnodes to the software image and install the packagemkdir -p ${AGENT_IMAGE_PATH}/etc/shoreline rsync /cm/local/apps/autonomous-hardware-recovery/etc/agent.config ${AGENT_IMAGE_PATH}/etc/shoreline/agent.config mkdir -p ${AGENT_IMAGE_PATH}/cm/local/apps/autonomous-hardware-recovery/var/packages rsync /cm/local/apps/autonomous-hardware-recovery/var/packages/shoreline_${AHR_VERSION}-enroot.deb ${AGENT_IMAGE_PATH}/cm/local/apps/autonomous-hardware-recovery/var/packages/shoreline_${AHR_VERSION}-enroot.deb
Copy the Mellanox repo files created during the agent installation on headnodes into the software image:
mkdir -p ${AGENT_IMAGE_PATH}/usr/share/keyrings ${AGENT_IMAGE_PATH}/etc/apt/sources.list.d

rsync /usr/share/keyrings/cm-mellanox-archive-keyring.gpg ${AGENT_IMAGE_PATH}/usr/share/keyrings/cm-mellanox-archive-keyring.gpg

rsync /etc/apt/sources.list.d/cm-mellanox.list ${AGENT_IMAGE_PATH}/etc/apt/sources.list.d/cm-mellanox.list

systemd-nspawn --directory=$AGENT_IMAGE_PATH --chdir=/root --bind-ro=/etc/resolv.conf:/etc/resolv.conf --setenv=SUDO_CMD="sudo -h 127.0.0.1" --setenv=DEBIAN_FRONTEND=noninteractive bash -c "mount -o remount,size=10G /tmp && apt-get update && update-ca-certificates"
Install agent Debian package in software image:
# Pre-stage the .sqsh file created via enroot import during agent installation on the headnode
mkdir -p ${AGENT_IMAGE_PATH}/var/lib/shoreline/agent/image

rsync /var/lib/shoreline/agent/image/shoreline-agent-release-${AHR_VERSION}-multiarch-lt.sqsh ${AGENT_IMAGE_PATH}/var/lib/shoreline/agent/image/shoreline-agent-release-${AHR_VERSION}-multiarch-lt.sqsh

# Install Debian package
for mp in /dev/pts /dev; do
  mountpoint -q ${AGENT_IMAGE_PATH}${mp} && umount ${AGENT_IMAGE_PATH}${mp} || true
done

systemd-nspawn --directory=$AGENT_IMAGE_PATH --chdir=/root --bind-ro=/etc/resolv.conf:/etc/resolv.conf --setenv=SUDO_CMD="sudo -h 127.0.0.1" --setenv=DEBIAN_FRONTEND=noninteractive bash -c "mount -o remount,size=10G /tmp && apt update && apt install -y -o Dpkg::Options::=--force-confmiss /cm/local/apps/autonomous-hardware-recovery/var/packages/shoreline_$AHR_VERSION-enroot.deb"
You may encounter the following warning in the output:
System has not been booted with systemd as init system (PID 1). Can't operate.
Failed to connect to bus: Host is down
This occurs only when the AHR agent installation is run from within a software image and can be safely ignored.
Run the following code to sync the updated image to the worker nodes:
cmsh -c "device; imageupdate -w -c $AGENT_CATEGORY"
Restart the
shorelineservice on all nodes in the selected category:USERNAME="autonomous-hardware-recovery" pdsh -g category=$AGENT_CATEGORY \ "test -d /etc/shoreline && chown -R ${USERNAME}:${USERNAME} /etc/shoreline || true && \ test -d /var/lib/shoreline && chown -R ${USERNAME}:${USERNAME} /var/lib/shoreline || true && \ systemctl daemon-reload && systemctl restart shoreline"
[Only if using self-signed certificate] Complete the post-install agent configuration steps.
If both the backend and agent have been configured properly, the agents will register successfully on the backend. For instructions on verifying backend health and agent connectivity, refer to Backend Health and Agent Connectivity.
Runbooks Deployment#
NVIDIA Mission Control autonomous hardware recovery uses OpenTofu, an open source infrastructure-as-code (IAC) tool, to automate the deployment of resources required to run baseline tests, health checks, and break/fix workflows. Please use OpenTofu version 1.10.8+ and follow the steps in this section to deploy the latest version of the NVIDIA Mission Control autonomous hardware recovery tests.
Install the
tofubinary on the BCM headnode:apt-get update && apt-get install -y apt-transport-https ca-certificates curl gnupg install -m 0755 -d /etc/apt/keyrings curl -fsSL https://get.opentofu.org/opentofu.gpg | tee /etc/apt/keyrings/opentofu.gpg >/dev/null curl -fsSL https://packages.opentofu.org/opentofu/tofu/gpgkey | gpg --no-tty --batch --dearmor -o /etc/apt/keyrings/opentofu-repo.gpg >/dev/null chmod a+r /etc/apt/keyrings/opentofu.gpg /etc/apt/keyrings/opentofu-repo.gpg echo \ "deb [signed-by=/etc/apt/keyrings/opentofu.gpg,/etc/apt/keyrings/opentofu-repo.gpg] https://packages.opentofu.org/opentofu/tofu/any/ any main deb-src [signed-by=/etc/apt/keyrings/opentofu.gpg,/etc/apt/keyrings/opentofu-repo.gpg] https://packages.opentofu.org/opentofu/tofu/any/ any main" | \ tee /etc/apt/sources.list.d/opentofu.list > /dev/null chmod a+r /etc/apt/sources.list.d/opentofu.list apt-get update apt-get install tofu=1.10.8
Verify the binary was successfully installed by running:
tofu versionCreate Service Accounts for NVIDIA Mission Control autonomous hardware recovery API and Runbooks. These users are used to deploy the runbooks, during the Firmware Upgrade process, and also during the Break/Fix workflow to verify that the AHR agents are connected back to the backend. Note: We recommend creating a different user for each of the tasks to gain better access control and auditing.**
Login to NVIDIA Mission Control autonomous hardware recovery UI
https://{AHR_APP_URL}/with BCM LDAP CredentialsNavigate to the Access Control page in the left sidebar and then to the Users tab.
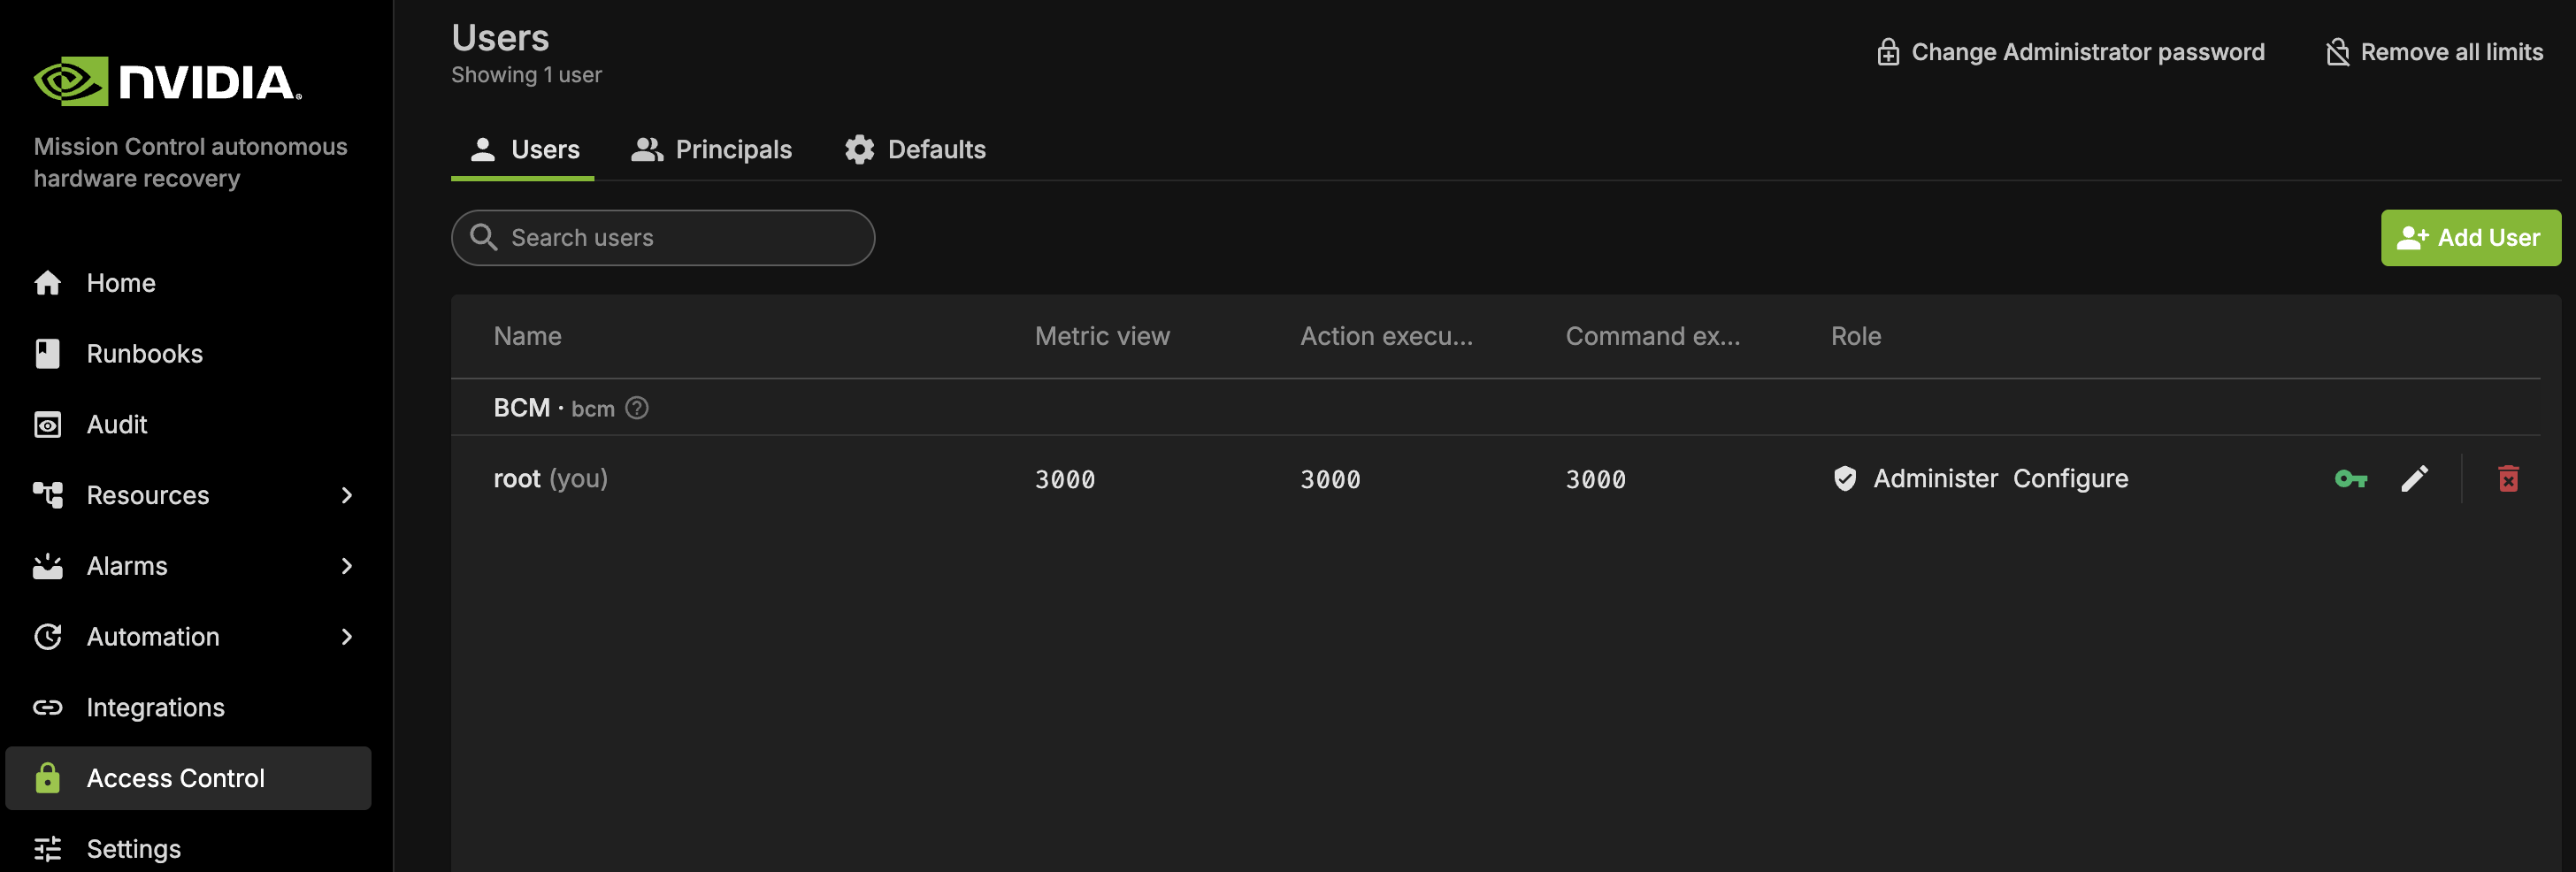
From there, you may either:
Use the default root user, or
Create a new user:
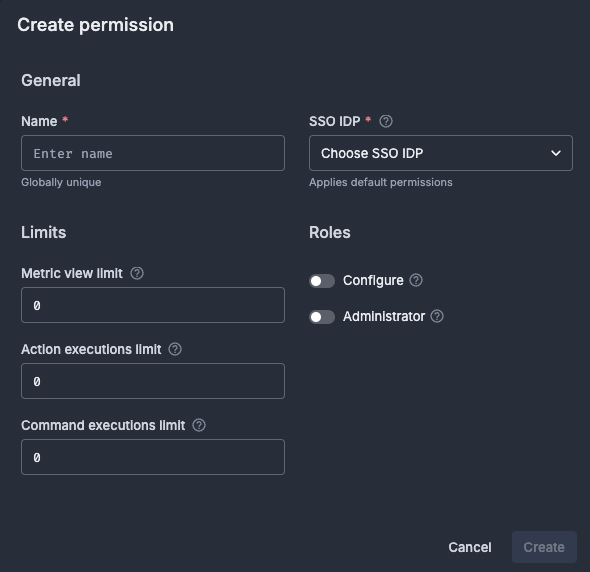
Click ‘Add User’ to create a new user, and apply the following settings:
Permission: Configure (for FW upgrade & Break/Fix) or Administer (for deployments)
Limits: Set all applicable limits to 3000
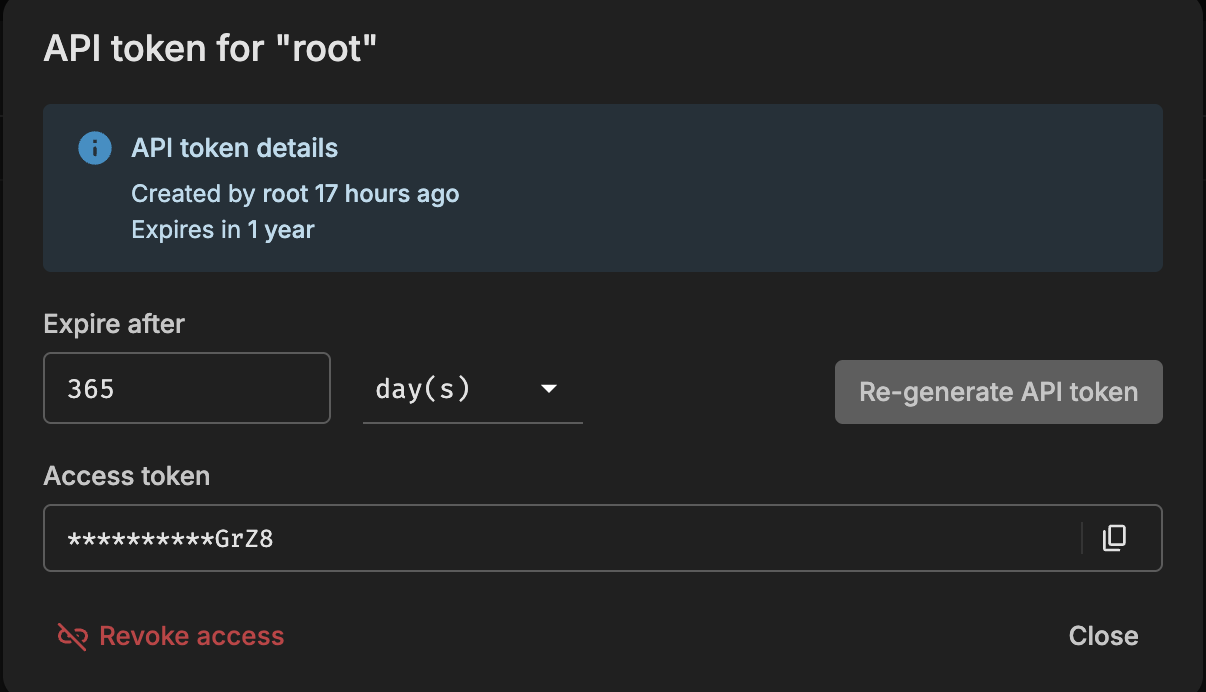
Once the user has been created, search for the user and click the Key icon to the right to generate an API Token. You must also provide an expiration based on the API key rotation policy.
 .
.Copy the token and use it to send requests to the AHR API.
Add Secrets to AHR
Navigate to: Settings → Secrets
Click the
+icon to add new secrets. Create the following two secrets. Important: Ensure the key names exactly match the ones in the following list. These are referenced in the AHR runbooks:Secret 1
Name:
AHR_API_ENDPOINTValue: The API endpoint of your backend. Do not include
https://or a trailing slash.Example:
api-customer.nvidia.com
Secret 2
Name:
AHR_TOKENValue: The API token generated for the FW Upgrade and Break/Fix service user
Run the following commands to download and extract the appropriate artifacts package (
nmc-ahr.tgz) from the NGC registry, and place it on the headnode in the/cm/local/apps/autonomous-hardware-recovery/runbooks/folder. Set theAHR_NGC_TOKENvariable to the NGC token obtained from the Prerequisites of the document and theAHR_NGC_VERSIONvariable to the version of the runbooks to download. SetCHIPto either “B200”, “GB200”, or “GB300” to match your hardware.Set environment variables
export AHR_NGC_TOKEN=<ngc-token-used-during-installation>
export CHIP=GB300
export AHR_NGC_VERSION=2.3.26
export AHR_NGC_ORG=nvidia
export AHR_NGC_TEAM=nv-mission-control
Download the package and extract
curl -LO "https://api.ngc.nvidia.com/v2/org/${AHR_NGC_ORG}/team/${AHR_NGC_TEAM}/resources/nmc-ahr/versions/${AHR_NGC_VERSION}/files/nmc-ahr.tgz" -H "Authorization: Bearer ${AHR_NGC_TOKEN}" -H "Content-Type: application/json"

mkdir -p /cm/local/apps/autonomous-hardware-recovery/var/runbooks/downloaded
cp nmc-ahr.tgz /cm/local/apps/autonomous-hardware-recovery/var/runbooks/downloaded/nmc-ahr-$AHR_NGC_VERSION.tgz

cd /cm/local/apps/autonomous-hardware-recovery/var/runbooks
mkdir -p $AHR_NGC_VERSION
tar -xzvf downloaded/nmc-ahr-$AHR_NGC_VERSION.tgz -C $AHR_NGC_VERSION/
cd -
Deploy the runbooks via opentofu
In
/cm/local/apps/autonomous-hardware-recovery/runbooks/CHIP/${CHIP}/Baselinedirectory, create theterraform.tfvarsfile which includes these user inputs# terraform.tfvars # The hostname of the active headnode. Note: only one node is supported headnode_name="<headnode hostname>" # The name of the Slurm node from where to submit slurm jobs. Note: Only one node is supported slurm_node_name="<slurm_control_node hostname>" # The URL of the AHR API Endpoint ahr_url="https://your-instance.nvidia.com" # The jwt for the AHR API, found in Access Control ahr_token="<jwt>" # Absolute path to the user's home directory ahr_user_homedir="/shoreline" # Nvidia Container Registry token ** nvcr_token="<token>" # Set to false if automated support ticket feature is opted in, else by default it is disabled disable_callhome=true # NOTE: The variable 'gpu_nodes_name' applies only to the B200 chips # Provide a regex that includes all GPU nodes in your cluster (for example, dgx-*). Allowed special characters: *, ., -, _, [, ], ^, $, +, ?. gpu_nodes_name="<gpu_nodes regex>"
For the
nvcr_tokenvalue, use the NGC token obtained from the Prerequisites of the document (same token that was set as the value for theAHR_NGC_TOKENenvironment variable in the previous step).To resolve a known issue with BCM missing a required certificate, on ALL headnodes, please do the following:
sudo mkdir -p /shoreline/.cm
sudo cp /root/.cm/admin.key /shoreline/.cm/admin.key
sudo cp /root/.cm/admin.pem /shoreline/.cm/admin.pem

sudo chown shoreline:shoreline /shoreline/.cm /shoreline/.cm/admin.pem /shoreline/.cm/admin.key
cdto the appropriate directory (with terraform.tfvars) and run opentofu commandscd /cm/local/apps/autonomous-hardware-recovery/runbooks/CHIP/${CHIP}/Baseline # Get value set for CUSTOMER_ID export CUSTOMER_ID=$(kubectl --kubeconfig /root/.kube/config-k8s-admin get configmap shoreline-variables -n autonomous-hardware-recovery -o jsonpath="{.data.CUSTOMER_ID}") # Set AWS environment variables for access ceph buckets export AWS_ENDPOINT_URL_S3=https://$(kubectl --kubeconfig /root/.kube/config-k8s-admin get configmap shoreline-variables -n autonomous-hardware-recovery -o jsonpath="{.data.CEPH_ENDPOINT}") export AWS_ACCESS_KEY_ID=$(kubectl --kubeconfig /root/.kube/config-k8s-admin get secret shoreline-secret -n autonomous-hardware-recovery -o jsonpath="{.data.aws-access-key-id}" | base64 -d) export AWS_SECRET_ACCESS_KEY=$(kubectl --kubeconfig /root/.kube/config-k8s-admin get secret shoreline-secret -n autonomous-hardware-recovery -o jsonpath="{.data.aws-secret-access-key}" | base64 -d) export AWS_DEFAULT_REGION=local tofu init \ -backend-config bucket="ss-arc-$CUSTOMER_ID-onprem-local-objects" \ -backend-config key="opentofu/terraform.tfstate" # if terraform.tfvars does not exist, # you will be prompted for values # ignore any warnings in the plan tofu apply
After the
tofu applycompletes, configure certificate access and container capabilities to enable runbook execution. These steps apply to GB200, GB300, B200, and B300 environments.Configure CM API certificate access by copying the CM
admincertificates to theautonomous-hardware-recoveryuser’s home directory on all headnodes. Run the following command from the primary headnode:pdsh -g headnode 'AGENT_USER=autonomous-hardware-recovery && \ HOME_DIR=$(getent passwd ${AGENT_USER} | cut -d: -f6) && \ sudo mkdir -p ${HOME_DIR}/.cm && \ sudo cp /root/.cm/admin.key ${HOME_DIR}/.cm/admin.key && \ sudo cp /root/.cm/admin.pem ${HOME_DIR}/.cm/admin.pem && \ sudo chown ${AGENT_USER}:${AGENT_USER} ${HOME_DIR}/.cm ${HOME_DIR}/.cm/admin.pem ${HOME_DIR}/.cm/admin.key'
Set the required Linux capabilities for Enroot in each software image that has the AHR agent installed:
Set the agent category to apply the capabilities to:
export AGENT_CATEGORY=<name-of-agent-category-with-ahr-agent-installed>
Resolve the software image path and set the necessary capabilities inside the software image:
export AGENT_IMAGE_PATH=$(cmsh -c "category; use $AGENT_CATEGORY; get softwareimage" | xargs -I{} cmsh -c "softwareimage; use {}; get path" | grep "^/")

systemd-nspawn --directory=$AGENT_IMAGE_PATH --chdir=/root bash -c \
  "setcap cap_sys_admin,cap_mknod=ep /usr/bin/enroot-aufs2ovlfs && \
   setcap cap_sys_admin,cap_mknod=ep /usr/bin/enroot-mksquashovlfs"
Push the updated image to all nodes in the category:
cmsh -c "device; imageupdate -w -c $AGENT_CATEGORY"
NVIDIA Mission Control autonomous hardware recovery Failover#
Overview#
Mission Control provides the option to run AHR in failover mode if an extra node for the installation is available. In this configuration, AHR is installed on two nodes — a primary and a secondary — with data replicating between the two to ensure data synchronization. This setup allows for transition to the secondary node in the event of hardware issues on the primary node, ensuring that AHR functionality can continue with minimal interruption.
Failover Replication Verification (if installed)#
If the failover option was selected, you’ll want to verify that data replication between the primary and secondary backend instances is occurring successfully
Verify Ceph replication is set up properly
From the headnode run the following against the primary backend:
kubectl --kubeconfig /root/.kube/config-k8s-admin exec -it -n autonomous-hardware-recovery shoreline-ceph-0 -c ceph -- radosgw-admin sync status
The following is the expected output if the replication is running properly:
 metadata sync no sync (zone is master)
      data sync source: 71f9ccd2-97ff-4b92-aff1-d7a5324bb207 (shoreline-zone-shoreline-ceph-failover-0)
                        syncing
                        full sync: 0/128 shards
                        incremental sync: 128/128 shards
                        data is caught up with source
From the headnode run the following against the secondary (failover) backend:
kubectl --kubeconfig /root/.kube/config-k8s-admin exec -it -n autonomous-hardware-recovery shoreline-ceph-failover-0 -c ceph -- radosgw-admin sync status
The following is the expected output if the replication is running properly:
 metadata sync syncing
               full sync: 0/64 shards
               incremental sync: 64/64 shards
               metadata is caught up with master
     data sync source: 32af394d-ee8f-4d6b-a221-ebce96ce981b (shoreline-zone-shoreline-ceph-0)
                       syncing
                       full sync: 0/128 shards
                       incremental sync: 128/128 shards
                       data is caught up with source
Verify bucket data replication. On the headnode, run:
kubectl --kubeconfig /root/.kube/config-k8s-admin exec -it -n autonomous-hardware-recovery deployment/shoreline-openbao -c openbao -- /bin/sh

aws s3 ls s3://onprem-org-shoreline-mdkey-mr/ --endpoint-url http://shoreline-ceph-service:7480 --recursive

aws s3 ls s3://onprem-org-shoreline-mdkey-mr/ --endpoint-url http://shoreline-ceph-service-failover:7480 --recursive

exit
The contents of the 2 buckets should match
Backup AHR databases. On the headnode, run:
kubectl --kubeconfig /root/.kube/config-k8s-admin exec -it -n autonomous-hardware-recovery deployment/shoreline-ops-tool -c ops-tool -- /bin/bash
Then, once in the ops-tool container, run:
python3

# Run in the python3 console
import ops_tool
# This command can take some time to run:
ops_tool.backup_backend("shorelinecust")
exit()

exit
Verify database backups. On the headnode, run:
### on the primary backend
kubectl --kubeconfig /root/.kube/config-k8s-admin exec -it -n autonomous-hardware-recovery deployment/shoreline-openbao -c openbao -- /bin/sh
aws s3 ls --endpoint-url http://shoreline-ceph-service:7480

### Choose the bucket that contains your change
aws s3 ls s3://ss-arc-shorelinecust-onprem-local --recursive | sort

### in the expected output, the db will contain the latest timestamp
### the following is just an example
2025-03-04 01:57:07     110592 7482318612660724179_shorelinecust_internal_configuration_1.db

exit
Verify OpenBao backup cron job. On the BCM headnode, run:
### choose a completed shoreline-backup-xxxxxxxx pod
kubectl --kubeconfig /root/.kube/config-k8s-admin -n autonomous-hardware-recovery get pod
kubectl --kubeconfig /root/.kube/config-k8s-admin -n autonomous-hardware-recovery logs <backup pod>

### expected output in the log
upload: ./openbao.tar to s3://onprem-org-shoreline-mdkey-mr/openbao.tar

### other useful commands to get some details about cronjobs
kubectl get cronjobs -n autonomous-hardware-recovery --kubeconfig /root/.kube/config-k8s-admin
kubectl get cronjob shoreline-backup -n autonomous-hardware-recovery --kubeconfig /root/.kube/config-k8s-admin -o yaml
When to Initiate a Failover to the Secondary Node#
If a node becomes unhealthy due to a hardware issue that requires significant time to repair (e.g., disk failure, physical server issues), users can initiate a failover of AHR to the secondary node to allow for continued operation of AHR functionality.
Failover Procedure - Promote Secondary Node to Primary#
Promote Secondary Ceph to Primary
kubectl --kubeconfig /root/.kube/config-k8s-admin -n autonomous-hardware-recovery exec -it shoreline-ceph-failover-0 -c ceph -- /bin/bash
# Run in the ceph container
/scripts/ceph-promote.sh
exit
Scale up failover backend
kubectl --kubeconfig /root/.kube/config-k8s-admin -n autonomous-hardware-recovery create job --from=cronjob/shoreline-failover-scaleup shoreline-failover-scaleup-manual
Restore data from backup:
kubectl --kubeconfig /root/.kube/config-k8s-admin -n autonomous-hardware-recovery exec -it deployment/shoreline-ops-tool-failover -c ops-tool -- /bin/bash

# Run in the ops-tool container
/scripts/user-promote.sh

### Successful command output should look like the following:
# Command succeeded
# Successful restore for System Metadata
# Customer not found in backend before restore, skipping unassignment
# Successful restore for Backend, for customer ID $CUSTOMER_ID
# Successfully assigned customer back to backend after restore

exit
Verify database restoration:
kubectl --kubeconfig /root/.kube/config-k8s-admin -n autonomous-hardware-recovery exec -it shoreline-backend-failover-0 -c backend -- bash

ls -trl databases/$CUSTOMER_ID

### expected output - all databases have the timestamp of when user-promote.sh was run

exit
Create notebook_run_output folder for the old Runs to properly load:
kubectl --kubeconfig /root/.kube/config-k8s-admin -n autonomous-hardware-recovery exec -it shoreline-backend-failover-0 -c backend -- bash

# create notebook_run_output directory
mkdir /backend/databases/$CUSTOMER_ID/notebook_run_output

# Update notebook_run
dbclient time-partitioned-write $CUSTOMER_ID notebook_runs "UPDATE notebook_run SET status =12, state = 2 WHERE state NOT IN (2, 3, 10) AND checkpoint_json <> '{}';"

exit
Update values.yaml to bring up the failover stateful set as new primary backend:
helm get values --namespace autonomous-hardware-recovery backend --kubeconfig /root/.kube/config-k8s-admin > values-failover.yaml

### Use a text editor to modify this values-failover.yaml file
# Change the enable_failover key to false to shut down the broken primary backend
enable_failover: false

# Add the switch_backend_failover key and set it to true
switch_backend_failover: true
Perform helm upgrade using the
values-failover.yamlfile that was created to switch the secondary backend as primary backend and turn down the broken primary backend:helm upgrade backend shoreline-onprem-backend/shoreline-onprem-backend --values values-failover.yaml --version "$(helm --kubeconfig /root/.kube/config-k8s-admin get values -n autonomous-hardware-recovery backend | grep platform_ver | cut -d '-' -f 2)" --namespace autonomous-hardware-recovery --kubeconfig /root/.kube/config-k8s-admin
Verify previous primary backend is shut down:
### Check if the shoreline-backend statefulset disappears from the sts list
kubectl get sts -n autonomous-hardware-recovery --kubeconfig /root/.kube/config-k8s-admin

### Expected output should look like:
NAME                        READY   AGE
shoreline-backend-failover   1/1     95m
shoreline-ceph-failover      1/1     95m
Verify UI shows all previous runbook runs and actions are persisted
Retrigger Break-Fix Workflows#
Failover may involve some loss of recent data not backed up to secondary node yet, such as recent runbook outputs and resource tags. After a failover event occurs and the primary backend instance has been failed over to the secondary backend instance, you will want to execute an AHR runbook to ensure maintenance tags are reset, allowing the health check system to re-classify nodes accurately. This allows nodes still requiring break/fix to be promptly detected and returned to maintenance status, triggering the necessary repair workflows.
Ensure the steps under the NVIDIA Mission Control autonomous hardware recovery Runbook Deployment have been completed successfully
In the AHR UI, in the Runbooks section, search for the runbook titled
CLEAR_MAINTENANCE_TAGS:Execute this runbook by clicking the Create Run button at the top right and provided the appropriate rack name for the
RACK_NAMEparameter. If left empty, the runbook will be executed against all nodes.
Set Primary Node as the New Secondary Node#
Once the primary node’s issues have been resolved, you will want to add the primary node back to environment as the new secondary/failover node. To do so you will need to update the values.yaml file and run the helm upgrade again:
In values.yaml update enable_failover to true:
enable_failover: true
Run the helm upgrade again to bring up the previous primary backend as secondary
helm upgrade shorelinebackend shoreline-onprem-backend/shoreline-onprem-backend --values values.yaml --version "$(helm --kubeconfig /root/.kube/config-k8s-admin get values -n autonomous-hardware-recovery backend | grep platform_ver | cut -d '-' -f 2)" --namespace autonomous-hardware-recovery --kubeconfig /root/.kube/config-k8s-admin
BCM Connectivity Integration#
Login into the UI as a user with the
Administerrole.From the left menu bar, select Integrations.
Click the Configure button within the BCM Connectivity tile.
On the BCM Connectivity configuration page:
Enter a name for the integration (e.g., bcm_connectivity_configuration).
Set the API certificate field to the content of
/cm/local/apps/autonomous-hardware-recovery/etc/autonomous-hardware-recovery.pemfile (cat /cm/local/apps/autonomous-hardware-recovery/etc/autonomous-hardware-recovery.pemcan be run on BCM headnode to view the contents of the file).Set the API key field to the content of
/cm/local/apps/autonomous-hardware-recovery/etc/autonomous-hardware-recovery.keyfile (cat /cm/local/apps/autonomous-hardware-recovery/etc/autonomous-hardware-recovery.keycan be run on BCM headnode to view the content of the file).Click the Apply button on the top right.
To check the BCM Connectivity integration health, a user with the
Administerpermission should click the Test button on the top right.
Backend Setup with a Self-Signed Certificate Guide - Manual Procedure#
To configure the backend environment to work with a self-signed certificate, follow these steps:
Generate the CA root certificate and the server certificate (signed by the CA).
Install the backend as described in the manual installation procedure
Execute the post-installation steps after the backend installation.
Apply the post-installation steps after deploying the agent.
Detailed instructions for each step are in the following subsections.
Generating Self-Signed Certificate#
This guide outlines the procedure for generating a Certificate Authority (CA) and server certificate from scratch.
If an existing Certificate Authority (CA) or intermediate certificates are already available, proceed directly to Step 2 to generate the server certificate.
Generate CA certificate
Generate unencrypted private key:
openssl genrsa -out ca.key 4096
Create
ca.cnf:# ca.cnf [ req ] default_bits = 4096 prompt = no default_md = sha256 x509_extensions = v3_ca distinguished_name = dn [ dn ] C = US ST = California L = Santa Clara O = Shoreline OU = Dev CN = Shoreline Root CA [ v3_ca ] subjectKeyIdentifier = hash authorityKeyIdentifier = keyid:always,issuer basicConstraints = critical, CA:true keyUsage = critical, keyCertSign, cRLSign
Generate self-signed CA cert:
openssl req -x509 -new -key ca.key -out ca.crt -days 3650 -config ca.cnf -extensions v3_ca
Generate the server certificate (requires the CA certificate from Step 1).
Create server.cnf, setting the Common Name (CN) and Subject Alternative Names (SAN) to match your environment:
[ req ]
default_bits       = 2048
prompt             = no
default_md         = sha256
distinguished_name = dn
req_extensions     = req_ext

[ dn ]
C  = US
ST = CA
L  = Santa Clara
O  = Shoreline
OU = Dev
CN = your-instance.shoreline.nvidia.com

[ req_ext ]
subjectAltName = @alt_names

[ alt_names ]
DNS.1 = your-instance.shoreline.nvidia.com
DNS.2 = *.your-instance.shoreline.nvidia.com
Create key and CSR
openssl req -new -nodes -out server.csr -newkey rsa:2048 -keyout server.key -config server.cnf
Sign the server CSR with your CA
openssl x509 -req -in server.csr -CA ca.crt -CAkey ca.key -CAcreateserial \
    -out server.crt -days 8250 -extensions req_ext -extfile server.cnf
Create full chain and rename
server.keycat server.crt ca.crt > ahr.crt cp server.key ahr.key
To ensure your browser trusts this certificate when viewing the UI after installation, import the self-signed CA certificate generated in Step 1 (
ca.crt) into your local trust store. This is required to enable access to the site (secured with the server certificate) using browsers, curl, and other clients. If this certificate was generated on the BCM headnode, copy theca.crtfile to your local machine first.To trust the self-signed CA certificate in Firefox, follow these steps:
Open Firefox and go to Preferences (or Options on Windows).
Navigate to Privacy & Security and scroll down to the Certificates section.
Click View Certificates.
In the Certificate Manager window, select the Authorities tab.
Click Import.
Choose your self-signed CA certificate file (e.g.,
ca.crt).When prompted, check Trust this CA to identify websites.
Click OK to complete the import.
To trust the self-signed CA certificate in Chrome, follow these steps:
Open Chrome and navigate to
chrome://settings/certificatesUnder Custom, click on Installed by you
Next to Trusted Certificates, click Import
Select the self-signed CA certificate file -
ca.crt
The
ahr.crtandahr.keyfiles generated during this procedure satisfy the certificate prerequisite that can be used when following the manual installation procedure.
Post-Install Backend Configuration#
If you supplied self-signed certificates to the installer or are configuring them as part of a manual installation, after deploying the AHR backend, you’ll need to complete the following steps to configure the AHR backend container to trust the Ceph endpoint when using a self-signed certificate.
Note
Repeat these steps after every backend upgrade performed through Helm.
Manual Application of the Self-Signed Certificate to the Backend#
Note
Note: If you do not already have an existing certificate and key, please refer to the section Generating Self-Signed Certificate to create the required ahr.crt and ahr.key files before proceeding.
Copy the ca.crt file that was created previously to your current directory and run the following command to create a ConfigMap with the CA certificate in the backend cluster:
kubectl create configmap -n autonomous-hardware-recovery custom-ca \
  --from-file=ca.crt=./ca.crt
Create
backendpatch.json:{ "spec": { "template": { "spec": { "volumes": [ { "name": "custom-ca", "configMap": { "name": "custom-ca" } }, { "name": "ca-bundle", "emptyDir": {} } ], "initContainers": [ { "name": "ca-bundle-builder", "image": "ubuntu:22.04", "command": [ "sh", "-c", "apt-get update && apt-get install -y ca-certificates && mkdir -p /usr/local/share/ca-certificates && cp /ca/ca.crt /usr/local/share/ca-certificates/custom-ca.crt && update-ca-certificates && cp /etc/ssl/certs/ca-certificates.crt /bundle/ca-certificates.crt" ], "volumeMounts": [ { "name": "custom-ca", "mountPath": "/ca" }, { "name": "ca-bundle", "mountPath": "/bundle" } ] } ] } } } }
Patch the backend statefulset with the file above:
kubectl patch statefulset shoreline-backend -n autonomous-hardware-recovery --type='strategic' --patch "$(cat backendpatch.json)"
# Run the following line only if failover was enabled in this environment
kubectl patch statefulset shoreline-backend-failover -n autonomous-hardware-recovery --type='strategic' --patch "$(cat backendpatch.json)"
Run another patch to mount
ca-certificates.crt:INDEX=$(kubectl get statefulset shoreline-backend -n autonomous-hardware-recovery -o json \ | jq -r '.spec.template.spec.containers | to_entries[] | select(.value.name=="backend") | .key') kubectl patch statefulset shoreline-backend -n autonomous-hardware-recovery --type='json' -p="[ { \"op\": \"add\", \"path\": \"/spec/template/spec/containers/${INDEX}/volumeMounts/-\", \"value\": { \"name\": \"ca-bundle\", \"mountPath\": \"/etc/ssl/certs/ca-certificates.crt\", \"subPath\": \"ca-certificates.crt\" } } ]" INDEX=$(kubectl get statefulset shoreline-backend-failover -n autonomous-hardware-recovery -o json \ | jq -r '.spec.template.spec.containers | to_entries[] | select(.value.name=="backend") | .key') kubectl patch statefulset shoreline-backend-failover -n autonomous-hardware-recovery --type='json' -p="[ { \"op\": \"add\", \"path\": \"/spec/template/spec/containers/${INDEX}/volumeMounts/-\", \"value\": { \"name\": \"ca-bundle\", \"mountPath\": \"/etc/ssl/certs/ca-certificates.crt\", \"subPath\": \"ca-certificates.crt\" } } ]"
Post-Install Agent Configuration#
If you supplied self-signed certificates to the installer or are configuring them as part of a manual installation, after deploying the agent, you’ll need to perform the following steps to enable the agent to trust the discovery endpoint using the self-signed certificate.
Note
These steps must also be repeated after every agent upgrade.
The agent start script (startAgent.sh) automatically bind-mounts /var/lib/shoreline/agent/secrets/ca_cert.crt into the enroot container and runs update-ca-certificates at startup when this file is present. The following steps place the CA certificate at this path so the built-in mechanism handles trust automatically.
Manual Application of the Self-Signed Certificate on the Agent - Headnodes#
Add the CA cert to the host trust store and to the agent secrets directory on all headnodes:
pdcp -g headnode ca.crt /usr/local/share/ca-certificates/self-signed.crt
pdsh -g headnode 'update-ca-certificates'
pdsh -g headnode 'mkdir -p /var/lib/shoreline/agent/secrets'
pdcp -g headnode ca.crt /var/lib/shoreline/agent/secrets/ca_cert.crt
pdsh -g headnode 'chown autonomous-hardware-recovery:autonomous-hardware-recovery /var/lib/shoreline/agent/secrets/ca_cert.crt'
Reload and restart the
shorelineservice on all headnodes:pdsh -g headnode 'systemctl stop shoreline && systemctl daemon-reload && systemctl start shoreline'
Manual Application of the Self-Signed Certificate on the Agent - Software Image#
Repeat the following steps for each software image the AHR agent is installed on
export AGENT_CATEGORY=<category-of-node-with-ahr-agent-installed>
Copy the CA cert into the image trust store and the agent secrets directory:
export AGENT_IMAGE_PATH=$(cmsh -c "category; use $AGENT_CATEGORY; get softwareimage" | xargs -I{} cmsh -c "softwareimage; use {}; get path" | grep "^/")

cp ca.crt $AGENT_IMAGE_PATH/usr/local/share/ca-certificates/self-signed.crt
mkdir -p $AGENT_IMAGE_PATH/var/lib/shoreline/agent/secrets
cp ca.crt $AGENT_IMAGE_PATH/var/lib/shoreline/agent/secrets/ca_cert.crt
chown autonomous-hardware-recovery:autonomous-hardware-recovery $AGENT_IMAGE_PATH/var/lib/shoreline/agent/secrets/ca_cert.crt
Update the CA certificates bundle inside the software image:
systemd-nspawn --chdir=/root --setenv=SUDO_CMD="sudo -h 127.0.0.1" -D $AGENT_IMAGE_PATH bash -c "mount -o remount,size=10G /tmp && update-ca-certificates"
Sync the image to nodes in the agent category:
cmsh -c "device ; imageupdate -w -c $AGENT_CATEGORY"
Restart the
shorelineservice on nodes in the agent category:pdsh -g category=$AGENT_CATEGORY 'systemctl stop shoreline && systemctl daemon-reload && systemctl start shoreline'
Verification#
If both the backend and agent are configured properly, the agent will register successfully on the backend.
Note
For instructions on verifying backend health and agent connectivity, refer to Backend Health and Agent Connectivity.
NVIDIA Mission Control autonomous hardware recovery Uninstall - Manual Procedure#
Agent Uninstall#
Run the following procedure from the BCM headnode:
Remove AHR agent from software image: For each agent node category the AHR agent was installed on, detach the category from the
shoreline-agentconfigurationoverlay, remove theshorelineDebian package from the category’s software image, and clean up the agent files, staged Debian package, andautonomous-hardware-recoveryuser and group that were created inside the image during agent installation. Repeat this procedure for every agent node category the AHR agent was installed on.Set the appropriate agent category:
export AGENT_CATEGORY=<category-of-node-with-ahr-agent-installed>
Remove the agent category from the
shoreline-agentconfigurationoverlay:cmsh -c "configurationoverlay; use shoreline-agent; removefrom categories $AGENT_CATEGORY; commit"
Remove the
shorelineDebian package that was installed during agent installation:export AHR_VERSION=29.1.82 export AGENT_IMAGE_PATH=$(cmsh -c "category; use $AGENT_CATEGORY; get softwareimage" | xargs -I{} cmsh -c "softwareimage; use {}; get path" | grep "^/") systemd-nspawn --directory=$AGENT_IMAGE_PATH --chdir=/root --bind-ro=/etc/resolv.conf:/etc/resolv.conf --setenv=SUDO_CMD="sudo -h 127.0.0.1" --setenv=DEBIAN_FRONTEND=noninteractive bash -c "apt purge -y shoreline"
You may encounter the following warning in the output:
System has not been booted with systemd as init system (PID 1). Can't operate.
Failed to connect to bus: Host is down
This only occurs when the package removal is run from within the software image and can be safely ignored.
Once the agent package has been uninstalled from the software image, run the following to remove any leftover files from the agent installation, the staged agent Debian package, and the
autonomous-hardware-recoveryuser and group that were created during agent installation:systemd-nspawn \ --directory=$AGENT_IMAGE_PATH \ --chdir=/root \ --bind-ro=/etc/resolv.conf:/etc/resolv.conf \ --setenv=SUDO_CMD="sudo -h 127.0.0.1" \ --setenv=DEBIAN_FRONTEND=noninteractive \ bash -c " rm -rf /var/lib/shoreline && \ rm -rf /etc/sudoers.d/99-shoreline-user && \ rm -rf /etc/shoreline && \ rm -rf /cm/local/apps/autonomous-hardware-recovery/var/packages && \ { id -u autonomous-hardware-recovery > /dev/null 2>&1 && deluser --remove-home autonomous-hardware-recovery || true; } && \ { getent group autonomous-hardware-recovery > /dev/null 2>&1 && delgroup autonomous-hardware-recovery || true; } "
Note
The Mellanox DOCA repo files (
/usr/share/keyrings/cm-mellanox-archive-keyring.gpgand/etc/apt/sources.list.d/cm-mellanox.list) staged during the agent installation are not removed by default because they may be shared with other NVIDIA software. If you are certain no other software depends on them, they can be removed manually from the software image.Run the following command to sync the updated image to the worker nodes:
cmsh -c "device; imageupdate -w -c $AGENT_CATEGORY"
then update
systemctlon the nodes in this agent category:pdsh -g category=$AGENT_CATEGORY 'systemctl daemon-reload'
Remove AHR agent from headnodes: Remove the
shorelineDebian package from all BCM headnodes, along with the agent configuration files, the staged agent Debian package, and theautonomous-hardware-recoveryuser and group that were created during agent installation:pdsh -g headnode 'DEBIAN_FRONTEND=noninteractive apt purge -y shoreline' pdsh -g headnode 'rm -rf /var/lib/shoreline' pdsh -g headnode 'rm -rf /etc/sudoers.d/99-shoreline-user' pdsh -g headnode 'rm -rf /etc/shoreline' pdsh -g headnode 'rm -rf /cm/local/apps/autonomous-hardware-recovery/etc/agent.config' pdsh -g headnode 'rm -rf /cm/local/apps/autonomous-hardware-recovery/var/packages' pdsh -g headnode 'id -u autonomous-hardware-recovery > /dev/null 2>&1 && deluser --remove-home autonomous-hardware-recovery || true' pdsh -g headnode 'getent group autonomous-hardware-recovery > /dev/null 2>&1 && delgroup autonomous-hardware-recovery || true'
Note
The Mellanox DOCA repo files (
/usr/share/keyrings/cm-mellanox-archive-keyring.gpgand/etc/apt/sources.list.d/cm-mellanox.list) added to the headnodes during the agent installation are not removed by default because they may be shared with other NVIDIA software. If you are certain no other software depends on them, they can be removed manually from the headnodes.Remove the
shoreline-agentconfigurationoverlay (which also removes thegeneric::shoreline_agentrole assigned during installation):cmsh -c "configurationoverlay; remove shoreline-agent; commit"
Backend Uninstall#
Run the following procedure from the BCM headnode:
Get current values for node names, storage paths, and the AHR domain:
export AHR_BACKEND_NODE=$(helm --kubeconfig /root/.kube/config-k8s-admin get values -n autonomous-hardware-recovery backend --all  | grep backend_node: | awk '{print $2}')
export AHR_FAILOVER_NODE=$(helm --kubeconfig /root/.kube/config-k8s-admin get values -n autonomous-hardware-recovery backend --all  | grep backend_node_failover: | awk '{print $2}')
export AHR_SHARED_STORAGE_PATH=$(helm --kubeconfig /root/.kube/config-k8s-admin get values -n autonomous-hardware-recovery backend --all  | grep shared_storage_path: | awk '{print $2}')
export AHR_OBJECT_STORAGE_PATH=$(helm --kubeconfig /root/.kube/config-k8s-admin get values -n autonomous-hardware-recovery backend --all  | grep object_storage_path: | awk '{print $2}')
export AHR_FAILOVER_OBJECT_STORAGE_PATH=$(helm --kubeconfig /root/.kube/config-k8s-admin get values -n autonomous-hardware-recovery backend --all  | grep object_storage_path_failover: | awk '{print $2}')
export AHR_DOMAIN=$(helm --kubeconfig /root/.kube/config-k8s-admin get values -n autonomous-hardware-recovery backend --all | grep app_endpoint: | awk '{print $2}' | tr -d '"' | grep . | head -n1)
export AHR_USE_EXTERNAL_CEPH=$(helm --kubeconfig /root/.kube/config-k8s-admin get values -n autonomous-hardware-recovery backend --all | grep use_external_ceph: | awk '{print $2}')
env | grep AHR
Uninstall the backend helm chart
helm uninstall backend -n autonomous-hardware-recovery --wait --cascade foreground --kubeconfig /root/.kube/config-k8s-admin
Delete all persistent volume claims (pvcs) associated with the AHR backend
kubectl delete pvc --all -n autonomous-hardware-recovery --kubeconfig /root/.kube/config-k8s-admin
Delete persistent volumes associated with the AHR backend
kubectl --kubeconfig /root/.kube/config-k8s-admin delete pv $(kubectl --kubeconfig /root/.kube/config-k8s-admin get pv -o json | jq -r '.items[] | select(.status.phase == "Released") | select(.spec.claimRef.namespace == "autonomous-hardware-recovery" ) | .metadata.name')
Delete the AHR namespace:
kubectl delete ns autonomous-hardware-recovery --kubeconfig /root/.kube/config-k8s-admin
Revert the
ingress-nginxHelm release overrides that were applied during installation (switch the controller back to aDeployment, clear the AHR-specificnodeSelector, and disablehostPort):META=$(helm list -n ingress-nginx --kubeconfig /root/.kube/config-k8s-admin -o json | jq -r '.[0]') && \ CHART=$(helm search repo "$(echo $META | jq -r '.chart' | sed 's/-[0-9].*//')" --kubeconfig /root/.kube/config-k8s-admin -o json | jq -r '.[0].name') && \ VERSION=$(echo $META | jq -r '.chart' | grep -oP '(?<=-)\d+\..*') && \ helm upgrade ingress-nginx "$CHART" \ --namespace ingress-nginx \ --kubeconfig /root/.kube/config-k8s-admin \ --version "$VERSION" \ --reuse-values \ --wait \ --set controller.kind=Deployment \ --set-json 'controller.nodeSelector={}' \ --set controller.hostPort.enabled=false \ --set-json 'controller.hostPort.ports={}'
Note
If the
ingress-nginxrelease had custom values before the AHR installation, review the resulting configuration after thishelm upgradeand re-apply any customizations that may have been overridden by the AHR install.Wipe the disk device used for $AHR_OBJECT_STORAGE_PATH. Skip this step if the environment is using external object storage (i.e.
AHR_USE_EXTERNAL_CEPHistrue):if [ "$AHR_USE_EXTERNAL_CEPH" != "true" ]; then ssh $AHR_BACKEND_NODE blkdiscard -f $AHR_OBJECT_STORAGE_PATH # Run the following line only if failover was enabled in this environment if [ -n "$AHR_FAILOVER_NODE" ]; then ssh $AHR_FAILOVER_NODE blkdiscard -f $AHR_FAILOVER_OBJECT_STORAGE_PATH fi fi
Clean $AHR_SHARED_STORAGE_PATH on nodes
ssh $AHR_BACKEND_NODE rm -rf $AHR_SHARED_STORAGE_PATH/*
# Run the following line only if failover was enabled in this environment
if [ -n "$AHR_FAILOVER_NODE" ]; then
  ssh $AHR_FAILOVER_NODE rm -rf $AHR_SHARED_STORAGE_PATH/*
fi
Remove the
shoreline-backendconfigurationoverlay (and its associated role)cmsh -c "configurationoverlay; remove shoreline-backend; commit"
Remove
shoreline-backendlabelsetscmsh -c "kubernetes; use k8s-admin; labelsets; remove shoreline-backend; commit"
Remove the
ahrBCM user:cmsh -c "user; remove ahr; commit"
Remove the cached Helm repo credential from the primary headnode:
helm repo remove shoreline-onprem-backend
Remove the AHR DNS entries that were created on the headnodes’ local DNS server (bind9) during installation:
Remove the AHR zone file from all headnodes:
pdsh -g headnode 'rm -f /etc/bind/autonomous-hardware-recovery.zone'
Remove the AHR zone block from
/etc/bind/named.conf.includeon all headnodes:pdsh -g headnode "sed -i '/^zone \"$AHR_DOMAIN\" IN {/,/^};/d' /etc/bind/named.conf.include"
Restart the
namedservice on all headnodes to apply the changes:pdsh -g headnode 'systemctl restart named'
Note
The
include "/etc/bind/named.conf.include";directive added to/etc/bind/named.confduring installation is not removed by default because it may be used by other zones. If no other zones are defined in/etc/bind/named.conf.include, it can be removed manually from each headnode.
Remove AHR Runbooks#
Delete the runbooks directory
rm -rf /cm/local/apps/autonomous-hardware-recovery/var/runbooks
Replacing Certificates in an Existing Environment#
Whether publicly-trusted or self-signed, you can replace the existing certificates of a running backend using the following procedure. The procedure assumes you have already obtained a new, valid cert/key pair from following the process in either the Prerequisites section or the Self-signed Certificate Guide.
Set the locations of your certificate and key files. If they are in your current working directory on the headnode, you would run
path_to_cert="./ahr.crt"
path_to_privkey="./ahr.key"
Create a kubernetes resource definition for the base64-encoded versions of the cert and key files
cert_base64=$(sudo cat "${path_to_cert}" | base64 -w 0)
privatekey_base64=$(sudo cat "${path_to_privkey}" | base64 -w 0)

cat <<EOF > ahr-certificates.yaml
apiVersion: v1
kind: Secret
metadata:
  name: shoreline-api-certificate
  namespace: autonomous-hardware-recovery
type: kubernetes.io/tls
data:
  tls.crt: ${cert_base64}
  tls.key: ${privatekey_base64}
---
apiVersion: v1
kind: Secret
metadata:
  name: shoreline-app-certificate
  namespace: autonomous-hardware-recovery
type: kubernetes.io/tls
data:
  tls.crt: ${cert_base64}
  tls.key: ${privatekey_base64}
---
apiVersion: v1
kind: Secret
metadata:
  name: shoreline-discovery-certificate
  namespace: autonomous-hardware-recovery
type: kubernetes.io/tls
data:
  tls.crt: ${cert_base64}
  tls.key: ${privatekey_base64}
---
apiVersion: v1
kind: Secret
metadata:
  name: shoreline-ceph-certificate
  namespace: autonomous-hardware-recovery
type: kubernetes.io/tls
data:
  tls.crt: ${cert_base64}
  tls.key: ${privatekey_base64}
EOF
Apply the new certificates to the cluster. Note that this will overwrite the existing certificates
kubectl --kubeconfig /root/.kube/config-k8s-admin apply -f ahr-certificates.yaml
Restart the nginx process to pick up the new certs without bringing down the AHR backend pod.
kubectl --kubeconfig ~/.kube/config-k8s-admin exec -n autonomous-hardware-recovery deployment/shoreline-ui -- kill -HUP 1
You may need to run this command twice to get the process to start using the new certs