Appendix: Manual Setup of Edge Components
Manual Setup of Edge VST
Configuration
Edge side VST can be configured based on requirement using config files.
VST configuration details can be found here: VST Config
VST Storage Config details can be found here: Storage Config
VST RTSP Streams Config details can be found here: RTSP Stream Config
Some edge-vst related configurations are illustrated below
a.  "remote_vst_address" : "ip_address:port_number"   (Mandatory, Cloud VST address, Eg. 13.0.0.1:30000)
b.  "device_name": "Edge_VST"                         (Optional, Edge VST name to distinguish devices at the cloud)
c.  "device_location": "6th Floor"                    (Optional, Edge VST location for tagging purpose)
Installation using Docker
Copy all Edge VST related configs in one single directory.
Modify Edge VST configs as per requirement.
Run the docker command either with auto-discovery mode or with predefined RTSP streams.
Camera auto-discovery mode (ONVIF auto-discovery):
sudo docker run -it -v <absolute_host_path_of_configs_dir>/:/home/vst/vst_release/configs/ --net=host --gpus all nvcr.io/rxczgrvsg8nx/vst-1-0/vst:v1.2.33_x86_64 --vstConfigFile /home/vst/vst_release/configs/vst_config.json
Pre-defined RTSP Streams mode. Modify
rtsp_streams.jsonto add predefined RTSP urls & toggle param"enabled": true:sudo docker run -it -v <absolute_host_path_of_configs_dir>/:/home/vst/vst_release/configs/ --net=host --gpus all -e ADAPTOR=vst_rtsp nvcr.io/rxczgrvsg8nx/vst-1-0/vst:v1.2.33_x86_64 --vstConfigFile /home/vst/vst_release/configs/vst_config.json --rtspStreamsFile /home/vst/vst_release/configs/rtsp_streams.json
To get latest container version, refer here, https://registry.ngc.nvidia.com/orgs/rxczgrvsg8nx/teams/vst-1-0/containers/vst/tags.
Alternatively, to install VST using Helm Chart, refer here: Setup & Deployment.
Manual Setup of Edge NVStreamer
To setup NVStreamer using either Docker container or Helm Chart, refer here: Setup & Deployment.
Manual Setup of OpenVPN
Deploy OpenVPN access server in Azure
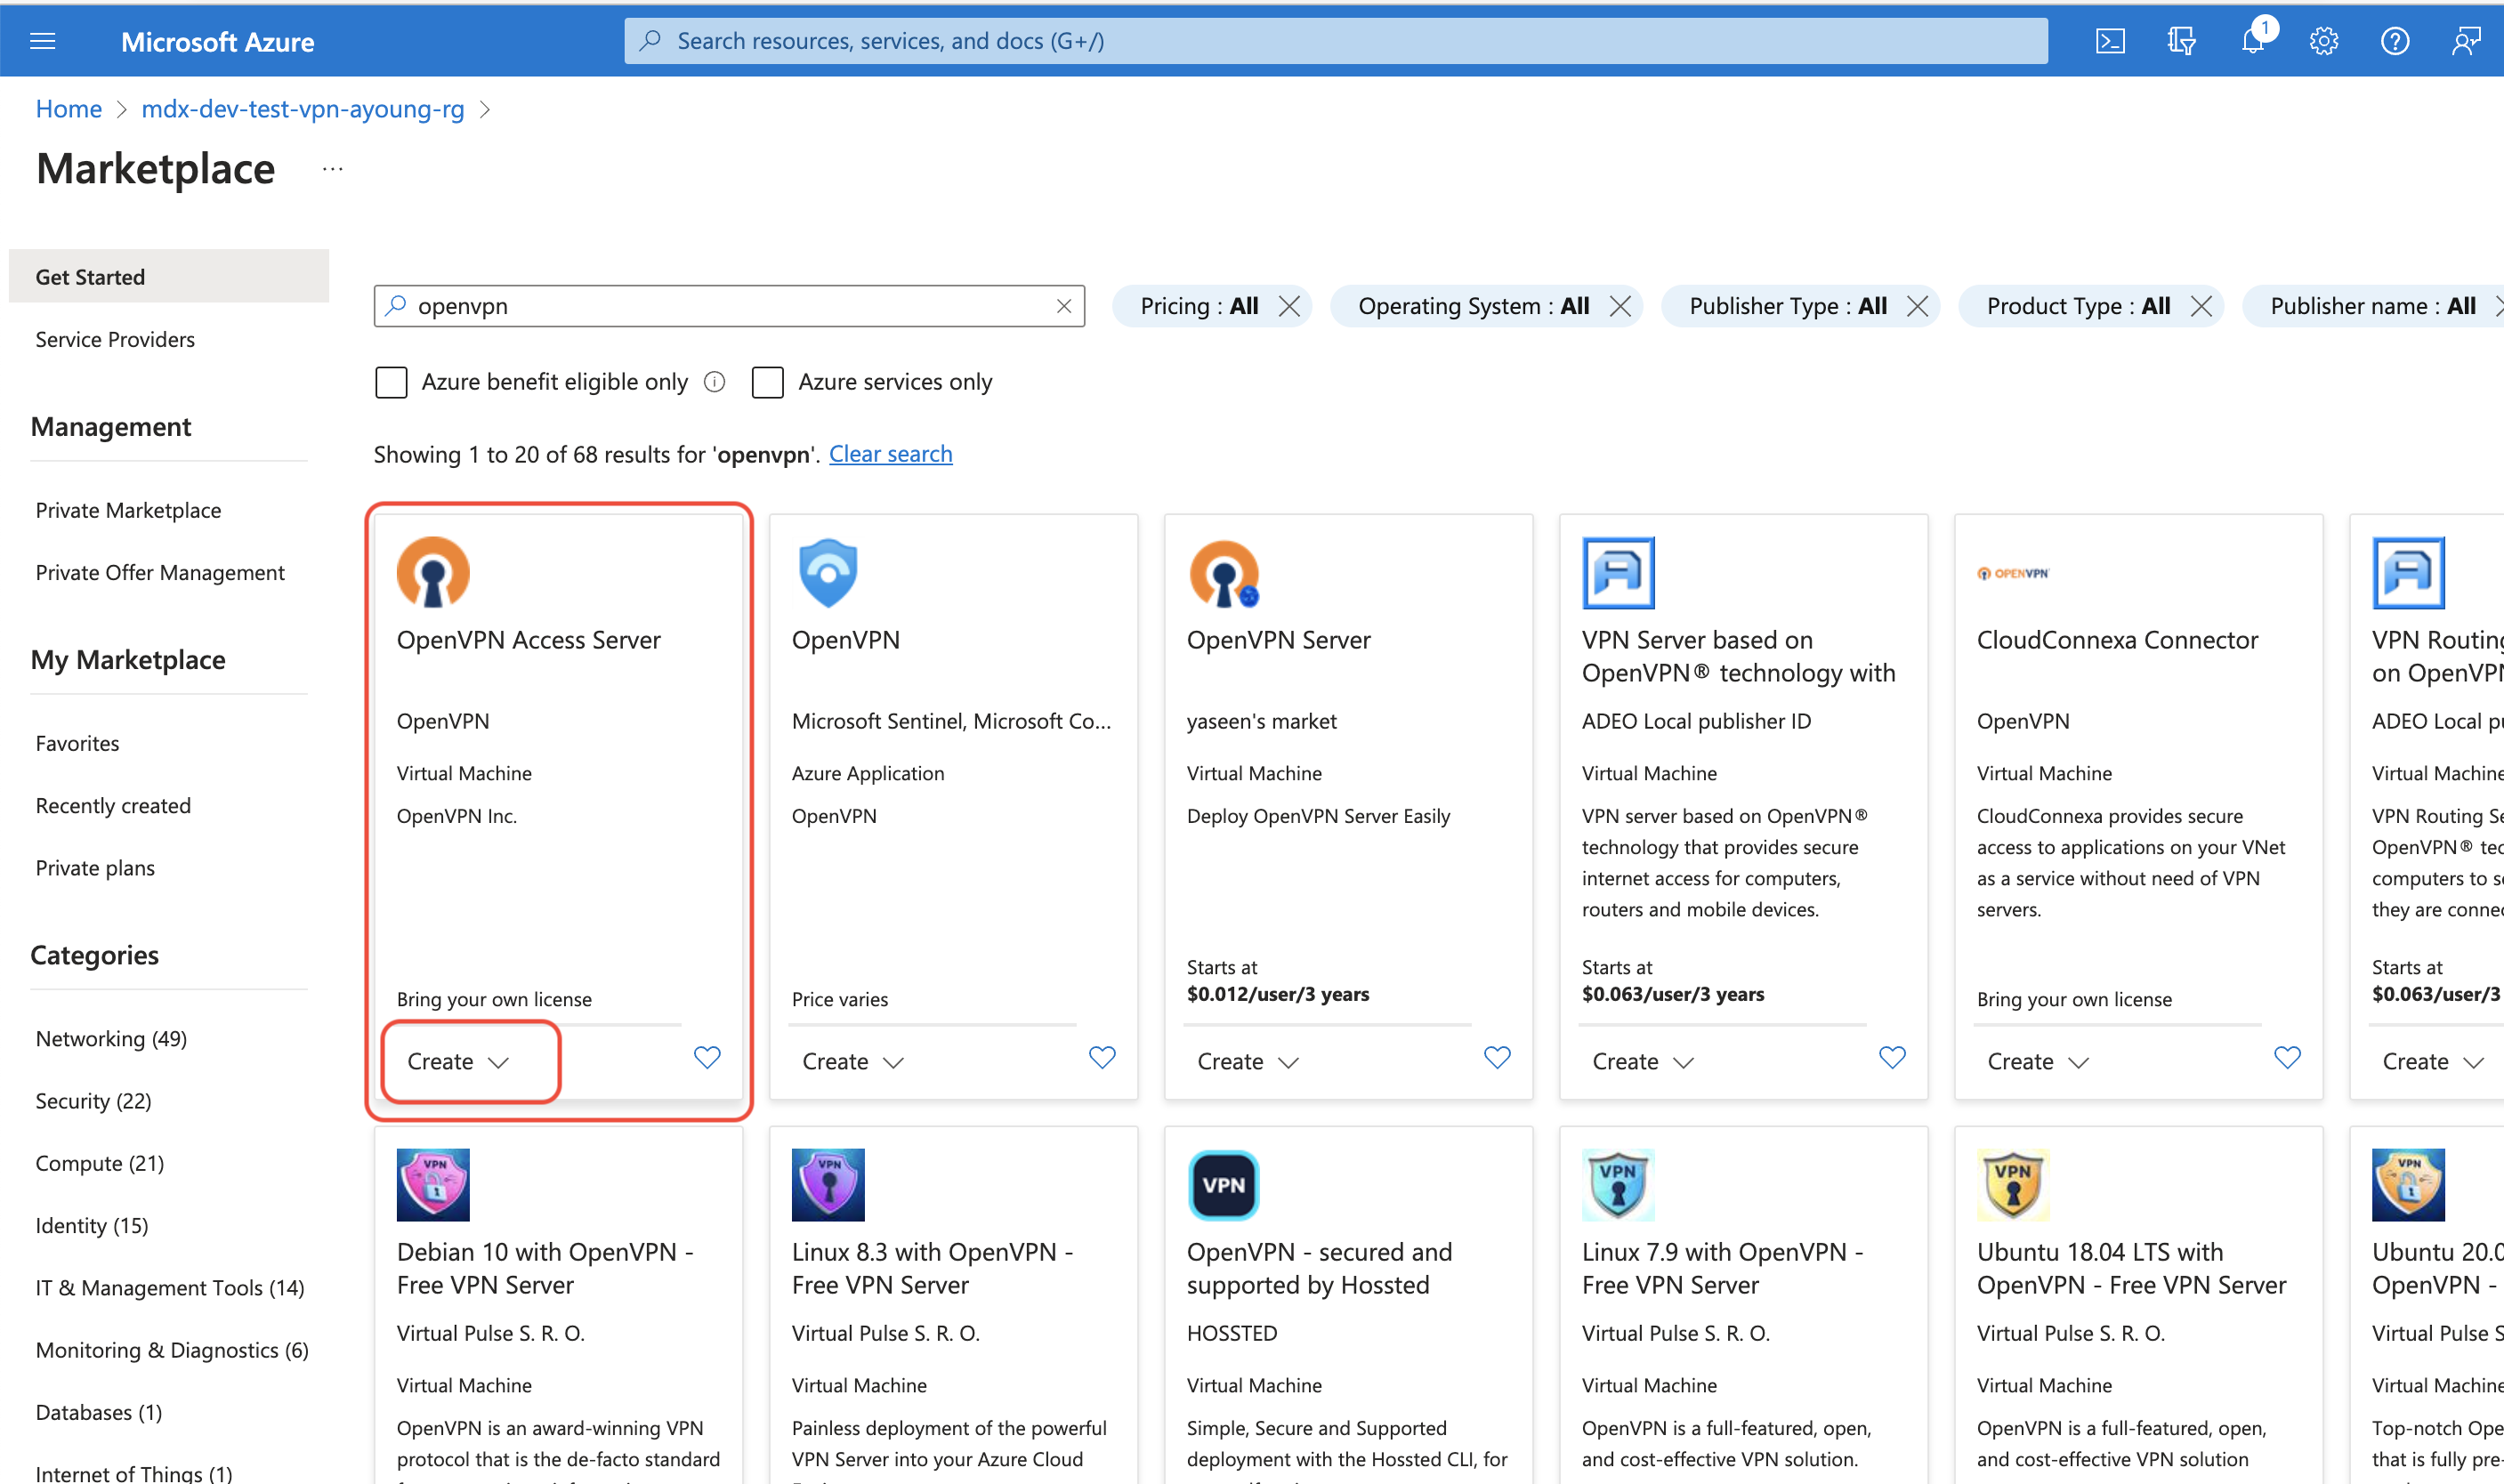
Create a virtual machine using the OpenVPN Access Server marketplace offering in a Resource Group using the VNET/Subnet where the MTMC application VM has been installed.
Setup the routing in Azure
Login into the Azure portal, and find the resource group where the hosted MTMC infrastructure is running.
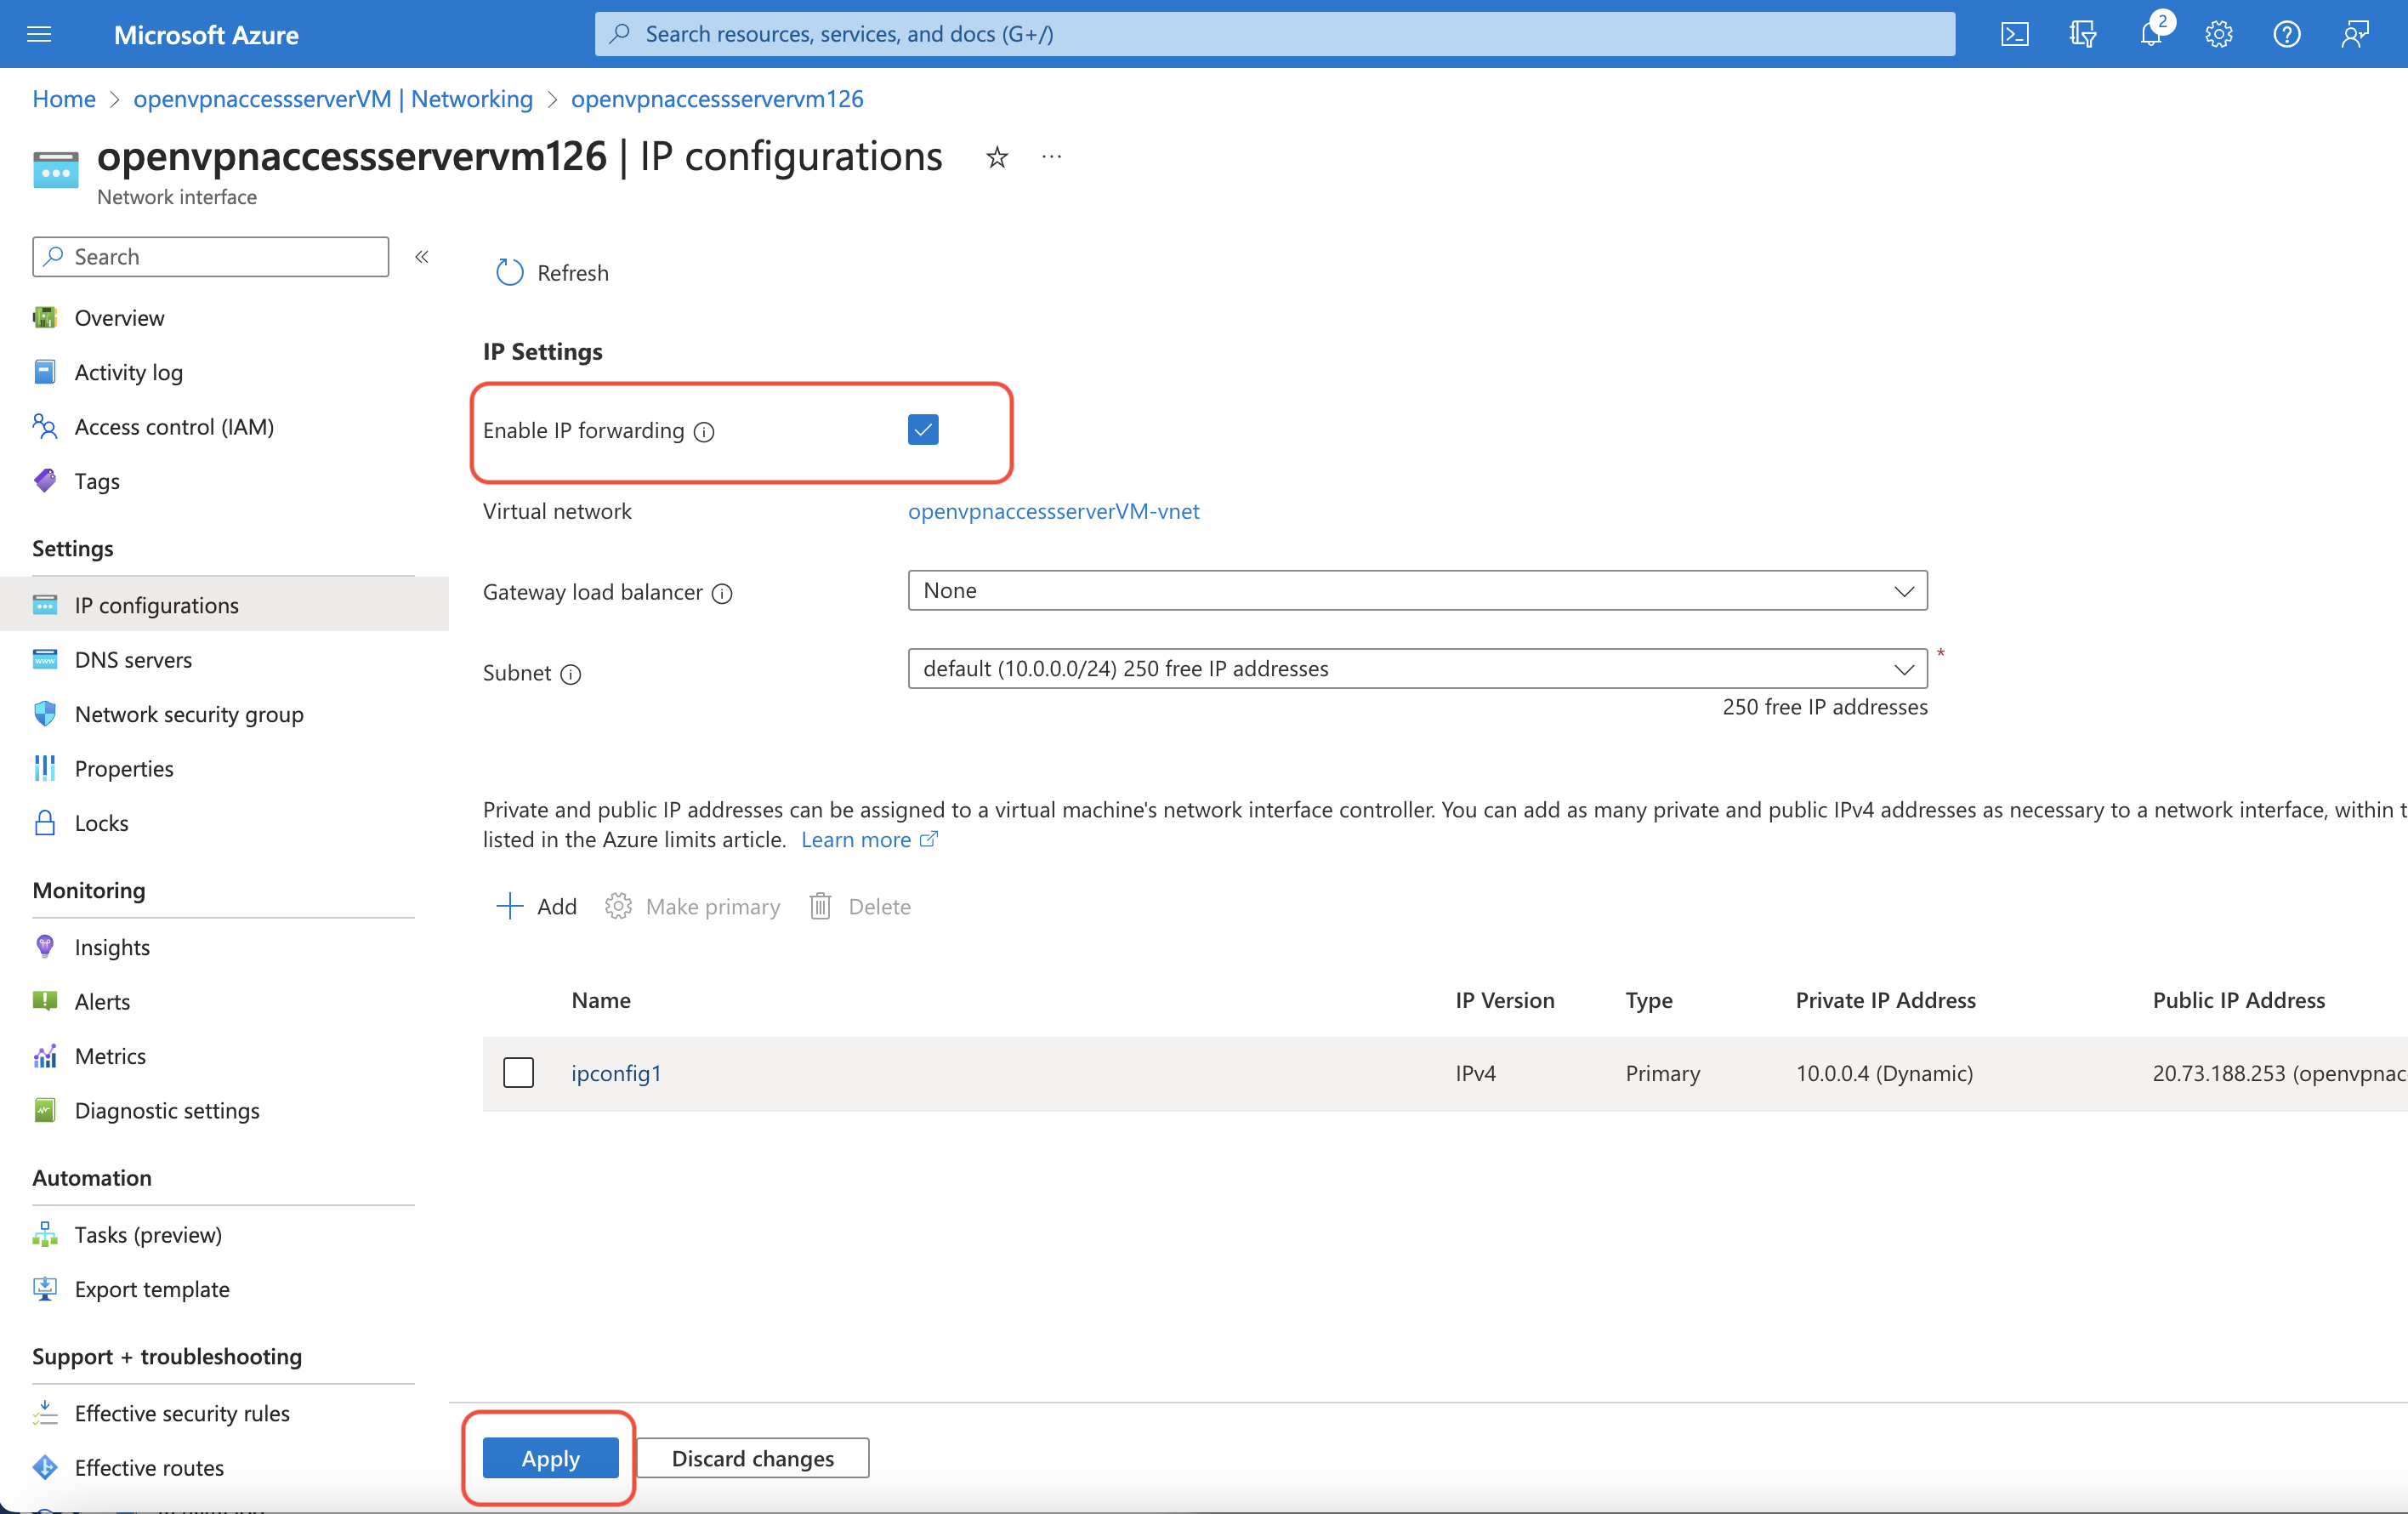
Go to the OpenVPN Access server VM overview page in the Azure Portal and click on Settings→Network to display the network configuration pane for the VM and select the Network Interface name to open the Network interface pane. Click on Settings→IP configurations to display the network interface IP settings. Toggle the Enable IP forwarding check box to on, and save the change by pressing “Apply” at the bottom of the screen
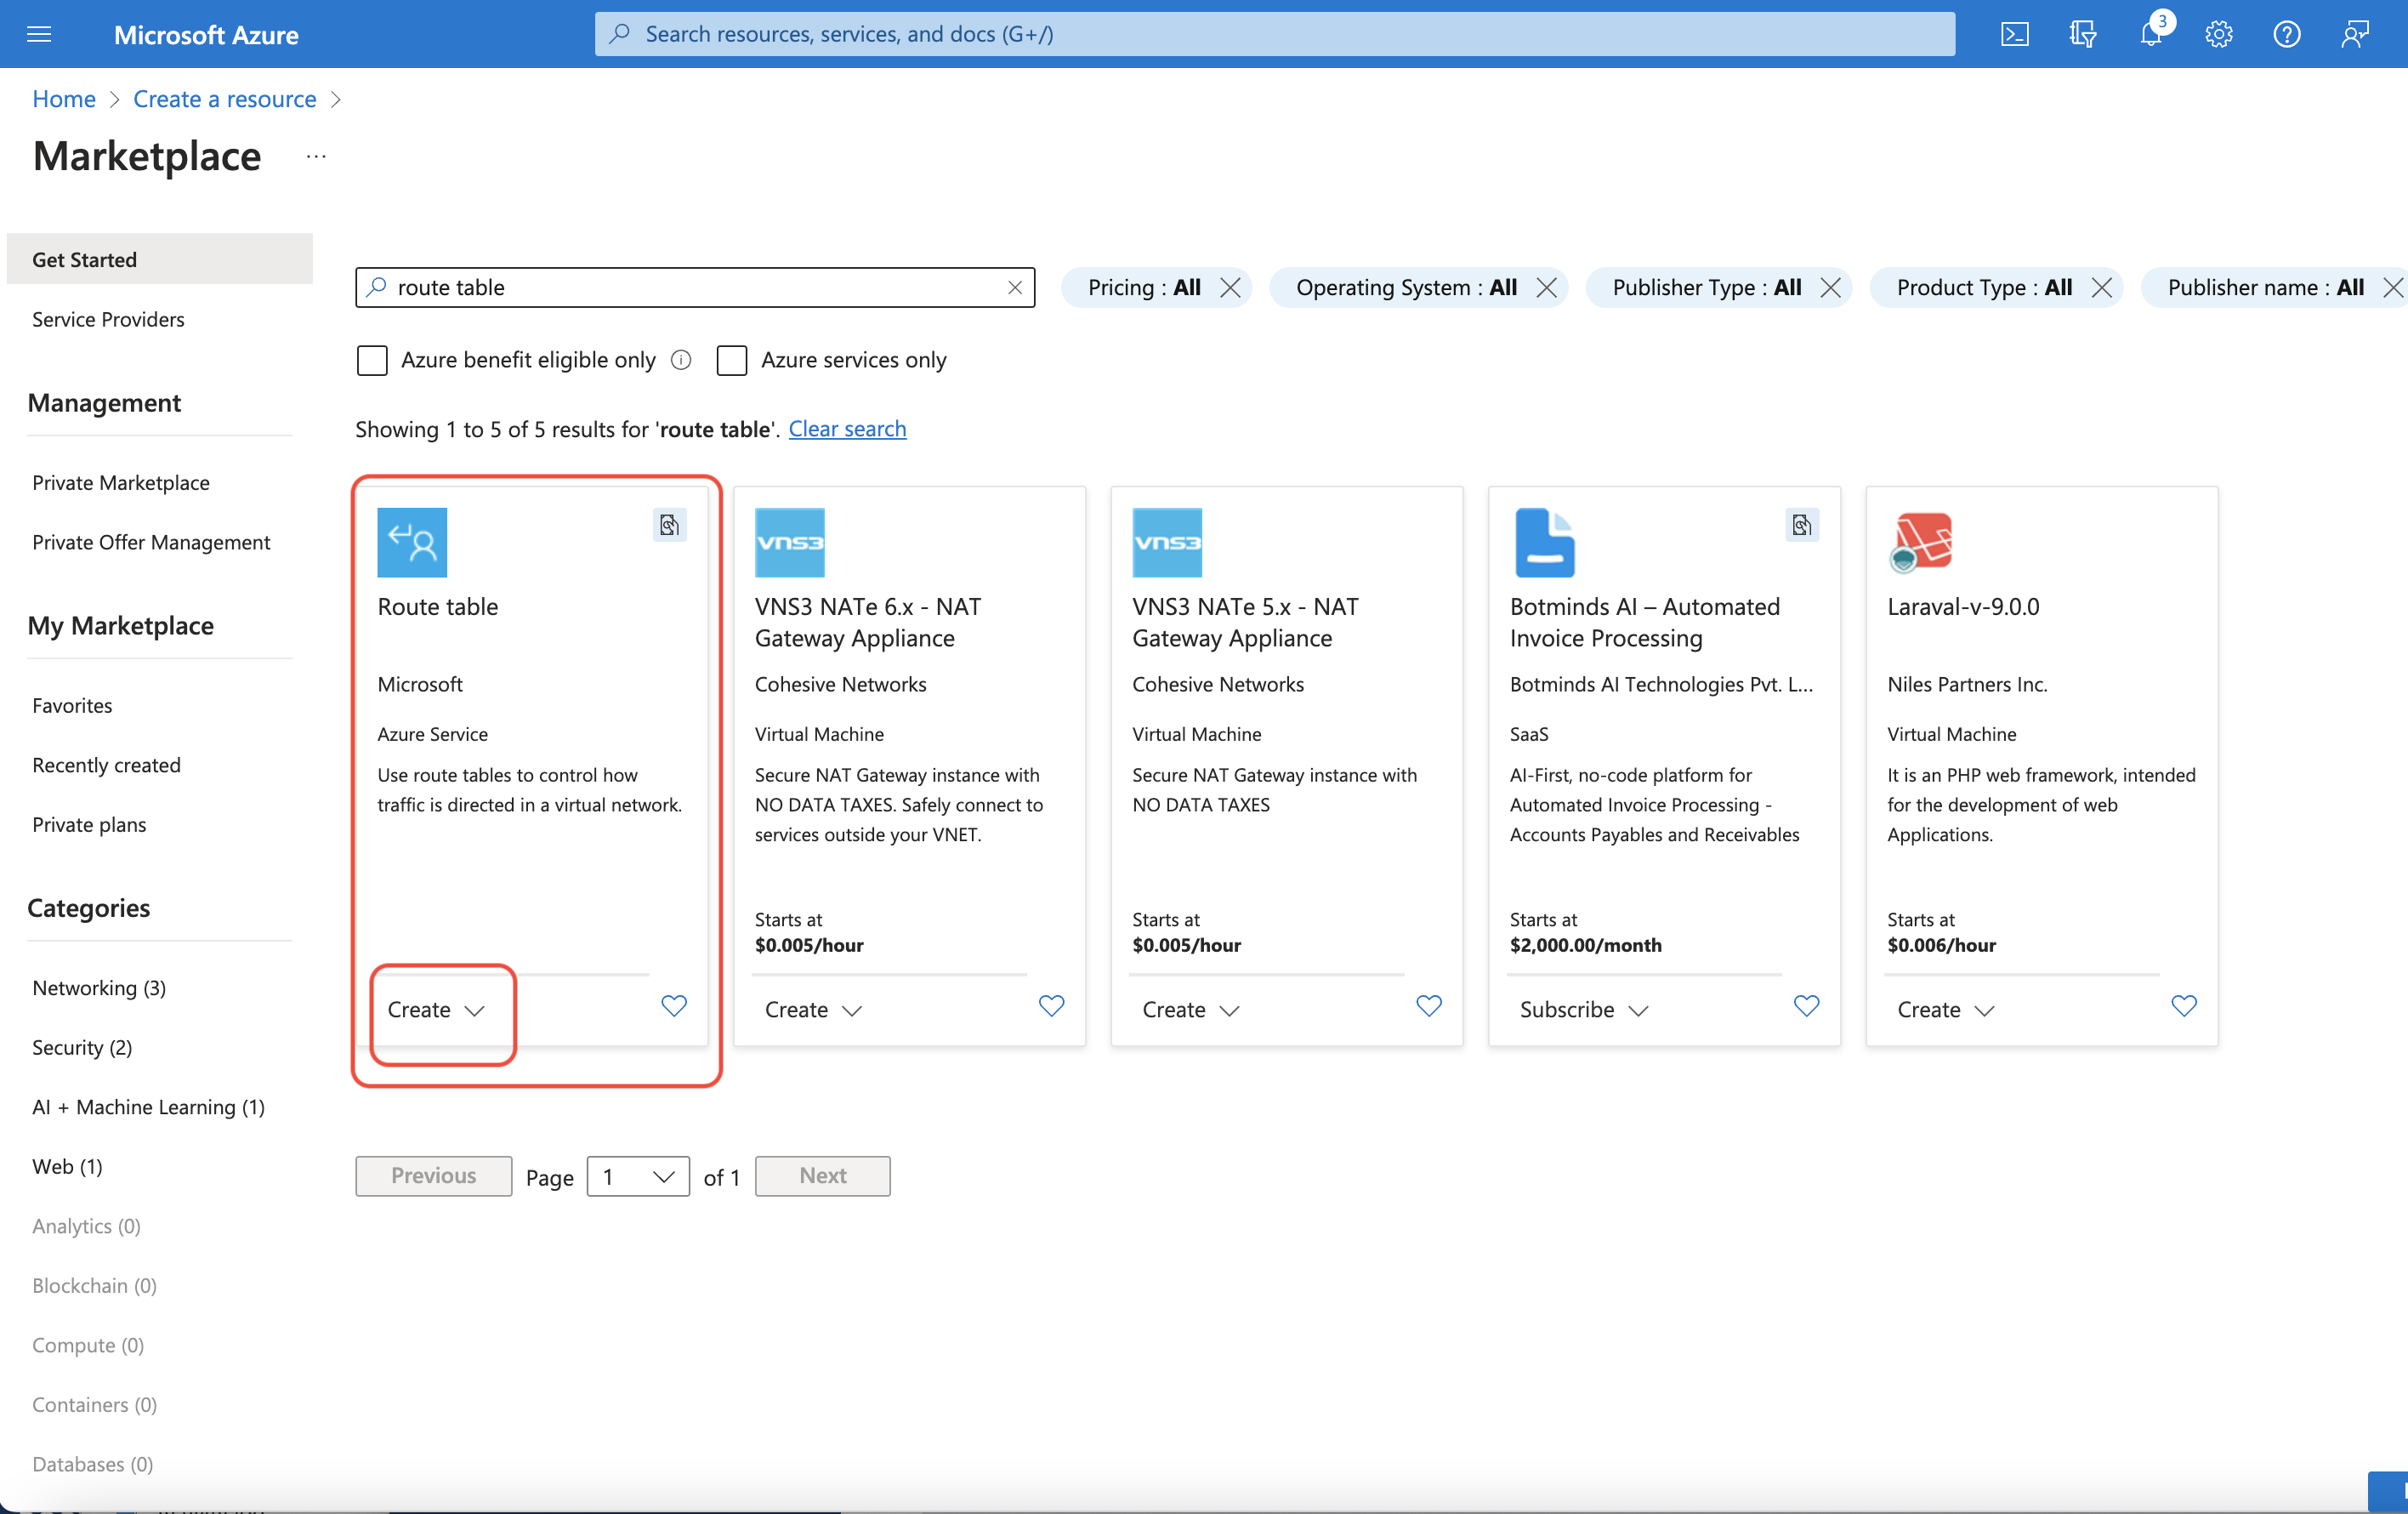
Press the “Create a resource” button in the Azure portal, to open the create a resource window. Search for “Route table” and press create on the Microsoft Route table offer. Select the previously created resource group where MTMC is running, give the route table a name and press the Review+Create button and then the Create button
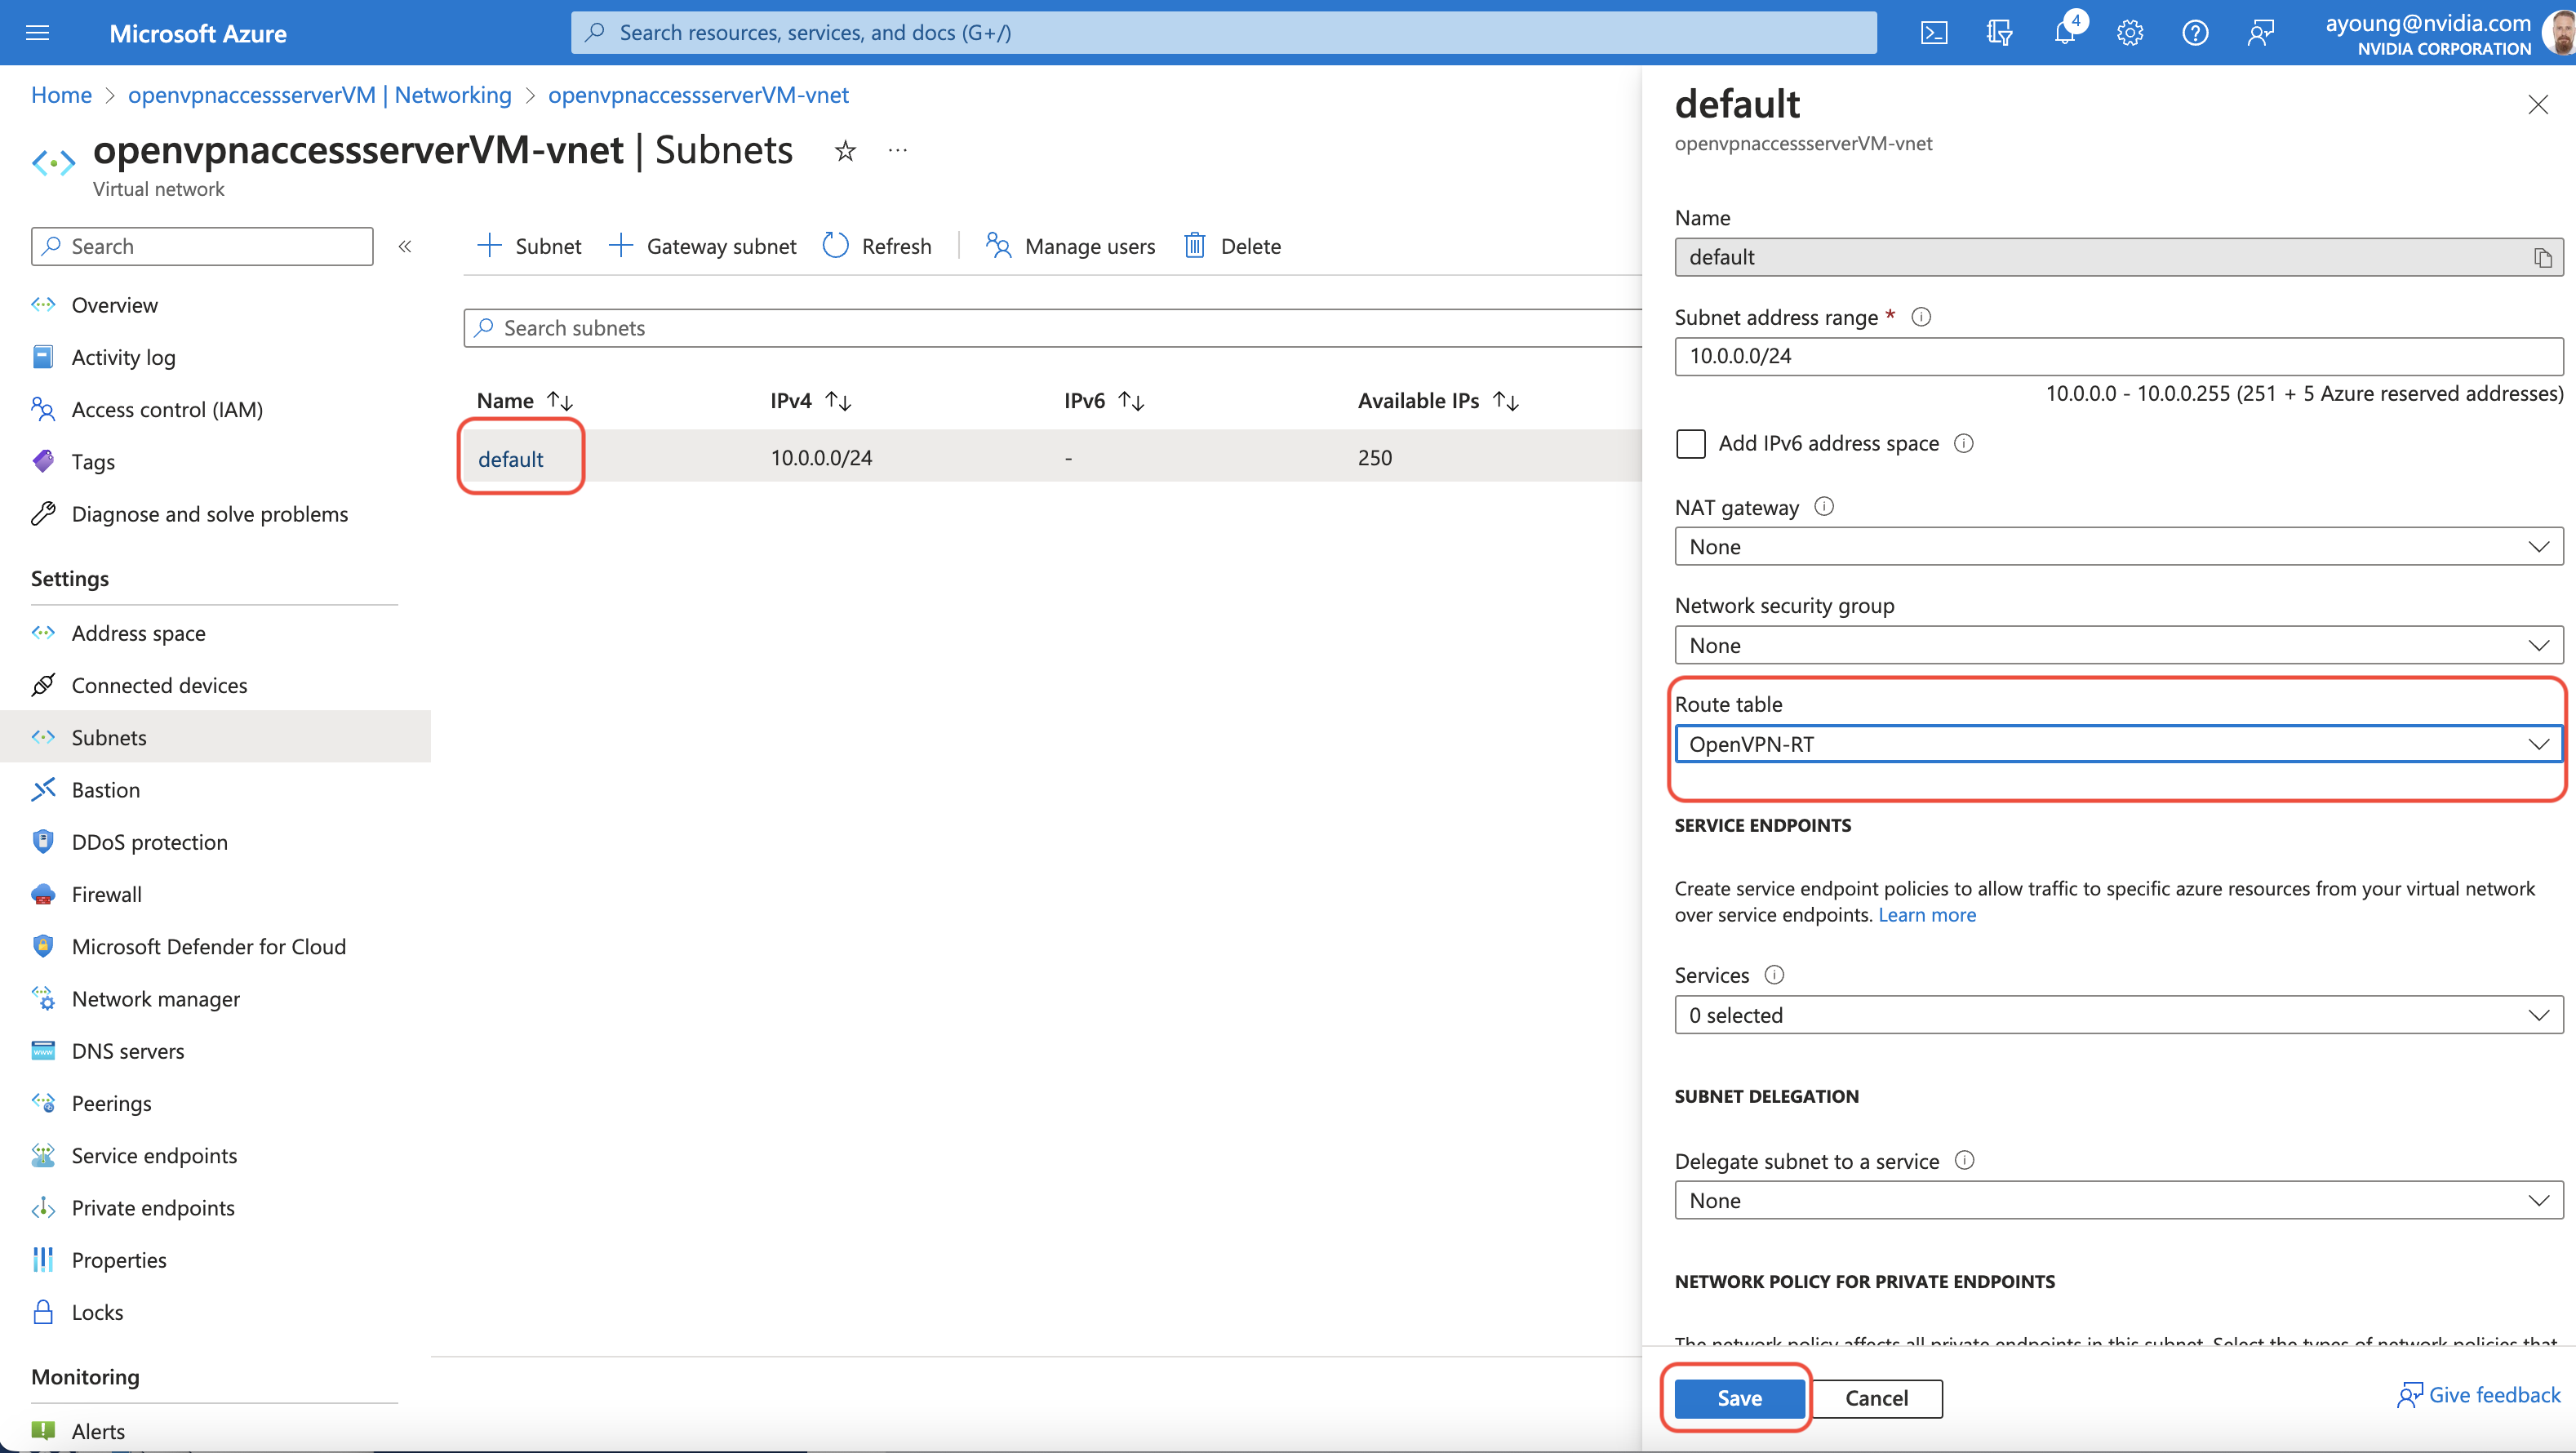
Attach the route table you just created to the subnet the OpenVPN access server is on by going back to the OpenVPN VM overview pane and selecting Settings→Networking and then clicking on the Virtual network/subnet link to open the Virtual Network pane. Select Settings→Subnets and choose the name of the subnet. This will open the subnet configuration side pane where you can select the previously created route table in the Route Table drop down menu. Finally click on the Save button to attach the route table to your subnet.
Finally add custom routes to your route table by navigating to the route table you created and click on Settings→Routes. Press the +Add button to open the create new route side pane. Choose IP Addresses from the “Destination Type” drop down menu, and Virtual Appliance from the “Next Hop” drop down menu. Enter a name for this route, 172.27.224.0/20 in the Destination IP addresses/CIDR ranges field, the private IP address of the OpenVPN access server VM, which can found from the VM overview page and press add. Repeat this step to create another route, but this time for the 172.27.240.0/20 IP Address range
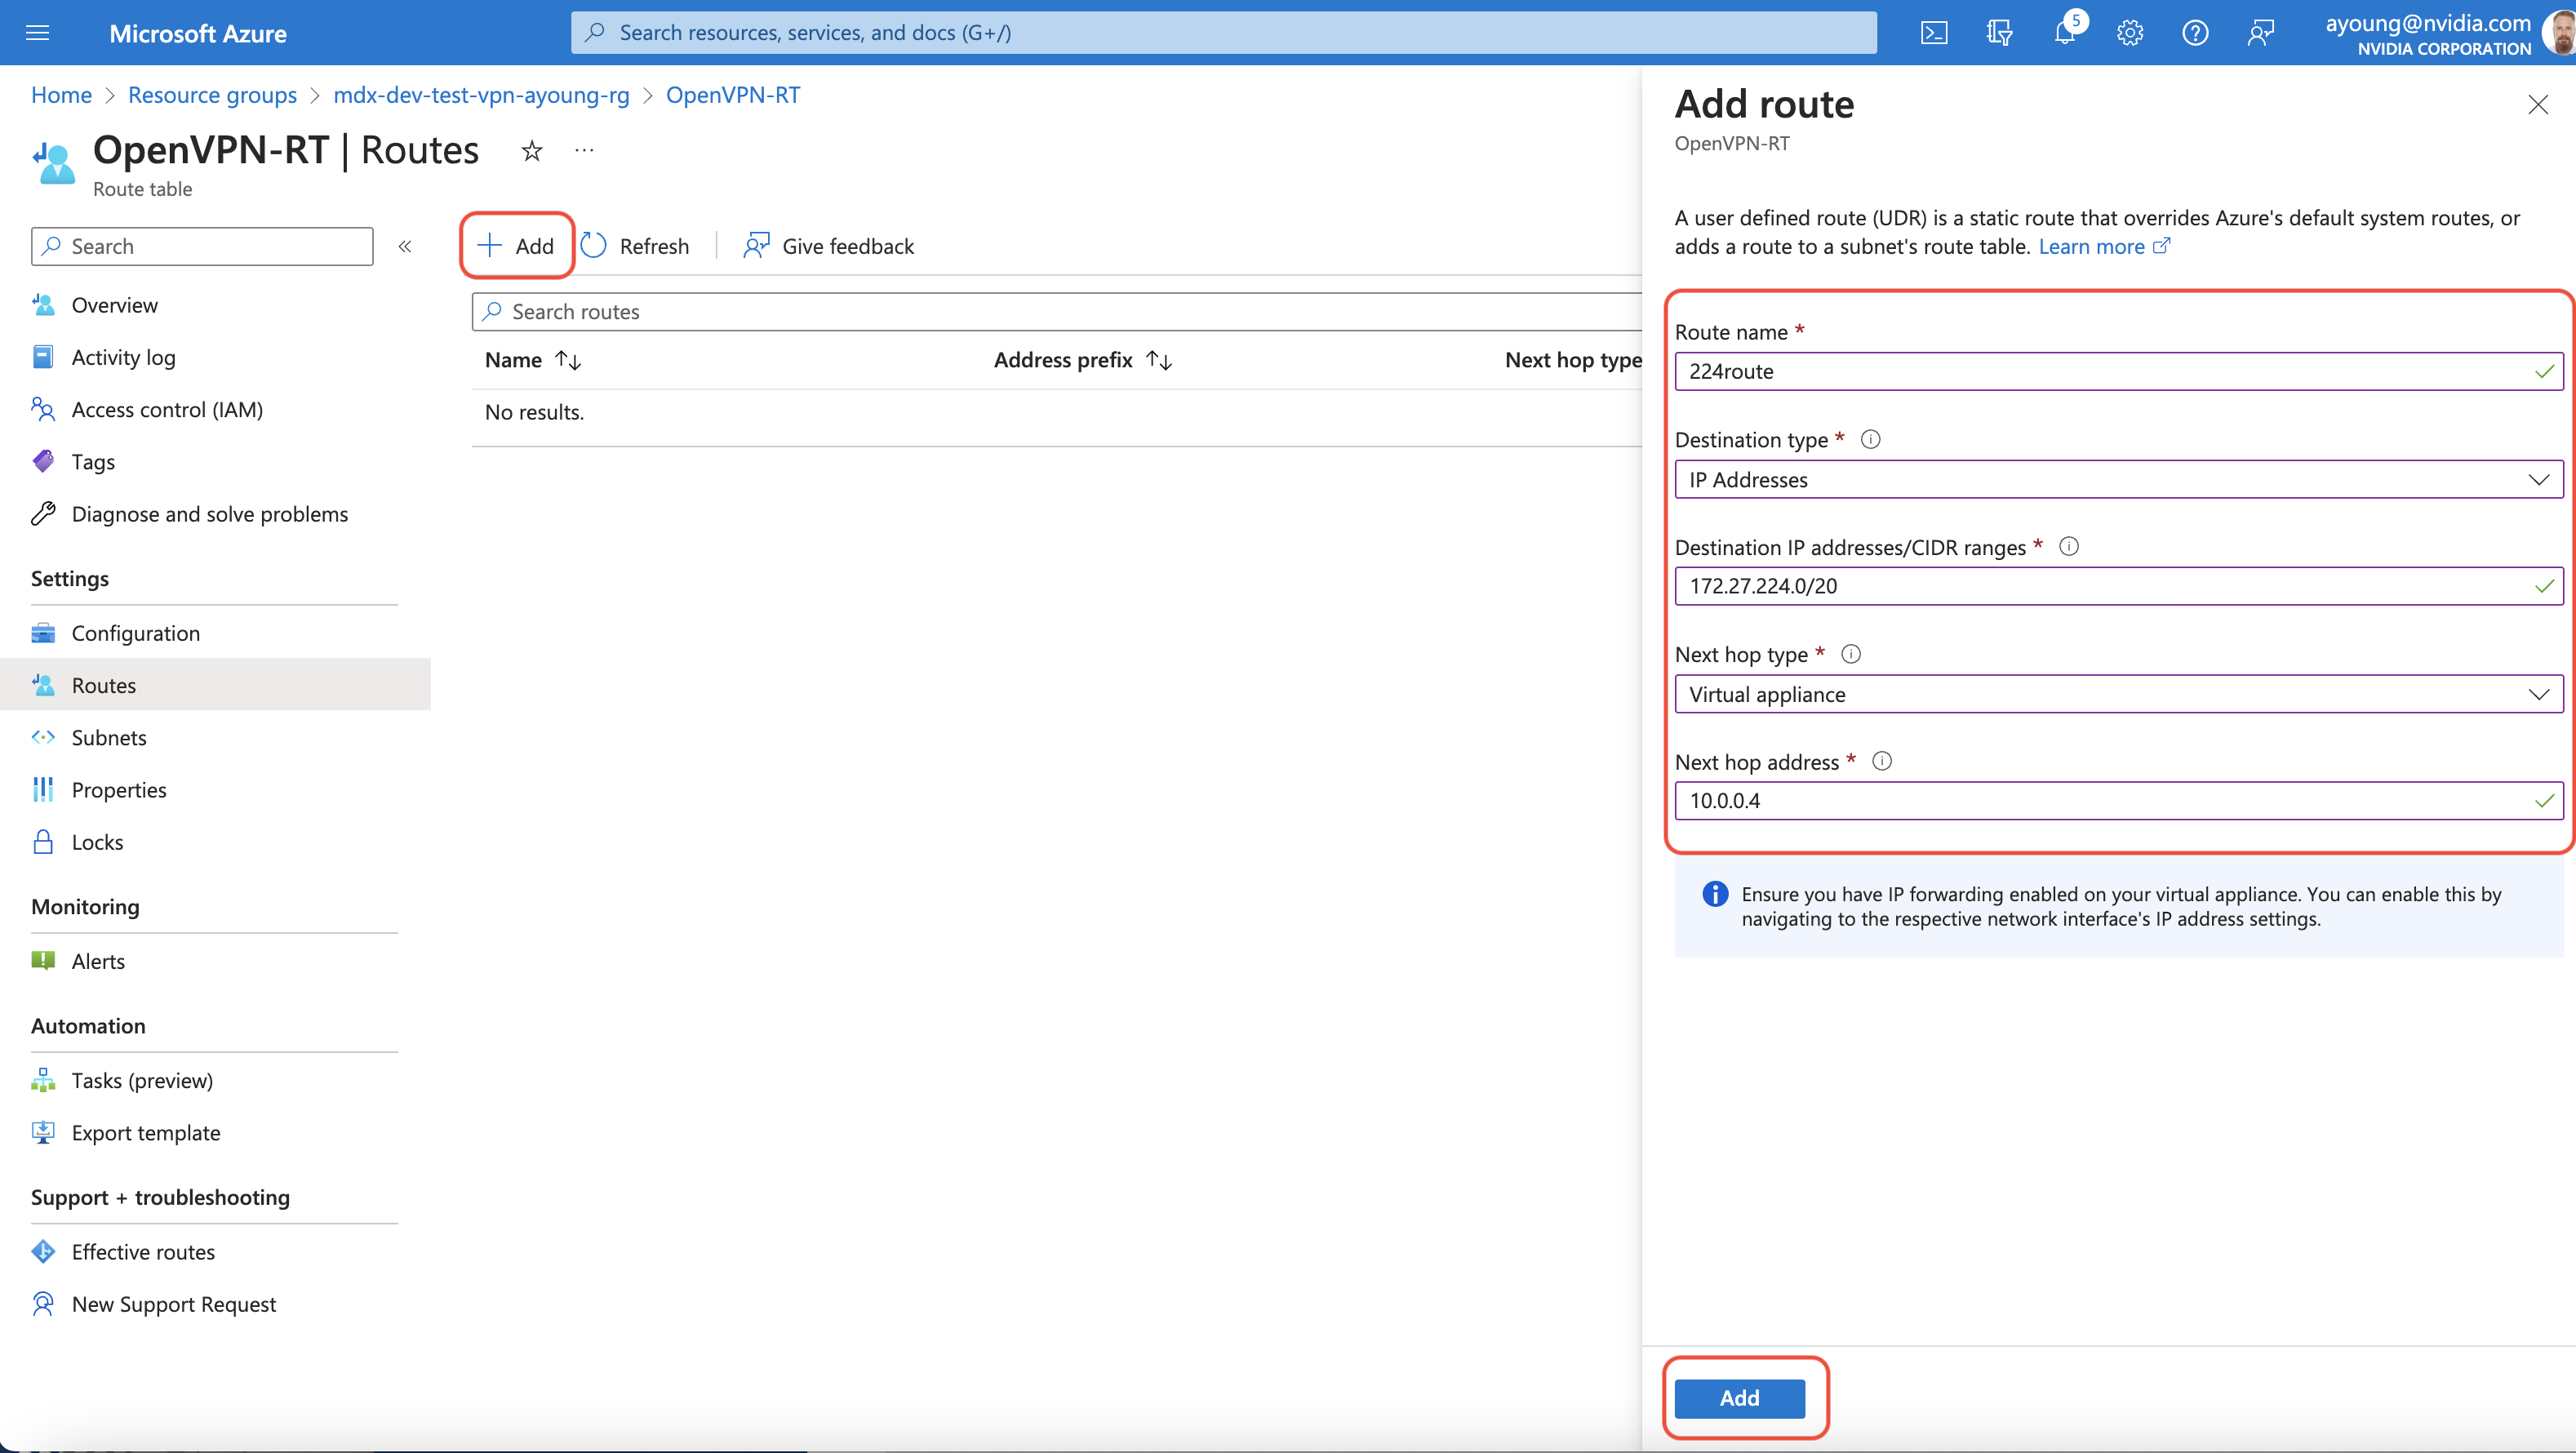
You should now have two routes that steer traffic destined for the 172.27.224.0/20 & 172.27.240.0/20 networks to the OpenVPN Access server VM’s private IP. These address ranges are the default ranges the the OpenVPN access server’s DHCP allocates OpenVPN client IPs from. The routes are needed so that VM’s in the Azure private subnet can access the connected OpenVPN clients at the Edge location.
Configure OpenVPN access server
Connect to the OpenVPN VM via the bastion VM using SSH with the OpenVPN access server private IP and the key you assigned when you ran the oneclick script. Replace
app-vm-private-ipwithopenvpn-vm-private-ipin the following command:
Replace content between '<' and '>' with its appropriate values.
#pem file refered here must the key associated to the public key used in initial steps of setup.
ssh -i <path-to-pem-file> -o StrictHostKeyChecking=no -o ProxyCommand="ssh -i <path-to-pem-file> -W %h:%p -o StrictHostKeyChecking=no ubuntu@<bastion-vm-public-ip>" ubuntu@<app-vm-private-ip>
Accept the EULA by typing yes, for the rest of the questions you can select the defaults, but note down the OpenVPN admin user password it generates. Once the configuration is finished and the server is started you can disconnect the SSH session. Be aware however that due to the way Azure manages public IPs the IP addresses the script output as connection information are internal IPs only and so these URL’s cannot be used to connect to the OpenVPN Access Server
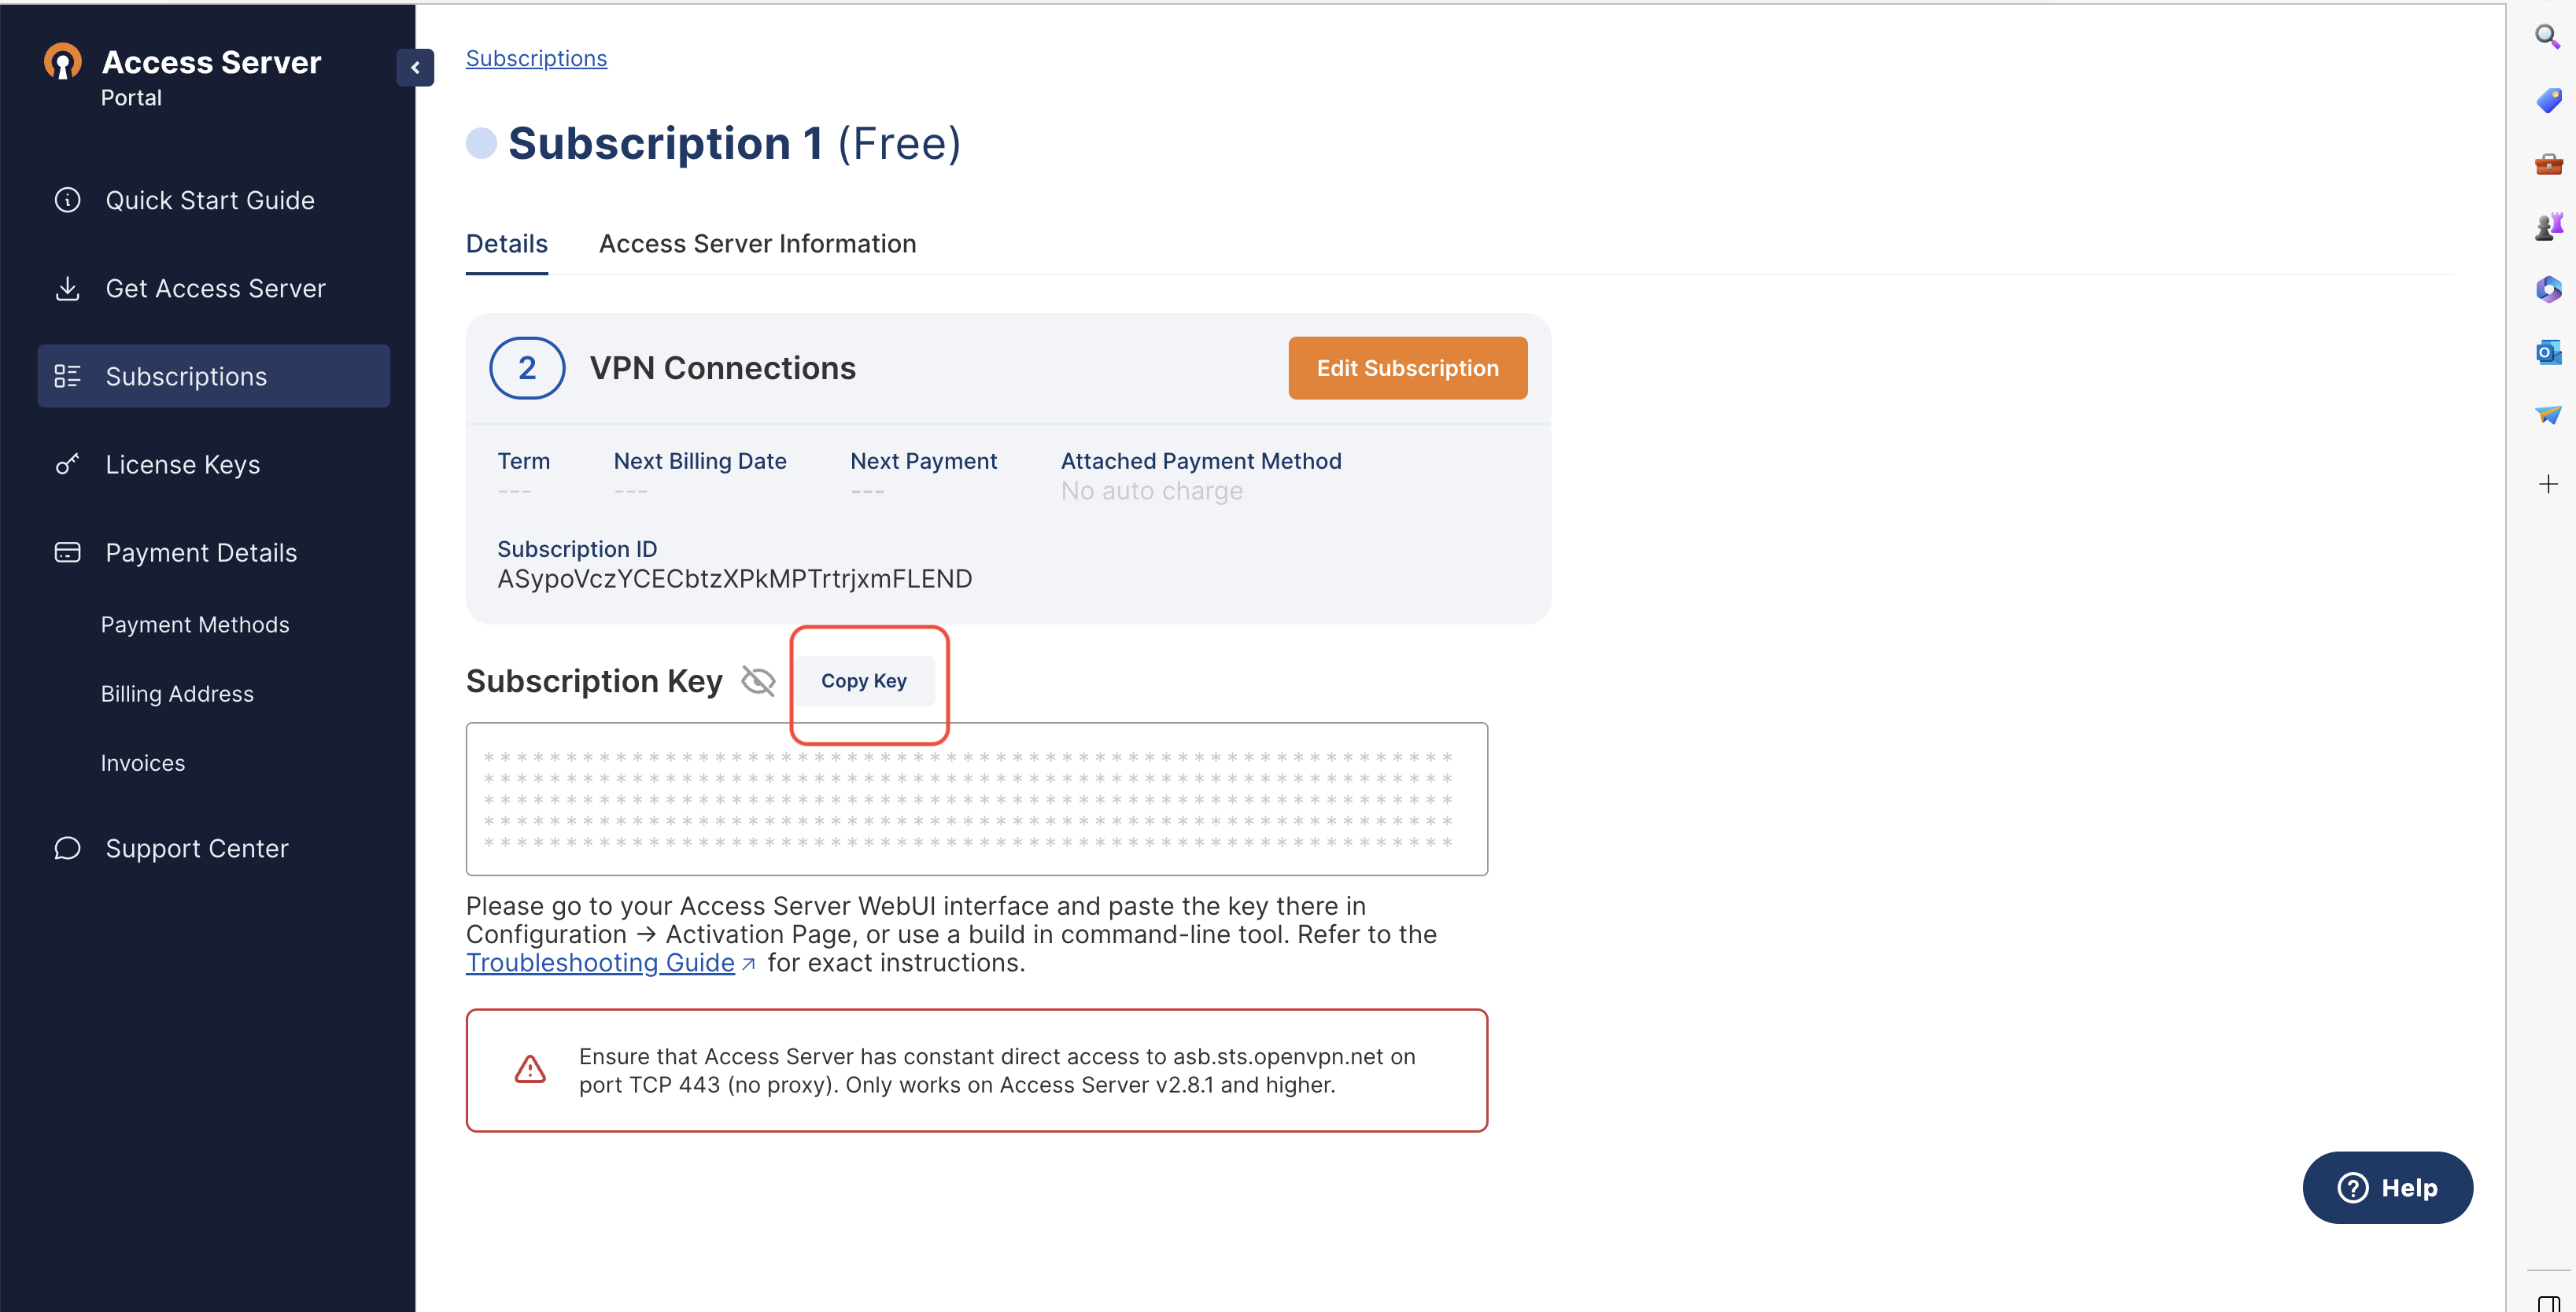
Create an account at openvpn.net and choose the free subscription Access Server option which is limited to 2 VPN tunnels. Copy your subscription key from the subscriptions tab.
In your web browser connect to the OpenVPN access server VM’s admin interface using the Azure Public IP, the password generated by the OpenVPN access server script setup, the port 943 and the path /admin like this: https://<Azure Public IP>:943/admin . Click through the “Your Connection is not private” error by selecting the Advanced button and clicking on the Continue to link (unsafe Login) with the default admin user “openvpn” and the random OpenVPN admin user password the setup script generated for you in step 2. Click agree in the EULA pop up. Paste in the subscription key, you copied above from the Subscriptions page in the openvpn.net Portal, into the “Enter Activation Key here” field and click on the activate button.
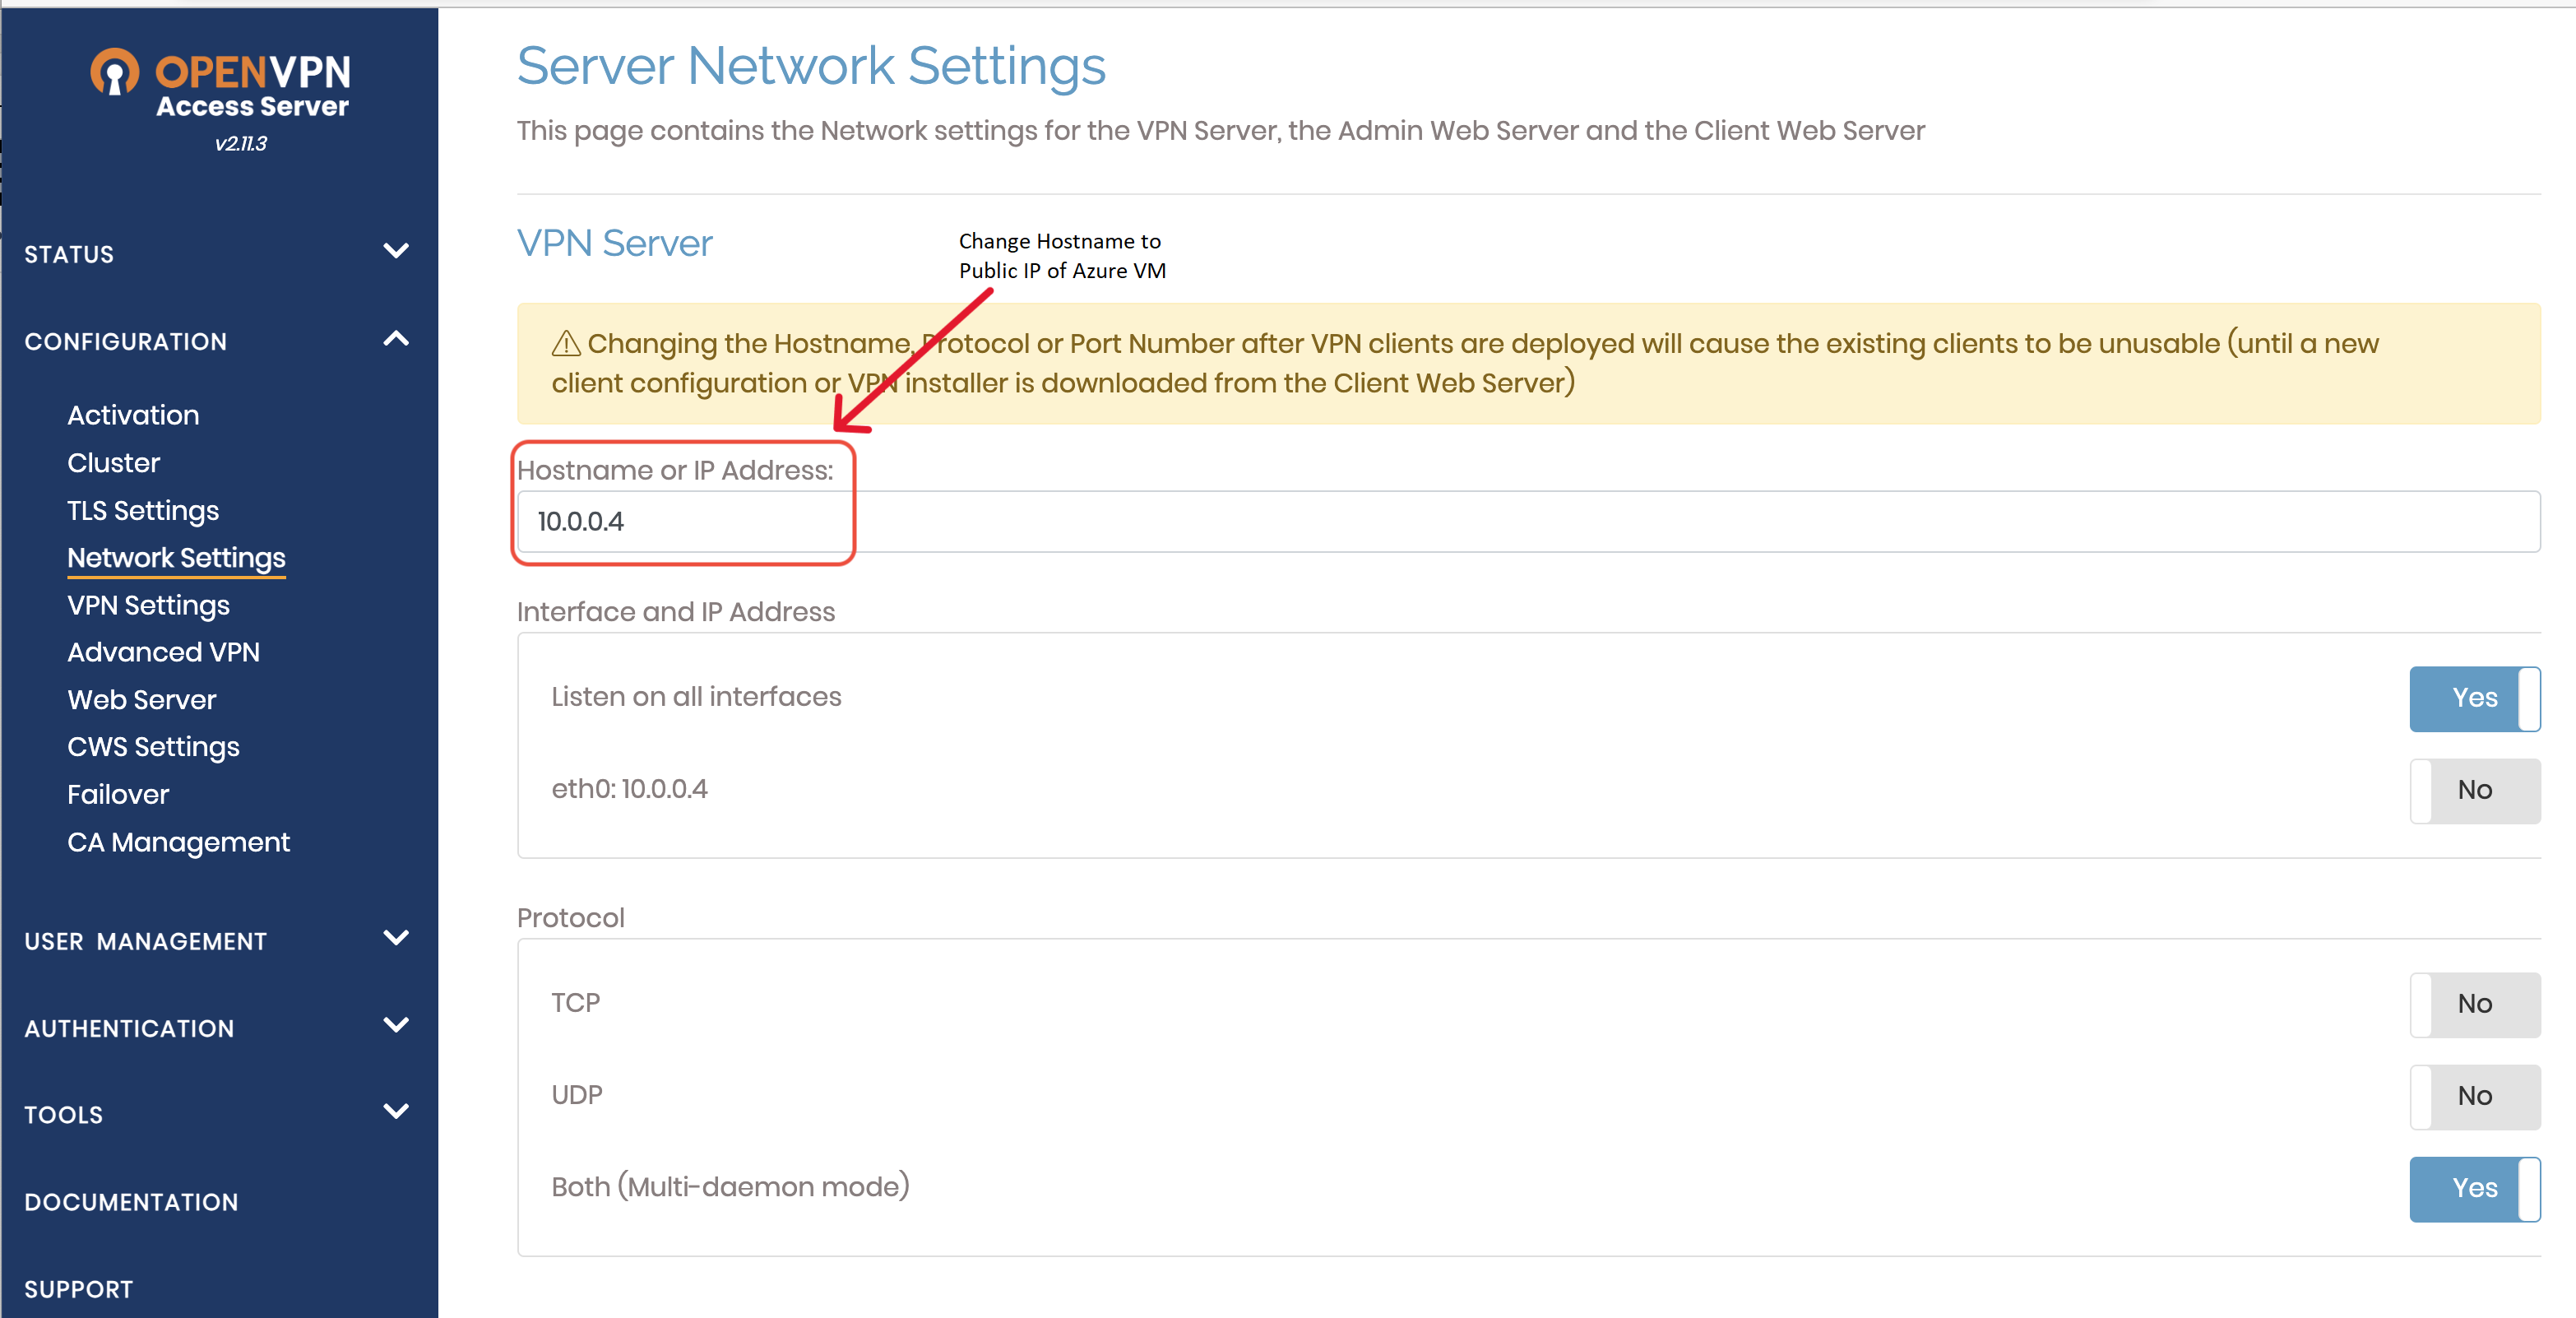
Go to network settings and change the hostname or IP Address to the Azure OpenVPN VM Public IP. Not forgetting to scroll down to the bottom of the page to save the changes by selecting the “Save Settings” button, otherwise the changes will not be registered.
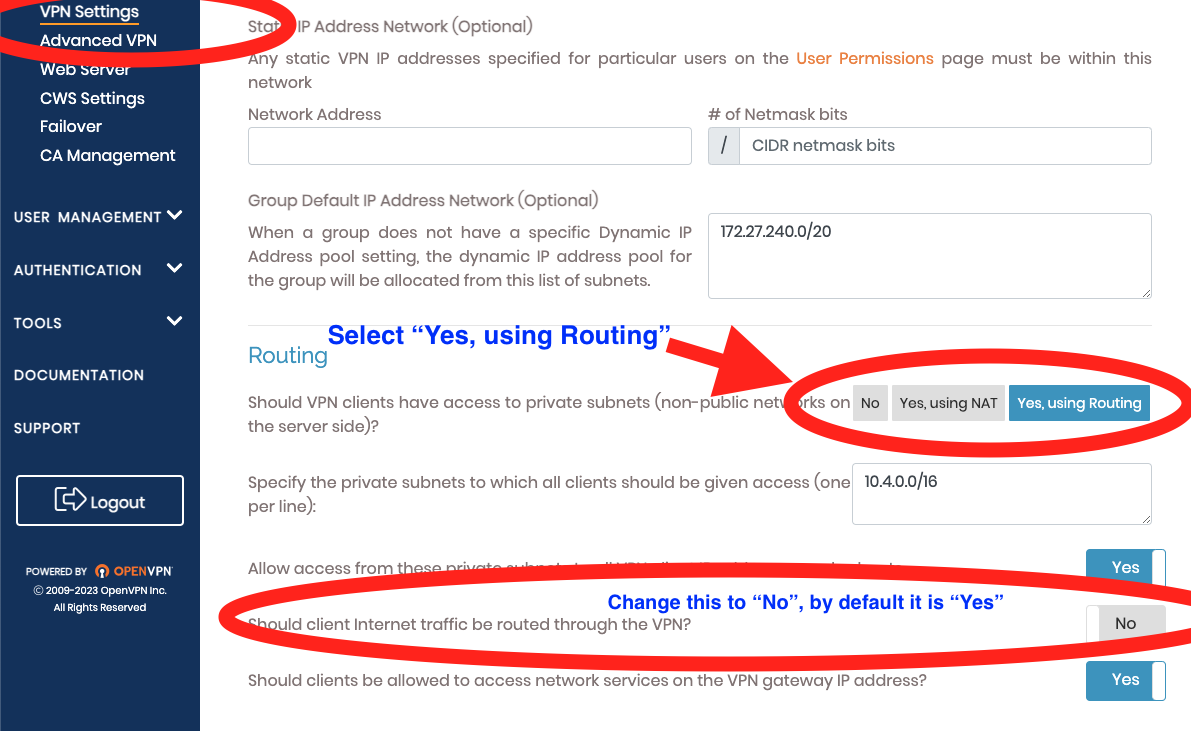
Navigate to the VPN Settings section and change the routing option from “yes using NAT” to the “yes using routing” option. Also make sure to change “Should client Internet traffic be routed through the VPN?” to “No”. Again don’t forget to save the change by scrolling to the bottom of the page and select “Save Settings”.
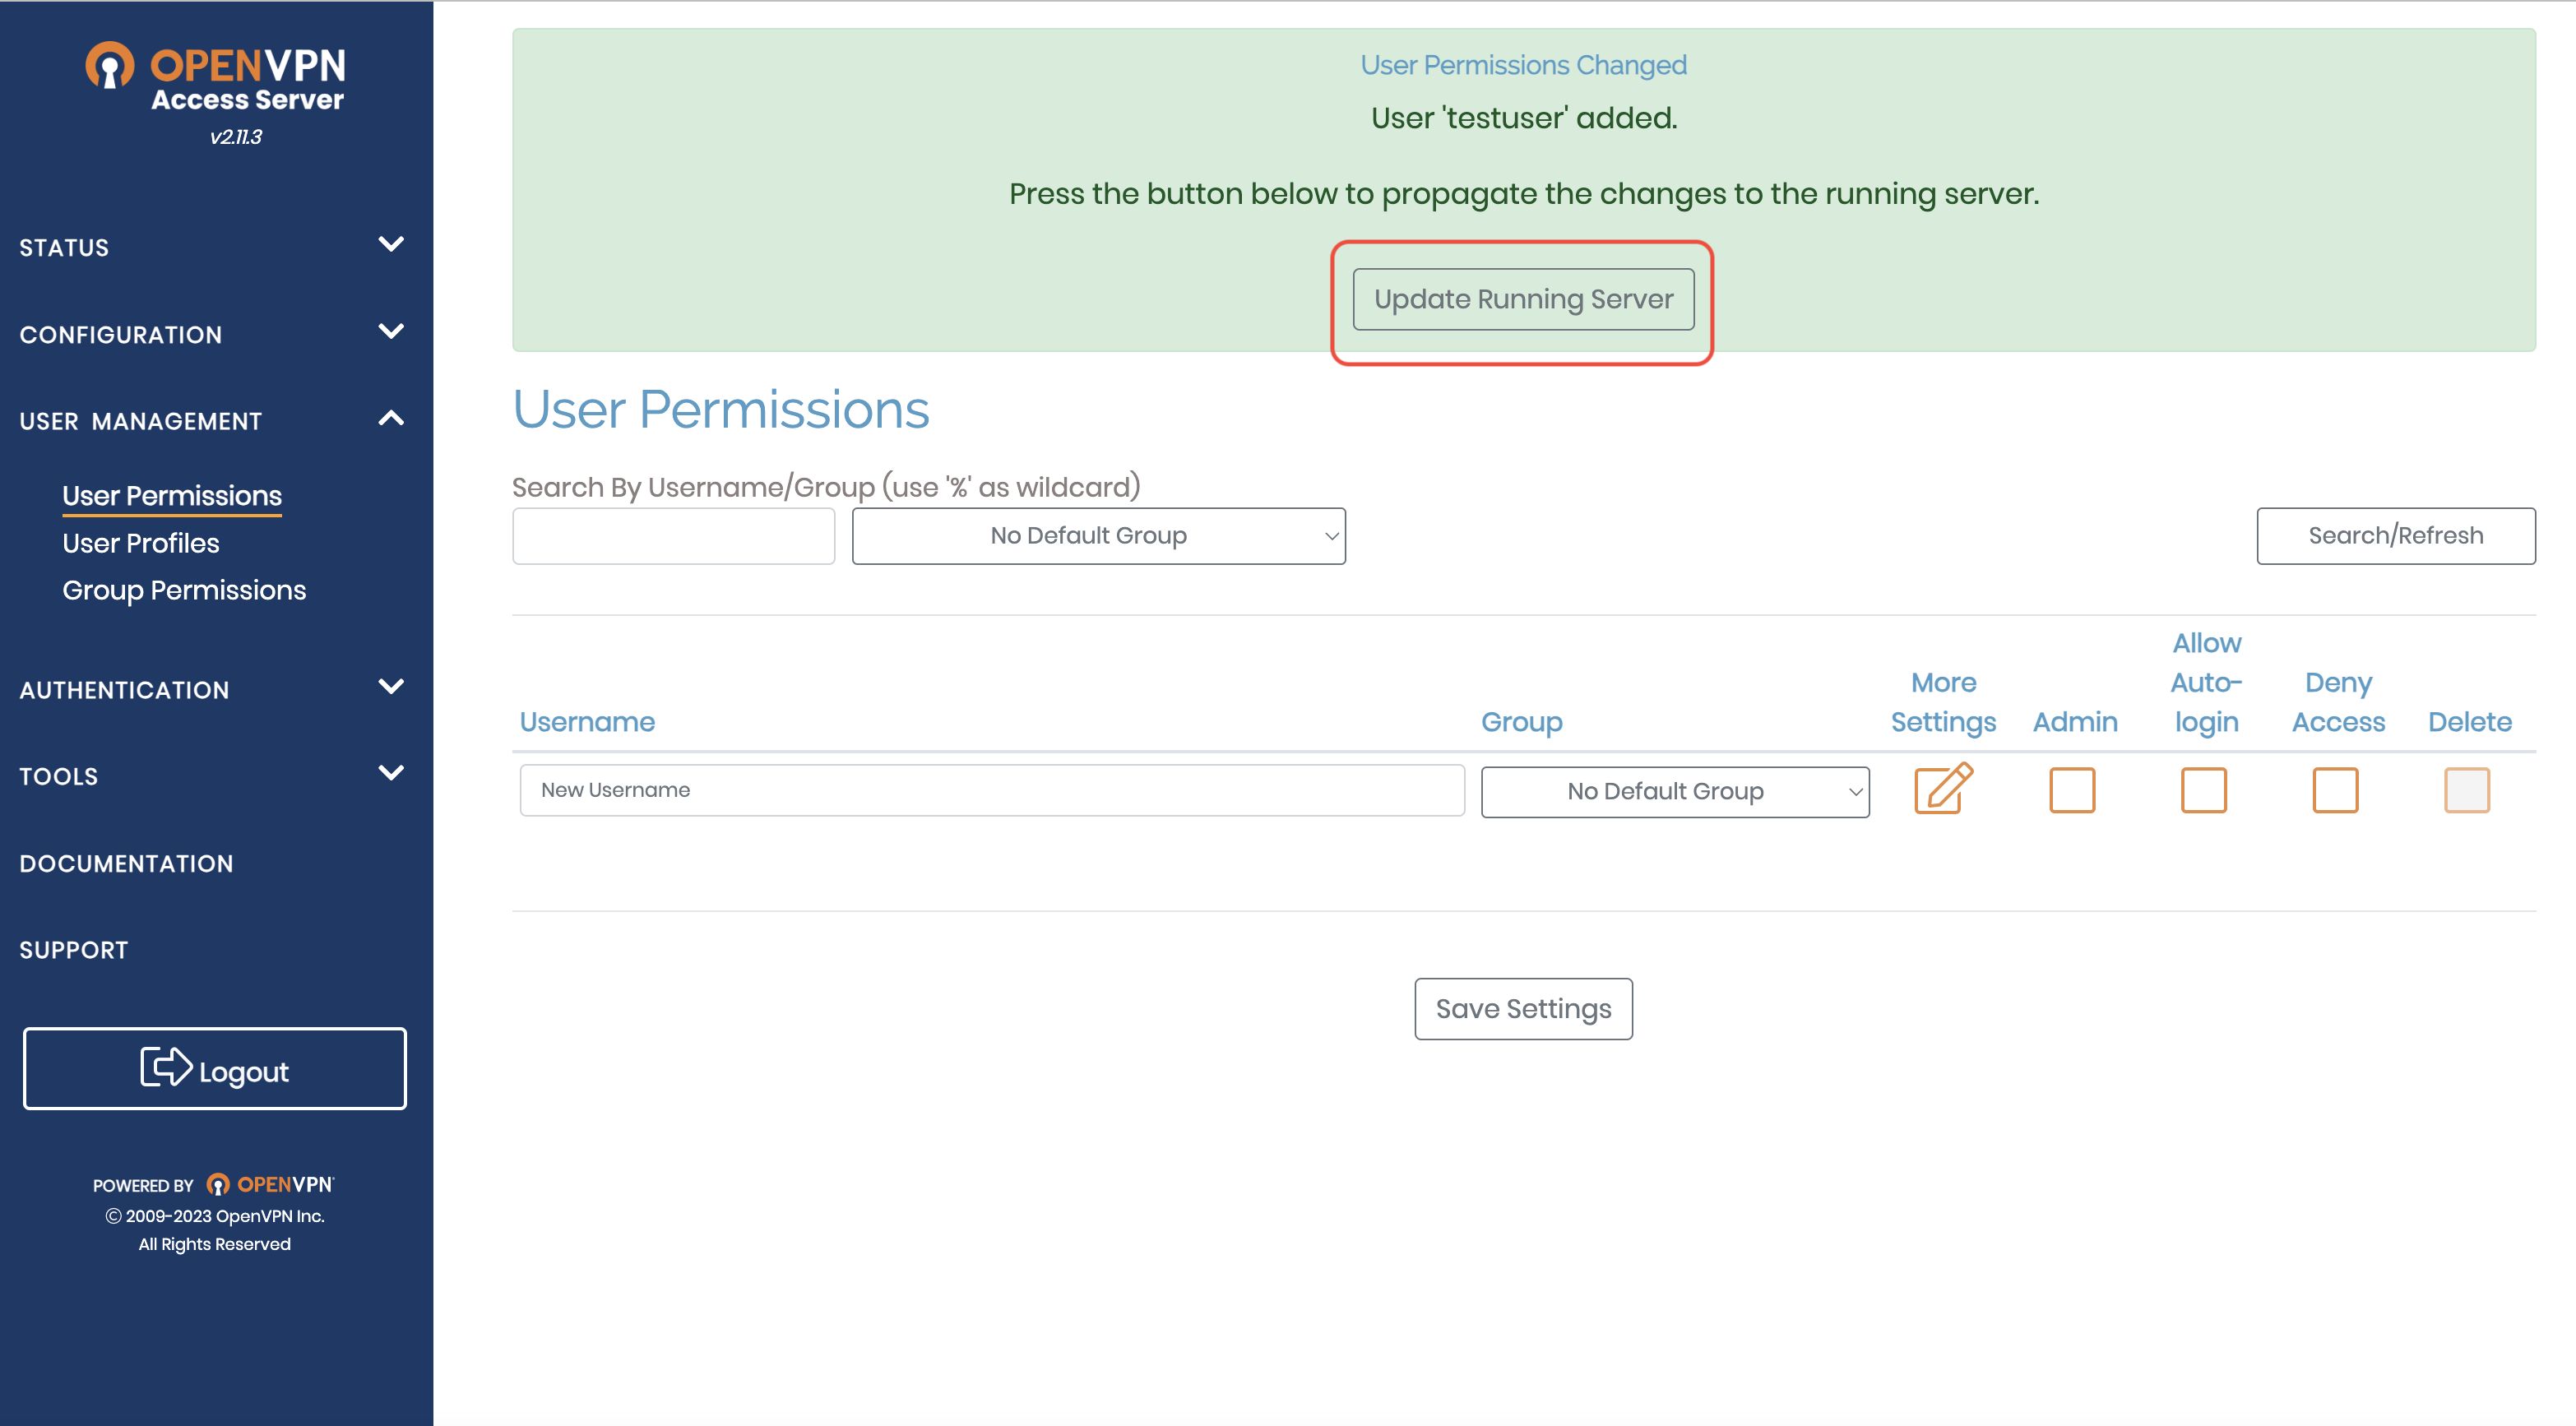
Select the User Management pane and create the user that you will use to connect to the OpenVPN with. First type a username into the New Username field, then click on the More settings icon to display more fields. Enter a new password for the user into the Local password “new password” field. Press “Save Settings” at the bottom of the page to create the new user. Finally press the “Update Running Server” to propagate all the changes to the running server.
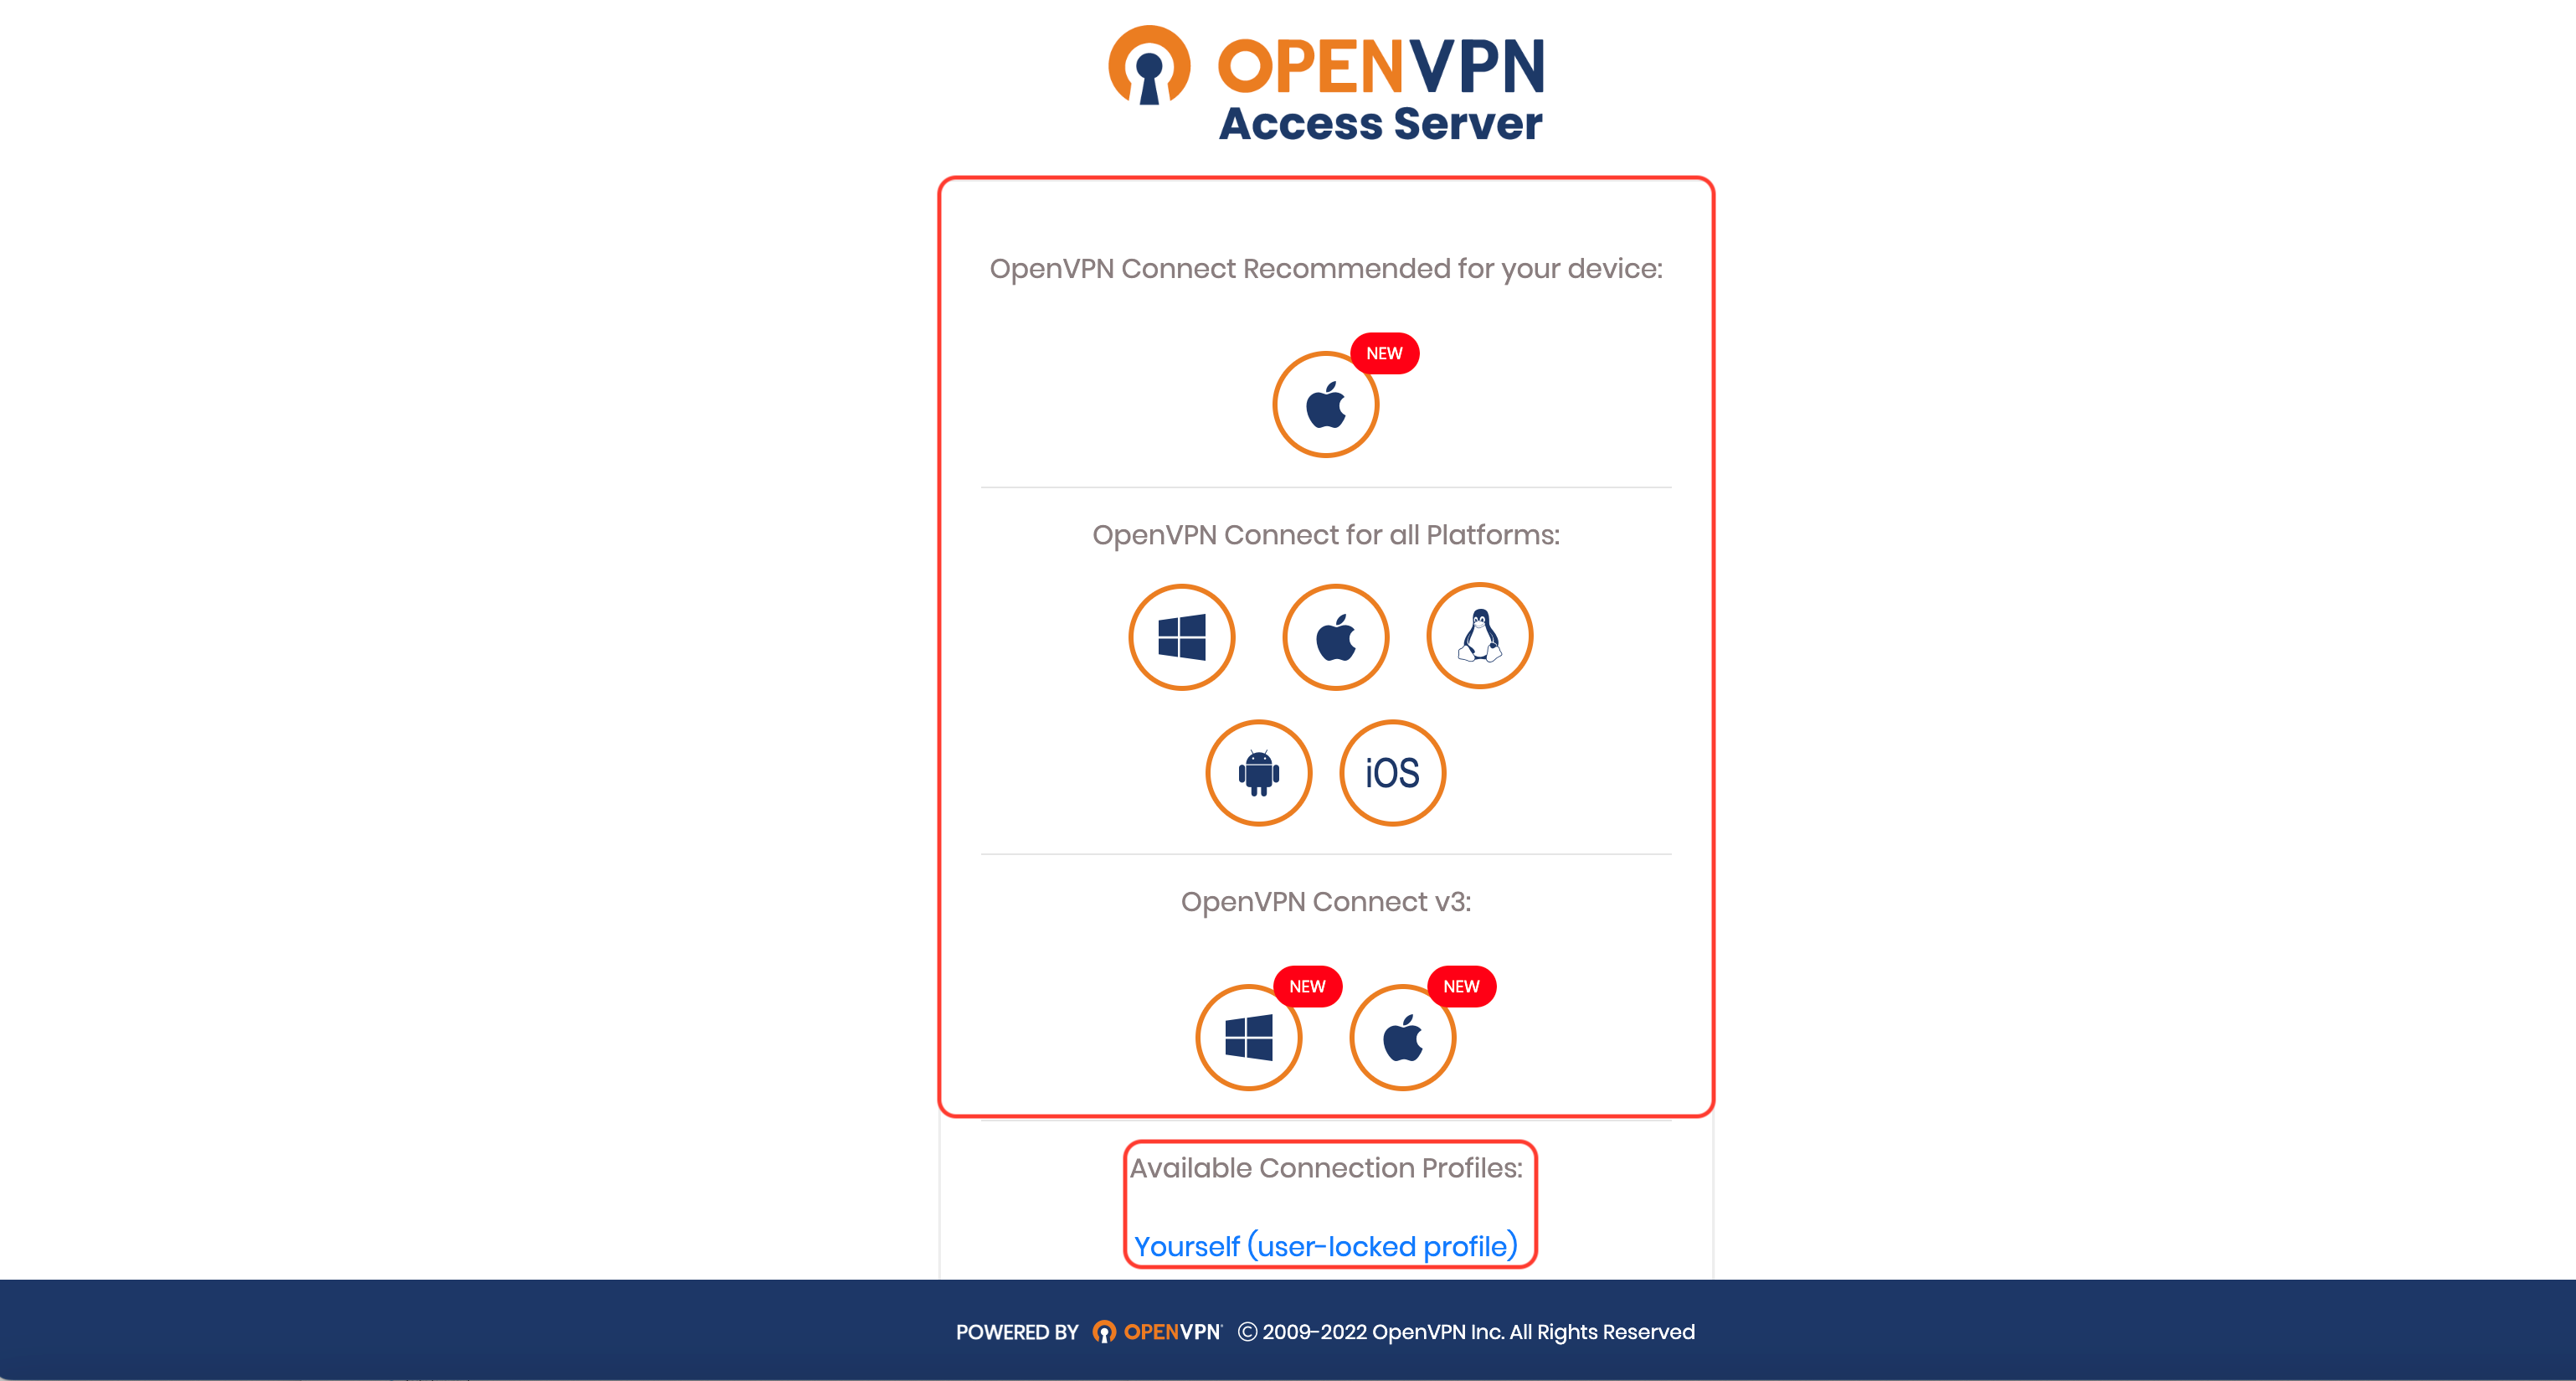
Use your web browser to browse to the OpenVPN Access Server URL, https://<Azure Public IP> :943, and login with the username and password you created in step 7 above.
Select and download the appropriate OpenVPN client for your ClientOS, also click on the Yourself (user-locked profile) to download the connection profile file.