Overview
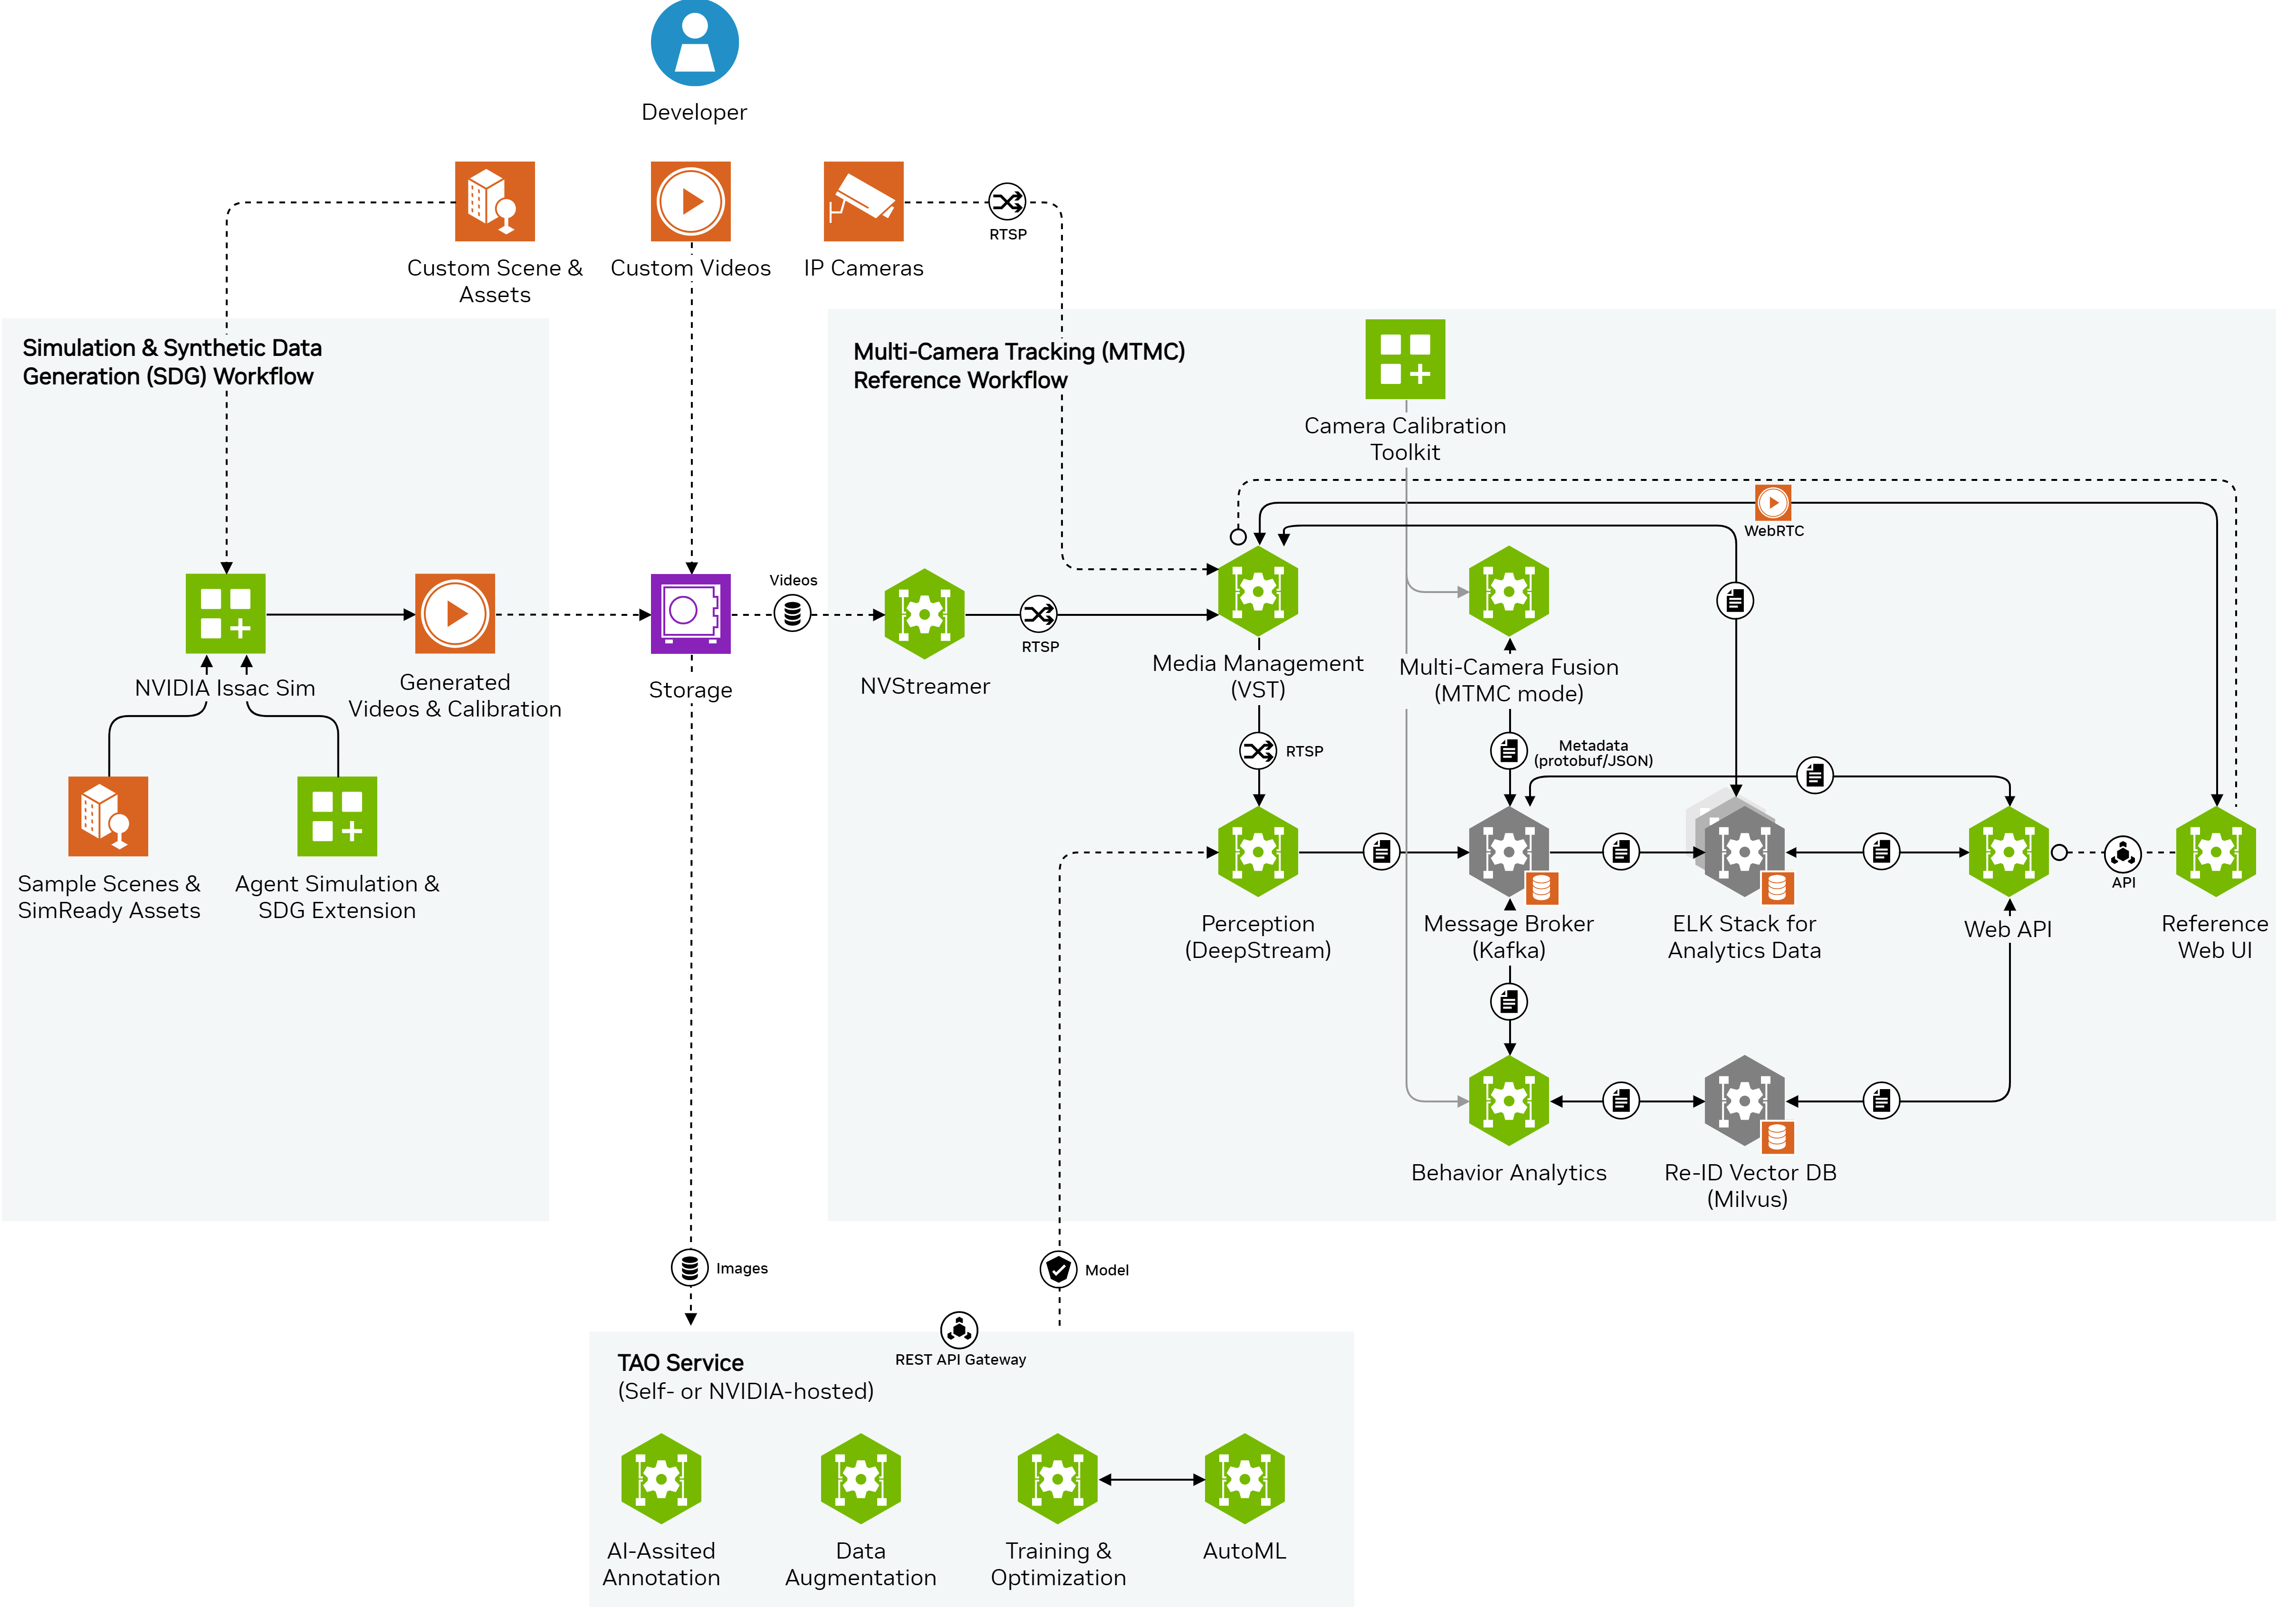
Multi-Camera Sim2Deploy workflow is a scalable end-to-end recipe to develop spatio-temporal understanding capabilities across multiple cameras.
It leverages simulation & synthetic data generation from scenes involving digital humans, while also incorporating real-world data from IP cameras or recorded videos. The workflow includes customization & deployment of prebuilt microservices as cloud-native building blocks, and fine-tuning of pretrained foundational models.
1. Simulation & Synthetic Data Generation (SDG)
Setup
Review the system requirements.
Set up Agent SDG extension 0.1.12:, or Omni.Replicator.Agent (ORA).
Build & Simulate Scene
Create the scene in Isaac Sim using default pre-populated scene assets with characters and cameras or build your own custom environment.
Add characters & configure their behaviors through command files, the UI, or generate them randomly.
Set up the simulation by selecting a configuration file, adjusting simulation length, number of cameras, and other parameters as needed.
Specify the output directory and TAOWriter preferences for the generated synthetic data.
Run the simulation to generate the synthetic data. Note that simulation time depends on hardware performance and scene complexity.
Refer to the agent SDG getting started guide for visual illustrations and more detailed documentation.
Generate Synthetic Data
Use the configured Isaac Sim scene to generate images & videos from virtual cameras as input data for downstream vision AI applications like Multi-Camera Tracking. See the details in the SDG for multi-camera AI guide.
Generate automatically in Isaac Sim the camera calibration, ground truth (GT) data, and floor plan required by Multi-Camera Tracking reference workflow. Refer to the calibration GT generation documentation.
Find instructions for importing media & calibration data into multi-camera AI reference workflows in the next section.
Note
While the initial development heavily relies on synthetic data, the Sim2Deploy workflow is designed to seamlessly integrate real-world data from IP cameras or recorded videos in later stages of development and deployment. This integration enhances the robustness and real-world applicability of the developed AI models and systems.
2. Deployment of Multi-Camera AI
Setup
Review system requirements: Quickstart, Production.
Deploy NVIDIA Metropolis Microservices 2.1:
With Docker Compose for quickstart, or
With Kubernetes for production.
Evaluate AI & Deployment Features
Explore the architecture and data flow of Multi-Camera Tracking and Real-Time Location System (RTLS) reference workflows.
Review inference results from pre-packed sample datasets.
Explore the sample browser-based interface to review key features for multi-camera tracking & analytics.
Interact with deployed workflows via REST API. Learn more in the multi-camera tracking API tutorial notebook and the full Analytics & Tracking API specs.
Import Custom Data and Calibration
Input custom videos or connect edge cameras, for real-time data, of real-world scenarios: camera addition guide.
Calibrate the cameras for more robust tracking and alignment with floor plans via a user-friendly web UI (not needed for OV digital twin as it can generate calibration ground truth via the ORA extension): real camera calibration guide.
Tune Parameters
Explore the multi-camera parameter tuning guide to learn about various parameter groups and how to tune them.
Update runtime parameters via the analytics API endpoint.
Adjust deployment-time parameters as needed.
Explore data-driven parameter tuning with PipeTuner: Automatic Accuracy Tuning guide.
3. Fine-Tuning of AI Models
Setup
Review the system requirements.
NVIDIA TAO 5.2:
Leverage hosted API (currently in Early Access).
Fine-Tune via TAO API
Choose between the REST API Notebook and the TAO Toolkit Notebook for fine-tuning.
Follow the step-by-step guide in the chosen notebook for environment setup, data formatting, training, evaluation, and exporting the model to ONNX.
Refer to the synthetic data augmenttion and general fine-tuning guides.